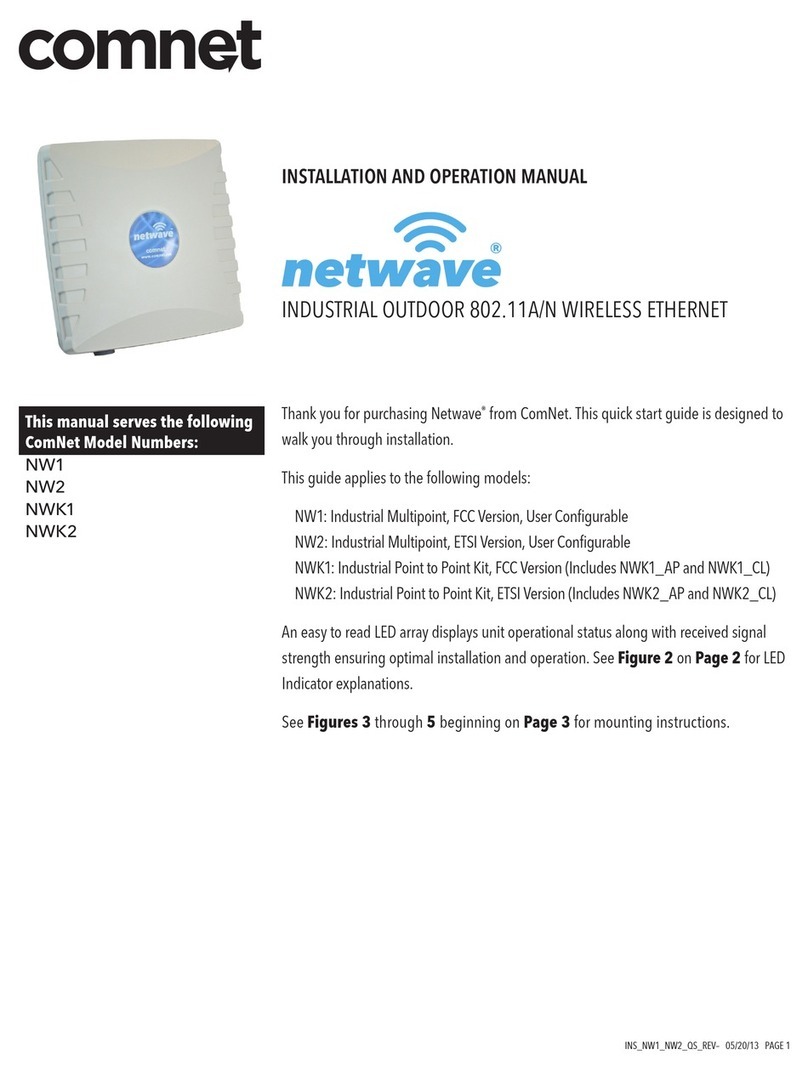
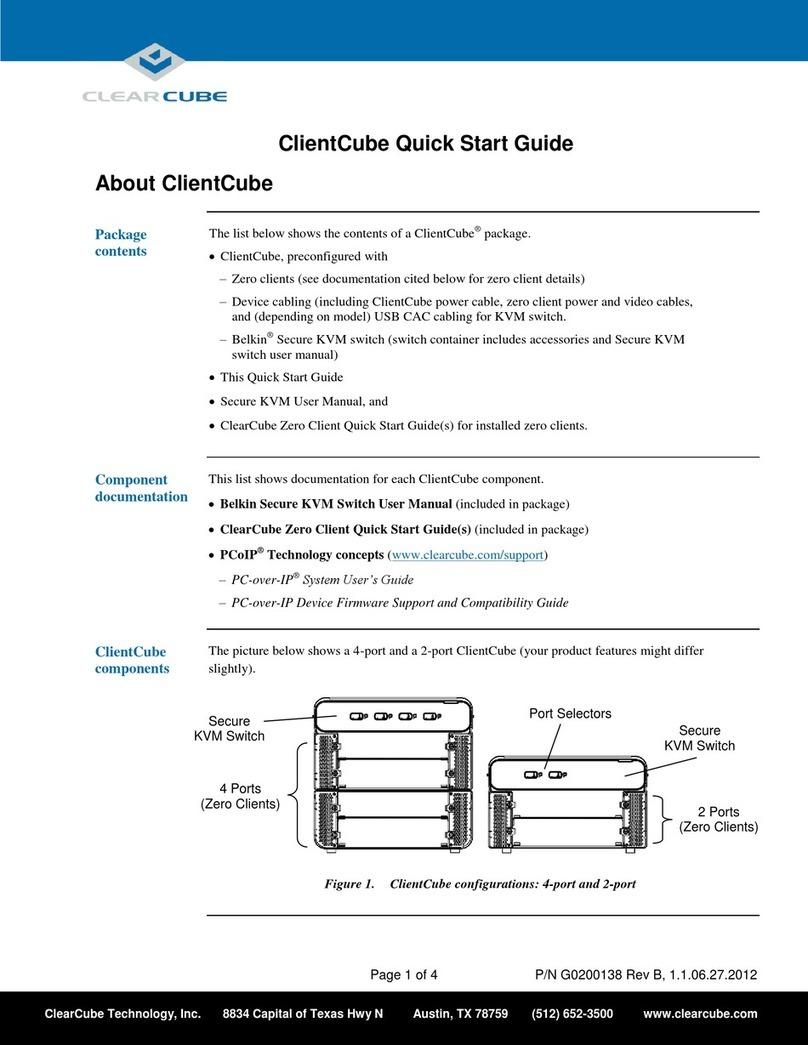
Technicolor OWA3111 User manual

OWA3111
Quick Setup Guide
Technicolor Delivery Technologies – www.technicolor.com

1. Before you start
• Carefully read the Safety Instructions and Regulatory Notices document
included in your package before continuing with the installation of your OWA3111.
• Do not make any connections until instructed to do so!
2. Check the content of your box
Your package contains the following items:
D
CA B
Item Description
AOne OWA3111.
BUser Documentation (this Quick Setup Guide, Safety Instructions &
Regulatory Notices…). Other additional documents may be included.
COne power supply adapter.
DOne Ethernet cable with yellow connectors.

1
1. Before you start
• Carefully read the Safety Instructions and Regulatory Notices document
included in your package before continuing with the installation of your OWA3111.
• Do not make any connections until instructed to do so!
2. Check the content of your box
Your package contains the following items:
D
CA B
Item Description
AOne OWA3111.
BUser Documentation (this Quick Setup Guide, Safety Instructions &
Regulatory Notices…). Other additional documents may be included.
COne power supply adapter.
DOne Ethernet cable with yellow connectors.

2
3. About the OWA3111
3.1. Wi‑Fi
Wi‑Fi general
The OWA3111 is equipped with:
• Two 5GHz Wi-Fi6 (IEEE802.11ax) interfaces that provide superior transfer rates
and are less sensitive to interference.
• One 2.4GHz Wi-Fi6 (IEEE802.11ax) interface which allows you to connect Wi-Fi
devices that don’t support 5GHz Wi-Fi.
Wi‑Fi6
Enabled with the latest Wi-Fi 6 technology, the OWA3111 oers ultimate wireless
networking by improving latency, providing faster throughputs, better performance
and optimal link stability in your local network.
EasyMesh
The OWA3111 supports EasyMesh (as EasyMesh agent) that allows you to bring
an ultimate in-home Wi-Fi experience by creating a unified intelligent Wi-Fi
environment throughout your home using multiple EasyMesh-enabled access points.
3.2. Top panel
A
WPS button and Status LED (item A)
The WPS button with integrated Status LED ( ) on the top panel of your
OWA3111 is used to pair the OWA3111 with other Wi-Fi devices and informs you
about the status of your OWA3111.
If the Status LED ( ) of your OWA3111 is flashing green, your OWA3111 is
updating its software. In this case, wait until the LED becomes slowly blinking
yellow, or solid green, yellow or red. This can take several minutes! Do not
power o your gateway or unplug any cables!
3.3. Back panel and bottom product label
A
BC D E
G
F
Reset button (itemA)
When the OWA3111 is powered on and you press the Reset you can restart or reset
it. For more information, see “5.8. How to repair an unresponsive Wi-Fi extender” on
page13.
Power button (itemB)
The power button allows you to power the OWA3111 on or o.
Power port (itemC)
The power port allows you to connect the power supply.
Warning: Only use the power supply delivered with your OWA3111.
USB port (itemD) ‑ optional
The USB port (optional) is reserved for future use.
Ethernet LAN port (itemE)
The Ethernet LAN port allows you to connect an Ethernet device (for example a
set-top box, a NAS drive).
Ethernet WAN/LAN port (itemF)
The Ethernet WAN port allows you to connect your OWA3111 to the Internet
gateway. If free, you can also use it as a second Ethernet LAN port.
Product label (bottom of your product)
The product label contains:
• the default network name and wireless key of the OWA3111.
• the access key to configure the OWA3111 via its GUI.

3
3. About the OWA3111
3.1. Wi‑Fi
Wi‑Fi general
The OWA3111 is equipped with:
• Two 5GHz Wi-Fi6 (IEEE802.11ax) interfaces that provide superior transfer rates
and are less sensitive to interference.
• One 2.4GHz Wi-Fi6 (IEEE802.11ax) interface which allows you to connect Wi-Fi
devices that don’t support 5GHz Wi-Fi.
Wi‑Fi6
Enabled with the latest Wi-Fi 6 technology, the OWA3111 oers ultimate wireless
networking by improving latency, providing faster throughputs, better performance
and optimal link stability in your local network.
EasyMesh
The OWA3111 supports EasyMesh (as EasyMesh agent) that allows you to bring
an ultimate in-home Wi-Fi experience by creating a unified intelligent Wi-Fi
environment throughout your home using multiple EasyMesh-enabled access points.
3.2. Top panel
A
WPS button and Status LED (item A)
The WPS button with integrated Status LED ( ) on the top panel of your
OWA3111 is used to pair the OWA3111 with other Wi-Fi devices and informs you
about the status of your OWA3111.
If the Status LED ( ) of your OWA3111 is flashing green, your OWA3111 is
updating its software. In this case, wait until the LED becomes slowly blinking
yellow, or solid green, yellow or red. This can take several minutes! Do not
power o your gateway or unplug any cables!
3.3. Back panel and bottom product label
A
BC D E
G
F
Reset button (itemA)
When the OWA3111 is powered on and you press the Reset you can restart or reset
it. For more information, see “5.8. How to repair an unresponsive Wi-Fi extender” on
page13.
Power button (itemB)
The power button allows you to power the OWA3111 on or o.
Power port (itemC)
The power port allows you to connect the power supply.
Warning: Only use the power supply delivered with your OWA3111.
USB port (itemD) ‑ optional
The USB port (optional) is reserved for future use.
Ethernet LAN port (itemE)
The Ethernet LAN port allows you to connect an Ethernet device (for example a
set-top box, a NAS drive).
Ethernet WAN/LAN port (itemF)
The Ethernet WAN port allows you to connect your OWA3111 to the Internet
gateway. If free, you can also use it as a second Ethernet LAN port.
Product label (bottom of your product)
The product label contains:
• the default network name and wireless key of the OWA3111.
• the access key to configure the OWA3111 via its GUI.

4
4. Set up
The OWA3111 can be used:
• As a wired Wi-Fi6 home network enabler.
You will use this scenario in case your Internet gateway and/or home network has
no Wi-Fi, or Wi-Fi capabilities without Wi-Fi6.
For this scenario, see “4.1. Wired Wi-Fi6 home network enabler” on page5.
• As a wireless Wi-Fi6 home network enabler.
You will use this scenario in case your Internet gateway and/or home network has
Wi-Fi, but no Wi-Fi6 and/or EasyMesh.
For this scenario, see “4.2. Wireless Wi-Fi6 home network enabler” on page6.
• As an EasyMesh home network extender.
You will use this scenario in case you want to extend your existing EasyMesh Wi-Fi
home network with additional coverage using the OWA3111. In such environment
your Internet gateway or another Wi-Fi device is already operating as the Wi-Fi
EasyMesh controller.
For this scenario, see “4.3. EasyMesh home network extender” on page7.
To join an existing EasyMesh home network, you must first enable EasyMesh
on your OWA3111 via its GUI. For more information, see “5.7. Configure your
Wi-Fi extender to your needs” on page11.
4.1. Wired Wi‑Fi6 home network enabler
This scenario allows you to add Wi-Fi6 coverage using the OWA3111.
OWA3111
Wi-Fi 6 access point
Internet gateway Wi-Fi device
Ethernet cable
Wi-Fi 6
You will connect the OWA3111 to your Internet gateway either:
• Directly using an Ethernet cable.
• Indirectly via a powerline adapter or similar.
Step 1: Set up the Wi‑Fi extender
1 Take the included Ethernet cable (this is the cable with the yellow connectors).
Connect one end of the Ethernet cable to the blue Ethernet WAN ( ) port on
the back of your OWA3111. Connect the other end of the Ethernet cable to an
Ethernet or LAN port of your Internet gateway.
2 Take the power supply, plug the small end into the power inlet port ( ) of the
OWA3111 and then plug the other end into a nearby power outlet.
3 Press the power ( ) button on the back of the OWA3111. The Status LED ( )
will first be solid yellow during startup, then turn solid green. If this is not the case,
check the connections you made.
4 Wait until the Status LED ( ) turns solid green before connecting your Wi-Fi
devices.
Step 2: Connect your Wi‑Fi devices
If your Wi-Fi device:
• Supports WPS, use WPS to pair it with the OWA3111. For more information, see
“5.4. Pairing Wi-Fi devices to your OWA3111” on page10.
• Does not support WPS, configure it with the Wi-Fi network name (SSID) and
wireless key that are printed on the product label on the bottom of the OWA3111.
For more information, consult the user documentation of your device.
Step 3: Connect an Ethernet device (optional)
You can use the OWA3111’s yellow Ethernet LAN ( ) port to connect an
Ethernet device (for example, a Set-Top Box, a NAS drive or computer) to your home
network.

5
4. Set up
The OWA3111 can be used:
• As a wired Wi-Fi6 home network enabler.
You will use this scenario in case your Internet gateway and/or home network has
no Wi-Fi, or Wi-Fi capabilities without Wi-Fi6.
For this scenario, see “4.1. Wired Wi-Fi6 home network enabler” on page5.
• As a wireless Wi-Fi6 home network enabler.
You will use this scenario in case your Internet gateway and/or home network has
Wi-Fi, but no Wi-Fi6 and/or EasyMesh.
For this scenario, see “4.2. Wireless Wi-Fi6 home network enabler” on page6.
• As an EasyMesh home network extender.
You will use this scenario in case you want to extend your existing EasyMesh Wi-Fi
home network with additional coverage using the OWA3111. In such environment
your Internet gateway or another Wi-Fi device is already operating as the Wi-Fi
EasyMesh controller.
For this scenario, see “4.3. EasyMesh home network extender” on page7.
To join an existing EasyMesh home network, you must first enable EasyMesh
on your OWA3111 via its GUI. For more information, see “5.7. Configure your
Wi-Fi extender to your needs” on page11.
4.1. Wired Wi‑Fi6 home network enabler
This scenario allows you to add Wi-Fi6 coverage using the OWA3111.
OWA3111
Wi-Fi 6 access point
In
ternet gateway Wi-Fi device
Ethernet cable
Wi-Fi 6
You will connect the OWA3111 to your Internet gateway either:
• Directly using an Ethernet cable.
• Indirectly via a powerline adapter or similar.
Step 1: Set up the Wi‑Fi extender
1 Take the included Ethernet cable (this is the cable with the yellow connectors).
Connect one end of the Ethernet cable to the blue Ethernet WAN ( ) port on
the back of your OWA3111. Connect the other end of the Ethernet cable to an
Ethernet or LAN port of your Internet gateway.
2 Take the power supply, plug the small end into the power inlet port ( ) of the
OWA3111 and then plug the other end into a nearby power outlet.
3 Press the power ( ) button on the back of the OWA3111. The Status LED ( )
will first be solid yellow during startup, then turn solid green. If this is not the case,
check the connections you made.
4 Wait until the Status LED ( ) turns solid green before connecting your Wi-Fi
devices.
Step 2: Connect your Wi‑Fi devices
If your Wi-Fi device:
• Supports WPS, use WPS to pair it with the OWA3111. For more information, see
“5.4. Pairing Wi-Fi devices to your OWA3111” on page10.
• Does not support WPS, configure it with the Wi-Fi network name (SSID) and
wireless key that are printed on the product label on the bottom of the OWA3111.
For more information, consult the user documentation of your device.
Step 3: Connect an Ethernet device (optional)
You can use the OWA3111’s yellow Ethernet LAN ( ) port to connect an
Ethernet device (for example, a Set-Top Box, a NAS drive or computer) to your home
network.

6
4.2. Wireless Wi‑Fi6 home network enabler
This scenario allows you to add (extra) Wi-Fi6 coverage using the OWA3111.
OWA3111
Wi-Fi 6 access point
Wi-Fi deviceInternet gateway
or
Wi-Fi extender
Wi-Fi Wi-Fi 6
Step 1: Set up the Wi‑Fi extender
1 Position your OWA3111 half-way between your Internet gateway (or extender) and
your Wi-Fi devices.
2 Take the power supply, plug the small end into the power inlet port ( ) of the
OWA3111 and then plug the other end into a nearby power outlet.
3 Press the power ( ) button on the back of the OWA3111. The Status LED ( )
will first be solid yellow during startup.
4 Wait until the Status LED ( ) slowly blinks yellow.
5 Pair the OWA3111 with your Internet gateway (or extender) using WPS. For
detailed instructions, see “5.2. Pairing the OWA3111 with your Internet gateway” on
page8.
6 Check the link quality via the Status LED ( ) on the OWA3111. If it is:
Solid green, then link quality is optimal.
Solid yellow, then link quality is fair, but not optimal.
Solid red, then link quality is bad. It is advised to reposition your OWA3111.
See “5.6. Optimizing the link quality” on page10 for more information.
Step 2: Connect your Wi‑Fi devices
If your Wi-Fi device:
• Supports WPS, use WPS to pair it with the OWA3111. For more information, see
“5.4. Pairing Wi-Fi devices to your OWA3111” on page10.
• Does not support WPS, configure it with the Wi-Fi network name (SSID) and
wireless key that are printed on the product label on the bottom of the OWA3111.
For more information, consult the user documentation of your device.
Step 3: Connect an Ethernet device (optional)
You can use both of the OWA3111’s Ethernet ports to connect Ethernet devices (for
example, a Set-Top Box, a NAS drive or computer) to your home network.
4.3. EasyMesh home network extender
This scenario allows you to extend Wi-Fi coverage in your home by retransmitting
Wi-Fi messages from your existing Wi-Fi EasyMesh network.
OWA3111
EasyMesh agent
Wi-Fi deviceInternet gateway or OWA3111
as EasyMesh controller
Wi-Fi 6
EasyMesh
Wi-Fi 6
Requirements
Your Internet gateway or another EasyMesh-capable Wi-Fi device must be
enabled and configured as the EasyMesh controller.
Step 1: Set up the repeater and onboard to the EasyMesh network
1 Position your OWA3111 half-way between your Internet gateway (or extender) and
your Wi-Fi devices.
2 Take the power supply, plug the small end into the power inlet port ( ) of the
OWA3111 and then plug the other end into a nearby power outlet.
3 Press the power ( ) button on the back of the OWA3111. The Status LED ( )
will first be solid yellow during startup.
4 Wait until the Status LED ( ) slowly blinks yellow.
5 Enable EasyMesh on your OWA3111 if not done yet. For more information ,see
“5.7. Configure your Wi-Fi extender to your needs” on page11.
6 Onboard the OWA3111 to the EasyMesh network using WPS. For detailed
instructions, see “5.3. Joining your OWA3111 with an existing EasyMesh network” on
page9.
7 Check the link quality via the Status LED ( ) on the OWA3111. If it is:
Solid green, then link quality is optimal.
Solid yellow, then link quality is fair, but not optimal.
Solid red, then link quality is bad. It is advised to reposition your OWA3111.
See “5.6. Optimizing the link quality” on page10 for more information.
Step 2: Connect your Wi‑Fi devices
Because the OWA3111 now uses the same Wi-Fi settings as the EasyMesh home
network, Wi-Fi devices that were already connected to your home network will also
be able to connect to the OWA3111, and vice versa.

7
4.2. Wireless Wi‑Fi6 home network enabler
This scenario allows you to add (extra) Wi-Fi6 coverage using the OWA3111.
OWA3111
Wi-Fi 6 access point
Wi-Fi deviceInternet gateway
or Wi-Fi extender
Wi-Fi Wi-Fi 6
Step 1: Set up the Wi‑Fi extender
1 Position your OWA3111 half-way between your Internet gateway (or extender) and
your Wi-Fi devices.
2 Take the power supply, plug the small end into the power inlet port ( ) of the
OWA3111 and then plug the other end into a nearby power outlet.
3 Press the power ( ) button on the back of the OWA3111. The Status LED ( )
will first be solid yellow during startup.
4 Wait until the Status LED ( ) slowly blinks yellow.
5 Pair the OWA3111 with your Internet gateway (or extender) using WPS. For
detailed instructions, see “5.2. Pairing the OWA3111 with your Internet gateway” on
page8.
6 Check the link quality via the Status LED ( ) on the OWA3111. If it is:
Solid green, then link quality is optimal.
Solid yellow, then link quality is fair, but not optimal.
Solid red, then link quality is bad. It is advised to reposition your OWA3111.
See “5.6. Optimizing the link quality” on page10 for more information.
Step 2: Connect your Wi‑Fi devices
If your Wi-Fi device:
• Supports WPS, use WPS to pair it with the OWA3111. For more information, see
“5.4. Pairing Wi-Fi devices to your OWA3111” on page10.
• Does not support WPS, configure it with the Wi-Fi network name (SSID) and
wireless key that are printed on the product label on the bottom of the OWA3111.
For more information, consult the user documentation of your device.
Step 3: Connect an Ethernet device (optional)
You can use both of the OWA3111’s Ethernet ports to connect Ethernet devices (for
example, a Set-Top Box, a NAS drive or computer) to your home network.
4.3. EasyMesh home network extender
This scenario allows you to extend Wi-Fi coverage in your home by retransmitting
Wi-Fi messages from your existing Wi-Fi EasyMesh network.
OWA3111
EasyMesh agent
Wi-Fi device
In
ternet gateway or OWA3111
as EasyMesh controller
Wi-Fi 6
EasyMesh
Wi-Fi 6
Requirements
Your Internet gateway or another EasyMesh-capable Wi-Fi device must be
enabled and configured as the EasyMesh controller.
Step 1: Set up the repeater and onboard to the EasyMesh network
1 Position your OWA3111 half-way between your Internet gateway (or extender) and
your Wi-Fi devices.
2 Take the power supply, plug the small end into the power inlet port ( ) of the
OWA3111 and then plug the other end into a nearby power outlet.
3 Press the power ( ) button on the back of the OWA3111. The Status LED ( )
will first be solid yellow during startup.
4 Wait until the Status LED ( ) slowly blinks yellow.
5 Enable EasyMesh on your OWA3111 if not done yet. For more information ,see
“5.7. Configure your Wi-Fi extender to your needs” on page11.
6 Onboard the OWA3111 to the EasyMesh network using WPS. For detailed
instructions, see “5.3. Joining your OWA3111 with an existing EasyMesh network” on
page9.
7 Check the link quality via the Status LED ( ) on the OWA3111. If it is:
Solid green, then link quality is optimal.
Solid yellow, then link quality is fair, but not optimal.
Solid red, then link quality is bad. It is advised to reposition your OWA3111.
See “5.6. Optimizing the link quality” on page10 for more information.
Step 2: Connect your Wi‑Fi devices
Because the OWA3111 now uses the same Wi-Fi settings as the EasyMesh home
network, Wi-Fi devices that were already connected to your home network will also
be able to connect to the OWA3111, and vice versa.

8
Step 3: Connect your Ethernet devices (optional)
You can use both of the OWA3111’s Ethernet ports to connect Ethernet devices (for
example, a Set-Top Box, a NAS drive or computer) to your home network.
5. Tips and tricks
5.1. Making a wired connection between the OWA3111 and your
Internet gateway
1 Take the included Ethernet cable (this is the cable with the yellow connectors).
2 Connect one end of the Ethernet cable to the blue Ethernet WAN ( ) port on
the back of your OWA3111.
3 Connect the other end of the Ethernet cable to an Ethernet or LAN port of your
Internet gateway.
5.2. Pairing the OWA3111 with your Internet gateway
Requirements
Make sure your OWA3111 isn’t onboarded already to an existing EasyMesh home
network, or paired with another Internet gateway.
Procedure
1 Briefly press the WPS ( ) button on the OWA3111. The Status LED ( ) on the
OWA3111 starts blinking green.
2 Within two minutes, briefly press the WPS button on your Internet gateway (or a
Wi-Fi extender connected to it).
Note: On some Internet gateways you may have to press and hold the WPS
button for a few seconds or until its WPS LED starts blinking.
3 After some time the Status LED ( ) on the OWA3111 turns solid green, yellow or
red. The Wi-Fi connection is now successfully established.
Note: If the Status LED ( ) is blinking blinking red, go to “5.5. What to do when
the Status LED is blinking red?” on page10 for further instructions.
4 Check the link quality via the Status LED ( ) on the OWA3111. If it is:
Solid green, then link quality is optimal.
Solid yellow, then link quality is fair, but not optimal.
Solid red, then link quality is bad. It is advised to reposition your OWA3111.
See “5.6. Optimizing the link quality” on page10 for more information.
5.3. Joining your OWA3111 with an existing EasyMesh network
Requirements
Make sure your OWA3111 isn’t joined already to an existing EasyMesh home network.
Procedure
1 Briefly press the WPS ( ) button on the OWA3111. The Status LED ( ) on the
OWA3111 starts blinking green.
2 Within two minutes, briefly press the WPS button on your Internet gateway or any
Wi-Fi extender in the EasyMesh home network.
Note: On some Internet gateways you may have to press and hold the WPS
button for a few seconds or until its WPS LED starts blinking.
3 During EasyMesh onboarding the Status LED ( ) on the OWA3111 goes
through (one or more of) the following states:
Flashing green & yellow (1 second each): EasyMesh onboarding started and
ongoing.
Flashing green (3 seconds) & yellow (1 seconds): EasyMesh network was
found but upstream onboarding ongoing or failing.
Flashing green (1 second) & yellow (3 seconds): No EasyMesh network was
found.
Once the the Wi-Fi connection is successfully established it will turn solid green,
yellow or red.
Note: If the Status LED ( ) is blinking red, go to “5.5. What to do when the
Status LED is blinking red?” on page10 for further instructions.
4 Check the link quality via the Status LED ( ) on the OWA3111. If it is:
Solid green, then link quality is optimal.
Solid yellow, then link quality is fair, but not optimal.
Solid red, then link quality is bad. It is advised to reposition your OWA3111.
See “5.6. Optimizing the link quality” on page10 for more information.

9
Step 3: Connect your Ethernet devices (optional)
You can use both of the OWA3111’s Ethernet ports to connect Ethernet devices (for
example, a Set-Top Box, a NAS drive or computer) to your home network.
5. Tips and tricks
5.1. Making a wired connection between the OWA3111 and your
Internet gateway
1 Take the included Ethernet cable (this is the cable with the yellow connectors).
2 Connect one end of the Ethernet cable to the blue Ethernet WAN ( ) port on
the back of your OWA3111.
3 Connect the other end of the Ethernet cable to an Ethernet or LAN port of your
Internet gateway.
5.2. Pairing the OWA3111 with your Internet gateway
Requirements
Make sure your OWA3111 isn’t onboarded already to an existing EasyMesh home
network, or paired with another Internet gateway.
Procedure
1 Briefly press the WPS ( ) button on the OWA3111. The Status LED ( ) on the
OWA3111 starts blinking green.
2 Within two minutes, briefly press the WPS button on your Internet gateway (or a
Wi-Fi extender connected to it).
Note: On some Internet gateways you may have to press and hold the WPS
button for a few seconds or until its WPS LED starts blinking.
3 After some time the Status LED ( ) on the OWA3111 turns solid green, yellow or
red. The Wi-Fi connection is now successfully established.
Note: If the Status LED ( ) is blinking blinking red, go to “5.5. What to do when
the Status LED is blinking red?” on page10 for further instructions.
4 Check the link quality via the Status LED ( ) on the OWA3111. If it is:
Solid green, then link quality is optimal.
Solid yellow, then link quality is fair, but not optimal.
Solid red, then link quality is bad. It is advised to reposition your OWA3111.
See “5.6. Optimizing the link quality” on page10 for more information.
5.3. Joining your OWA3111 with an existing EasyMesh network
Requirements
Make sure your OWA3111 isn’t joined already to an existing EasyMesh home network.
Procedure
1 Briefly press the WPS ( ) button on the OWA3111. The Status LED ( ) on the
OWA3111 starts blinking green.
2 Within two minutes, briefly press the WPS button on your Internet gateway or any
Wi-Fi extender in the EasyMesh home network.
Note: On some Internet gateways you may have to press and hold the WPS
button for a few seconds or until its WPS LED starts blinking.
3 During EasyMesh onboarding the Status LED ( ) on the OWA3111 goes
through (one or more of) the following states:
Flashing green & yellow (1 second each): EasyMesh onboarding started and
ongoing.
Flashing green (3 seconds) & yellow (1 seconds): EasyMesh network was
found but upstream onboarding ongoing or failing.
Flashing green (1 second) & yellow (3 seconds): No EasyMesh network was
found.
Once the the Wi-Fi connection is successfully established it will turn solid green,
yellow or red.
Note: If the Status LED ( ) is blinking red, go to “5.5. What to do when the
Status LED is blinking red?” on page10 for further instructions.
4 Check the link quality via the Status LED ( ) on the OWA3111. If it is:
Solid green, then link quality is optimal.
Solid yellow, then link quality is fair, but not optimal.
Solid red, then link quality is bad. It is advised to reposition your OWA3111.
See “5.6. Optimizing the link quality” on page10 for more information.

10
5.4. Pairing Wi‑Fi devices to your OWA3111
Connecting your Wi‑Fi devices using WPS
1 Briefly press the WPS ( ) button on
the OWA3111. The Status LED ( ) on
the OWA3111 starts blinking green.
2 Within two minutes, start WPS on your
Wi-Fi device. If your Wi-Fi device is:
Another Wi-Fi extender, briefly press its WPS button.
Another type of device, consult the documentation of your device.
3 After some time the Status LED ( ) on the OWA3111 turns back to its previous
solid state (green, yellow or red). The Wi-Fi connection is now successfully
established.
Note: If the Status LED ( ) is blinking red, go to “5.5. What to do when the
Status LED is blinking red?” on page10 for further instructions.
5.5. What to do when the Status LED is blinking red?
This indicates that the OWA3111 could not establish a Wi-Fi connection through
WPS.
Do the following:
1 Wait until the red blinking LED goes out, then try using WPS again.
2 Turn your OWA3111 slightly and then try again.
3 Obstructions may deteriorate the signal strength. Try to minimize the number of
walls between the two devices and then try again.
4 Move the devices closer to each other and then try again.
5.6. Optimizing the link quality
Tips
To achieve optimal link quality:
• Always try to reduce the number of obstacles (especially walls) between your
Wi-Fi devices to a minimum.
• Do not place your Wi-Fi devices in the neighbourhood of devices that cause
interfence (microwave ovens, cordless phones, baby monitors, etc.).
• Use Wi-Fi devices that support and use (multiple) 5GHz Wi-Fi.
WPS
Status LED
If the OWA3111 has a Wi-Fi connection to an Internet gateway, extender or repeater
(with or without EasyMesh), the Status LED ( ) will provide information about the
quality of the link between them.
If the Status LED ( ) is:
• Solid green: then the link quality is optimal. No further actions are needed.
• Solid yellow: then the link quality is fair, but not optimal. Change the position of
the OWA3111 until the LED turns green.
• Solid red: then the link quality is bad. Change the position of the OWA3111 until
the LED turns green or at least orange.
Repositioning the OWA3111 for better link quality
First try to improve the link quality without unplugging the power supply:
1 Reposition the OWA3111 to avoid obstacles, like walls, furniture and TV screens,
between the OWA3111 and your access point.
2 Wait 15seconds to allow the OWA3111 to re-evaluate the link quality.
If the link quality did not improve:
1 Unplug the power supply and move the OWA3111 closer to your access point, or
to a place with less obstacles between the OWA3111 and your access point.
2 Plug in the power supply and wait two minutes to allow the OWA3111 to start up
all services and evaluate the link quality.
5.7. Configure your Wi‑Fi extender to your needs
Accessing the OWA3111 web interface
The Wi-Fi extender web interface allows you to configure your Wi-Fi extender using
your web browser. To access the Wi-Fi extender web user interface:
1 Check the IP address of your OWA3111. If your OWA3111:
Is connected to your home network (either wired or via Wi-Fi), browse to the
web interface of your gateway to check the IP address of the OWA3111.
Not connected to your home network, the default IP address of the OWA3111
is 192.168.1.2.
2 Browse to the OWA3111’s IP address found (or http://192.168.1.2) on a computer
or device that is currently connected to your Wi-Fi extender (either wired or over
Wi-Fi).

11
5.4. Pairing Wi‑Fi devices to your OWA3111
Connecting your Wi‑Fi devices using WPS
1 Briefly press the WPS ( ) button on
the OWA3111. The Status LED ( ) on
the OWA3111 starts blinking green.
2 Within two minutes, start WPS on your
Wi-Fi device. If your Wi-Fi device is:
Another Wi-Fi extender, briefly press its WPS button.
Another type of device, consult the documentation of your device.
3 After some time the Status LED ( ) on the OWA3111 turns back to its previous
solid state (green, yellow or red). The Wi-Fi connection is now successfully
established.
Note: If the Status LED ( ) is blinking red, go to “5.5. What to do when the
Status LED is blinking red?” on page10 for further instructions.
5.5. What to do when the Status LED is blinking red?
This indicates that the OWA3111 could not establish a Wi-Fi connection through
WPS.
Do the following:
1 Wait until the red blinking LED goes out, then try using WPS again.
2 Turn your OWA3111 slightly and then try again.
3 Obstructions may deteriorate the signal strength. Try to minimize the number of
walls between the two devices and then try again.
4 Move the devices closer to each other and then try again.
5.6. Optimizing the link quality
Tips
To achieve optimal link quality:
• Always try to reduce the number of obstacles (especially walls) between your
Wi-Fi devices to a minimum.
• Do not place your Wi-Fi devices in the neighbourhood of devices that cause
interfence (microwave ovens, cordless phones, baby monitors, etc.).
• Use Wi-Fi devices that support and use (multiple) 5GHz Wi-Fi.
WPS
Status LED
If the OWA3111 has a Wi-Fi connection to an Internet gateway, extender or repeater
(with or without EasyMesh), the Status LED ( ) will provide information about the
quality of the link between them.
If the Status LED ( ) is:
• Solid green: then the link quality is optimal. No further actions are needed.
• Solid yellow: then the link quality is fair, but not optimal. Change the position of
the OWA3111 until the LED turns green.
• Solid red: then the link quality is bad. Change the position of the OWA3111 until
the LED turns green or at least orange.
Repositioning the OWA3111 for better link quality
First try to improve the link quality without unplugging the power supply:
1 Reposition the OWA3111 to avoid obstacles, like walls, furniture and TV screens,
between the OWA3111 and your access point.
2 Wait 15seconds to allow the OWA3111 to re-evaluate the link quality.
If the link quality did not improve:
1 Unplug the power supply and move the OWA3111 closer to your access point, or
to a place with less obstacles between the OWA3111 and your access point.
2 Plug in the power supply and wait two minutes to allow the OWA3111 to start up
all services and evaluate the link quality.
5.7. Configure your Wi‑Fi extender to your needs
Accessing the OWA3111 web interface
The Wi-Fi extender web interface allows you to configure your Wi-Fi extender using
your web browser. To access the Wi-Fi extender web user interface:
1 Check the IP address of your OWA3111. If your OWA3111:
Is connected to your home network (either wired or via Wi-Fi), browse to the
web interface of your gateway to check the IP address of the OWA3111.
Not connected to your home network, the default IP address of the OWA3111
is 192.168.1.2.
2 Browse to the OWA3111’s IP address found (or http://192.168.1.2) on a computer
or device that is currently connected to your Wi-Fi extender (either wired or over
Wi-Fi).

12
3 The Wi-Fi extender web interface appears. By default, you are logged in as
guest. This means that some items are hidden. To view all items, click Sign In and
enter admin as user name and the ACCESS KEY printed on the label of your
Wi-Fi extender as password.
Note: If this is the first time that you sign in, the OWA3111 may oer you to
change your password.
4 The Wi-Fi extender web interface appears with all settings available.
Configuring Easy Mesh
To use EasyMesh you must first enable it on your OWA3111. To enable EasyMesh:
1 Browse to the Wi-Fi extender web user interface and login as the user admin (for
more information, see “Accessing the OWA3111 web interface” on page11).
2 To open the EasyMesh page, click the EasyMesh card header.
3 On the EasyMesh page, you can see whether EasyMesh is enabled on your
Wi-Fi extender or not. If the switch is set to:
then the EasyMesh agent is enabled. Clicking the switch will disable
EasyMesh on your Wi-Fi extender.
then the EasyMesh agent is disabled. Clicking the switch will enable your
broadband interface.
5.8. How to repair an unresponsive Wi‑Fi extender
If at some point your Wi-Fi extender becomes unresponsive you can:
• Force it to restart: After restarting the OWA3111 will return to normal operation
with its last known working condition and configuration.
• Reset it to factory defaults: The OWA3111 restarts with the factory default
configuration. None of the Wi-Fi and EasyMesh settings, nor other configuration
changes you made to the OWA3111 are preserved.
Proceed as follows:
1 Make sure that your Wi-Fi extender is turned on.
2 Use a pen or an unfolded paperclip to push the recessed Reset button on your
Wi-Fi extender:
shortly (less than 5 seconds) and then release it to force it to restart.
for at least 10 seconds and then release it to rest it to factory defaults.
Reset
3 Your Wi-Fi extender restarts..

13
3The Wi-Fi extender web interface appears. By default, you are logged in as
guest. This means that some items are hidden. To view all items, click Sign In and
enter admin as user name and the ACCESS KEY printed on the label of your
Wi-Fi extender as password.
Note: If this is the first time that you sign in, the OWA3111 may oer you to
change your password.
4The Wi-Fi extender web interface appears with all settings available.
Configuring Easy Mesh
To use EasyMesh you must first enable it on your OWA3111. To enable EasyMesh:
1Browse to the Wi-Fi extender web user interface and login as the user admin (for
more information, see “Accessing the OWA3111 web interface” on page11).
2To open the EasyMesh page, click the EasyMesh card header.
3On the EasyMesh page, you can see whether EasyMesh is enabled on your
Wi-Fi extender or not. If the switch is set to:
then the EasyMesh agent is enabled. Clicking the switch will disable
EasyMesh on your Wi-Fi extender.
then the EasyMesh agent is disabled. Clicking the switch will enable your
broadband interface.
5.8. How to repair an unresponsive Wi‑Fi extender
If at some point your Wi-Fi extender becomes unresponsive you can:
• Force it to restart: After restarting the OWA3111 will return to normal operation
with its last known working condition and configuration.
•Reset it to factory defaults: The OWA3111 restarts with the factory default
configuration. None of the Wi-Fi and EasyMesh settings, nor other configuration
changes you made to the OWA3111 are preserved.
Proceed as follows:
1 Make sure that your Wi-Fi extender is turned on.
2 Use a pen or an unfolded paperclip to push the recessed Reset button on your
Wi-Fi extender:
shortly (less than 5 seconds) and then release it to force it to restart.
for at least 10 seconds and then release it to rest it to factory defaults.
Reset
3 Your Wi-Fi extender restarts..

Technicolor Delivery Technologies – www.technicolor.com
Copyright © 2020 Technicolor. All rights reserved.
All tradenames referenced are service marks, trademarks,
or registered trademarks of their respective companies.
Specifications subject to change without notice.
DMS3-QIG-25-597v1.0
*6247426A*
6247426A
Federal Communication Commission Interference Statement
This equipment has been tested and found to comply with the limits for a Class B
digital device, pursuant to Part 15 of the FCC Rules. These limits are designed to
provide reasonable protection against harmful interference in a residential
installation. This equipment generates, uses and can radiate radio frequency
energy and, if not installed and used in accordance with the instructions, may
cause harmful interference to radio communications. However, there is no
guarantee that interference will not occur in a particular installation. If this
equipment does cause harmful interference to radio or television reception, which
can be determined by turning the equipment off and on, the user is encouraged to
try to correct the interference by one of the following measures:
● Reorient or relocate the receiving antenna.
● Increase the separation between the equipment and receiver.
● Connect the equipment into an outlet on a circuit different from that to which the
receiver is connected.
● Consult the dealer or an experienced radio/TV technician for help.
FCC Caution: Any changes or modifications not expressly approved by the party
responsible for compliance could void the user’s authority to operate this
equipment.
This device complies with Part 15 of the FCC Rules. Operation is subject to the
following two conditions: (1) This device may not cause harmful interference, and
(2) this device must accept any interference received, including interference that
may cause undesired operation.
For product available in the USA market, only channel 1~11 can be operated.
Selection of other channels is not possible.
This device is restricted for indoor use.
IMPORTANT NOTE:
FCC Radiation Exposure Statement:
This equipment complies with FCC radiation exposure limits set forth for an
uncontrolled environment. This equipment should be installed and operated with
minimum distance 30cm between the radiator & your body.
Table of contents
Other Technicolor Wireless Access Point manuals
Popular Wireless Access Point manuals by other brands
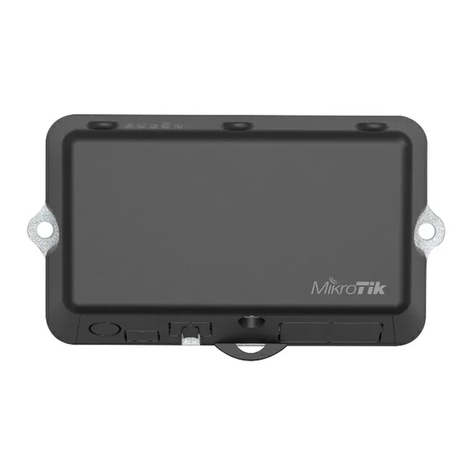
MikroTik
MikroTik LtAP RB912R-2nD-LTm&R11e-LTE-US user manual
Cisco
Cisco Aironet 1800i Getting started guide
3e Technologies International
3e Technologies International AirGuard 3e-525A-3 user guide
Pakedge
Pakedge WA-4200 user guide
Ubiquiti
Ubiquiti NanoBeam M5-16 quick start guide
ActionTec
ActionTec 11 Mbps Wireless Access Point user manual
NETGEAR
NETGEAR WG102 - ProSafe Wireless Access Point Reference manual
NODEXON
NODEXON NX-AP8000 Series Product guide
Ubiquiti
Ubiquiti PowerBeam PBE-5AC-Omni quick start guide
Repotec
Repotec RP-WA6048 user manual
D-Link
D-Link DWL-7200AP - AirPremier AG - Wireless Access... Brochure & specs
D-Link
D-Link DAP-1260L user manual
