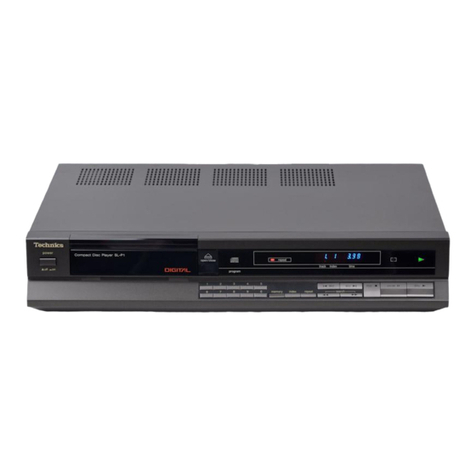
manuals.online logo
Brands
  1. Home
  2. •
  3. Brands
  4. •
  5. Technics
  6. •
  7. CD Player
  8. •
  9. Technics SL-PG340 User manual

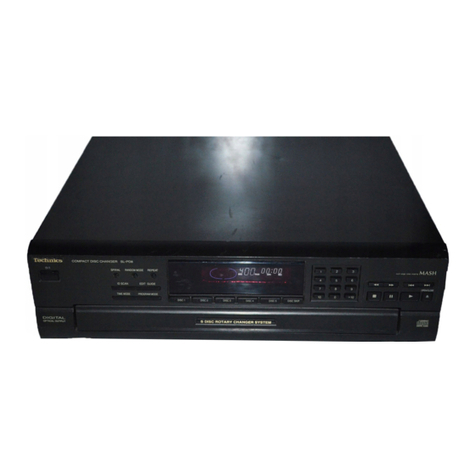
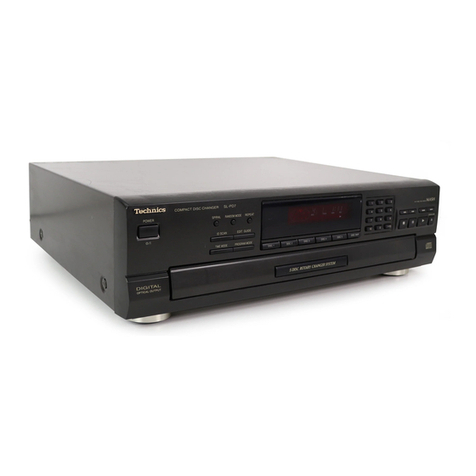
Technics SL-PG340 User manual

Technics
Operating
Instructions
rp~irpcn
00
“
00=00
"1
Compact
Disc
Player
SL-PG340
Hl
i^ls
a
aaaB
1}
(HOSE
DIGIT L
UDIO
Before
connecting,
operating
or
adjusting
this
product,
please
read
these
instructions
completely.
=
!
h
Z>^
>
•-
-
I
■
■
.
!
■
.
-
■■■
■*
I
gB
RQT
1708-1
P
W®
F
1
292L1
122
Table
of
Contents
Before
Use
Recording
Reference
Listening
When
There
Seems
to
Be
a
Problem
Index
Back
cover
MODEL
NUMBER
SERI L
NUMBER
2
Thank
you
for
purchasing
this
product.
For
optimum
performance
and
safety,
please
read
these
instructions
carefully.
Precautions
....
Safety
Installation
Maintenance
Service
Preparations
....
Supplied
accessories
Connections
The
model
number
and
serial
number
of
this
product
can
be
found
on
either
the
back
or
the
bottom
of
the
unit.
Please
note
them
in
the
space
provided
below
and
retain
them
for
future
reference.
3
3
3
3
Special
Features
uto
cue
Repeat
function
...
Time
fade
function
.
Time
mode
selection
Troubleshooting
Guide
Product
Service
Product
information
Recording
from
Compact
Discs
Sequential
recording
( utomatic
editing)
Program
editing
Link
function
Fade
out
editing
C UTION:
TO
REDUCE
THE
RISK
OF
ELECTRIC
SHOCK,
DO
NOT
REMOVE
SCREWS.
NO
USER-SERVICE BLE
P RTS
INSIDE.
REFER
SERVICING
TO
QU LIFIED
SERVICE
PERSONNEL.
RISK
OF
ELECTRIC
SHOCK
DO
NOT
OPEN
27
Back
cover
..
Back
cover
Front
Panel
Controls
and
Functions
Control
section
..........................................
Display
section
Basic
Operating
Procedure
(Sequential
Play)
To
stop
disc
play
To
temporarily
stop
disc
play
Random
Play
.............................
To
cancel
random
play
Search/Skip
Function
..............
Search
function
Skip
function
........................................
Program
Play
.............................
To
switch
to
sequential
mode
during
play
To
cancel
the
program
play
mode
To
confirm
the
program
.......................
To
enter
additional
tracks
.....................
To
clear
the
entry
..............................
C UTION:
TO
PREVENT
ELECTRIC
SHOCK
MATCH
WIDE
BLADE
OF
PLUG
TO
WIDE
SLOT,
FULLY
INSERT.
.
.
.12
.
.
.13
.
.
.13
...
.13
..
.
.13
.
.
.
.13
4
4
5
6
6
7
8
9
9
Concerning
Compact
Discs
Handling
precautions
Storage
precautions
.................
Technical
Specifications
..
....26
.
.
.
.26
26
....27
14
.14
.15
.16
.17
18
.18
.20
.22
.24
W RNING:
TO
REDUCE
THE
RISK
OF
FIRE
OR
ELEC

TRIC
SHOCK,
DO
NOT
EXPOSE
THIS
AP

PLIANCE
TO
RAIN
OR
MOISTURE.
The
lightning
flash
with
arrowhead
symbol,
within
an
equilateral
triangle,
is
intended
to
alert
the
user
to
the
presence
of
uninsulated
“
dangerous
voltage
”
within
the
product
’
s
enclosure
that
may
be
of
suf

ficient
magnitude
to
constitute
a
risk
of
electric
shock
to
persons.
The
exclamation
point
within
an
equilateral
triangle
is
intended
to
alert
the
user
to
the
presence
of
important
operating
and
maintenance
(servicing)
instructions
in
the
literature
accompanying
the
ap-
pliance.
.
.10
10
.
.11
...
11
...
11
CAUTION
A
Precautions
Environment
Maintenance
Service
3
Clean
the
cabinet,
panel
and
controls
with
a
soft
cloth
lightly
moist

ened
with
mild
detergent
solution.
1.
Damage
Requiring
Service
-
The
unit
should
be
serviced
by
qualified
service
personnel
when.
(a)
The
C
power
supply
cord
or
the
plug
has
been
damaged;
or
(b)
Objects
have
fallen
or
liquid
has
been
spilled
into
the
unit;
or
(c)
The
unit
has
been
exposed
to
rain;
or
(d)
The
unit
does
not
appear
to
operate
normally
or
exhibits
a
marked
change
in
performance;
or
(e)
The
unit
has
been
dropped,
or
the
enclosure
damaged.
2.
Servicing
-
The
user
should
not
attempt
to
service
the
unit
beyond
that
described
in
the
operating
instructions.
ll
other
servicing
should
be
referred
to
qualified
service
personnel.
•THIS
PRODUCT
UTILIZES
L SER.
USE
OF
CONTROLS
OR
DJUSTMENTS
OR
PERFORM

NCE
OF
PROCEDURES
OTHER
TH N
THOSE
SPECIFIED
HEREIN
M Y
RESULT
IN
H Z RDOUS
R DI TION
EXPO

SURE.
DO
NOT
OPEN
COVERS
ND
DO
NOT
REP IR
YOURSELF.
REFER
SERVICING
TO
QU LIFIED
PERSONNEL.
Do
not
use
any
type
of
abrasive
pad,
scouring
powder
or
solvent
such
as
alcohol
or
benzine.
7.
Wall
or
Ceiling
Mounting
-
The
unit
should
not
be
mounted
to
a
wall
or
ceiling,
unless
specified
in
this
operating
instructions.
5.
Surface
--
Place
the
unit
on
a
flat,
level
surface.
6.
Carts
and
Stands
--
The
unit
should
be
used
only
with
a
cart
or
stand
that
is
recommended
by
the
manufacturer.
The
unit
and
cart
combination
should
be
moved
with
care.
Quick
stops,
excessive
force,
and
uneven
sur

faces
may
cause
the
unit
and
cart
combination
to
overturn.
3.
Power
Cord
Protection
-
C
power
supply
cords
should
be
routed
so
that
they
are
not
likely
to
be
walked
on
or
pinched
by
items
placed
upon
or
against
them.
Never
take
hold
of
the
plug
or
cord
if
your
hand
is
wet,
and
always
grasp
the
plug
body
when
connecting
or
disconnecting
it.
4.
Nonuse
Periods
--
When
the
unit
is
not
used,
turn
the
power
off.
When
left
unused
for
a
long
period
of
time,
the
unit
should
be
unplugged
from
the
household
C
outlet.
Radio
Interference
Regulations
of
the
Canadian
Department
of
Communications.
If
moisture
forms
inside
this
unit,
it
may
not
operate
properly.
To
correct
this
problem,
turn
on
the
power
and
wait
about
one
hour
for
the
moisture
to
evaporate.
3.
Heat
-
The
unit
should
be
situated
away
from
heat
sources
such
as
radiators
and
the
like.
It
also
should
not
be
placed
in
tem

peratures
less
than
5°C
(41
°F)
or
greater
than
35°C
(95
C
F).
Before
using
this
unit
please
read
these
operating
instructions
carefully.
Take
special
care
to
follow
the
warnings
indicated
on
the
unit
itself
as
well
as
the
safety
suggestions
listed
below.
fterwards
keep
them
handy
for
future
reference,
Safety
---------------------------
C UTION:
•This
equipment
has
been
tested
and
found
to
comply
with
the
limits
for
a
Class
B
computing
device
in
accordance
with
the
specifications
set
forth
in
Subpart
J
of
Part
15
of
the
FCC
Rules.
If
this
equipment
does
cause
interference
to
radio
or
television
reception
which
can
be
determined
by
turning
the
equipment
on
and
off,
use
the
equipment
in
another
location
and/or
utilize
an
electrical
outlet
different
from
that
used
by
the
receiver.
•This
digital
apparatus
does
not
exceed
the
Class
B
limits
for
radio
noise
emissions
from
digital
apparatus
set
out
in
the
1.
Power
Source
-
The
unit
should
be
connected
to
power
supply
only
of
the
type
described
in
the
operating
instructions
or
as
marked
on
the
unit.
2.
Polarization
-
If
the
unit
is
equipped
with
a
polarized
C
power
plug
(a
plug
having
one
blade
wider
than
the
other),
that
plug
will
fit
into
the
C
outlet
only
one
way.
This
is
a
safety
feature.
If
you
are
unable
to
insert
the
plug
fully
into
the
outlet,
try
reversing
the
plug.
If
the
plug
should
still
fail
to
fit,
contact
your
electrician
to
replace
your
obsolete
outlet.
Do
not
defeat
the
safety
purpose
of
the
polarized
plug.
Installation
---------------------
1.
Ventilation
--
The
unit
should
be
situated
so
that
its
location
or
position
does
not
interfere
with
its
proper
ventilation.
llow
10
cm
(4")
clearance
from
the
rear
of
the
unit
2.
Foreign
Material
-■
Care
should
be
taken
so
that
objects
do
not
fall
into
and
liquids
are
not
spilled
into
the
unit.
Do
not
subject
this
unit
to
excessive
smoke,
dust,
mechanical
vibration,
or
shock
3.
Magnetism
--
The
unit
should
be
situated
away
from
equipment
or
devices
that
generate
strong
magnetism.
4.
Stacking
-
Do
not
place
heavy
objects,
other
than
system
com

ponents,
on
top
of
the
unit
1.
Water
and
Moisture
-
Do
not
use
this
unit
near
water
—
for
example,
near
a
bathtub,
washbowl,
swimming
pool,
or
the
like.
Damp
basements
should
also
be
avoided.
2.
Condensation
-
Moisture
may
form
on
the
lens
in
the
following
cases..
•
immediately
after
a
heater
has
been
turned
on.
•
in
a
steamy
or
very
humid
room.
•
when
the
unit
is
suddenly
moved
from
a
cold
environment
to
a
warm
one.
Placement
----------------------------------------
GE
1
pc.
Stereo
connection
cable
(SJP2249-6)
1
pc.
1
pc.
4
Preparations
Supplied
accessories
------
Check
the
packing
carton
for
these
accessories.
C
power
supply
cord
(polarized)
(For
U.S. .:
SJ 175-1)
(For
Canada:
SJ 175)
Remote
control
cable
(SJP2257T)
Connections
Rear
panel
of
this
unit
OUT
REMOTE
C
IN-
Q©
©
9
(red)
(white)
(L)
(R)
1
3
connection
cable
(in-
2
4
5
Before
making
connections,
be
sure
that
the
power
of
this
unit
and
all
other
system
components
is
first
turned
off.
See
the
operating
instructions
of
the
amplifier
or
the
cassette
deck
for
details.
Connect
the
synchro
edit
cable
(SJP2257T,
in

cluded
with
the
cassette
deck)
to
the
“
SYN

CHRO
EDIT
”
terminal
of
the
Technics
cassette
deck.
Connect
the
remote
control
cable
(SJP2257T,
included)
to
the
“
REMOTE
”
terminal
of
the
Technics
receiver
or
cassette
deck.
Household
C
outlet
Connect
the
C
power
supply
cord
(included)
to
the
“
C
OUTLET
”
of
the
amplifier
or
the
household
C
outlet
( C
120
V/60
Hz).
(white)
(red)
Connect
the
stereo
eluded)
to
the
“
CD
”
or
“
UX
”
terminals
of
the
amplifier.
4
Connect
C
power
supply
cord.
7\X,
t
A
L,
3
Connect
remote
control
cable.
SYNCHRO
EDIT
2
Connect
synchro
edit
cable.
"1
Connect
stereo
connection
cable.
Front
Panel
Controls
and
Functions
0
Q
0
Q
0
6
0
©
(J)
®
©
©
©
oo
6
Far
©
stop
button
(■
STOP)
©
Pause
button
(I
I
P USE)
©
Play
button
(►
PL Y)
©
Search
buttons
(◄◄
SE RCH
►►)
®
Peak
search
button
(PE K
SE RCH)
©
uto
cue
button
( UTO
CUE)
©
Repeat
button
(REPE T)
©
Random
play
button
(R NDOM)
ugvs?
I
”
.
0
'
I
I
SAC*
ISOCI
Control
section
---------------
O
Power
switch
(POWER)
Q
Disc
tray
©
Buttons
for
program
function
•
Program
button
(PROGR M)
•
Clear
button
(CLE R)
•
Recall
button
(REC LL)
Q
Buttons
for
CD-Edit
function
•Tape
length
button
(T PE
LENGTH)
•Tape
side
select
button
(SIDE
/B)
•
Disc
link
button
(DISC
LINK)
•Time
fade
button
(TIME
F DE)
©
Time
mode
select
button
(TIME
MODE)
©
Disc
tray
open/close
button
(
OPEN/CLOSE)
O
Skip
buttons
(
SKIP,
SKIP)
T
I
—
I
I
CHHClCtt
TC
IXM5IH
s
’
or*»"i>iuL»
m>c
r*ot
II
il
|r~r
©©
©@
©
©
©
_pO
DP
3
6
©
©
©
©
©
7
T
9T20,
Display
section
-------
©
Disc
link
indicator
(LINK)
©
Program
indicator
(PGM)
©
Track
number
display
©
Index/program
sequence
display
©
uto
cue
indicator
( .CUE)
©
Time
display
©
Repeat
indicator
(
|co|
)
©
-B
repeat
indicator
(
|
a
-
b
|
)
©
Random
play
indicator
(
|
random
|
)
©
Play
indicator
(►)
©
Pause
indicator
(I
I)
©
Peak
search
indicator
(PE K)
©
Compact
disc
edit
indicator
(EDIT)
©
Tape
side
indicator
(
-> ,
->B
)
©
Track
number
indicator
(1-16)
©
“
Over
”
mark
(
)
©
Time
fade/fade
out
indicator
(
|
t
.
fade
|
)
]
©
4
5
ZZ
ZZ
I
-B
11R NDOM
|
uu
■
uu
foi
r
T.F DE
H
|-f
t
T
r
PGM
I
/I
I
l-ll-l
'--LINK
—
I
—
!
'-"-
1
r--PEAK
L
—
!
LJ
No.
.CUE
EDIlgTl
Basic
Operating
Procedure
(Sequential
Play)
1
|4
1
1
■X
/
------------
2
1
POWER
PL Y
OPEN/CLOSE
1
1
4
Press
►
PL Y.
2
Label
must
face
upward.
Total
playing
time
8
Press
OPEN/CLOSE
to
open
the
disc
tray
and
insert
a
disc.
The
total
playing
time
displayed
includes
the
silent
sections
between
tracks.
For
this
reason,
it
may
be
a
few
seconds
longer
than
the
playing
time
indicated
on
the
disc.
You
can
skip
this
step
and
press
►
PL Y.
The
disc
tray
will
be
automatically
closed
and
then
play
will
start
from
the
first
track.
Press
OPEN/CLOSE
again
to
close
the
disc
tray.
Press
POWER
to
switch
on
the
power.
If
there
is
a
disc
in
the
disc
tray,
play
will
start
from
the
first
track.
c\
Total
number
of
tracks
____
I
____
IE
1
6
7
open
/
close
!
*
0FF
-O
nni
-
1
-
A
5
I
Lights
when
the
total
number
of
tracks
exceeds^?
2
3
8.
9
10
11
12
irw
]LZ
Z
I
I
ll
r
c.r>*
wtcau.
rnic
wooc
I
I
I
ll
HQ,-
RAKQCM
Index
number
(For
discs
without
index
number,
"
f
"
Will
ho
nnntinno.ml,.
Track
number
in
play
I
—
—
+
—
J-
.
i
H
n
;
n
i
i
u
■
u
I
The
unit
stops
automatically
when
the
last
track
finishes
playing.
!
”
will
be
continuously
displayed.)
I
Elapsed
time
Play
indicator
—
in
STOP
P USE
To
stop
disc
play
Press
■
STOP.
TOP
To
temporarily
stop
disc
play
Pause
indicator
i
II
Press
►
PL Y
(o
resume
play.
in
u_i
U:
Press
II
P USE.
P USE^"^
]E
[
r«m:«
otxi
Q
6
74
5
8
9
10
11
12
I
I
“
r
|
"r
Random
Play
R NDOM
TOP
Press
R NDOM
in
play
or
stop
mode.
I
To
cancel
random
play
Press
■
STOP.
STOP
10
Illuminates
I
Before
beginning,
follow
steps
1-3
of
“
Basic
Oper

ating
Procedure
”
on
page
8.
The
unit
will
automatically
select
the
sequence
of
selections
to
be
played
from
the
disc
in
a
random
manner.
The
unit
stops
automatically
when
all
tracks
have
played
once.
(Random
play
mode
will
be
cancelled.)
In
the
program
play
mode
(See
page
12.):
The
unit
plays
only
the
programmed
tracks
in
random
manner.
E
j^trwnur
»»oc
1
2
I
M
U
“
When
you
press
R NDOM
in
the
play
mode,
play
continues
from
subsequent
tracks
in
the
normal
order
to
the
end
of
the
disc.
3
4
8
9
10
11
12
L1_JL
0
0
:
5-
X
6
-7
Search/Skip
Function
I
SKIP
I
I
SKIP
I
Search
function
(Forward)
(Backward)
Skip
function
11
■
El
You
can
skip
as
many
tracks
as
the
number
of
times
you
press
the
button.
In
play
or
pause
mode,
you
can
search
rapidly
forward
or
backward
on
the
disc
for
specific
sections.
You
can
search
slowly
at
first
and
then
rapidly
if
the
button
is
held
down
for
more
than
about
three
seconds.
In
the
pause
mode:
The
unit
will
move
to
the
beginning
of
the
selected
track
and
switch
back
to
the
pause
mode.
In
the
stop
mode:
The
unit
displays
only
the
selected
track
number.
Press
►
PL Y
to
start.
In
the
program
play
mode:
You
can
skip
forward
and
backward
in
the
programmed
sequence.
In
the
random
play
mode:
►►1
:
You
can
skip
to
the
beginning
of
a
track
in
random
manner.
:
You
can
skip
to
the
beginning
of
the
track
in
play.
In
the
pause
mode,
no
sound
is
heard.
It
remains
at
the
point
where
you
release
the
button.
In
the
random
and
program
play
mode:
You
can
search
forward
and
backward
within
the
track
in
play.
Press
◄◄
SEARCH
SE RCH
To
skip
backward,
press
SKIP.
|
SKIP
I
To
skip
forward,
press
SKIP.
I
SKIP
I
You
can
skip
to
the
beginning
of
the
track
being
played.
If
you
press
this
button
again
quickly,
you
can
skip
to
the
beginning
of
the
previ

ous
track.
Remember
that
in
a
backward
skip,
the
track
in
play
is
included
in
the
count.
I
\
I
I
I
mm
see
Program
Play
2
1
PROGR M
PROGR M
STOP
5
4
You
can
program
up
to
20
tracks
in
any
order
you
desire.
PGM
If
you
enter
a
wrong
number
by
mistake,
press
CLE R.
1
PGM
1Z3.J.1678
10
11
12
►H
SKIP
PGM
12.21567021011
12
13
14
15
16
J>
5
12
Repeat
steps
2,
and
3
as
desired.
Number
of
programmed
tracks
The
last
track
in
programmed
order
TA
<_"/
3
L-
No.
1
2
3
4
5
6
7
6
7
When
the
21st
program
has
been
performed,
the
following
display
indicates
that
no
more
tracks
can
be
added.
I
■
n»«
npt
C.i
.
>
.M*.
X
I
1
-------
=11
1[
—
Before
beginning,
follow
steps
1-3
of
“
Basic
Oper

ating
Procedure
”
on
page
8.
1
in
the
stop
mode,
press
PROGR M.
If
you
press
this
button
in
the
play
mode,
the
track
in
play
will
be
programmed.
Illuminates
|
PGM
REC LL
-rn
CLE R
3
Press
PROGR M.
4
Repeat
steps
2
and
3
until
the
desired
program
is
completed.
For
example,
if
you
enter
tracks
5.3
and
2:
If
the
total
playing
time
exceeds
99
minutes
59
seconds
or
if
the
track
number
21
or
higher
has
been
specified,
the
display
reads
as
follows:
Press
►
PL Y
to
start.
The
unit
stops
automatically
when
all
the
programmed
tracks
have
finished
playing.
/
EG
L_
I
No.
Total
playing
time
of
programmed
tracks
I-I
I
U
-I
I
_(•
II
n
0
U
NO.
2
3
8
9
10
11
12
4
5
8
9
10
11
12
2
Press
SKIP
(K<,
»l)
to
select
the
track
num

ber.
For
example:
To
select
the
3rd
track,
press
3
times.
Even
after
play
is
completed,
the
program
sequence
will
remain
in
the
unit's
memory.
You
can
play
the
sequence
again
by
pressing
►
PL Y.
This
clears
all
programmed
contents
from
memory.
To
confirm
the
program
PGM
PGM
PGM
The
normal
display
will
resume
in
about
4
seconds.
To
enter
additional
tracks
To
clear
the
entry
CLE R
1
Each
time
you
press
REC LL,
the
display
shows
programmed
track
number
and
its
sequence,
so
that
you
can
verify
the
entire
program.
Press
once
in
the
stop
mode
and
twice
during
play.
This
clears
all
programmed
contents
from
memory.
Turning
off
the
power
will
also
cancel
the
program
play
mode.
To
switch
to
sequential
mode
during
play
Press
PROGR M.
PROGR M
Press
RECALL.
REC LL
In
the
stop
mode,
press
SKIP
(
|«,
)
to
specify
the
track
number
and
then
press
PROGRAM.
(See
page
12.)
To
clear
the
last
track
in
the
sequence,
press
CLEAR
in
the
stop
mode.
CLE R
To
cancel
all
the
programmed
tracks,
press
PROGR M
twice
in
the
stop
mode
and
return
to
step
2
on
the
previous
page.
PROGR M
To
cancel
a
track
in
the
middle
of
the
sequence,
press
REC LL
repeatedly
until
the
display
shows
the
track
number
to
be
cancelled,
then
press
CLE R.
REC LL
For
example:
The
diagram
shows
a
program
consisting
of
tracks
5,3,2.
Press
REC LL.
o
Press
REC LL
again.
7
8
Programmed
track
number
Programmed
sequence
—
To
cancel
the
program
play
mode
Press
■
STOP.
stop
^~|
r
-J
No.
,
I
3
<
S
6
3
3
I
—
No.
1
II
«
I
■
9
10
11
Q
8
9
10
11
12
3
?
—
'
No.
123
4
567B9>0Ut2
o
Press
REC LL
again.
o
____
)
Special
Features
Auto
cue
>
----
2
SKIP
1
SKIP
R NDOM
PL Y
2
1
The
unit
switches
to
the
play
standby
mode.
Press
UTO
CUE.
3
Illuminates
To
cancel
auto
cue
14
Note:
The
auto
cue
may
fail
to
function
at
the
proper
point
if
the
selected
track
begins
with
a
very
soft
passage
or
if
there
is
a
lot
of
background
noise.
Select
the
desired
play
mode.
To
play
track
1,
press
►
PLAY.
( lso
available
during
program
play.
See
page
12.)
To
play
desired
track,
press
SKIP
(!◄◄,►►!)
and
►
PLAY.
To
play
the
disc
randomly,
press
RANDOM.
Press
►
PL Y
to
start.
Press
►
PL Y
at
the
beginning
of
each
track
Press
UTO
CUE
again.
UTO
CUE
£
7
The
auto
cue
function
allows
the
unit
to
wait
in
a
standby
condition
at
the
beginning
of
each
track
so
as
to
start
play
right
when
you
are
ready.
When
each
track
finishes
playing,
the
unit
skips
to
the
beginning
of
the
next
track
and
switches
to
the
play
standby
mode.
T
il
_8
9
10
11
12
2
3
A
5
1
TI I
.CUE
—
’
Repeat
function
REPE T
Press
REPE T.
Illuminates
3 6
15
S5-IJE!
During
program
play,
the
unit
plays
only
the
programmed
tracks
repeatedly.
1
2
8
9
10
11
12
4
5
To
cancel
repeat
function,
press
REPE T
again.
REPE T
|
J
D
(continued)
2
TIME
F DE
TIME
F DE
STOP
Time
fade
indicator
T.F DE
6
8
To
see
the
remaining
time
T.F DE
-Ai
1
n
i
I
■
i
j
H
To
cancel
the
fade
mode
16
Special
Features
Time
fade
function
---------
fter
the
fade-out
is
finished,
the
unit
goes
into
the
pause
mode.
The
time
fade
indicator
goes
out.
jn
•
nn
JIJ
■
uu
TIME
MODE
Press
TIME
MODE
three
times
in
the
play
mode.
(See
page
17.)
TIME
MODE
If
you
want
to
change
the
time
while
entering,
press
CLE R
to
cancel
it.
Press
►
PLAY.
The
fade-out
begins
5
seconds
before
the
specified
time.
The
time
fade
indicator
flashes
on
and
off.
The
time
fade
function
allows
the
unit
to
finish
the
play
with
fade-out.
You
can
specify
the
time
(from
5
sec,
to
99
min.
59
sec.)
when
the
fade-out
of
5
seconds
is
finished.
1
Remaining
time
Press
■
STOP.
Press
SKIP
(K<,
»
)
and
TIME
F DE
to
enter
the
desired
time.
For
example:
If
you
want
the
fade-out
to
be
finished
30
minutes
later,
follow
the
procedure
de

scribed
as
below.
1)
Keep
pressing
SKIP
until
the
display
shows
“
3{]
".
Pressing
K<
SKIP
starts
the
countdown
from
99.
2)
Press
TIME
F DE
to
enter
"30".
3)
Press
»l
SKIP
to
specify
"
"•
Pressing
K<
SKIP
starts
the
countdown
from
59.
4)
Press
TIME
F DE
to
enter
“
00".
The
time
fade
indicator
on
the
display
panel
illuminates.
9
to
11
12
2
3
4
5
Press
TIME
F DE
in
the
pause
or
stop
mode.
The
"
—
:
—
”
indication
will
be
shown
on
the
display
panel.
2
TIME
MODE
Time
mode
selection
The
"■
on
©
Number
of
track
in
play
and
elapsed
time
(2)
Total
remaining
time
on
disc
O
(3)
Time
remaining
in
track
in
play
@
Total
elapsed
time
since
beginning
of
disc
17
Each
time
you
press
TIME
MODE
in
the
play
or
pause
mode,
the
information
will
change
as
follows.
When
the
track
in
play
is
number
21
or
higher:
The
“
:
—
"
indication
will
appear
on
display
(3).
In
the
random
play
mode:
■:
—
’
’
indication
will
appear
on
display
(2)
and
“
—
display
(4).
In
the
fade
out
mode:
The
remaining
time
till
the
fade-out
will
appear
between
the
displays
(3)
and
(3).
In
the
edit
mode:
The
remaining
time
of
each
side
of
the
tape
will
appear
on
display
(2).
In
the
program
play
mode:
The
information
displayed
on
displays
(2)
and
(4)
is
only
within
the
programmed
tracks.
(-
I
I
I
I
I
I
I
Sequential
recording
( utomatic
editing)
3
1
2
T PE
LENGTH
'V'
4
5
KIP
SKIP
3
2
Illuminates
c
I
EDIT
To
enter
desired
recording
time,
see
next
page.
Remaining
time
on
side
Press
■
STOP.
PGM
Side
.
18
Prepare
the
cassette
deck.
4
5
To
enter
additional
tracks
at
the
tape
end
of
side
B,
see
“
To
change
the
programmed
contents"
on
page
21.
PGM
PE K-
The
unit
will
calculate
how
many
tracks
can
be
entered
onto
tape
side
and
B,
and
then
program
them
automatically.
In
the
edit
mode,
silent
gaps
of
approximately
3
seconds
will
be
automatically
inserted
between
tracks
automatically
(auto
space
function).
Press
T PE
LENGTH
to
select
the
tape
length.
Each
time
the
button
is
pressed
the
tape
length
indicator
changes
as
follows.
Choose
the
length
of
the
tape
to
be
used.
r
C-46
O
C-60
O
C-90
c>
C
—
Prepare
the
cassette
deck
for
recording.
(See
next
page.)
Press
►
PL Y
to
start.
Recording
on
the
cassette
deck
will
start
at
the
same
time.
Press
PE K
SE RCH
to
search
for
the
peak
point
then
adjust
the
recording
level
on
the
cassette
deck.
It
takes
about
1.5
minutes
to
find
the
peak
point
for
a
60-minute
compact
disc.
Recording
from
Compact
Discs
The
edit
function
of
this
unit
is
used
when
recording
from
compact
of
the
tape,
considering
the
length
of
the
tape
used,
so
that
there
is
no
discs
to
tape.
Tracks
can
be
recorded
on
both
sides
(sides
and
B)
interruption
of
tracks
at
the
end
of
one
tape
side.
If
you
use
this
unit
in
combination
with
the
Technics
cassette
deck
which
has
the
SYNCHRO
EDIT
terminal,
recording
on
the
cassette
deck
will
start
automatically
at
the
same
time
you
start
CD
play
(synchro
recording
function).
lso,
if
you
set
the
cassette
deck
to
the
auto-reverse
mode,
both
sides
of
the
tape
will
automatically
be
recorded.
The
maximum
numbers
of
tracks
allowable
for
editing
is
20
and
the
biggest
track
number
allowable
for
editing
is
20.
The
edit
function
does
not
work
for
more
than
20
tracks
nor
the
track
number
over
20.
1
Number
of
tracks
to
be
recorded
on
side
Last
track
of
side
10
11
12
1
----------
Tracks
to
be
recorded
on
side
B
(lower
bars)
F
peak
|
search
|
%
c
No.
EDrr
Hft
~
2
3~
4~p~
6.
.7
.8
_9
Tracks
to
be
recorded
on
side
(upper
bars)
i
ci
X
|C51
I
If
the
cassette
deck
is
set
to
the
auto-reverse
mode,
recording
from
tape
side
B
will
follow
automatically.
When
recording
from
tape
side
B
is
finished,
the
CD
player
will
automatically
stop
and
the
cassette
deck
will
switch
to
recording
standby
mode.
8
9
10
11
12
2
3
iHO<i
src
4-
5.-6
7
When
the
peak
point
is
found,
the
unit
repeatedly
produces
the
sound
for
about
6
seconds
around
the
peak
point.
s
there
are
many
peak
points
on
the
disc,
each
time
you
make
a
new
peak
level
search
the
unit
might
find
a
different
point
as
the
peak
point.
(Refer
to
operating
instructions
for
the
cassette
deck
to
find
out
how
to
adjust
the
recording
level.)
To
cancel
the
edit
mode
O
How
to
prepare
the
cassette
deck
for
recording
If
the
cassette
deck
has
no
SYNCHRO
EDIT
terminal
To
enter
desired
recording
time
other
than
46,
60
or
90
minutes
T PE
LENGTH
1
Press
T PE
LENGTH
to
select
“
C-----
”
then
keep
pressing
SKIP
(|«
►►!)
to
enter
the
tape's
total
playing
time
in
minutes.
To
record
on
side
B,
first
press
the
stop
button
on
the
cassette
deck,
then
start
recording
again
on
side
B
while
at
the
same
time
pressing
►
PL Y
on
the
CD
player.
For
example:
When
the
total
recording
time
of
the
tape
to
be
used
is
52
minutes,
keeppressing
»l
SKIP
until
the
display
shows
“
C-
St?".
Press
the
play
button
of
the
cassette
deck
at
the
same
time
as
pressing
►
PL Y
on
the
CD
player
to
start
recording.
When
the
deck
has
reverse
mode,
set
to
one-way
(
).
When
the
recording
for
side
is
finished,
the
CD
player
will
go
to
the
pause
mode.
The
cassette
deck
will
keep
recording.
Press
■
STOP
after
recording
has
finished.
STOP
1.
Insert
the
cassette
tape
into
the
cassette
holder
of
the
deck
for
the
synchro-edit-recording.
(Be
sure
the
tape
is
rewound.)
2.
Select
the
noise-reduction
system
and
the
reverse
mode
(
CZO
).
3.
Check
to
be
sure
that
the
forward-side
indicator
(►)
of
the
deck
to
be
used
is
illuminated.
4.
Set
the
cassette
deck
to
the
recording
standby
mode.
(Refer
to
operating
instructions
for
the
cassette
deck
to
be
used.)
Recording
from
Compact
Discs
(continued)
Program
editing
4
SIDE /B
1
2
T PE
LENGTH
STOP
CLE R
5
6
SKIP
SKIP
4
PGM
2
Total
time
of
programmed
tracks
5
PGM
6
Remaining
time
on
side
PGM
20
I
o*tKCioir
Prepare
the
cassette
deck.
Enter
the
track
number.
Adjust
the
recording
level.
□
Eorr
<o
i
2
3
“
1
-------
Side
B
Enter
the
desired
track
numbers
and
the
de

sired
sequence.
(See
page
12.)
Total
number
of
programmed
tracks
Prepare
the
cassette
deck
for
recording.
(See
page
19.)
Press
T PE
LENGTH
to
select
the
tape
length.
(See
step
2
on
page
18.)
Number
of
tracks
to
be
recorded
on
side
djust
the
recording
level
on
the
cassette
deck.
(Follow
steps
3
and
4
on
page
18.)
Press
►
PLAY
to
start.
Recording
on
the
cassette
deck
will
start
at
the
same
time.
I
UE
REC LL
I
PROGR M
LZH
IJ
No.
If
the
cassette
deck
is
set
to
auto-reverse,
recording
on
tape
side
B
will
begin
automatically.
When
recording
on
tape
side
B
has
finished,
the
CD
player
will
automatically
stop
and
the
cassette
deck
will
switch
to
recording
standby
mode.
You
can
make
an
original
tape
consisting
of
your
favorite
tracks,
in
any
sequence
desired.
The
maximum
number
of
tracks
allowable
for
editing
is
20
and
the
biggest
track
number
allowable
for
editing
is
20.
The
edit
function
does
not
work
for
more
than
20
tracks
nor
the
track
number
over
20.
1
PL Y
I
-h
1
Press
SIDE
A/B
to
view
the
time
remaining
on
side
B.
minus
(-)
sign
on
the
remaining
time
display
indicates
that
the
total
time
of
programmed
tracks
exceeds
the
tape
length,
and
the
programmed
contents
should
be
changed.
(See
page
21.)
Minus
sign
4
No.
45.6
’
7,8'9
10
11
e
Ij
»«•
8
No.
i
IZ
4
ZZZ
a
91011
^
In
the
edit
mode,
silent
gaps
of
approximately
3
seconds
will
be
automatically
inserted
between
tracks
automatically
(auto
space
function).
4
s.
6
L
8
9
10
11
12
Last
track
of
side
Eorr-
i
2
FT

Other manuals for SL-PG340

1

Other Technics CD Player manuals

Technics SL-MC70 User manual

Technics

Technics SL-MC70 User manual

Technics SL-PS50 User manual

Technics

Technics SL-PS50 User manual

Technics SL-XP140 User manual

Technics

Technics SL-XP140 User manual

Technics SL-PG480A - schematics User manual

Technics

Technics SL-PG480A - schematics User manual

Technics SL-PD988 User manual

Technics

Technics SL-PD988 User manual

Technics SL-PD888 User manual

Technics

Technics SL-PD888 User manual

Technics SL-PS840 User manual

Technics

Technics SL-PS840 User manual

Technics SLPD8 - COMPACT DISC CHANGER User manual

Technics

Technics SLPD8 - COMPACT DISC CHANGER User manual

Technics SL-HD301 User manual

Technics

Technics SL-HD301 User manual

Technics SL-PS770A User manual

Technics

Technics SL-PS770A User manual

Technics SL-XP600 User manual

Technics

Technics SL-XP600 User manual

Technics SL-PD667 User manual

Technics

Technics SL-PD667 User manual

Technics SL-ca01 User manual

Technics

Technics SL-ca01 User manual

Technics SL-E10 User manual

Technics

Technics SL-E10 User manual

Technics sl-mc410 User manual

Technics

Technics sl-mc410 User manual

Technics SL-EH50 User manual

Technics

Technics SL-EH50 User manual

Technics SL-PG370A User manual

Technics

Technics SL-PG370A User manual

Technics SL-EH560 User manual

Technics

Technics SL-EH560 User manual

Technics SL-P1300 User manual

Technics

Technics SL-P1300 User manual

Technics SL-G700 User manual

Technics

Technics SL-G700 User manual

Technics SL-PS7 User manual

Technics

Technics SL-PS7 User manual

Technics SL-P350 User manual

Technics

Technics SL-P350 User manual

Technics SL-PS700 User manual

Technics

Technics SL-PS700 User manual

Technics SL-PG440 User manual

Technics

Technics SL-PG440 User manual

Popular CD Player manuals by other brands

Philips EXp2550 user manual

Philips

Philips EXp2550 user manual

jWIN JX-CD418 instruction manual

jWIN

jWIN JX-CD418 instruction manual

Yamaha CDX-396 owner's manual

Yamaha

Yamaha CDX-396 owner's manual

Magnavox AZ 8310 operating instructions

Magnavox

Magnavox AZ 8310 operating instructions

Philips AZ3811 user manual

Philips

Philips AZ3811 user manual

RCA RP-9540 user guide

RCA

RCA RP-9540 user guide

Onkyo DX-708 instruction manual

Onkyo

Onkyo DX-708 instruction manual

Sanyo CDP-195 instruction manual

Sanyo

Sanyo CDP-195 instruction manual

Aiwa ADC-M105 operating instructions

Aiwa

Aiwa ADC-M105 operating instructions

Memorex MP3851SP user guide

Memorex

Memorex MP3851SP user guide

RCA RCD159 Specifications

RCA

RCA RCD159 Specifications

Sony DVP-FX705 - Portable Dvd Player operating instructions

Sony

Sony DVP-FX705 - Portable Dvd Player operating instructions

Sony CDX-L600X - Fm/am Compact Disc Player Installation/connections

Sony

Sony CDX-L600X - Fm/am Compact Disc Player Installation/connections

Philips EXP2561/17 user manual

Philips

Philips EXP2561/17 user manual

Sharp WQ-CH900H Operation manual

Sharp

Sharp WQ-CH900H Operation manual

Samsung MX-C630D Service manual

Samsung

Samsung MX-C630D Service manual

Pioneer CLD-980 operating instructions

Pioneer

Pioneer CLD-980 operating instructions

Audiovox CE531MP operating instructions

Audiovox

Audiovox CE531MP operating instructions

manuals.online logo
manuals.online logoBrands
  • About & Mission
  • Contact us
  • Privacy Policy
  • Terms and Conditions

Copyright 2025 Manuals.Online. All Rights Reserved.