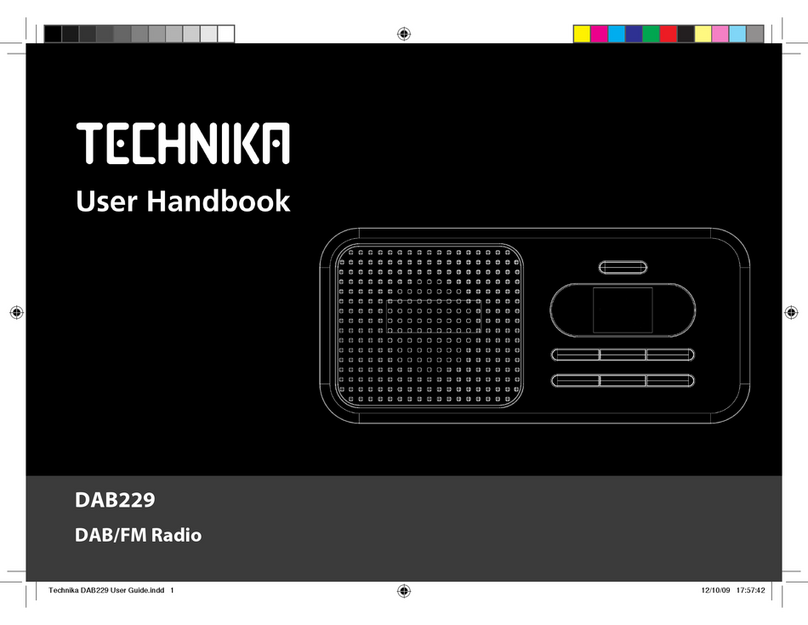
Technika IR-129 User manual

IR-129
Internet radio
User Guide


1
Read these instructions.
Keep these instructions.
Heed all warnings.
Follow all instructions.
Do not use this apparatus near water.
Clean only with a slightly damp cloth.
Do not block any ventilation openings.
Install in accordance with the manufacturer’s
instructions.
Do not install or operate near any heat sources such
as radiators, stoves, or other apparatus that produce
heat.
Unplug this apparatus during lightning storms or when
unused for long periods of time.
IMPORTANT
This equipment generates, uses and can radiate radio
frequency energy and, if not installed and used in
accordance with the instructions, may cause harmful
interference to radio communication. However, this
is no guarantee that interference will not occur in a
particular installation. If this equipment does cause
harmful interference to radio or television reception,
which can be determined by turning the equipment
o and on, the user is encouraged to try to correct the
interference by one of the following measures:
- Reorient or relocate the receiving antenna.
- Increase the separation between the equipment
and receiver.
- Connect the equipment into an outlet on a
circuit dierent from that to which the receiver is
connected.
- Consult the dealer or an experienced radio/TV
technician for help.
ELECTRICAL INFORMATION
Use this appliance only with the supplied AC Adaptor.
Using non-approved power supplies will void the
warranty.
Mains Supply: The mains operating voltage of the
AC Adaptor is marked on a rating plate on the AC
Adaptor.
The means of disconnecting this appliance from
the mains supply is the AC adaptor. This should be
unobstructed and readily operable at all times.
Refer all servicing to qualied service personnel.
Servicing is required when the apparatus has been
damaged in any way, such as the power-supply cord
or plug is damaged, liquid has been spilled or objects
have fallen into the apparatus, the apparatus has been
exposed to rain or moisture, does not operate normally,
or has been dropped.
Warning: To reduce the risk of re or electrical shock,
do not expose this product to rain or moisture. The
product must not be exposed to dripping and splashing
and no object lled with liquids such as a vase of
owers should be placed on the product.
No naked ame sources such as candles should be
placed on the product.
Caution: Changes or modications not expressly
approved by the manufacturer could void the user’s
authority to operate this device.
Caution: Usage of controls or adjustments or
performance of procedures other than those specied
herein may result in hazardous exposure.
This symbol indicates that there are impor-
tant operating and maintenance instructions
in the literature accompanying this unit.
This symbol indicates that dangerous voltage
constituting a risk of electric shock is present
within this unit.
CAUTION!
RISK OF ELECTRIC SHOCK
DO NOT OPEN
TO REDUCE THE RISK OF ELECTRIC SHOCK
DO NOT REMOVE COVER (OR BACK)
IMPORTANT SAFETY INFORMATION

2
INDEX
INDEX
Important safety information..................................1
Introduction ............................................................2
Unpacking ...............................................................2
Control panel...........................................................3
Display features .......................................................4
Remote control........................................................5
Getting started ........................................................6
First time use...........................................................6
Power and volume control.......................................6
Navigating menus ...................................................7
Alphanumeric entry.................................................8
Connecting to your network (AUTO DHCP)...............9
Connecting to your network (Fixed IP address)......10
Listening to Internet radio.....................................11
FM Radio ...............................................................12
Internet radio and FM presets................................12
Reciva login and registration .................................13
Media player function and essentials.....................14
UPNP servers .........................................................16
Windows shares.....................................................17
Media player control..............................................18
Conguration menu ..............................................20
Using the alarms....................................................21
Sleep timer............................................................22
Troubleshooting ....................................................23
Sound EQ...............................................................26
Headphones ..........................................................26
Care & Maintenance...............................................26
Warranty & Specications......................................26
Computer network basics ......................................27
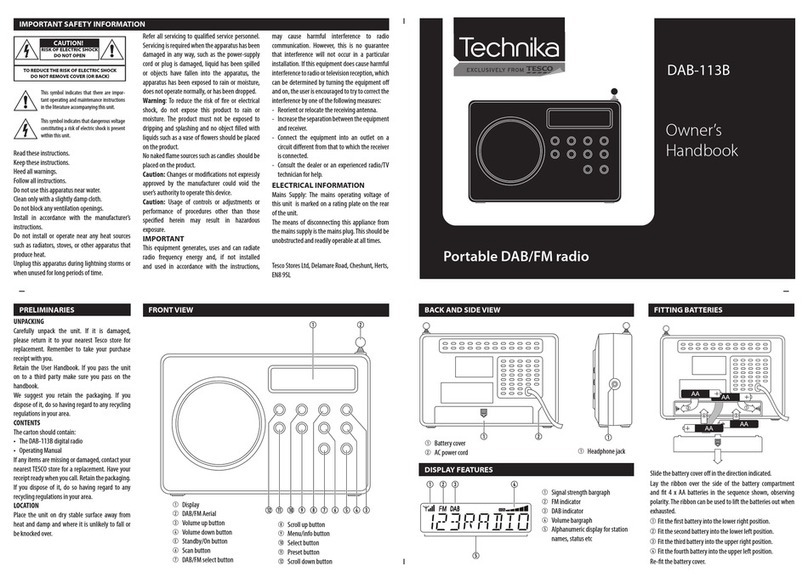
PRELIMINARIESINTRODUCTION
The IR-129 is a remote controlled, stereo Internet Radio with
alarm function.
The IR129 connects to the Internet via a wireless computer
network and can then receive Internet Radio stations from
around the globe. The radio stations are presented in a
browseable list indexed by country, genre or alphabetic
search. Stations may be preset for quick recall.
A Media Player feature also enables the unit to remotely
browse and play music stored on any computer connected
within its local network environment*.
In addition to Internet connectivity, the IR-129 also includes
an FM tuner for reception of local stations.
*Requires appropriately congured computers and wireless
network.
UNPACKING
Carefully unpack the unit. If it is damaged, please return it to
your nearest Tesco store for replacement. Remember to take
your purchase receipt with you.
Retain the User Handbook. If you pass the unit on to a third
party make sure you pass on the handbook.
We suggest you retain the packaging. If you dispose of it, do
so having regard to any recycling regulations in your area.
CONTENTS
The carton should contain:
The IR-129 Internet radio•
AC adaptor•
Remote control with batteries•
Operating Manual•
If any items are missing or damaged, contact your nearest
TESCO store for a replacement. Have your receipt ready when
you call. Retain the packaging. If you dispose of it, do so
having regard to any recycling regulations in your area.
LOCATION
Place the unit on dry stable surface away from heat and
damp and where it is unlikely to fall or be knocked over.
3
aAlarm set button
bSelect button
cStandby button
dStop/Preset 1 button
ePrevious button
fNext button
gPlay/Pause/Preset 2 button
hBack button
iDisplay window
1) Remote control sensor
1! Volume/Menu scroll control
1@ Headphone jack
1# DC-in jack
1$ FM aerial
CONTROL PANEL
FRONT VIEW BACK VIEW

4
DISPLAY FEATURES
aStation name (scrolling for longer names)
bAudio compression rate and type
cReal Player Enabled
dShift function selected
eInternet radio mode
fAlarm set symbol
gSleep timer set symbol
hWiFi signal strength
aAlbum/track name
bElapsed time and audio compression rate
cReal Player Enabled
dMedia Player mode
eShue mode symbol
fRepeat mode symbol
gSleep timer set symbol
hWiFi signal strength
INTERNET RADIO DISPLAY EXAMPLE
MEDIA PLAYER DISPLAY EXAMPLE

5
aStandby button
bMute button
cAlarm set button
dNext button
eSleep button
fUp button
gDown button
hSelect button
iShift button
1) Numeric keypad
1! Back button
1@ Play mode button
1# Reply button
1$ EQ button
1% Play/Pause button
1^ Previous button
1& Menu button
1* Stop button
1( Browse/Queue button
2) Source button
2! Snooze button
REMOTE CONTROL BATTERIES
FITTING OR REPLACING THE REMOTE CONTROL BATTERIES
When replacing the batteries in the remote control, refer to the
diagram above.
1. Press the catch on the battery door across.
2. While holding the catch, open the battery door.
3. Fit two AAA batteries observing polarity as shown. When replacing
the batteries, use only the same AAA type specied.
4. Re-t the battery door and clip it in place.
DISPOSAL OF BATTERIES
Dispose of used batteries with regard to the recycling regulations in
your area. Do NOT short circuit batteries or throw them into water, the
general rubbish or in a re.
Weak batteries can leak and damage the remote control. Replace
them in good time!
REMOTE CONTROL

6
GETTING STARTED
FM AERIAL
Before using your radio, unwrap and fully extend the aerial
wire. You may need to adjust the position of the aerial wire
in use for maximum signal strength.
CONNECTING POWER
Before connecting the power, check that the mains voltage
on the rating plate of the AC adaptor is the same as the
voltage in your area.
Plug the DC cord from the AC adaptor into the DC jack on•
the back of the unit.
Plug the AC adaptor into the wall socket and switch the•
mains power on.
The unit is now ready for use.
NOTE:- The AC adaptor may become warm during operation
- this is normal.
WIRELESS NETWORK
Your InternetRadiomust beconnectedto awirelesscomputer
network so that it can browse the Internet for available radio
stations. A wireless network is also required to enable the
Media Player function and browse for music from computers
connected to the network.
If you don’t have a wireless computer network you will only
be able to use the FM radio function.
For a more detailed explanation about computer networks,
refer to the guide on page 27.
FIRST TIME USE
FIRST TIME USE
It is advisable to read the information on the following
2 pages before switching on your radio for the rst time.
These pages explain power and volume control, then how to
navigate the menus, before continuing to the essential rst
step of connecting to a wireless network.
STANDBY CONTROL
To turn the radio on:
Press the• STANDBY button on the control panel or the
remote control.
If the radio was last used to play Internet Radio, it
will switch on and search for the last-used network name.
If the network is found, the radio will search for the Internet
gateway. Once the gateway is found, the radio will tune to the
last station played.
If the radio was last used as a Media Player, it will switch
on and search for the last-used network name, then search for
the Internet gateway. Once the gateway is found, the radio will
set to Media Player mode and wait for you to select tracks to
play.
If the radio was last used to play FM radio, it will switch on
and tune to the last station played.
To turn the radio o:
Press the• STANDBY button.
The radio will switch o. The display will switch to display the
time.
POWER CONTROL
VOLUME CONTROL
To set the volume level:
Turn the• ROTARY control clockwise to increase the
volume or anti-clockwise to reduce the volume.
Or
Press the• UP or DN buttons on the remote control to
increase or reduce the volume level.
When you adjust the volume, the display will briey switch to a
Volume Bargraph to show the level you have set.
NOTE: If the multi-function ROTARY control or UP/DN
navigation buttons have been used to navigate the menu
system, volume mode is automatically restored a few
seconds after the last menu navigation.

7
NAVIGATING MENUS
Many of the functions available on your Radio are selected
through a menu system.
Before using your radio you should understand how to view
and select menu options. You can navigate the menus from
the front panel controls or from the remote control.
Navigating the menus:
To enter the menu or select the highlighted option on•
the display, press the SELECT button.
To scroll through the menu options, turn the• ROTARY
control (or press the UP/DN buttons on the remote
control).
To step back through the menu, press the• BACK button.
The diagrams on this page illustrate how the menu system
is navigated.
Turn the ROTARY control (or press UP or DN on the remote
control) to highlight each option in turn on the display.
Press the SELECT button to enter the menu
system or select a highlighted option.
Press the BACK button to step back through
the menus.

8
ALPHANUMERIC CHARACTERS
Some menu items will require you to enter alphanumeric
characters and words. For example, a wireless network
Security Key or the name of a network when entered
manually. To enter alphanumeric characters, follow the
steps shown in the diagrams below (example of entering a
wireless security key)-
Turn the• ROTARY CONTROL (or press the UP/DN buttons
on the remote control) to move the letter/symbol you
want to use into the centre of the display.
Press the• SELECT button on the front panel or remote
control to add the letter to the script on the bottom
line.
NOTE: If you enter a letter in error, you can press the BACK
button to delete it.
When you have nished entering alphanumeric•
characters, highlight the word END in the character list
and select it.

9
CONNECTING TO A NETWORK
The rst essential step in using your Internet Radio is to
connect your radio to your network. You cannot receive
Internet Radio or use the Media Player function without
joining a network.
NOTE:- Most home networks are set up for auto (DHCP)
operation and will automatically assign an address to
new devices as they join the network. Alternatively, if you
know that your network requires addresses to be assigned
manually, refer now to the instructions on the next page.
Information you will need:
Before attempting to connect your radio to a network you
will need the following information -
Wireless network name (SSID)•
Wireless network security key (if set).•
If you didn’t install your network and don’t have this
information you will need to contact the installer. Sometimes
an installer will x a label under the wireless access point or
modem/router listing the network name and password.
To connect to a network:
Press the• Standby button to switch on the unit.
If this is the rst time the radio has been switched on, the
display will show the ‘network’ menu options -
CONNECTING TO YOUR NETWORK (AUTO DHCP)
Follow the next instructions to scan for a network
(recommended) or refer to the section ‘Entering a network
name manually’if you prefer to enter the network name and
security key (if required) manually.
Scanning for a network:
Press the• SELECT button to choose the rst option
‘Scan for network’ and enable your radio to scan for all
networks within range.
The radio will scan for networks, the network name (SSID)
should then be shown on the display. If there is more than
one network within range, a list of names will be shown. For
example -
SUCCESSFUL CONNECTION
Once you have successfully connected to the network, the
display will show the‘root’menu options of -
Press the• UP or DN button on the remote control or turn
the ROTARY control on the front panel to highlight the
name of the network you want to join.
Press the• SELECT button to connect to the network.
The radio will now connect to the network. If a security key
is required to join the network, you will now be prompted
to enter it.
Entering a network key:
Follow the alphanumeric entry instructions on page 8 to
enter the characters in the security key.
The network settings (including security key) will be
memorised for future connection to the network.
If you have successfully connected to a network, skip to the
‘Listening to Internet radio’section on page 11.
If no wireless network is found:
If no wireless network is found, this may be because the
wireless network signal strength is too weak, or the name of
your network could be hidden.
Weak signal: To check this it is advisable to temporarily
move the radio close to the source of your wireless network
and try once again to join the network.
Network name hidden: If the network name is hidden, you
can still join the network, but must enter the name and key
manually.
Entering a network name manually:
Navigate to the menu option ‘Enter network name’ and•
enter the network name referring to the alphanumeric
entry instructions on page 8 to enter the name.
NOTE:- Both upper and lower case and numeric characters
are available for entry of a network name.

10
If your network does not have a DHCP server you will need
to enter settings manually to enable your radio to join the
network.
Before you change to manual network settings, check that
you have the following information for your network-
A free IP address that you can assign to your radio.1.
The netmask address for your network.2.
The IP address of your Internet Gateway (Modem/3.
Router).
The IP address for your DNS server(s).4.
You may need to consult your network administrator to
obtain this information.
To enter these settings manually:
Press the• MENU button to reach the root menu options.
Select the ‘Congure’option.•
From the next menu select the ‘Edit Cong’ menu•
option.
At this menu you can choose if your network is DHCP enabled
(factory default) or if it requires manual setting of a static IP
address.
If your network requires manual setting, select ‘No’.
You can now follow the prompts to enter a static IP address
for your radio. This will be in the form 123.456.789.123.
Press the• UP or DN button to change the number
Press the• SELECT button to move to the next number.
Press the BACK button if you want to go back and
change a number.
NOTE:Do not enteradditional digitsifyourIP addressincludes
single or dual digit numbers, (for example 123.4.56.789).
CONNECTING TO YOUR NETWORK (MANUAL)
From the next menu select the ‘Network Cong’ menu•
option.
When you have entered the last number in the sequence the
next menu screen will appear for entry of the Network Mask
address for your system.
Enter the four numbers for the Network Mask address.•
When you have entered the last number in the sequence the
next menu screen will appear for entry of the IP address for
your Gateway.
Enter the four numbers for the Gateway address.•
When you have entered the last number in the sequence the
next menu screen will appear for entry of a DNS address for
your network.
Enter the four numbers for a DNS address.•
When you have entered the last number in the sequence the
next menu screen will ask if you want to enter a further DNS
address.
Select ‘Y’ if you want to enter another DNS address or ‘N’•
if you have nished entering settings.
When you have completed entering the network settings your
radio will scan for the Network.

11
LISTENING TO INTERNET RADIO
When you have successfully joined a network you will see the
‘root’menu options -
CHOOSING A STATION BY NAME
If you know the name or part of the name of the station you
want to nd, you can search the listing for the station.
Searching for a station name:
Navigate to the main‘Stations’menu.•
CHOOSING A STATION BY GENRE (PROGRAMME TYPE)
Choose the‘Genre’option from the‘Stations’menu.•
You can now scroll to see a list of genres (examples) -
To listen to Internet Radio:
Navigate to the ‘Stations’option.•
Press the• SELECT button to select this option.
After a short delay while the station lists load you will see the
‘Stations’ menu with three station selection options -
CHOOSING A STATION BY LOCATION (COUNTRY)
Choose the‘Location’option from the‘Stations’menu.•
You can now scroll to see a list of countries (examples) -
Choose a country and your radio will load a list of stations•
to browse in that country.
Choose a station from the list•
There will be a short delay while the radio station loads and
buers. The station will now begin to play.
Selecting another station/location:
At any time you can press the BACK button to move back
through the station listing menus to re-select another
station or country.
Choose a genre and your radio will load a list of stations•
to browse in that category.
Choose a station from the list.•
There will be a short delay while the radio station loads and
buers. The station will now begin to play.
Selecting another station:
At any time you can press the BACK button to move back
through the station listing menus to re-select another
station.
Select the ‘Search’option.•
You can now enter part of the name of the station to get a list of
stations including your search word or phrase.
For example, if you enter ‘London’ a station list will be
produced of all stations including the word London anywhere
within the station name.
Examples in this search could be ‘BBC Radio London’ or
‘London Radio’.
NOTE:- The search is not case-sensitive so search words can
be entered in upper-case or lower-case.
Selecting another station:
At any time you can press the BACK button to move back
through the station listing menus and select another
station.
STATION DISPLAY
When playing a station, the display will show the station
name and also information about the station such as the
audio compression rate etc.

12
INTERNET RADIO AND FM PRESETS
STORING PRESETS
For quick, convenient recall of your favourite stations, 20
station presets (numbered 1-20) are provided for both
Internet radio and FM radio stations. Presets 1 and 2 are
available from the front panel of your radio, the remainder
are stored or recalled using the remote control.
Saving a preset from the front panel (preset 1 or 2):
Tune to the station you want to save as a preset.•
Press and hold the• ./P1 or //,/P2 button that you
want to save.
Saving a preset from the remote control (all preset
numbers):
Tune to the station you want to save as a preset.•
To save preset numbers 1-10, press and• hold the
NUMBER button on the remote control for the preset
number that you want to save.
To save preset numbers 11-20, press the• SHIFT button
briey, then press and hold the NUMBER button for
the second digit (for example 4 to select preset 14).
When a preset is saved,‘Assigned to preset 3’(preset 3 in this
example) will show on the display to conrm that the preset
is saved.
RECALLING PRESETS
Selecting a preset station from the front panel (preset
1 or 2):
Press the the ./P1 or //,/P2 button briey to select
preset 1 or 2.
Selecting a preset station from the remote control:
To recall preset numbers 1-10, press a NUMBER button
briey to recall your selected preset.
To recall preset numbers 11-20, press the SHIFT button
briey, then press the NUMBER button for the second digit
(for example 4 to select preset 14).
The station stored under the selected preset number will be
recalled.
FM RADIO
LISTENING TO FM RADIO
Your internet radio can also receive FM radio stations.
To select FM radio:
From the remote control, press the• SOURCE button
repeatedly to switch between Internet Radio and FM
radio.
Or
From the front panel press the• BACK button to navigate
to the‘root’menu.
Scroll down to the ‘Tuner’ option with the• ROTARY
control.
Press the• SELECT button to select Tuner (FM radio).
To scan for FM radio stations:
Press and• hold the }or {button to scan up or down
the FM band.
The scan will stop when a station is detected.
To tune manually:
Whilst set to FM mode, press the• SELECT button.
The display will change to show manual tuning mode -
Press the UP or DN button on the remote control or turn the
ROTARY control to step the frequency up or down .
Press the• SELECT button to return to normal operation.

13
RECIVA WEBSITE LOG-IN
Advanced users may choose to create a log-in at the Reciva
website and register their radio.
With registration complete, Reciva oers the possibility for
you to browse through their website for your favourite sta-
tions and save them under the‘My Stations’category of ‘My
Stu’on your Reciva login.This list of saved stations will then
download to your Radio.
To create a log-in at www.reciva.com:
To create a log-in, browse to the Reciva website on your•
computer (www.reciva.com) and click on the ‘register’
link.
Enter the details requested to create a log-in.•
Reciva will then activate your log-in by email.
Once have a log-in at the Reciva website, you can register
your radio.
Press the• BACK button to return to the‘Congure’menu.
Select the ‘Version’option from this menu.•
Scroll to the‘Serial Number’option.•
The serial number of your radio (8 digits) will be displayed.
Make a note of this number.
REGISTER YOUR RADIO
Downloading ‘My Stu’ to your radio:
After creating or changing ‘My Stu’ under your Reciva log-
in, you must download a full station list.
Disconnect the power from your radio.•
Wait 10 seconds.•
Re-connect the power.•
Switch on the radio.•
Press the• MENU button to return to the‘root’menu.
Select the ‘Stations’option.•
The radio will now download a new station list, including con-
tent from ‘My Stu’ under your login.
An extra‘My Stu’option will now appear in the radio’s‘root’
menu.
Before registering your radio:
Press the• MENU button to return to the‘root’menu.
Select the ‘Congure’option.•
Navigate to the‘Congure’menu.•
Select the ‘Register’option from this menu.•
After a brief delay a registration ‘Key’ will be displayed (7 char-
acters). Make a note of the Key.
‘MY STUFF’
To access ‘My Stu’ content from your radio:
Press the• MENU button to return to the‘root’menu.
Select the ‘My Stu’option.•
Select the options you want from this menu.•
To register your radio:
Return to the Reciva website and log in.•
Click the‘My Radios’link.•
Here you can enter the serial number and registration key for
your radio.

14
MEDIA PLAYER ESSENTIALS
How does the radio work as a Media Player?:
Once set up as a Media Player, your Internet Radio can browse
for music les stored on computers that are connected to
your network. You can browse the les by artist or album,
then choose a selection of tracks, add them to a queue and
play them in sequence.
NOTE:- To use the Media Player feature you may nd that
some changes are necessary to your computer to enable
le sharing etc. If you are not experienced at making these
changes, seek the assistance of an IT professional with
Windows experience or you may risk operational problems
with your computer.
Tesco accepts no responsibility for corrupted or lost computer
data or software, nor for any data security breach that occurs
in the use of a computer with this product.
Windows Shares or UPNP Server?:
There are two ways for your radio to index and play music
from your computer, via Windows Shares or a UPNP Server.
If you have a UPNP Server installed to organise the music on
your computer (Windows Media Player 11 recommended),
then this is probably the easiest method for browsing and
will oer extra browsing category options such as Genre or
Rating.
If you prefer to organise your own folders to store music for
sharing, thenWindows Shares should be your choice.
In order to play music les stored on your computer via your
network, you must ensure that the following 5 points are
taken care of -
1. COMPUTER NAME - If there is more than one computer
present on your network you must know the name of the
computer where you have stored your music les.This will be
required when you browse for music with your Media Player.
To check the name of your computer:
Click the Start Icon on your computer screen and select•
‘CONTROL PANEL’.
The Control Panel will open.
Select the ‘System’option.•
The System Properties window will open.
Click on the‘COMPUTER NAME’tab.•
The name of your computer is displayed here under ‘Full
computer name’.
2. FILE SHARING - The computer must have le sharing
switched on.
To check if le sharing is switched on:
Click the Start Icon on your computer screen and select•
‘My Computer’.
The My Computer pane will open.
Click ‘Tools’ at the top of the screen and select ‘Folder•
Options’.
Click the‘View’tab.•
Scroll to the bottom of the ‘Advanced Settings’ pane•
MEDIA PLAYER FUNCTION

15
MEDIA PLAYER ESSENTIALS
and check the box marked ‘Use simple le sharing
(Recommended)’.
3. LOCATION - Your music les must be stored in a single
location on your computer and shared on your network.
For your Media Player to browse your media les, all les
must be contained within a folder ‘tree’ that is located
within the ‘Shared Documents’ folder of your computer or
alternatively located in the root directory of your drive in a
folder that you have set for File Sharing. If the media les are
stored in a directory that is not shared, they will not be visible
to the Media Player.
To share a folder:
Open ‘My Computer’ on your computer to locate the•
folder you want to share.
Navigate to the folder where your media les are stored.•
Right click on the folder you want to share.•
Select the ‘Sharing and security’option.•
In the‘Properties ‘ window, select the ‘Sharing’tab.•
Check the box‘Share this folder on the network’.•
Check the box‘Allow network users to change my les’.•
Click‘OK’.•
NOTE:- You cannot share folders on your network unless you
have previously enabled le sharing on your computer (see
previous page).
NOTE:- You cannot share your ‘My Documents’ or ‘My Music’
folders. If you want to share one of these folders you will have
to move the folder to the root directory of the drive, then set
sharing.
4. FILE TYPES - The les stored on your computer must be
the correct type. Your Internet Radio is compatible with any
of these le formats -
FILE TYPE FILENAME EXTENSION
MP3 .mp3
Windows Media .wma
Check that the music les you want to play are stored in the
listed formats. If you want to play les stored in other formats
it will be necessary to rip them in one of the listed formats.
5. COPY PROTECTION - The music les on your computer
cannot be browsed if they are copy- protected.
If you chose to copy-protect the music les on your computer
when you ripped them, you will not be able to browse them
with your Media Player. The Copy-Protection system cannot
be defeated in les that are already ripped so it will be
necessary to delete protected les from your computer and
rip them again with Copy-Protection disabled.
NOTE:- Music les downloaded for playback on an iPod
from the on-line iTunes store cannot be browsed as they are
protected. Music ripped from your own discs with iTunes for
playback on your iPod can be browsed.

16
UPNP SERVERS
If you have a UPNP server installed on your computer
(Windows Media Player 11 recommended), you may prefer
to use this method for browsing your music.
If you connect to your music library via a UPNP Server, the
Server will have already created a library of media les
available on your computer and this will be updated each
time you import new media.
Windows Media Player 11 is a recommended UPNP Server to
use with your Radio. If you don’t haveWindows Media Player
11 installed on your computer you can download it from
Microsoft’s website www.microsoft.com.
Connecting your Radio to Windows Media Player 11
for the rst time:
If you have successfully installed Windows Media Player 11,
then on the rst occasion that you connect your Radio to
it, you will have to set access permission for your Radio to
browse your Windows Media Player library.
Switch on your computer.•
Press the• MENU button to reach the root menu -
You will now see the main Media Player menu- PLAYBACK QUEUE AND PLAYBACK CONTROL
For more information about the Playback Queue and the
Playback Control options available for the Media Player, refer
to the sections ‘Playing tracks with the Media Player’ and
‘Playback Control’on pages 18 and 19.
Choose the‘Media player’option from those available.•
Choose the‘UPNP Servers’option.•
Your Radio will scan for UPNP Servers. The display may initially
read ‘Empty’, then after a few seconds, the server name(s) will
be listed on the Radio display.
Select a server name.•
NOTE: At this stage your Radio will display ‘Access Denied’,
then, after a short delay, your computer should prompt you
that a device has attempted to connect to your UPNP Server.
Follow the on-screen prompts on your computer to allow
your Radio to access your library and the message should
change on the Radio display to conrm the location of the
UPNP server.
Select the server.•
You can now see the music selection menu-
NOTE:The browsing options available will be those available
in your Windows Media Player. For example, if you have
compiled playlists, these will appear in your selection menu
as shown above and can be added to the queue.
You can now choose one of these options, browse the music
content in your Windows Media Player library and place your
choices in the Playback Queue.

17
If your music les are organised in shared folders on your
computer, you can choose to browse your music using
Windows Shares.
Selecting Windows Shares:
To start the Media Player and select Windows Shares mode:
Press the• MENU button to select the root menu -
Your radio will now search your network for connected
computers and display a list of those found. For example-
When the scan is complete, you will return to the main
Media Player menu. Music les that were found in the
scan will be indexed in a small le that is stored on your
hard-drive with your music les. This le is used to nd your
music tracks quickly.
If the scan completes successfully, proceed to the next
section to begin playing your Music les.
Choose the‘Media player’option from those available.•
You will see the main ‘Media Player’menu -
Select the ‘Windows Shares’option from the menu.•
You will now reach the ‘Search’ menu-
Searching for computers:
Choose the‘Scan for PCs’option if this is the rst time•
you have used your Radio as a Media Player.
NOTE:- Once your music les have been scanned, you can
scroll straight up to the music selection options.
NOTE:- Only the rst part of the computer name is shown.
After a short delay, the full name will scroll across the screen
for the highlighted choice.
Choose the computer where your music les are stored.•
You will now see a choice of shared locations on this computer,
for example-
In this example, SharedDocs is a folder that is accessible to
the network without requiring a Login.
The [Set User] option is not a folder, but enables you to enter
a Login and Password for this computer to gain access to les
that require a user to log in. This Login and password are the
same as you would use if you were sat at the computer.
Choose the folder where your music les are stored or choose
[Set User] to enter your Windows log in details and scan
under your login for folders.
WINDOWS SHARES

18
PLAYING TRACKS WITH THE MEDIA PLAYER
This section describes how to navigate and play Music Files
with your Media Player.
NOTE:- Before you can play les through your Media Player
you must have successfully scanned your computer for music
les as described in the previous section.
PLAYBACK QUEUE
When you select tracks to play through the Media Player,
you will place them in a queue for playback. You can place
individual tracks or complete albums in the playback queue
and it is also possible to place the same track in the queue
more than once.
Adding an album or tracks from an album to the
queue:
After scanning, the‘Media Player’menu will be displayed. All
menu options are shown here -
Select an artist from the list to see a list of albums by that•
artist.
or
Select ‘By Album’ to search directly through a list of•
album names.
Whichever search method you choose, you can now scroll
through a list of album names-
To change to another album/artist:
Press the• BACK button repeatedly to return to the list of
albums/artists and make a new selection.
Reviewing the queue:
Press the BROWSE/QUEUE button to display the tracks
currently in the queue with the queue position.
Press the UP or DN button to scroll along the queue.
Press the BROWSE/QUEUE button to return to the track
display.
Clearing the queue:
Press the BACK button repeatedly to navigate back to the
main Media Player menu -
To search by artist, select‘By Artist’and choose from a list•
of tracks by a particular artist.
You can now scroll through a list of artists -
Choose an album to play and the display will change to•
show‘Add to queue’with the track listing beneath.
To add the complete album to the queue:
Select ‘Add to queue’.•
To add individual tracks from the album to the
queue:
Scroll down the track list and select the track that you•
want to add to the queue.
Continue to scroll through the album and add tracks in•
this way.
Playback will start automatically when there are tracks to play
in the queue.
Select the ‘Clear Queue’option.
The playback queue will be cleared.
Table of contents
Other Technika Radio manuals

Technika
Technika DAB-113B User guide

Technika
Technika DR1303 User guide

Technika
Technika DAB1101ST User guide

Technika
Technika DAB 211L User guide

Technika
Technika DR1302 User guide

Technika
Technika DAB211PT User manual

Technika
Technika DAB229 Instruction Manual

Technika
Technika Oxford DR11202B User guide

Technika
Technika RDR-HX User guide