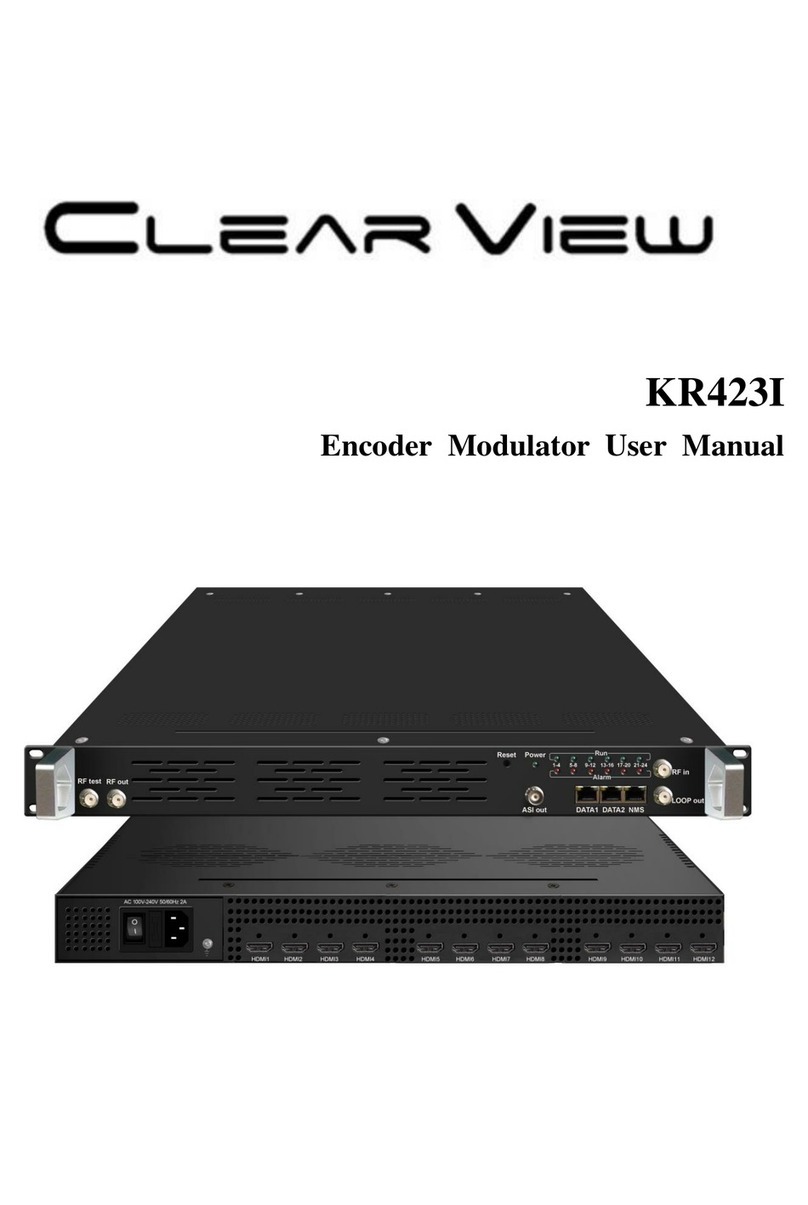
Technomate TM-RF HD IR User manual

TM-RF HD IR
User’s Manual
Please note: the TM-RF HD IR supports 1080p Full HD & 4K UHD displays only

1. IMPORTANT SAFETY INSTRUCTIONS
• To prevent fire or shock hazard, do not expose any part of the devices to rain or moisture.
• This product is for indoor use only.
• Do not install near and heat sources such as radiators, heat registers, stoves or other apparatus (including amplifiers)
that produce heat.
• Clean only with a dry cloth
• Protect the power cord from being walked on or pinched particularly at plug, convenience receptacles, and the point
where it exits from the apparatus.
• Unplug this apparatus during lightning storms and when unused for long periods of time.
• Refer all servicing to qualified service personnel.
• Do not expose the equipment to dripping or splashing and ensure that no objects filled with liquids, are placed on the
equipment.
• This device should be operated using only the AC/DC adaptor supplied with it.
• Do not overload wall outlets and extension cords as this can result in the risk of fire or electrical shock.
2. CONTENTS
1 x TM-RF HD IR
1 x 12V DC Power Supply Adaptor
1 x IR Transmitter
1 x 9V IR Adaptor
1 x Owner’s Manual
3. CONNECTIONS
1. IR Transmitter (to source device)
2. 9V IR ON/OFF Switch
3. RF Output (to TV)
4. RF Input (for cascading or aerial input)
5. HDMI Output (loop-through)
6. HDMI Input
7. USB Service Port (for software update/download)
8. 12V DC Power Input
4. Menus
Stream (please note that the TM-RF HD IR has been defaulted to UK settings):
1. Country: select a country for your UHF settings. Default is UK.
a. Press Menu button
b. Go to STREAM via buttons and press OK
c. Go to COUNTRY via buttons and press OK
d. Change country via buttons
e. Press OK to confirm
2

2. Channel: enter a UHF channel number. Check which channels/frequencies are being used by your local television
stations to avoid conflict. It’s best to select a channel that is unoccupied. For example, in the UK, Channel 21 is
unoccupied. Default is: 21
a. Press MENU button
b. Go to STREAM via buttons and press OK
c. Go to CHANNEL via buttons and press OK
d. Change numbers via buttons
e. Press OK to confirm
Please note which UHF channels are used for 4G/LTE transmissions (normally channels above 61) as a 4G/LTE filter may
be required to avoid interference (not included).
3. Service Name: enter a channel name which will appear in your TV’s channel list. Default is: TV1
a. Press MENU button
b. Go to STREAM via buttons and press OK
c. Go to SERVICE NAME via buttons and press OK
d. Edit letters via buttons
e. Press OK to confirm
4. Service ID: allocate an ID. Default is: 1.
a. Press MENU button
b. Go to STREAM via buttons and press OK
c. Go to SERVICE ID via buttons and press OK
d. Edit number via buttons
e. Press OK to confirm
5. Network Name: enter a network name which may appear in your TV’s channel list.
a. Press MENU button
b. Go to STREAM via buttons and press OK
c. Got to NETWORK NAME via buttons and press OK
d. Edit letters via buttons
e. Press OK to confirm
6. Provider Name: enter a provider name which may appear in your TV’s channel list.
a. Press MENU button
b. Go to STREAM via buttons and press OK
c. Go to PROVIDER NAME via buttons and press OK
d. Edit letters via buttons
e. Press OK to confirm
Advanced (please note that the TM-RF HD IR has been defaulted to UK settings):
1. LCN Mode: select a region or select Manual to enter a number. Default is: ITC
a. Press MENU button
b. Go to ADVANCED via buttons and press OK
c. Go to LCN MODE via buttons and press OK
d. Select a region or select Manual to enter a number via buttons
e. Press OK to confirm
2. LCN ID: enter a number. Default is: 800 which is an unused area of the EPG. Provided that
3
3

Your display supports LCN (also check LCN is ON in your display), this will be the channel number you enter into your
displays remote to watch the TM-RF HD IR’s channel.
If you would like to use a lower number, please check the first free slot in your EPG and that can be you LCN ID number.
a. Press MENU button
b. Go to ADVANCED via buttons and press OK
c. Go to LCN ID via buttons and press OK
d. Enter a number via buttons
e. Press OK to confirm
3. TSID: Default is: 128
a. Press MENU button
b. Go to ADVANCED via buttons and press OK
c. Go to TSID via buttons and press OK
d. Enter a number via buttons
e. Press OK to confirm
4. ONID: Auto will automatically configure ONID for all countries or select Manual to enter a number.
Default is: AUTO
a. Press MENU button
b. Go to ADVANCED via buttons and press OK
c. Go to ONID via buttons and press OK
d. Select a country or select Manual to enter a number via buttons
e. Press OK to confirm
5. Network ID: Auto will automatically configure Network ID for all countries or select Manual to enter a number
Default is: AUTO
a. Press MENU button
b. Go to ADVANCED via buttons and press OK
c. Go to NETWORK ID via buttons and press OK
d. Select a country or select Manual to enter a number via buttons
e. Press OK to confirm
6. Bandwidth: select 6, 7 or 8MHz. Default is: 8MHz
a. Press MENU button
b. Go to ADVANCED via buttons and press OK
c. Go to BANDWIDTH via buttons and press OK
d. Select bandwidth via buttons
e. Press OK to confirm
7. Constellation: select QPSK, 16QAM, or 64QAM. Default is 64QAM
a. Press MENU button
b. Go to ADVANCED via buttons and press OK
c. Go to CONSTELLATION via buttons and press OK
d. Select constellation via buttons
e. Press OK to confirm
8. FEC: select 1/2, 2/3, 3/4, 5/6, or 7/8. Default is: 7/8
a. Press MENU button
b. Go to ADVANCED via buttons and Press OK
c. Go to FEC via buttons and press OK
4

d. Select a FEC via buttons
e. Press OK to confirm
9. Guard Interval: 1/4, 1/8, 1/16 or 1/32. Default is: 1/32
a. Press MENU button
b. Go to ADVANCED via buttons and press OK
c. Go to GUARD INTERVAL via buttons and press OK
d. Select an interval via buttons
e. Press OK to confirm
10. Carrier Rate: 2K or 8K. Default is: 8K
a. Press MENU button
b. Go to ADVANCED via buttons and press OK
c. Go to CARRIER RATE via buttons and press OK
d. Select a rate via buttons
e. Press OK to confirm
11. Video Bitrate: adjust the video compression size. Default is: 18,000 Mbps
a. Press Menu button
b. Go to ADVANCED via buttons and press OK
c. Go to VIDEO BITRATE via buttons and press OK
d. Enter a number via buttons
e. Press OK to confirm
12. Audio Bitrate: adjusts the audio compression size. Default is: 192 kbps
a. Press MENU button
b. Go to ADVANCED via buttons and press OK
c. Go to AUDIO BITRATE via buttons and press OK
d. Select a rate via buttons
e. Press OK to confirm
13. Audio Format: adjusts the audio type. Default is: MPEG
a. Press Menu button
b. Go to ADVANCED via buttons and press OK
c. Go to AUDIO FORMAT via buttons and press OK
d. Select a format via buttons
e. Press OK to confirm
14. Audio Sync: to adjust the audio delay. Default is: 0
a. Press Menu button
b. Go to ADVANCED via buttons and press OK
c. Go to AUDIO SYNC via buttons and press OK
d. Enter a number via buttons
e. Press OK to confirm
15. dB Level: to adjust the dB strength from RF OUT. Default is: 0 dB
a. Press MENU button
b. Go to ADVANCED via buttons and press OK
c. Go to dB LEVEL via buttons and press OK
d. Enter a number via buttons
e. Press OK to confirm
5

System:
1. Version: Shows current software version
2. Reset: to the factory default all settings.
3. Upload: Uploads current configuration in order to edit data when cascading.
5. INSTALLATION –Basic
1. Connect a source device to the HDMI input. The HDMI Output can be used to send a HDMI signal to a local TV.
2. Connect a coaxial cable (75Ohm) from the RF OUT to an aerial/antenna input on a TV.
3. The default UHF Channel is 21. You can change this in the Channel menu (please refer to 4. Menus).
4. The default country is PAL-I UHF 21-69, United Kingdom. In the Country menu (please refer to 4. Menus), you can
also select systems from: Denmark, Finland, France, Italy, Spain and Sweden.
5. In your TV, go to Terrestrial Search (may also be called, Aerial, Antenna, Freeview, etc.) and search using the
Digital Scan/Search option. You can also do a Manual Digital Search and enter the Channel Number you selected
in the TM-RF HD IR (default is 21), for a faster search.
6. You can connect an existing aerial into the RF IN or in you have more than one TM-RF HD IR, you can cascade
another TM-RF HD IR into it.
7. If you have more than one TV, you can use a passive splitter or an amplified (mains powered) splitter from the RF
OUT of the TM-RF HD IR into the Input of a passive splitter or the UHF Input of unamplified splitter. For further
information, please see the following section.
6. INSTALLATION –Using the 9V IR Infra-Red Adapter
This allows an IR Infra-Red remote control signal to be transmitted along the same coaxial cable so that you can control
your source device from another TV. If you would like to control on more TV’s, you will require more IR adapters (sold
separately) and please refer to 7.a. Amplified Splitter.
1. Turn ON the 9V switch on the back of the TM-RF HD IR.
2. At the second TV, connect the 9V IR Adapter to the coaxial cable coming from the TM-RF HD IR.
3. Then connect the IR adapter your TV and LED on the IR Adapter will light up.
6

7. INSTALLATION –Advanced
7.a. Watching on more than 1 TV
Passive Splitter (non-mains powered, DC Pass recommended) –if you would like to only watch video/audio
without having the option to use an IR remote control, you can use a passive splitter. We can recommend up to
3 cascades.
Furthermore, you can loop the outputs of a passive splitter. For example, you can connect/cascade two 4-way
splitters together so you can watch on up to 7 TV’s.
Amplified Splitter (mains powered, distribution amplifier) –there are two types: Bypass(IR, required for the 9V
IR Adapters) and Non-Bypass (Non-IR, also known as Aerial Distribution Amplifiers).
Bypass –the advantage with a Bypass amplifier is that you can control your HDMI source device from every TV
as IR Infra-Red remote control signals are transmitted via the same coaxial cable. You will also require a 9V IR
Adapter (1 included) for each TV which will send the IR signal from your TV to the source device.
*All Splitters, Amplifiers and Adapters are available from Technomate, sold desperately.
7.b. To have more than 1 HDMI Source Device
You can use up to 35 TM-RF HD IR’s in one system by cascading the modulators. This allows you to use up 35 HDMI
source devices, allocated to different channels.
If using an aerial in the same system, please check your local aerial transmitter to see which channels are not used in
order to avoid channel conflict/interference. We recommend channels to be 2 channels apart to avoid conflict and to
be less than CH60 to avoid 4G LTE interference.
To set up the cascade system:
1. Connect the RF OUT of the first modulator to the RF IN of the second modulator, and so forth
2. Each modulator will need different:
a. Channel Number (UHF Number)
b. Service Name
c. Service ID
d. LCN ID
e. Provider Name (optional, Provider Name can be the same on all modulators)
For example, the first modulator could be set to Channel 21, Service Name BBC1, Service ID 1, LCN ID 800, Provider
Name TM. The second could be set to Channel 23, Service Name BBC2, Service ID 2, LCN ID 801, Provider Name TM1
(or TM), etc.
The cascade configuration can also be done on a PC to save time. Please contact Technomate for the file or you can
upload it directly to your USB, refer to 8. Update & Configuration.
3. The RF Out of the final modulator can be connected to a TV or to a splitter (as in 6.a.).
7

7.c. Connecting an aerial system
If you have a UHF TV aerial, you can connect this to the RF IN.
The RF OUT will then combine video/audio of the source with your TV signal, so that when you do an automatic digital
scan on your TV, it will find the TM-RF HD IR channel as well as all your TV channels.
If some aerial channels have an issue, such as distortion, the current dB may be too high. Please decrease the dB in:
Menu –Advanced –dB Level.
7.b. Defining Channel Numbers in your TV’s channel list
If your TV supports LCN, the TM-RF HD IR will appear in your TV’s channel list as the channel number you selected. The
default is 800 which means the TM-RF HD IR will appear as channel 800 in your EPG of your TV after all your TV / Radio
channels.
You will need to check which LCN numbers are free in your EPG to allocate a different number.
If after a search, the channel appears at a different number, this means that the LCN number you chose is not available
or that your TV does not support LCN.
If you are not using an aerial/antenna, then the LCN can be set to 1 to appear as Channel 1 in your EPG and TV.
Please also check that LCN in your TV is ON as it may be defaulted to OFF.
8. UPDATE & CONFIGURATION
1. To update to the latest software
a. Copy the TM-RF HD IR software file to the root directory of your USB drive (FAT32 format).
b. Turn the power of the TM-RF HD IR OFF.
c. Connect the USB to the USB Service Port.
d. Turn the power ON.
e. The file will automatically install within a few seconds.
f. Remove the USB after the TM-RF HD IR has finished booting up.
2. To update to the Cascaded Settings
a. Connect a USB drive (FAT32 format) to the USB Service Port.
b. Go to System - Upload.
c. Use Notepad on a PC to open and edit the file.
d. Each file should have unique settings only for the following information:
i. Channel Number
ii. Service Name
iii. Service ID
iv. Provider Name
v. LCN ID
8

e. Once finished, save the file (do not change the files name) and copy to your USB drive’s root directory.
f. Turn the power of the TM-RF HD IR OFF.
g. Connect the USB to the USB Service Port.
h. Turn the power ON.
i. A message will pop-up to say: Update Cascade?
j. Select YES.
k. Remove the USB after the TM-RF HD IR has finished booting up.
9. TROUBLESHOOTING
1. No Video/Audio, Channel not found when Scanning
a. Ensure that your TV is 1080p Full HD or 4K UHD and has a DVB-T Digital Tuner.
b. When doing a scan, please ensure you have selected the Digital Scan / Search option. Analogue Search will
not find the TM-RF HD IR.
c. Try a different Channel Number. Check that the channel number is not conflicting with your local
transmitter, for example, in London BBC 1 is on channel 23 so if you selected Channel 23 in the TM-RF HD IR,
it would not work.
Furthermore, check that the selected channel number is not conflicting with other transmissions such at
4G/LTE (normally above Channel 61).
d. The software in your TV may be out of date. Please update your TV to ensure it has the latest software. This
is normally found in Settings or Maintenance menus.
e. Try a different HDMI cable.
f. Disconnect HDMI cables, any cable going into RF IN, leaving only RF OUT connected. Try another scan.
g. Please check your country is selected in Menu –Stream –Country.
h. If you have connected an aerial / antenna to the RF IN, please remove it and try another scan on your TV to
see if it shows the vide.
If this works without the aerial / antenna connected, please try 1.i. below
i. Different channel numbers have different dB signal strengths. Furthermore, if using an amplifier or powered
splitter, this will affect the dB too. If the dB is too high, there will be no video or the channel may not be
found.
The output signal from the RF OUT may be too high or too low as a result, therefore please adjust the dB in
the Menu –Advanced –dB Level by for example, -5 dB, -10 dB and then rescan the channel.
j. Ensure that your TV’s DVB-T tuner is compatible with MPEG-4. If it is not, you will require a DVB-T2 Set-Top
Box for the TM-RF HD IR to connect to in order to make the modulator compatible with your TV.
k. Try a Factory Reset and scan again.
2. LCN not working
a. Ensure that your TV supports LCN.
b. Check that LCN is ON in your TV
c. Ensure that LCN you entered is free in your TV’s EPG.
9

10. DELAY TIME
The TM-RF HD IR has a very fast delay time of less than 0.8 seconds, therefore channel change speeds will only take
less than 0.8 seconds.
For video only source devices such as CCTV products, this can be even faster. Please contact your supplier or
Technomate for further information.
11. SPECIFICATIONS
Encoding
Video
Encoding
H.264
Interface
HDMI
Resolution
480i@60Hz
480p@60Hz
576i@50Hz
576p@50Hz
720p@50/60Hz
1080i@50/60Hz
1080p@50/60Hz
Aspect Ratio
16:, 4:3
Bit Rate
1.000 ~ 30.000 Mbps
Audio
Encoding
MPEG-1 Layer 2
Sample Rate
48KHz
Bit Rate
64, 96, 128, 192, 256, 320 kbps
Modulator
Standard
DVB-T COFDM
Bandwidth
6M, 7M, 8M
Constellation
QPSK, 16QAM, 64QAM
Code Rate
1/2, 2/3, 3/4, 5/6, 7/8
Guard Interval
1/32, 1/16, 1/8, 1/4
Transmission Mode
2K, 8K
RF Frequency
142.5 ~ 858 MHz
LCN Support
Yes
Infra-Red
9V IR Compatible
General
Power
12V DC 1A
Dimensions
167.5 x 98.8 x 26mm
Weight
450g
Operating Temperature
0°C-50°C
10
Table of contents
