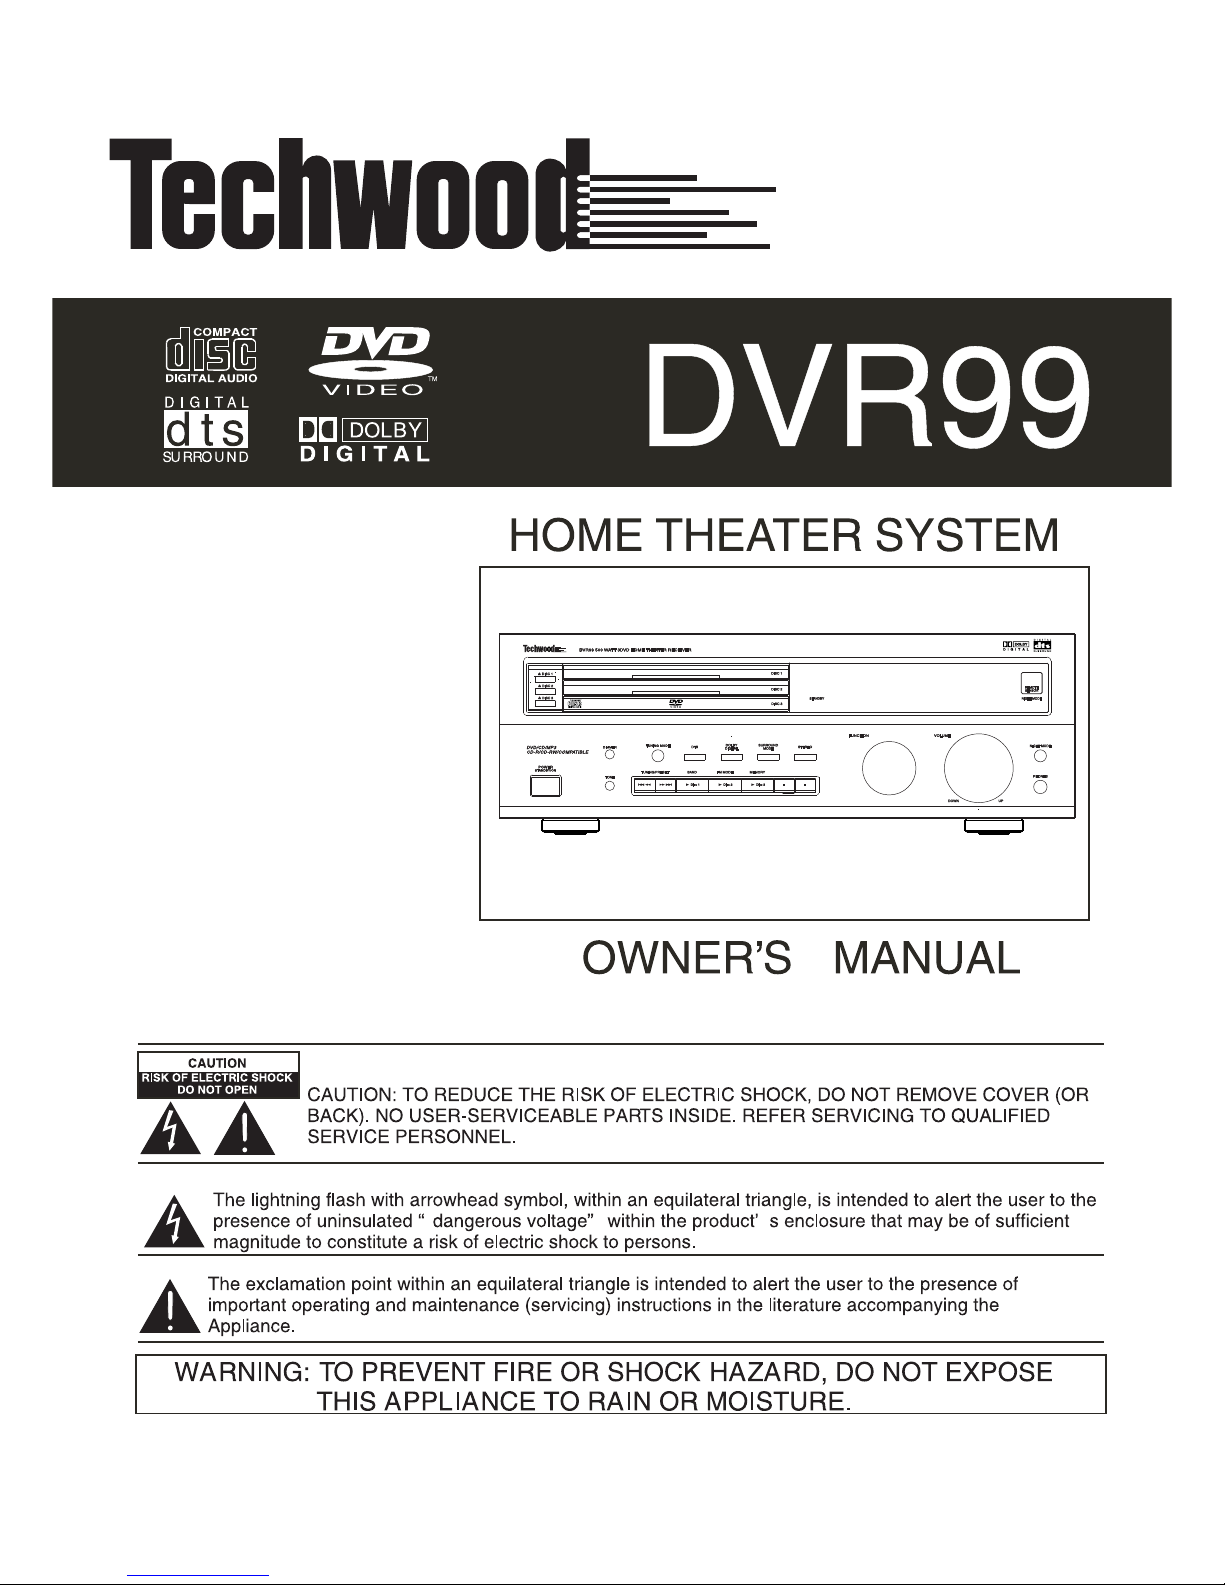
TECHWOOD DVR99 User manual

HOME THEATER
SYSTEM
CAUTION: TO REDUCE THE RISK OF ELECTRIC SHOCK, DO NOT REMOVE COVER (OR
BACK). NO USER-SERVICEABLE PARTS INSIDE. REFER SERVICING TO QUALIFIED
SERVICE PERSONNEL.
CAUTION
RISK OF ELECTRIC SHOCK
DO NOT OPEN
QUICK-START
GUIDE
DVR99
This "QUICK-START GUIDE" will get you started without reading the complete own-
er's manual. However, we recommend you take time to read the owner's manual
completely to learn about all of the features and operating instructions for the
DVR99. The Quick Guide covers only basic connections and operating instructions.
The owner's manual includes important safety information and describes in detail,
the advanced features and operating instructions of the DVR99.
PL
EA
SE READ
!
WELTON U.S.A. 11625 Columbia Center Drive Suite 100 Dallas, Texas 75229 972-243-5602 weltonusa.com


CENTER
REAR
+
-
L
+
-
FRONT
AUDIO
TAPE
OUT
IN
TV IN
VCR
SAT IN
AUX IN
L
RLR
VIDEO
VCR
DVD
SAT
SUB
WOOFER
PRE-OUT
ANTENNA
GNDAM
FM OPTICAL
TV
SATELLITE
SYSTEM
VCR
NOTE: Solid lines = suggested method of connection
Dotted lines = alternate method of connection
CABLE BOX
CD
RECORDER
S-VIDEO
OUT
MONITOR
OUT
OUT
IN
IN
DIGITAL
OUT
SAT
IN
ANTENNA OUT
COMPONENT VIDEO IN
ANTENNA IN VIDEO IN
S-VIDEO IN
AUDIO OUT OPTICAL AUDIO IN
Cr
Cb
Y
V
I
D
E
O
O
U
T
C
O
M
P
O
N
E
N
T
VIDEO OUT
VIDEO IN
AUDIO IN
AUDIO OUT
R
VIDEO OUT
OPTICAL AUDIO OUT
AUDIO OUT
OUT
IN
SPEAKERS 8
IMPORTANT NOTE: When connecting components
to the DVR99 make sure that the AUDIO/VIDEO
cables are properly connected (white audio plugs
to white audio jacks, red audio plugs to red audio
jacks and yellow video plugs to yellow video jacks).
SECTION
2
AUDIO & VIDEO
CONNECTIONS

DISC 1
DISC 2
DISC 3
DISC 1
DISC 2
DISC 3
STAND BY
REMOTE
SENSOR
NIGHT MODE
NIGHT MODE
PHONES
VOLUME
UP
DOWN
FUNCTION
STEREO
MEMORY
SURROUND
MODE
DOLBY
DIGITAL
FM MODEBAND
DTS
TUNING MODE
TUNING/PRESET
DIMMER
TONE
POWER
STANDBY/ON
Press the power button on the front of the DVR99 or on the remote.
Turn the FUNCTION knob on the front of the DVR99 until AM or FM appears on the display or press
the TUNER button on the remote. NOTE: The TUNER button on the remote must be pressed in or-
der to control the TUNER functions with the remote.
Press the BAND button on the front of the DVR99 or on the remote to select AM or FM.
Press the TUNING MODE button on the front of the DVR99 until TUNING appears in the display,
then press the TUNING/PRESET or buttons on the front of the DVR99 or on the
remote repeatedly until the desired station appears in the display. NOTE: Pressing for about a sec-
ond and releasing the TUNING/PRESET or buttons activates the auto tuning
function allowing the tuner to automatically scan to the next clear station. Pressing the TUN-
ING/PRESET ..................or buttons for less than a half of a second changes the frequency
by one step.
To adjust the volume use the VOLUME knob on the front of the DVR99 or the VOLUME +/- buttons
on the remote. IMPORTANT NOTE: All radio stations are broadcast in mono or 2 channel stereo so
it is recommended that when the DVR99 is in the TUNER mode that you select the STEREO button
on the front of the DVR99.
To memorize a station, press the TUNING MODE button until TUNING appears in the display, then
press the TUNING/PRESET or buttons on the front of the DVR99 or on the re-
mote repeatedly until the desired station appears in the display. Press the MEMORY button on
the front of the DVR99 or on the remote and MEMO will appear and flash in the display for 5 sec-
onds. While MEMO is flashing in the display select a preset number by pressing the TUNING/PRE-
SET ..................or buttons on the front of the DVR99 or on the remote then press then
MEMORY button again to store the station . Repeat this step to store additional stations.
NOTE: You can store up to 30 stations for each band.
To listen to a radio station stored in memory press the TUNING MODE button until PRESET ap-
pears in the display, then press the TUNING/PRESET or buttons on the front of
the DVR99 or on the remote control to select the desired preset station.
1
1
STEPS
2
3
3
4
4
5
1
2
6
6
7
3
4
6
2
6
7
5
5
5
Again this is only a “QUICK-START GUIDE” that
covers basic connection and operation. The
DVR99 has many advanced features and operat-
ing functions that are covered in detail in the
complete owner’s manual
SECTION
3
PLAYING THE RADIO
DVR99 500 WATT 3 DVD HOME THEATER RECEIVER
4
7
4
DVD/CD/MP3
CD-R/CD-RW/COMPATABLE
Disc 1 Disc 2 Disc 3
6
6

PLAYING A CD
SECTION
4
STEPS
Press the power button on the front of the DVR99 or on the remote.
Turn the function knob on the front of the DVR99 until DVD/CD appears on the display or press the
DVD/CD button on the remote. NOTE: The DVD/CD button on the remote must be pressed in order to
control DVD/CD playback with the remote.
Press DISC 1 , DISC 2 or DISC 3 to open a disc tray. Insert a CD and press the appropriate
DISC button to close the tray.
Press Disc 1, Disc 2 or Disc 3 on the front of the DVR99 or on the remote to begin playback.
To adjust the volume use the VOLUME knob on the front of the DVR99 or the VOLUME +/- buttons
on the remote . IMPORTANT NOTE: Most CD’s are recorded in 2 channel stereo so it is recommend-
ed that when you are playing a CD that you select the STEREO button on the front of the DVR99.
To skip to a specific track on a disc, press the UP/DOWN or buttons on the front of
the DVR99 or on the remote repeatedly until the desired track appears in the display.
To search for a specific location on a track press and hold down the UP /DOWN or U
buttons on the front of the DVR99 or on the remote until you find the desired location on the track.
To pause playback of a CD press the PAUSE button on the front of the DVR99 or on the remote.
To resume play press the PAUSE button again.
To stop playback of a CD press the STOP button on the front of the DVR99 or on the remote and
RESUME will appear in the display. Press the STOP button again and the CD will stop playing.
12
1
2
3
1
2
4
4
4
3
5
6
7
6
6
7
89
8
9
8
9
This is only a “QUICK-START GUIDE” that
covers basic connection and operation.
The DVR99 has many advanced features
and operating functions such as program
play, repeat play, random play, etc. Please
refer to the appropriate section in the com-
plete DVR99 owner’s manual.
5
DISC 1
DISC 2
DISC 3
DISC 1
DISC 2
DISC 3
STAND BY
REMOTE
SENSOR
NIGHT MODE
NIGHT MODE
PHONES
VOLUME
UP
DOWN
FUNCTION
STEREO
MEMORY
SURROUND
MODE
DOLBY
DIGITAL
FM MODEBAND
DTS
TUNING MODE
TUNING/PRESET
DIMMER
TONE
POWER
STANDBY/ON
DVR99 500 WATT 3 DVD HOME THEATER RECEIVER
DVD/CD/MP3
CD-R/CD-RW/COMPATABLE
Disc 1 Disc 2 Disc 3
5
7
5

PLAYING A DVD
SECTION
5
1
2
9
87
10
This is only a “QUICK-START GUIDE” that
covers basic connection and operation.
The DVR99 has many advanced features
and operating functions such as zoom, re-
peat play, slow-motion, etc. Please refer to
the appropriate section in the complete
DVR99 owner’s manual.
12
5
37896
Press the power button on the front of the DVR99 or on the remote. Turn on your TV and select the vid-
eo input on your TV that is connected to the DVR99.
Turn the function knob on the front of the DVR99 until DVD/CD appears on the display or press the
DVD/CD button on the remote. NOTE: The DVD/CD button on the remote must be pressed in order to
control DVD/CD playback operation with the remote.
Press DISC 1 , DISC 2 or DISC 3 to open a disc tray. Insert a DVD and press the appropriate
DISC button to close the tray.
Most DVD’s are recorded in DOLBY DIGITAL or DOLBY PRO LOGIC . If the
DVD you want to watch has the DOLBY DIGITAL logo on it, we recommend pressing the DOL-
BY DIGITAL button on the front of the DVR99 until DOLBY DIGITAL scrolls across the display. If the
DVD has the DOLBY PRO LOGIC ................... ...logo on it, we recommend pressing the SURROUND
MODE button on the front of the DVR99 repeatedly until PRO LOGIC scrolls across the display or
press the SURROUND button on the remote repeatedly until PRO LOGIC scrolls across the display.
NOTE: Please refer to "SELECTING DIGITAL AUDIO OUT" section of the complete DVR99 owner's
manual if the DVD you want to play has the DTS logo on it.
Press Disc 1, Disc 2 or Disc 3 on the front of the DVR99 or on the remote. The display will read
PLAY followed by LOADING . A DVD menu will appear on the TV screen. Select the desired
menu option using the remote UP/DOWN buttons. Press the appropriate Disc button to begin
playback.
To adjust the volume use the VOLUME knob on the front of the DVR99 or the VOLUME +/- buttons
on the remote.
To skip to a specific chapter on a disc, press the UP/DOWN or buttons on the front of
the DVR99 or on the remote repeatedly until the desired chapter appears in the display.
To search for a specific location on a disc press and hold down the UP /DOWN or
buttons on the front of the DVR99 or on the remote until you find the desired location.
To pause playback of a DVD press the PAUSE button on the front of the DVR99 or on the remote.
To resume play press the appropriate Disc play button.
To stop playback of a DVD press the STOP button on the front of the DVR99 or on the remote and
RESUME will appear in the display. Press the STOP button again and the DVD will stop playing.
3
1
2
4
5
6
7
8
9
dts
SURROUND
D I G I T A L
D
DOLBY
D I G I T A L
D
D
DOLBY
D I G I T A L
D
10
10
10
DISC 1
DISC 2
DISC 3
DISC 1
DISC 2
DISC 3
STAND BY
REMOTE
SENSOR
NIGHT MODE
NIGHT MODE
PHONES
VOLUME
UP
DOWN
FUNCTION
STEREO
MEMORY
SURROUND
MODE
DOLBY
DIGITAL
FM MODEBAND
DTS
TUNING MODE
TUNING/PRESET
DIMMER
TONE
POWER
STANDBY/ON
DVR99 500 WATT 3 DVD HOME THEATER RECEIVER
DVD/CD/MP3
CD-R/CD-RW/COMPATABLE
Disc 1 Disc 2 Disc 3
4
5
6
4
5

PLAYING A VCR
SECTION
6
STEPS
Press the power button on the front of the DVR99 or on the remote. Turn on your TV and select the vid-
eo input on your TV that is connected to the DVR99.
Turn the function knob on the front of the DVR99 until VCR appears on the display or press the VCR but-
ton on the remote. NOTE: The VCR button on the remote must be pressed in order to control VCR Au-
dio functions on the DVR99 with the remote.
If the VHS tape you want to play has the DOLBY PRO LOGIC logo on it we recommend
that you press the SURROUND MODE button on the front of the DVR99 repeatedly until PRO LOGIC
scrolls across the display or press the SURROUND button on the remote repeatedly until PRO LOGIC
scrolls across the display. If the VHS tape does not have the DOLBY PRO LOGIC l
logo on it you can get a simulated surround effect by selecting THEATER, HALL or STADIUM. To do this
press the SURROUND MODE button on the front of the DVR99 repeatedly until the desired surround ef-
fect scrolls across the display (THEATER, HALL or STADIUM) or press the SURROUND button on
the remote repeatedly until the desired surround effect scrolls across the display (THEATER, HALL or
STADIUM).
Turn on your VCR, insert the tape and press play.
To adjust the volume use the VOLUME knob on the front of the DVR99 or the VOLUME +/- buttons on
the remote.
3
1
2
4
5
This is only a “QUICK-START GUIDE” that
covers basic connection and operation.
The DVR99 has many advanced features
and operating functions that are covered
in detail in the complete owner’s manual.
1
2
DISC 1
DISC 2
DISC 3
DISC 1
DISC 2
DISC 3
STAND BY
REMOTE
SENSOR
NIGHT MODE
NIGHT MODE
PHONES
VOLUME
UP
DOWN
FUNCTION
STEREO
MEMORY
SURROUND
MODE
DOLBY
DIGITAL
FM MODEBAND
DTS
TUNING MODE
TUNING/PRESET
DIMMER
TONE
POWER
STANDBY/ON
DVR99 500 WATT 3 DVD HOME THEATER RECEIVER
DVD/CD/MP3
CD-R/CD-RW/COMPATABLE
Disc 1 Disc 2 Disc 3
12
35
5
3

PLAYING A TV, CABLE BOX
OR SATELLITE SYSTEM
SECTION
7
This is only a “QUICK-START GUIDE” that
covers basic connection and operation.
The DVR99 has many advanced features
and operating functions that are covered
in detail in the complete owner’s manual.
STEPS
Press the power button on the front of the DVR99 or on the remote. Turn on your TV and select the vid-
eo input on your TV that is connected to the DVR99.
If you want to watch a TV or cable program and you used the suggested method of connection under
section 2 turn the function knob on the front of the DVR99 until TV appears on the display or press the
TV button on the remote. NOTE: The TV button on the remote must be pressed in order to control TV
audio functions on the DVR99 with the remote.
If the program you want to watch on TV or cable is broadcast in DOLBY SURROUND we recommend
that you press the SURROUND MODE button on the front of the DVR99 repeatedly until PRO LOGIC
scrolls across the display or press the SURROUNDbutton on the remote repeatedly until PRO LOGIC
scrolls across the display. If the program you want to watch is not broadcast in DOLBY SURROUNDl
you can get a simulated surround effect by selecting THEATER, HALL or STADIUM. To do this press
the SURROUND MODE button on the front of the DVR99 repeatedly until the desired surround effect
scrolls across the display (THEATER, HALL or STADIUM) or press the SURROUND button on the
remote repeatedly until the desired surround effect scrolls across the display (THEATER, HALL or
STADIUM).
If you want to watch a satellite program and you used the suggested method of connection under sec-
tion 2 turn the function knob on the front of the DVR99 until SAT appears on the display or press the
SAT button on the remote. NOTE: The SAT button on the remote must be pressed in order to control
SAT audio functions on the DVR99 with the remote. If you want to watch a satellite program and you
used the alternate method of connection under section 2 using an optical cable turn the function knob
on the front of the DVR99 until SAT OPT appears on the display or press the SAT button on the re-
mote control until SAT OPT appears. NOTE: The SAT button on the remote must be pressed and
SAT OPT must appear in the display in order to control SAT OPT audio functions on the DVR99 with
the remote.
If you used the suggested method of connection under section 2 and the program you want to watch
on a satellite system is broadcast in DOLBY SURROUND we recommend that you press the SUR-
ROUND MODE button on the front of the DVR99 repeatedly until PRO LOGIC scrolls across the dis-
play or press the SURROUNDbutton on the remote repeatedly until PRO LOGIC scrolls across the
display. If the program you want to watch is not broadcast in DOLBY SURROUNDl you can get a simu-
lated surround effect by selecting THEATER, HALL or STADIUM. To do this press the SURROUND
MODE button on the front of the DVR99 repeatedly until the desired surround effect scrolls across the
display (THEATER, HALL or STADIUM) or press the SURROUND button on the remote repeatedly
until the desired surround effect scrolls across the display (THEATER, HALL or STADIUM).
NOTE: If you used the alternate method of connection using an optical cable and the satellite program
is broadcast in DOLBY DIGITAL we recommend pressing the DOLBY DIGITAL button on the front of
the DVR99.
To adjust the volume use the VOLUME knob on the front of the DVR99 or the VOLUME +/- buttons
on the remote.
3
1
2
4
5
6
1
4
2
DISC 1
DISC 2
DISC 3
DISC 1
DISC 2
DISC 3
STAND BY
REMOTE
SENSOR
NIGHT MODE
NIGHT MODE
PHONES
VOLUME
UP
DOWN
FUNCTION
STEREO
MEMORY
SURROUND
MODE
DOLBY
DIGITAL
FM MODEBAND
DTS
TUNING MODE
TUNING/PRESET
DIMMER
TONE
POWER
STANDBY/ON
DVR99 500 WATT 3 DVD HOME THEATER RECEIVER
DVD/CD/MP3
CD-R/CD-RW/COMPATABLE
Disc 1 Disc 2 Disc 3
126
3
3
4
6
5
5


2
READ THIS FIRST
This audio system is made and tested to meet exacting safety
standards. It meets both UL and FCC requirements.
W
WW
Wa
aa
ar
rr
rn
nn
ni
iiin
nn
ng
gg
gs
ss
s:
:::
• This system employs a laser light beam. Only a qualified
service person should remove the cover or attempt to
service this device, due to possible eye injury.
• The use of controls, adjustments, or procedures other than
those specified herein might result in hazardous radiation
exposure.
THE FCC WANTS YOU TO KNOW
This equipment has been tested and found to comply with the
limits for a Class B digital device, pursuant to Part 15 of the
FCC Rules. These limits are designed to provide reasonable
protection against harmful interference in a residential
installation. This equipment generates, uses and can radiate
radio frequency energy and, if not installed and used in
accordance with the instructions, may cause harmful
interference to radio communications.
However, there is no guarantee that interference will not occur
in a particular installation. If this equipment does cause
harmful interference to radio or television reception, which can
be determined by turning the equipment off and on, the user is
encouraged to try to correct the interference by one or more of
the following measures:
• Reorient or relocate the receiving antenna.
• Increase the separation between the equipment and
receiver.
• Connect the equipment into an outlet on a circuit different
from that to which the receiver is connected.
• Consult your local store or an experienced radio/TV
technician for help.
• If you cannot eliminate the interference, the FCC requires
that you stop using your system.
Changes or modifications not expressly approved may cause
interference and void the user’s authority to operate the
equipment.
REGION MANAGEMENT INFORMATION
Region Management Information: This DVD Player is designed
and manufactured to respond to the Region Management
Information that is recorded on a DVD disc. If the Region
number described on the DVD disc does not correspond to the
Region number of this DVD player, this DVD player cannot
play that disc.
The Region number of this DVD player is 1 (USA/CANADA).
Notes on Unauthorized Discs
You may not be able to play back some DVD video discs on
this player if they were purchased from outside your
geographic area or made for business purposes. When you try
to play back an unauthorized disc, “Check Regional Code”
appears on the TV screen.
NOTES ON COPYRIGHT
It is forbidden by law to copy, broadcast, show, broadcast on
cable, play in public, and rent copyrighted material without
permission. DVD video discs are copy protected, and any
recordings made from these discs will be distorted.
This product incorporates copyright protection technology
that is protected by method claims of certain U.S. patents and
other intellectual property rights owned by Macrovision
Corporation and other rights owners. Use of this copyright
W
WW
WA
AA
AR
RR
RN
NN
NI
II
IN
NN
NG
GG
G:
::: To reduce the risk of fire or shock hazard, do not
expose this product to rain or moisture.
C AUT ION
R IS K OF E L E CT R IC S HOC K . DO NOT
O P E N.
C
CC
CA
AA
AU
UU
UT
TT
TI
II
IO
OO
ON
NN
N:
:::T O R E DUC E T HE R IS K OF E LE C T R IC S HO C K, DO
NOT R E MOVE C OV E R OR B ACK . NO US E R -S E R VIC E AB LE
PAR TS INS IDE . R E F E R S E R V IC ING TO Q UALIF IE D P E R S ON-
NE L.
This symbol is intended to alert you to the
presence of uninsulated dangerous voltage
within the product’s enclosure that might
be of sufficient magnitude to constitute a
risk of electric shock. Do not open the
product’s case.
This symbol is intended to inform you that
important operating and maintenance
instructions are included in the literature
accompanying this product.
!
!

3
protection technology must be authorized by Macrovision
Corporation, and is intended for home and other limited
viewing uses only, unless otherwise authorized by Macrovision
Corporation. Reverse engineering or disassembly is prohibited.
PLACING THE RECEIVER
Do not place objects directly on top of the receiver as it could
prevent proper heat dispersal.
When installing in a rack or shelf, be sure to leave more than 8
inches of space above and behind the receiver.
MAKING CABLE CONNECTIONS
Be careful not to bend cables over the top of the receiver. If
cables are placed on top of the receiver, the magnetic field
produced by the receiver’s transformers can cause the speakers
to produce a humming noise.
USING DISCS
When using discs, you must always take the following
precautions:
• Do not touch the playback side of the disc.
• Do not attach paper or tape to discs.
• Do not store discs in a place subject to direct sunlight or
near heat sources.
• Do not store discs in places subject to moisture and dust
such as a bathroom or near a humidifier.
• Store discs vertically in a case. Stacking or placing objects
on discs outside of their case may cause warping.
Cleaning Discs
Fingerprints and dust on the disc cause picture and sound
deterioration. Wipe the disc from the center outward with a
soft cloth. Always keep the disc clean.
If you cannot wipe off the dust with a soft cloth, wipe the disc
lightly with a slightly moistened soft cloth and finish with a dry
cloth.
Do not use any type of solvents such as thinner, benzene,
commercially available cleaners or anti-static spray for vinyl
LPs. They might damage the disc.
IMPORTANT SAFETY INSTRUCTIONS
Careful attention is devoted to quality standards in the
manufacture of your system, and safety is a major factor in its
design. However, safety is also your responsibility.
This section lists important information that will help you
properly use and enjoy your system. Read all the included
safety and operating instructions before using your system.
Follow them closely, and retain them for future reference.
1. Heed Warnings — Follow all warnings on the product and
in the operating instructions.
2. Cleaning — Unplug this product from the wall outlet
before cleaning. Use only a damp cloth for cleaning. Do
not use liquid or aerosol cleaners.
3. Attachments — Do not use attachments/accessories not
recommended by the product manufacturer, as they might
create a hazard.
4. Water and Moisture — Do not use this product near water
(for example, near a bathtub, washbowl, kitchen sink, or
laundry tub; in a wet basement; or near a swimming pool).
5. Accessories — Do not place this product on an unstable
cart, stand, tripod, bracket, or table. The product may fall,
causing serious injury to a child or adult, and serious
damage to the product. Use only with a cart, stand, tripod,
bracket, or table recommended by the manufacturer or
sold with the product. Follow the manufacturer's
instructions for mounting, and use a recommended
mounting accessory.
• Carts — Move the product on a cart carefully. Quick
stops, excessive force, and uneven surfaces may cause
the product/cart to overturn.
6. Disc Tray — Keep your fingers well clear of the disc tray as
it is closing. It may cause serious personal injury.
7. Burden — Do not place a heavy object on or step on the
product. The object may fall, causing serious personal
injury and serious damage to the product.
8. Connecting — W hen you connect the product to other
equipment, turn off the power and unplug all the
equipment from the wall outlet. Failure to do so may cause
an electric shock and serious personal injury. Read the
owner’s manual of the other equipment carefully and
follow the instructions when making any connections.
9. Sound Volume — Reduce the volume to the minimum
level before you turn on the product. Otherwise, sudden
high volume sound may cause hearing or speaker damage.
10. Sound Distortion — Do not allow the product to output
distorted sound for a longtime. It may cause speaker
overheating and fire.
11. Headphones — When you use headphones, keep the
volume at a moderate level. If you use headphones
continuously with high volume sound, it may cause
hearing damage.
12. Laser Beam — Do not look into the opening of the disc
tray or ventilation openingof the product to see the source
of the laser beam. It may cause sight damage.
13. Disc — Do not use a cracked, deformed, or repaired disc.
These discs are easily broken and may cause serious
personal injury and product malfunction.

4
14. Ventilation — Slots and openings in the cabinet provide
ventilation, ensure reliable operation, and protect from
overheating. Do not block or cover these openings, and do
not place the product on a bed, sofa, rug, or other similar
surface. Do not place the product in a built-in installation
such as a bookcase or rack unless it provides proper
ventilation as specified by the manufacturer.
15. Power Sources — Operate this product using only the
power source indicated on its marking label. If you are not
sure of your home's power type, consult your product
dealer or local power company.
16. Polarization — This product is equipped with a polarized
AC line plug (a plug having one blade wider than the
other). This plug will fit in the power outlet only one way.
This is a safety feature. If you cannot insert the plug fully
into the outlet, try reversing the plug. If the plug still
doesn't fit, contact your electrician to replace your
obsolete outlet. Do not defeat the safety purpose of the
polarized plug. If you need an extension, use a polarized
cord.
17. Power-Cord Protection — Route power-supply cords so
they are not likely to be walked on or pinched by items
placed on or against them, paying particular attention to
cords at plugs, convenience receptacles, and the point
where they exit from the product.
18. Lightning — For added protection for this product during
a lightning storm, or when it is left unattended and
unused for long periods of time, unplug it from the wall
outlet and disconnect the antenna or cable system. This
will prevent damage to the product due to lightning and
power-line surges.
19. Overloading — Do not overload wall outlets, extension
cords, or integral convenience receptacles, as this can
result in a risk of fire or electric shock.
20. Objects and Liquids — Never push objects of any kind
into this product through openings, as they may touch
dangerous voltage points or short out parts that could
result in a fire or electric shock. Never spill liquid of any
kind on the product.
21. Servicing — Do not attempt to service this product
yourself, as opening or removing covers may expose you
to dangerous voltage or other hazards. Refer all servicing
to qualified service personnel.
22. Damage Requiring Service — Unplug this product from
the wall outlet and refer servicing to qualified service
personnel under the following conditions:
• When the power-supply cord or plug is damaged.
• If liquid has been spilled or objects have fallen into the
product.
• If the product has been exposed to rain or water.
• If the product does not operate normally by following
the operating instructions. Adjust only those controls
that are covered by the operating instructions, as an
improper adjustment of other controls may result in
damage and will often require extensive work by a qual-
ified technician to restore the product to normal opera-
tion.
• If the product has been dropped or damaged in any way.
• When the product exhibits a distinct change in
performance.
23. Replacement Parts — When replacement parts are
required, be sure the service technician uses replacement
parts specified by the manufacturer or having the same
characteristics as the original part. Unauthorized
substitutions may result in fire, electric shock, or other
hazards.
24. Safety Check — Upon completion of service or repairs to
this product, ask the service technician to perform safety
checks to determine that the product is in proper
operating condition.
25. Wall or Ceiling Mount — The product should be mounted
to a wall or ceiling only as recommended by the
manufacturer.
26. Heat — The product should be situated away from heat
sources such as radiators, heat registers, stoves, or other
products (including amplifiers) that produce heat.
27. Non-use Periods — Unplug the system’s power cord when
you will not use it for extended periods.
28. Outdoor Antenna Grounding — If an outside antenna or
cable system is connected to the product, be sure the
antenna or cable system is grounded so as to provide some
protection against voltage surges and built-up static
charges. Article 810 of the National Electrical Code, ANSI/
NFPA 70, provides information with regard to proper
grounding of the mast and supporting structure,
grounding of the lead-in wire to an antenna discharge unit,
size of grounding conductors, location of antenna-
discharge unit, connection to grounding electrodes, and
requirements for the grounding electrode.
Note to CATV System Installer
This reminder is provided to call the CATV system installer’s
attention to Section 820-40 of the NEC which provides
guidelines for proper grounding and, in particular, specifies
that the cable ground shall be connected to the grounding
system of the building, as close to the point of cable entry as
practical.
Power Lines — An outside antenna system should not be
located in the vicinity of overhead power lines or other electric
light or power circuits, or where it can fall into such power
lines or circuits. When installing an outside antenna system,
extreme care should be taken to keep from touching such
power lines or circuits as contact with them might be fatal.

5
CONTENTS
Features 6
Preparation 7
Connecting Components .................................................. 7
Connectinga TV .......................................................... 7
Connecting a Cassette Deck ......................................... 8
Connectinga VCR ........................................................ 8
Connecting a Satellite Receiver or Cable Box ................ 8
Connecting a Digital (Optical) Audio Component ........ 8
Connecting an Auxiliary Audio Component ................. 8
Connecting a Sub Woofer ............................................ 8
ConnectingAntennas ....................................................... 8
FM Indoor Antenna ..................................................... 8
FM Outdoor Antenna ................................................... 8
AM Indoor Loop Antenna ............................................ 8
AM Outdoor Antenna .................................................. 9
Connecting the Speakers .................................................. 9
Placing the Speakers ......................................................... 9
Installing Batteries in the Remote Control ......................... 9
Receiver Operation 10
A Quick Look at the Receiver’s Controls ......................... 10
Using the Tuner .............................................................. 11
Listening To FM Stereo Broadcasts ............................. 11
Presetting Radio Stations ............................................ 11
Manual Preset ............................................................. 11
Auto Preset ................................................................. 11
Listening to Preset Stations ......................................... 11
Switching Between Preset Stations and
Manual Tuning ........................................................... 11
Using the CD Player ....................................................... 11
How to adjust the Tone .................................................. 12
Continuous Play ......................................................... 12
UsingNight Mode .......................................................... 12
Using the Sleep TImer .................................................... 12
Remote Control Operation 13
A Quick Look at the Remote Control .............................. 13
Operating Range of the Remote Control ......................... 13
Setting up the Surround Sound System .......................... 14
Changing the Speaker Size ......................................... 14
Changing the Channel Level ...................................... 14
Changing the Speaker Distance .................................. 14
Surround Effects ......................................................... 15
Changing System Settings – Special
Circumstances ............................................................ 15
Using the Remote Control to Control
Additional Components ................................................. 15
Changing the Sound Mode .............................................. 15
Using GUI Menu Icons .................................................... 15
Repeat Play .................................................................... 16
Programming Tracks ...................................................... 16
Modifying the Program and Adding a Track ................... 16
Random Play .................................................................. 16
DVD Player Operation 18
Basic Playback ................................................................ 17
Stopping Play ............................................................. 17
Pausing Play ............................................................... 17
Advancing by Frames ................................................. 17
Playing in Slow-Motion .............................................. 18
Skipping Chapters ..................................................... 18
Scanning .................................................................... 18
Advanced Features ......................................................... 18
Using GUI Menu Icons .............................................. 18
Using a Title Menu ..................................................... 19
Using a DVD Menu .................................................... 19
Changing Subtitle Language ....................................... 19
Changing Soundtrack Language ................................. 19
Viewing from Another Angle ...................................... 19
Using Repeat Play ...................................................... 19
Zooming In ................................................................ 20
Setting rating level and password ................................... 20
Selecting a Rating Level .............................................. 20
Setting a Password ..................................................... 20
Clearing Your Password ............................................. 20
Selecting TV Aspect ....................................................... 20
Selecting Digital Audio Out ............................................ 21
Troubleshooting 23
Care ............................................................................... 24
Manufacturer’s Codes 25
TV Codes ................................................................... 24
VCR Codes ................................................................ 25
Cable Codes ............................................................... 27
SAT Codes ................................................................. 28

6
FEATURES
Dolby Digital, Dolby Pro Logic and DTS Surround Settings
Lets you use the Home Theater Audio System for a movie-theater
surround sound experience when viewing DVD's.
Additional Component Connectors
Lets you connect other audio/video components to the receiver.
Night Mode
Lets you compress the dynamic range of audio when operating the
unit in Dolby Digital mode.
Parental Lock (Rating Level)
Lets you set a rating level so that your children cannot watch a DVD
that has a rating level higher than you set.
Sleep Timer
Lets you program the receiver to turn off after a set period of time.
S-Video and Component Video Outputs
For superior picture when viewing DVD's.
Subwoofer Output
Lets you add an optional powered Subwoofer for improved bass output.
Digital SAT-IN Audio input
Allows digital connection of satellite or cable boxes equipped with
digital audio outputs.
Digital Audio Output
Allows connection of digital audio recorders ( ie: MD, DAT or CD recorder)
to record from CD.
Adjustable Speaker Size, Channel Level and Distance
Lets you customize your setup for a true surround sound
experience.
Built-in, 3-Disc DVD/CD Changer
Plays audio and video discs including CD, CD-R, MP3 AND DVD.

7
PREPARATION
CONNECTING COMPONENTS
You must connect a TV to the receiver in order to use the
receiver’s DVD player. You can connect other audio and audio/
visual components to the receiver in order to use the Home
Theater Audio System’s surround sound capabilities.
S peaker T erminals — Us e the color-c oded wires (s upplied) to c onnec t each
s peaker to the appropriate terminal.
Note: B e s ure to c onnect the black wires to the blac k terminals , and the
red wires to the other terminals .
DIG IT A L OUT — T o c onnec t a T os link optic al c able
if you have a digital audio c omponent s uch as a
MD,DA T or C D rec order.
S ee " C onnec ting a Digital (O ptic al) A udio
C omponent" on P a ge 8).
S AT IN — T o your
s atellite rec eiver
or c able box ’ s
digital audio out-
put jac k (s ee
“ C onnecting a
Digital (Optic al)
A udio C omponent”
on P age 8).
To your c as s ette dec k’ s IN and OUT jacks
(s ee “ C onnecting a C as s ette Dec k” ).
To your TV’ s audio OUT jacks
(s ee “ C onnec ting a TV” ).
DV D/T V
C onnec tion
Option 2
(s ee below)
To your VC R ’ s IN and OUT
audio jacks (s ee “ C onnec t-
ing a V C R ” on P a ge 8).
To your s atellite
rec eiver or cable
box’ s analog audio
IN and OUT jacks
(s ee “ C onnec ting
a S atellite R ec eiv-
er or C able B ox”
on P age 8).
To an auxiliary analog
component's audio out
jacks (s ee “ C onnecting
an A uxiliary Audio
C omponent on P age 8" ).
T o y our V C R ’ s IN a nd
OUT video jacks (s ee
“ C onnecting a V C R ”
on P age 8).
To your s atellite re-
ceiver or c able
box’ s analog video
OUT jack (s ee
“ C onnecting a S at-
ellite R eceiver or
C able B ox” on
P age 8).
C onnec t a s ubwo-
ofer here (s ee
“ C onnecting a S ub
Woofer” on
P age 8).
C o nne ct A M an d F M anten na s
here (s ee page 8).
CONNECTING A TV
Use RCA type audio cables to connect from the TV’s
Audio Out jacks, to the DVR99’s TV In jacks. Connect
Red to Red and White to White.
FOR DVD VIDEO PLAYBACK:
OPTION 1: If your TV has Component Video jacks,
connect to the Component Video Out jacks on the rear
of the DVR99 using a three wire (R,G,B) component
video cable. (This option will give the highest picture
playback quality available.)
DV D/T V
C onnec tion
Option 1
(s ee below)
DV D/VC R /T V
C onnec tion
Option 3
(s ee below)
OPTION 2: If your TV has an S-Video jack, connect
to the [DVD] S-video Out jack on the rear of the DVR99.
OPTION 3: If your TV only has a Composite Video
jack (RCA Type Jack) use a single RCA type coaxial cable
(yellow plug) and connect to the [DVD] Monitor Out jack
on the rear of the DVR99.
FOR VCR, SATELLITE OR CABLE BOX VIDEO PLAYBACK:
The [DVD] Monitor Out jack on the DVR99 MUST be con-
nected to the TV using a single RCA Type coaxial cable
(yellow plug). Or you can connect the VCR, Satellite or cable
box video output directly to the TV if the TV is equipped with
more than one video input.

8
Connecting a Cassette Deck
Use audio cables (not supplied) to connect a cassette
deck to the receiver. Connect red plugs to the right A UDIO
jacks and white plugs to the left A UDIO jacks. Make sure you
connect the cassette deck to both the T A P E IN and T A P E OUT
sets of jacks.
N
NN
No
oo
ot
tt
te
ee
e:
::: If the cassette deck is placed too close to the receiver,
noise might occur during cassette playback. If this happens,
move the cassette deck farther away from the receiver.
Connecting a VCR
Use audio/video cables (not supplied) to connect a VCR to the
receiver. Connect red plugs to the right A UDIO jacks and white
plugs to the left A UDIO jacks marked VCR.
Connect yellow plugs to the VIDE O jacks marked VCR or dir-
N
NN
No
oo
ot
tt
te
ee
e:
::
: Make sure you connect the VCR to both the IN and OUT
sets of jacks.
Connecting a Satellite Receiver
or Cable Box
Use audio/video cables (not supplied) to connect a satellite
receiver or cable box to the receiver. Connect the yellow plug
to the VIDE O jack marked SAT.
If your satellite receiver or cable box has analogaudio connections,
connect red plugs to the right A UDIO jacks and white plugs to
the left A UDIO jacks marked SAT. To use your satellite receiver
(or cablebox), select the SAT function (see “Using a Satellite
Receiver or Cable Box” on Page 12).
If your satellite receiver or cable box has digital audio output, use
an optical cable to connect the satellite receiver to the home
theater receiver’s S AT IN optical jack. To use your satellite
receiver or cable box, select the SAT-OPT function (see “Using
a Satellite Receiver or Cable Box” on Page 12).
N
NN
No
oo
ot
tt
te
ee
e:
::: Your cable box or satellite receiver must use audio/video
cables or a Toslink optical cable to connect to the receiver. If
your equipment only uses coaxial cable, you cannot connect it
to the receiver.
Connecting a Digital (Optical) Audio
Component
You can connect a digital audio Component such as an
MD (Mini Disc) or DAT (Digital Audio Tape) recorder to the
receiver’s DIG ITA L O UT to record audio from the receiver.
Use a Toslink optical cable to connect the MD or DAT recorder
to the receiver’s DIG ITA L OUT optical jack.
You can also connect a satellite receiver, portable CD player,
MD or DAT recorder, or other components with digital output
to the receiver’s S AT IN optical jack. Use a Toslink optical cable
to connect the desired Component to the receiver.
Connecting an Auxiliary Audio Component
You can also connect an audio Component that does not require
a Toslink Optical cable (such as an MP3 player, playback cassette
deck, or portable CD player) to the Home Theater Audio System.
Use audio cables to connect the desired Component to the receiver’s
AUX jacks. Connect red plugs to the right AUDIO jacks and white
plugs to the left A UDIO jacks.
Connecting a Subwoofer
You can connect an optional powered subwoofer to the receiver.
Connect the subwoofer to the receiver’s S U B W OOF E R P R E -O UT
jack using shielded audio cable (not supplied).
CONNECTING ANTENNAS
When connecting equipment, always make sure the power is
switched off and the power cord is disconnected from the wall
outlet.
FM Indoor Antenna
In an area with strong FM signals, the T-type FM antenna
(supplied) is sufficient.
1. Use a flat or Phillips screwdriver to loosen the screws on
the supplied transformer.
2. Place the metal connectors on the end of theT-type
antenna’s base on the transformer’s metal contacts
(underneath the screw heads) then tighten the screws.
3. Plug the transformer into A NT E N NA F M
75 .
4. Extend the T-antenna’s other two wires and attach them to
a wall or window frame for the best possible reception.
N
NN
No
oo
ot
tt
te
ee
e:
::: If you have a FM antenna that uses coaxial cable, connect
it directly to A NT E NNA F M
75 .
FM Outdoor Antenna
In an area where FM signals are weak, you must use a 75-ohm
unbalanced-type outdoor FM antenna (not supplied).
Generally, a 3-element antenna will be sufficient. If you live in
an area where the FM signals are particularly weak, it may be
necessary to use one with 5 or more elements.
If you have a FM antenna that uses coaxial cable, connect it
directly to A NTE NNA F M
75 .
If you have a twin-lead FM antenna, connect it to the supplied
transformer, then plug the transformer into A NT E N NA F M
75 .
(see Steps 1–3 of “FM Indoor Antenna”).
AM Indoor Loop Antenna
The supplied high-performance AM loop antenna is sufficient
for good reception in most areas.
ectly to the TV if the TV has more than one video input.

9
Connect the loop antenna’s wires to AM and GND. Place the
antenna in a location (for example, on a shelf or window
frame) that gives the best reception.
Keep the antenna as far away as possible from the entire
system, speaker cords and the power cord to prevent
unwanted noise.
AM Outdoor Antenna
If the supplied AM loop antenna does not deliver sufficient
reception, use an outdoor AM antenna (not supplied).
Use an insulated wire more than 15 feet (5 m) long. Strip one
end, and connect that end to AM.
String the antenna wire outdoors or indoors near a window.
For better reception, connect the GND terminal to a reliable
ground.
CONNECTING THE SPEAKERS
When connecting equipment, always make sure the power is
switched off and the power cord is disconnected from the wall
outlet.
N
NN
No
oo
ot
tt
te
ee
e:
::: Use speakers with a nominal impedance of 6 Ohms or
more.
Follow these steps to connect the speakers.
1. Press up (or down) the speaker’s terminal and insert the
appropriate wire ends. Black wires to black terminals
and red wires to other terminals
N
NN
No
oo
ot
tt
te
ee
e:
::: Be sure to connect each speaker to the appropriate
speaker terminal, connecting positive to positive (+ to +)
and negative to negative (– to –).
2. Connect the front speakers wires to the receiver’s
SPEAKERS FRONT L
and
R
terminals.
Connect the surround speakers’ wires to the receiver’s
SPEAKERS REAR L and
R
terminals.
Connect the center speaker’s wire to the receiver’s
SPEAKERS CENTER terminal.
3. Plug the AC power cord into an AC wall socket.
PLACING THE SPEAKERS
1. Place the front left and right speakers at equal distances
from the TV.
2. Install the center speaker above or below the TV so the
center channel’s sound is localized at the TV screen.
C
CC
Ca
aa
au
uu
ut
tt
ti
iiio
oo
on
nn
n:
::: If you choose to install the center speaker on top
of the TV, be sure to secure it to reduce the risk of damage
or injury resulting from the speaker falling from the TV in
the event of the TV being bumped.
3. Install the rear speakers slightly above ear level.
N
NN
No
oo
ot
tt
te
ee
e:
::: Try not to install the rear speakers farther away
from the listening position than the front and center
speakers. Doing so can weaken the surround effect.
4. Place the optional subwoofer on the floor near the L or R
front speakers.
Caution: Be sure all speakers are installed securely to prevent
accidents and improve sound quality.
INSTALLING BATTERIES IN THE
REMOTE CONTROL
Your remote control requires two AAA batteries (supplied)
for power. For the best performance and longest life, we
recommend alkaline batteries.
C
CC
Ca
aa
au
uu
ut
tt
ti
iiio
oo
on
nn
ns
ss
s:
:::
• Use only fresh batteries of the required size and
recommended type.
• Do not mix old and new batteries or different types of
batteries.
Follow these steps to install batteries.
1. Slide the battery compartment cover in the direction of the
arrow to remove it.
2. Place the batteries in the compartment as indicated by the
polarity symbols (+ and –) marked inside.
3. Replace the cover.
When the remote control stops operating properly, replace the
batteries.
W
WW
Wa
aa
ar
rr
rn
nn
ni
iiin
nn
ng
gg
g:
::
: Dispose of old batteries promptly and properly. Do
not burn or bury them.
C
CC
Ca
aa
au
uu
ut
tt
ti
iiio
oo
on
nn
n:
::: If you do not plan to use the remote control for a
month or longer, remove the batteries. Batteries can leak
chemicals that can destroy electronic parts.

10
RECEIVER OPERATION
A QUICK LOOK AT THE RECEIVER’S CONTROLS
NIG H T MO DE
– When the
s ound s ourc e is
Dolby Digital
pres s to c om-
pres s the dy-
namic range
of audio.
(s ee “ Us ing
Night Mode” on
P age 12).
P HON E S – T h is
jack is c ompatible
with many c onven-
tional dynamic
headphone types .
When you c onnec t
headphones , the
unit automatic ally
s elec ts s tereo
mode.
ME MOR Y /
DIS C 3 P L A Y
-s tores a s tation
in memory in
tuner mode.
-P res s to pla yback
dis c 3 in DV D/C D
mode.
F M MO DE / DIS C 2 P L A Y
-In tuner mode, pres s to s elec t s tereo
or m on au ra l mo de for F M.
-P res s to playbac k dis c 2 in DVD/C D mode.
P A US E
-P aus es the dis c in DVD/C D mode.
S TOP
-IN DV D/C D mode,
pres s twice to s top
the dis c.
TONE
-P res s to turn tone on
and off and to adjus t
bas s and treble.
(s ee page 12 HOW
T O ADJ US T T ONE ).
T UNIN G /P R E S E T – R epeatedly
pres s to tune to A M or F M s ta tion s
and s elec t pres et s tations in tuner
mode. (S K IP +/-, S C AN +/-)
– Us e to adjus t bas s and treble
when in tone c ontrol mode.
B A ND/
DIS C 1 P L A Y
-P res s to s elec t
AM or F M band
in tuner mode.
-P r es s to play-
bac k dis c 1
in DV D/C D mode.
DIS C 1, 2, 3
– Pres s to open or
clos e the dis c trays .
Note: Y ou c annot us e thes e but-
tons in tuner mode.
– P res s
onc e to dim the
dis play panel. P res s
again to return it to normal.
T UNING MO DE
In tuner mode, pres s to s witc h between pres et and manual tuning
(s ee “ S witc hing B etween P res et S tations and Manual T uning” on
P age 11).
DT S – P res s to s witch
to 5.1 C hannel DT S
from s tereo mode.
DOL B Y DIG ITA L
– P res s to
s witc h to 5.1 C hannel Dolby
Digital from s tereo mode.
S UR R OUND MODE
P res s to s witc h s urround
modes between P R O
L OG IC , T HE A T E R , H AL L ,
and S T ADIUM for analog
equipment.
S T E R E O –
P res s to s witc h
from s urround
mode to s tereo
mode.
In Dolby Digital
mode, pres s to
downmix to s tereo.
F UNC T ION – R otate to s elec t the
des ired audio or audio/video
s ourc e. The s elec ted s ource name
appears on the dis play panel.
V OL UME — R otate
to s et the des ired
volume.
Dis pla y P a nel
DIMME R

11
USING THE TUNER
1. Press POWER. The receiver defaults to the last selected
function.
2. Rotate FUNCTION knob until the TUNER function appears.
3. Press BAND AM
Tuned.
FM
AM FM.
to select the desired band ( or ).
4. Press the TUNING MODE button on the front of the DVR99
until tuning appears in the display, then press the TUNING/
PRESET or buttons on the front of the DVR99
or on the remote repeatedly until the desired station appears
in the display. NOTE : Pressing for about a second and re-
leasing the TUNING/PRESET or buttons activ-
ates the auto tuning function allowing the tuner to automa-
tically scan to the next clear station. Pressing the TUNING/
PRESET or for less than a half second chan-
ges the frequency by one step.
Listening To FM Stereo Broadcasts
In FM mode, press the STEREO
S T
button on the front of the
DVD99 until appears to the right of
When you listen to very weak FM stereo stations, you might
hear higher-than-normal background hiss. Switching to
mono (no ST indicator) may eliminate the hiss.
Presetting Radio Stations
You can preset up to 30 AM and 30 FM stations regardless of
the reception. Tune in the desired stations using auto or
manual tuning.
Manual Preset
To memorize a station press the TUNING MODE button
until TUNING appears in the display, then press the
TUNING/PRESET or buttons on the front of
the DVR99 or on the remote repeatedly until the desired
station appears in the display. Press the MEMORY but-
ton on the front of the DVR99 or on the remote and MEMO
will appear and flash in the display for 5 seconds. W hile
MEMO is flashing in the display select a preset number by
pressing the TUNING/PRESET or buttons on
the front of the DVR99 or on the remote then press the
MEMORY button again to store the station. Repeat this
step to store additional stations.
NOTE: You can store up 30 stations for each band.
Auto Preset
1. Press BAND to select or
2. Hold down MEMORY button for about 3 seconds.
3. The tuner automatically begins scanning, and stores the
first 30 strong signals it receives.
4. Scanningstops automatically after radio stations are stored
in the auto preset memory.
N
NN
No
oo
ot
tt
te
ee
e:
::
: Press MEMORY again to stop auto scanning earlier.
To store stations on the other band, repeat Steps 1–4,
substituting the other band in Step 1.
Listening to Preset Stations
To listen to a radio station stored in the station memory,
press the TUNING/PRESET
or to go to the
Switching Between Preset Stations and
Manual Tuning
If you store preset stations, pressing TUNING/PRESET
scrolls through the preset stations, rather than changing
the frequency station by station.
To switch to scrolling by individual stations, press the
TUNING
until TUNING appears in the display. Then,
TUNING/PRESET
or buttons to change
the frequency by one step. Or hold down TUNING/ PRESET
or
buttons to tune to the next clear station.
Toswitch back to scrollingthrough the preset stations, press
TUNING MODE, until PRESET appears in the display. Then,
TUNING/PRESET
or
press the buttons until you
USING THE CD PLAYER
You can use the receiver’s 3-DVD changer to listen to audio
CDs.
I
II
Im
mm
mp
pp
po
oo
or
rr
rt
tt
ta
aa
an
nn
nt
tt
t:
::: You can only use audio CDs with the receiver.
CD-ROM, CD-G, photo CD, and CD-i discs cannot be
played on this player.
1. Press POWER. The last selected function appears.
2. Rotate FUNCTION DVD/CD
until appears.
3. Press
drawer.
DISC1, DISC2
, or DISC3
to open the desired
desired preset station.
MODE button
press the
reach the desired preset station.

12
4. Place a CD in the tray, then press the appropriate
DISC button again to close the drawer.
N
NN
No
oo
ot
tt
te
ee
e:
::: If you want to load more than one CD, you can
press another DISC button. The receiver closes the open
drawer and opens the drawer of the DISC button you
pressed. The disc number to be played flashes.
5. To play select
The disc icon (at the far left) begins to rotate.
To pause playback, press PAUSE . The disc icon flashes
rapidly. To resume playback, press PAUSE again or press
PLAY .
To scan forward through a track , hold down PRESET
for about 2 seconds. Repeat up to two times to
increase the fast-forward speed. To resume playback,
press PLAY .
N
NN
No
oo
ot
tt
te
ee
e:
::: At the beginning or end of a track on an audio CD,
the scan speed returns to normal.
To scan backward through a track , hold down PRESET
for about 2 seconds. Repeat up to two times to
increase the rewind speed. To resume playback, press
PLAY .
Toskip to the next track on the CD, press PRESET
once.
Toreturn to the beginningof the current track, press
PRESET
Toreturn tothe previous track, press PRESET twice.
To stop playback, press STOP
. The disc icon stops rotating,
and appears. To resume playback, press the appr-
RESUME
iate play button . To
stop playback completely, press again.
Changing the Sound Mode
You can listen to your CDs using Stereo or Surround modes.
For stereo, press the button once.
S TE R E O
For a surround mode, repeatedly press SURROUND
STADIUM, or PRO LOGIC)
MODE
button until the desired mode (THEATER, HALL,
appears.
N
NN
No
oo
ot
tt
te
ee
e:
::: Dolby Digital and DTS modes only operate when playing
DVD's encoded in Dolby Digital or DTS.
:: If you are playing an MP-3 disc that has multiple folders
on it you must have your TV on and connected to the DVR99.
Use the on screen display on your TV and use the
buttons on the remote to navigate to the desired folder and
N
NN
No
oo
ot
tt
te
ee
e:
:: W hen the DVR99 finishes playing an audio CD, it
automatically plays the disc in the next drawer until the disc
in drawer 3 is finished. Playback will then stop.
USING NIGHT MODE
When watching DVD movies encoded in Dolby Digital
Surround Sound, you can use Night Mode to compress
large dynamic audio ranges, resulting in "quieter" expl-
osions and other loud sounds in movies. The Night Mode
feature adjusts the dynamic audio range so that there is
less difference in the output of all sounds in a movie
(explosions, music, dialogue and so on).
While in Dolby Digital or Dolby Digital Stereo mode, press
NIGHT MODE to turn Night Mode on. Press NIGHT MODE
again to turn it off.
No
oo
ot
tt
te
ee
e:
::: Night Mode is not available for movies using DTS mode.
USING THE SLEEP TIMER
You can set the sleep timer to turn off the receiver after a set
period of time.
Repeatedly press SLEEP
10, 20, 30, 40, 50, 60, 70, 80
on the remote control to set the
(,or 90 minutes).
DISC1, DISC2, DISC3
DISC1, DISC2, DISC3
STOP
N
NN
No
oo
ot
tt
te
ee
e:
song title and then press play.
To adjust the tone with the receiver press the TONE button
on the DVR99 until TONE ON appears in the display.
Press the TONE button again and BAS 0dB will appear in the
display. While BAS 0dB is displayed use the or
buttons on the receiver to increase or decrease the bass
level. After you have set the bass level press the TONE button
again and TRE 0dB will appear in the display. While TRE 0dB
is displayed use the or buttons on the receiver to
increase or decrease the treble level. Press the TONE button again
until TONE ON appears in the display and wait until TONE ON
is no longer displayed. Your bass and treble levels are now set.
To adjust the tone with the remote press the TONE button
on the remote until TONE ON appears in the display. Press
the TONE button again and BAS 0dB will appear in the display.
While BAS 0dB is displayed use the or buttons on
the remote to increase or decrease the bass level. After you
have set the bass level press the TONE button again and
TRE 0dB will appear in the display. While TRE 0dB is disp-
layed use the or buttons on the remote to increase or
decrease the treble level. Press the TONE button again until
TONE ON appears in the display and wait until T ONE ON
is no longer displayed. Your bass and treble levels are now set.
To set the bass and treble levels to 0dB press the tone button
on the receiver or on the remote until TONE OFF appears in the
display. Your bass and treble levels are now set at 0dB.
The receiver turns off when the selected time has expired.
HOW TO ADJUST THE TONE
sleep timer to the desired length of time
Table of contents
Other TECHWOOD Home Theater System manuals