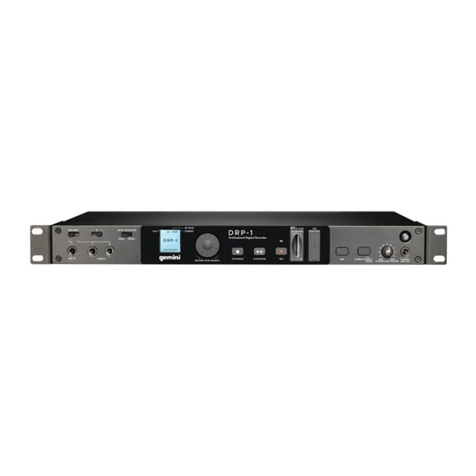
Tecnet TDR-2128M User manual


wv~lyGvmGh{{vyul
wv~lyGvmGh{{vyulwv~lyGvmGh{{vyul
wv~lyGvmGh{{vyulG
GG
G
DATE : Dec. 27. 2002
Federal Communications Commission
Authorization and Evaluation Division
7435 Oskland Mills Road
Columbia, MD 21046
To Whom It May Concern :
We the undersigned, hereby authorize THRU Lab & Engineering on our behalf, to apply to the FEDERAL
COMMUNICATIONS COMMISSION on our equipment.Any and all acts carried out by THRU LAB &
ENGINEERING. on our behalf shall have the same effect as acts of our own. This authorization expires on
Jan. 31. 2003.
This is to advise that we are in full compliance with the Anti-Drug Abuse Act. We, the applicant, are not
subject to a denial of federal benefits pursuant to Section 5301 of the Anti-Drug Act of 1988, 21 USC853a,
and no party to the application is subject to a denial of federal benefits pursuant to that section.
TelewinInc.
.
(AUTHORIZED SIGNATURE)

mjjGuv{pjl
mjjGuv{pjlmjjGuv{pjl
mjjGuv{pjlG
GG
G
/
//
/
/
//
/
/
//
/
/
//
/
/
//
/
/
//
/
/
//
/
/
//
/
/
//
/
/
//
/
/
//
/
{G G G G G G G G G G G G G G G iG G SG
{G G G G G G G G G G G G G G G iG G SG{G G G G G G G G G G G G G G G iG G SG
{G G G G G G G G G G G G G G G iG G SG
GGGX\GG Gm GyUG{GGGGGGGG
GGGX\GG Gm GyUG{GGGGGGGGGGGX\GG Gm GyUG{GGGGGGGG
GGGX\GG Gm GyUG{GGGGGGGG
G G G G G
G G G G G G G G G G
G G G G G G UG {G G SG G G G
G UG {G GSG G G GG UG {G GSG G G G
G UG {G GSG G G G
GGGGSGGGGGGGGGGSGG
GGGGSGGGGGGGGGGSGGGGGGSGGGGGGGGGGSGG
GGGGSGGGGGGGGGGSGG
GGGGGUGoSGGGGGG
GGGGGUGoSGGGGGGGGGGGUGoSGGGGGG
GGGGGUGoSGGGGGGG
GG
G
GGGGGGUGpGGGGGGGGGG
GGGGGGUGpGGGGGGGGGGGGGGGGUGpGGGGGGGGGG
GGGGGGUGpGGGGGGGGGG
G SG G G G G G G G G G G SG G G G
G SG G G G G G G G G G G SG G G GG SG G G G G G G G G G G SG G G G
G SG G G G G G G G G G G SG G G G
GGGGGG
GGGGGGGGGGGG
GGGGGGGGGGGGGGGa
GGGGGGGGGaGGGGGGGGGa
GGGGGGGGGaG
GG
G
G
GG
G
T
TT
TGyGGGGGU
GyGGGGGUGyGGGGGU
GyGGGGGUG
GG
G
G
GG
G
T
TT
TGpGGGGGGGU
GpGGGGGGGUGpGGGGGGGU
GpGGGGGGGUG
GG
G
G
GG
G
T
TT
TG GGGGGGGGGGG
G GGGGGGGGGGGG GGGGGGGGGGG
G GGGGGGGGGGG G
GG
G
G G GGGGG
G G GGGGGG G GGGGG
G G GGGGGGU
GUGU
GUG
GG
G
G
GG
G
T
TT
TG GGGGGGV{}GGGU
G GGGGGGV{}GGGUG GGGGGGV{}GGGU
G GGGGGGV{}GGGUG
GG
G
G
GG
G
uv{lGaG{GGGGGGGGG{}GGGG¡G
uv{lGaG{GGGGGGGGG{}GGGG¡Guv{lGaG{GGGGGGGGG{}GGGG¡G
uv{lGaG{GGGGGGGGG{}GGGG¡G
GGGUGzG GGGGNG
GGGUGzG GGGGNGGGGUGzG GGGGNG
G G GUGzGGGG G NG G GG G
G GGGG GGG
G GGG
U
UU
UG
GG
G
G
GG
G
G
GG
G
G
GG
G
/
//
/
{opz
{opz{opz
{opzGkl}pjlGjvtwsplzG~p{oGwhy{GX\GvmG{olGmjjGy|slzUG G
Gkl}pjlGjvtwsplzG~p{oGwhy{GX\GvmG{olGmjjGy|slzUG GGkl}pjlGjvtwsplzG~p{oGwhy{GX\GvmG{olGmjjGy|slzUG G
Gkl}pjlGjvtwsplzG~p{oGwhy{GX\GvmG{olGmjjGy|slzUG G /
//
/
vwlyh{pvuGpzGz|iqlj{G{vG{olGmvssv~punG{~vGjvukp{pvuza
vwlyh{pvuGpzGz|iqlj{G{vG{olGmvssv~punG{~vGjvukp{pvuzavwlyh{pvuGpzGz|iqlj{G{vG{olGmvssv~punG{~vGjvukp{pvuza
vwlyh{pvuGpzGz|iqlj{G{vG{olGmvssv~punG{~vGjvukp{pvuzaG
GG
G
OXPG{opzGkl}pjlGthGuv{Gjh|zlGohytm|sGpu{lymlylujlSGhuk
OXPG{opzGkl}pjlGthGuv{Gjh|zlGohytm|sGpu{lymlylujlSGhukOXPG{opzGkl}pjlGthGuv{Gjh|zlGohytm|sGpu{lymlylujlSGhuk
OXPG{opzGkl}pjlGthGuv{Gjh|zlGohytm|sGpu{lymlylujlSGhukG
GG
G
OYPG{opzGkl}pjlGt|z{Ghjjlw{GhuGpu{lymlylujlGyljlp}lkS
OYPG{opzGkl}pjlGt|z{Ghjjlw{GhuGpu{lymlylujlGyljlp}lkSOYPG{opzGkl}pjlGt|z{Ghjjlw{GhuGpu{lymlylujlGyljlp}lkS
OYPG{opzGkl}pjlGt|z{Ghjjlw{GhuGpu{lymlylujlGyljlp}lkSG
GG
G
pujs|kpunGpu{lymlylujlG{oh{GthGjh|zlG|uk
pujs|kpunGpu{lymlylujlG{oh{GthGjh|zlG|ukpujs|kpunGpu{lymlylujlG{oh{GthGjh|zlG|uk
pujs|kpunGpu{lymlylujlG{oh{GthGjh|zlG|uklyzpylkGvwlyh{pvuU
lyzpylkGvwlyh{pvuUlyzpylkGvwlyh{pvuU
lyzpylkGvwlyh{pvuU/
//
/

USER’S GUIDE
Digital Voice Recorder
MP3 PLAYABLE
(TDR-2128M)

GX
- Contents -
Features ------------------------------------------------------------------------------------
Locations of Function and Control Button ------------------------------------------
LCD Description ---------------------------------------------------------------------------
Battery Installation ------------------------------------------------------------------------
Battery Life Time --------------------------------------------------------------------------
Power On & Off ----------------------------------------------------------------------------
Recording ------------------------------------------------------------------------------------
Playback -------------------------------------------------------------------------------------
Erasing ---------------------------------------------------------------------------------------
Adjusting Volume --------------------------------------------------------------------------
Selecting the File number ------------------------------------------------------------------
Hold Function -------------------------------------------------------------------------------
Setting the VOS Mode -------------------------------------------------------------------
Setting Mic Sensitivity --------------------------------------------------------------------
Repeating the Playback -----------------------------------------------------------------
Setting Beep On/Off Function ---------------------------------------------------------
Setting Preengaged Recording -------------------------------------------------------
Setting Alarm Function ------------------------------------------------------------------
Connecting External Equipments (Optional) -----------------------------------------
Using MP3 Player -------------------------------------------------------------------------
Manager Program Installation ---------------------------------------------------------
Using Manager Program ----------------------------------------------------------------
Troubleshooting ---------------------------------------------------------------------------
Cautions ------------------------------------------------------------------------------------
Specifications ------------------------------------------------------------------------------
FCC Note ----------------------------------------------------------------------------------
Guarantee ----------------------------------------------------------------------------------

GY
Features
Preengaged Recording
Enables to record at any time when you want.
Alarm Sound Function
You can hear the alarm sound at any time when you want.
Recording up to 3 groups
Enables to record 99 messages into each group.
Automatic Power Off
The unit will be automatically turned off when not in use.
Indication of the remaining recording time
You can check the available remaining recording time.
Adjustable repeating time
Enables to repeatedly listen to the part you want by adjusting the time.
Monitoring of recording
Available to listen to the message by using the stereo earphone
during the recording .
External jack for Input/Output
Enables to record between the unit and other equipments.
Indication of the recording/playback level
Enables to check the level when recording/playback.
VOS recording
Available only when any voice and sound exist.
Scan Function
Enables to playback just the fore part of each message.
Pause Function
Enables to pause during recording.
USB PC Interface
Lets you use the recorder with a PC with fast USB port for voice & data file.
MP3 File Playback
It can be used to play and store digital music file

GZ
Locations of Function and Control Buttons
Top
LeftSide Front RightSide
Back
BUILT-IN MIC USB PORT
HAND STRAP HOLE
MICROPHONE JACK
EARPHONE JACK
HOLD
ERASE
REC/PLAY LED
LCD DISPLAY
REC/STOP
MODE/PAUSE
FF/INDEX
PLAY/STOP
REWIND
VOLUME
(+, -)
FOLD/REPEAT
SPEAKER

G[
LCD Description
VOS
Alarm
Amount of Recorded Time
Recording Mode
MIC Sensitivity
One Folder Repeat
Hold
Operation Graphic
Message Number
Remaining Battery Capacity
All Repeat
Section Repeat
and Recording Time Left
Preengaged Record
Folder
MP3 Folder
Equalizer mode

G\
Battery Installation
Be sure to replace batteries at stop mode.
1.Open the battery cover.
Press and slide the battery cover off.
2. Install two(2) AAA size batteries and slide the cover back into place.
* Battery should be LR03 or equivalent(AAA Size or UM-4)
3. Press PLAY/STOP(/) button or REC/STOP button to check the battery condition.
* Recorded messages will not be erased when replacing batteries.
Battery Lifetime
Recording Mode About 10 Hours
Speaker playback About 8 Hours(VOL: 10)
Voice
Earphone playback About 9 Hours(VOL: 10)
MP3 Earphone playback About 7 Hours(VOL: 10)

G]
1. Power On & Off
- Set the HOLD switch to “Off” mode and press the REC/STOP button for about one second.
Then, LCD is displayed, which means power on.
- Automatic power off : the unit will be automatically turned off within one minute when not in use
without pressing any button.
2. Recording
- Release the HOLD switch and press the REC/STOP button for recording.
- The unit starts recording when the red LED lights ON.
(The unit displays the recording number, level and time on the LCD.)
** Recording Time Indication on the LCD
- To stop recording, press the REC/STOP button again.
1) Pause function
- Press the MODE/PAUSE button during recording.
- The “PAUSE” letter blinks in LCD display, which means pause function is operated.
- To release the pause function, press the MODE/PAUSE button one more time.
2) To record on the following number during recording
- During recording, move the button upwards and then, you can continue to record on the
following number.
3) Indication of the remaining recording time
- If you press the FOLD/REPEAT button during recording, the LCD indicates the remaining time.
4) Monitoring of recording
- You can listen to the recorded messages by connecting earphone to EAR jack during recording.
(During monitoring, the volume level can not be controlled.)
5) Using an external pin microphone (Optional)
- Record after connecting an external microphone to MIC jack located on the left side of unit.
minute second
hour

G^
3. Playback
- Release the HOLD button and select your desired message number by moving upwards() or
downwards() the button located on the top/side of unit.
- If you press the /button to vertical direction, the LED lights in Green color to playback the
recorded message.
- During playback, you can stop the unit by pressing the /button to vertical direction one more
time.
(Resume Play)
If you re-play just after pressing stop button, playback will be proceeded continuously from the pre-
stopped time. (If another button except for the /button is pressed at stop mode, the fore part of
the last recording message will be played.)
1) Fast-forwarding() and rewinding() during playback
- You can adjust the playback time by moving the or button upwards or downwards long
enough during playback.
- If you wheel the or button shortly, you can hear the following recorded message or
previous recorded message.
2) Converting message during playback
- You can adjust by wheeling the button (/) upward or downward.
3) Scanning
- At stop mode, press the /button for more than 2 seconds.
- Then, “SCAN” will be displayed and the unit will playback each message for about 5 seconds in
sequence from the first message to the last message.
- After playback of all messages in one folder, the unit stops to playback and if you press the /
button, the unit stops operation.
4) Repeating the section playback
- During playback, press the FOLD/REPEAT button which means the repeat function is being started.
Then, if press the FOLD/REPEAT button again after a certain time, the repeat function is
completed Which means the repeating time is set-up and the unit will continue to repeat in the
selected section.
5) Indication of the remaining playback time
- If you press the FOLD/REPEAT button one time during playback, the LCD indicates the
remaining time.

G_
4. Erasing
1) Erasing one message
- Select the recorded number you want to erase.
- Press the ERASE button.
- The number of recorded message will blink and the recorded message is heard for 3 seconds.
- Press the ERASE button again.
- To cancel the erasing, press any button except for the ERASE button.
2) Erasing all recorded messages in one folder
- Select the folder which you want to erase at stop mode.
- Press the ERASE button for about 5 seconds.
(At that time, and the related folder icon will blink.)
- Press the ERASE button again for about a second and then, all recorded messages are erased.
- To cancel the erasing, press any button except for the ERASE button.
5. Adjusting Volume
- You can adjust Volume level by pressing VOLUME + / - button.
(But the volume will not be adjusted during recording.)
6. Hold Function
- If the HOLD switch is set upwards, any button is not operated.
- If the HOLD switch is set upwards, the key icon is displayed on LCD, which means Hold function is
set.
- To release the hold function, move the HOLD switch downwards.
When you set the HOLD switch at stop mode, the recorder will be automatically turn off.
7. Setting the VOS mode
- Press the MODE/PAUSE button 1 time and then, LCD displays “VOS” letter.
- At that time, select “on” mode by the Volume button and press the FOLD/REPEAT button.
- When there is no voice or no sound during recording after the “VOS” setting, the LCD displays
“SENSE” letter and the unit stop recording. With voice voice or sound heard, the “SENSE” letter
disappear and start recording again.
8. Setting Mic sensitivity
- Press the MODE/PAUSE button 2 times and then, LCD displays “REP” letter.
- At that time, select “HI” or “LO” mode by the Volume button and press the FOLD/REPEAT button.
- After finishing the selection, the LCD displays the selected “HI” or “LO”.

G`
9. Repeating the Playback
- Press the MODE/PAUSE button 3 times and then, LCD displays “REP” letter.
- At that time, select one of the “OFF”, “FOLD” or “ALL” by the Volume button and press the
FOLD/REPEAT button.
. In order to repeat the recorded massages in one folder, please select “FOLD”.
. If you select “ALL”, all the messages for A/B/C folders can be repeated.
. If you don’t want any repeat, please select “OFF”.
10. Setting Beep On/Off Function
- Press the MODE/PAUSE button 4 times and then, LCD displays “BEEP” letter.
- At that time, select “ON” or “OFF” mode by the Volume button and press the FOLD/REPEAT button.
- If you set the mode to be “ON”, you can hear the beep sound whenever you press the buttons.
11. Setting Preengaged Recording
- Press the MODE/PAUSE button 5 times and then, LCD displays “P-REC” letter.
- At that time, select your desired time by the Volume button and press the FOLD/REPEAT button.
Then, press FOLD/REPEAT button one more time at “On” mode.
(You can set up your desired preengaging time up to max. 255 minutes.)
- After your setting the time, the unit is automatically turned on the time which you set up and the
recording is started.
12. Setting Alarm Function
- Press the MODE/PAUSE button 6 times and then, LCD displays “ALARM” letter.
- At that time, select “ON” or “OFF” mode by the Volume button and press the FOLD/REPEAT button.
Then, press FOLD/REPEAT button one more time at “On” mode.
(You can set up your desired alarm time up to max. 255 minutes.)
- After your setting the time, the unit is automatically turned on the time which you set up and you can
hear the alarm sound.
- In order to stop the alarm sound, please press the any button.

GXW
13. Connecting External Equipments (Optional)
Recording from the external equipments into the voice recorder
You can record by connecting an external cable between the MIC jack of the voice recorder and the
earphone jack of an external equipment.
Recording from the voice recorder into the external equipments
- Connect an external cable between the EAR JACK of the voice recorder and the MIC IN, or the
external input jack of an external equipment.
- Press the PLAY button of the voice recorder and the REC button of an external equipments.
- You can adjust volume by using VOLUME button of the voice recorder.

GXX
14. USING MP3 Player
1. Getting to start MP3 Player
!!"#$%&
2. Playing MP3 File
- Release the HOLD button and select your desired music file by moving the upward() or
downward() button.
- If you press the /button to vertical direction, the LED lights in Green color to playback the
music.
- During playback, you can stop the playback by pressing the /button to vertical direction one
more time.
(Resume Play)
If you re-play just after pressing stop button, playback will be proceeded continuously from the
pre-stopped time. (If another button except for the /button is pressed at stop mode, the
fore part of the last recording message will be played.)
3. Fast-forwarding(▶▶) and rewinding(◀◀) during playback
- You can adjust the playback time by moving the or button upward or downward
long enough during playback.
- If you wheel the or button shortly, you can hear the following music or previous music.
4. Converting file during playback
'() *$(((&
5. Scanning
- At stop mode, press the /button for more than 2 seconds.
- Then, “SCAN” will be displayed and the unit will playback each music file for about 5 seconds in
sequence from the first music file to the last music file.

GXY
6. Repeating the section playback
- During playback, press the FOLD/REPEAT button which means the repeat function is being
started “ ”. Then, if press the FOLD/REPEAT button again after a certain section, the repeat
function is completed “ ” which means the repeating section is set-up and the unit will repeat in
the selected section.
7. Indication of the remaining playback time
- If you press the FOLD/REPEAT button 1 time during playback, the LCD indicates the remaining
time.
8. Repeating the Playback
- Press the MODE/PAUSE button 2 times during playback and then, LCD displays “REP” letter.
- At that time, select one of the “OFF” or “FOLD” or “ALL” by the Volume button and press the
MODE/PAUSE button.
. In order to repeat all the MP3 files , please select “FOLD” or “ALL”.
. If you don’t want any repeat, please select “OFF”.
9. Setting the EQ(Equalizer) mode
- If you press the FOLD/REPEAT button 3 times during playback, the LCD displays “Eq” and select
one of the “POP” - “JAZZ” - “ROCK” - “CLAS(SIC)” by the Volume button and press the
MODE/PAUSE button.

GXZ
Installation of Manager Program
System Requirement
Computer : Pentium or IBM compatible system with USB support
Memory : 64MB or higher
OS : Windows 98/ME/2000/XP
Hard Disk : At least 100 MB free disk space
Playback : Soundcard, Speaker
Recording : Sound Card, Microphone
-Insert the Manager program CD into CD-ROM drive.
-Program SETUP will be started as follows.
- Click “Next”.
- Click “Yes”.

GX[
- Fill the blanks and click “Next”.
- Choose your Destination Location and click “Next”.
- Click “Next” on Start Copying Files Window.
- Click “Finish” on InstallShield Wizard Complete Window.

GX\
-Click “Yes, I want to restart my computer now” on reboot windows
-Click “Finish” then, Driver installation is completed.

GX]
Using Manager Program
1. Composition
2. Connect Voice recorder and PC with USB cable.
!"
# $
" %
&
'"
3. To Upload files
- Select a folder of the Voice Recorder Folder List.
- Select a file (Voice file or Data file) of the Voice Recorder File List.
- Click the Upload Icon.
- The selected file is copied to your computer.
* You can’t upload MP3 files to PC.
Play Bar
V
o
l
u
m
e
Co
n
t
r
o
l
Computer’s Folder
Voice Recorder / MP3
Folder List
Computer’s
File List
Voice Recorder / MP3
File List
Displays both whole memory and
Remaining memory of the recorder / MP3
STOP
PLAY
PAUSE
Download Icon Upload Icon
Recording & Playback Status Display
Menu
Tim
e
Channel
Table of contents

