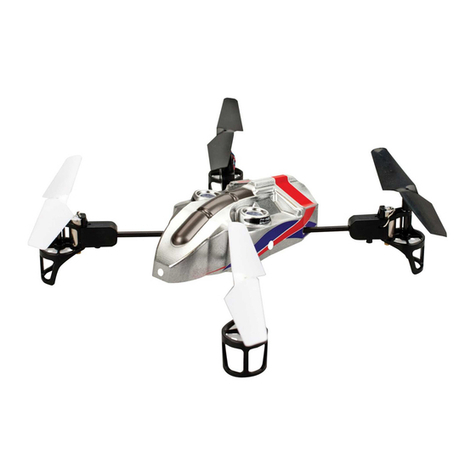
Teeggi SG906 User manual

SG906
Brushless Motor
(1806 1500KV)
Independent ESC
(Card protection, high
temperature protection)
Two-way 2.4GHz
(remote signal weak signal
alarm, low pressure alarm)
4K Full HD Image transmission200-300M
Farther. Faster. Clearer
(Please confirm that the mobile phone used supports 5G WiFi standard)
GPS system
4K 5G WIFI
camera
Gesture recordingGesture photo
Gesture control
One-button return
Trajectory flight
Follow the flight
User manual

Important statement
● This product is not a toy, but a precision device that
integrates expertise in mechanics, electronics,
aerodynamics, and high-frequency emission. It
requires proper assembly and commissioning to
avoid accidents. The holder of the product must use
a safe means of operation control; improper handling
may result in serious personal injury or property
damage.
● This product is suitable for people who have
experience in operating model aircraft and are not
younger than 14 years old.
● In case of use, operation, maintenance, etc., please
contact your local dealer or the relevant personnel of
the company. We and the seller are not responsible
for any loss or damage caused by improper use or
operation and human injury.
● The product contains small parts, so keep them out
of reach of children to avoid the risk of eating or
suffocating.
Safety Precautions
The remote-controlled model aircraft is the most
dangerous commodity, so be sure to stay away from
the crowd when flying.Improper assembly or damage
to the body, poor electronic control, and unfamiliar
operation can lead to unpredictable accidents such as
aircraft damage or personal injury.
Important statement and safety guidelines
You are welcome to purchase our products. In order
to make it easier and more convenient for you to use
this aircraft, please read this manual and then operate
it. Please save this manual as well.
After adjustment and maintenance reference.
-1-

● Stay away from obstacles and people
The remotely piloted aircraft has an indeterminate flight speed
and state when flying, and is potentially dangerous. When
flying, you must stay away from people, high-rise buildings,
high-voltage power lines, etc., while avoiding flying in bad
weather such as wind and rain and lightning. Commissioning
and installing the aircraft must be carried out in strict
accordance with the operating instructions. Note that the
aircraft should be kept at a distance of 1-2 meters from the
user or other people during flight, to avoid the aircraft flying,
landing, hitting the head, face and body, causing injury.
● Keep away from the humid environment
The interior of the aircraft is composed of many sophisticated
electronic components and mechanical parts. Therefore, it is
necessary to prevent the aircraft from getting wet or moisture
into the body, so as to avoid accidents caused by mechanical
and electronic components failure. Use a clean rag to clean
the surface stains during maintenance.
● Avoid manipulation alone
The remote control aircraft control technique has certain
difficulties in the early stage of learning. It is necessary to
avoid flying by itself, and it should be guided by experienced
people.
● Proper use of this product
Please use our original parts for modification or repair to
ensure flight safety. Please operate and use within the scope
of the product's functions and may not be used for other illegal
purposes other than the safety laws.
●Safe operation
1. Operate the remote control aircraft according to your own
status and flight skills. Fatigue, poor mental health or
improper operation will increase the probability of
unexpected risks.
2. Do not use near the ear! Misuse can cause hearing damage.
-2-
Please operate the flight crew to pay attention to flight
safety, you must understand the responsibility of
accidents caused by your negligence.

Product Description
Product Configuration
Packing List
Basic Parameters
Wheelbase: 340mm Total weight: about 530g
Brushless motor: 1806 1500KV
Battery: 7.4V 2800mAh 25C
Charging time: about 6 hours
Flight time: about 23 minutes
Aircraft fuselage X1 Charging cable X1
Screwdriver X1 Remote control X1
USB charging cable X1 Battery X1
positive / reverse wind blade X1 (sold separately)
● Keep away from high speed rotating parts
When the rotor of the aircraft is rotating at high speed, please
keep the pilot, the surrounding crowd and objects away from
the rotating parts to avoid danger and damage.
● Keep away from heat
The remote control aircraft is made of metal, fiber, plastic,
electronic components and other materials, so it should be
kept away from heat sources, prevent sun exposure, and
avoid deformation or even damage caused by high
temperature.
● Environmental requirements
Discarding this product at will may affect the environment.
Please dispose of it properly in accordance with local laws
and regulations.
-3-

Aircraft Component
1
2
3
4
5
1.Propeller Installation
Make sure all propellers are installed in the correct orientation
as shown below. If the installation is wrong, the aircraft will not
be able to fly normally.
A
B
B
A
1.HD camera
2. Propeller
3. Motor
4. LED lights
5. Smart lithium battery
-4-

1
2
3
!Tips: If the battery is not installed properly, it is likely to
cause the drone to interrupt the electric fall accident.
Battery Installation
- Press and hold the power button for 3 seconds to turn it on,
then press and hold the power button for 3 seconds to turn it
off.
- Once the battery is in a low battery state, there is one light left
in the battery power indicator. Please charge the battery
immediately to avoid unnecessary loss.
Press the battery button down and push the battery into the
battery compartment of the drone. After the installation is
complete, the battery clip will pop up and check to make sure
the battery is in place.
2. Aircraft Lithium Battery
1.Battery switch
2.Battery level indicator
3.USB interface
low Electricity high
-5-

USB charging
cable
battery
Aircraft Battery Charging
Connect the battery to the 5V 1-2A adapter USB port with a USB
charging cable. Connect the battery to charge it. When the
battery is charging, the battery blue light flashes from left to right,
and the battery power indicator is always on after the battery is
fully charged. The battery is fully charged for approximately 6
hours.
Battery Removal
Press the battery clip, then place the finger on the specified
position and pull it back. The battery will be removed
immediately. Keep the finger and the machine clean and dry
before operation. Otherwise, the battery may not be slipped.
USB
!
Tips:
● Please insert the plug in the correct way.
● It is recommended to use the 5V 1-2A adapter for
charging.
adapter
(sold
separately)
-6-

● When charging the rechargeable battery, do not use it
separately for children. It must be carried out under
adult supervision. It must be kept away from
inflammable materials during charging. When charging,
the guardian should not leave the model to the outside
of the surveillance range.
● Please do not short circuit or squeeze the battery to
avoid explosion.
● The power terminals should not be removed from the
model, the terminals should not be short-circuited; do
not short-circuit, disassemble or put the battery into fire;
do not place the battery in a hot, heated place (such as
in a fire or near a heating device).
● The model can only use the recommended charger.
The charger is not a model. The model that can be
cleaned with liquid should be disconnected from the
charger before cleaning. Check the charger's wires,
plugs, casing and other components regularly for
damage. Stop using the battery if it is damaged. Until
the repair is in order.
● The charger is not a toy; the charger can only be used
indoors.
● The battery after the flight needs to be recharged and
stored. If it is not used, it is recommended to charge the
battery at least once every 3 months to prevent the
battery from being over-discharged and permanently
damaging the battery.
!
Camera Installation/removal
Camera Installation:
Insert the camera into the aircraft as shown in the figure (see
Figure 1) and pay attention to the buckle (Figure 2).
figure 1 figure 2
-7-

PTZ camera control
By dialing the remote control PTZ button, you can adjust the
shooting angle of the PTZ camera and experience a better
aerial photography process. When the left button is pressed, the
camera is adjusted in the A direction; when the right button is
pressed, the camera is adjusted in the B direction.
Camera Removal:
Hold your finger on the camera snap and press the arrow
(Figure 1) to remove the camera. (Figure 2)
!Tips: The camera needs to be used with the real-time
transmission app. For details on the download process,
please refer to the APP manual. For details on the
camera function, please refer to the contents of the app.
figure 1 figure 2
A
B
AB
-8-

[6] Battery compartment
[7] Front indicator
[8] Rear indicator
Aircraft Part Name
[1] Lights [2] Brushless Motors
[3] Blades [4] Cameras
[6]
[8]
[7]
[1]
[2]
[3]
[4]
-9-

[1] [2] [3] [4] [5] [6] [7]
[8]
[9]
[10]
Remote Control Part Name
[1] Switch the speed button for 5 seconds to
correct the gyroscope
[2] One-button return
[3] The red signal light is connected constantly
[4] Battery light
[5] Power switch
[6] Record button
[7] Photo button for 5 seconds to correctg
eomagnetism
[8] Throttle stick
[9] LCD display
[10] Left and right side fly forward and
backward
-10-

[11] [12] [13] [14]
LCD Display
[11] steering gear up
[12] Steering gear down
[13] Headless mode
[14] One-button
takeoff, landing
Model
Remote
control
battery
GPS mode
icon
GPS star number
Height data
Video
Headless
mode icon
Return icon
Flight signal
grid
Mode 1: Optical flow mode
Mode 2: GPS mode
Distance data
Take a
photo Aircraft
power
-11-

● The remote control uses 4 “AA” non-rechargeable
batteries, or “AA” rechargeable batteries. (sold
separately)
● Pay attention to the polarity of the battery when
installing or replacing the battery.
● Non-rechargeable batteries are not rechargeable and
can only be used with the same or the same battery as
the recommended battery.
● Do not mix old and new or different types of batteries.
● Exhausted batteries should be removed in time, and
discarded batteries should not be thrown.
● If you do not use it for a long time, please remove the
battery to avoid damage to the product caused by
battery leakage.
!
Open the remote control battery cover, follow the positive and
negative poles indicated by the remote control, correctly load
the 4 AA batteries, and then re-cover the battery cover.
1 2
Prepare The Remote
Aircraft Pair Code:
-12-

After the aircraft successfully crosses the frequency, the aircraft
is placed on the flat ground. Press and hold the speed button for
about 5 seconds. The remote control drops, and the aircraft
lights flash quickly and the button is released. At this point, you
can search for the GPS signal. After the light is on, you can
control the aircraft to unlock and take off. If you don't need GPS
signal, you can take off directly.
1 2 3
The remote control is turned on and the indicator light flashes.
Press and hold the battery switch of the aircraft, the battery
indicator lights up from left to right, the aircraft light flashes, the
remote control drops, the remote indicator light is on, and the
code is successful.
Gyro Correction Function:
Geomagnetic Correction Function:
-13-

After the aircraft successfully pairs, the remote control camera
button presses for about 5 seconds, the remote control drops,
the aircraft lights flash quickly, and the aircraft is picked up 3
meters from the ground level in a clockwise direction, and the
remote control drops after a click. The aircraft is erected, the
camera is facing down, and the clockwise rotation of the aircraft
lights for 3 seconds in a clockwise direction can be changed. At
this point, you can search for the GPS signal. After the light is on,
you can control the aircraft to unlock and take off. If you don't
need GPS signal, you can take off directly.
Tips: Please ensure that the take-off environment is empty and
the satellite signal is greater than 7 stars before take-off.
● Do not calibrate in areas with strong magnetic fields, such as
magnets, parking lots, building areas with underground
reinforcement, etc.
● When calibrating, do not carry ferromagnetic materials such as
keys, mobile phones, etc. with you.
● Do not calibrate near large pieces of metal.
After the QR code on the mobile device scanning APP manual is
downloaded and the APP is downloaded, the WIFI function of
the mobile device is turned on, and the XL-4K-5G-********* is
selected in the WIFI list to exit the interface and open. APP.
Note: At this time, the remote control is turned off, and the
mobile APP will connect the aircraft to control the aircraft in about
5 seconds. If the aircraft is not connected to the remote control
after the power is turned on, the remote control can not directly
match the aircraft with the mobile phone.
Connect APP
(mobile phone needs to support 5G-WiFi signal function)
-14-

Aircraft Unlocked:
Flight Control Method:
remote control Aircraft
go up
go down
Turn
left
Turn
right before
Rear
At this time, the throttle lever and the direction lever are pushed
to the lower left corner and the lower right corner (1) at the same
time, or pushed to the lower right corner and the lower left corner
(2) at the same time, the unlocking can be completed, and the
motor can be started after starting.
2
1
-15-

Mode Switching
Go ahead
Back
Fly on the
left
Flying on
the right
before
Rear
1. Mode 1: [Optical Flow Mode] After the aircraft has
successfully coded, the mode of the remote control
display is 0 to Mode-1, and Mode-1 is the optical flow
mode. At this time, the aircraft unlocks the take-off
light to flash or keep lit (flashing). Because the
ambient environment of the aircraft is too dark, the
optical flow positioning does not work, and the light
flow is always positioned. Note: The optical flow
mode aircraft does not have low power return, no
signal returning and other GPS functions. If you want
to fly GPS mode, please land to wide. The ground
search star can be positioned, refer to mode 2.
2. Mode 2: [GPS mode] After the aircraft is successfully paired,
the remote control is turned on, the remote control
display Mode-0 becomes Mode-1, and Mode-1 is the
optical flow mode. At this time, the aircraft will
automatically enter the search star mode. When
placing the aircraft in an open area, do not have
-16-

One-button Takeoff/landing
● After the aircraft is unlocked, press the button shortly and the
aircraft will automatically take off to a height of about 1.5
meters to hover.
● When the aircraft is in flight, press the button and the aircraft
will automatically land on the ground.
Flight mode
-17-
high-rise buildings or wires and other obstructions
around it. When the number of satellites reaches
about 10 or so, the remote control will drop a prompt
to enter the GPS function, the lights are always on,
and Mode-1 can be changed to Mode-2. Unlock to
take off.

Return flight
(Mode 1 optical flow mode does not have this function)
The aircraft has a return function. If the return point is
successfully recorded before take-off, if the communication
signal is lost between the remote control and the aircraft or the
return button is pressed, the aircraft will automatically return to
the return point and land to prevent accidents. The aircraft has
three different return modes.
They are:
1. One-button return
2. Out of control
return
3. Low battery return.
When the headless mode button is pressed, the remote
controller emits a "drip" sound. When the aircraft is unlocked,
the direction indicated by the nose is the front of the flight.
During the flight, the aircraft is rotated in the direction of the
aircraft, and the front of the flight is still unlocked by the aircraft.
When the machine head points in the direction.
Headless Mode
Returning considerations:
● During the automatic return flight,
the aircraft cannot escape obstacles.
● When the GPS signal is not good or
the GPS is not working, it cannot be
returned.
!
-18-

Return point:
During the takeoff or flight, when the GPS receives more than 7
stars for the first time, it will be recorded as the current position
of the aircraft as the return point.
When the GPS signal is good (the number of satellites is
greater than 7), the aircraft can be returned to the aircraft
through the button below. The return process is the same as the
uncontrolled return. The difference is that when the aircraft
returns to the landing, the user can control the aircraft to avoid
obstacles. With the return button, you can exit the return flight
and the user can regain control.
The GPS signal is good (the number of GPS satellites is
greater than 7), the compass works normally, and after the
aircraft successfully records the return point, if the remote
control signal is continuously interrupted for more than 6
seconds, the flight control system will take over the control of
the aircraft and control the aircraft to fly back to the signal.
The place stops.
One-button return
Out Of Control
-19-
Table of contents
Popular Quadcopter manuals by other brands
Propel Trampolines
Propel Trampolines HD VIDEO DRONE Instruction booklet
Alpha
Alpha 250q race copter user manual
Reely
Reely Folding Drone GPS 1668261 operating instructions

World Tech Toys
World Tech Toys Horizon Spy Drone ZX-34895 instruction manual
Walkera
Walkera QRX350 PRO User handbook
Carrera RC
Carrera RC Quadrocopter CRC X1 Assembly and operating instructions
