Teledyne Oceanscience High Speed Operating and maintenance manual

Information included herein is controlled by the Export Administration Regulations
(EAR) and may require an export license, license exception or other approval from
the appropriate U.S. Government agency before being exported from the United
States or provided to any foreign person. Diversion contrary to U.S. law is prohibited.
High Speed
Riverboat
User Guide and Warranty
P/N 95K-6001-00 (July 2017)
© 2017 Teledyne Oceanscience, Inc. All rights reserved.

Page ii
EAR-Controlled Technology Subject to Restrictions Contained on the Cover Page.
TABLE OF CONTENTS
Introduction .................................................................................................................................................1
High-Speed Riverboat Specifications............................................................................................................2
High-Speed Riverboat Order Codes......................................................................................................2
High-Speed Riverboat Assembly and Installation.........................................................................................3
Boat Assembly......................................................................................................................................3
Wire Rope Bridle Installation .......................................................................................................................4
Acoustic Doppler Profiler Installation ..........................................................................................................4
Installation of a SonTek M9 or S5 and External PCM Box ....................................................................4
Installation of a Teledyne RDI Rio Grande....................................................................................................7
Installation of a Teledyne RiverRay ..............................................................................................................8
Safety Cable Assembly and Installation........................................................................................................9
Optional GPS Mounting Bracket Installation................................................................................................10
High-Speed Riverboat Warranty ..................................................................................................................11
REVISION HISTORY
July 2017
•Reformatted
August 2016
•Initial release.

Page iii
EAR-Controlled Technology Subject to Restrictions Contained on the Cover Page.
Dear Valued Customer,
Thank you for purchasing your Oceanscience High-Speed Riverboat. Teledyne Oceanscience has a support
team in place to assist you with understanding, operating, and deploying your riverboat system. Included
with your system is documentation regarding the setup and deployment of the riverboat. We strongly en-
courage you to thoroughly read through this documentation to maximize your user experience.
TECHNICAL SUPPORT
If you have technical issues or questions involving a specific application or deployment with your instru-
ment, contact our Field Service group:
Phone: +1 (858) 842-2700
FAX: +1 (858) 842-2822
Email: Oceanscience.Support@teledyne.com
SALES
Our products are available from Oceanscience directly or from representatives throughout the world.
Please contact us for more information:
E-mail: Oceanscience.Sales@teledyne.com

Page iv
EAR-Controlled Technology Subject to Restrictions Contained on the Cover Page.
NOTES

High-Speed Riverboat User’s Guide July 2017
EAR-Controlled Technology Subject to Restrictions Contained on the Cover Page.
Page 1
Introduction
Congratulations on your recent purchase of the Oceanscience High-Speed Riverboat.
The Oceanscience High-Speed Riverboat is the new benchmark for acoustic Doppler current profiling for
discharge measurements that provides the best data quality in the most challenging measurement condi-
tions. The advanced hull design allows the boat to slice through standing waves and still maintain instru-
ment position and data collection. Fast flowing water, often problematic with conventional tethered boat
designs, can be handled with relative ease with the High Speed Riverboat.
The Oceanscience High-Speed Riverboat has gathered data at water velocities over 20fps (6m/s). The
state-of-the-art trimaran hull cuts through surface waves, strongly resists overturning, and maintains in-
strument orientation in high flows. Any instrument up to 9” in diameter may be accommodated, with
mounting options for commonly used profilers available. For sites where tethered boat measurements
have been impossible, or data were too poor to be of value, the High-Speed Riverboat is the solution.
Made of high impact UV resistant ABS, the High-Speed Riverboat is strong and robust to cope with the
worst deployment conditions. All High-Speed Riverboats are configured for an instrument of choice and
include all necessary cabling for easy plug-and-play operation.

July 2017 High-Speed Riverboat User’s Guide
Page 2EAR-Controlled Technology Subject to Restrictions Contained on the Cover Page.
High-Speed Riverboat Specifications
HIGH-SPEED RIVERBOAT SPECIFICATIONS
Typical Measurement Water Velocity
10-16 fps
(3-5 m/s)
Maximum Water Velocity
20 fps (6.09 m/s)
Main Hull Length
60” (152.5 cm)
Overall Beam (Assembled)
48” (122 cm)
Crossbar Material
Anodized Aluminum
Hull Material
High Impact, UV Resistant ABS
Weight
30 lbs. (13.6 kg)
Hardware
Stainless Steel
Safety Lines
Stainless Steel
Fasteners
Stainless Steel
Fin Configuration
Large, Foldable Kick-up Fins
ADCP Size
2”-9” Diameter
High-Speed Riverboat Order Codes
•HSRB – High-Speed Riverboat (color: orange)
•HSRB-Y – High-Speed Riverboat (color: yellow)
•LSCAS – Soft transportation case - large
•LHCAS – Aluminum ATA transportation case - large
•LDFK – Large Drag Fin Kit

High-Speed Riverboat User’s Guide July 2017
EAR-Controlled Technology Subject to Restrictions Contained on the Cover Page.
Page 3
High-Speed Riverboat Assembly and
Installation
Boat Assembly
The following items are required to assemble the outriggers and center hull:
•Center Hull
•Outriggers
•Crossbar
•6 ¼”-20 x 1 ¾” socket head screw
•4 ¼”-20 x 1 ¼” socket head screw
•10 ¼” lock washer
•10 ¼” washer
•1 5/32” hex driver
Attach the Outriggers to the crossbar us-
ing the ¼-20 x 1 ¾” socket head screws
with ¼” lock and ¼” flat washers.
Attach the Main Hull to the Crossbar us-
ing the ¼-20 x 1” screws with ¼” lock
washers and ¼” flat washers provided.

July 2017 High-Speed Riverboat User’s Guide
Page 4EAR-Controlled Technology Subject to Restrictions Contained on the Cover Page.
Wire Rope Bridle Installation
The following items are required to install the wire rope bridle:
•1 Wire rope bridle
•1 Carabineer
•1 600# 316ss ring
Attach the Wire Rope Bridle to the
crossbar by turning the U-bolt con-
nector screw counter-clockwise. Firmly
tighten the connector screw onto the
crossbar bridle by turning bolt in a
clockwise direction. (See figure 4.1 and
4.2)
Attach 600# 316ss ring to Carabineer.
Attach Carabineer to Wire Rope Bridle
at the center loop.
Acoustic Doppler Profiler Installation
Installation of a SonTek M9 or S5 and External PCM Box
The following items are required to install a SonTek M9 or S5 (includes spare parts):
•5 ¼”-20 x 1 ¾” button head socket screw
•10 ¼” flat washer
•5 ¼” split washer
•2 10-32 x ½” Phillips pan head screw
•2 #10 flat washer
•2 #10 split washer
•1 M9 safety cable – 43”
High-Speed Riverboat User’s Guide July 2017
EAR-Controlled Technology Subject to Restrictions Contained on the Cover Page.
Page 5
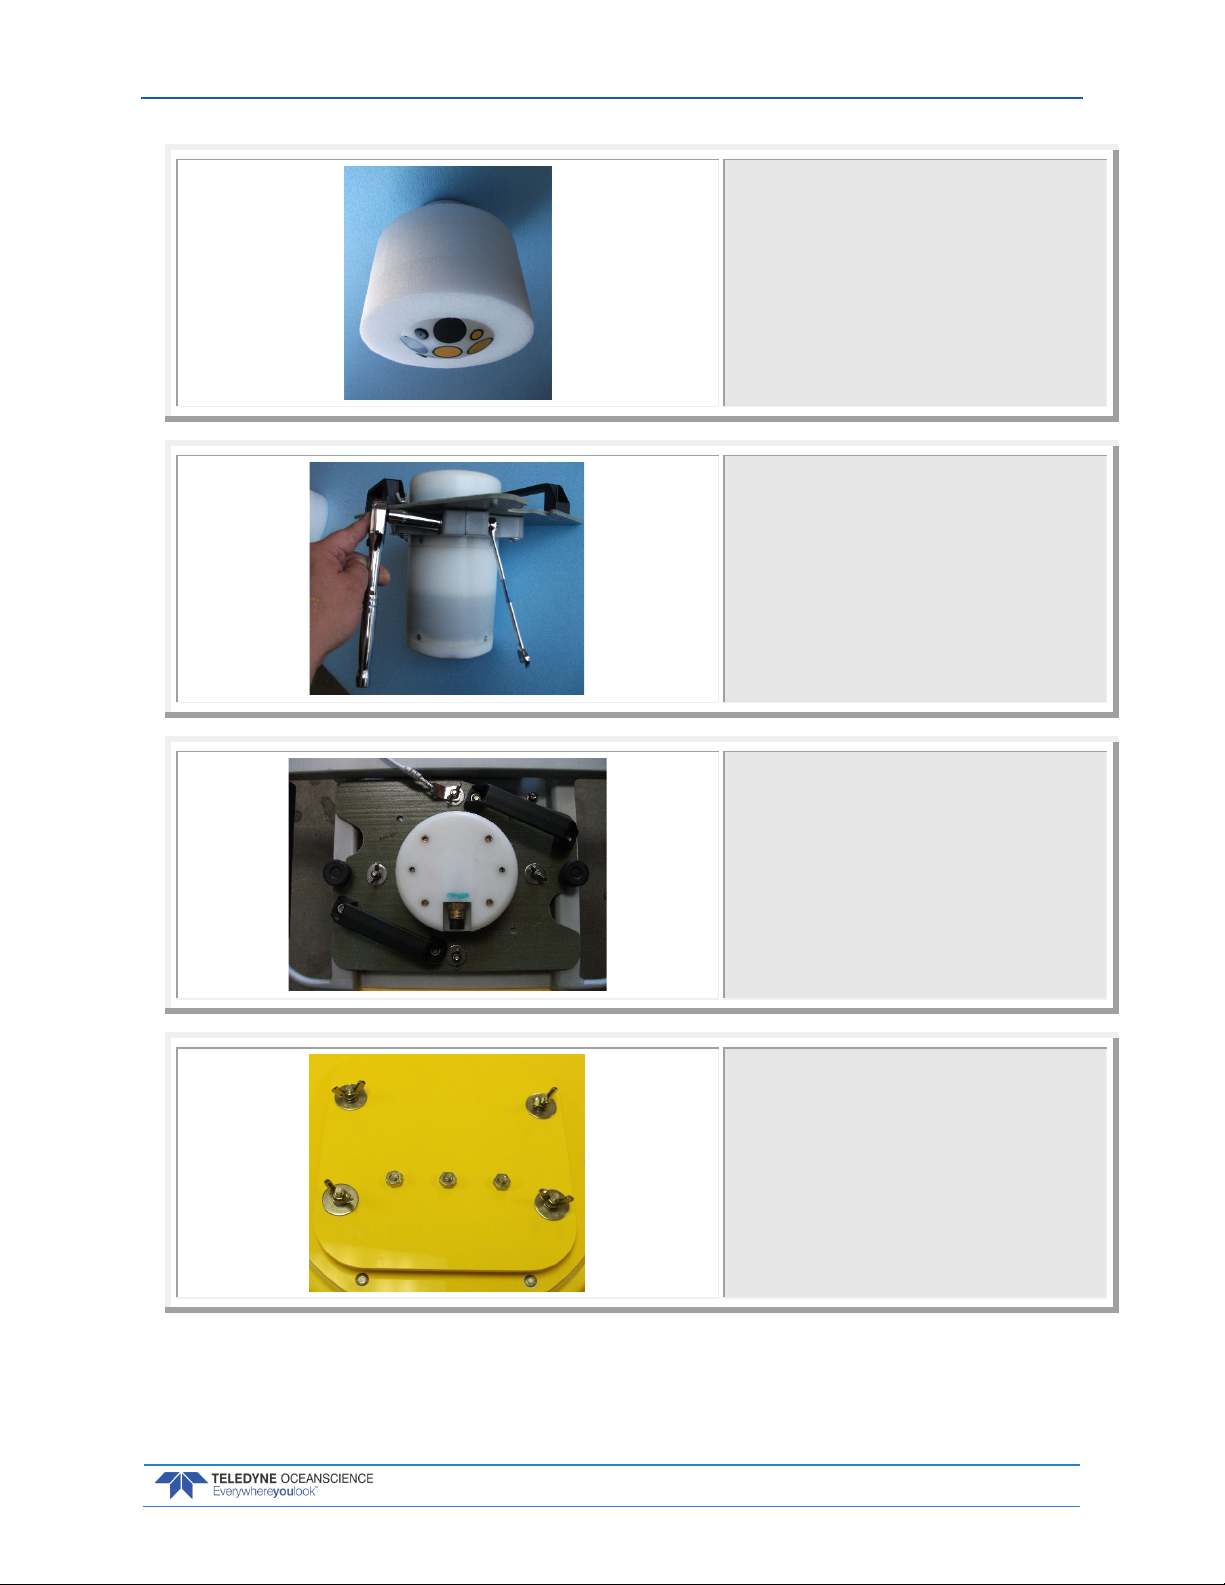
Begin by placing the foam seal ring
around the instrument with only the
sensors protruding, as shown.
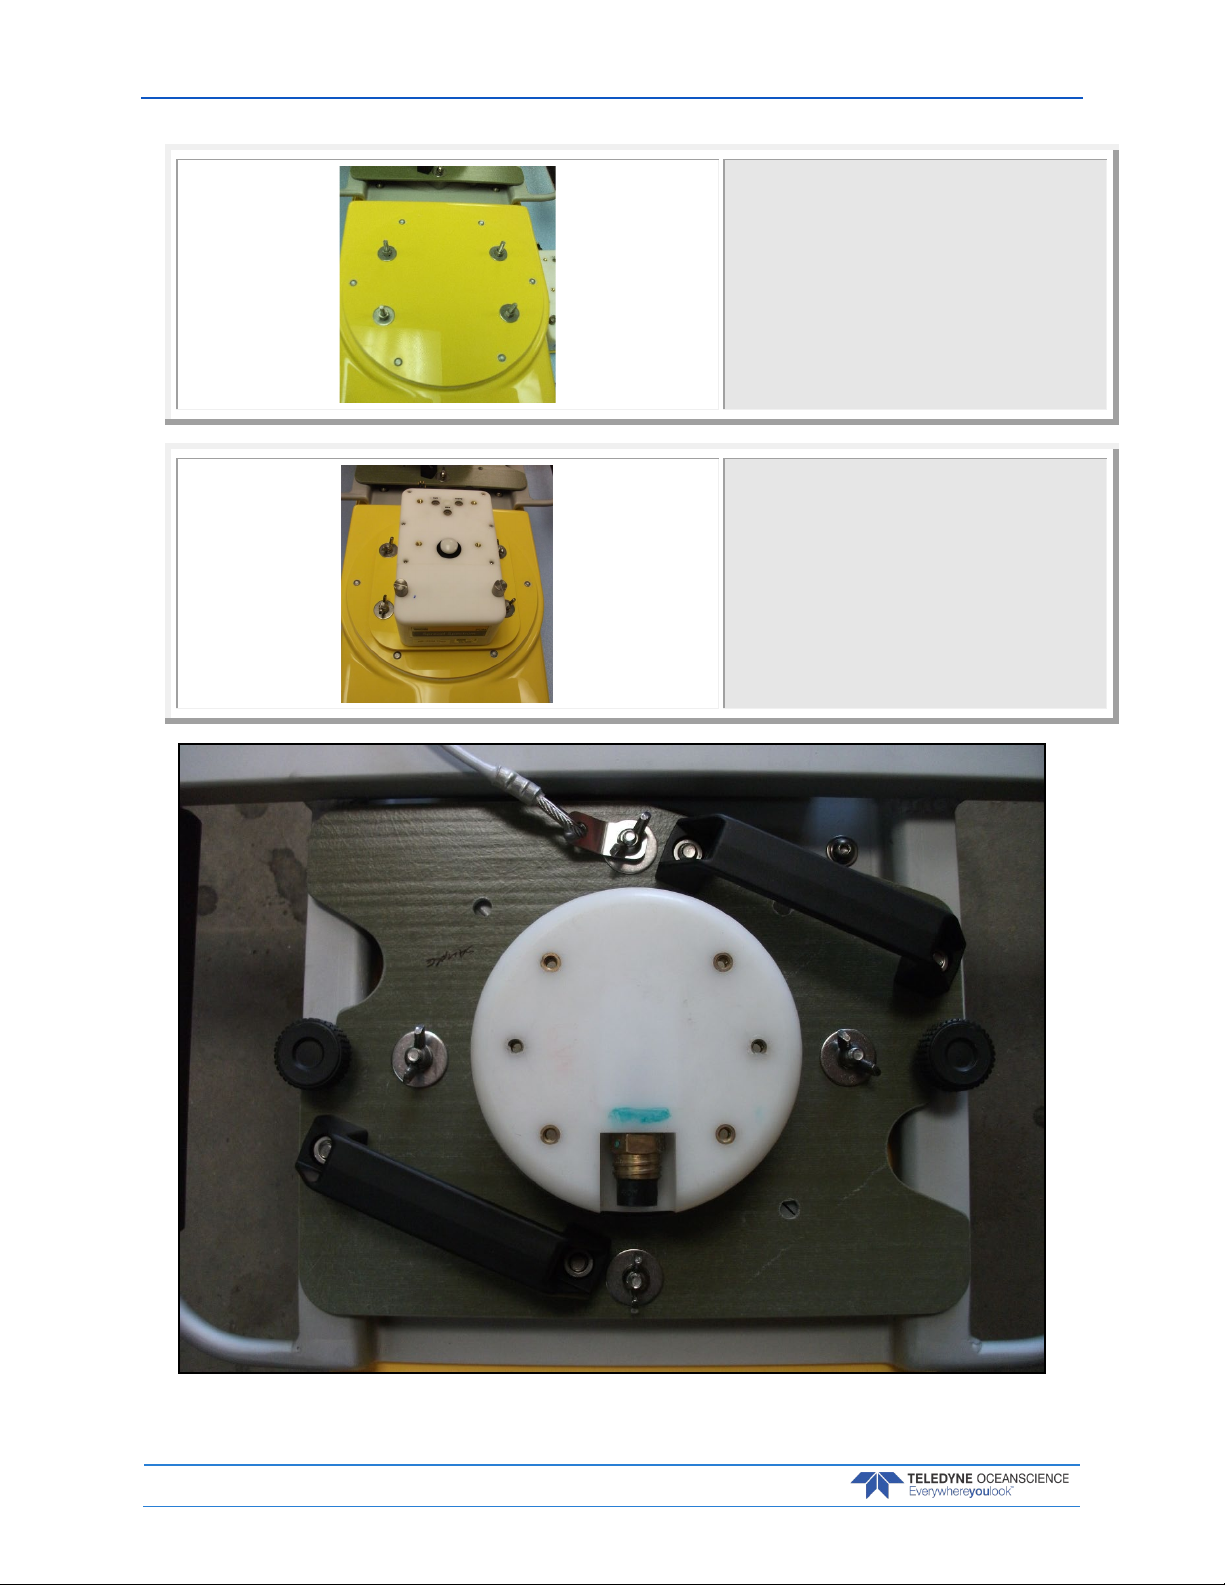
Slide the instrument plate, with clamp
attached, over the top side of the M9.
Tighten the clamp to lock the instru-
ment in place.
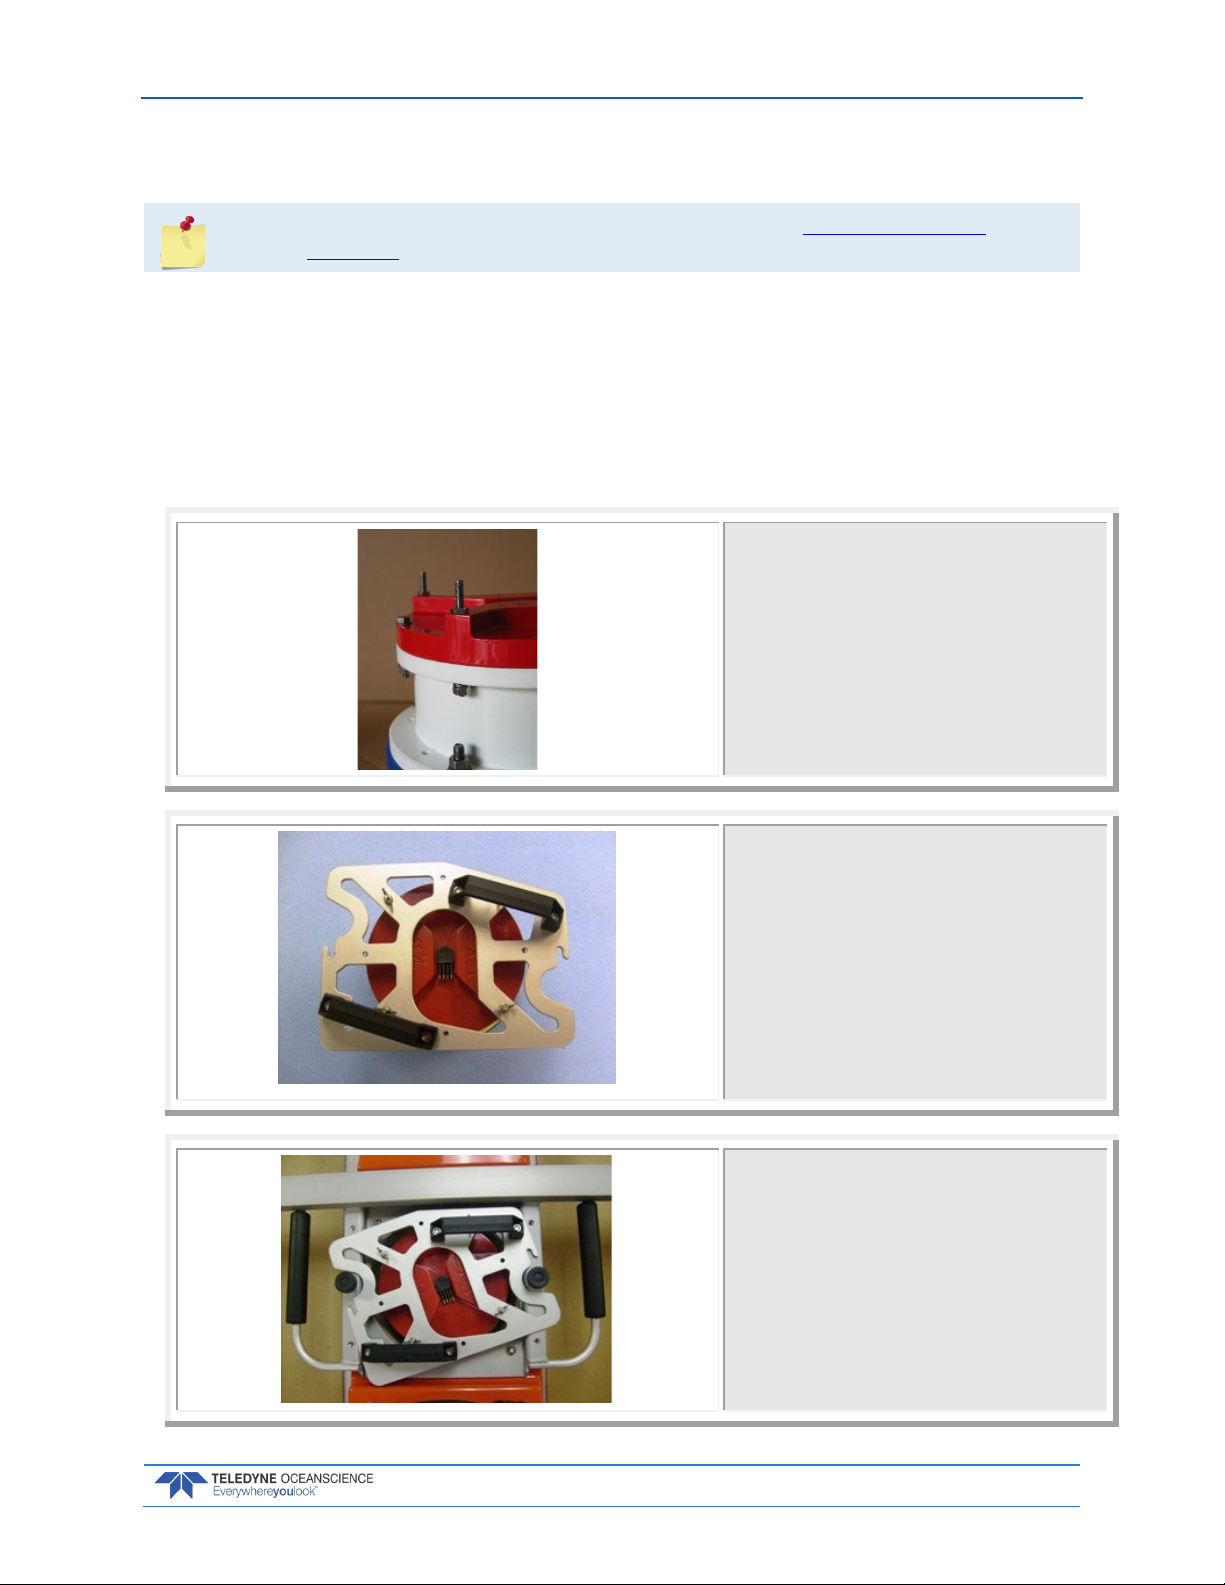
Slide the M9 Instrument Assembly into
the hull with the impulse connector fac-
ing the rear right corner of the boat.
Turn the M9 Instrument Assembly
clockwise to engage the locking studs
and then tighten the thumb-turns to se-
cure the assembly.
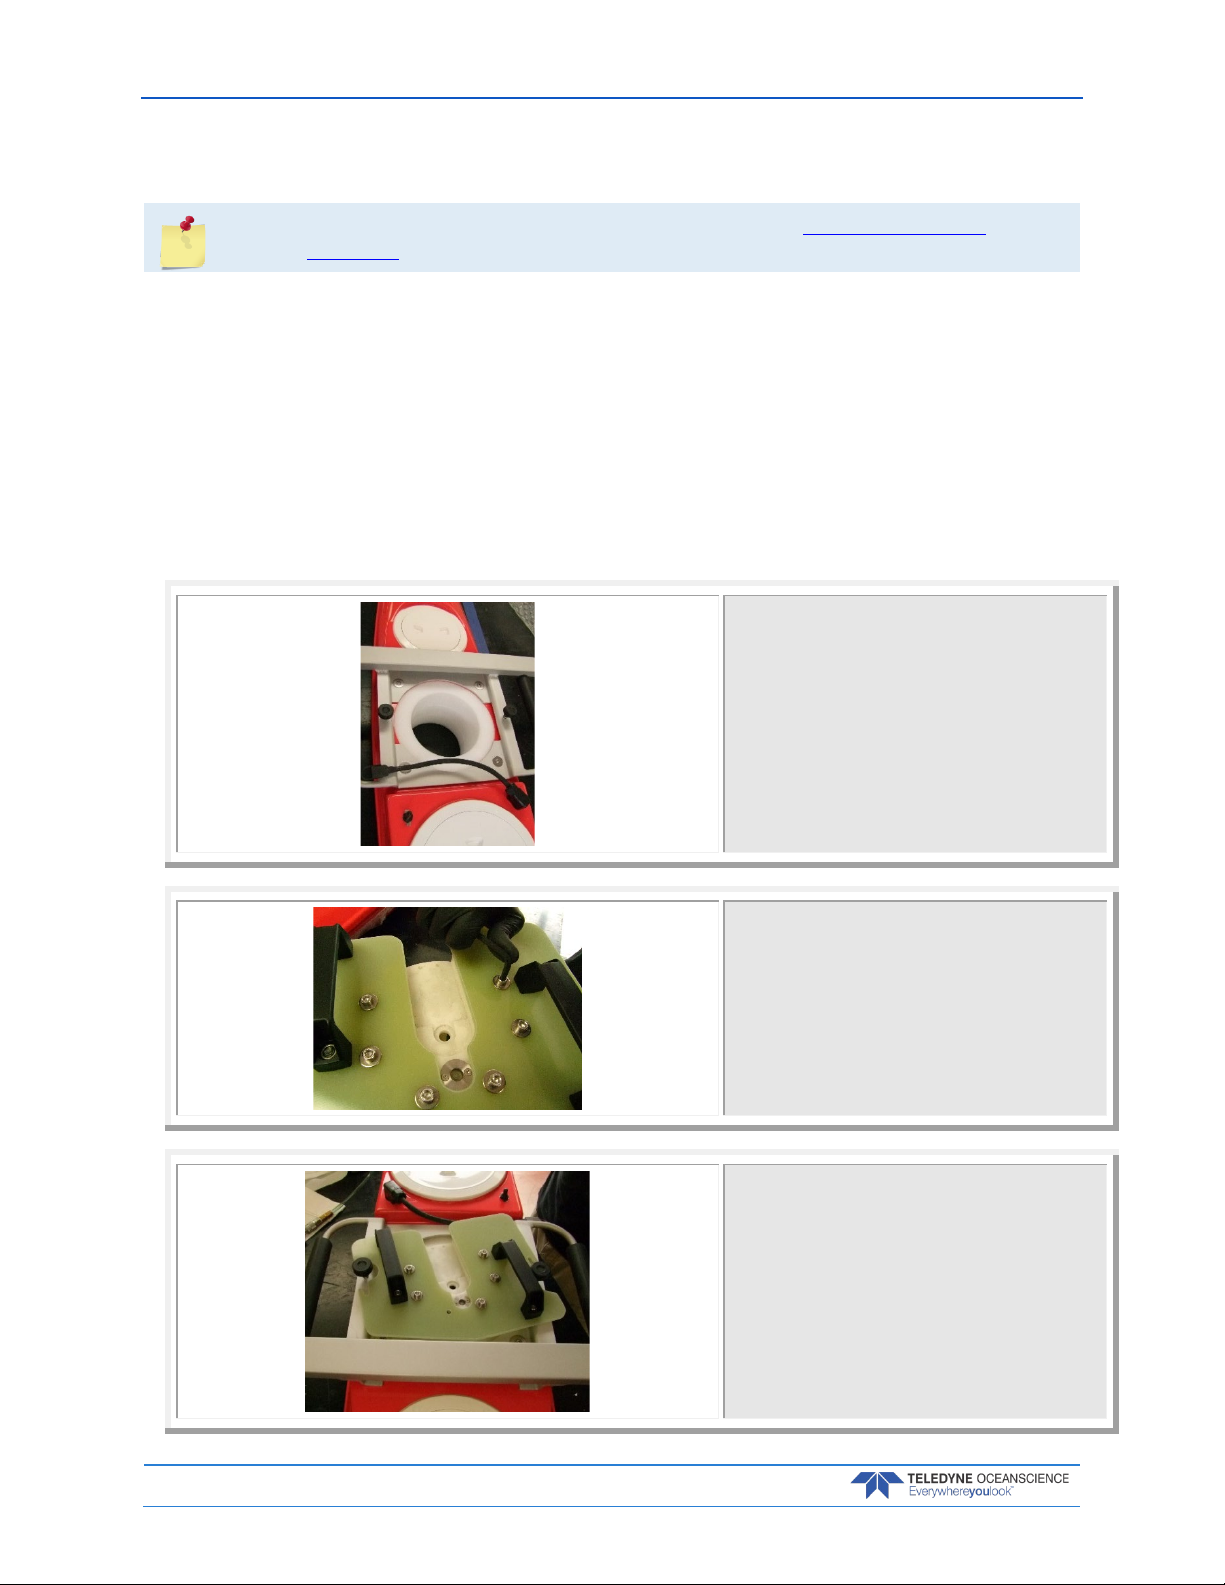
Attach the electronics box to the base
plate shown.
July 2017 High-Speed Riverboat User’s Guide
Page 6EAR-Controlled Technology Subject to Restrictions Contained on the Cover Page.
Slide the electronics box with base plate
over the mounting studs.
Secure electronics box assembly with
lock washers and wing nuts.
High-Speed Riverboat User’s Guide July 2017
EAR-Controlled Technology Subject to Restrictions Contained on the Cover Page.
Page 7
Installation of a Teledyne RDI Rio Grande
If GPS is included with your High-Speed Riverboat, please see GPS Mounting Bracket
Installation before completing this section.
The following items are required to install a Teledyne RDI Rio Grande ADCP (includes spare parts):
•5 ¼”-20 x 3” stud
•10 ¼”-20 hex nut
•4 ¼”-20 wing nut
•10 ¼” split washer
•10 ¼” flat washer
With the ADCP looking downward, sit-
ting on its cap, install the ¼-20 x 3”
mounting studs. Insert the stud from
above and install a lock washer and
standard nut on the bottom, leaving no
more thread than necessary protruding
from the bottom of the nut.
Install a hex nut from the top, using
wrenches provided to snug both nuts
against the instrument flange. This will
leave about ¾” of thread protruding up-
wards to pass through the High-Speed
Riverboat instrument plate
Place the instrument plate over the
ADCP so that the threaded rods extend
through the instrument plate holes.
Fasten in place with the wing nuts and
lock washers.
Place the instrument assembly into the
main hull. Rotate clockwise and tighten
the thumb turns.
July 2017 High-Speed Riverboat User’s Guide
Page 8EAR-Controlled Technology Subject to Restrictions Contained on the Cover Page.
Installation of a Teledyne RiverRay
If GPS is included with your High-Speed Riverboat, please see GPS Mounting Bracket
Installation before completing this section.
The following items are required to install a Teledyne RDI RiverRay ADCP (includes spare parts):
•1 ADCP Instrument Plate with handles
•7 M6 x 20mm socket head cap screw
•7 M6 large washer
•7 M6 split washer
•1 Instrument plug
•2 Thumb turns
•1 Wrench –M5 Allen
Place foam plug into center of Main
Hull.
With the ADCP looking downward, sit-
ting on its cap, align instrument plate
holes to the holes on the RiverRay in-
strument.
Install a M6 large washer and split
washer on each hole with M6 x 20mm
socket head cap screw to provide a snug
fit using supplied Allen wrench
Place the instrument assembly into the
main hull. Rotate clockwise and tighten
the thumb turns.

High-Speed Riverboat User’s Guide July 2017
EAR-Controlled Technology Subject to Restrictions Contained on the Cover Page.
Page 9
Safety Cable Assembly and Installation
The safety cable provides a vital link
from the ADCP to the tow line. Use the
eye nut at one end of the safety cable to
secure one of the forward ADCP mount-
ing studs to the instrument plate.
Attach the other end of the safety cable
to the carabineer on the Wire Rope
Bridal as shown.

July 2017 High-Speed Riverboat User’s Guide
Page 10 EAR-Controlled Technology Subject to Restrictions Contained on the Cover Page.
Optional GPS Mounting Bracket Installation
The following items are required to install a GPS mounting bracket (includes spare parts):
•4 10-32 x 5/16 Phillips screws
•3 ¼”-20 x 5/8” Button head screws
•3 ¼” flat washers – 316ss
•3 ¼”-20 nylocks
•1 Cable: GPS antenna to bulkhead
•1 Aluminum antenna mount
•1 Stainless steel antenna mount base
Attach the aluminum GPS antenna mast
to the stainless steel mounting bracket
using the 10-32 x 5/16” screws.
Install the stainless bracket to the in-
strument mounting plate using the ¼-
20 x 5/8” screws, flat washers, and lock
nuts.
Install the instrument plate, thread the
GPS antenna onto the mast and install
the External GPS Antenna Cable.

High-Speed Riverboat User’s Guide July 2017
EAR-Controlled Technology Subject to Restrictions Contained on the Cover Page.
Page 11
High-Speed Riverboat Warranty
The Oceanscience Group, Ltd makes every effort to assure that its products meet the highest quality, relia-
bility and durability standards and warrants to the original purchaser or original purchasing agency that
each High-Speed Riverboat be free from defects in materials or workmanship for a period of one year
from date of shipment.
High Impact, UV Resistant ABS hulls on the High-Speed Riverboat are warranted free from manufactur-
ing defects for one year from date of shipment.
Warranty does not apply to defects due directly or indirectly to misuse, negligence or accidents, repairs or
alterations outside of our facilities, use of the High-Speed Riverboat for purposes other than river dis-
charge measurements, or use with instruments weighing more than 25 lbs.
Oceanscience is not responsible for loss of boat, instruments, damage to property, injury or death associ-
ate with the use of any of its products or products that may be included or used with Oceanscience prod-
ucts.
Oceanscience does not warrant third party products sold by Oceanscience. These may include GPS, depth
sounders and other ancillary equipment.
All warranty services are FOB Oceanscience’s facility in Poway, CA.
To take advantage of this warranty, contact Oceanscience at 858 842-2600 or info@oceanscience.com.

July 2017 High-Speed Riverboat User’s Guide
Page 12 EAR-Controlled Technology Subject to Restrictions Contained on the Cover Page.
NOTES
Table of contents
Popular Boat manuals by other brands

Galaxy
Galaxy PILOT P6 user manual

Topper
Topper Topaz 16C Rigging instructions

Blue Wave
Blue Wave KAYAK-BW-01-PK-iKAYAK-RED Instructions of use and owners manual

LaserPerformance
LaserPerformance DART 16 manual

Sea-doo
Sea-doo ISLANDIA Operator's guide

Pro-Aqua
Pro-Aqua Water Tube Fossil II instruction manual


