Blue Wave KAYAK-BW-01-PK-iKAYAK-RED User manual
BLUEWAVEKAYAKS.COM
Bluewave have been manufacturing Kayaks for many years and are well
known for moulded leisure kayaks across the UK. All at Bluewave have the
love of the paddle whether this is in a hard hulled kayak; on a paddle board;
iSup or inflatable kayak, our sense of adventure and enthusiasm for the in-
dustry hasn’t dimmed. We only ever work with the highest grade materials
and construction techniques to provide cutting edge durable craft for you
to enjoy paddling. Our products come with a standard 12 month warranty
against manufacturing defects.
CONTACT US
We are a family run business and hold to the ideals of our founder. Custom-
ers make us a strong company so we are more than happy to chat through
any concerns, questions or special requests when ordering – Give our friend-
ly customer service team a call we are more than happy to help.
BLUEWAVE INFLATABLE KAYAKS
INSTRUCTIONS OF USE
AND OWNER’S MANUAL
Telephone: +44 1823 672 970 | BLUEWAVE SPORTS: Unit 3, Woodlands Business Park, Burlescombe, Devon, EX16 7LL | enquiries@bluewavekayaks.com
Model: BLUEWAVE Glider Single Seater
KAYAK-BW-01-PK-iKAYAK-RED
KAYAK-BW-01-PK-iKAYAK-YELLOW
KAYAK-BW-01-PK-iKAYAK-BLUE
Dimensions: 12’10” x 28” (320cm x 71.12cm)
Weight: 14.3kg
Max Load Capacity: 496lbs / 225kg
Style: Single, Touring, Inflatable
Inflation Time: 7 Minutes
Model: BUEWAVE Glider 2+1 Seater
KAYAK-BW-02-PK-iKAYAK-RED
KAYAK-BW-02-PK-iKAYAK-YELLOW
KAYAK-BW-02-PK-iKAYAK-BLUE
Dimensions: 15’5” x 29” / 471cm x 76cm
Weight: 18kg
Max Load Capacity: 700lbs / 317kg
Style: Double, Touring, Inflatable
Inflation Time: 7 Minutes
INFLATE TO 10PSI – ALL CHAMBERS
WARRANTY: 12 months warranty against manufac-
turing defects.
SAFETY – WARNING – THESE KAYAKS HAVE NOT
BEEN DESIGNED FOR WHITE WATER USE
PRODUCTS
NEVER ALLOW CHILDREN TO USE THE GLIDER INFLATABLE
KAYAK WITHOUT SUPERVISION
Kayaking or canoeing is one of the most popular sports in the UK and Ireland.
Water safety should be paramount from the moment you consider going out
on the water in any craft. Whether you are seasoned pro or a novice be aware
of the risk and paddle safely. As the popularity of kayaking and paddle based
sports has increased so have the number of rescue incidents reported. In many
cases, paddlers were unable to call for help themselves.
STAYING SAFE – Always carry a means of calling for help and keep it within
reach. Phones belong in water tight cases within easy reach NOT locked in stor-
age compartments. Consider carrying alternative communication channels and
flares if you are going some distance off shore.
Remember not all coastal areas have a mobile phone signal so consider other
means of communicating should you get into any difficulty such as a water-
proof VHF radio, Personal Locator Beacon (PLB), Tracker GSM tracker with a
SOS function.
• Wear a flotation device
• Check weather and tides
• Tell someone where you are going and when you will be back
• Don’t paddle alone
• Always carry drinking water and snacks.
• Wear appropriate clothing for the conditions, be aware of hypothermia,
store additional waterproof and warm clothing for your trip in a dry bag.
Wear a wetsuit or drysuit if warranted.
• Use sun screen
• Carry a waterproof first aid kit
• Carry a tow line, whistle, spare flotation device, flares and drybag
• GET SOME TRAINING: Contact your local canoe club. You can get coach-
ing sessions and training from the British Canoeing Club - https://www.
britishcanoeing.org.uk
REMEMBER: Some waterways require a licence – check before setting out.
ALWAYS CHECK YOU CRAFT BEFORE VENTURING OUT ON WATER.
Check your equipment is ready for the water and has adequate buoyancy if
capsized before setting out. Whilst this craft is extremely durable and hardy it
is always best to make sure you are carrying your repair kit and a mobile pump.
CE
Pr od uc t: IN FL ATAB LE K AYAK
Model(s):
Length: 2850mm-6000mm,
width: 700mm-1000mm,
height: 200mm-700mm
Verification to: Standard:
EN 15649-1:2009+A2:2013
related to CE Directive(s):
2001/95/EC (General Product Safety)
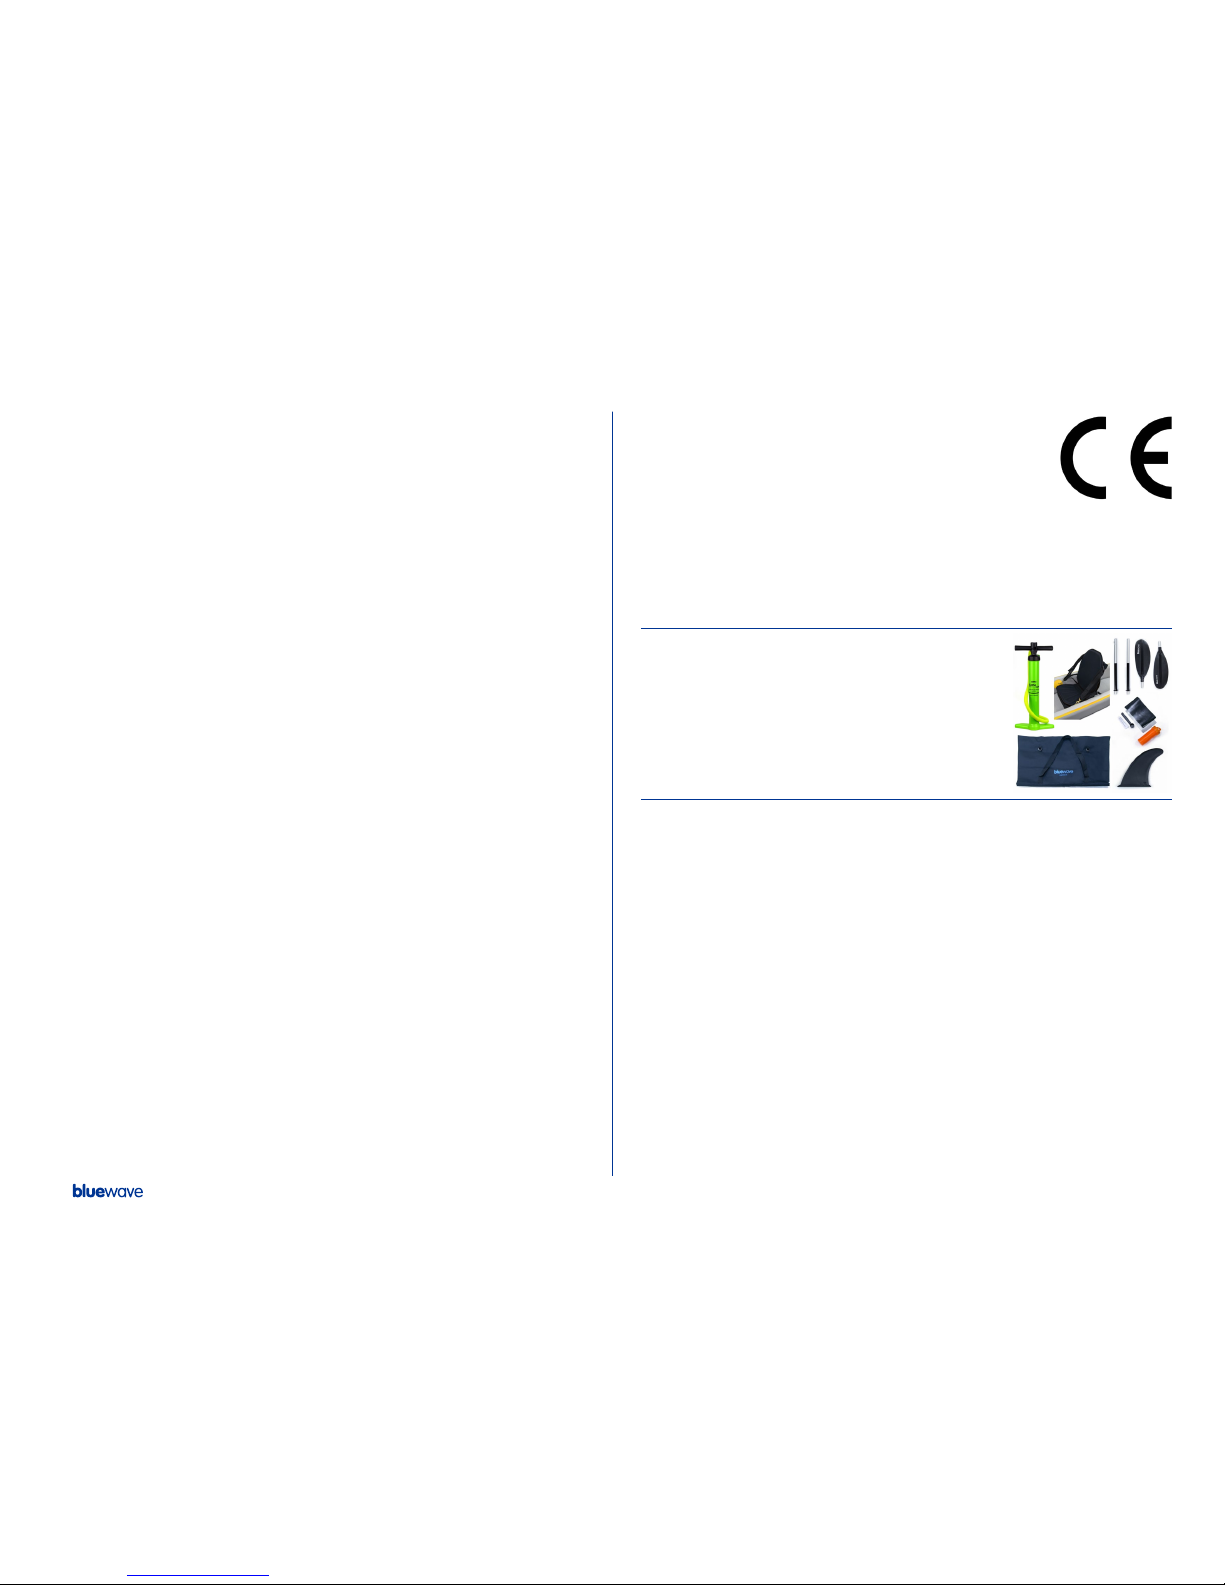
INCLUDED ACCESSORIES
PUMP
SEATS
SKEG (FIN)
PADDLE
CARRY BAG
REPAIR KIT
FEATURES
Double layer dropstitch construction giving inflation to 10PSI. This construc-
tion allows for overall rigidity to be increased. Bluewave Sports inflatable kay-
aks are not going to fold in half the moment they hit some surf and are as rigid
as any kayak in their class.
The hull features tapered dropstitch walls creating secondary buoyancy and
stability providing a rigid chine at the waterline. The double concave design
at bow allows for air pockets to form between hull and the water creating lift
while reducing friction and drag. The bows are tapered and formed with mould-
ed plastic creating a smooth exit through the water. The Glider has a high de-
gree of manoeuvrability, with superior length to width ratio, razor sharp bow
entry, straight-line planing and sharp stern exit.
2
INSTRUCTIONS OF USE
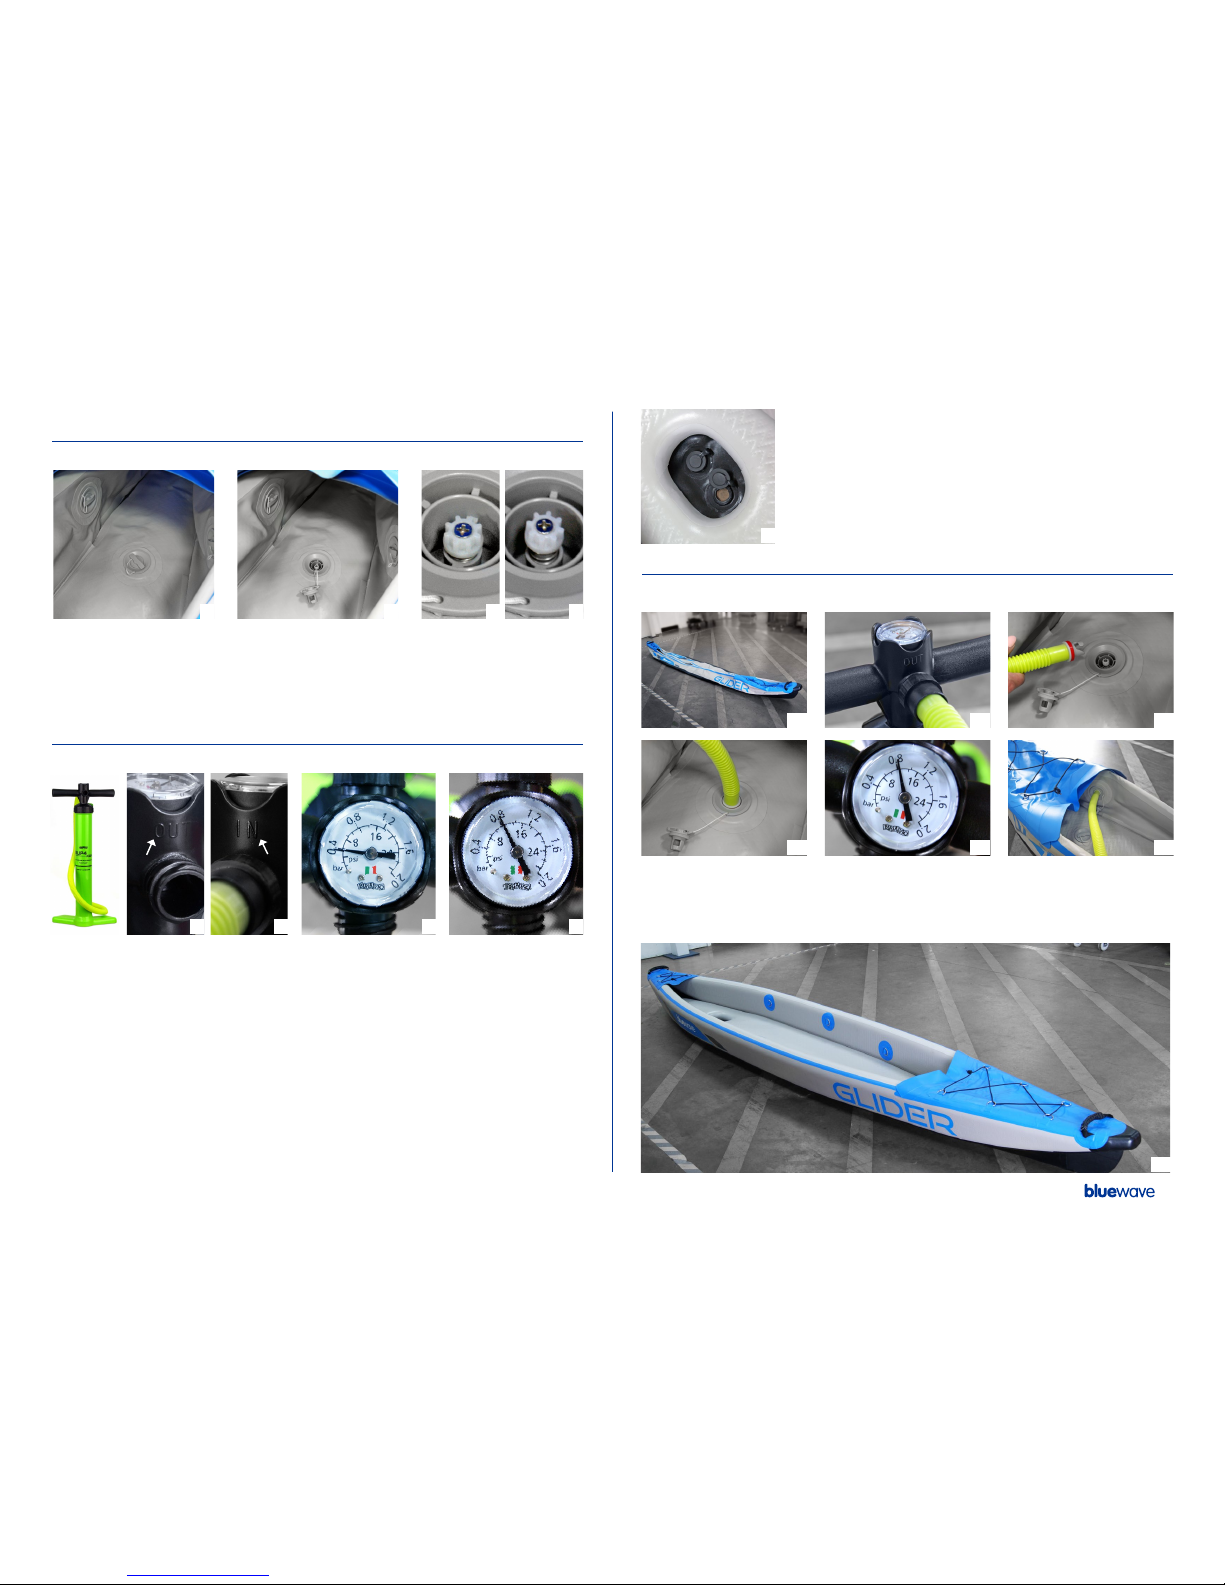
VALVES
The Bluewave Glider has a recessed valve for each side chamber and the floor[1].
Remove the cap to access the valve [2]. Press and turn the valve counter clock-
wise so that it pops up [3,4]. This will close the valve and hold in air for inflation.
Turning the valve clockwise will open the valve for deflation.
PUMP
MAXIMUM AIR PRESURRE FOR THESE MODELS IS 10 PSI [8] – In extremely
warm weather you may wish to let some of the air out when not using to allow
for hot air expansion. AVOID over inflation as this will lead to your warranty
being declared invalid.
The high volume pump comes with a pressure gauge and a inflate [5] / deflate [6]
inlet. The pressure gauge will not move until you have reached the minimum
PSI [7]. You should feel the resistance in the pump when you start to reach the
correct PSI. The highest recommended PSI pressure will achieve the best per-
formance in your kayak.
DRAINS
Drains are a convenient way to drain accumulated water
from paddle splash and rain. Only open drains on shore.
WARNING Drains are not intended for use while on water.
INFLATION
Choose an area large enough to unfold [10] the Glider without hazards which
could damage the kayak or injure yourself. Make sure that you have the pump
hose inserted into the ‘inflation’ (‘OUT’) outlet [11]. You can inflate the sides or
floor in any particular order. The working pressure for walls and floor is 10PSI [14].
2
85 6 7
9
3 41
10 11
14
12
1513
FRONT –
larger spalsh guard
BACK – smaller spalsh guard
3
16
OUT IN
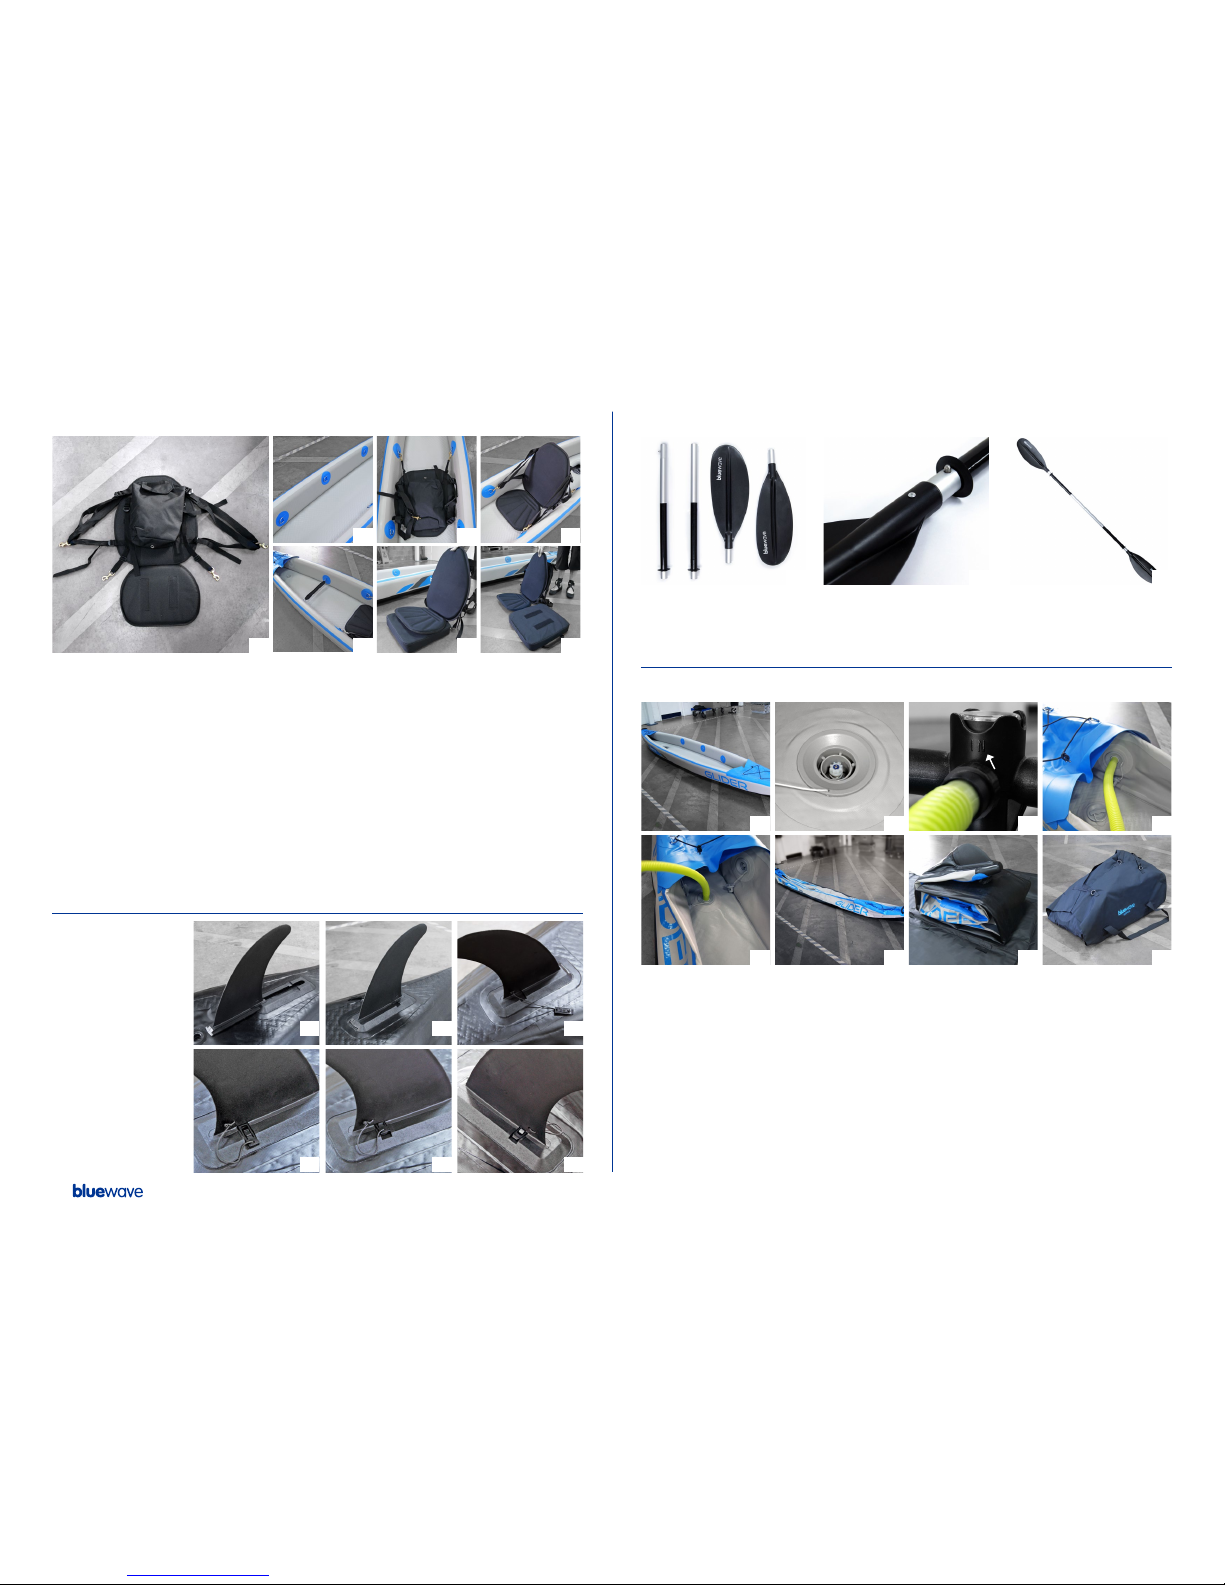
SEAT(S)
Attach the seats by attaching the seat connectors [17-20]. The top connectors
attach to the forward D-rings and the lower seat straps connect to the rear
D-ring connectors. You have been provided with an extra cushion block which
is attached by Velcro to the bottom of the seat [22]. To see if the seat is at the
right height, place your weight on the seat pushing your lumber region into
the backrest by arching your back forward then sit up straight. You want to
feel supported and steady. If you are using the cushion block and the seat is
slipping or moving around then the seat is set too high so remove it [23]. The
seat should be set and adjusted to give you the best support and balance whilst
paddling. You have been provided with an additional velcro strap which you can
use as a footrest [21].
SKEG/FIN
Turn the Kayak over
and slide the skeg/
fin into the base
[24-25]. It will only
slide in one way.
Slide the locking
tab into its groove
until it clicks into
place [27-29].
PADDLE
Assembly for the paddle is straight forward, begin by connecting the halves by
inserting the half with the push pin into the half with the holes.
DEFLATION
Make sure that the kayak is fully dry before folding and stowing.
Remove all seats, skeg/fin etc. [33] Push down on the valve stem and quarter
turn to the right. The valve will stay in the down position allowing the air to
escape [34].
WARNING: DO NOT PLACE FACE DIRECLY OVER VLAVE AS AIR ESCAPES
AT FORCE AND COULD BE DANGEROUS.
Once you have removed most of the air you can use the pump by changing the
outlet pipe (‘IN’) [35] and pumping out the last of the air [36-37]. Once you have
completely deflated the kayak fold the walls over the floor so that the kayak is
a a
a
a
b
b
b
b
17
18 19 20
21 22 23
24
27
25
28
26
29
30 31 32
36
40
35
39
34
38
33
37
4
IN

ready for a compact tight fold [38]. Always make sure that the Skeg/Fin slide
base is pushed down flat to prevent it from bending and becoming misshaped.
Fold both ends towards the middle of the kayak leaving just enough gap to fold
again comfortably.
PROTECTION FROM HEAT
Avoid leaving the boat in direct sunlight when ashore. Temperatures on a beach,
dock, davit, etc. can get very high, which could affect the vinyl or glue. Exces-
sive exposure to sun and heat can cause your Glider to become sticky or cause
the glue to fail.
STORAGE
The best way to store your inflatable Kayak is dry in its bag. Always check for
water in chambers when you are folding your kayak. Always dry thoroughly
to prevent mould developing during storage. Keep in a dry, cool storage area.
Avoid direct sunlight, attics and metal sheds.
REPAIRS
Your Glider is supplied with a repair kit which includes glue,
mixing spoon and patching material.
We use a PVC glue specifically for PVC boats. Epoxy, water-
proofing sprays and Gorilla Glue do not work.
TIP: The smaller the patch the easier the repair most repairs
fail due to the patch being too big.
TIP FOR FINDING A LEAK: You’ll need a bucket and washing up liquid. Fill the
bucket with clear water and add a good squirt of soap (couple of tablespoons)
to the water. Inflate the leaking chamber to full pressure. Spread lots of soapy
water on the leaking chamber with a hand towel or large sponge. Don’t assume
the leak is coming from the valve or seams. The leak may produce bubbles,
make hissing or sputtering noises, or spray water.
Once you have located the leak you can judge the size of the patch required use
a coin to create a template and use a scalpel or sharp scissors to cut out a patch.
Using the same template trace an outline on some masking tape and cut with
a scalpel. Place this over the puncture on the kayak with the puncture in the
centre, this is now your guide for placing the patch.
Once you have glued the patch and boat remove the masking tape immediately
and smooth the patch with a finger to remove any air bubbles. Heat patch with
a hair dryer for 10-20 seconds and smooth again.
5
BLUEWAVE KAYAKS WARRANTY
Register Now Through Facebook
The easiest way to register your new kayak is through Facebook. Simply
visit our page www.fb.com/bluewavesports or scan the QR code below
with your mobile phone and message us with this information:
• Your Name
• Your Email Address
• Your Postal Address
• Kayak Model & Colour
• Purchase Date
• Where You Purchased From
BE SURE TO REGISTER RIGHT AWAY
SO YOUR KAYAK IS COVERED!
Don’t have Facebook? Email the above details to
enquiries@bluewavekayaks.com to activate your Warranty.

BLUEWAVEKAYAKS.COM
Telephone: +44 1823 672970
BLUEWAVE SPORTS: Unit 3, Woodlands Business Park, Burlescombe, Devon, EX16 7LL
enquiries@bluewavekayaks.com
This manual suits for next models
5
Other Blue Wave Boat manuals


Popular Boat manuals by other brands

Kadey-Krogen Yachts
Kadey-Krogen Yachts 5814 owner's manual

Hallberg-Rassy
Hallberg-Rassy HR 412 Instruction book

Sailfish
Sailfish 220 WAC owner's manual

Sea Ray
Sea Ray 300 Select Ex owner's manual

Horizon Yacht Charters
Horizon Yacht Charters Leopard 46 Catamaran 200 Information & operation manual

Tartan
Tartan Ten owner's manual


Cruisers Yachts
Cruisers Yachts 2870 rogue series owner's manual

grabner
grabner SPEED owner's manual

Yamaha
Yamaha WaveRunner SuperJet 700 2001 Owner's/operator's manual

WaterQuest
WaterQuest 14' Square Stern owner's manual

Lagoon
Lagoon 440 S2 user guide

Yamaha
Yamaha WaveRunner GP1800R HO Owner's/operator's manual