Telos Z/IP ONE User manual

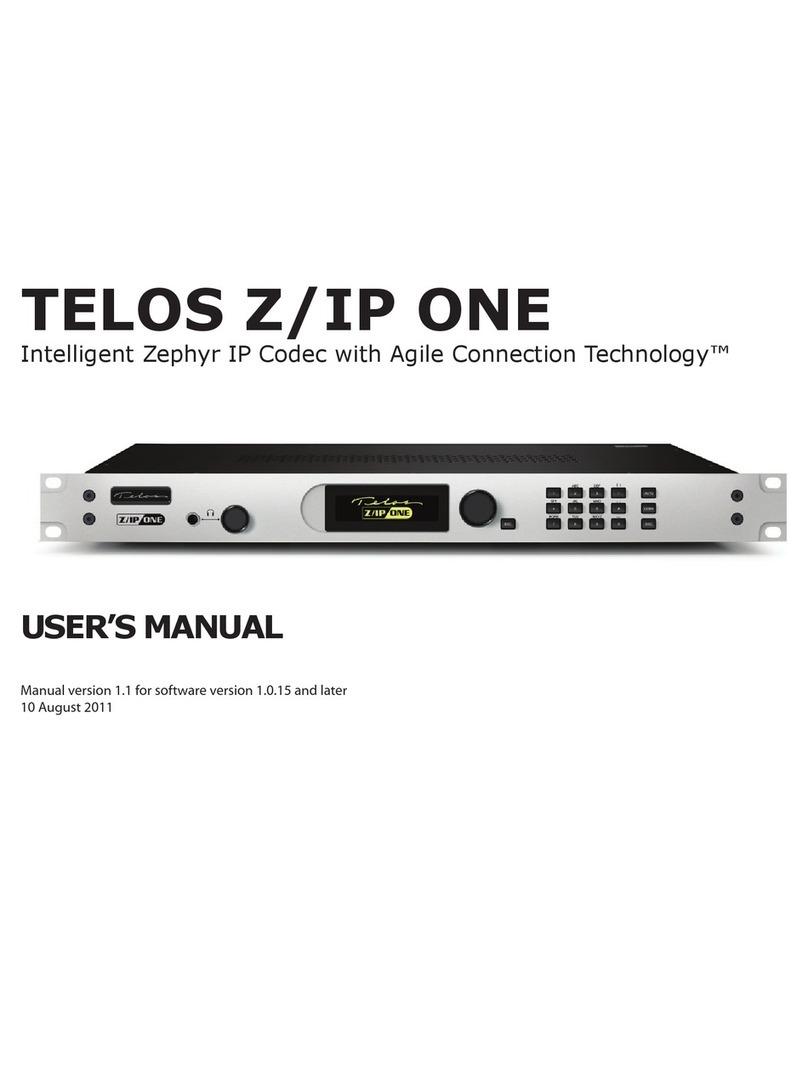
TELOS Z/IP ONE
Intelligent Zephyr IP codec with Agile Connection Technology™
USER’S MANUAL
Manual v2.0.1 for software version 2.0.1r and higher
August 2014

II |
Z/IP ONE Manual
© 2014 TLS Corporation. Published by Telos Systems/TLS Corporation. All rights reserved.
Trademarks
Telos Systems, the Telos logo and Z/IP ONE are trademarks of TLS Corporation. All other trademarks are the
property of their respective holders.
Notice
All versions, claims of compatibility, trademarks, etc. of hardware and software products not made by Telos
mentioned in this manual or accompanying material are informational only. Telos Systems makes no endorsement
of any particular product for any purpose, nor claims any responsibility for operation or accuracy. We reserve the
right to make improvements or changes in the products described in this manual which may affect the product
specifications, or to revise the manual without notice.
Warranty
This product is covered by a five year limited warranty, the full text of which is included in this manual.
Updates
The operation of the Z/IP ONE is determined largely by software. We routinely release new versions to add
features and fix bugs. Check the Telos web site for the latest. We encourage you to sign-up for the email notification
service offered on the site.
Feedback
We welcome feedback on any aspect of the Z/IP ONE, or this manual. In the past, many good ideas from users have
made their way into software revisions or new products. Please contact us with your comments.
Service
You must contact Telos before returning any equipment for factory service. We will need the serial number, located
on the back of the unit. Telos Systems will issue a Return Authorization number which must be written on the
exterior of your shipping container. Please do not include cables or accessories unless specifically requested by the
technical support engineer at Telos. Be sure to adequately insure your shipment for its replacement value. Packages
without proper authorization may be refused. US customers please contact Telos technical support at
+1-216-622-0247. All other customers should contact your local representative to make arrangements for service.
We support you...
By Phone / Fax:
You may reach our 24/7 Support Team anytime around the clock by calling +1-216-622-0247.
For billing questions or other non-emergency technical questions, call +1-216-241-7225 between 9:30 AM to 6:00
PM USA Eastern Time, Monday through Friday.
Our fax is +1-216-241-4103.
By E-Mail:
Technical support is available at Support@Telos-Systems.com.
All other inquiries at Inquiry@Telos-Systems.com.
Via World Wide Web:
The Telos Web site has a variety of information which may be useful for product selection and support.
The URL is www.Telos-Systems.com
10 9 8 7 6 5 4 3 2 1

| III
Telos Systems USA
Telos Systems
1241 Superior Avenue E
Cleveland, OH 44114 USA
+1-216-241-7225 (phone)
+1-216-241-4103 (fax)
+1-216-622-0247 (24/7 Technical Support)
Support@Telos-Systems.com
Inquiry@Telos-Systems.com
Notices and Cautions
This symbol, wherever it appears, alerts you to the presence of uninsulated,
dangerous voltage inside the enclosure – voltage which may be sufficient to
constitute a risk of shock.
This symbol, wherever it appears, alerts you to important operating and
maintenance instructions. Read the manual.
CAUTION:
THE INSTALLATION AND SERVICE INSTRUCTIONS IN THIS MANUAL ARE FOR USE BY QUALIFIED PERSONNEL
ONLY. TO AVOID ELECTRIC SHOCK, DO NOT PERFORM ANY SERVICING OTHER THAN THAT CONTAINED
IN THE OPERATING INSTRUCTIONS UNLESS YOU ARE QUALIFIED TO DO SO. REFER ALL SERVICING TO
QUALIFIED PERSONNEL.
THIS INSTRUMENT HAS AN AUTORANGING LINE VOLTAGE INPUT. ENSURE THE POWER VOLTAGE IS
WITHIN THE SPECIFIED RANGE. THE ~ SYMBOL, IF USED, INDICATES AN ALTERNATING CURRENT SUPPLY.
WARNING:
THE PRODUCT’S POWER CORD IS THE PRIMARY DISCONNECT DEVICE. THE SOCKET OUTLET SHOULD BE
LOCATED NEAR THE DEVICE AND EASILY ACCESSIBLE. THE UNIT SHOULD NOT BE LOCATED SUCH THAT
ACCESS TO THE POWER CORD IS IMPAIRED. IF THE UNIT IS INCORPORATED INTO AN EQUIPMENT RACK,
AN EASILY ACCESSIBLE SAFETY DISCONNECT DEVICE SHOULD BE INCLUDED IN THE RACK DESIGN.
TO REDUCE THE RISK OF ELECTRICAL SHOCK, DO NOT EXPOSE THIS PRODUCT TO RAIN OR MOISTURE.
THIS UNIT IS FOR INDOOR USE ONLY.

IV |
USA CLASS A COMPUTING DEVICE INFORMATION TO USER. WARNING:
This equipment generates, uses, and can radiate radio-frequency energy. If it is not installed and used as directed by
this manual, it may cause interference to radio communication. This equipment complies with the limits for a Class A
computing device, as specified by FCC Rules, Part 15, Subpart J, which are designed to provide reasonable protec-
tion against such interference when this type of equipment is operated in a commercial environment. Operation
of this equipment in a residential area is likely to cause interference. If it does, the user will be required to eliminate
the interference at the user’s expense. NOTE: Objectionable interference to TV or radio reception can occur if
other devices are connected to this device without the use of shielded interconnect cables. FCC rules require the use
of shielded cables.
CANADA WARNING:
“This digital apparatus does not exceed the Class A limits for radio noise emissions set out in the Radio Interference
Regulations of the Canadian Department of Communications.”
“Le présent appareil numérique n’émet pas de bruits radioélectriques dépassant les limites applicables aux appar-
eils numériques (de Class A) prescrites dans le Règlement sur le brouillage radioélectrique édicté par le ministère
des Communications du Canada.”

| VV | Table of Contents
1Introduction 1
2Quick Start Guide 3
2.1 Unpack and Identify . . . . . . . . . . . . . . . . . . . . . . . . . . . 3
2.2 The ZIP/ONE User Interface . . . . . . . . . . . . . . . . . . . . . . . . 4
2.3 Setup Wizard . . . . . . . . . . . . . . . . . . . . . . . . . . . . . . 4
2.4 MakeYour First IP-Codec Call . . . . . . . . . . . . . . . . . . . . . . . 6
2.5 Congratulations!. . . . . . . . . . . . . . . . . . . . . . . . . . . . . 7
Codec Features . . . . . . . . . . . . . . . . . . . . . . . . . . . . . . . 8
Codec Characteristics . . . . . . . . . . . . . . . . . . . . . . . . . . . . 9
3Installation 11
3.1 Rack Mounting the Studio Unit . . . . . . . . . . . . . . . . . . . . . . 11
3.2 Power . . . . . . . . . . . . . . . . . . . . . . . . . . . . . . . . .11
3.3 Audio Inputs (balanced analog) . . . . . . . . . . . . . . . . . . . . . . 11
3.4 Audio Outputs (balanced analog) . . . . . . . . . . . . . . . . . . . . . 12
3.5 Network Interfaces . . . . . . . . . . . . . . . . . . . . . . . . . . .12
3.6 USB Ports . . . . . . . . . . . . . . . . . . . . . . . . . . . . . . . . 12
3.7 Network Interfaces . . . . . . . . . . . . . . . . . . . . . . . . . . .12
3.8 USB Ports . . . . . . . . . . . . . . . . . . . . . . . . . . . . . . . . 13
3.9 Parallel Control . . . . . . . . . . . . . . . . . . . . . . . . . . . . .13
4The Front Panel Interface 15
4.1 Front Panel Controls . . . . . . . . . . . . . . . . . . . . . . . . . . . 15
4.2 The User Interface and Menu System. . . . . . . . . . . . . . . . . . . . 17
5The Audio I/O Menu 19
5.2 Input Mode . . . . . . . . . . . . . . . . . . . . . . . . . . . . . . . 20
5.3 Microphone-level Gain . . . . . . . . . . . . . . . . . . . . . . . . . . 20
5.4 Line-level Gain . . . . . . . . . . . . . . . . . . . . . . . . . . . . .20
5.5 Transmit Mode . . . . . . . . . . . . . . . . . . . . . . . . . . . . .20
5.6 AES/EBU Output Sample Rate. . . . . . . . . . . . . . . . . . . . . . . 20
5.7 Loopback . . . . . . . . . . . . . . . . . . . . . . . . . . . . . . . . 20

VI | TELOS Z/IP ONE | VI
6The Setup Menu 21
6.1 Network . . . . . . . . . . . . . . . . . . . . . . . . . . . . . . . .21
6.2 Audio Codec. . . . . . . . . . . . . . . . . . . . . . . . . . . . . . . 24
6.3 System . . . . . . . . . . . . . . . . . . . . . . . . . . . . . . . . . 26
6.4 Software . . . . . . . . . . . . . . . . . . . . . . . . . . . . . . . . 26
6.5 Setup Wizard . . . . . . . . . . . . . . . . . . . . . . . . . . . . . . 27
6.6 ZIP Server. . . . . . . . . . . . . . . . . . . . . . . . . . . . . . . . 27
6.7 Parallel Port. . . . . . . . . . . . . . . . . . . . . . . . . . . . . . . 28
7The Status Screens 29
7.1 Overview . . . . . . . . . . . . . . . . . . . . . . . . . . . . . . . . 29
7.2 Call Status + GPIO . . . . . . . . . . . . . . . . . . . . . . . . . . . . 30
7.3 Call Status + Codec . . . . . . . . . . . . . . . . . . . . . . . . . . .30
7.4 Network Interface Status Screens . . . . . . . . . . . . . . . . . . . . . 31
7.5 Version Info . . . . . . . . . . . . . . . . . . . . . . . . . . . . . . . 32
8The Web Interface 33
8.1 Status Page . . . . . . . . . . . . . . . . . . . . . . . . . . . . . . . 33
8.2 Connect . . . . . . . . . . . . . . . . . . . . . . . . . . . . . . . .34
8.3 Audio, Streaming, GPIO, and System . . . . . . . . . . . . . . . . . . . . 35
8.4 Network . . . . . . . . . . . . . . . . . . . . . . . . . . . . . . . .35
8.5 Software Management. . . . . . . . . . . . . . . . . . . . . . . . . . 35
8.6 Quick Start and Manual . . . . . . . . . . . . . . . . . . . . . . . . .36
8.7 Logs . . . . . . . . . . . . . . . . . . . . . . . . . . . . . . . . . . 36
9Audio Streams 37
9.1 Telos Session Control Protocol . . . . . . . . . . . . . . . . . . . . . . . 37
9.2 N/ACIP Session Initiation Protocol . . . . . . . . . . . . . . . . . . . . . 40
9.3 Real-time Transport Protocol . . . . . . . . . . . . . . . . . . . . . . . 41
10 Making Connections 43
10.1 Dialing Manually . . . . . . . . . . . . . . . . . . . . . . . . . . . . 43
10.2 Using the Phone Book. . . . . . . . . . . . . . . . . . . . . . . . . . 44
10.3 Call History . . . . . . . . . . . . . . . . . . . . . . . . . . . . . .46

| VIIVII | Table of Contents
11 Mobile Network Devices 47
11.1 WiFi/WLAN Networks . . . . . . . . . . . . . . . . . . . . . . . . . . 47
11.2 UMTS/EVDO Wireless Networks . . . . . . . . . . . . . . . . . . . . .47
12 Ancillary Data 49
12.1 GPIO . . . . . . . . . . . . . . . . . . . . . . . . . . . . . . . . .49
12.2 Serial Data. . . . . . . . . . . . . . . . . . . . . . . . . . . . . . . 54
Appendix A When an IT Department is not Available 55
IP Addresses, Subnet masks, and Gateways . . . . . . . . . . . . . . . . . .55
Discover the Local Network Settings. . . . . . . . . . . . . . . . . . . . . . 58
Find an Available IP Address without a DHCP Server . . . . . . . . . . . . . .60
Duplicate IP Addresses. . . . . . . . . . . . . . . . . . . . . . . . . . . . 61
Network Address Translation . . . . . . . . . . . . . . . . . . . . . . . . . 62
Appendix B Audio Coding Reference 65
History. . . . . . . . . . . . . . . . . . . . . . . . . . . . . . . . . . . 65
Basic Principles of Perceptual Coding . . . . . . . . . . . . . . . . . . . . . 66
MPEG . . . . . . . . . . . . . . . . . . . . . . . . . . . . . . . . . . .69
MPEG4 AAC (Advanced Audio Coding) . . . . . . . . . . . . . . . . . . . . . 69
AAC-LD (AAC Low Delay). . . . . . . . . . . . . . . . . . . . . . . . . . . 72
MPEG-4 High Eciency AAC (HE-AAC, previously known as“aacPlus™”). . . . . . 74
MPEG-4 Enhanced Low Delay AAC . . . . . . . . . . . . . . . . . . . . . .74
ISO/MPEG Layer 2 . . . . . . . . . . . . . . . . . . . . . . . . . . . . . . 74
G.722 . . . . . . . . . . . . . . . . . . . . . . . . . . . . . . . . . . .74
aptX and aptX Enhanced . . . . . . . . . . . . . . . . . . . . . . . . . . . 75
Z/IP ONE Audio Specications 77
Warranty and Application Cautions 79
Safety Notication 81

INTRODUCTION | 1
1 Introduction
Congratulations on your purchase of the Telos Z/IP ONE! This codec achieves a new level in IP Audio transmission
at a very attractive price. It is a one RU unit intended to be used with a microphone directly, or an external mixer for
remote broadcasts, or anywhere space is at a premium.
The Telos Z/IP ONE combines RTP/UDP streaming capabilities with MPEG coding to deliver broadcast-quality
audio over IP connections. Z/IP ONE employs sophisticated new technology to achieve superb audio quality over
IP networks such as the Internet and mobile IP services. The Z/IP ONE utilizes ACT™ - Agile Connection Technology
to continually adapt to network conditions, minimizing the effects of packet loss, varying bandwidth, and jitter
that can occur on these networks by means of sophisticated error detection and concealment, dynamic buffering,
and other techniques that work together to provide reliable IP audio connections.
The Z/IP ONE has an impressive list of features, including:
♦Analog line professional or microphone input levels
♦AES/EBU digital input and output
♦15 volt phantom power for direct use with condenser microphones
♦Transmission bit rates from 8kbps to 2304 kbps
♦User-friendly front panel interface with OLED screen
♦Real-time metering and connection status display screen
♦Context-sensitive on-screen help available at a touch of a button
♦EBU N/ACIP (Audio Contribution over IP) and SIP interoperability with other third party codecs
♦Backward compatible with the Telos Zephyr Xstream, as well as the original Zephyr/IP
♦Built-in web server for configuration and remote control
♦Wireless connection through Wi-Fi and 3G/4G/EVDO modems (Wi-Fi modem included)
♦Livewire™ audio-over-IP inputs and outputs
♦Separate LAN and WAN Ethernet ports simplify isolation of your LAN from the internet
♦The ability to register with a “directory server” (ZIP Server). This allows establishing a connection
even when located behind NATs and firewalls, without knowing the other party’s IP address
♦Router Mode allows the Z/IP ONE to be used as a gateway to access the Web


QUICK START GUIDE | 3
2 Quick Start Guide
This quick start will guide you through a basic, yet perfectly usable setup scenario of the Telos Z/IP ONE IP audio codec.
More sophisticated configurations are available, and are preferred or even necessary in some IP network situations.
2.1 Unpack and Identify
Your Z/IP ONE is shipped with a few accessories that we won’t use for this initial setup, but you may want to use
later. For now, we’ll want the Z/IP ONE itself, AC power cord, and a network cable – all included with the Z/IP ONE.
To test the Z/IP ONE, you’ll also need:
1. Headphones – or connect the Z/IP ONE’s audio output to an audio monitor.
2. Microphone or audio source (optional)
3. An Internet-connected Local Area Network with DHCP Server (You may set your Z/IP ONE’s network
configuration manually if you prefer)
The basic steps to follow are:
1. Attach AC power cable and power up
2. Follow the built-in Setup Wizard
3. Connect to the Internet
4. Make your first call

4| Section 2
2.2 The Z/IP ONE User Interface
The Z/IP ONE uses an OLED display for status, metering, and configuration. There are six menus available:
Turning the Z/IP ONE’s control knob will move the highlight between these options. The name shown in the middle
of this screen is the device’s identity on the ZIP Server, used for making calls without having to memorize IP addresses.
Z/IP ONEs with software earlier than v2.0.0r, such as the one shown above, had the version number printed on the
main screen instead. If your Z/IP ONE is not running at least v2.0.0r, please update your codec to the latest released
version of software. The latest version is always listed and available for download here:
http://www.telos-systems.com/codecs/zip-one/
If the front panel controls are not used for a short period of time, the display will revert back to a status screen
(by default, the last status screen viewed):
2.3 Setup Wizard
One option for initial setup of the Z/IP ONE is using the built-in Setup Wizard. The Setup Wizard will work in
most common IP networks, and requires little technical knowledge. Let’s walk through it:
From the Main menu, highlight and select Setup. From the Setup menu, highlight and select Setup Wizard.
Click to Continue. Select the WAN Ethernet connection.

QUICK START GUIDE | 5
Select the Analog XLR connectors for audio input. Answer “Yes” to allow control of your unit from either port.
Let’s answer “No” to the SIP server question. Keep this easy; answer “Yes” here.
Answer “Yes” here. We’ll use this port. Using the keypad, enter a name for this Z/IP ONE.
Then click to Apply settings and exit Click OK to complete the Setup Wizard.
Plug your Internet-connected network to the WAN port. Then, highlight and select Status.
The top Status screen should show WAN connected. Within a few seconds, the ZIP light should come on, too.
The ZIP indicator is your assurance that your Z/IP ONE is communicating with the Telos ZIP Server, and that
connections to other Z/IP ONEs and Zephyr/IPs are just two button presses away.
What if the ZIP indicator doesn’t light up? This condition is usually caused by a very restrictive network firewall,
a non-standard DNS configuration, or not having DHCP available to obtain an IP address automatically. Appendix
A offers information and suggestions about working through restrictive network firewalls and alternatively
configuring DNS.

6| Section 2
2.4 Make Your First IP-Codec Call
Now that the WAN and ZIP indicators are ON, you’re ready to make your first Z/IP ONE IP call. Press the AUTO
button - it’s in the upper right corner of the keypad area. This brings up the phone book – a quick-dial list of the
other Z/IP ONEs you’d like to connect with.
Your Z/IP ONE is factory programmed with two contacts - the Telos Line in Cleveland, Ohio, USA, and the Euro
Line in Freising, Germany. Highlight “Telos Line” and press the AUTO button again (or push the main control
knob) to establish a call. As the call progresses and connects, the screen changes automatically to the main Status
display.
The large Connect indicator should come ON quickly, followed a few seconds later by the RcvLock indicator. The
Rcv audio level meters will begin showing moving audio levels. In a few more seconds the Buffer and Quality gauges
in the lower third of the screen will show relative indications of receive buffer size at both ends and quality of the
connection, indicating dropped packets.
Plug your favorite headphones into the front panel headphone jack. Adjust the volume knob that’s next to the jack
for a comfortable level. You’ll hear whatever music our Support Engineers have selected. Don’t be alarmed when
the Z/IP ONE automatically disconnects from the Telos test line. It will time out and hang up after 10 minutes. This
is to allow others to test Z/IP ONE connections, too.

QUICK START GUIDE | 7
2.5 Congratulations!
You’ve configured your Z/IP ONE and made your first IP-codec call. There are dozens of configuration options
within the Z/IP ONE, allowing it to work ideally in different broadcast and remote-audio roles. Consult the
manual, our online video tutorials, or Telos Support to get the most out of your Z/IP ONEs.
Info for IT experts:
You may choose to congure either theWAN or LAN port for streaming connections. We recommend
using the WAN port, saving the LAN (also Livewire) port for Livewire AoIP network connections.
Z/IP ONE connection success is virtually guaranteed by assigning it an unused static IP address on
your network, assigning a xed“ZIP Server Listen Port” in the ZIP Server menu, and conguring a
port forward from the Internet side of your rewall/router to the static IP address of your Z/IP ONE,
using that same“Listen Port”number. We suggest you choose a listen port in the 20000-21000 range
to avoid port conicts. Left unassigned, as in this Quick Start, the Z/IP ONE negotiates a listening port
with the ZIP Server. The ZIP Server is always located at zip.telos-systems.com, which is the factory
default setting. Incoming calls to the Z/IP ONE will connect instantly if a xed listen port is chosen
and a port forward made. Otherwise, each inbound call negotiation will take ve to ten seconds.
Placing the Z/IP ONE on a DMZ or un-NATted Public IP address is not recommended. A good choice
for a manually-congured DNS address is 8.8.8.8.

8| Section 2
…Now what?
Most hardware codecs, such as the Telos Z/IP ONE, Telos ProSTREAM, and Telos iPort, offer a choice of audio
coding algorithms. With unhelpful names like “G.722”, “AAC-LD”, and “Layer 2”, how does one choose the best
coding algorithm for a given connection or use? A full discussion of audio coding is in Appendix B, Audio Coding
Reference, but the following tables summarize their features at a glance.
Codec Features
CODEC Mono / Stereo Lower Bit
Rates Lower Delay Remote
Broadcasts
STL &
Infrastructure
Error
Concealment
Highly
Compatible
AAC-ELD M/S ü ü ü ü
AAC-HE M/S ü ü ü
AAC-LD M/S ü ü ü
AAC M/S ü ü
Layer 2 M/S ü ü
G.722 M ü ü ü ü
G.711 M ü ü ü
aptX®
Enhanced M/S ü ü
PCM Linear M/S ü ü ü

QUICK START GUIDE | 9
Codec Characteristics
CODEC Bit Rates Audio Expectations Typical Use
AAC-ELD 48 – 64
kbps
Excellent quality for low bi-
trates, full audio range, mono
or stereo, low delay. Error
concealment.
Live broadcasts of voice or music. Can use for
music if necessary. Quick interaction with studio
hosts and callers.
AAC-HE 16 – 96
kbps
Excellent quality for low
bitrates for voice and music.
Full audio range. Relatively
high delay. Error conceal-
ment.
Music at lower bitrates. Best for one-way broad-
casts where tight interaction with studio hosts
or callers is not critical. Works at very low bitrates
with some compromise in quality.
AAC-LD 112 – 320
kbps
Excellent, full-range audio
quality for medium bitrates.
Low delay. Error conceal-
ment.
Music or voice at medium bitrates. When medi-
um bandwidth is available and interaction with
studio hosts or callers is needed, this is a great
choice.
AAC 80 – 320
kbps
Excellent, full-range audio
quality for medium bitrates.
Slightly higher delay. Error
concealment.
Music at medium bitrates. For the medium range
of bitrates, this is the best codec to choose when
a little delay is okay. Quality is fully “awesome,”
especially at 256 kbps and higher.
Layer 2 112 – 384
kbps
Excellent quality at medi-
um-high bitrates. Very com-
patible with other brands of
equipment.
Music or voice at medium bitrates to other
brands of codecs. Layer 2 is a great choice, espe-
cially for compatibility across dierent brands of
codecs.
G.722 64 kbps Good voice quality (7 kHz)
when low delay and compat-
ibility is needed. Also called
“HD Voice”
Voice at low bitrate to other brands of codecs.
Not “high quality,”but much better than a stan-
dard telephone call. It’s the most compatible low
bitrate codec with any other brand.
G.711 56 – 64
kbps
Low quality, low delay mono
voice. Only 3.3 kHz audio
This is a“phone call.” Often used for compati-
bility for SIP (VoIP) calls to or from regular tele-
phones.
aptX®
Enhanced
384 – 576
kbps
Excellent quality, full audio
bandwidth, low delay. Op-
tional on some codecs.
aptX® Enhanced is primarily used in professional
broadcast applications where low delay is desired
and cascading coding algorithms may be en-
countered.
PCM
Linear
1536 –
2304 kbps
Perfect quality, full band-
width, low delay. No error
concealment.
Perfect audio for perfect connections. If you’ve
got the bandwidth and a perfect IP path (low
jitter and no packet loss), this is the perfect “algo-
rithm.” Bit rate is not variable, but is xed for given
mono/stereo and bit depth parameters.


INSTALLATION | 11
3 Installation
3.1 Rack Mounting the Studio Unit
The Z/IP ONE mounts in a 1RU space in a standard 19” rack. The Z/IP ONE does not have an internal fan, and does
not have any special requirements for space above and below the unit. As long as you keep the stirred air in the rack
between 0 and 40 Celsius (32 to 104 degrees Fahrenheit) with a relative humidity of 0 to 98% (non-condensing),
the unit will operate as described.
3.2 Power
Install the power cord included with the Z/IP ONE in the marked AC power connector located in the rear of the
unit. The internal universal switching supply will accept 100-240 VAC (50-60 Hz) input. You should see the blue
front panel LED flash to indicate the unit is booting. Subsequently, the main menu will appear. This process can
take about 90 seconds.
3.3 Balanced Analog Inputs
Input Audio XLR Pinout
PIN DESCRIPTION
1 Ground
2 Signal + Input
3 Signal - Input
Install the left and right analog audio cables in the female XLR connectors marked “CH 1 In” and “CH 2 In” on the
rear panel. The analog audio section accepts audio input with a peak level of +22dBu. In the Audio I/O -> Input
mode Left or Right menu option, each audio input can be configured for the following settings:
♦Line (+4 dBu nominal)
♦Microphone
♦Mic + Phantom Power
Mic Gain Trim
There is a microphone gain trim adjustment option in the Setup->Audio I/O menu for each input, which can be
used to add additional gain when that input is set to microphone level. This setting is ignored when an input is set
to line level. Gain should be adjusted so that the microphone reaches your desired level on peaks.

12 | Section 3
3.4 Balanced Analog Outputs
Output Audio XLR Pinout
PIN DESCRIPTION
1 Ground
2 Signal + Output
3 Signal - Output
The audio outputs are balanced to +4 dBu, with 18 dB of headroom (i.e., inputs clip at +22 dBu).
3.5 AES/EBU Input
Input Audio XLR Pinout
PIN DESCRIPTION
1 Ground
2 Signal + Input
3 Signal - Input
3.6 AES/EBU Output
Output Audio XLR Pinout
PIN DESCRIPTION
1 Ground
2 Signal + Output
3 Signal - Output
3.7 Network Interfaces
The Z/IP ONE is designed to work on managed private networks or the public Internet. For reliable operation
when connected to the public network, the Z/IP ONE must be placed behind a firewall. These are commonly
included in network address translating routers, commonly called either “NAT routers” or simply “routers.”
The Z/IP ONE conjunction with the ZIP server on the public Internet, has technology for automatically creating
connections without requiring port forwarding on most styles of NAT routers. For more information on these
topics, see Chapter 9, Audio Streams and Appendix A, When an IT Department is not Available.
The network interfaces are Ethernet, twisted pair, 100BaseT connectors. Use a CAT5e or CAT6 network cable. The
standard pin-out for an RJ45 style 8-Pin/8-Position miniature modular jack when used for 10/100BaseT Ethernet is:
PIN FUNCTION
1 Transmit +
2 Transmit -
3 Receive +
4 Unused
5 Unused
6 Receive -
7 Unused
8 Unused

INSTALLATION | 13
3.8 USB Ports
Attach any of the supported USB devices to these ports. Use of an unapproved device may cause unpredictable and
unacceptable results. Therefore, we recommend against such experimentation. The pin-out of the standard USB
connector used in the Z/IP ONE is:
PIN FUNCTION
1+5Volts
2 Data –
3 Data +
4 Ground
3.9 Parallel Control
The DB25 connector on the back panel provides contact closures (close-to-ground) inputs and outputs. There
are 8 open-collector outputs, and 8 open-collector inputs, each configurable from the Settings menu on the user
interface. The DB 25 connector is pinned out as follows:
PIN FUNCTION
1 +5 Volts DC 400 mA max
2 Output 0
3 Output 1
4 Output 2
5 Output 3
6 Output 4
7 Output 5
8 Output 6
9 Output 7
10 No Connection
11 No Connection
12 No Connection
13 No Connection
14 Input 0
15 Input 1
16 Input 2
17 Input 3
18 Input 4
19 Input 5
20 Input 6
21 Input 7
22 Not Connected
23 Not Connected
24 Not Connected
25 Ground
See Chapter 12 for more detailed information on
the contact closure operations.
Other manuals for Z/IP ONE
2
Table of contents
Other Telos Recording Equipment manuals
Popular Recording Equipment manuals by other brands
Patton electronics
Patton electronics NetLink 2701/I user manual
Cochlear
Cochlear Baha 5 SuperPower user manual
DB Drive
DB Drive EUPHORIA EDSP4-31BT user manual
American Time
American Time Wired Tone Generator Installation and operation manual

PRESONUS
PRESONUS AudioBox 22VSL owner's manual
Roland
Roland CD-2e Guide book
