TELUS Actiontec Series User manual

Business
Wireless Internet
quick install guide
Read me first
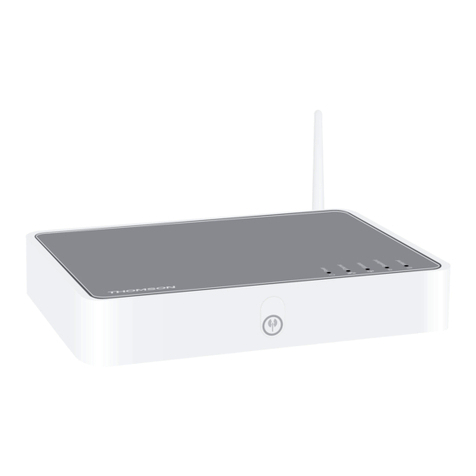
Actiontec Wireless Gateway
Wi-Fi and
email set-up
instructions
included

2
Welcome
Thank you for choosing TELUS. This guide will help you set-up your
wireless gateway and quickly connect to the Internet.
For more information, please visit telus.com/business
For tech support call 310-3100 and choose the repair option to reach
a live agent.
Table of contents
Wireless gateway set-up ................................................................... 3
Wireless (Wi-Fi) set-up ...................................................................... 7
Troubleshooting................................................................................ 9
Frequently asked questions............................................................. 12
Notes............................................................................................. 14
What’s in the box
nQuick install guide
nWireless gateway
nPower adaptor
nTelephone jack splitter
nEthernet cable
nTelephone cable
nMicrofilters
TELUS Internet account information
Record your personal account information in the space provided below and
save this pamphlet for quick future reference. This information is required for
setting up your Internet service or if you need to call for technical support or
general inquiries.
Service telephone number:
Username:
User password:
Network key:
Network name:
Default gateway:
If you have forgotten or misplaced any of the above information,
please call 310-3100 to reach a live agent.
Thank you for choosing TELUS.
1
What you need
nComputer:
Windows PC (XP or newer) or
Mac (OS X 10.x or higher)
nWeb browser:
Internet Explorer, Chrome,
Firefox, Safari

34
Wireless gateway set-up
Step 1
If you have a designated ADSL jack/potsplitter reserved
specifically for internet service, plug the telephone cable
directly into the ADSL jack and proceed to Step 4. If not,
please proceed to Step 2.
additional
telephone
Step 3
Connect the remaining microfilters to all other telephone jacks in your office that
are connected to the same phone line for a telephone, fax machine or any other
equipment. Microfilters eliminate interference during telephone calls.
Step 4
Plug the other end of the telephone cable into the grey phone port at the back
of the wireless gateway.
Important: Do not connect a microfilter between the wireless gateway and
telephone jack. This will block the ADSL signal.
microfilter
telephone
jack splitter
telephone jack
Option 2
If you do not want to connect another telephony device into this telephone jack,
plug the telephone cable directly into the jack.
Step 2
Locate the telephone jack closest to your computer.
Option 1
If the jack will be used for a telephone or other device such as a fax or
answering machine as well, insert a microfilter into one of two ports of the
telephone jack splitter and connect your telephone to that microfilter.
Microfilters eliminate interference during telephone calls.
ADSL
Voice
telephone cable
grey phone port on wireless gateway
wireless
gateway
4321
telephone cable
grey phone port on wireless gateway
wireless
gateway
4321
4321
wireless
gateway
power adaptor
Step 5
Connect the power adaptor to the wireless gateway and plug it into the closest
power outlet.

56
4321
Ethernet cable
Desktop or Laptop
Ethernet/LAN port
wireless
gateway
Ethernet/LAN
port
PC Ethernet /
LAN port symbol
MAC Ethernet /
LAN port symbol
<•••>
Step 7
Wait for 4 green lights (Power, DSL,
Internet and LAN Ethernet) to appear
on your wireless gateway. This may
take a few minutes.
Important: If the four lights do not
turn green please refer to the
troubleshooting section of this
guide on page 9.
1
2
3
4
Power
(solid green)
LAN Ethernet
(solid green
or flashing)
DSL
(solid green)
Internet
(solid green
or flashing)
Step 6
Plug one end of the Ethernet cable into the LAN port on your desktop or laptop
computer. Plug the other end of the Ethernet cable into one of the 4 LAN ports
on the back of the wireless gateway.
Important: Your laptop or desktop computer must be wired to the wireless
gateway to complete the first time set-up of your TELUS Internet service.
Step 8
As a new TELUS customer, you must now accept the TELUS Internet Solutions
Service Agreement (TISSA) in order to use your service. As you open a Web
Browser, you should be automatically re-directed to the TELUS device and IP
registration page.
Important: If you are not automatically re-directed, please enter this address
into your web browser’s address line: telus.com/registerdevice and hit enter.
Step 9
Enter your username and password and click LOG IN. This information should
have been given to you when you signed up for your TELUS Internet Service.
Important: If you do not know your username or password, please contact
TELUS Customer Service at 310-3100.
Congratulations, you have completed your TELUS Business Internet Set-up.
To connect additional devices to the Internet,review Step 6 for wired devices
or go to page 7for steps on how to access your Wi-Fi network.
Step 10
Take a moment to read through the TELUS Internet Solutions Service Agreement
(TISSA) and click on ACCEPT once you are done.

78
Wireless (Wi-Fi)set-up
Follow these simple steps to set-up a wireless (Wi-Fi) connection to your
wireless gateway.
Your pre-configured Network Name and Network Key can be found on the
bottom of your wireless gateway.
Step 1
Ensure your Wi-Fi is enabled on your computer or device. If you are
having trouble enabling Wi-Fi, please refer to your device’s user guide.
Step 2
Launch the Wi-Fi icon on your device and select Available Networks or
Scan for Networks Available to display all available networks within your range.
Location of the Network
Name and Network Key
Your Wi-Fi icon may look like one of the following:
Step 3
Select your Network Name from the list and enter your Network Key
(found on the bottom of your wireless gateway). Press Ok or Connect to
complete the set-up.
Congratulations, you have completed the wireless set-up and should now be
connected to your Wi-Fi network.
To learn how to connect a mobile device such as a tablet or smartphone to your
wireless gateway, check out our Internet tutorial videos at telus.com/welcome
Mac
Windows

910
Troubleshooting
Power light
is not green
Check your power adaptor to ensure it is
connected to a live outlet – check that the
outlet works or try a different power outlet for
the wireless gateway
ISSUE POSSIBLE RESOLUTION
Power light
flashing red
Your wireless gateway is receiving an update.
While the red light is flashing, do not unplug the
wireless gateway. This activity will complete in
approximately 10 minutes
DSL light
is not green
nEnsure your Internet service activation date
has passed (you have reached the end of
the business day)
nVerify the telephone cable is properly
connected to the wireless gateway
(grey phone port) and the telephone jack
nEnsure that you do not have a microfilter
connected to the telephone cable that
connects your wireless gateway to the
telephone jack
nTest the telephone line is active by plugging
in a phone and listening for a dial tone
nIf these steps did not solve the issue,
unplug the power adaptor from the
wireless gateway for 30 seconds then
plug it back in
ISSUE POSSIBLE RESOLUTION
LAN Ethernet light
is not green
nUnplug the power adaptor and wait for
30 seconds before reconnecting. This will
reboot your wireless gateway
nA blinking or solid Internet green light means
the Internet is working
Internet light
is not green
nVerify that the Ethernet cable is properly
connected from the Ethernet/LAN port on
your wireless gateway to the Ethernet/LAN
port on your computer
nWithin the Internet network settings on
your computer, ensure that the Ethernet
connection is set to enable. For instructions
on how to do this, refer to the instruction
manual for your computer’s operating system
DSL light
is not green
(continued)
nEnsure that all other equipment (fax, phone,
etc.) sharing the same phone line has a
microfilter connected

11 12
ISSUE POSSIBLE RESOLUTION
Wireless does not
work
You may need to confirm your network settings
by following these simple instructions:
nClick the Apple menu
nChoose System Preferences
nClick the Network icon
nFrom the show dropdown menu, select
Built-in-Ethernet
nChoose the TCP/IP tab
nSet the configure menu to Using DHCP
nLeave the remaining fields blank
nClick Apply now and close window
Frequently asked questions
I received a new wireless gateway. What do I do next?
nUnplug your old modem or wireless gateway and follow the set-up instructions
beginning on page 3
nYour wireless settings have changed, refer to Wireless (Wi-Fi) set-up on
page 7 for steps on connecting to your wireless network
How do I connect additional computers to my network?
nConnect an additional computer to your wireless gateway with an Ethernet
cable to one of the free LAN ports on the back of the wireless gateway
nIf you would like to watch a set-up video on these instructions, check out our
Internet tutorial vidoes at telus.com/welcome
nLaunch the Internet browser on your additional computer
Enter internet.telus.com/setup
nFollow the screens to complete the set-up process
How do I connect another computer wirelessly to my wireless
gateway?
nRefer to Wireless (Wi-Fi) set-up on page 7 for the steps on
connecting to your wireless network
nIf you would like to watch a set-up video on these instructions, check out our
Internet tutorial vidoes at telus.com/welcome
How do I connect my tablet or smartphone to my wireless
network?
nFollow the steps found at telus.com/welcome
Internet connection
issues – Mac user
nReboot your wireless gateway
nRefer to the Wireless (Wi-Fi) set-up steps
found on page 7 to connect to your wireless
gateway
nConfirm that the Wireless light is solid or
blinking green. If not, plug your computer
into the wireless gateway using an Ethernet
cable. Visit telus.com/welcome to find
instructions on setting up your wireless

13
How do I get additional microfilters?
nCall 310-3100
Where do I go for further help with the Internet, email or security?
nLaunch your web browser and go to telus.com/welcome for all your
TELUS Internet needs
14
Notes

© 2012 TELUS. 09/12
the future is friendly®
Table of contents
