Tenada TED8620B User manual


1.Brief Introduction of TED8620B ADSL Modem
1.1 Product Features
Welcome to use Tenda ADSL Modem TED8620B
1.1.1 Features
Pure bridge mode,support 64 groups of VPI/VCI setting
Max Downstream/Upstream: 8Mbps/1Mbps
Max Transmission Distance: 5.4 Kms
Excellent and Friendly User Configuration Interface, compliant with the currently popular
Server/Browser mode
1.1.1 Protocol
Support Full-Wire ADSL standard
ANSI T1. 413 Issue 2
ITU-T G. 992. 1 (G. dmt)
ITU-T G. 992. 2 (G. Lite)
Multi-Mode
1.1.2 Data Packing
Support RFC 1483 Bridge
1.2 Unpacking
Please unpack and you would find the following items inside:
One unit of TED8620B ADSL Modem
One English User’s Manual
One ADSL Splitter
One RJ45 Cable
2 RJ11 Cable
One piece of product warranty card
If you found any of the above items missing, please contact your local distributor or
contact us with the warranty card.
1.3 Physical Environment Required
In order to reach maximum performance, we recommend using the following computer
configuration:
Pentium 233MHz of above
64MB Memory of above
10M Base T Ethernet NIC or above
WIN9X WIN2000 WINXP WINME WINNT
1.4 Introduction of External Components
1.4.1 LED Indicators
Figure 1.1 TED8620B Front Panel
There are 5 LED indicators on front panel of TED8620R, you can know the working status
of the modem through the LED, they indicate as follows:

LED Color Status Indication
Green On Power OnPower Off Power Off
LAN_LINK Green On Connectivity between
computer or NIC with
TED8620B is set up.
Off Connectivity between
computer or NIC with
TED8620B is not set up.
LAN_ACT Green Blinking Transmission of data is
being process between
computer or NIC with
TED8620B
ADSL_LINK On A valid ADSL connection
Blinking An invalid ADSL connectionGreen
Fast Blinking Handshaking
ADSL_ACT Green Blinking TED8620B is sending or
receiving data
1.4.2 Interface
Figure 1.2 TED8620B Rear Panel
Introduction of the panel is as follows: (from left to right)
Power: AC 9V,1A
RESET: There is a small round hole here, if you want to input default setting, please use
small stick to press this hole for 3 times continuously, after this, all the indicators will be on
then off, and the system will reset and go back default factory setting. (Note: Unless you
want to clear the current information, otherwise please don’t press this button.)
LAN: RJ-45 Interface, use the cable to connect to the NIC of the user’s computer
LINE: Interface for ADSL telephone line
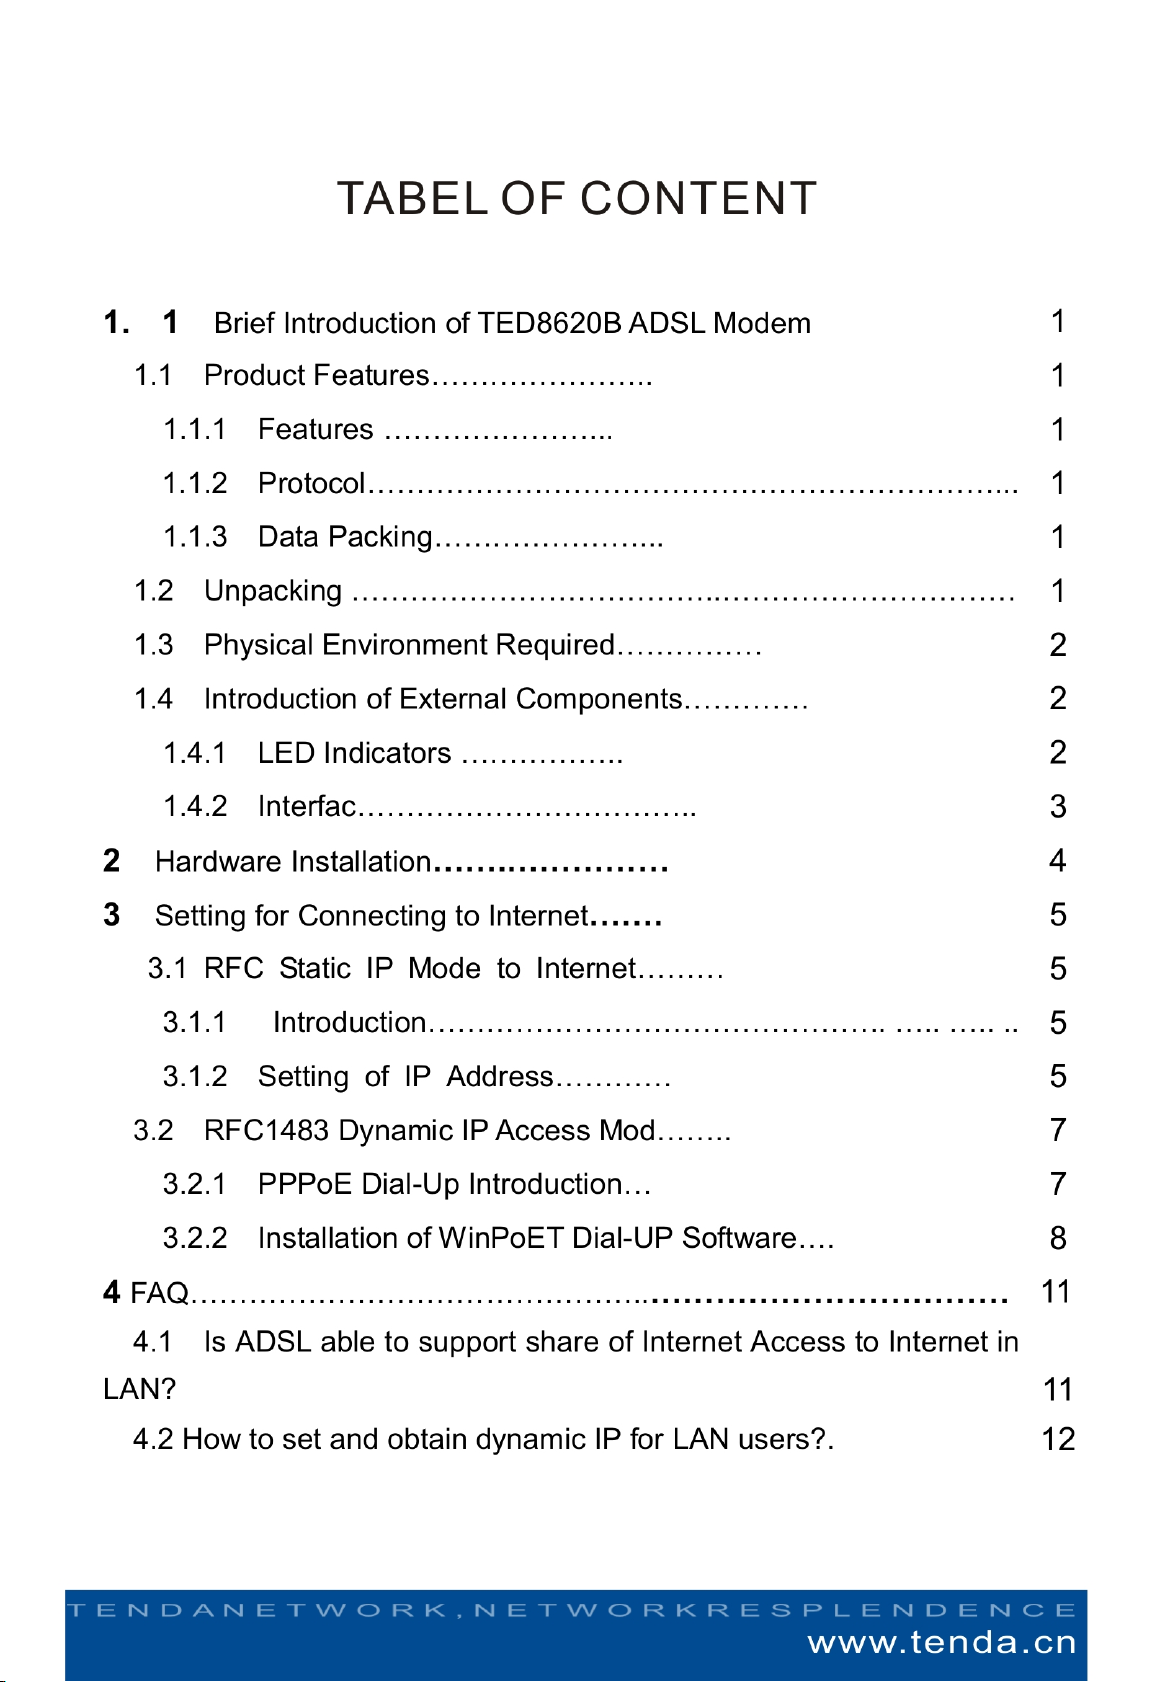
2. Hardware Installation
Basic steps of hardware installation are as follows:
1. Connect the power adapter correctly to power interface of TED8620B
2. Use RJ45 cable to connect the LAN Interface of TED8620R and the NIC interface of
the computer
3. Connect the ADSL telephone line with the LINE interface of TED8620R
If you are using splitter, please connect the ADSL telephone line to the LINE interface of
the splitter, connect the telephone to the PHONE interface of the splitter, and connect the
LINE interface of TED8620B together with the MODEM interface of the splitter.
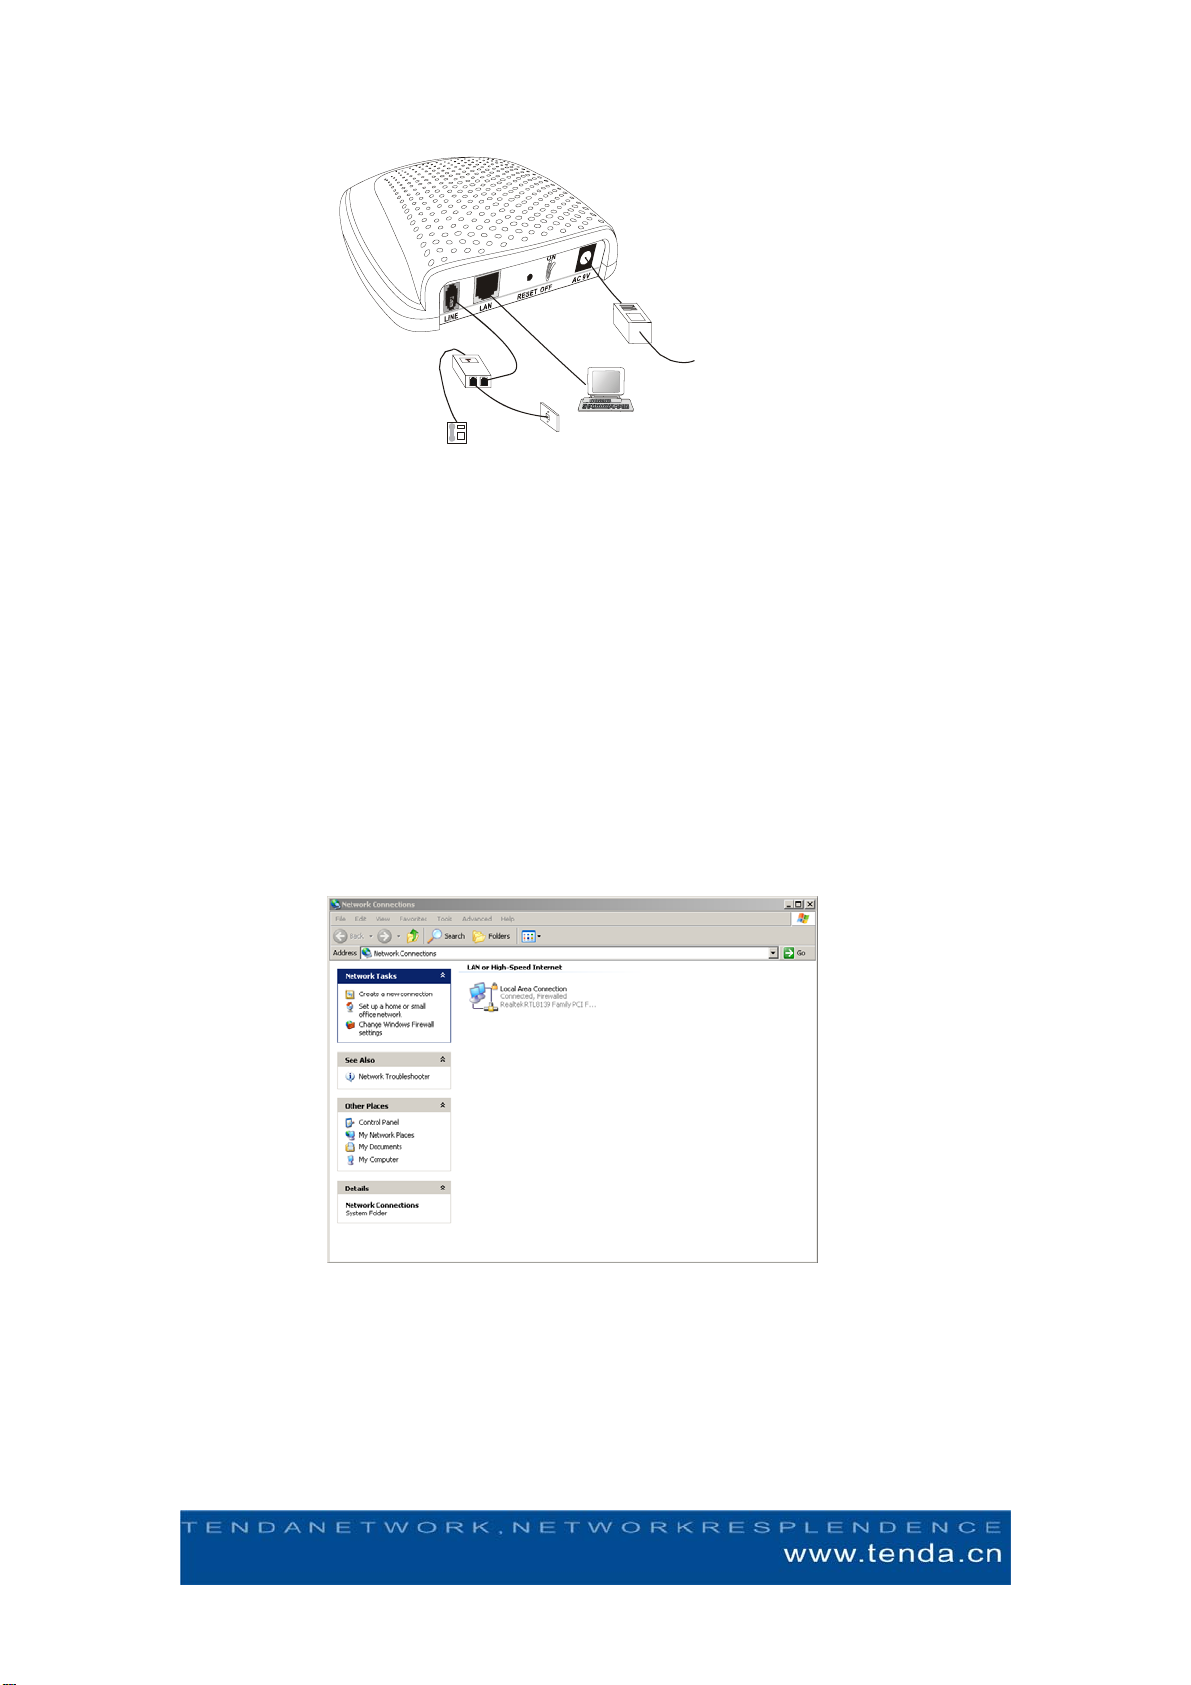
Figure 1.3 Installation of TED8620B
3. Setting for Connecting to Internet
3.1 RFC Static IP Mode to Internet
3.1.1 Introduction
This mode is for using fixed IP mode to connect to Internet through ADSL, you can set the
IP address of your NIC according to the information provided by your ISP or broadband
access services provider. And then you can use the dial-up software (PPPoE dial-up
software) to connect to the Internet.
3.1.2 Setting of IPAddress (Take example under Windows XP)
First we can see there is one icon called “My Network Place” on the desktop screen, we
can move our mouse to it and then click the right key and then choose “Properties”, and
we can open the window of “Network Connections”, as follows:
3.13In this window we can see the icon of LAN (If you have more than one NIC, then it
may be LANX, X is related to the number of NIC that you have). We can move our
mouse to LAN and click the right key and choose “Properties”, then we can open the
window of LAN properties, as the figure below:
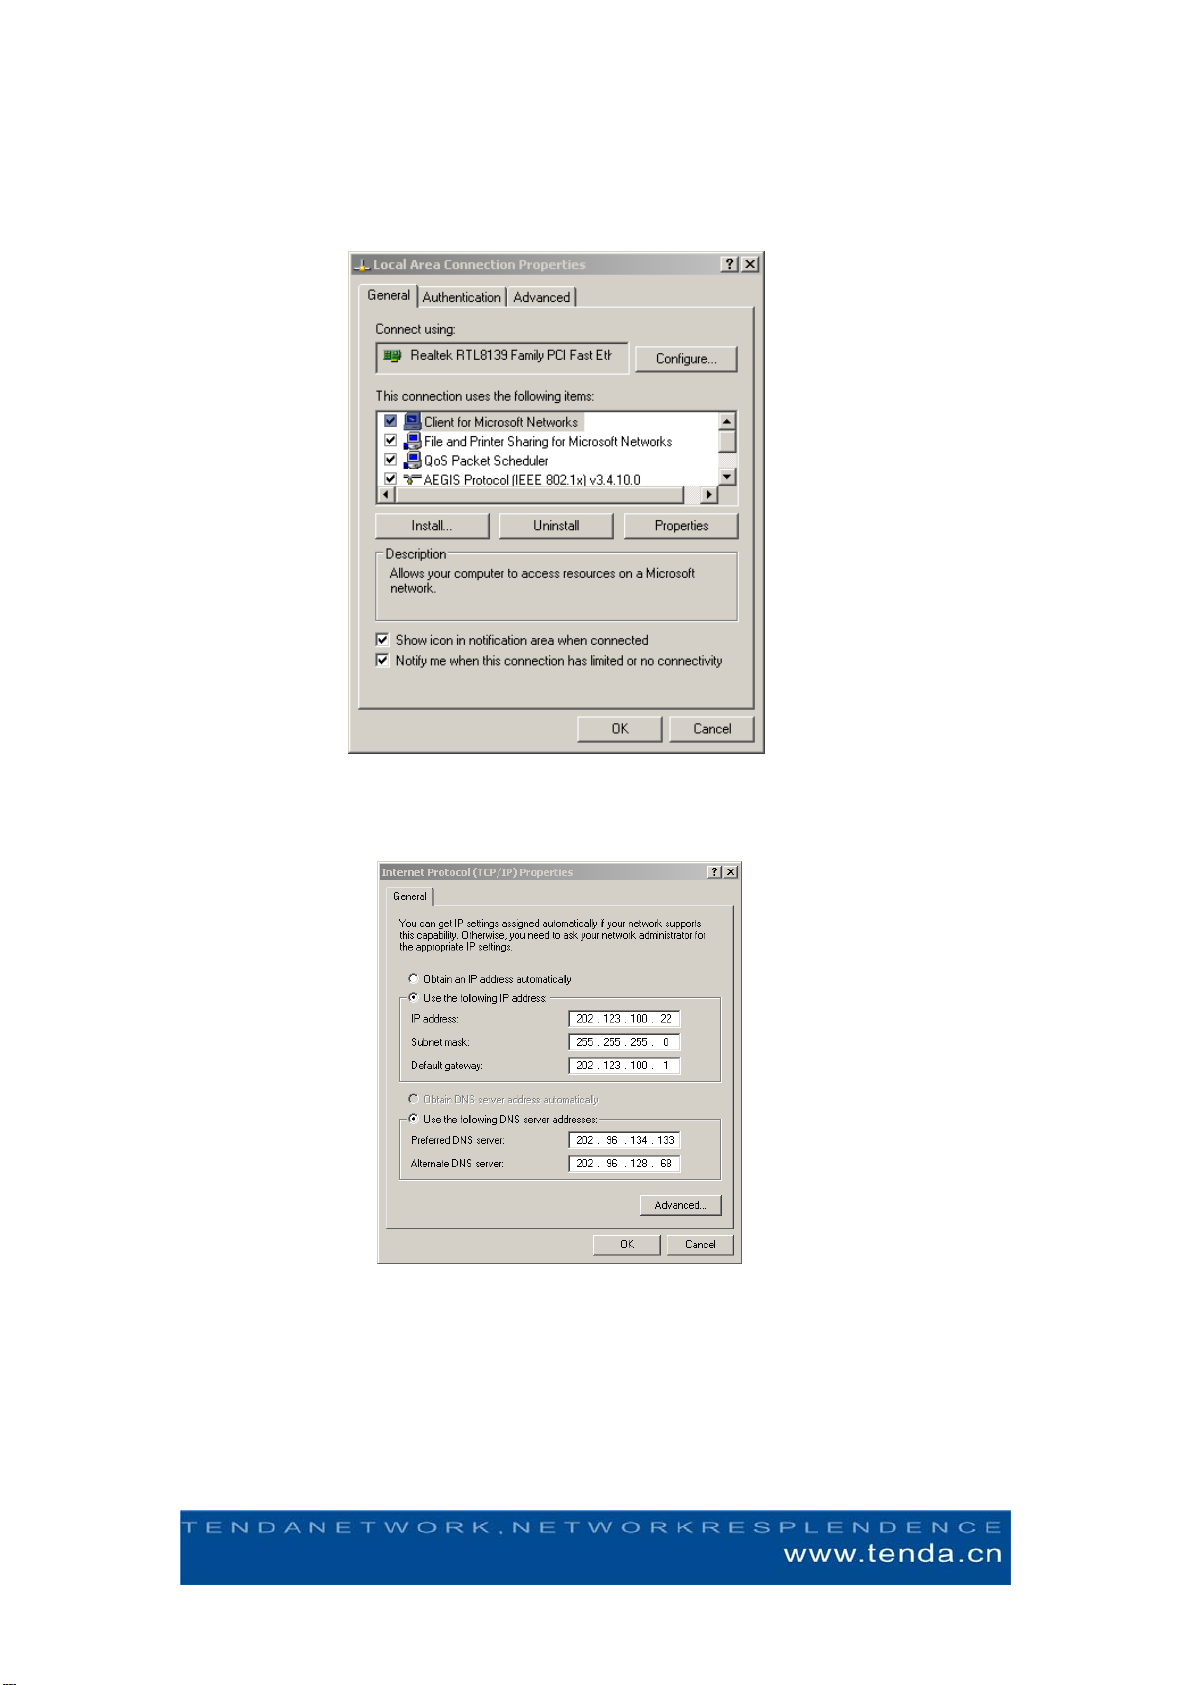
3.14Then we should choose the Internet Protocol (TCP/IP) and click “Properties”, as the
figure below:
3.15 If the information offered by the ISP is as follows, configuration is as the figure above:
IP Address: 202.123.100.22
Subnet Mask: 255.255.255.0
Gateway: 202.123.100.1
Preferred DNS Server: 202.96.134.133
Alternate DNS Server: 202.96.128.68
3.2 RFC1483 Dynamic IPAccess Mode
3.2.1 PPPoE Dial-Up Introduction
This mode is suitable of most users, that is to say, in the normal ADSL access, you don’t
need any other configuration, you just need to install a PPPoE dial-up software and then
you can connect to the Internet.
PPPoE dial-up mode is based on RFC1483 Bridge, because this equipment is integrated
with more than one VPI/VCI rules, we can dial up directly. In the following, we take
WinPoET for example.
3.2.2 Installation of WinPoET Dial-UP Software
Installation of WinPoET dial-up software is easy and convenient, it can support many
different kinds of operation system. Before installation, you just need to obtain the
WinPoET dial-up software through your ISP or download it from Internet.
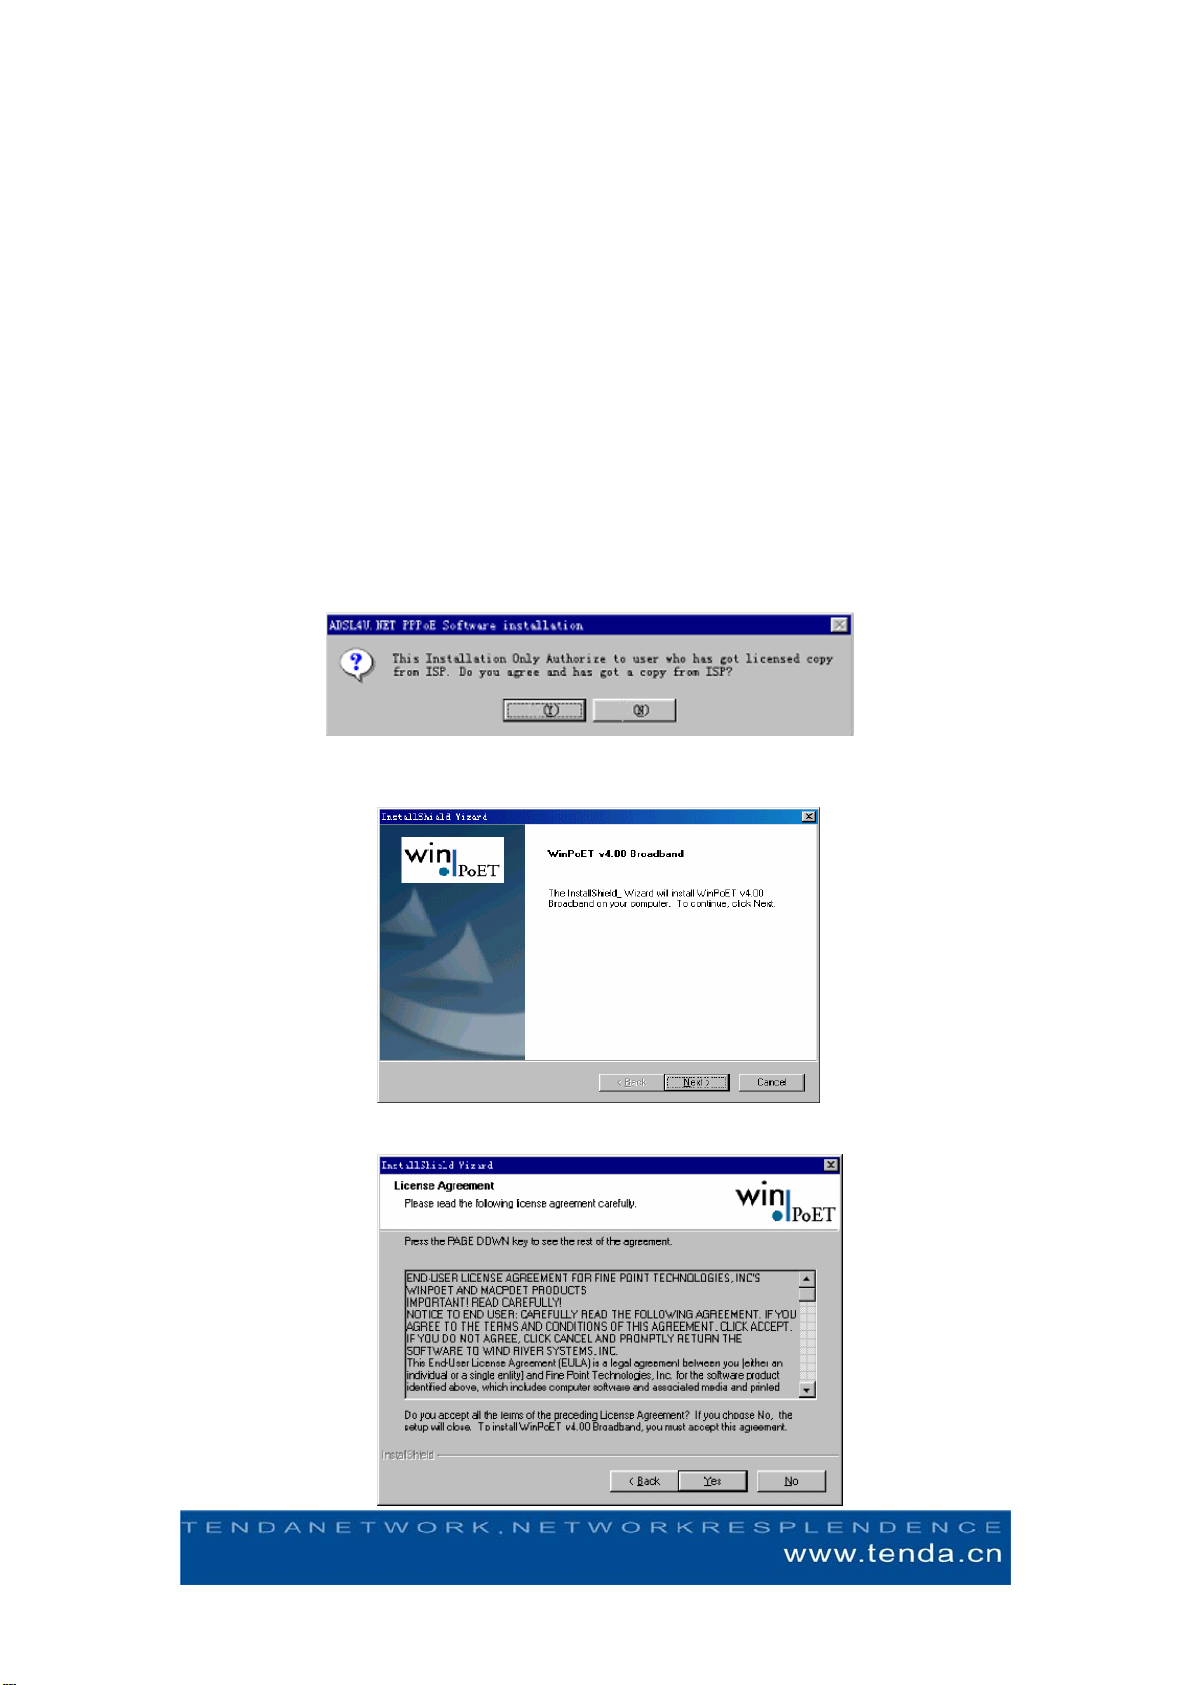
After obtaining the installation software of WinPoET v4.00, which is WINPOET4.EXE,
please double click it to launch, the following interface will appear in the screen, please
press button “Y” to continue installation.
Please press the button “Next” to continue when the following window appears.
Please press “Next” again when the following window appears.

Please press “Next” again when the following window appears.
Please select Destination Location and press “Next”
After installation we can launch the dial-up software WinPoET, as the figure below:

Please input the correct user’s name and password in the log in window of this software,
and press “Connect” and then you will be able to dial up. After identification of user’s
name and password, you will be able to connect to the Internet.
Note: Please consult your ADSL service provider for the Internet information before
installing this ADSL modem.
VPI (Virtual Path Identifier)
VCI (Virtual Channel Identifier)
Packing format, Modulate mode, Protocol mode
This TED8620B ADSL modem is integrated with 31 groups of VPI/VC parameters, as
follows:
8/81 0/100 8/88 8/34 0/101 0/36 0/34 0/102 8/38 0/127 0/104 1/100 0/40 1/40
0/39 8/40 8/37 0/103 0/105 0/200 0/37 130/32 8/33 0/33 8/36 1/32 1/33
8/35 0/35 8/32 0/32
4. FAQ
4.1 Is ADSL able to support share of Internet Access to Internet in LAN?
Answer: Yes. And there are three methods to do this.
a. Choose the Internet share software which support ADSL, and please also pay attention
to the sequence of installing the software. You should first install the PPPoE software and
then the Internet share software like Sygate. The integrated ICS share of of Windows
2000 and Windows 98 second version both support ADSL. Or you can set the host which
is directly connect to ADSL as Proxy Server., and then the clients in LAN will have access
to the external sources through this Proxy Server. Advantage of this is that you just need
to apply for one ADSL account or require only one IP address. Client in LAN can use the
reserved IPAddress.
b. Use the method of special line. Apply IP addresses for all computers in the LAN.
Advantages of this is that you don’t need to configure an extra Proxy Gateway,
disadvantages is that due to the current technical shortage, the ISP can offer limited IP
address to LAN.
c. Connect a Router behind the ADSL modem, apply a series of IP addresses for
computers in LAN from the ISP. When these IP addresses are routed by the ISP, the
computer will be able to connect to the Internet. Advantages of this method is that the
number of computer is not limited ,but you need to equipt an extra computer.
4.2 How to set and obtain dynamic IP for LAN users?
Answer: Take Win 98 for example: Open the ”Change a setting”, find Network, double
click and open Network Properties, select TCP/IP protocol, open Properties of TCP/IP
protocol, select the IP address obtainment mode as “Automatic Obtainment of IP address”,
press enter, and then reset the computer. Then it will be ok.


