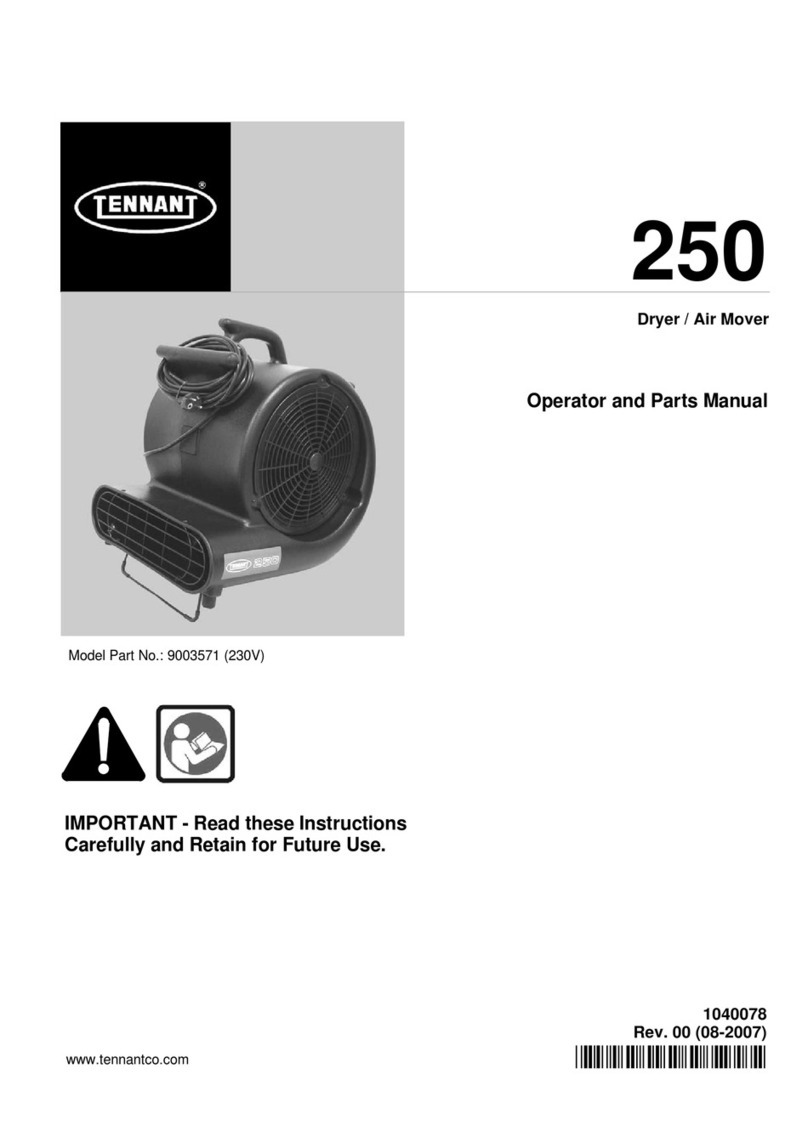
Tennant Floor/Carpet Dryer User manual

COPYRIGHT TENNANT COMPANY 1999 2
TABLE OF CONTENTS
SAFETY INFORMATION....................................... 2
DRYER FEATURES.............................................. 3
PRINCIPLES OF DRYING..................................... 3
Airflow Circulation........................................... 3
Humidity Control............................................. 3
DRYING PROCEDURES....................................... 4
Subsurface Carpet Drying............................... 4
Surface Drying................................................ 4
Stapling Down................................................ 4
Adjusting Airflow............................................. 4
Gluedown Carpets.......................................... 4
Loose Lay Rugs.............................................. 4
Application of Deodorants............................... 5
COOLING & VENTILATION................................... 5
ELECTRICAL CONNECTIONS.............................. 5
MAINTENANCE..................................................... 5
RECOMMENDED STOCK ITEMS ......................... 5
SPECIFICATIONS................................................. 6
PARTS LIST.......................................................... 8
TROUBLESHOOTING........................................... 8
Congratulations on your purchase of this Dryer. It is
our goal to offer you the best high performance airmover
available. Your Dryer is durable, simple to operate and can
provide years of trouble free service when you follow the
recommendations listed in this manual.
We strongly advise that you read this manual before unit
operation. Please pay particular attention to the safety in-
formation. We invite your written comments and sugges-
tions for improvements. If you do not understand some-
thing in this manual or if you have a question about your
Dryer , call our Customer Service Department at 1-800-
522-7839.
SAFETY INFORMATION
SAVE THESE WARNINGS
The manufacturer is concerned about the safety of every-
one who uses or comes in contact with the Dryer. The
Dryer is designed to be operated in compliance with the
safety warnings and instructions provided in this manual.
Like other electrical devices, Dryers can become danger-
ous if abused, damaged or misused. Failure to observe the
following warnings can result in injury to persons, fire
damage, or damage to the Dryer. To reduce the risk of
electrical shock, fire, or personal injury, read and follow
each of the warnings below before using Dryers.
Keep Dryers Grounded: Always operate Dryers with
the three pronged grounding plug and a grounded electrical
outlet. Never remove the three pronged plug, use an un-
grounded extension cord or an ungrounded adapter. The
grounding prong on the Dryer’s plug is an essential safety
feature that helps reduce the risk of shock or fire in the
event of an electrical hazard.
DANGER
Removal or alteration of the grounding plug, or use of an
adapter that defeats the Dryer’s electrical grounding, can
create risk of serious personal injury or fire in the event of
damage to or malfunction of this product. Do not use Dry-
ers for any reason if they cannot be properly grounded. If
you are unsure whether a receptacle is grounded, test the
outlet with a receptacle tester or consult an electrician.
Extension Cords: Extension cords must be grounded
and be able to deliver the appropriate voltage to the Dryer.
For use with the Dryer, an extension cord up to 25 feet in
length must have 14 AWG wire; a cord up to 50 feet in
length must have 12 AWG wire.
CAUTION
Never operate Dryers in pooled or standing water, as this
may create a risk of serious injury from electrical shock.
Protect the Power Cord From Damage: Never oper-
ate Dryers with cut, nicked, abraded, frayed or otherwise
damaged power cords or extension cords as this may lead
to electrical or fire hazards. Never unplug the Dryer by
pulling the cord. Grasp the plug firmly and pull straight
out. Take precautions not to use the cord in a way where
damage may occur. Keep cords away from heated sur-
faces. Inspect cords before each use and replace cords that
show signs of damage.
Storage: Store Dryers in a clean dry environment. Do not
store Dryers outdoors.
Keep Motor Dry: Never allow water inside the Dryer’s
motor. If the motor becomes wet for any reason, thor-
oughly dry it before use.
Keep Children Away: Do not allow children to play
with or around the Dryer. Be sure the Dryer is inaccessible
to children when unattended. Children can hurt themselves
by playing with or around Dryers. Secure all areas in
which Dryers are left unattended while running.
Handle With Care: Do not drop or throw Dryers for any
reason. Rough treatment can damage the motor, wiring or
motor mount and safety screens and create a hazardous
condition.

COPYRIGHT TENNANT COMPANY 1999 3
Run on Stable Surface: Always operate Dryers on a
stable flat surface such as the floor. Do not operate Dryers
from places where they can fall or be pulled down causing
injury. Beware that Dryers may vibrate or be pulled from
smooth surfaces such as counter tops and cause an injury,
fire or electrical hazard.
WARNING
To reduce the risk of fire or electric shock, do not use Dry-
ers with a solid-state speed control device.
Air Intakes Must Be Clear: Operate Dryers away from
draperies and other materials that may come in contact
with the air intakes. Do not allow any material to clog or
block air intakes, as this may cause Dryers to overheat and
result in a fire or electrical hazard.
Keep Foreign Matter Out: Do not allow oil, grease,
solvents or other matter (including sawdust and drywall
dust) to be drawn into the air intakes of Dryers. Never di-
rect fogged or liquid chemicals of any kind into the air
intakes of Dryers.
CAUTION
Never operate Dryers in pooled or standing water, as this
may create a risk of serious injury from electrical shock.
Don’t Operate Without Safety Screens: Never oper-
ate Dryers without the factory installed safety screens on
the air inlets and air exhaust as the rapidly revolving wheel
can cause serious injury.
Keep Away From Heaters: Do not use Dryers for cir-
culating hot air by placing the intakes close to a heater.
The housing could melt or the motor could overheat and
cause a fire or electrical hazard.
Keep Away From Combustible Gas: Do not operate
Dryers in an area containing combustible gas. This could
cause a danger of fire or explosion. Ventilate environments
that may be explosive.
Don’t Modify Unit: Never modify the motor, wiring or
casing of Dryers for any reason. Modifications to Dryers
can lead to fire or electrical hazards.
Share Owners Manual: Be sure to include a copy of the
Dryer Owners Manual whenever you loan, rent, or other-
wise allow someone else to use your Dryers. They need the
same safety information that you require for safe efficient
operation. Make sure that all technicians and operators
have read and understand the manual.
Maintenance or Repair: Do not attempt to disassemble
or repair Dryers if you are not qualified to do so. If the
Dryer is not working as it should, return it to an authorized
dealer or distributor for servicing. Note: For information
about authorized repair and maintenance call our Customer
Service Department at 1-800-522-7839.
DANGER
Do not attempt to service or clean the Dryer while it is
plugged into an electrical outlet or while the wheel is
turning as this may lead to risk of electrical shock or in-
jury. It is dangerous for an unqualified individual to at-
tempt to disassemble or repair the Dryer.
DRYER FEATURES
Dryers feature durable polyethylene housings, durable
switches and handles, and molded venturi air inlets. Metal
parts are treated for corrosion resistance. The efficient
motors reduce energy consumption and the engineered
four point motor mount is extremely durable. You may
find that they operate more quietly, last longer and deliver
greater airflow and static performance than competitive
airmovers.
PRINCIPLES OF DRYING
Given any drying situation, there are three factors that can
be managed for fast successful drying: temperature, air
movement and humidity control.
IMPORTANT NOTE
It is not within the scope of a users guide to teach restora-
tion. The information in this manual should serve as a ref-
erence only. It is strongly recommended that IICRC Certi-
fication courses be completed before water damage resto-
ration is attempted.
Airflow Circulation
Dryers are designed to deliver a high volume laminar air-
flow over or under wet surfaces for speed drying. Airflow
speeds the rate of evaporation, helps prevent mold growth,
and reduces the risk of secondary damage. Circulating air
speeds evaporation by removing the "boundary layer" of
saturated air that hangs near wet surfaces. The moist air is
whisked away and replaced with dryer air.
Place at least one Dryer in each room or one for every 200
square feet. For best results when walls are wet, place one
Dryer for each 8-10 feet of wall, pointed toward the wall at
a 45-degree angle, with all Dryers pointed in the same cir-
cle around the walls to create a vortex of airflow that will
reach all surfaces in the room.
Ensure that all affected areas have good airflow. Open
doors and operate Dryers to maintain good air circulation.
Doors may need to be braced to prevent them from closing
as a result of air movement.
WARNING
Do not, under any circumstances, remove the grounding
plug from the cord. To do so may create a safety hazard
and void the warranty.

COPYRIGHT TENNANT COMPANY 1999 4
Humidity Control
Using Dryers to speed the rate of evaporation in an en-
closed area can cause humidity to escalate. As humidity
elevates, airmovers become less effective and the rate of
drying slows. It is vital that Dryers be used with adequate
dehumidification. For safety, indoor humidity should not
exceed 60% Rh. For maximum drying of porous materials,
indoor humidity should be maintained below 45% Rh.
Even lower humidity between 25-40% Rh is helpful for
drying saturated, dense materials such as walls and floors.
To assist in the drying process, close off the building area
being dried from the rest of structure. Regulate the heating
or air conditioning system of the structure. When dehu-
midifiers are not available, turn on exhaust fans in the at-
tic, kitchen and bathroom to remove some humidity. Use a
thermo-hygrometer such as the DHT200 or DHT600 to
determine the indoor relative humidity.
DRYING PROCEDURES
It is possible to dry both the stretched in carpet and syn-
thetic cushion at the same time on many flood jobs. Dryers
are used to force air under the carpet so that a cushion of
air floats the carpet off the floor. Along with humidity
control, the high volume airflow will usually dry most car-
pet, cushion, and flooring.
When hardwood flooring is present under wet carpet,
strong consideration should be given to removing carpet
for drying. Consideration should also be given to removing
water damaged carpet cushion when it has a non-porous
plastic "skin", when it shows signs of severe wear or in
contaminated situations.
Sub-surface Carpet Drying
Dryer with Carpet Clamp.
For most subsurface drying, place Dryers in a corner or
door opening. Place the snout of the Dryer between the
carpet and cushion. For subsurface carpet drying, the car-
pet must be disengaged and folded back several feet. Place
the airmover snout below the carpet edge and staple
through the tackless on both sides of the Dryer. Note the
condition of the tackless strip, cushion and floor. They
may require additional procedures.
Stapling Down
After placing the dryer, staple through the tack strip on
both sides of the dryer. This is done to keep the carpet
from floating off the tackless and losing float. To relieve
excess pressure, open an opposite corner and staple as if
placing a dryer.
Adjusting Airflow
When adjusting the volume of air under the carpet, care
should be exercised to not force too much air into the
space. Too much air volume may disengage the carpet
from the tackless strip and tear it as it comes off the strip.
If the carpet is a tightly stretched installation, the carpet
may stretch if too much air is forced under it, and the
stretching may cause difficulty in the final steps of rein-
stallation. Air pressure can be relieved by releasing the
carpet from the tackless strip at the opposite side from the
Dryer until the proper lift has been attained.
CAUTION
Increased air movement and evaporation without proper
dehumidification may result in extremely saturated air.
Drywall and other hygroscopic materials may absorb the
excess moisture in the air. This can result in "secondary
damage" to materials. When using Dryers, monitor hu-
midity levels and use dehumidifiers as required. Maintain
the humidity below 60% Rh at all times.
Surface Drying of Carpet and Walls
In some cases, stretched-in carpet, pad and subfloor can be
dried from the surface, without disturbing the installation
in any way except lifting corners of carpet to inspect.
Factors for success in surface drying include: exceptionally
complete extraction, use of enough Dryers strategically
placed to create constant airflow across all affected areas,
use of enough dehumidifiers to quickly and constantly
maintain a lowering of humidity in the drying area, and
careful monitoring with adequate moisture and humidity
meters.
The advantages of surface drying include less restretching,
repair and replacement of materials, fewer problems with
difficult types of carpet, less disturbance of furniture and
contents, greater reliance on equipment rather than labor
(except that extraction may take more time to guarantee

COPYRIGHT TENNANT COMPANY 1999 5
that it is more complete), greater profitability, and less
overall time and expense on the job when successful. The
disadvantages may include greater use of equipment and
electrical power, and a greater possibility of incomplete
drying if the job is not adequately set up and monitored.
Gluedown Carpets
Do not attempt to lift corners when carpet is glued directly
to a subfloor. Glued rubber or foam backed carpet is best
dried from the surface if replacing it is avoided. As in any
surface drying place Dryers where the airflow will cover
the most surface area, either directly or by causing a cir-
cular "vortex" of air that keeps flowing across all surfaces.
If appropriate, instruct the customer on how to turn off the
Dryer and move it every few hours until the carpet is dry.
Again, carpet drying will be most rapid when the extrac-
tion process has been thorough, proper humidity levels are
maintained and sufficient Dryers are used.
Loose Lay Rugs
Loose lay rugs may be dried on the customer’s premises, in
your plant or in a garage. A loose lay rug with separate
cushion may be dried by placing a dryer between the car-
pet and cushion on one end while placing another dryer
between the cushion and floor on the opposite end. Use the
carpet clamp to attach the carpet to the airmover to prevent
it from blowing off the snout.
COOLING & VENTILATION
Hot humid rooms can be cooled with the high volume air-
flow from a Dryer. Simply place the airmover on the floor
or other flat surface and direct the air from the Dryer out-
side or towards cooler areas. Use the kickstand or the 45-
90 degree tilt feature to elevate the snout and circulate cool
air throughout the room.
CAUTION
Be careful not to position Dryers in such as way as to blow
wall hangings and other items off the walls.
ELECTRICAL CONNECTIONS
Dryers are designed to operate on a 115V/60 Hz electrical
connection. Make sure that the electrical outlet is grounded
and that all safety precautions are taken.
MAINTENANCE
Always turn off the power before performing maintenance
procedures. All the service procedures below are to be
executed with the unit unplugged. Perform before each use
or as needed.
Cord Inspection: Inspect the electrical cord for damage.
Units with damaged cords must be removed and repaired
before use. Failure to do so may lead to electrical shock, or
a fire hazard.
Clean Air Intakes: Clean the air inlet side screens of any
accumulated lint and or fabric. A buildup will reduce the
airflow and may cause the motor to overheat and become a
fire hazard.
CAUTION
Do not over tighten screws when reinstalling the plastic air
inlet side screens on Sahara models, as this may cause
them to crack.
Clean Exterior: Clean the exterior plastic housing with
mild detergent and water. Bring back the original shine
with Armor-All or similar cleaner-shiner.
Exterior Inspection: Evaluate exterior components and
make sure that exterior components are properly installed.
Repair or replace missing components as required. Listen
to the unit for abnormal sounds and repair as needed.
YEARLY
Make sure unit is unplugged and the wheel has stopped.
Remove the four side screen screws on each side and re-
move the side screens. This will permit access to motor
and wheel for cleaning.
Clean Blower Wheel: Remove lint and dust. Use a vac-
uum or air hose to vacuum or blow lint and dust from
blower wheel, motor and side screens.
Motor Bearings: The bearings are permanently lubri-
cated. No oiling is necessary.
CAUTION
Internal repair procedures should be performed by a quali-
fied technician from an authorized service center.
RECOMMENDED STOCK ITEMS
Refer to Parts list on page 7 for recommended stock items.
Stock items are clearly identified with a bullet preceding
the parts description.

COPYRIGHT TENNANT COMPANY 1999 6
DRYER SPECIFICATIONS
Switch 2-Speed Rocker
RPM 800 - 1050 rpm
Rated CFM 2000 cfm 3400 cmh
Power Draw, 115 Volts 7.5 amps
Carpet Clamp Kit Available
Wheel 9.5" x 9.5" 24 x 24 cm
Height, Width, Length 19", 17", 19" 47 cm, 42 cm, 39 cm
Use Weight 25 lb 11 kg
Ship Weight 30 lb 14 kg
Motor Rating .25 hp
Overheating Cutoffs Dual Thermal Protectors
Safety Listings UL-CUL
Specifications are subject to change without notice.
FOR PARTS AND SERVICE CALL YOUR LOCAL DISTRIBUTOR,
OR OUR CUSTOMER SERVICE DEPARTMENT AT 1-800-522-7839

COPYRIGHT TENNANT COMPANY 1999 7
EXPLODED VIEW
PARTS LIST
1611989 HOUSING – POLYETHYLENE BLACK
2 608805 • MOTOR ASSEMBLY – 115V 1/4 HP 1050 RPM 2-SPD
3 608804 • POWER CORD ASSEMBLY – 16/3 SJTW SJTW-A 5-15P 25FT
4 608803 • STRAIN RELIEF – SNAP .370 BLACK
5 608802 • MOTOR SIDE GRILL – ABS BLACK
6 608800 • INLET SIDE GRILL – ABS BLACK
7 608799 • SWITCH – ROCKER SPDT RED
8611994 SWITCH PLATE – ABS BLACK
9611995 BLOWER WHEEL – CENTRIFUGAL 9.5 X 9.5 GALV STEEL
10 608798 • FOOT – ROUND 3/8 ID X 1.25 OD X 5/8 RUBBER BLACK
11 611996 RIVET – 3/16 X 5/8 AL/AL BLACK ANODIZED
12 611997 WASHER – 3/16 RIVET .19 ID X .47 OD X .05 ZP
13 611998 SCREW – 1/4-20 X 3/8 HWH NYLOC ZINC
14 611999 SNOUT GRILL – ABS BLACK
15 612000 SCREW - #6 X 3/8 PHILLIPS PH ZP
16 612005 SCREW - #6 X 7/8 PHILLIPS PH ZP
17 612006 CABLE TIE – NYLON 4”
18 612007 KICKSTAND ASSEMBLY
19 612014 RIVET – 1/8 X 1/2 AL/AL
20 612016 WASHER – 1/8 RIVET 1/8 ID X 3/8 OD X .06 ZP
• Recommended Stocking Items

COPYRIGHT TENNANT COMPANY 1999 8
DRYER TROUBLESHOOTING
WARNING: ALL THE SERVICE PROCEDURES BELOW SHOULD BE EXECUTED WITH POWER OFF I.E. UNPLUGGED.
Motor won’t run. 1. Switch not turned on. 1. Turn switch to appropriate speed
2. Circuit is overloaded and
panel circuit breaker tripped. 2. Unload circuit and reset circuit break-
ers.
3. No power at outlet. 3. Check panel circuit breaker and check
outlet with receptacle tester.
4. Intake screens or exhaust
snout is blocked. 4. Turn machine off, allow to cool; re-
move blockage and reset breaker.
5. Switch is broken. 5. Contact Service Center
6. Loose wiring. 6. Contact Service Center
7. Blower wheel completely
jammed. 7. Contact Service Center
Motor runs but wheel
turns erratically and
makes a scraping
noise.
1. Severe jolt has caused motor
mount to bend and blower
wheel to rub against mount.
1. Contact Service Center
2. Severe jolt has caused motor
to slip out of mount and
blower wheel to rub against
housing.
2. Contact Service Center
Airmover vibrates
excessively. 1. Uneven accumulation of soil
has built up on wheel. 1. Clean blower wheel.
2. Blower wheel has been bent. 2. Contact Service Center
3. Blower wheel has lost bal-
ance. 3. Contact Service Center
4. Bent motor shaft. 4. Contact Service Center
FOR PARTS AND SERVICE CALL YOUR LOCAL DISTRIBUTOR,
OR OUR CUSTOMER SERVICE DEPARTMENT AT 1-800-522-7839
Table of contents
Other Tennant Dryer manuals
Popular Dryer manuals by other brands

GE
GE Spacemaker DSKS433EB Dimensions and installation information

Miele
Miele PT 8407 EL Installations plan

GE
GE Profile DPVH890EJ Dimensions and installation information

Samsung
Samsung DV340AER user manual

Alliance Laundry Systems
Alliance Laundry Systems LEB07A*-1709 Service manual

SATA
SATA dry jet 2 operating instructions