manuals.online logo
Brands
  1. Home
  2. •
  3. Brands
  4. •
  5. Tesco
  6. •
  7. Cordless Telephone
  8. •
  9. Tesco ARC200 User manual

Tesco ARC200 User manual

Important note — emergency calls
The DECT Phone is not designed for making emergency calls when the
mains power fails. So you should make alternative arrangements for
access to Emergency Services.
(This means that you should also have a basic phone that does not
need mains power, connected to your line so that you can make calls
during a power failure.)
USER GUIDE
Unpacking your DECT Phone
In the box:
the cordless handset (two handsets with
a Twin system, three with a Triple system)
the base unit
rechargeable batteries or a battery pack,
and a battery compartment cover for
handset
a telephone line cable
a mains power lead and adapter
If you have an ARC201 Twin pack or
ARC202 Triple pack, you should also have:
one charger pod for ARC201.
two charger pods for ARC202.
If any item are damaged or missing contact
your nearest Tesco store for assistance.
n
n
n
n
n
n
n
Please have your receipt ready when
you call.
11 Handset registration
14 Troubleshooting
15Technical details
Interference
If the sound quality gets worse as you move around while on a call, this is
probably due to interference between the handset and the base unit, perhaps
because you are too near to another phone or other electrical equipment. Move
to a different position to clear the interference. If you do not move, your call
may be cut off.
Radio interference in the environment may occasionally cause a short break in
the link between the handset and the base unit while you are on a call. The
handset’s display will flash briefly, while the unit automatically changes to a
different channel to restore the link.
Keeping the batteries charged
When you don’t need to carry your handsets around (for example, at night),
leave them on the base unit or charger pod, to keep the batteries charged.
Whenever the battery charge level symbol on the display shows ‘nearly empty’,
replace the handset on the base unit or charger pod.
‘Out of range’ warning
If you hear a warning tone during a call, and/or the sound in the earpiece
becomes faint or distorted, you may be going out of range of the base unit.
Move nearer to the base unit within 20 seconds, until the tone stops.
Otherwise, your call may be cut off.
While you are out of range and you are not on a call, the handset’s display
shows and the ‘signal level’ symbol flashes. Before you make a call,
you must move closer to the base unit until the handset’s name and number
are displayed and the symbol stops flashing.
Cleaning and care
■
Don’t clean any part of your DECT phone with benzene, thinner or other solvent
chemicals — this may cause permanent damage which is not covered by the
Guarantee. When necessary, clean it with a damp cloth.
■
Keep your DECT Phone away from hot, humid conditions or strong sunlight,
and don’t let it get wet.
■
Every effort has been made to ensure high standards of reliability for your
DECT Phone. However, if something does go wrong, please do not try to repair
it yourself
— Please contact Tesco help line.
Contents of this User Guide
1 Where to find it
2 Installation
3 Making and answering calls
4 Memory dialling
5 Caller Display
6 Tones and volumes
7 Call barring
8 Customising your phone
9 Resetting the system
10 Using a muti-handset system
11 handset registration
12 Baby Call
13 Operational notes
14 Troubleshooting
15 Technical details
Pressing buttons on your phone
■
When the instructions in this user guide tell you
simply to ‘press’ a button, this means that you
should press the button briefly, then release it.
■
When the instructions tell you to ‘press and hold’
a button, this means you should keep the button
pressed until the display changes and/or you hear a
tone.
19
18
23
22
21
20
27
26
25
24
28
Ver 3, Sep 06
ÚThe outside call is put on hold. When the user of the other handset unit
answers, you can talk on an intercom call.
3Press the HANG UP/C to transfer the call
If the handset user does not answer:
you can get back to the outside call by pressing the INTERCOM button
again.
You can also shuttle backwards and forwards between the calls -
To shuttle between two calls
When you have both an outside call and an intercom call in progress, you can
shuttle from one to the other, like this:
◗
Press the INTERCOM for one second to speak to each in turn, putting
the other on hold
You can transfer the outside call to the other handset by pressing the
HANG UP/C while you’re connected to the intercom call
If you press theHANG UP/Cwhile you're connected to the outside call,
you will disconnect it.
You can set up a conference using two handsets.
When you have an outside call (either one you've made or answered, or one
that’s been transferred to you) in progress
1Press the INTERCOM then key in a handset number
ÚThe outside call is put on hold. When the other handset user answers,
and you have an intercom call in progress:
2Press and hold the (STAR) button for 2 seconds to set up a
three-way conference
ÚBoth you and the other user are connected to the outside call.
If you press HANG UP/C during the conference call, youll leave the other
user connected to the outside call.
If the other user presses HANG UP/C , you’ll be left connected to the outside
New call tone
When both handsets are on an intercom call and an outside call comes in, you will
hear NEW CALL TONE over your conversation to tell you that someone is calling you.
Press the
R
To answer the outside call and put the intercom call on hold (so you can later
use shuttle,conference or transfer):
Press
INTERCOM
R
To answer the outside call and end the intercom call:
To set up a three-way conference
Ø
To suspend the other handset user from the conference call: Press and hold
the (STAR) button for 2 seconds
You remain connected to the outside call.If the other user has not hung up,
Ø
you can bring her/him back into the conference by pressing and hold the
(STAR) button for 2 seconds.
Ø
The handsets supplied with your DECT Phone are already registered to the
base unit. You don t need to register them yourself.
If you buy new handsets separately, you’ll need to register them. Up to
six handsets can be registered to each base unit; and each handset can be
registered to up to four base units.
To register a new handset
1
Press and hold the HANDSET LOCATOR on the base unit until you
hear Registration tone (repeated ‘beeps’)
2
On the handset, press the PROG then the
▲
or
▼
button to display
REGISTER
3
Press the PHONE/OK
ÚThe display shows BS 1234 . If any of these numbers is steady (not
flashing), then the handset is already registered to that base unit.
4
Press 1to select base unit number 1
ÚThe display shows PIN____
5
Key in the system PIN (default 0000) and press the PHONE/OK
ÚThe display shows WAIT____ for a few moments, while the handset
searches for a base. Then it shows a list of handset numbers which are still
free on the base unit.
(For example, 1346indicates that numbers 1,3, 4 and 6 are free; 2 and 5
are already assigned to other handsets.)
BASE
6
Key in a free handset number
ÚAfter a moment, the display should show the handsets name and number.
If registration fails…
Try again, making sure you begin step 2 as soon as Registration tone starts.
To register to a new base unit
If your handset is already registered to a base unit, and you want to register it to
another one:
◗
Follow steps 1 to 5 on page 20. But at step 4, select the lowest numbered
free base unit (the lowest number that is still flashing).
To select a base unit
If your handset is registered to more than one base unit, you can select which
one you want it to operate with. Or you can leave it to search and establish a
link with the nearest free base unit.
1
Press the PROG
2
Press the
▲
or
▼
button to display SELBASE
3
Press the PHONE/OK
ÚThe display shows a list of the base units to which the handset is registered.
The currently selected base unit is steady; others are flashing.
4
Key in a base unit number (or 0to let the handset search for the nearest
free base unit) and press the PHONE/OK to confirm
Ú
The display goes back to SELBASE and you can wait a moment or press
HANG UP/C
to go back.
To de-register a handset
1
Press the PROG
2
Press the
▲
or
▼
button to select
3
Press the PHONE/OK
ÚThe display shows the numbers of all handset registered to
the base unit.
4
Key in a the number of the handset to be de-registered.
ÚThe display goes back to and you can wait a moment
or press
HANG UP/C
to go back to standby mode.
!
The DECT phone must be serviced by trained engineers. NEVER attempt
any repairs or adjustments yourself.
ALWAYS check
first that:
■
you have followed all the steps listed in section 2
to install and set up your DECT Phone
■
all connectors are firmly inserted in their sockets
■
mains power to the base unit telephone is switched
on at the socket
“I can’t make or
answer calls.” If you don’t hear Dial tone when you press the
handset’s
PHONE/OK button, check whether the base
unit or another handset is already using the line.
If you’re using a cordless handset, make sure it’s within
range of the base unit. Move closer to the base unit
and see if that helps.
Make sure you’re using the telephone line cable that
was supplied with your DECT Phone. Other telephone
line cables might not work.
If the handset’s display is blank, press the HANG UP/C
button to switch it on.
Call barring may be set (see section 7) for your handset.
Check with any other user who may have set it.
Switch off power at the mains socket, wait for a few
seconds and then switch back on. This may solve the
problem.
“The phone is
not ringing.” The ringer melody may be set to OFF. Change it as
described in section 6.
Check that the total REN value of all instruments con-
nected to the line is no more than 4 . Disconnect
one or more instruments and see if that helps.
“Caller Display
isn’t working.” You need to subscribe to the Caller Display feature
from your network service provider. You should find
contact details on your phone bill.
The caller may have withheld their number by dialling
141. Or they may be calling from a network that does
not transmit the caller’s number (for example, it may be
an international call).
When you store local numbers in the Phone Book,
include the full dialling code (you’ll still be charged
local rate for making calls). Then the name will be
shown as part of the Caller Display record. Alternatively,
you can set the national dialling code for your area as a
local code.
“The phone is
dialling very
slowly”
The dial mode may have been accidentally changed
to
PULSE
. Change the setting to
TONE
—
you should hear ‘beep’ tones as you dial.
“I can’t make
intercom calls.” Make sure you’re using the correct handset number
Make sure the handset you’re trying to call is switched
on and within range.
“Baby Call isn’t
working.” When you turn Baby Call on, you also need to set the
number to be dialled.
PBX use
“Last Number
Redial and/or
memory dialling
don’t work on
a PBX.”
When you first make a call, press the REDIAL/CDS/P
button for a pause between the outside line access
code (for example, 9) and the telephone number. You
should later be able to redial the number.
When storing numbers in memory, you can include the
outside line access code
(e.g. 9) with each number.
If your PBX requires you to wait for a second Dial tone
before dialling the telephone number, press Pfor a
pause between the access code and the number.
If the fault persists …
Disconnect all other instruments connected to the
same line as the DECT phone and see whether you can
make a call.
Disconnect the base unit from the telephone line and
plug a different phone into the master telephone
socket. Try making a call. If this works, the line is OK.
If the call does not work, and you are using a two-way
socket adapter, remove it and plug a telephone
directly into the socket. If the call now works, the
adapter may be faulty.
If you cannot make a call, the fault may be on the
exchange line. Contact the service provider.
Standard Digital Enhanced Cordless
Telecommunications (DECT)
Frequency range 1.88 to 1.9 GHz (bandwidth = 20 MHz)
Channel bandwidth 1.728 MHz
Operating range up to 300 m outdoors; up to 50 m indoors
Operating time
for cordless
handset
standby: 100 hours approx.
talking: 9 hours approx.
battery charge time: 15 hours
Temperature
range Operating 0 ºC to 40 ºC
Storage -20 ºC to 60 ºC
Electrical power
Cordless handset
— three AAA-size 1.2V NiMH
rechargeable batteries
Base unit
/
Port specification The port (connected to the mains power supply) is a
SELV port with respect to EN41003.
The port (connected to the telephone line) is a TNV port with respect to
EN41003.
PBX compatibility Timed break recall: programmable as 85 ms , 100 ms
(recommended for most PBX systems) or 250 ms
Pause length: 3 seconds. Signalling type: DTMF (dual-tone multifrequency), also
called tone dialling; or loop-disconnect (pulse dialling).
Network connection
This equipment is intended to be used in the UK only. Operation on other
countries’ PSTN termination points cannot be guaranteed.
Charger pod
— input 230 V AC, 50 Hz; output AC 9 V, 300 mA
g
h
i
12Baby Call
With Baby Call (babysitter’s call) turned on, the handset will automatically dial a
specified number when any button (except PROG) is pressed. Before you turn
Baby Call on, you must programme the Baby Call phone number to be dialled.
!
With Baby Call turned on, the handset can’t be used for calling Emergency
Services. Make sure there’s another handset (or phone) available for
emergencies.
1
Press the button then
2
Press
BABYCALL
4
Key in the phone number and press to confirm
ÚIf a Baby Call number is already programmed use to delete
5
Press to go to
6
Press to select Tick (ON) or Cross (OFF)
7
Press and hold to go back Stand by mode
When Baby Call is turned on, the number is shown on the display, with a ¡®lock¡¯
symbol on the top line.
Ú
To turn Baby Call off:
1
Press the PROG
2
Press the
▲
or
▼
button to display BABYCALL
3
Press the PHONE/OK
4
Press the PHONE/OK to display a cross next to ON / OFF
Make sure the symbol disappears from the display.
rANGE OUT
button then Ú
3
Press
NUMBER
ON / OFF
13Operational notes
Electrical safety
■
DON’T let the base unit get wet. Electrical equipment can cause serious
injury if used while you are wet or standing in water.
■
If the base unit ever falls into water, DON’T retrieve it until you have
unplugged the power lead from the mains and the telephone line plug from
the telephone socket; then pull it out by the unplugged cables.
■
NEVER use your DECT Phone outdoors during a thunderstorm — unplug the
base unit from the telephone line and the mains socket when there are
storms in your area. Damage caused by lightning is not covered by the
guarantee.
Siting the base unit and charger pod
The base unit and charger pod should each be placed on a level surface, in a
position where:
■
the mains adapter plug will reach an easily accessible 230-V
AC
switched
mains supply socket — never try to lengthen the mains power cable
■
the telephone line cable will reach your telephone line socket or extension
socket (base unit only; charger pods have no connection to the telephone
line)
■
it is not close to another telephone — this can cause radio interference
during calls
■
it is not close to a sink, bath or shower, or anywhere else where it might get
wet
■
it is not close to other electrical equipment — fridges, washing machines,
microwave ovens, TVs, fluorescent lights, etc.
Radio signals between the handset and the base unit
To use your handset and base unit together, you must be able to establish a
radio link between them. Be aware that:
■
Siting the base unit as high as possible will give better results — for example,
in a two-storey house, the best position may be on the first-floor landing.
■
Any large metal object — like a refrigerator, a mirror or a filing cabinet —
between the handset and base unit may block the radio signal.
■
Other solid structures, like walls, may reduce the signal strength.
a main power lead and adapter
n
for each one.
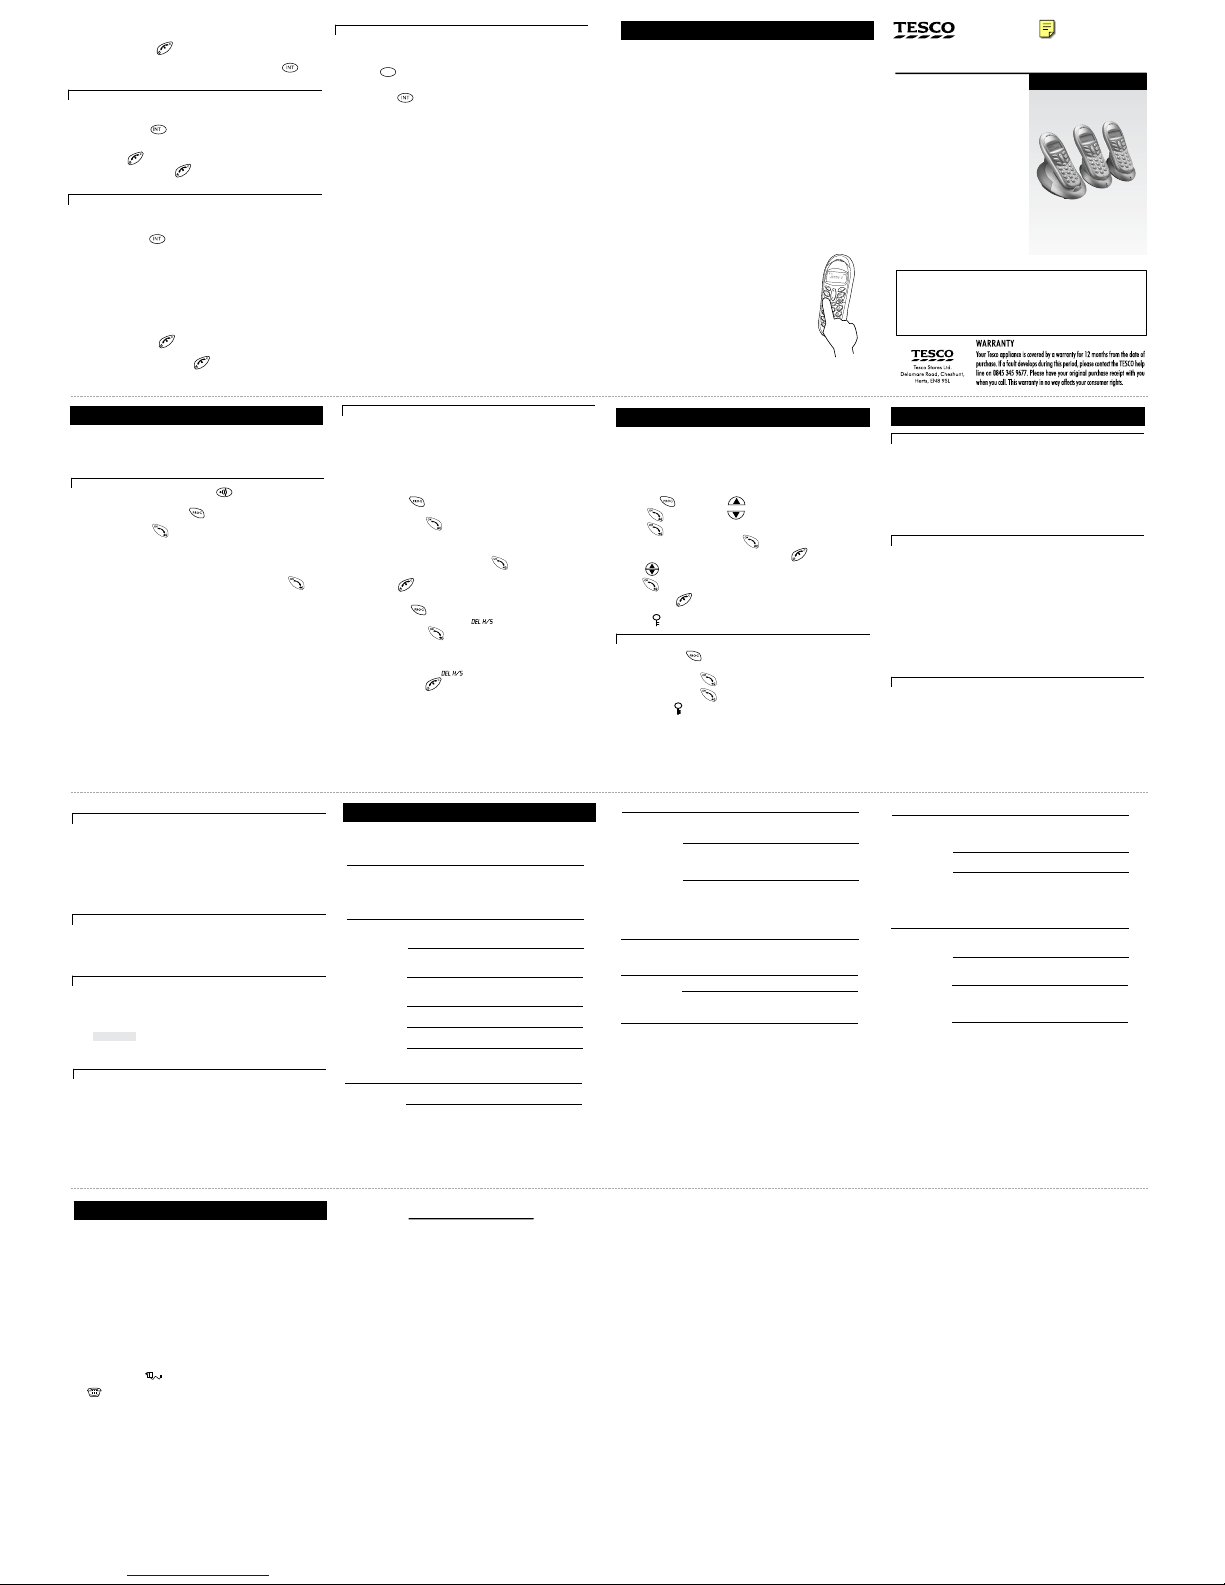
ARC200 Tesco Cordless DECT Phone
ARC201 Tesco Cordless DECT Phone Twin Pack
ARC202 Tesco Cordless DECT Phone Triple Pack
call.
29
Declaration of Conformity
Hereby Tesco Stores Ltd declares that this (ARC200/201/202
Tesco Cordless Dect Phone) is in compliance with the essential
requirements and other relevant provisions of directive 1999/5/EC
For a full copy of the Declaration of conformity for this product
please contact:
Tesco Stores Limited, Cheshunt, EN8 9SL
PHONEBOOK
ringer
Display messages and symbols
Installation
2
3 Making and answering calls
To make a call
1
Key in the phone number
If you make a mistake, press
to clear digits from the display.
To clear all digits, press and hold
2
Press
To answer a call
When the handset and base unit ring:
◗
Press
To end a call
◗
Press
so that the
symbol disappears from the display
Last Number Redial
To make a repeat call to the last number you dialled:
1
Press
2
Press
To make a repeat call to one of the 10 last numbers you dialled:
1
Press
▲
or
▼
button to go to the number you want
2
Press
Muting the mouthpiece
◗
During a call, press and hold key for 4s to mute the mouthpiece
While the mouthpiece is muted the person on the other end of the call can’t
hear you. is shown on the display.
◗
Press and hold key
once again to un-mute the mouthpiece
6 Tones and volumes
To adjust the earpiece volume during a call
1
Press
▲
or
▼
to change the volume
Handset ringing melodies
To change the ringing melody for incoming external calls:
1
Press
à
2
Press
à
3
Press
à
4
Press
àmelody1to
5
Press
▲
or
▼
to hear each melody in turn.
6
Press to confirm the melody you want.
7
Press and hold to go back to standby mode.
4 Memory dialling
You can store up to 40 numbers in each handset’s memory. Each number can
have up to 24digits, and you can store a name of up to 10 characters with
the number.
To store a number The display shows:
1
Press à
3
Press
àadd
4
Press
àname
5
Key in the name, using the numbered keys
6
Press
7
Key in the number
Note:
if you make a mistake , press to clear digits or letters from
the display.
8
Press
You can now carry on storing numbers
To store a number from redial list
1
Press then select the number
2
Press
if you wish.
5
Press to confirm.
3
Press key in a name then
To make a memory call
1
Press
2
Press
▲
or
▼
until the display shows the name and number
3
Press to dial the number
Handset ringing volume
You have a choice of eight volume levels including ringer off.
1
Press à
2
Press
à
3
Press
à
4
Press
à1toorvoloff
5
Press
▲
or
▼
to change the volume
6
Press to confirm
7
Press and hold to go back to standby mode
Base unit ringing melody
1
Press à
2
Press
à
3
Press
àvolume
4
Press
àmelody
5
Press
àmelodyand1to
6
Press
▲
or
▼
to hear each melody in turn
7
Press to confirm the melody you want
8
Press and hold to go back to standby mode
Base unit ringing volume
1
Press
à
2
Press
à
3
Press
à
4
Press à
5
Press
▲
or
▼
to change the volume
6
Press to confirm the volume level you want
7
Press and hold to go back to standby mode
* If you’ve set the ringer volume to OFF, you won’t hear any melody at this point.
Key tone on/off
Each time you press a key, you hear a tone. You can turn this off if you prefer.
1
Press
then
à
àhandset
2
Press
àkeytone
3
Press
àon or off
4
Press and hold
to go back to standby mode
7 Call barring
Using call barring, you can prevent certain types of call being made on your
handset.
■
no bar — all calls are allowed. This is the default.
■
local
— no international calls
■
internal — you can’t make any outgoing calls except emergency call.
To bar calls to specified numbers
1
Press
then
press
àbase
2
Press
then press
3
Press to select [ ] or [ ]
the display shows a list of registered handset numbers
4
Key in a handset number
5
key in the barred number and confirm using
6
Press to select [
] and confirm using ,
7
Using to select tick(ON) to activate the call barring or
Cross (OFF) to de- activerte it ,
to go back.
8 Customising your phone
Your handset’s name
You can change the handset name with up to eight characters.
1
Press
then
à
handset
2
Press à
h s name
3
Press to display the current name
4
Press repeatedly to clear the display
5
Key in your chosen name
6
Press to confirm
7
Press and hold to go back to standby mode
Auto-answer
Normally, you need to press to answer an incoming call. But with
auto-answer turned on, when your handset is resting on the base unit and
it rings for an incoming call, you can answer by simply lifting the handset.
To turn auto-answer on or off:
1
Press
then à
àhandset
2
Press
then
àauto ans
3
Press to select Tick (ON)
or
Cross (OFF)
4
Press
and hold
to go back to standby mode
!
If you have turned auto-answer on, don’t press the after
you’ve answered a call by lifting the handset;
Locking the keypad
When the keypad is locked, no numbered keys can be pressed so you can’t make
calls by mistake.
To lock the keypad:
1
Press and hold for 4 seconds
àThe display shows the symbol when the keypad is locked.
To unlock the keypad:
1
Press and hold for 4 seconds again
The symbol will disappear from display.
!
With the keypad locked, you cannot make emergency calls to 999 or 112.
Your security PIN
The base unit has a default PIN (personal identity number) of 0000. You can
change it to any number you’ll remember, with up to four digits.
9 Resetting the system
!
If you reset the system, all features will return to their default settings.
!
While you are resetting the system, you should disconnect the telephone
line cord from the back of the base unit, so you won’t be interrupted by
incoming calls.
Reset Base
1
Press
àbase
2
Press
then
àdefault
3
Press
à
4
Press à
You hear a confirmation tone
Reset handset
1 Where to find it
5
4
3
2
7
6
13
12
11
10
17
16
15
14
g
h
i
Redial
/CDS/
PAUSE button
once
twice
Press to open a list
of the last 10 phone
numbers you called.
Press to open the
list of Caller Display
records.
Press while dialling a
number to insert a
pause (you might need
this on a PBX).
Ringer Off /
Scroll button
Press and hold for 4 seconds
to turn the ringer off.
When viewing a number with
more than 12 digits, press to
scroll back along the display.
R (Recall) button
You may need this if your
phone is connected to a
PBX, or if you use
network-based services.
UP and DOWN buttons
Press during programming to
Press to move through the Caller
Press during a call to adjust the
Keypad Lock /MUTE /
Scroll button
Press and hold for a moment to lock and
unlock the keypad.
During a call to mute the mouthpiece.
When viewing a number with more than 12
digits,press to scroll forward along the display.
PHONE BOOK button
Press to open the Phone Book.
INTERCOM button
Press to make an intercom call
to another handset.
HANG UP /ON–OFF /C
(Cancel) button
Press to end a call.
Press and hold for 3 seconds to
switch the handset on and off.
Press while editing or using
Menu functions, to cancel what
you’re doing and return the
display to Standby mode.
move through the menus and
options.
Display or Redial list.
volume in the earpiece or
speakerphone.
HANDSET LOCATOR
(PAGE) button
Press to make all registered
handsets ring (useful if
you've forgotten
where a handset is).
IN USE light
This comes on when
you have a connection
to the telephone line.
16 25
When this shows ‘nearly empty’ ( ), put the handset on the
base unit or charger pod as soon as possible, to charge the
batteries. While the batteries are being charged, this blinks.
Appears when you have a connection to the outside line.
Flashes when there’s an incoming call to be answered
(even if the ringer is turned off).
The handset’s number
The current time
The handset’s name
(the default is )
V
A
NTAGE
Phone
Book
Ringer off
Comes on when you’re storing numbers in the Phone Book, and
when you’re making calls to stored numbers.
Comes on when the handset’s ringer is turned off.
Radio link/
signal level
Th on steadily when there’s a radio link between
the handset and base unit. lashes while the handset is trying
to establish a link ..
e first symbol It f
to the base unit
The second symbol shows the strength of the signal.
If this symbol flashes while
you’re on a call, move closer to the base unit
Battery
charge
level
Phone
New call
You have new Caller Display records.
What the symbols mean
The duration of each call is displayed, from 20 seconds after you press the
PHONE button for a line, until 5 seconds after you end the call.
Lock
Comes on when your handset’s keypad is locked.
Mute
Comes on when your handset’s microphone is muted.
Appears when the handset is set to route non-local calls via an
alternative network service provider (using the Prefix code).
Provider
network
3
5
4
Plug the mains adapter into a
230 V AC, 50 Hz mains socket,
with the switch on the socket
set to OFF
Plug the mains adapter into a 230 V AC,
50 Hz mains socket, with the switch on
the socket set to OFF
Switch on at the mains socket(s)
Install the charger pod(s) …
Connect the mains power
lead and the telephone
line cord into the
underside of the base unit
2
Use the telephone line
supplied with your
DECT phone — don’t
use any other
telephone line cord
cord
1
Choose a suitable site for the
base unit telephone
The CHARGE
light comes
on
The bars on the
battery level symbol
continuously change
as the batteries are
being charged
Make sure the mains socket is
switched on — the phone won’t
work without electrical power
Connect the base unit to the telephone line
Switch off power at the mains socket
Insert the telephone line plug into the socket
Switch mains power back on
8
NOTE: the charger pod doesn’t have
a connection to the telephone line.
Charge the batteries for 15 hours
7
Before you use the cordless
handsets for the first time,
it’s important to charge the
batteries fully.
You hear a ‘beep’ when the
handset is correctly in
position on the charging
cradle.
To keep the batteries charged,
whenever you don’t need to use the
handset (such as overnight, or when
you go out), leave it on the base unit
or charger pod.
Leave the handsets on the base unit
and charger pod(s) for 15 hours.
Fit the batteries in the cordless handsets
6
Insert the three rechargeable
batteries as shown Drop in the battery compartment
cover, then slide it forward until it
clicks firmly into place
g
h
i
g
h
i
2
Press
show first memory stored entry.
4
You can edit the number using HANG UP/C before storing it
call bar
à
To bar certain type of call
1
Press
t
hen press
àbase
2
Press
then press
4
Press then key in a handset number, press
select [ ] , [ ] or [
]
5
Using to confirm or to go back to turn call barring off
* Follow 1 to 4above, setting the level to [ ] at step 4
call bar
à
à
Clear memories on handset
1
Press
then
2
Press
then
3
Press
4
Press
to confirm
àhandset
à
à
1
Press
then
2
Press
Key in your new PIN and Press to confirm.
3
Press
to go back.
à
à
base
à
1
Press
then
2
Press
then
àdefault
3
Press
4
Press àYou hear a confirmation tone from the
handset.
àhandset
10 Using a muti-handset system
■
page the handsets from the base unit (this is useful if you can t find a handset)
■
make intercom calls from one handset to another
■
transfer outside calls between handsets
To page all handsets
Press the HANDSET LOCATOR button on the base unit
ÚAll registered handsets ring, and their displays show PAGING
To stop the ringing:
Press the HANDSET LOCATOR button again, or press any button
on any handset
If you have an ARC201 twin pack or ARC202 triple pack multi-handset system,
you already have up to six handsets registered to your base unit.
You can register additional handsets — altogether, up to six handsets per base
unit. With two or more handsets registered, you can:
■
Set up a three - way conference call
To make an intercom call
1
Press the INTERCOM on the handset
2
EITHER key in a handset number (1 to 6, depending on how many
handsets are registered);
OR key in 9to call all registered handsets;
ÚIf you called a handset, it rings and its display shows INT
and your handset number.
To answer the intercom call:
3
Press the PHONE/OK button on the ringing handset;
To end the intercom call:
4
Press the HANG UP/C button on the handset;
To transfer a call
1
Make or answer an outside call using the handset
2Briefly
press the INTERCOM then key in a handset number (or
press 9to call all handsets)
To modify (change) a number in memory
1
Press
show memory stored.
àadd
4
Press
▼
TWICE àmodify
5
Press
2
Press
▲
or
▼
until the display shows the name.
6
Modify the name if necessary, pressing to clear characters from
the display before keying in the correct ones.
7
Press the display shows the corresponding number.
8
Modify the number if necessary then press
You can now carry on modifying numbers.
To return a call
To make a return call to someone who’s called you:
◗
Press while either the name or number is shown on the display
To delete a Caller Display record
1
Press
twice
, then
▲
or
▼
to select the caller display record,
press
2
Press twice
àdelete
3
Press
to delete this record or press if you don¡¯'t want to delete the record
When there are no more records, the display shows handset name.
To delete all Caller Display records
1
Press
twice
The display shows the first Caller Display record.
3
press
à
4
Press to confirm or press if you don'¡¥t want to delete all records
When there are no more records, the display shows handsset name.
5 Caller Display
If you subscribe to this feature from your service provider, you can see the phone
numbers of people calling you, before you answer. The DECT phone will store
the
numbers of the last incoming calls. Each Caller Display record includes:
■
The caller’s name, if it’s one you’ve already stored in your phone’s memory.
■
The caller’s number (up to 20 digits). The number won’t be displayed if the
network they’re calling from doesn’t support this feature or withheld
If the caller’s number wasn’t available, the display shows .
■
The date and time of the call
When there have been calls you haven’t answered, the symbol is shown on
the display.
To check Caller Display records
1
Press
twice
2
Press
▲
or
▼
to scroll through the records
You’ll see either names or numbers.If you see a name displayed or
number
,
to check Date/Time of the call,
3
Press to show the Date/Time, the symbol will disappear
from the display, once you enter the record list.
9
8
3
Press
2
Press
then
melody
To store a number from Caller Display
1
Press
twice
, then select the number.
2
Press
5
Press to confirm.
3
Press key in a name then
4
You can edit the number using HANG UP/C before storing it if you wish.
then
by (Tick)
by(Cross)
à
à
UNKNOWN
To delete an entry (all entries) from redial list
1
Press
2
Press
or .
then
select the number.
3
Press to confirm delete an entry or delete all entries.
To delete an entry or all entries from Phone Book
1
Press
2
Press
then select
or .
then
select the number.
3
Press to confirm.
hs
volume
hs
COPY tO PB
DELETE DELETE ALL
DELETE
DELETE ALL
COPY tO PB
bs
bs
7
8
8
volume
bs
bs
1toorvoloff
7
then key in a handset number
3
Press
then press
à
TPE
Y
To set the date and time
1
Press
then
à
2
Press à
4
Press to confirm
DATE/TIME
dd-mm-yy
key in the date
3
Press à
key in the time
HH-MM
If you do will clear all numbers from the handset's phonebook and redial list
It’s very unlikely that you’ll need this function, and it’susually best to leave
the setting at its default,
.
But if your DECT Phone is connected to an extension on a PBX, you may
need to change this setting (also
called the recall length) to . If
applicable, consult the PBX documentation for details.
Clear all memories on base
Select this to clear all numbers from caller display list
1
Press then
ÚThe display asks:
2
Press then
3
Press to confirm, to cancel
Flash
à
à
CONFIRM?
CONFIRM?
twice
Handset Switch ON/OFF
1
Press and hold
2
The handset will switch ON or OFF
for 3 seconds
base
then
CONFIRM?
à
CONFIRM?
CLEAR MEM
PHONEBOOK
h/s ringer
PHONEBOOK
h/s ringer
PHONEBOOK
ringer
bs
PHONEBOOK
PHONEBOOK
PIN
NEW
CLEAR DCI
PHONEBOOK
then select
DELETE
ALL
Provider mode
1
Press
then
2
Press
then
3
Press
to select Tick (ON) or Cross (OFF)
àhandset
à
If you have programmed a prefix code into the base unit , you need to turn provider
mode on for each handset if you want it automatically to dial the prefix whenever
you dial a number beginning with 0.
PROV MODE
Prefix number
This may be useful if you use a dialling prefix to route your long-distance calls via a
service provider other them the one which supplies your line. You can program this
prefix into the base unit. Then when you turn on Provider Mode on individual handsets
the prefix will automatically be dialled out at the beginning of any phone number
starting with 0.
the display shows
PREFIXNUMBER
and any prefixthat¡¯s
4
If necessary, use to clear digits from the display. Then key in the
prefix and confirm using
1
Press
then
2
Press
then
3
Press
à
à
base
PREFIXNUM
already been set.
NUMBER1
NUMBER2
ACTIVATION
INTERNAL LOCAL
NO BAR
NO BAR
Remember:
The Handset can only use AAA 1.2V Ni-MH rechargeable batteries.
PROG button
Press to start using Menu
functions.
PHONE /OK button
Press to begin or answer a
phone call.
When using Menu functions,
press to confirm your selection.
Press during a call to switch
/
the speakerphone on and off.
Your handset's loudspeaker is on.
Speakerphone
Switch the Speakerphone on and off
◗
During a call, you can press to switch the speakerphone on, the
symbol will appear on display.
◗
Press when speakerphone on, the speakerphone will turn off and
the symbol disappear from display.
!
The speakerphone won't work if the batteries are low.

This manual suits for next models

2

Other Tesco Cordless Telephone manuals

Tesco AWB001 User manual

Tesco

Tesco AWB001 User manual

Tesco AWB001 User manual

Tesco

Tesco AWB001 User manual

Popular Cordless Telephone manuals by other brands

Toshiba SG-1801 owner's manual

Toshiba

Toshiba SG-1801 owner's manual

AT&T CL82115 quick start guide

AT&T

AT&T CL82115 quick start guide

Polycom VVX D230 user guide

Polycom

Polycom VVX D230 user guide

AT&T E5945B user manual

AT&T

AT&T E5945B user manual

Sony SPP-N1025 - Cordless Telephone operating instructions

Sony

Sony SPP-N1025 - Cordless Telephone operating instructions

Newcont NTP-3422 operating instructions

Newcont

Newcont NTP-3422 operating instructions

switel DE 1702 operating instructions

switel

switel DE 1702 operating instructions

AEG Voxtel M310 user guide

AEG

AEG Voxtel M310 user guide

Alcatel E130 user manual

Alcatel

Alcatel E130 user manual

US Robotics USR9602 Quick installation guide

US Robotics

US Robotics USR9602 Quick installation guide

EnGenius DuraFon PSL user manual

EnGenius

EnGenius DuraFon PSL user manual

Philips DECT1231S Specifications

Philips

Philips DECT1231S Specifications

NEC IP3NA-12TXHBT user guide

NEC

NEC IP3NA-12TXHBT user guide

Doro FORM 20 manual

Doro

Doro FORM 20 manual

ClearSounds i700 iCreations Information guide

ClearSounds

ClearSounds i700 iCreations Information guide

US Robotics USR9601 user guide

US Robotics

US Robotics USR9601 user guide

Binatone Brick 4home edition user guide

Binatone

Binatone Brick 4home edition user guide

Interquartz Discovery CLI 9859 user manual

Interquartz

Interquartz Discovery CLI 9859 user manual

manuals.online logo
manuals.online logoBrands
  • About & Mission
  • Contact us
  • Privacy Policy
  • Terms and Conditions

Copyright 2025 Manuals.Online. All Rights Reserved.