Technical Specication
Quick Start Set Up Guide
For information on using the TV’s features, please refer to the Operating Instructions (Available online to download).
Model Numbers
43A23B-UHD
Quick & easy guide for setting up your TV
What is included in the box
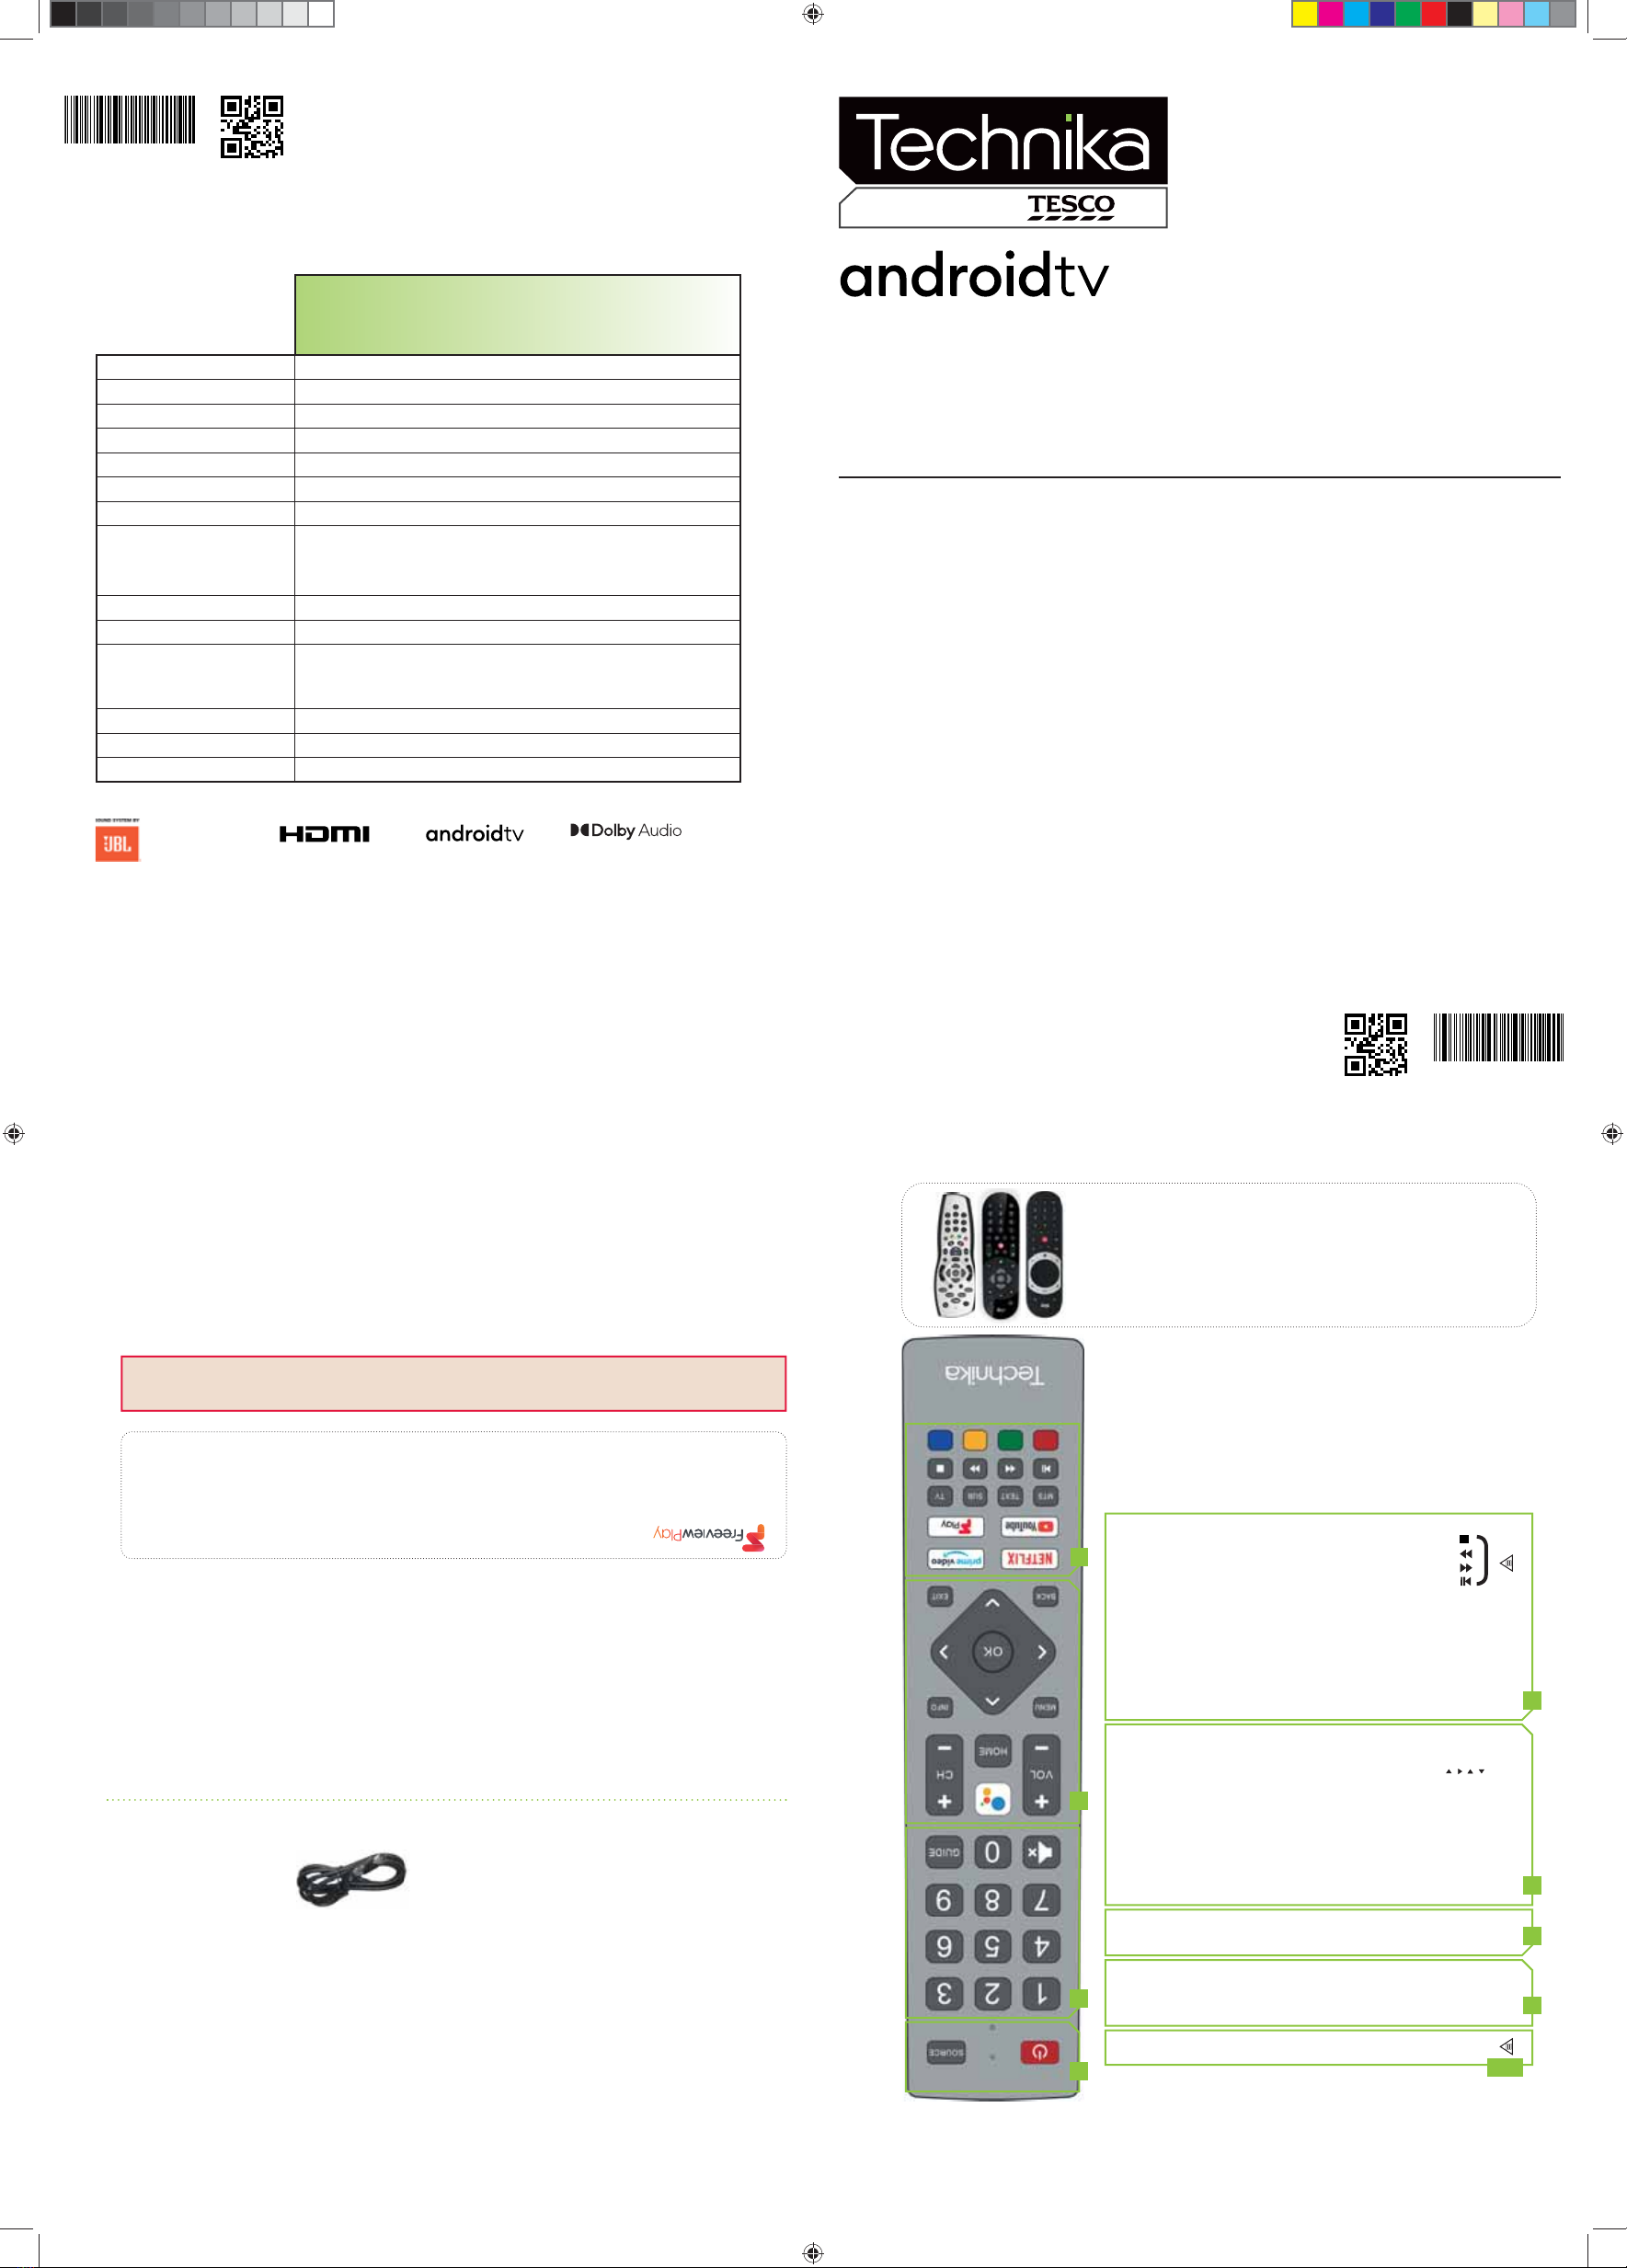
Using the remote control
Setting up the TV for the rst time - including attaching the stand
Connecting other devices to the Television
Need help setting up or using your TV?
Please contact the UK & ROI Helpline*
Telephone UK: 0330 024 0804 or ROI 01443 3940
Online support at: www.umc-uk.co.uk
*Calls to 0330 numbers are charged at standard call rates and are included as part of any bundled minutes with your
phone provider.
Calls to the ROI number are charged at the local call rate.
The telephone opening hours are:
Monday to Friday: 8.30am - 6pm
Saturday: 9am - 5pm
Bank Holidays: 10am - 4pm
Closed Christmas and New Years day
Sky Remote Code
If you wish to use your Sky remote to operate the TV’s basic
functions, you will need a Sky remote control (Revision 9 or later) and
you will need to program it with the code 2134. If you wish to use
your Sky Q remote to operate the TV’s basic functions, you will need
to program it with the code 4170.
Microsoft PlayReady™
This product contains technology subject to certain intellectual property rights of Microsoft. Use or
distribution of this technology outside of this product is prohibited without the appropriate license(s) from
Microsoft.
Content owners use Microsoft PlayReady™ content access technology to protect their intellectual property,
including copyrighted content. This device uses PlayReady technology to access PlayReady-protected
content and/or WMDRM-protected content. If the device fails to properly enforce restrictions on content
usage, content owners may require Microsoft to revoke the device’s ability to consume PlayReady-protected
content. Revocation should not aect unprotected content or content protected by other content access
technologies. Content owners may require you to upgrade PlayReady to access their content. If you decline
an upgrade, you will not be able to access content that requires the upgrade.
STANDBY - Switch on the TV when in standby or vice versa. By long
pressing of this button, the set will display a menu offering power down
option to energy saving standby mode
SOURCE - To display the input/source menu.
VOL (+/-) - To increase/decrease the sound level.
The Google Assistant - Use your voice to access entertainment, control
smart devices, obtain answers on screen, and more.
HOME – Display the TV Home Menu.
CH (+/-) - To increase or decrease the channel being watched.
MENU - Display LIVE TV menu. This button works only in sources (TV,
HDMI, Component, etc.). It will not work in the Home Menu.
INFO - Press once for now/next channel information.
( / / / / OK) - Allows you to navigate the on-screen menus and adjust
the system settings to your preference.
BACK - To go back a previous step.
EXIT - To exit all menus.
NETFLIX - Access the Netflix App.
Prime video - Access the Prime video App.
YouTube - Access the YouTube App.
Freeview Play - Access the Freeview Play app.
MTS – Opens audio track menu.
TEXT - To enter/exit teletext.
SUB - To switch the dialogue at the bottom of the screen (on/off).
TV - To switch to Live TV.
For multimedia playback
Accessories
Included with this TV are the following accessories
Please save your box/packaging as you will need this in the event of warranty/service repair or support. We
are unable to carry out warranty/service if you are unable to package it correctly. The safest way to package
your item in the event of warranty/service repair is in it’s original box/packaging.
1 x Quick Start Guide 1 x Remote Control and 2 x AAA Batteries
1 x Stand installation pack
(includes stand base, stand neck & screws )
1 x Safety Leaflet
- To play/pause media
- To play in fast rewind mode
- To play in fast forward mode
- To stop the playback
COLOUR BUTTONS - Execute corresponding function at that time
To launch the online manual, press the HOME button, select Apps from the Home menu, and select “E-instruction
Manual” from the apps list.
1 x RF Cable
NUMBER BUTTONS - 0–9 to select a TV channel directly.
MUTE - Mute the sound or vice versa.
TV GUIDE - Opens the 7 day TV guide (digital TV mode).
*Built-in JBL speaker systems (Full-range and tweeter).
What is included in the box
Online Manual
Using the remote control
Freeview Play brings together live TV viewing with ‘‘catch up’’ TV services such as BBC iPlayer, ITV player, More4 and
Demand 5. The Freeview Play Explore app features a carousel of genres to select from when searching for programmes,
such as sport, comedy, dramas and soaps, etc. Content is made up from recommendations of the major broadcasters and
offers an alternative means of searching.
Note that to use the full functionality of Freeview Play your set must be connected to the internet.
3
2
4
Key
1
Exclusively for
TEC/QSW/0011
TEC/QSW/0011
2
1
3
4
43A23B-UHD
Energy Eciency Class (SDR) G
Power consumption (SDR) 65 W
Energy Eciency Class (HDR) G
Power consumption (HDR) 103 W
Screen resolution (pixels) 3840 x 2160
Screen diagonal 108 cm / 43 inches
RF 75 ohm Antenna / Analog / DVB / Satellite
Inputs 3 x HDMI, 3 x USB, 1 x SD card reader,
1 x RJ45 LAN/Ethernet,
1 x Composite/CVBS Video & Component/YPbPr Input, 1 x L/R Audio input for
Composite/CVBS & Component YPbPr
Sound Outputs 1 x Digital Optical Audio output, 1 x 3.5mm Headphone
Speaker*/ Amplier Watts (RMS) 2 x 10 / 2 x 8
Voltage and power consumption AC 220V ~ 240V; 50Hz
65/95/115W
(home mode/standard/max)
(<0.5W in Standby)
Dimensions including stand (mm) 968W x 600H x 198D
Net weight (Kgs) 7.4
Wall Mounting VESA 200 x 200 (mm)
Manufactured under license from Dolby
Laboratories. Dolby, DolbyAudio, and the
double-D symbol are trademarks of Dolby
Laboratories Licensing Corporation.
Google, Google Play, YouTube,
Android TV and other marks are
trademarks of Google LLC.
The terms HDMI, HDMI High-
Denition Multimedia Interface,
and the HDMI Logo are trademarks
or registered trademarks of HDMI
Licensing Administrator, Inc.
JBL is trademark of HARMAN International
Industries, Incorporated, registered in the
United States and/or other countries.
TEC-QSW-0011.indd 1TEC-QSW-0011.indd 1 28/09/2021 14:04:1628/09/2021 14:04:16


