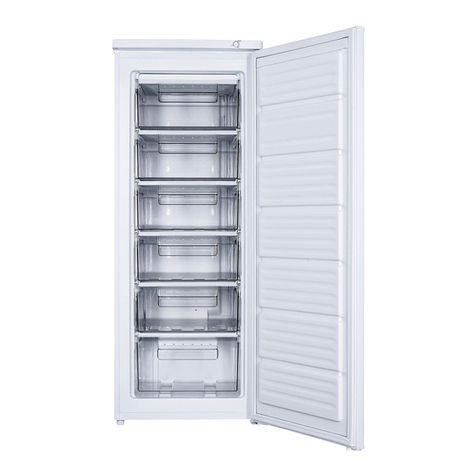
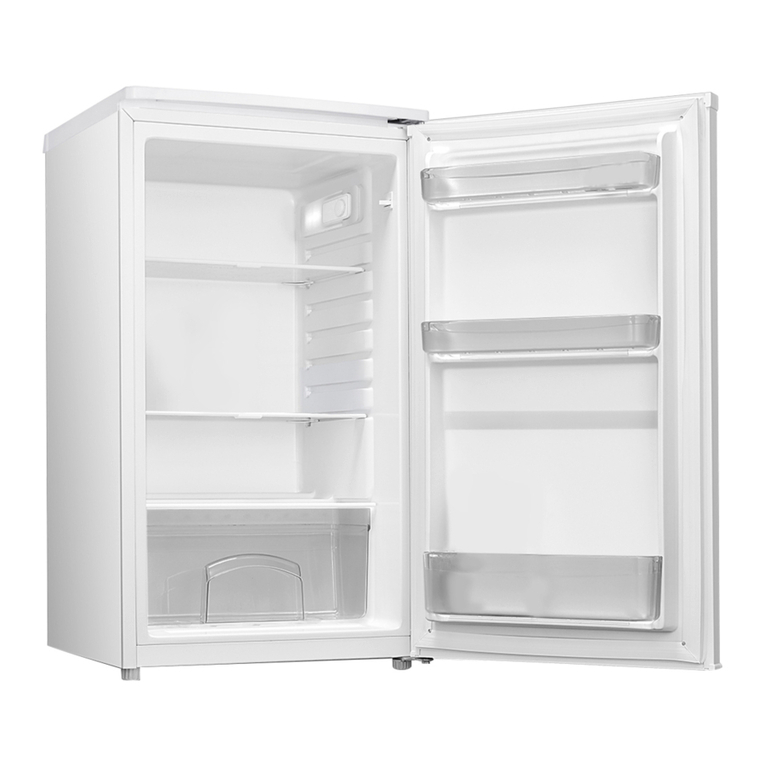
Tesla RC3400FHX User manual

ENG SRB
Product images are for illustrative purposes only and may differ from the actual product.
COMBI FRIDGE
FREEZER
NO-FROST
RC3400FHX
User Manual


3
ENG
SAFETY INFORMATION
In the interest of your safety and to ensure the correct use, before
installing and first using the appliance, read this user manual
carefully, including its hints and warnings.To avoid unnecessary
mistakes and accidents, it is important to ensure that all people using
the appliance are thoroughly familiar with its operation and safety
features. Save these instructions and make sure that they remain
with the appliance if it is moved or sold, so that everyone using it are
properly informed on appliance use and safety.
For the safety of life and property keep to the precautions of these
user instructions as the manufacturer is not responsible for damages
caused by omission.
Children and vulnerable people safety
• This appliance can be used by children aged of 8 years and above
and persons with reduced physical, sensory or mental capabilities,
or lack of experience and knowledge if they have supervision or
have been given instruction concerning the use of the appliance
in a safe way and understand the hazards involved.
• Children should be supervised to ensure that they do not play
with the appliance.
• Cleaning and user maintenance should not be done by children
unless they are aged from 8 years and above and supervised.
• Keep all packaging well away from children. There is risk of
suffocation.
• If you are discarding the appliance pull the plug out of the socket,
cut the connection cable (as close to the appliance as you can)
and remove the door to prevent playing children from suffering
electric shock or closing themselves in.
• If this appliance features a magnetic door seal to replace an older
appliance having a spring lock (latch) on the door or lid, be sure
to make that spring lack unusable before you discard the old
appliance. This will prevent it from becoming a death trap for a
child.
General safety
WARNING!
• Keep ventilation openings, in the appliance enclosure or in the
built-in structure, clear of obstruction.
• Do not use mechanical devices or other means to accelerate
the defrosting process, other than those recommended by the
manufacturer.
• Do not damage the refrigerant circuit.
• Do not use other electrical appliances (such as ice cream makers)
inside of refrigerating appliances, unless they are approved for
this purpose by the manufacture.
• Do not touch the light bulb if it has been on for a long period of
time because it could be very hot.1
• Do not store explosive substances such as aerosol cans with a
flammable propellant in this appliance.
• The refrigerant isobutene (R600a) is contained within the
refrigerant circuit of the appliance, a natural gas with a high level
of environmental compatibility, which is nevertheless flammable.
• During transportation and installation of the appliance, be certain
that none of the components of the refrigerant circuit become
damaged.
- avoid open flames and sources of ignition
- thoroughly ventilate the room in which the appliance is situated
• It is dangerous to alter the specifications or modify this product
in any way. Any damage to the cord may cause a short circuit, fire
and/or electric shock.
1If there is a light in the compartment.
2If there is a freezer compartment.
3If there is a fresh-food storage compartment.
• This appliance is intended to be used in a household and similar
applications such as
- staff kitchen areas in shops, offices and other working
environments;
- farm houses and by clients in hotels, motels and other residential
type environments;
- bed and breakfast type environments;
- catering and similar non-retail applications.
WARNING!
• Any electrical components (plug, power cord, compressor and
etc.) must be replaced by a certified service agent or qualified
service personnel.
• The light bulb supplied with this appliance is a “special use light
bulb” usable only with the appliance supplied. This “special use
lamp” is not usable for domestic lighting.
• Power cord must not be lengthened.
• Make sure that the power plug is not squashed or damaged by
the back of the appliance. A squashed or damaged power plug
may overheat and cause a fire.
• Make sure that you can come to the main plug of the appliance.
• Do not pull the main cable.
• If the power plug socket is loose, do not insert the power plug.
There is a risk of electric shock or fire.
• You must not operate the appliance without the lamp.
• This appliance is heavy. Care should be taken when moving it.
• Do not remove nor touch items from the freezer compartment if
your hands are damp/wet, as this could cause skin abrasions or
frost/freezer burns.
• Avoid prolonged exposure of the appliance to direct sunlight.
Daily use
• Do not put hot things on the plastic parts in the appliance.
• Do not place food products directly against the rear wall.
• Frozen food must not be re-frozen once it has been thawed out. 2
• Store pre-packed frozen food in accordance with the frozen food
manufacture, s instructions. 2
• Appliance, s manufactures storage recommendations should be
strictly adhered to. Refer to relevant instructions.
• Do not place carbonated of fizzy drinks in the freezer
compartment as it creates pressure on the container, which may
cause it to explode, resulting in damage to the appliance.2
• Ice lollies can cause frost burns if consumed straight from the
appliance.2
Care and cleaning
• Before maintenance, switch off the appliance and disconnect the
main plug from the power socket.
• Do not clean the appliance with metal objects.
• Do not use sharp objects to remove frost from the appliance. Use
a plastic scraper. 2
• Regularly examine the drain in the refrigerator for defrosted water.
If necessary, clean the drain. If the drain is blocked, water will
collect at the bottom of the appliance. 3
Installation
IMPORTANT! For electrical connection carefully follow the
instructions given in specific paragraphs.
• Unpack the appliance and check if there are damages on it.
Do not connect the appliance if it is damaged. Report possible
damages immediately to the place you bought it. In that case
retain packing.
• It is advisable to wait at least four hours before connecting the
appliance to allow the oil to flow back in the compressor.
4
ENG
• Adequate air circulation should be provided around the
appliance, lacking this leads to overheating. To achieve sufficient
ventilation, follow the instructions relevant to installation.
• Wherever possible the spacers of the product should be against
a wall to avoid touching or catching warm parts (compressor, con-
denser) to prevent possible burn.
• The appliance must not be located close to radiators or cookers.
• Make sure that the main plug is accessible after the installation of
the appliance.
Service
• Any electrical work required to do the servicing of the appliance
should be carried out by a qualified electrician or competent
person.
• This product must be serviced by an authorized Service Center,
and only genuine spare parts must be used.
Energy saving
• Do not put hot food in the appliance;
• Do not pack food close together as this prevents air circulating;
• Make sure food does not touch the back of the compartment(s);
• If electricity goes off, do not open the door(s);
• Do not open the door(s) frequently;
• Do not keep the door(s) open for a long time;
• Do not set the thermostat on exceeding cold temperatures;
• Some accessories, such as drawers, can be removed to get larger
storage volume and lower energy consumption.
Environment Protection
This appliance does not contain gasses which could damage
the ozone layer, in either its refrigerant circuit or insulation materials.
The appliance shall not be discarded together with the urban refuse
and rubbish. The insulation foam contains flammable gases: the
appliance shall be disposed according to the appliance regulations
which can be obtained from your local authorities. Avoid damaging
the cooling unit, especially the heat exchanger. The materials used
on this appliance marked by the symbol are recyclable.
The symbol on the product or on its packaging indicates
that this product may not be treated as household waste.
Instead it should be taken to the appropriate collection
point for the recycling of electrical and electronic
equipment. By ensuring this product is disposed of correctly, you will
help prevent potential negative consequences to the environment
and human health, which could otherwise be caused by
inappropriate waste handling of this product. For more detailed
information about recycling of this product, please contact your local
council, your household waste disposal service or the shop where
you purchased the product.
Packaging materials
The materials with the symbol are recyclable. Dispose the packaging
in a suitable collection container to recycle it.
Disposal of the appliance
1. Disconnect the power plug from the power socket.
2. Cut off the power cable and discard it.
OVERVIEW
Note: Picture is for
reference only. Real
appliance probably is
different.
Fridge Balconies
Fridge Shelves
Freezer Drawers
Crisper Cover
Crisper
Fresh convertible box
Leveling Feet

5
ENG
Door Reversibility
INSTALLATION
Before reversing the door, please be prepared below tools and material: straight screwdriver, cross screwdriver, spanner and the components
included in the poly bag:
1. Unscrew top hinge cover and disconnect connectors of door
switch and harness.
2. Unscrew top hinge
Space Requirement
• Select a location without direct exposure to sunlight;
• Select a location with enough space for the refrigerator doors to
open easily;
• Select a location with level (or nearly level) flooring;
• Allow sufficient space to install the refrigerator on a flat surface;
• Allow clearance to the right, left, back and top when installing. This
will help reduce power consumption and keep your energy bills
lower.
• Keep at lest 50mm gap at two sides and back.
Positioning
Install this appliance at a location where the ambient temperature
corresponds to the climate class indicated on the rating plate of the
appliance:
Climate class Ambient temperature
SN +10ºC to +32ºC
N+16ºC to +32ºC
ST +16ºC to +38ºC
T+16ºC to +43ºC
Location
The appliance should be installed well away from sources of heat
such as radiators, boilers, direct sunlight etc. Ensure that air can
circulate freely around the back of the cabinet. To ensure best
performance, if the appliance is positioned below an overhanging
wall unit, the minimum distance between the top of the cabi- net and
the wall unit must be at least 100 mm. Ideally, however, the appliance
should not be positioned below overhanging wall units. Accurate
leveling is ensured by one or more adjustable feet at the base of the
cabinet.
WARNING!
It must be possible to disconnect the appliance from the mains
power supply; the plug must therefore be easily accessible after
installation.
Electrical connection
Before plugging in, ensure that the voltage and frequency shown
on the rating plate correspond to your domestic power supply.
The appliance must be earthed. The power supply cable plug is
provided with a contact for this purpose. If the domestic power
supply socket is not earthed, connect the appliance to a separate
earth in compliance with current regulations, consulting a qualified
electrician.
The manufacturer declines all responsibility if the above safety
precautions are not observed. This appliance complies with the
E.E.C. Directives.
Left Door Hinge Cover x 1 Left Aid-Closer on Upper Door x 1 Left Aid-Closer on Lower Door x 1
1 2

6
ENG
3. Remove the pin with a screwdriver and filp the hinge bracket.Then
refit the pin to hinge bracket
4. Move door switch from right hinge cover to left hinge cover in
accessary bag.
5. Detach cover in top of upper
door and move harness from
right side to left side, then
replace the cover.
6. Move top left cover to right
side
7. Take off the upper door, take
out the screw from the middle
hinge by cross screwdriver, then
take off the lower door.
8.. Move the hinge hole covers
from left side to right side.
9. Unscrew bottom hinge. Then remove the adjustable feet from
both side.
10. Unscrew and remove the bottom hinge pin, turn the bracket over
and replace it.
11. Refit the bracket fitting the bottom hinge pin. Replace both
adjustable feet.
unscrew screw
3 4
5
6
7 8 9
unscrew screw
10 11

7
ENG
12. Remove aid-closers from bottom of upper and lower doors, then take
new aid-closers from accessary bag and install them to left side.
• Keep enough space of door open.
• Keep at least 50mm gap at two sides.
To do this adjust the two levelling feet at front of the unit.
If the unit is not level, the doors and magnetic seal alignments will not be
covered properly.
13. Detach the Fridge and the Freezer door gaskets and
then attach them after rotating.
14. Install the lower
door, adjust and fix
the middle hinge
onto the cabinet.
15. Replace upper door, please
ensure the door align with
the cabinet to make sure
door gasket seal the cabinet
tightly. Then connect door
with cabinet by tightly fixed
top hinge.
16. Connect harnesses from door and
cabinet. Then replace top hinge
cover. Before screw the cover,
connect terminals of door switch.
Install door external handle (if external handle is present)
Space Requirement Leveling the unit
12 13
14 15
16

8
ENG
USER INTERFACE
Using the Control Panel
BUTTON OPERATION
A. Temperature Control of Fridge Compartment
B. Temperature Control of Freezer Compartment
C. Mode/ Locking / Unlocking
LED DISPLAY
1. Temperature of Fridge Comparment
2. Temperature of Freezer Comparment
3. ECO Mode
4. Holiday Mode
5. Super Mode
6. Locking / Unlocking
OPERATING CONDITION
a. The control panel is 100% lit up for 3 seconds, which operates
exactly as per the setting (mode and temperature) before
the poweroff. The system will be automatically locked 25
seconds after the last button operation. After locking, the light
of the panel would be out 30 seconds after the last button
operation.
b. Both preset temperatures of fridge compartemnt and freezer
compartment would be shown on the display.
DISPLAY
• The panel will be lit up for 2 minutes once the door of fridge
compartment is opened.
• The panel will be lit up by any button operation whereas the
light would be out 2 minutes after the last operation.
• Display during normal operation
Temperature Display of the Fridge Compartment: Indicating
the temperature of the current setting.
Temperature Display of the Freezer Compartment: Indicating
the temperature of the current setting.
BUTTONS
• Temperature Control of the Fridge Compartment
This button is workable both in User Defined Mode as well as
Super Mode. After entering the temperature control of the
fridge compartment, this button flashes.
By touching the key consecutively, the temperature would change
in a circle of “2°C, 3°C, 4°C, 5°C, 6°C, 7°C, 8°C, after which
5-second flashing means the selection of temperature is settled.
• Temperature Control of the Freezer Compartment
This button is workable both in User Defined Mode as well as
Holiday Mode. After entering the temperature control of the
freezer compartment, the button flashes.
By touching the button consecutively, the temperature would
change in a circle from -14°C to -22°C, after which a 5-second
flashing means the selection of temperature is settled.
• Mode
By touching this button consecutively, the operation mode of the
refrigerator will change in a circle of “ECO Mode-Holiday Mode-
Super Mode-User Defined Mode. A 5-second flashing means the
selection of temperature is settled.
• Press Button
Short beep after per press button
All buttons will only valid under unlock mode.
• Lock / Unlock
Press MODE button and hold for 3 seconds to lock other two
buttons, then the LOCK icon will be at lock situation after a beep.
To unlock, press MODE button and hold for 3 seconds, then
LOCK icon will be at unlock situation after a beep. In unlock
situation, all buttons are workable.
If no any operation in 25 seconds, the display will be locked
automatically. Keep press “MODE” button to unlock the display.
ECO mode
Press MODE bottom to choose ECO mode.After 5 seconds of flash,
ECO icon will keep bright and ECO mode is confirmed.
In ECO mode, the refrigerator will automatically set temperature of
fridge compartment at 5°C, as temperature of freezer compartment
at -18°C. Except MODE button, other buttons will not response any
press.
Press MODE button to exit ECO mode.
• Holiday Mode
Press MODE button to choose Holiday mode. After 5 seconds of
flash, Holiday mode icon will keep bright and Holiday mode is
confirmed.
In Holiday mode, temperature of fridge will be set at 17°C.
“FRIDGE” button will not response any press.
Press “MODE” button to exit Holiday mode.
• Super mode
Press MODE button to select Super mode. And it will be
confirmed after 5 seconds of flash of Super icon.
In Super mode, “FREEZER” button will not response any press. To
exit Super mode,
- Adjust mode by MODE button,
- Or after 50 hours of Super mode, the refrigerator will
automatically stop it and enter to previous setting.
Helpful hint:
If you plan to freeze a large number food in one time, please set
Super mode 24 hours ahead.
WARNING!
In Super mode, the refrigerator will work hard. So the noise of
refrigerator will be slightly higher than normal running.
Door Open Alarm
if fridge (upper) door keeps open for 90 seconds, periodical alarm
will be arisen until the door is closed.

9
ENG
First use
Cleaning the interior
Before using the appliance for the first time, wash the interior and
all internal accessories with lukewarm water and some neutral soap
so as to remove the typical smell of a brand new product, then dry
thoroughly.
IMPORTANT! Do not use detergents or abrasive powders, as
these will damage the finish.
Daily use
Freezing fresh food
• The freezer compartment is suitable for freezing fresh food and
storing frozen and deep-frozen food for a long time.
• Place the fresh food to be frozen in the bottom compartment.
• The maximum amount of food that can be frozen in 24 hours is
specified on the rating plate.
• The freezing process lasts 24 hours: during this period do not
add other food to be frozen.
Storing frozen food
When first starting-up or after a period out of use. Before putting the
product in the compartment let the appliance run at least 2 hours on
the higher settings.
Important! In the event of accidental defrosting, for example the
power has been off for longer than the value shown in the technical
characteristics chart under “rising time”, the defrosted food must be
consumed quickly or cooked immediately and then re-frozen (after
cooked).
Thawing
Deep-frozen or frozen food, prior to be used, can be thawed in the
freezer compartment or at room temperature, depending on the
time available for this operation.
Small pieces may even be cooked still frozen, directly from the
freezer. In this case, cooking will take longer.
Helpful hints and tips
Hints for freezing
To help you make the most of the freezing process, here are some
important hints:
• the maximum quantity of food which can be frozen in 24 hrs. is
shown on the rating plate;
• the freezing process takes 24 hours. No further food to be frozen
should be added during this period;
• only freeze top quality, fresh and thoroughly cleaned, foodstuffs;
• prepare food in small portions to enable it to be rapidly and
completely frozen and to make it possible subsequently to thaw
only the quantity required;
• wrap up the food in aluminium foil or polythene and make sure
that the packages are airtight;
• do not allow fresh, unfrozen food to touch food which is already
frozen, thus avoiding a rise in temperature of the latter;
• lean foods store better and longer than fatty ones; salt reduces
the storage life of food;
• water ices, if consumed immediately after removal from the
freezer compartment, can possibly cause the skin to be freeze
burnt;
• it is advisable to show the freezing in date on each individual
pack to enable you removal from the freezer compartment, can
possibly cause the skin to be freeze burnt;
• it is advisable to show the freezing in date on each individual pack
to enable you to keep tab of the storage time.
Hints for storage of frozen food
To obtain the best performance from this appliance, you should:
make sure that the commercially frozen foodstuffs were adequately
stored by the retailer;
be sure that frozen foodstuffs are transferred from the food store to
the freezer in the shortest possible time;
not open the door frequently or leave it open longer than absolutely
necessary. Once defrosted, food deteriorates rapidly and cannot be
refrozen.
Do not exceed the storage period indicated by the food
manufacture.
Hints for fresh food refrigeration
To obtain the best performance:
• Do not store warm food or evaporating liquids in the refrigerator
• Do cover or wrap the food, particularly if it has a strong flavour
Hints for refrigeration
• Make (all types): wrap in polythene bags and place on the glass
shelves above the vegetable drawer.
• For safety, store in this way only one or two days at the most.
• Cooked foods, cold dishes, etc...: these should be covered and
may be placed on any shelf.
• Fruit and vegetables: these should be thoroughly cleaned and
placed in the special drawer(s) provided.
• butter and cheese: these should be placed in special airtight
containers or wrapped in aluminum foil or polythene bags to
exclude as much air as possible.
• Milk bottle: these should have a cap and should be stored in the
balconies on the door.
• Bananas, potatoes, onions and garlic, if not packed, must not be
kept in the fridge.
Fresh Zone Temperature Control
• Temperature of the fresh can be adjusted according to the type of
storage food.
• Push the knob upward from the bottom, temperature in the fresh
zone will be gradually decreased.
• When the knob is placed at the “CRISPER” position, the fresh zone
can be functioned as a crisper zone and maintain the appropriate
temperature and humidity for fruits and vegetable.
• When the knob is placed at the “ CHILLER” position, it is suitable
for short-term storage of fish or other fresh food. The food will
keep fresh but not frozen which makes it the best choice for
storing fresh food.
• Tips: When you choose “ CHILLER” function, it is recommended to
set the refrigerator temperature below 4°C . and preserved lead-
time no more than 3 days , in order to keep the best freshness.
DAILY USE

10
ENG
Cleaning
For hygienic reasons the appliance interior, including interior
accessories, should be cleaned regularly.
CAUTION!
The appliance may not be connected to the mains during cleaning.
Danger of electrical shock! Before cleaning switch the appliance
off and remove the plug from the mains, or switch off or turn out
the circuit breaker or fuse. Never clean the appliance with a steam
cleaner. Moisture could accumulate in electrical components, danger
of electrical shock! Hot vapors can lead to the damage of plastic
parts. The appliance must be dry before it is placed back into service.
IMPORTANT! Ethereal oils and organic solvents can attack
plastic parts, e.g. lemon juice or the juice form orange peel, butyric
acid, cleanser that contain acetic acid.
CAUTION!
Before troubleshooting, disconnect the power supply. Only a qualified electrician of competent person must do the troubleshooting that is not
in this manual.
IMPORTANT! There are some sounds during normal use (compressor, refrigerant circulation).
If the malfunction shows again, contact the Service Center.
These data are necessary to help you quickly and correctly. Write the necessary data here, refer to the rating plate.
TROUBLESHOOTING
Problem Possible cause Solution
Appliance does not
work
Power plug is not plugged in or is loose Insert power plug.
Fuse has blown or is defective Check fuse, replace if necessary.
Socket is defective Socket malfunctions are to be corrected by an electrician.
Appliance freezes or
cools too much
Temperature is set too cold or the appliance runs
at SUPER modes.
Turn the temperature regulator to a warmer setting
temporarily.
The food is not frozen
enough.
Temperature is not properly adjusted. Please look in the initial Temperature
Setting section.
Door was open for an extended period. Open the door only as long as necessary.
A large quantity of warm food was placed in the
appliance within the last 24 hours.
Turn the temperature regulation to a colder setting
temporarily.
The appliance is near a heat source. Please look in the installation location section.
Heavy buildup of frost
on the door
seal.
Door seal is not air tight.
Carefully warm the leaking sections of the door seal with a
hair dryer (on a cool setting). At the same time shape, the
warmed door seal by hand so that it sits correctly.
Unusual noises
Appliance is not level. Re-adjust the feet.
The appliance is touching the wall or other
objects. Move the appliance slightly.
A component, e.g. a pipe, on the rear of the
appliance is touching another part of the
appliance or the wall.
If necessary, carefully bend the component out of the way.
Side panel is hot Condenser is inside the panel. It`s normal.
• Do not allow such substances to come into contact the appliance
parts.
• Do not use any abrasive cleaners
• Remove the food from the freezer. Store them in a cool place, well
covered.
• Switch the appliance off and remove the plug from the mains, or
switch off or turn out the circuit breaker of fuse.
• Clean the appliance and the interior accessories with a cloth and
lukewarm water. After cleaning wipe with fresh water and rub dry.
• After everything is dry place appliance back into service.
Replace the lamp
The internal light is a LED type. To replace the lamp, please contact
qualified technician.

11
SRB
BEZBEDNOSNA UPUTSTVA
Radi sopstvene bezbednosti obezbedite sigurnu upotrebu, pre
instalacije i prve upotrebe uređaja, pročitajte ovo korisničko uputstvo,
uključujući i savete i upozorenja. Da biste izbegli nepotrebne greške
i nezgode, važno je da se postarate da sve osobe koje koriste uređaj
budu detaljno upoznate s njegovim operacijama i bezbedonosnim
funkcijama. Sačuvajte ova uputstva i pobrinite se da budu u sklopu
uređaja ako bude premešten ili prodat, kako bi svako, ko ga
koristi tokom svog života bio upoznat sa pravilnom upotrebom i
bezbednošću uređaja.
Imajte na umu ovo korisničko uputstvo radi svoje lične sigurnosti i
sigurnosti imovine, budući da proizvođač nije odgovoran za štetu
učinjenu propustima.
Bezbednost dece i nesamostalnih osoba
• Ovaj uređaj mogu koristiti deca starosti 8 ili više godina i osobe
sa smanjenim fizičkim, čulnim ili mentalnim sposobnostima, ili
manjkom iskustva i znanja ukoliko su pod nadzorom, ili su im data
uputstva u vezi sa bezbednom upotrebom uređaja, i svesni su
mogućeg rizika.
• Deca bi trebalo da budu pod nadzorom, kako biste osigurali da se
ne igraju uređajem.
• Čišćenjem i održavanjem ne bi trebalo da se bave deca, osim
ako nisu starosti 8 ili više godina i moraju biti pod obaveznim
nadzorom.
• Svu ambalažu čuvajte van domašaja dece. Postoji opasnost od
gušenja.
• Ukoliko ste odlučili da više ne koristite uređaj, prekinite napajanje
uređaja strujom, presecite kabl za napajanje (što je bliže moguće
uređaju) i uklonite vrata, kako biste sprečili mogućnost da deca,
koja se igraju, pretrpe strujni udar ili se zatvore u uređaj.
• Ukoliko ovaj uređaj ima magnetnu gumu na vratima, a želite da
njime zamenite stariji uređaj, koji se zatvarao pomoću opruge
na vratima ili poklopcu, onemogućite funkcionisanje zatvaranja
starijeg uređaja pomoću opruge. Na ovaj način ćete sprečiti da
uređaj postane smrtonosna zamka za dete.
Opšta bezbednost
UPOZORENJE!
• Održavajte ventilacione otvore u kućištu frižidera ili ugradnoj
strukturi čistima od začepljenja.
• Nemojte koristiti mehaničke uređaje ili druge naprave kako biste
ubrzali proces odmrzavaja, osim proizvoda preporučenih od
strane proizvođača uređaja.
• Nemojte oštetiti sistem za hlađenje.
• Nemojte stavljati druge električne uređaje (kao što su uređaji za
pravljenje sladoleda) u uređaj za hlađenje, osim ako ih proizvođač
nije odobrio u ovu svrhu.
• Ne dirajte sijalicu ukoliko radi duže vremena, jer može biti veoma
vruća.1
• Nemojte čuvati eksplozivne supstance, kao što su ambalaže
sprejeva sa zapaljivim gasom u ovom uređaju.
• Supstanca za hlađenje, izobutan (R600a), se nalazi u sistemu za
hlađenje uređaja, to je prirodni gas s visokim nivoom ekološke
kompatibilnosti, ali izuzetno zapaljiv.
• Pobrinite se da tokom transporta ili postavljanja uređaja ne bude
oštećena nijedna komponenta sistema za hlađenje uređaja.
- izbegavajte otvoren plamen i izvore zapaljivosti
- temeljno provetrite prostoriju, u kojoj se nalazi uređaj
• Opasno je menjati specifikacije ili modifikovati proizvod na bilo
koji način. Bilo kakvo oštećenje kabla može prouzrokovati kratak
spoj, požar i/ili strujni udar.
1Ukoliko u uređaju postoji.
2Ukoliko postoji deo za zamrzavanje.
3Ukoliko postoji deo za čuvanje sveže hrane
• Ovaj uređaj je namenjen za upotrebu u domaćinstvima i za slične
primene, kao što su
- prostori za zaposlene u kuhinji, u prodavnicama, kancelarije i
druga radna okruženja;
- poljoprivredna domaćinstva i od strane hotelskih i motelskih
gostiju, kao i drugih vrsta ovakvih objekata;
- objekti koji pružaju uslugu noćenja sa doručkom;
- ketering i slične neprodajne namene.
UPOZORENJE!
• Bilo koju električnu komponentu (utikač, kabl za napajanje,
kompresor itd.) mora zameniti ovlašćeni serviser ili kvalifikovano
osoblje.
• Sijalica, dostavljena sa ovim uređajem, je “sijalica za specijalnu
namenu” i može se koristiti samo za uređaj uz koji je dostavljena.
Ova “sijalica za specijalnu namenu” se ne može koristiti za kućno
osvetljenje.
• Kabl za napajanje se ne sme produžavati.
• Proverite da li je utikač, na zadnjoj strani uređaja, zgnječen ili
oštećen. Zgnječen ili oštećen utikač može dovesti do pregrevanja
i izazvati požar.
• Pobrinite se da vam glavni utikač uređaja bude dostupan.
• Nemojte izvlačiti glavni kabl.
• Ukoliko utičnica nije fiksirana, nemojte priključivati aparat. Postoji
rizik od strujnog udara ili vatre.
• Ne smete raditi ništa na uređaju bez osvetljenja.
• Uređaj je težak. Budite oprezni tokom pomeranja uređaja.
• Nemojte uklanjati ili dodirivati elemente iz dela za zamrzavanje
ako su vam ruke vlažne/mokre, budući da to može prouzrokovati
ogrebotine ili promrzline na koži.
• Izbegavajte duže izlaganje aparata direktnoj sunčevoj svetlosti.
Dnevna upotreba
• Ne stavljajte vruće stvari na plastične delove uređaja.
• Ne stavljate prehrambene proizvode uza zadnji zid.
• Zamrznuta hrana se ne sme ponovo zamrzavati nakon što se
otopi.2
• Već zapakovanu zamrznutu hranu čuvajte u skladu sa
instrukcijama proizvođača, u vezi sa zamrznutom hranom.2
• Striktno se pridržavajte preporuka proizvođača u pogledu držanja
stvari u uređaju. Pridržavajte se relevantnih instrukcija.
• Ne stavljate gazirana pića u deo za zamrzavanje, budući da to
stvara pritisak, koji može prouzrokovati pucanje ambalaže, što
može dovesti do oštećenja uređaja.2
Održavanje i čišćenje
• Pre održavanja, isključite uređaj, ili prekinite dotok električne
energije.
• Uređaj nemojte čistiti metalnim predmetima.
• Ne koristite oštre predmete, da bi uklonili led sa uređaja. Koristite
plastična sredstva za struganje. 2
• Redovno proveravajte odvod za odleđenu vodu u frižideru.
Ukoliko je potrebno, očistite odvod. Ukoliko je odvod blokiran,
voda će se sakupljati na dnu uređaja. 3
Instalacija uređaja
VAŽNO! Za priključivanje na električnu mrežu, pažljivo pratite
uputstva data u specifičnim delovima uputstva.
• Raspakujte uređaj i proverite da li postoje na njemu oštećenja. Ne
povezujte uređaj na struju, ukoliko je oštećen. Moguća oštećenja
odmah prijavite u mestu gde ste ga kupili. U tom slučaju zadržite
ambalažu uređaja.
• Preporučuje se, da sačekate najmanje četiri sata pre nego što priključite
uređaj, kako bi se ulje vratilo u kompresor.

12
SRB
• Potrebno je obezbediti adekvatno strujanje vazduha oko uređaja,
nepostojanje ovoga može dovesti do pregrevanja. Za postizanje
odgovarajućeg protoka vazduha, pratite uputstva potrebna za
instalaciju uređaja.
• Gde god je moguće, razmaknica mora biti postavljena između uređaja
i zida, kako bi se izbeglo dodirivanje ili hvatanje za vruće delove
(kompresor, kondenzator) kako bi se izbegle moguće opekotine.
• Uređaj ne sme biti postavljen blizu radijatora ili štednjaka.
• Pobrinite se da bude obezbeđen lak pristup glavnom utikaču i nakon
postavljanja uređaja.
Servisiranje
• Bilo kakvo servisiranje uređaja, koje zahteva električne radove,
treba da bude obavljen od strane kvalifikovanog električara ili
kompetentne osobe.
• Samo ovlašćeni centar za servisiranje može obaviti popravke na
uređaju, i mogu se koristiti samo originalni rezervni delovi.
Ušteda energije
• Ne stavljate vruću hranu u uređaj;
• Ne pakujte svu hranu zajedno, budući da to sprečava cirkulaciju
vazduha;
• Pobrinite se da hrana ne dotiče zadnji deo pregrade(a);
• Ukoliko nestane struje, ne otvarajte vrata;
• Ne otvarajte često vrata;
• Ne držite vrata otvorena drugo;
• Nemojte postavljati termostat na izuzetno niske temperature
• Određeni elementi, kao što su fioke, mogu biti uklonjeni, kako bi
se napravila veća zapremina za skladištenje, i smanjila potrošnja
energije.
Zaštita životne sredine
Ovaj uređaj ne sadrži gasove, koji mogu oštetiti ozonski omotač, ni
u sistemu za hlađenje, ni u materijalima za izolaciju. Uređaj ne bi trebalo
odlagati zajedno sa gradskim ili kućnim otpadom. Izolaciona pena sadrži
zapaljive gasove: uređaj bi trebalo odložiti u skladu sa propisima za
uređaje, koje su izdale lokale vlasti. Izbegavajte pravljenje oštećenja dela
za hlađenje, posebno dela za razmenu toplote. Materijali korišćeni za ovaj
uređaj, mogu se reciklirati ukoliko su označeni simbolom za reciklažu.
Oznaka na proizvodu, ili njegovom pakovanju, ukazuje da ovaj
proizvod ne sme biti tretiran kao otpad nastao u domaćinstvu.
Umesto toga, treba ga ostaviti na odgovarajućem mestu, na
kojem se sakuplja električna i elektronska oprema.
Osiguravanjem da je proizvod ispravno odložen, pomoćićete
sprečavanju potencijalnih negativnih posledica po životnu sredinu i
ljudsko zdravlje, koje inače mogu biti uzrokovane nepravilnim odlaganjem
otpada ovog uređaja. Za više detalja o recikliranju ovog proizvoda,
molimo vas da kontaktirate svoju lokalni organ za zaštitu životne sredine,
preduzeće za odlaganje komunalnog otpada ili prodavnicu, u kojoj ste
kupili proizvod.
Materijali ambalaže
Materijali označeni ovim simbolom mogu se reciklirati. Ambalažu odložite
u odgovarajući konterjner za prikupljanje otpada za reciklažu.
Odlaganje uređaja
1. Prekinite napajanje uređaja strujom.
2. Odsecite kabl za napajanje i odložite ga.
PREGLED
Ova ilustracija je samo
okvirna, molimo vas da
za detalje pogledajte svoj
uredjaj.
Police frižidera
Police frižidera
Fioke za zamrzavanje
Poklopac za korpu sa
kontrolom vlažnosti
Korpa sa kontrolom vlažnosti
Prilagodljiva kutija za svežu hranu
Podesive nožice

13
SRB
Zamena položaja vrata
INSTALACIJA
Pre nego što zamenite položaj vrata, molimo Vas da pripremite sledeće alate i materijale: ravan šrafciger, krstasti šrafciger, francuski ključ i
delove koji se nalaze u kesici uz uređaj:
1. Odšrafite gornji poklopac za šarku i zatim odvojte konektore
prekidača i kablova za vrata.
2. Odšrafite gornju šarku.
Potrebe prostora
• Odaberite mesto bez direktnog izlaganja sunčevim zracima;
• Odaberite mesto za uređaj gde ima dovoljno prostora za
neometano otvaranje vrata.
• Odaberite mesto za uređaj koje je na nivou poda (ili malo
odstupa visinom);
• Pronađite mesto za uređaj na kome će biti dovoljno mesta da bi
se uređaj instalirao na ravnoj površini;
• Pronađite mesto za uređaj na kome će biti dovoljno slobodnog
prostora sa leve, desne, zadnje i prednje strane kada ga instalirate
Ovo će Vam omogućiti vidnu uštedu energije i smanjiti Vam
troškove.
• Ostavite najmanje 50mm razmaka s obe strane.
Postavljanje uređaja
Postavite ovaj uređaj na mesto, na kojem će sobna temperatura
odgovarati klimatskom razredu, naznačenom na specifikaciji
proizvoda:
Klimatska klasa Sobna temperatura
SN +10ºC do +32ºC
N+16ºC do +32ºC
ST +16ºC do +38ºC
T+16ºC do +43ºC
Lokacija
Uređaj treba da bude postavljen daleko od izvora toplote, kao što su
radijatori, bojleri, izlaganje direktnim sunčevim zracima itd. Postarajte
se da vazduh slobodno cirkuliše oko zadnjeg dela frižidera. Kako
biste osigurali najbolji učinak, ukoliko je uređaj postavljen ispod
visećeg dela, minimalni razmak između vrha uređaja i visećeg dela
treba da bude bar 100 mm. Idealno bi bilo da uređaj ne bude
postavljen ispod visećeg dela. Odgovarajuća nivelacija se postiže uz
pomoć jedne ili više podesnih nožica, u zavisnosti od uređaja.
UPOZORENJE!
Prekidanje napajanja uređaja mora biti omogućeno; iz tog razloga,
utičnica mora biti dostupna nakon postavljanja uređaja.
Povezivanje na struju
Pre uključivanja, proverite da napon i frekvencija prikazana na tablici
specifikacije odgovaraju naponu električne energije domaćinstva.
Ovaj uređaj mora biti uzemljen. Kabl za napajanje električnom
energijom je opremljen kontaktom za ovu namenu. Ukoliko utičnica
u domaćinstvu nema uzemljenje, priključite uređaj na izdvojeno
uzemljenje u skladu sa trenutnim propisima; konsultujte se sa
kvalifikovanim električarem.
Proizvođač ne snosi nikakvu odgovornost, ukoliko gore navedene
preventivne mere nisu ispoštovane. Ovaj uređaj ispunjava uslove
EEC direktiva.
Poklopac za šarku levih vrata x1 Pomoćni zatvarač levih gornjih vrata x1 Pomoćni zatvarač desnih donjih vrata x 1
1 2

14
SRB
3. Uklonite iglu pomoću odvijača i obrnite šarku. Zatim ponovo
stavite iglu u šarku.
4. Premestite prekidač za vrata s desnog poklopca za šarku na levi
poklopac za šarku, koji se nalazi u torbi sa priborom.
5. Odvojite poklopac s vrha gornjih
vrata i premestite kablove s
desne strane na levu stranu i
zatim zamenite poklopac.
6. Premestite gornji levi
poklopac na desnu stranu
7. Skinite gornja vrata, izvadite
šraf iz srednje šarke uz pomoć
krstastog šrafcigera, zatim
skinite donja vrata.
8. Premestite štitnike rupe
za šarke sa leve na desnu
stranu.
9. Odšrafite donju šarku. Zatim uklonite podesive nožice s obe
strane.
10. Odvrnite i uklonite donju iglu na šarci, i okrenite podupirač, zatim
ga vratite.
11. Ponovo postavite podupirač, tako što ćete staviti iglu. Vratite
obe podesive nožice.
odšrafite zašrafite
3 4
5
6
7 8 9
odšrafite zašrafite
10 11

15
SRB
12. Uklonite pomoćni zatvarač s dna gornjih i donjih vrata, zatim uzmite nove
pomoćne zatvarače iz torbe s priborom i postavite ih na levu stranu.
• Ostavite dovoljno prostora za otvaranja vrata.
• Ostavite najmanje 50mm razmaka s obe strane.
Kako biste ovo uradili, podesite dve podesne nožice s prednje strane
uređaja.
Ukoliko uređaj nije poravnan, vrata i magnetna guma neće pravilno
prijanjati.
13. Odvojte vrata i zaptivke frižidera i zamrzivača i zatim
ih ponovo pripojite nakon rotiranja.
14. Instalirajte donja
vrata, prilagodite
i fiksirajte srednju
šarku na uređaj.
15. Zamenite gornja vrata, molimo
Vas, pobrinite se da vrata
budu poravnana s uređajem,
kako biste osigurali da
zaptivka bude pričvršćena uz
uređaj. Zatim povežite vrata
s uređajem, tako što ćete
pričvrstiti šarku.
16. Povežite kablove vrata i uređaja.
Zatim zamenite gornji poklopac
za šarku. Pre nego što zašrafite
poklopac, povežite krajeve
prekidača za vrata.
Postavljanje spoljne ručke na vratima (ukoliko postoji spoljnja ručka)
Potrebe prostora Nivelisanje uređaja
12 13
14 15
16

16
SRB
KORISNIČKI INTERFEJS
Upotreba kontrolne table
OPERACIJE TASTERA
A. Kontrola temperature dela za hlađenje
B. Kontrola temperature dela za zamrzavanje
C. Režim/Zaključavanje/Otključavanje
LED EKRAN
1. Temperatura dela za hlađenje
2. Temperatura dela za zamrzavanje
3. ECO režim
4. Režim godišnji odmor
5. Super režim
6. Zaključavanje/Otključavanje
USLOVI RADA
a. Kontrolna tabla je osvetljenja 100% na 3 sekunde, što
funkcioniše potpuno isto za svako podešavanje (režima rada i
temperature) pre nego što se isključi. Sistem će se automatski
zaključati 25 sekundi nakon poslednje upotrebe tastera.
Nakon zaključavanja, svetlo table će se ugasiti 30 sekundi
nakon upotrebe poslednjeg tastera.
b. I temperatura frižidera i temperatura zamrzivača će biti
prikazane na ekranu.
EKRAN
• Tabla će zasvetleti na 2 minuta kada su otvorena vrata dela
za hlađenje.
• Tabla će biti osvetljena s funkcijom bilo kog tastera i svetlo će
se isključiti nakon 2 minuta od poslednje operacije.
• Displej tokom redovnih funkcija
Displej za temperaturu frižidera: Pokazuje trenutno
podešenu temperaturu.
Displej za tempraturu zamrzivača: Pokazuje trenutno
podešenu temperaturu.
OPIS TASTERA
• Displej za temperaturu frižidera
Ovaj taster radi u oba režima i Korisničkom i u Super režimu.
Kontrole temperature za odeljak frižidera, taster treperi.
Uzastopnim pritiskom na dugme, temperatura će se menjati
u krug 2°C, 3°C, 4°C, 5°C, 6°C, 7°C, 8°C, nakon čega treperenje
u dužini od 5 sekundi na odeljku za temperaturu znači da je
temperatura podešena.
• Displej za temperaturu zamrzivača
Ovaj taster radi u oba režima i Korisničkom i u Godišnji odmor
režimu. Kontrole temperature za odeljak zamrzivača, taster treperi.
Uzastopnim pritiskom na taster, temperatura će se menjati u krug
od -14°C do -22°C, nakon čega treperenje u dužini od pet sekundi
na odeljku za temperaturu znači da je temperatura podešena.
• Režim
Dodirujući ovaj taster nekoliko puta u nizu, režim rada
funkcionisanja frižidera će se menjati u nizu kružno, i to od “ECO
režim rada - Godišnji odmor / Super režim rada / režim rada
definisan od strane korisnika . 5 sekundi blicanje sijalice znači da je
nameštena temperatura.
• Pritisak na taster
Zvučni signal nakon pritiska na taster
Svi tasteri će biti aktivni samo ako su otključani.
• Zaključavanje/Otključavanje
Pritisnite taster REŽIM i držite 3 sekunde, kako biste zaključali
druga dva tastera, zatim će se, nakon zvučnog signala ikona
KATANCA pojaviti u zaključanom položaju.
Kako biste otključali, pritisnite taster REŽIM i držite 3 sekunde,
zatim će se, nakon zvučnog signala, ikona KATANCA pojaviti
u otključanom položaju. Kada su otključani, svi tasteri su
funkcionalni.
Ukoliko se nijedna operacije ne izvede u roku od 25 sekundi,
displej će se automatski zaključati. Displej se otključava dugim
pritiskom na taster “REŽIM”.
ECO režim
Pritisnite taster REŽIM kako biste izabrali ECO režim. Nakon
petosekundnog treperenja, ECO ikona će postati svetla i ECO režim
će biti potvrđen.
U ECO režimu, frižider će automatski postaviti temperaturu dela za
hlađenje na 5°C, a temperaturu dela za zamrzavanje na -18°C. Osim
tastera REŽIM, drugi tasteri neće reagovati ni na kakav dodir.
Pritisnite taster REŽIM kako biste izašli iz ECO režima.
• Režim godišnji odmor
Pritisnite taster REŽIM kako biste izabrali režim godišnji odmor.
Nakon petosekundnog treperenja, ikona godišnji odmor će
postati svetla i režim godišnji odmor će biti potvrđen.
U režimu godišnji odmor, temperatura frižidera će biti postavljena
na 17°C. Taster “FRIŽIDER” neće reagovati ni na kakav dodir.
Pritisnite taster REŽIM kako biste izašli iz režima godišnji odmor.
• Super režim
Pritisnite taster REŽIM kako biste izabrali super režim. On će biti
potvrđen nakon što ikona Super bude treperela 5 sekundi.
U super režimu, taster “ZAMRZIVAČ” neće reagovati ni na kakav
dodir. Kako biste izašli iz super režima,
- Prilagodite režim pomoću tastera REŽIM,
- Ili, nakon 50 sati u super režimu, zamrzivač će automatski
zaustaviti ovaj režim, i ući u prethodni.
Koristan savet:
Ukoliko planirate da zamrznete veliku količinu hrane istovremeno,
molimo Vas da super režim podesite 24 sata unapred.
UPOZORENJE!
U super režimu će frižider napornije raditi.Tako da će buka koju
proizvodi frižider biti malo viša nego tokom normalnog rada.
Alarm za predugo otvorena vrata
Ukoliko su vrata frižidera (gornja) otvorena 90 sekundi, alarm će se
javljati periodično sve dok se vrata ne zatvore.

17
SRB
Prva upotreba
Čišćenje unutrašnjosti uređaja
Pre korišćenja uređaja po prvi put, očistite unutrašnjost i sve
unutrašnje elemente mlakom vodom i neutralnim sapunom, kako
biste uklonili tipičan miris novog proizvoda, a zatim ga dobro
osušite.
VAŽNO! Ne koristite deterdžente ili abrazivna sredstva, budući
da mogu da oštete površinu.
Dnevna upotreba
Zamrzavanje sveže hrane
• Deo za zamrzavanje je pogodan za zamrzavanje sveže hrane i
čuvanje zaleđene i duboko zamrznute hrane na duži vremenski
period.
• Svežu hranu stavite u pregradu na dnu, kako biste je zamrzli.
• Maksimalna količina hrane koja može biti zaleđena u 24 sata je
navedena u tablici specifikacije.
• Proces zamrzavanja traje 24 sata: tokom ovog perioda nemojte
dodavati još hrane, predviđene da se zamrzne.
Čuvanje zamrznute hrane
Ukoliko se uključuje prvi put ili nakon dužeg perioda van upotrebe.
Pre stavljanja proizvoda u pregradu, uređaj treba da radi najmanje 2
sata podešen na najviše vrednosti.
Važno! Ukoliko dođe do slučajnog odmrzavanja, na primer, ukoliko
nema struje duže nego što je prikazano u tehničkim karakteristikama
pod delom “rising time”, zamrznuta hrana se mora brzo upotrebiti,
ili odmah termički obraditi i onda ponovo zamrznuti (nakon što je
spremljena).
Odmrzavanje
Duboko zamrznuta ili zaleđena hrana, pre upotrebe, može biti
odmrznuta ili u pregradama frižidera ili na sobnoj temperaturi, u
zavisnosti od raspoloživog vremena.
Manji komadi se mogu čak pripremati za jelo iako su i dalje zaleđeni,
direktno iz zamrzivača. U ovom slučaju priprema hrane traje druže.
Korisni saveti
Saveti za zamrzavanje
Kako bismo vam pomogli da što bolje iskoristite proces zamrzavanja,
evo nekih važnih saveta:
• maksimalna količina hrane koja može biti zaleđena u 24 sata je
navedena u tablici specifikacije;
• proces zamrzavanja traje 24 sata. Tokom ovog perioda ne bi bilo
poželjno dodavanje hrane za zamrzavanje;
• zamrzavajte samo kvalitetnu, svežu i potpuno očišćenu hranu;
• hrana treba da bude podeljena u manje porcije, kako bi bilo
omogućeno brže i potpuno zamrzavanje, i kako bi se kasnije
mogla odmrznuti samo potrebna količina;
• hranu zavijte u aluminijumsku ili polietilensku foliju i pobrinite se
da pakovanja ne propuštaju vazduh;
• nemojte da dozvolite da sveža, nezaleđena hrana dodiruje već
zaleđenu, kako biste izbegli porast temperature;
• nemasna hrana se čuva bolje i duže od masne; so smanjuje vek
trajanja čuvane hrane;
• ukoliko se kockice leda upotrebe odmah nakon što su izvađene iz
zamrzivača, mogu izazvati promrzline na koži;
• savetuje se, da na svakom paketiću smrznute hrane navedete
datum zamrzavanja, kako biste omogućili uklanjanje iz odeljka za
zamrzavanje, budući da to može izazvati promrzline na koži.
• savetuje se, da na svakom paketiću smrznute hrane navedete
datum zamrzavanja, da biste znali koliko dugo se čuva.
Saveti za čuvanje zamrznute hrane
Kako biste dobili najbolji učinak od ovog uređaja, treba da:
da proverite, da je komercijalno zamrznutu hranu adekvatno čuvao
prodavac;
postarajte se da hrana bude prenesena od prodavnice do
zamrzivača u najkraćem mogućem roku;
ne otvarajte vrata često, i ne ostavljajte ih otvorena duže nego što je
potrebno. Hrana koja se jednom odmrzne brzo propada i ne može
biti ponovo zamrznuta.
Nemojte prekoračivati rok za čuvanje, koji je naznačio proizvođač.
Saveti za hlađenje sveže hrane
Kako biste dobili najbolji učinak:
• Ne čuvajte vruću hranu ili tečnosti koje isparavaju u frižideru
• Pokrijte ili uvijte hranu, naročito ako ima jak miris
Saveti za čuvanje hrane u frižideru
• Sve vrste: uvijte u polietilenske kese i stavite na staklene police
iznad fioke za povrće.
• Radi sigurnosti, hranu na ovaj način čuvajte jedan dan, najviše dva.
• Kuvana hrana, hladna jela, itd...: treba ih pokriti i mogu se odložiti
na bilo koju policu.
• Voće i povrće: treba da bude temeljno oprano i odloženo u fioke,
namenjene za njihovo čuvanje.
• Puter i sir: treba da budu stavljeni u specijalne posude koje
ne propuštaju vazduh, ili zavijeni u aluminijumske folije ili
polietilenske kese kako bi se uklonilo što više vazduha.
• Boce s mlekom/jogurtom: treba da budu zatvorene i da se čuvaju
u policama na vratima.
• Banane, krompir, luk i beli luk, ukoliko nisu zapakovani, ne smeju
biti čuvani u frižideru.
Kontrola temperature korpe sa kontrolom svežine
• Temperatura korpe sa kontrolom svežine se može podesiti u
skladu sa vrstom hrane koja se odlaže.
• Gurnite točkić nagore, od dna. Temperatura korpe sa kontrolom
svežine će se postepeno smanjivati.
• Kada je točkić podešen na “KONTROLA VLAŽNOSTI”, korpa sa
kontrolom svežine će raditi kao korpa sa kontrolom vlažnosti i
održavati odgovarajuću temperaturu i vlagu za voće i povrće.
• Kada je točkić podešen na “HLADNIJE”, to je pogodno za
kratkoročno čuvanje ribe i druge sveže hrane. Hrana će biti
sveža, ali ne zamrznuta, što ovu funkciju čini najboljim izborom za
čuvanje sveže hrane.
• Saveti: Kada izaberete funkciju “HLADNIJE”, preporučuje se da
temperaturu frižidera postavite na ispod 4°C, a da vreme čuvanja
hrane ne bude duže od tri dana, kako biste očuvali najbolju
svežinu.
DNEVNA UPOTREBA

18
SRB
Čišćenje
Iz higijenskih razloga unutrašnjost uređaja, uključujući i unutrašnje
elemente, treba čistiti redovno.
OPREZ!
Uređaj ne sme biti povezan na struju tokom čišćenja. Postoji
opasnost od strujnog udara! Pre čišćenja isključite uređaj i prekinite
dotok električne energije, ili isključite automatsku sklopku ili osigurač.
Uređaj nikako ne čistite paročistačem. Vlaga može da se nakupi
u električnim komponentama, opasnost od strujnog udara! Vrela
isparenja mogu dovesti do oštećenja plastičnih delova. Uređaj mora
biti suv pre ponovne upotrebe.
VAŽNO! Eterična ulja i organski rastvarači mogu nagristi
plastične delove, na primer limunov sok, ili sok od pomorandžine
kore, karboksilne kiseline ili sredstva koja sadrže sirćetnu kiselinu.
OPREZ!
Pre rešavanja problema, prekinite napajanje električnom energijom. Samo kvalifikovani električar ili kompetentna osoba treba da reši problem
koji nije naveden u ovom uputstvu.
VAŽNO! Postoje određeni zvukovi, koje uređaj proizvodi tokom normalne upotrebe (kompresor, rashladni deo uređaja).
REŠAVANJE PROBLEMA
• Ne dozvolite da ovakve supstance dođu u kontakt sa delovima
uređaja.
• Nemojte koristi abrazivna sredstva za čišćenje
• Uklonite hranu iz zamrzivača. Hranu čuvajte na hladnom mestu, i
dobro je pokrijte.
• Isključite uređaj i prekinite dotok električne energije, ili isključite
automatsku sklopku ili osigurač.
• Očistite uređaj i unutrašnje elemente tkaninom i mlakom vodom.
Nakon čišćenja isperite čistom vodom i osušite krpom.
• Nakon što sve bude suvo, ponovo uključite uređaj.
Zamena lampe
Unutrašnje svetlo je tipa LED. Kako biste uklonili sijalicu, molimo vas
da kontaktirate kvalifikovanog majstora.
Ukoliko se kvar pojavi ponovo, kontaktirajte Servisni centar.
Ove informacije su potrebne, kako bi Vam se pomoglo u što kraćem roku i što ispravnije. Ovde unesite potrebne podatke, u skladu sa tablicom
specifikacije.
Problem Mogući uzrok Rešenje
Uređaj ne radi
Utikač nije uključen ili je prekinut Utaknite utikač.
Osigurač je ispao ili je neispravan. Proverite osigurač, zamenite ga ako je potrebno.
Utičnica je neispravna. Kvarove utikača treba da popravi električar.
Uređaj zamrzava ili
hladi previše
Podešena temperatura je previše niska
ili uređaj radi u režimu SUPER.
Okrenite privremeno regulator temperature na neku višu
temperaturu.
Hrana se nedovoljno
zamrzava
Temperatura nije pravilno podešena. Pogledajte odeljak o početnom podešavanju temperature u
odeljku Podešavanja.
Vrata su bila otvorena duže vremena. Držite vrata otvorenim samo onoliko, koliko je potrebno.
Velika količina tople hrane je stavljena u uređaj u
poslednja 24 sata.
Okrenite privremeno regulator temperature na neku nižu
temperaturu.
Uređaj je blizu izvora toplote. Molimo vas, pogledajte odeljak za lokaciju i instalaciju.
Nagomilan led na
gumi na vratima. Guma na vratima propušta vazduh.
Pažljivo zagrejte deo koji propušta na gumi na vratima fenom
za kosu (podešenom na hladno). Istovremeno podesite,
zagrejani deo gume na vratima rukom, tako da pravilno
naleže.
Neobični zvukovi
Uređaj nije nivelisan. Ponovo podesite nožice.
Uređaj dodiruje zid ili druge predmete. Malo pomerite uređaj.
Deo, kao što je cevovod na zadnjoj strani uređaja,
dodiruje druge delove uređaja ili zid.
Ukoliko je potrebno, pažljivo uklonite deo koji predstavlja
prepreku.
Ploča sa strane je vruća Kondenzator je unutar ploče. To je normalno.


tesla.info
Other manuals for RC3400FHX
1
Table of contents
Other Tesla Freezer manuals

Tesla
Tesla RH2000M1 User manual

Tesla
Tesla RU2700FM User manual

Tesla
Tesla RC3400FHXE User manual

Tesla
Tesla RH2000H User manual

Tesla
Tesla Larder RS0900H User manual

Tesla
Tesla RH2000H1 User manual

Tesla
Tesla RU1600H1 User manual

Tesla
Tesla RH2950M User manual

Tesla
Tesla RU1600H User manual

Tesla
Tesla RU0800H1 User manual