Tev Bikes eBike User manual

A Toronto EV Company
Toronto EV, True EV
User Manual

1007 Bloor Street West, Toronto, M6H 1M1 -416-645-0158 -www.TEVBikes.ca
1﹞Front illuminating light
2﹞Front turning light
3﹞Rear view mirror
4﹞Saddle
5﹞Saddle lock (on other side)
6﹞Rear carriage
7﹞Tail light
8﹞Front wheel
9﹞Feet rest
10﹞Double stand
11﹞Rear wheel
12﹞Electrical motor
13﹞Rear fender
Locations of vehicle serial numbers
The vehicle serial number and electrical motor number are for registration of the vehicle.
The vehicle number ①is stamped on the frame. By opening the small plastic hood below the
front carriage box you will see it, as shown in the
figure

1007 Bloor Street West, Toronto, M6H 1M1 -416-645-0158 -www.TEVBikes.ca
The electrical motor number ①is stamped on the edge of right side, as shown in the figure.
Please write these numbers below for check-up in future:
Vehicle ID number: _________________________
Electrical motor number: _________________________
The operating parts of the electrical Scooter
Ignition switch
The switch has three positions as shown in the figure:
(on) position
Ignition circuit is closed and ready for starting the motor,
keep the key in.
(off) position
All circuits are opened, motor not to be stared, take the key off.

1007 Bloor Street West, Toronto, M6H 1M1 -416-645-0158 -www.TEVBikes.ca
(locked) position
Turn the handle all the way home, set the key to and then press down and go on
turning to the lock position and take off the key. To unlock, just reverse the above procedure.
Note:
With the handle locked, it will be very hard to move the vehicle. So unlock the handle if you
want to move the vehicle
The instrumentation assembly
1) speedometer: it shows the speed in km/h of the current riding
2) turning indicator: when turning light switch is set to left, the “ ” is on; when turning light
indicator is pushed to right the “ ”is on
3) power meter: when voltage shortage light is on, the battery needs recharging
4) power indicator: when power indicator is on, the vehicle’s electrical circuit is closed.
Left handle
rear brake handle: grip this handle and the rear brake is applied
and power cut off, while the vehicle slows down
①dimmer switch: turn on the light switch at first, then the
dimmer switch can activate
High Beam
Low Beam
③turning light switch
Left turning signal flashing
Right turning signal flashing
Press down
Turning light is off

1007 Bloor Street West, Toronto, M6H 1M1 -416-645-0158 -www.TEVBikes.ca
warning
●when riding, remember to turn on the turning lights in advance when it comes to changing
lane, making turns, or stopping so as to let others know
●the signals cannot be turn off automatically. Please turn off at once after using it to prevent
misunderstanding by other persons and causing accidents.
④horn button:press this button to honk the horn
The right handle
①light switch: it has three positions
②front brake handle: grip this handle to put the brake on the front wheel, also cut power and
slow down
③Throttle handle: accelerator/ speed handle is for controlling the motor rpm.
Turning towards yourself means to accelerate, turning away from yourself means to slow down
Note: Power cut off switch
●
Refers to front headlamp, instrument light, and tail light all being turned
off
Refers to position light, instrument light and tail light all being on
Refers front headlamp, instrument light and tail light all being on

1007 Bloor Street West, Toronto, M6H 1M1 -416-645-0158 -www.TEVBikes.ca
1. Insert the key into the seat lock keyhole ①and turn it rightward
2. Lift the seat from the rear to open, you will see the power cutoff switch ②
●Lift the saddle to check if its locked
●Remember not to leave the key in because that will make it very hard to get your key out
again
●In the case of short circuit, the power OFF switch will automatically cut off power.
●In the case of serous overload to motor, it is also possible the power is cut off
●When there is short circuit it will be very hard to close the cut off switch, there being great
impedance. Do not force it to close. Check the circuit to remove the trouble first.
The rear carriage
The rear carriage is in the rear of the saddle
①you may tie your cargo directly to the carriage or fit a rear cargo box
on it (rear carriage may vary on each models. Please visit TEVBikes.ca for more
information).
Warning
●Be sure to tie up the cargo fast and securely so that it may not fall off when riding
●Cargo on the rear carriage must not exceed 3 kg
●Rear box must be locked timely so that your belongings do not get stolen

1007 Bloor Street West, Toronto, M6H 1M1 -416-645-0158 -www.TEVBikes.ca
Kick stands
The vehicle has the central and side supports
Double stand:to rest the vehicle on the double stand, you will grip the handle with your left
hand and step down the pedal bar of the double stand, at the same time pull up the rear carriage
with your right hand.
Kick stand: use the side kick stand when you park your vehicle temporarily
Check-up before riding
It is a must to carefully check-up your vehicle before using it and make necessary adjustments.
The items below take only a few minutes of your time yet they can ensure your safety when
riding:
Item
Content of check-up
Brakes
Whether or not operation is smooth, free play of
brake handle is correct and braking performance
is ok
Tires, both front and rear
Whether or not pressure is ok, the tire veins
depth ok, and no cracks or other damage
Rotation throttle handle
Whether or not the turning is smooth, the
resetting function is ok
Operating switches
Whether or not the functions are normal
Handle bar steering
No gaps, no loosening, and flexible
Battery
Connections secure, no loosening
Warning
Be sure to retract the side-stand before starting the vehicle in order to prevent
possible danger.

1007 Bloor Street West, Toronto, M6H 1M1 -416-645-0158 -www.TEVBikes.ca
The correct operating procedure
Starting of the electrical motor:
●Make sure that the battery is fully charged, the horn, turning light and headlight are all
working normally
●Retract the side and/or central stand
●Grip the rear brake handle and be sure that you sit tight.
1. Insert the power switch key in the keyhole and turn it to ON position, now the instrument
light is on, showing that power is connected.
2. Check to see that vehicle lock is open and supports are retracted and the entire vehicle is in
working condition.
3. Grip the handle bar with both hands, turn the handle in right hand slowly in the counter
clock wise direction. Now the motorcycle is electrically started and begins to move slowly and
smoothly.
4. The vehicle has the function of power off when brakes are applied. When riding either
applying right hand/left hand brake or it will cut off power in order to protect the motor and
ensure safety.
5. Once the voltage indicator in the instrument board at the vehicle head shows inadequate
voltage be sure to stop riding and have the battery charged.
6. When riding uphill the applied current will be comparatively higher, this may have a shock
to the motor and battery. Therefore, to prolong the lifespan of the motor and the battery it is
recommended that you don’t push it too hard when going uphill.
7. Turn off power after stopping and take off the key to be safe.
8. After starting go slow with accelerating as sudden acceleration may waste power and may
damage electrical elements.
9. Under the condition that safety must have number one consideration, try and avoid constant
application of brakes or re-starting when riding, in order to save power.
10. When riding be sure to avoid keeping the speed handle turned-in while applying brakes in
order to avoid instant start causing overload to motor and damaging other elements.

1007 Bloor Street West, Toronto, M6H 1M1 -416-645-0158 -www.TEVBikes.ca
11. Max load of the vehicle is 150 kg( including the rider). Refrain from overloading your
vehicle.
Recommendation
●Before starting take a look round and turn on your turning light to warn others where you are
going. Star moving only after you are sure everything around is safe.
Braking and parking
Braking
1. In normal conditions apply both front and rear brakes simultaneously.
Note: Slow down by gently applying the brakes, as that is the way of braking.
Warning
●Applying either the front or rear brake only may reduce braking effect and cause the vehicle
side slipping or overturn
●To prevent side slipping, loss of control, please be sure to cut speed and to apply brakes when
making a turn
●When riding on wet, rainy and frozen roads with very smooth surface, the braking distance is
longer. Please keep in that in mind.
●Avoid sudden application of brakes and sharp turns to prevent loss of control
Parking
1. Have the speed handle reset quickly
2. Apply simultaneously the front and rear brakes(now the brake light is on )
3. Turn on the turning light to indicate the vehicle pull over and slowly go sidewise
4. When the vehicle is fully stopped, turn off the turning light

1007 Bloor Street West, Toronto, M6H 1M1 -416-645-0158 -www.TEVBikes.ca
5. Set the ignition switch to position and turn off power
6. Choose a flat place not in the way for traffic and erect the central stand
●Grip the handle bar with left hand, hold the rear carriage with right hand, step down on the
pedal bar of central stand forcedly, at the same time, elevate it with the right hand.
Recommendation:
●Do not park the vehicle on soft surface or sloping place to prevent overturn off power, which
will prevent unintentional turning of the speed handle, causing sudden start and resulting in
accidents.
●Refrain from constantly using the speed handle to start the vehicle in order to ensure normal
working life of the battery, motor and other electrical elements.
7. Lock the handle bar: to prevent your vehicle from being stolen, please lock your handlebar
when leaving and take off the key and keep it well.
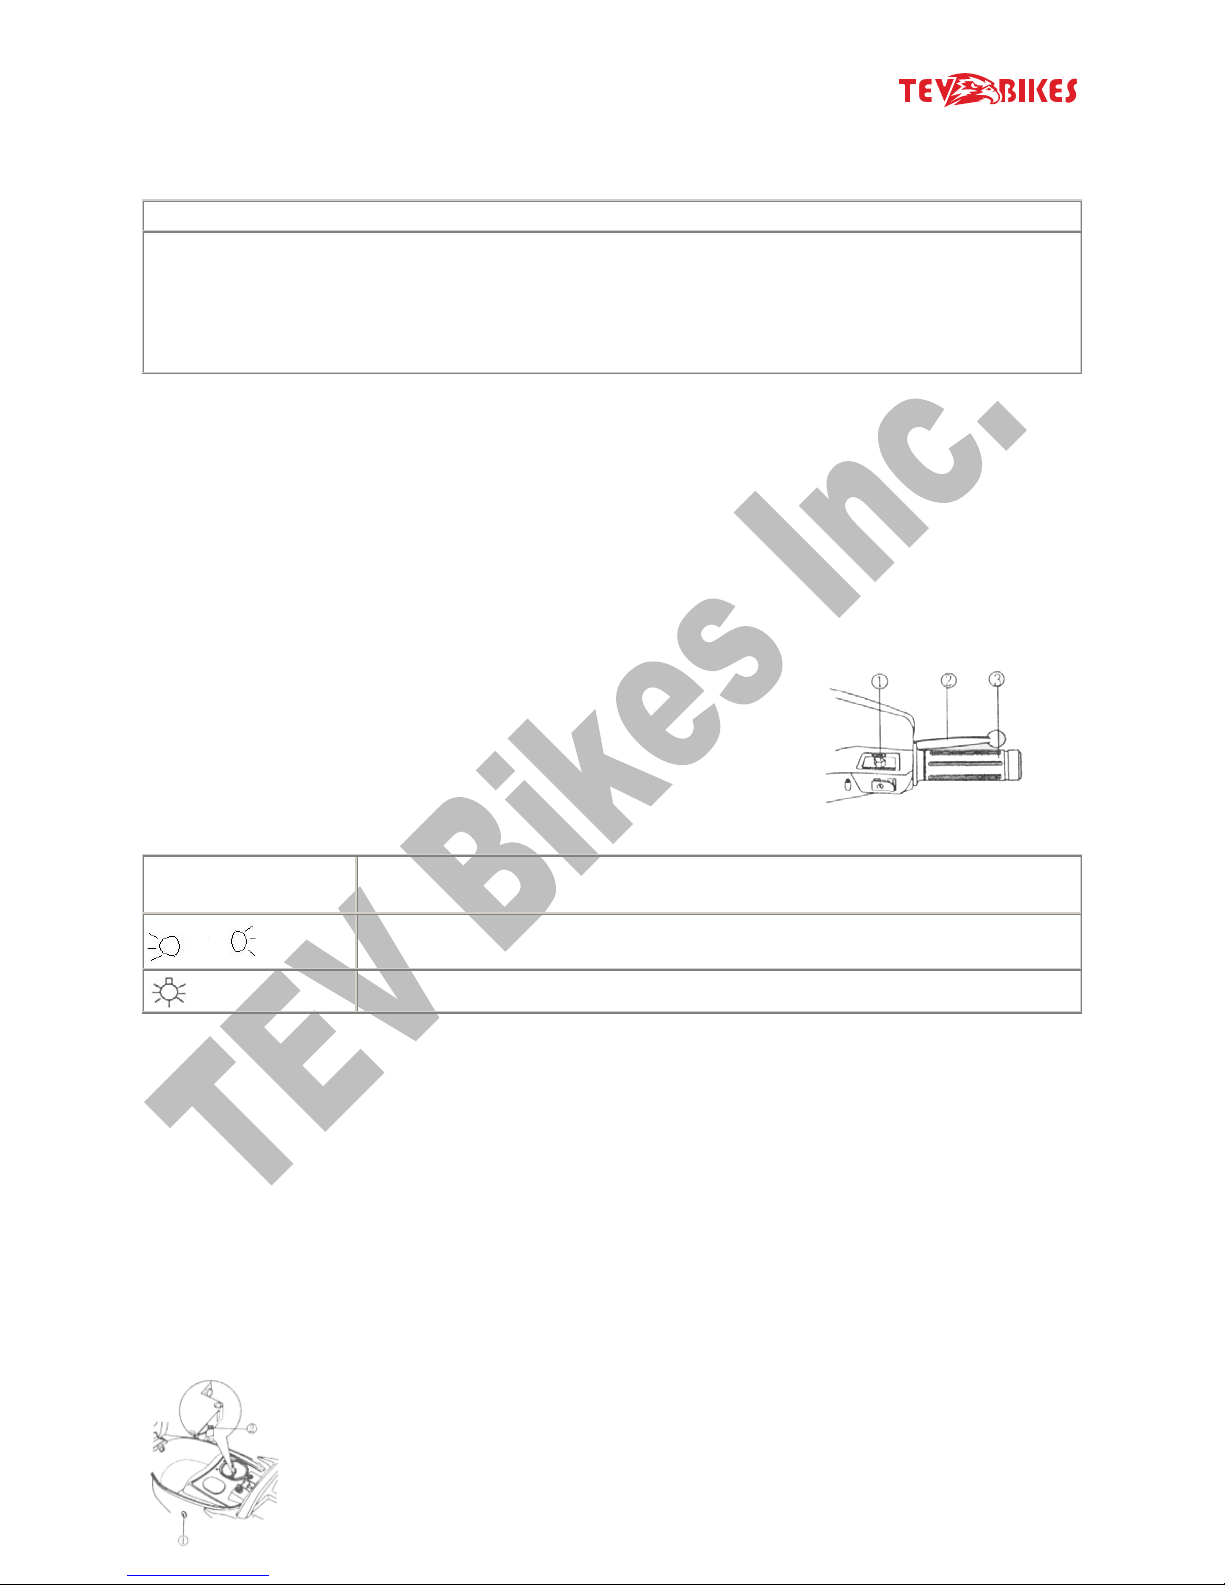
The battery and the charger maintenance
The connection to the charger is located below the saddle. You will see it when opening the
saddle.
1. Be sure to fully charge the battery when you have bought a new vehicle
2. For normal use be sure to charge the battery as often as possible to keep it constantly fully
charged, that can prolong its working life.
3. When the battery has to idle for long period of time, charge it fully before storing and
charge it once a month.
4. It is forbidden to charge the battery when it is set upside down, as that can seriously reduce
its service life
5. When charging, plug in the charger’s output plug (48V round hole/3 pins) into the charging
socket of the battery box and then plug in the charger’s input plug( AC110V/3 pins) in the
household power out let socket (110V). Power indicator and working status indicator are both
red, indicating power is on and charging is proceeding. After charging for 2-8 hours the working
status indicator turns to green showing the battery is basically full. Now the charger is in “gentle
charging” state with micro current. After charging is finished take out both plugs of the charger.

1007 Bloor Street West, Toronto, M6H 1M1 -416-645-0158 -www.TEVBikes.ca
6. For detailed instruction about the charge please read the manual of the charger
Note:
●Before charging, set the charger and battery in a safe place where children have no access
●It is not allowed to use the battery before it is fully charged, as that will affect the battery’s
working life.
●Do not use other Brand of charger, nor charge other brands of battery with TEV branded
charger.
●The charger has in it high voltage circuit ,please do not dissemble it by yourself.
●Make sure no liquid or metal particles come into the charger either when it is in use or in
storage and prevent it from any impact as that can damage the charger.
●When charging, never cover it with anything
●This charger is for use indoors, please use it in dry and well ventilated place.
●If you smell abnormal smell in the course of charging or find the charger unusually hot, please
stop charging immediately and have the charger sent to the retailer’s or service station for
repairs.
Service and maintenance
Maintenance cycle table
If you often have to use the vehicle in tough condition such as stand storm, or ride on bumping,
muddy or dusty roads you will have to make special maintenance after use to ensure its reliable
performance. You also have to shorten the maintenance cycle and do the maintenance more
often.
Proceed with the before-use check-up and maintenance
I: check-up, and when necessary clean, lubricate, replenish, adjust or replace
A: adjustment
T: tightening
*this item is done by the service station, if you have the right tools and skills you may do it by
yourself

1007 Bloor Street West, Toronto, M6H 1M1 -416-645-0158 -www.TEVBikes.ca
**for the sake of safety this item must be done at service station
Recommendation:
Choose a flat and spacious place for maintenance and have the central stand erected.
Locations for lubrication
Proper lubrication is of key importance to the safe riding and working life of the vehicle. After
long time use or riding in rainy weather and after cleaning up it is a must to apply lubricant to
important locations as shown in the sketch:
Cycle
item
Mileage(km)
500
1000
2000
3000
* brake light switch
I
I
I
I
* headlight
I
I
I
I
* wheels
I
I
I
I
* bearing in the fore fork steering
I
I
I
Brake device
A
I
A
I
* nuts/bolts/fasteners
I
I
I
I
Lubrication of all pulling wires
I
I

1007 Bloor Street West, Toronto, M6H 1M1 -416-645-0158 -www.TEVBikes.ca
0 - electrical Scooter lubricant G - grease
①rear axis ⑤(N/A)
②rear brake pulling wire front wheel axis ⑥front wheel axis
③central support rotary shaft ⑦front brake pulling wire
④side support rotary shaft ⑧(N/A)
Bakes:
they are relate to your safety and so need constant check-up and
adjustment
The front brake: grip firmly the front brake handle with the right
hand and front wheel is engaged. The free play of front brake handle refers to the distance the
handle moves from its initial position to the braking position. The free play distance is to be kept
at 10-20mm.
Adjustment to the front brake
1. When free play distance is not in the range of 10-20mm use the
front brake adjusting nut ①for adjustment
Turning clockwise
Reduce play
Turning counter clockwise
Increase play
Note: this step only apply to Wasaga model. For Muskoka, Montreal
and other models, please contact our tech support.
2. Adjustment done, try the front brake handle for a couple of time to check if its braking
performance is ok, if the wheel can turn freely.
3. After free play is adjusted, be sure to make the arc-form groove of the adjustment nut
engaged with the columniform surface of brake arm pin ②.

1007 Bloor Street West, Toronto, M6H 1M1 -416-645-0158 -www.TEVBikes.ca
The rear brake
Grip firmly the front brake handle with the left hand the rear wheels is
engaged. The free play of front brake handle refers to the distance the
handle moves from its initial position to the braking position. The play
distance is to be kept at 10-20mm.
Adjustment to the rear brake:
1. When free play distance is not in the range of 10-20mm turn the
adjustment nut on the rear brake arm ①for adjustment
Turning clockwise
Reduce play
Turning counter clockwise
Increase play
2. Other steps are identical with 2 and 3 for front brake adjustment
The brake shoe friction pad
To check the wearing of the pad of the brake shoe proceed as follows:
1. operate the front and rear brakes
2. feeling they not so effective, remove the brake drums
3. check the friction pad on the outside of brake shoe for its thickness, if it is
less than 2 mm please replace it at once
4. finding the pad stuck with grease of dust be sure to clean them up immediately as they may
seriously affect the braking performance

1007 Bloor Street West, Toronto, M6H 1M1 -416-645-0158 -www.TEVBikes.ca
The tire
Air pressure in the tires
1. check the pressure when the tire is “cool”
2. observe where the tire is in contact with the ground
3. check the air pressure of the tire to see if it is ok according to tire pressure PSI mark on the
tire.
Cracks, damages , alien matter and unusual wearing
Check the tire for its side in contact with the ground and the side surface for obvious cracks,
check the veins for things like nails and gravels that have got into them, and check for unusual
wearing. On finding such things be sure to remove immediately, if necessary replace the tire.
Depth of the tire veins
Check the depth of the tire veins. Replace the tire if it is less than 1.6mm
for the front tire and less than 2.0mm for the rear tire.
Note:
It is dangerous to use excessively worn tires, as it will reduce stability and cause loss of control
of the vehicle
Bulbs of illumination light
When replacing bulb be sure to use the ones of the same rated power. Use of the bulb with
excess of rated power may cause overload to the entire electrical system and lead to early
scrapping the bulbs.
Note:
●before replacing bulb set the ignition switch to position
●replacing is to be done after the bulb is fully cooled down
●the replacement must be new and free of dust
●after replacing check the illumination to see it is ok

1007 Bloor Street West, Toronto, M6H 1M1 -416-645-0158 -www.TEVBikes.ca
Servicing of the battery
This vehicle has a service-free lead acid battery as its source of power. The lifespan of the
battery is directly related to the way it is used. The user will please understand the following for
the normal use of battery:
1. when going uphill, pushing manually is needed
2. try to charge it as soon as you have used it if it is possible
3. to lay it idle for long period of time, please charge it fully and charge it once every month
when not in-use
4. when accelerating, turn the speed handle slowly rather than quickly
5. refrain from riding with voltage return
Breaker switch
It is often happens that the breaker is blown the likely cause will be short circuit or overload. In
that case please have service station to check up your vehicle.
Note:
●before checking on the breaker or replacing it be sure to turn of the ignition switch to prevent
sudden short circuit
●do not use breaker other than the specified or damage will be likely to the electrical system,
even a fire
Cleaning of the vehicle
You will please clean up your electrical Scooter at regular intervals to protect its paint coating
and check for damage/wearing to its important parts/components.
1. use clean water to rinse the vehicle after cleaning to prevent residue detergent causing rust
of erosion to the alloyed parts
2. When cleaning the plastic parts, use soft cloth or sponge sipped in mild detergent solution.
Rub gently where it is soiled and after it is clean, ring it in clean water repeatedly and remove
water drop with a piece of dry cloth
3. be sure to dry the vehicle thoroughly

1007 Bloor Street West, Toronto, M6H 1M1 -416-645-0158 -www.TEVBikes.ca
4. start the motor and left it run for a few minutes
5. After cleaning up, the vehicle may have its braking performance affected somewhat for a
while. To prevent any possible accident, it will be necessary to adjust the brakes. Ride the
vehicle only after the braking performance comes back to normal.
6. after cleaning up and dry up, be sure to lubricate the vehicle in time.
Note:
●Never use high pressure water jetting for cleaning purpose as that may wet the electronic
elements and the circuits thereby causing hidden danger
●Use neutral detergent in cleaning the plastic parts
●Never apply lubricant to brake either front or rear, wheel hub or tires
The storage of the vehicle
If your vehicle is to be stored up for a long period of time, for instance during the winter time,
you will take proper measures for its keeping. Besides, necessary repairs and maintenance should
be done to prevent deterioration of parts or damage to them.
1. service the parts where lubrication is necessary according to the maintenance cycle front
axis, central axis and rear axis and other moving parts should be applied with right quantity of
lubricant machine oil, the front, central and rear axles will need grease for lubrication, (see
details in “parts to be lubricated” of the manual
2. check up and adjust the braking devices according to the routine maintenance procedure
3. remove particles of glass, stone etc that have got into the tire surface
4. pressurize the tires to the correct pressure value
5. remove the battery and have it fully charged and store it in a cool and dry spot (charge it
monthly afterwards as is specified by the battery maintenance procedure)
6. Keep the vehicle in a cool, dry spot where temperature difference is not big. Cover it with a
piece of cloth.

1007 Bloor Street West, Toronto, M6H 1M1 -416-645-0158 -www.TEVBikes.ca
Re-use after storage
1. take off the covering and wipe the vehicle clean
2. charge the battery, proceed as per “Battery and charging ” of the manual
3. check up and adjust the vehicle where it is needed according to the sector “Check-up before
riding”.
4. before normal use of the vehicle, try it in a spacious place with little traffic to be sure that
the vehicle is all-ok.
Technical specifications:
Each models at TEVBikes has different specifications, please visit www.TEVBikes.ca for details
technical information.
Thank you for choosing TEV Bikes.
Our commitment is to provide you with the best in Clean transportation.