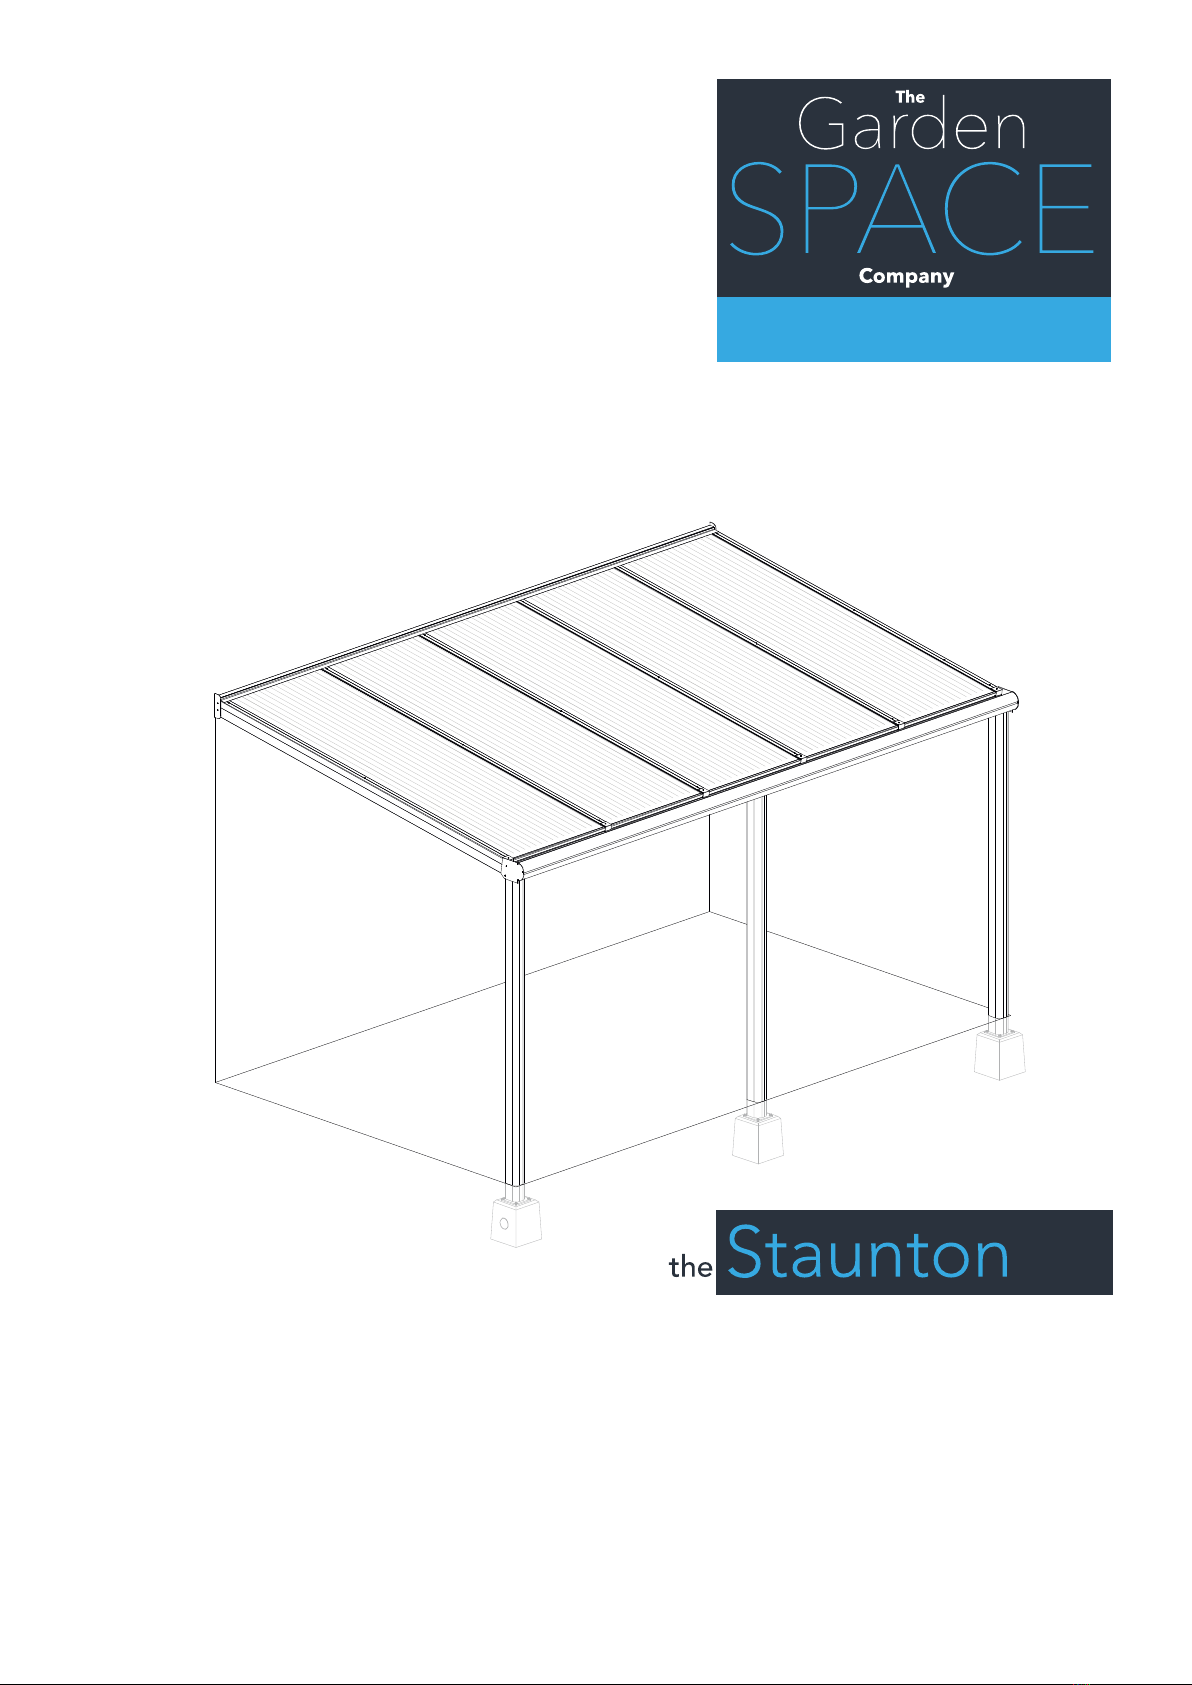
thegardenspace.co Assembly Instructions - the Staunton page: 9
• Note: The optimal processing temperature for the sealant is +5 °C to +40 °C.
Ground & façade
• Agoodatstablesurfaceisrequiredforconstructionofthecanopy.
• The location where the roof will be placed must be construction-ready and free of obstacles (garden
furniture,owerboxes,etc.)soinstallerscanperformtheirworkwithouthindrance.
• Anyobstacles,includingutilitylines(suchaspowercables,etc.),rootsanddebris,musthavebeen
removed from the ground.
• The façade must be free of sun shades, etc.
• Theplacewherethewallprolewillbeplacedmustberm,evenandat.
Dimensions & slope
• Thecanopyroofshouldbeinstalledwithaslopeof15.7cmpermetre.Theheightofthewallprole
andthepassageheight(distancefrombottomofguttertotheground)arecompletelydependenton
each other and determined by this slope.
• The maximum length of the roof is 4 metres. However, keep in mind the requirements concerning the
maximum free span and number of posts.
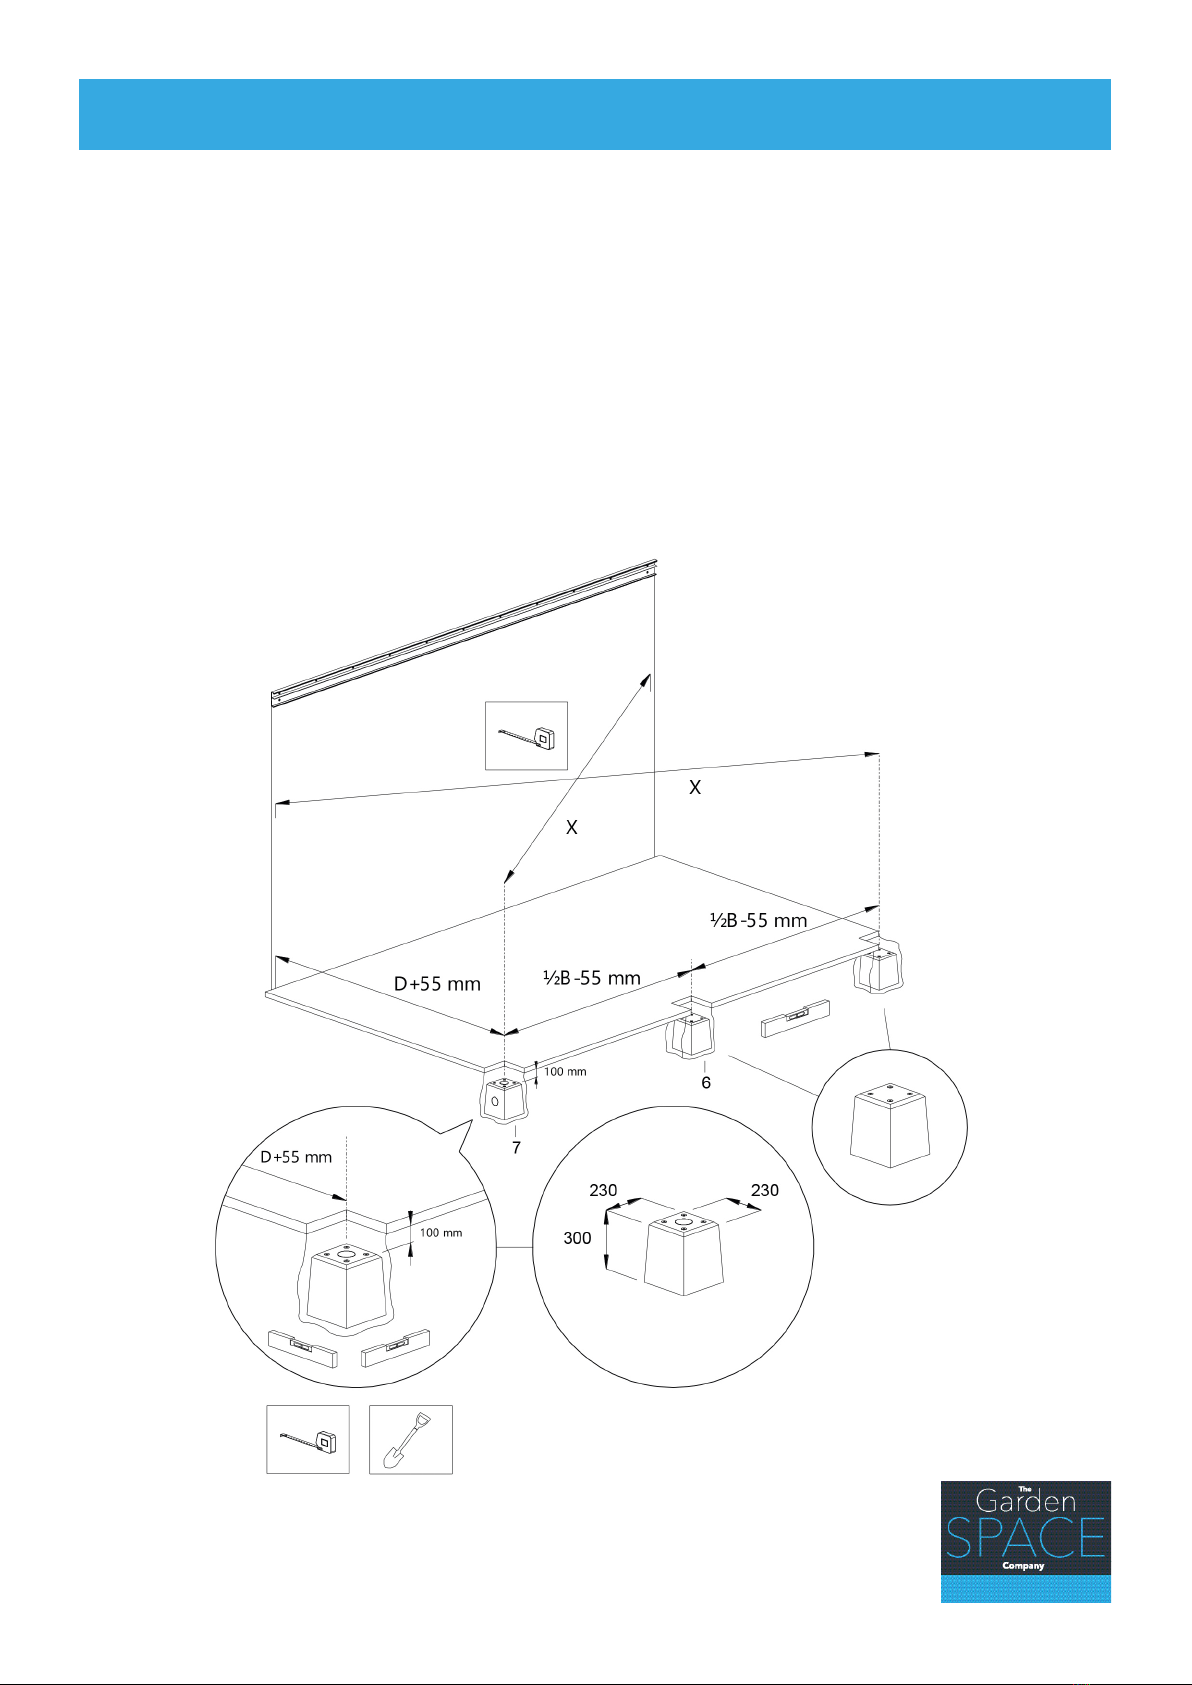
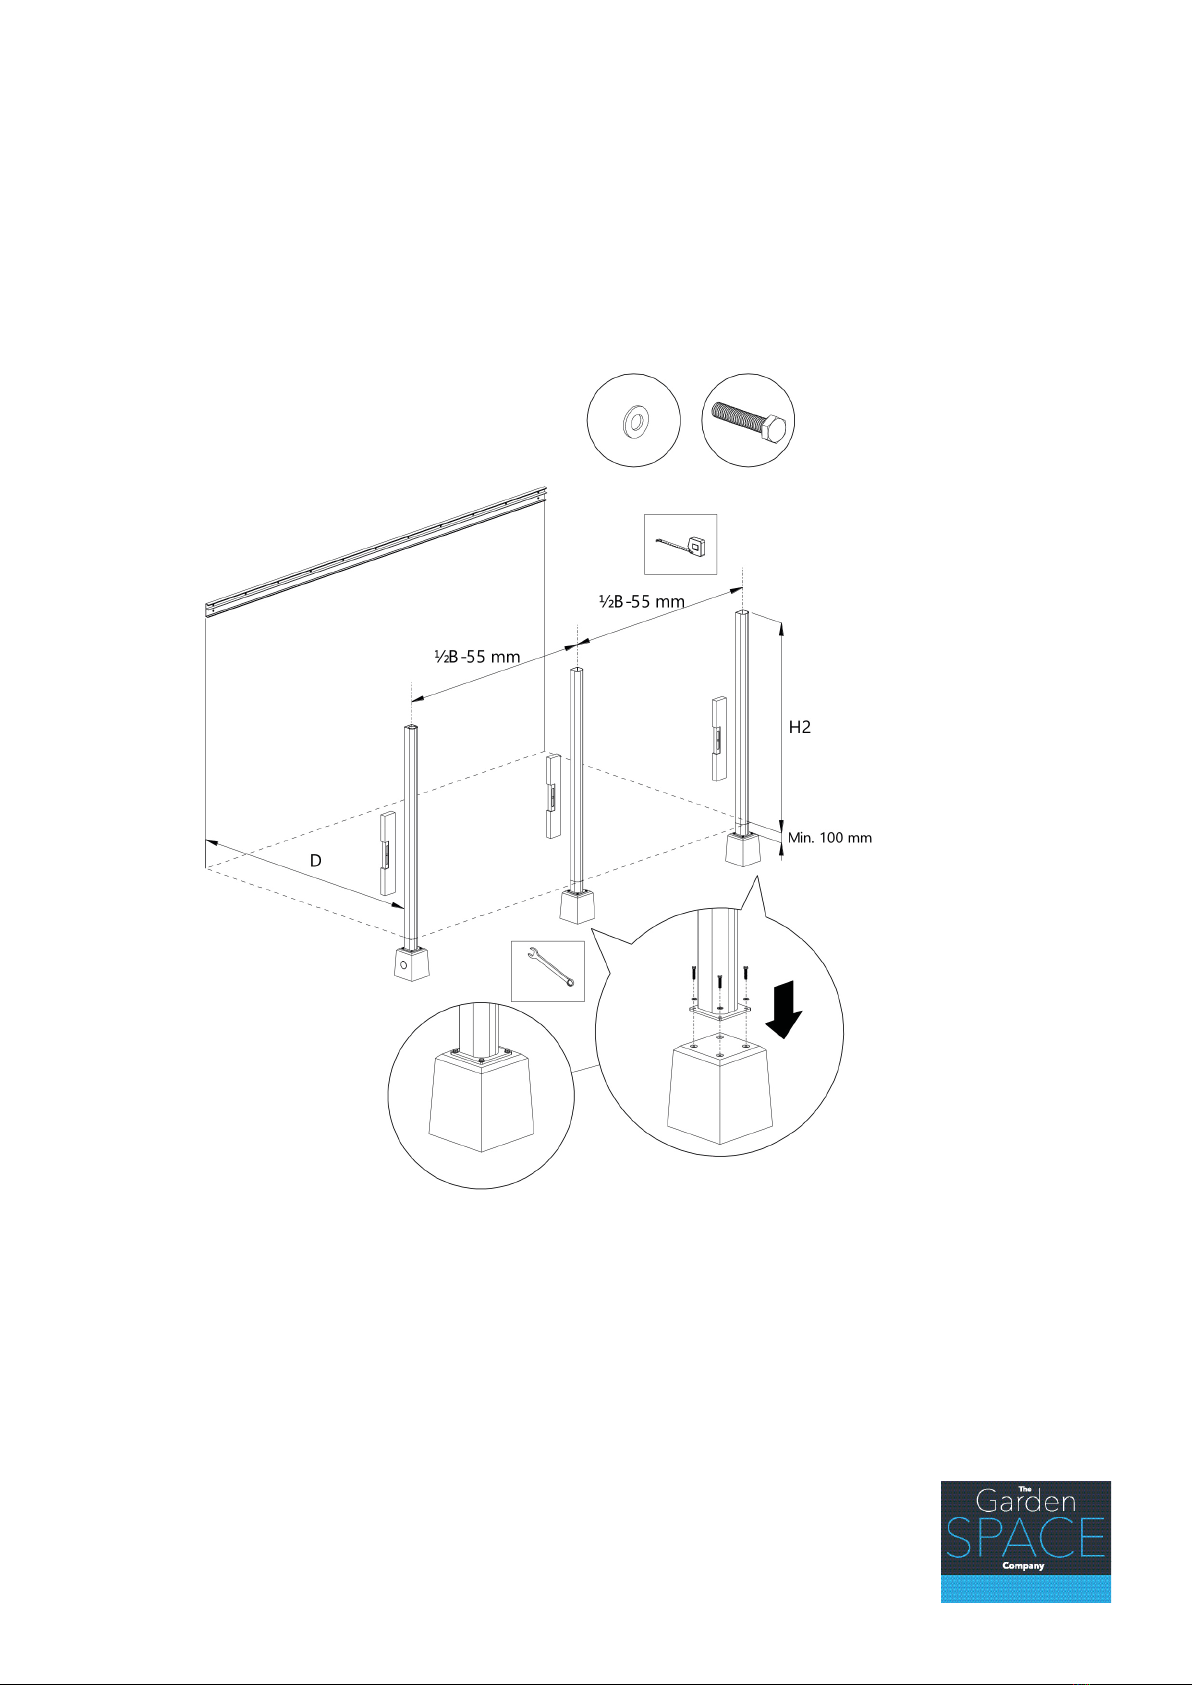
Posts & joined canopies
• Maximum distance between the posts is 4 metres.
• When canopies are joined, a post is always placed under the coupling.
Attachments at walls
• Due to expansion of the materials, the canopy may not be placed tightly between two walls; there must
be a gap of 1.5 mm per metre of width of the canopy.
• Posts cannot be placed against a wall if using a concrete base block as the block is wider than the post.
Theweldedbaseplateatthebottomofthepostwillalsostopthepostfrombeingushtothewall.To
butt against a wall, a plain ended square post is needed and a concealed U foot plate can be used with
suitablexings.Alternativelytheweldedfootplatecanbecutatthesidejoiningthewallandadditional
holesdrilledintheremainingangestoensure4suitablexingpoints.
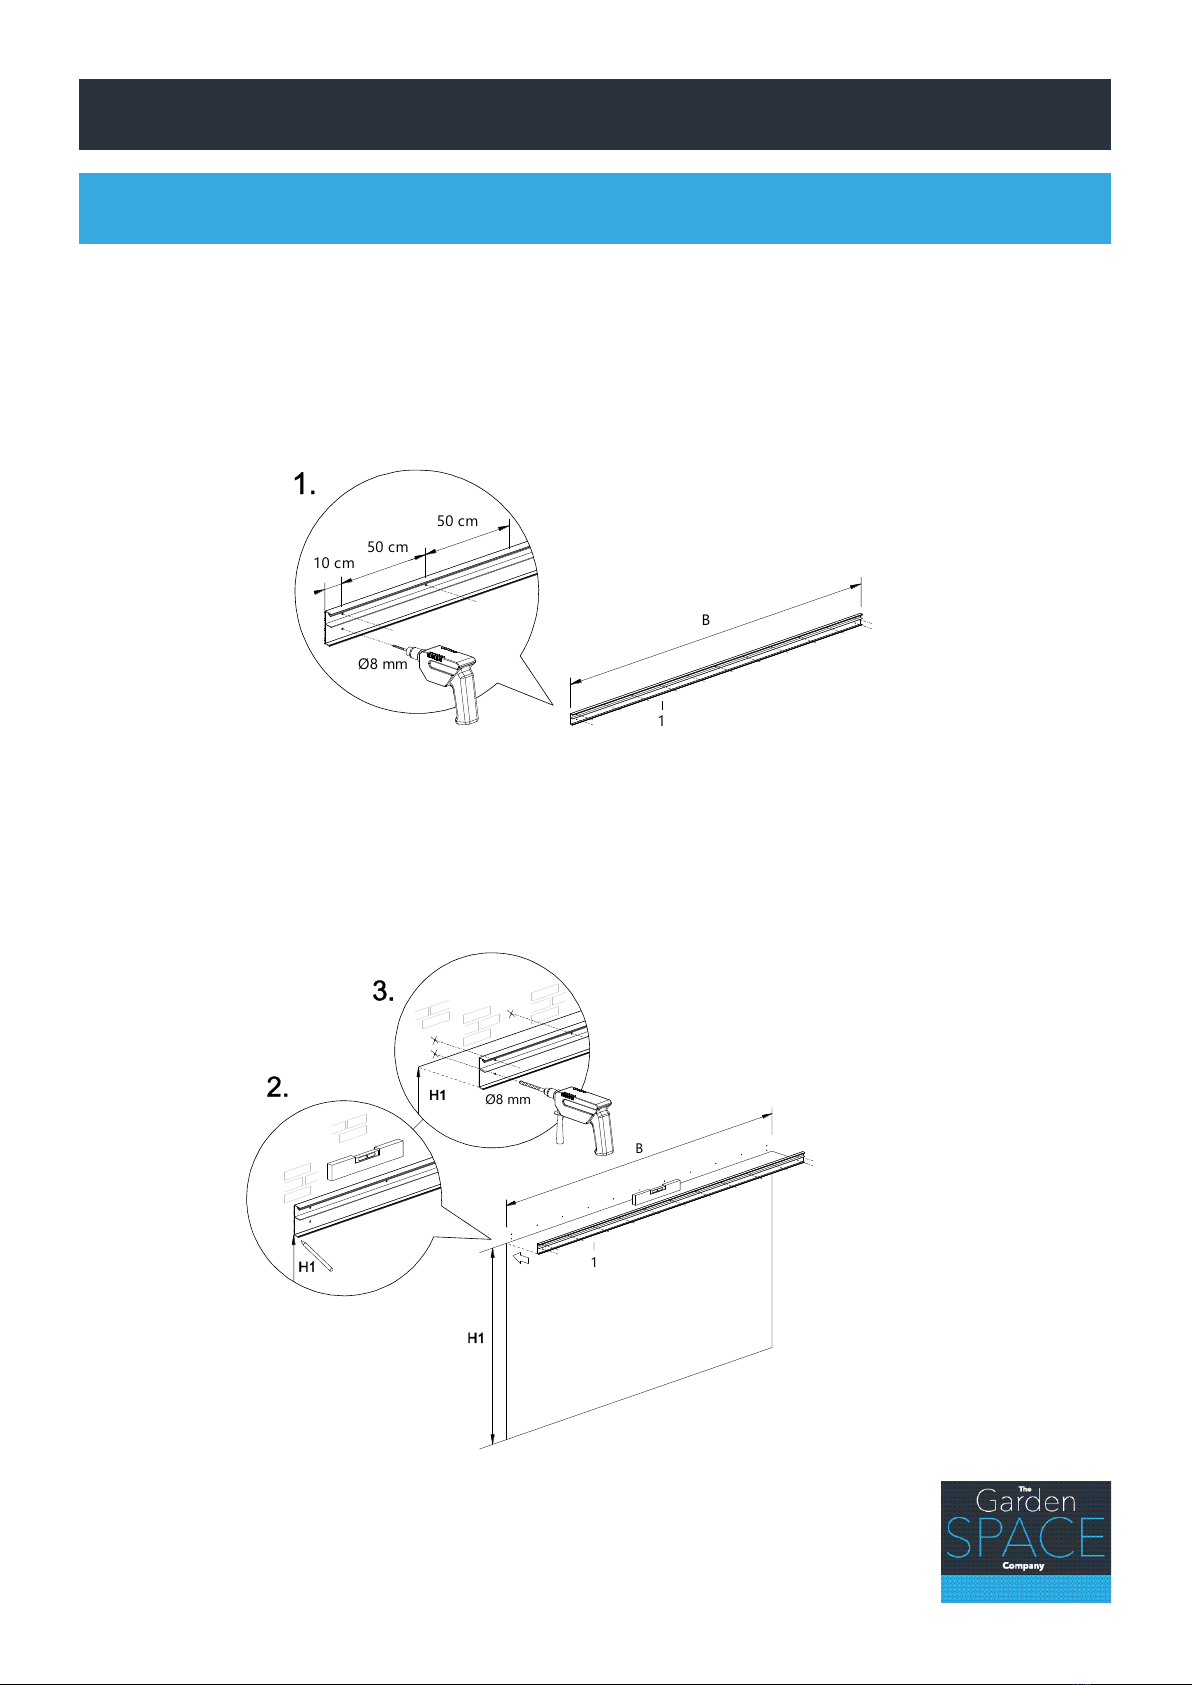
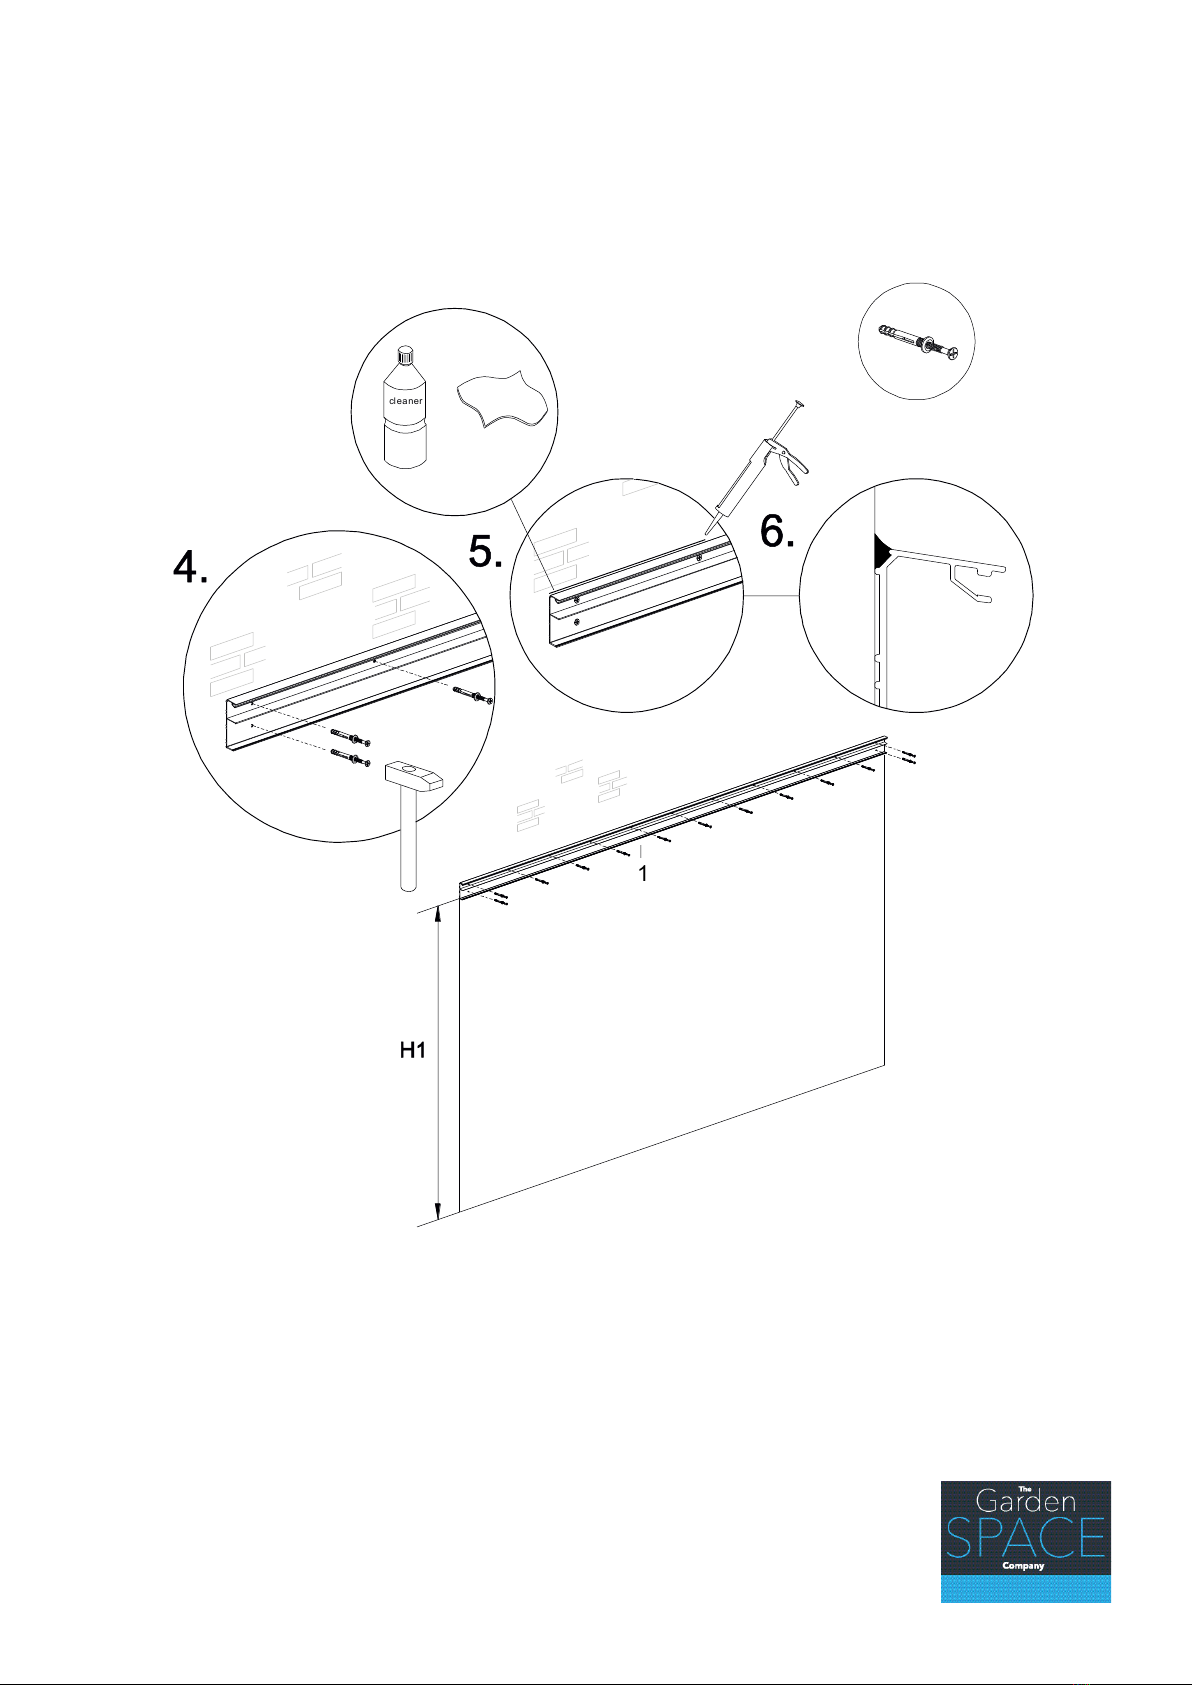
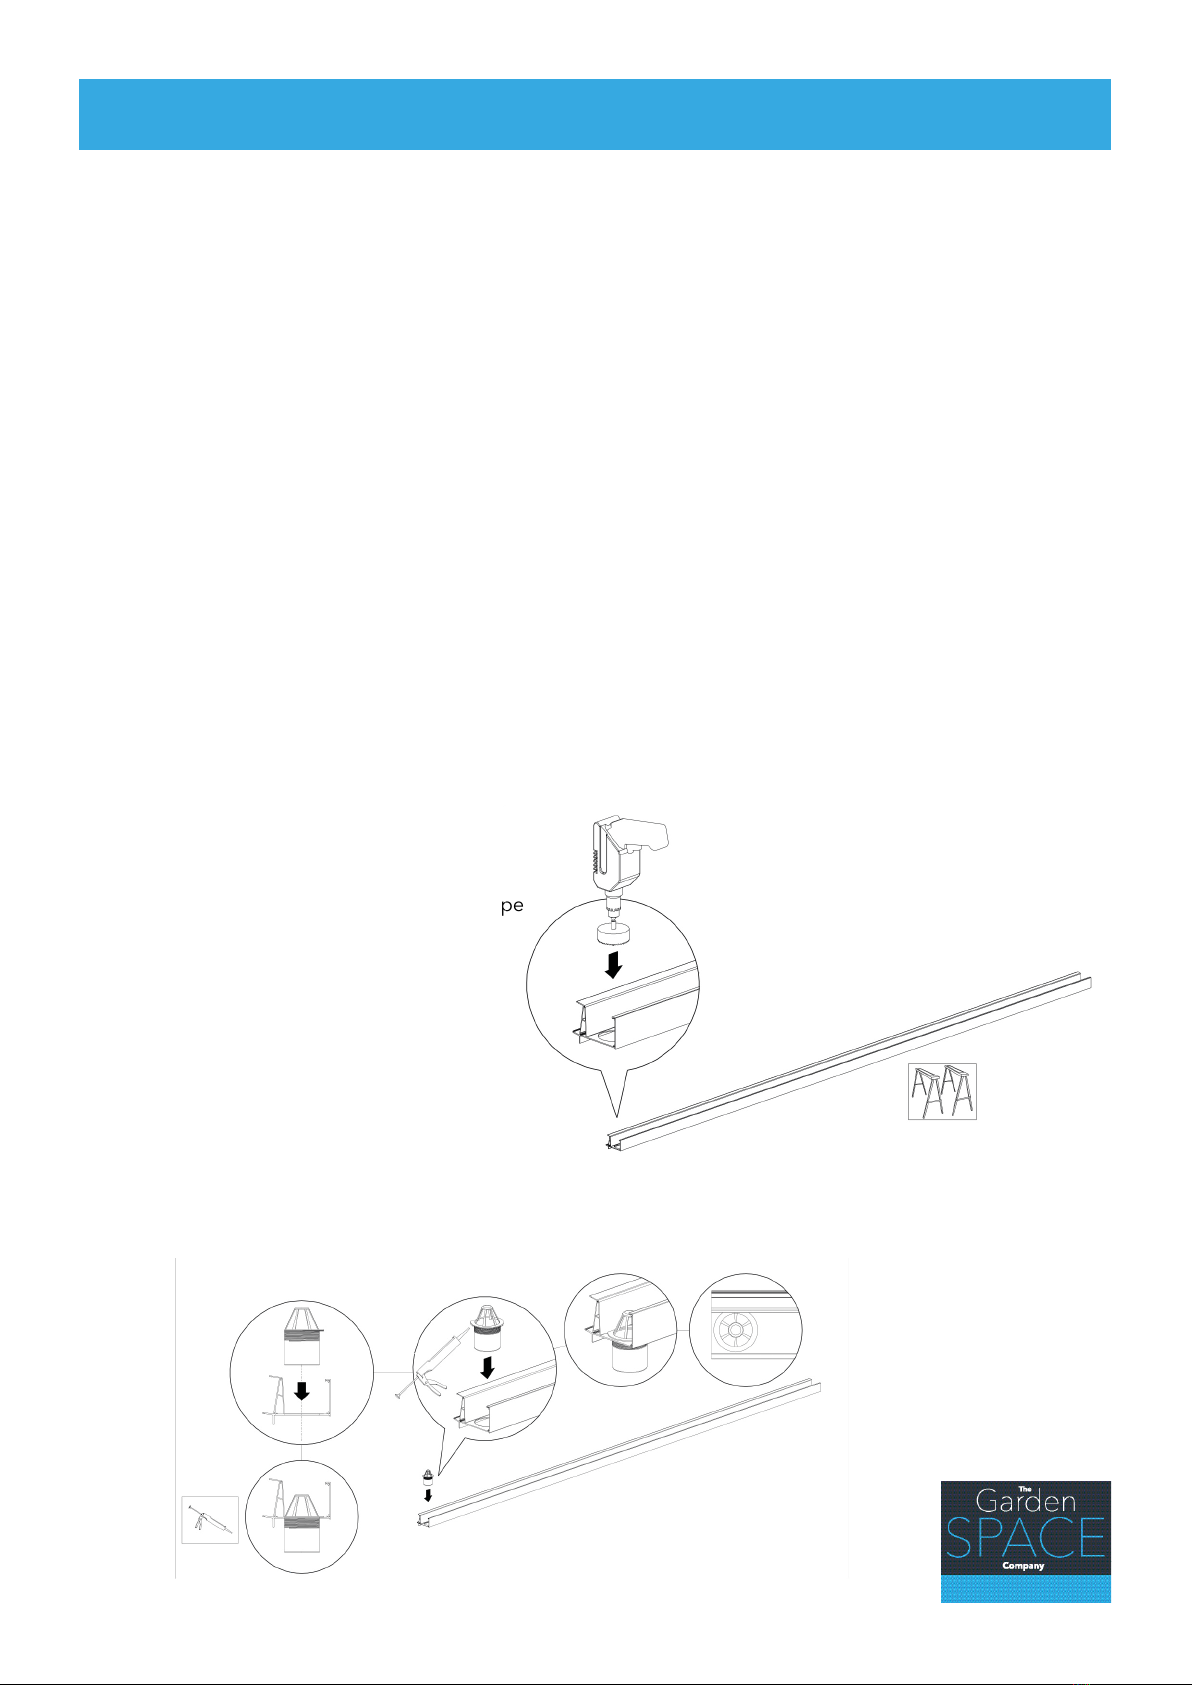
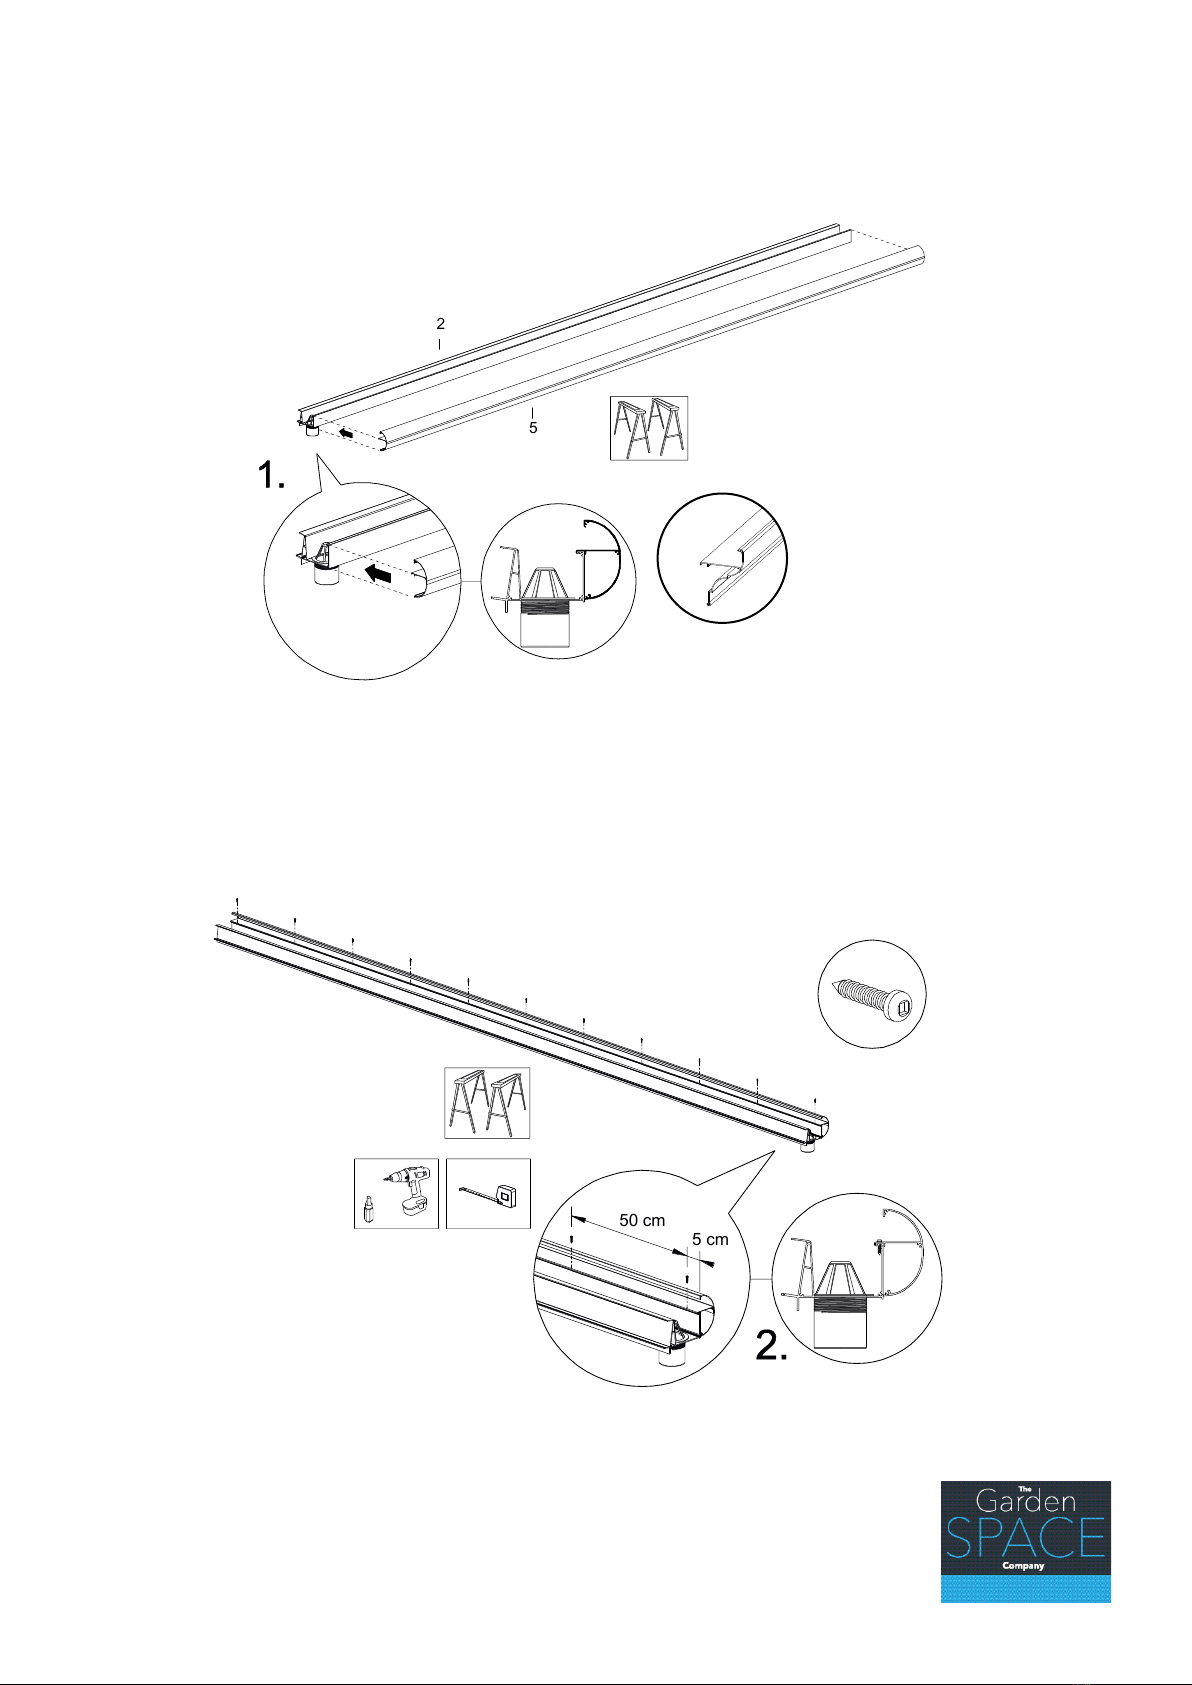
Screws and drilling
• Garden Space supplies special 4.2x19 mm and 4.2x40 mm stainless steel screws with the canopy.
Note: Pre-drill a hole for each screw with a 3 mm drill bit! If you continue to turn them after they are
tight, the screw head may break off. It is recommended that you screw carefully, with the torque limiter
on your drill set properly.
Sealant
• Garden Space supplies sealant selected for the waterproof sealing of aluminium to aluminium or to
most common construction materials, such as walls, concrete, etc. Follow the instructions on the tube.
• Note: This sealant is not suitable for sealing the polycarbonate sheets. If you need to seal your sheets,
becauseyouhavearainwaterdischarge(down-spout)piperunthroughitforexample,wehavespecial
transparent sealant in our range.
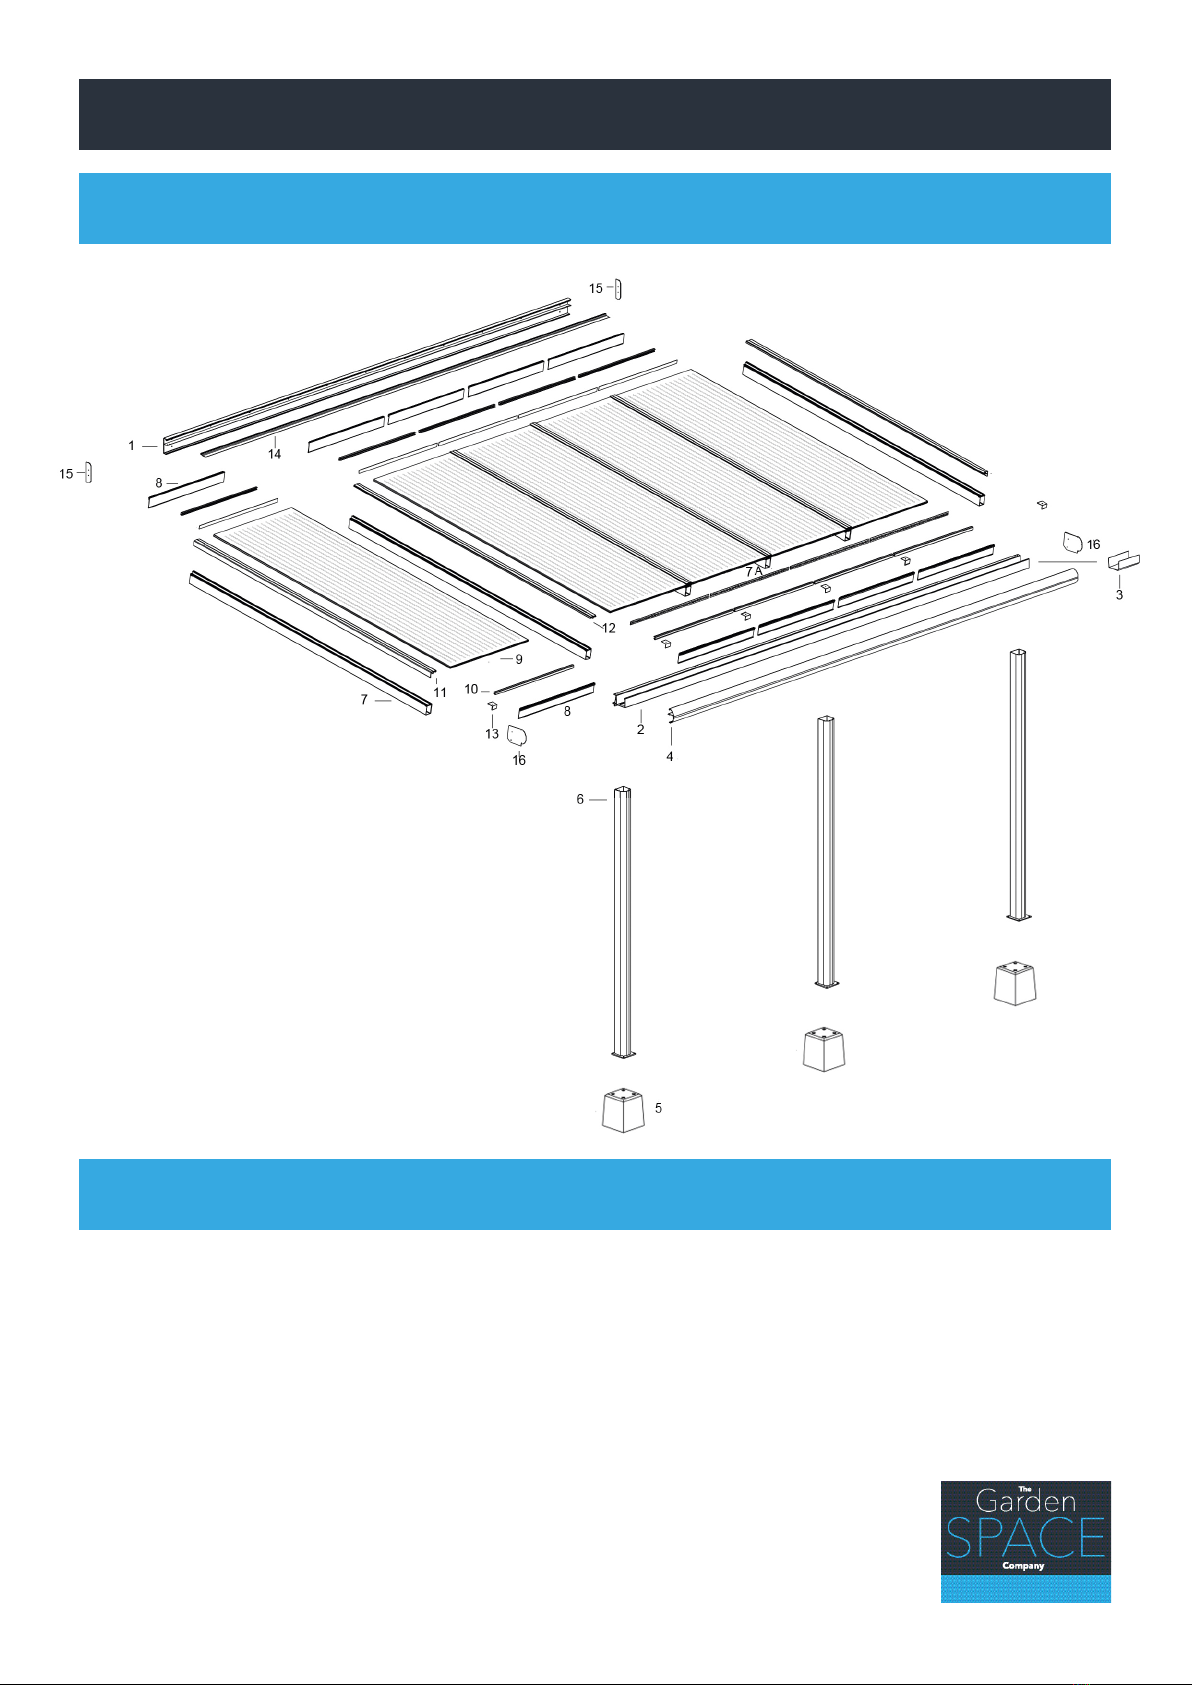
5. Preparation for assembly
5.1 Conditions for assembly
!
!