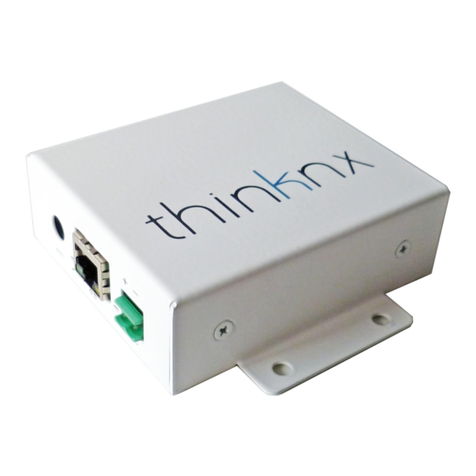
Thinknx Rack Assembly instructions

Rack Server
Installation sheet
Scheda di installazione

Caution
To reduce the risk of electric shock, this product should only be opened by an authorized technician when service is required.
Risk of electric shock
Do not open
ENGLISH
Technical data
Power Input:220V AC -Power Consumption:max. 30 Watt
Operating Temperature:+ 10°C / + 40°C -Humidity:<80%
Industrial card with x86 CPU
Solid State Drive
Linux Operative System
Measurements
Compliances
2006/95/CE
EN 60950-1
89/336/CE
Content
ThinKnx Rack server
Power Cord
BUS terminal connector
2 connectors to link RS232-RS485
Installation Sheet
Installation
Rack Server must be installed in compliance with electrical
installation rules of your country.For its composition, the server
can be placed in a framework rack of 19”, it will occupy a 2 unit
space (3,5 inches).The server must be installed in a dust free
place, not subject to water infiltration and must not be placed
near a source of heat or in direct contact with the sun. Power
Input is supplied directly from the main 220V AC; it is better to
mount a thermal-magnetic circuit breaker in the electrical panel
and possibly with UPS line to deal with any power outages.
Disclaimer
Not attending to these regulations and safety instruction might
cause fatal accidents, injuries and damages to persons and
property.
The manufacturer / supplier assumes no liability for damages
caused by failure to comply with the intended use.

BUS
AB
2
C
Connections
USB port (x4)
Ethernet RJ45 (DHCP)
Ethernet RJ45 (fixed IP
192.168.24.254)
Slot for optional cards
PCI (not included)
Power supply connector
Serial port A (port number: 2)
Serial port B (port number: 3)
EIB/KNX port connector
RS232 port C (port number: 0)
First configuration
The first configuration of the server is via web.To reach web console an internet browser must be used (Firefox or Chrome is
recommended). Please write the following address into browser: http://<ip address>:5051 where ‘ip address’ is the server one. At
first login use the following credentials:
User:service
Password:password
To find the IP address of the server, a search utility is available and can be downloaded from: www.thinknx.com. The server is
configured to use DHCP.If the DHCP fails, the server will acquire the next address by default: 192.168.0.200. If a static IP address
has been set, the server is always reachable at the address: 192.168.24.254 (with subnet mask 255.255.255.252).
Use only supplied connector to connect with the BUS.
Remove power from server during electrical connections.
ENGLISH
BUS
A
B
C
2
2
1
3
23 4 6
RX TX B- A+
5
5
Device
2
RX TX B- A+
Device
1
Device
3
1 2 3 4 65 65
BUS
+
-
In the jack 1
Rx
insert the pin
2 of the connector
RS232
.
In the jack 2 Tx insert the pin
3 of the connector
RS232
.
In the jack 5 insert the pin 5 of
the connec
tor
RS232
.
For the connection
RS485
link the jack
B-/A+
to the
different devices.
To select the modality
RS485
connect together the
jack 5 and 6 of the server’s
connector.

Attenzione
Per ridurre il rischio di scosse elettriche, questo prodotto deve essere aperta solo da un tecnico autorizzato, se occorre assistenza.
Rischio di scosse
elettriche - Non aprire
ITALIANO
Caratteristiche
Alimentazione:220V AC -Consumo massimo:30 Watt
Temperatura funzionamento:+ 10°C / + 40°C -Umidità:<80%
Scheda industriale processore x86
Memoria flash allo stato solido
Sistema operativo Linux
Dimensioni
Normative
2006/95/CE
EN 60950-1
89/336/CE
Contenuto della confezione
Server ThinKnx Rack
Cavo di alimentazione
Connettore BUS
2 connettori per il collegamento RS232-RS485
Scheda di installazione
Avvertenze per l’installazione
Il Server Rack deve essere installato secondo le disposizioni che
regolano l’installazione di materiale elettrico in ambiente
domestico e similare. Per la sua composizione, il server può
essere installato in un quadro rack da 19”; lo spazio occupato è
di 2 unità (3,5 pollici).Deve avvenire in un luogo non polveroso,
non soggetto a infiltrazioni d’acqua, non deve essere posizionato
vicino a fonti di calore o a diretto contatto con il sole.
L’alimentazione è fornita direttamente dalla rete elettrica 220V
AC; è preferibile che a monte venga predisposto un interrutore
magneto-termico dedicato nel quadro elettrico possibilmente con
linea UPS per far fronte ad eventuali mancanze di tensione.
Dichiarazione di non responsabilità
La mancata osservanza delle condizioni sopra citate, può
causare decessi, lesioni e danni a persone e cose.
Il produttore / fornitore declina ogni responsabilità per danni
causati dal mancato rispetto della destinazione d'uso.
Connessioni
Prima configurazione
Per accedere al software ThinKnx, dopo aver collegato l’hardware in rete, aprire un web browser (si consiglia FireFox o Chrome)e
poi la pagina: http://<indirizzo ip>:5051 dove
«
indirizzo ip
»
è quello assunto dal server. Come credenziali per il primo accesso
usare:
User:service
Password:password
Per determinare l’indirizzo IP assunto dal server utilizzare l’apposito tool disponibile sul sito: www.thinknx.com. In assenza di un
servizio DHCP, il server ThinKnx assumerà l’indirizzo di default:192.168.0.200. Se è stato impostato un indirizzo IP statico, il server
è sempre raggiungibile all’indirizzo seguente: 192.168.24.254 (con maschera di sottorete 255.255.255.252).
ITALIANO
BUS
AB
2
Porta USB (x4)
Presa RJ45 (DHCP)
Presa RJ45 (IP fisso
192.168.24.254)
Slot per eventuale
schede PCI (non incluse)
Connessione alimentazione
Porta seriale A (numero porta: 2)
Porta seriale B (numero porta: 3)
Porta EIB/KNX
Porta RS232 C (numero porta: 0)
Per la connessione del
BUS utilizzare
il morsetto in dotazione.
Effettuare i collegamenti in assenza di tensione.
BUS
A
B
C
2
BUS
+
-
2
1
3
23 4 6
RX TX B- A+
5
5
Device
2
RX TX B- A+
Device
1
Device
3
1 2 3 4 65 65
Al morsetto 1
Rx
collegare il
piedino 2 del connettore
RS232
.
Al morsetto 2
Tx
collegare il
piedino 3 del connettore
RS232
.
Al morsetto 5 collegare il
piedino 5 N del connettore
RS232
.
Per la connessione
RS485
collegare i morsetti
B-/A+
agli altri dispositivi.
Per selezionare la modalità
RS485
collegare insieme i
piedini 5 e 6 del connettore
del server.
C

www.thinknx.com
Go Paperless!
Manuals are online Recycle with us!
entirely designed and made
Table of contents
Languages:
Other Thinknx Server manuals
Popular Server manuals by other brands

Channel Vision
Channel Vision W-4001 user manual

Compaq
Compaq 108164-003 - ProLiant - 800 White paper

Wyse
Wyse Winterm 9450XE installation guide

Lowrance
Lowrance SonicHub 2 installation guide

HPE
HPE Cloudline CL2200 Gen10 troubleshooting guide

Digital Equipment
Digital Equipment DECserver 700-08 Hardware owner's manual