THOR GH110-P Operating manual

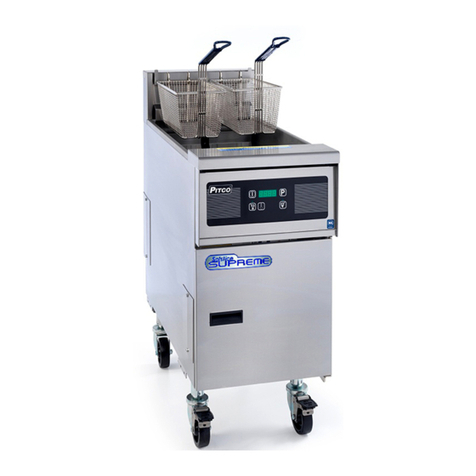
Thor Gas Fryer
Technical Service Manual
Model: GH110-P , GH110-N,GH111-P,GH111-N
IMPORTANT FOR FUTURE REFERENCE
Please complete this information and retain this manual for the life of the equipment. For Warranty
Service and/or parts, this information is required.
Model Number Serial Number Date Purchased
WARNING: For your safety, do not store or use gasoline or other flammable vapors or
liquids in the vicinity of this or any other appliances. Keep the area free and clear of
combustible.
WARNING:Improper installation, adjustment, alteration, service or maintenance can
cause property damage, injury, or death. Read the installation operating and
maintenance instructions thoroughly before installing, or servicing this equipment.
WARNING:Instructions must be posted in a prominent location. All safety
precautions must be taken in the event the user smells gas. Safety information can be
obtained from your local gas supplier.
15 Badgally Road, Campbelltown
NSW 2560

Table of Contents
TABLE OF CONTENTS
PAGE
Introduction
1
Specification
2
Dimensions
3
Installation
4 ~ 6
Operation
7 ~ 9
Cleaning and Maintenance
10 ~ 11
Troubleshooting
12 ~ 25
Conversion from NG to LPG and vice-versa
25
Explosion Drawing
26
Parts List
27

Introduction
We are confident that you will be delighted with your Thor Gas Fryer, and it will become a most valued appliance in
your commercial kitchen.
To ensure you receive the utmost benefit from your new Gas Fryer, there are two important things you can do.
Firstly:
Please read the instruction book carefully and follow the directions given. The time taken will be well spent.
Secondly:
If you are unsure of any aspect of the installation, instructions or performance of your appliance, contact your dealer
promptly. In many cases a phone call could answer your question.
CE Only:
These instructions are only valid if the country code appears on the appliance. If the code does not appear on the
appliance, refer to the supplier of this appliance to obtain the technical instructions for adapting the appliance to the
conditions for use in that country.
1
WARNING:
IMPROPER INSTALLATION, ADJUSTMENT, ALTERATION, SERVICE OR MAINTENANCE CAN CAUSE
PROPERTY DAMAGE, INJURY OR DEATH.
READ THE INSTALLATION, OPERATING AND MAINTENANCE INSTRUCTIONS THOROUGHLY BEFORE
INSTALLING OR SERVICING THIS APPLIANCE.
WARNING:
INSTRUCTIONS TO BE FOLLOWED IN THE EVENT THE USER SMELLS GAS ARE TO BE POSTED IN A
PROMINENT LOCATION. THIS INFORMATION SHALL BE OBTAINED BY CONSULTING THE LOCAL GAS
SUPPLIER.
WARNING:
GREAT CARE MUST BE TAKEN BY THE OPERATOR TO USE THE EQUIPMENT SAFELY TO GUARD IT
AGAINST RISK OF FIRE.
•THE APPLIANCE MUST NOT BE LEFT ON UNATTENDED.
•IT IS RECOMMENDED THAT A REGULAR INSPECTION IS MADE BY A COMPETENT SERVICE PERSON
TO ENSURE CORRECT AND SAFE OPERATION OF YOUR APPLIANCE IS MAINTAINED.
•DO NOT STORE OR USE GASOLINE OR OTHER FLAMMABLE VAPOURS OR LIQUIDS IN THE VICINITY
OF THIS OR ANY OTHER APPLIANCE.
•DO NOT SPRAY AEROSOLS IN THE VICINITY OF THIS APPLIANCE WHILE IT IS IN OPERATION.
CAUTION:
THIS APPLIANCE IS;
•FOR PROFESSIONAL USE AND IS TO BE USED BY QUALIFIED PERSONS ONLY.
•ONLY QUALIFIED SERVICE PERSONS ARE TO CARRY OUT INSTALLATION, SERVICING AND GAS
CONVERSION OPERATIONS.
•COMPONENTS HAVING ADJUSTMENTS PROTECTED BY THE MANUFACTURER SHOULD NOT BE
ADJUSTED BY THE USER/OPERATOR.
•DO NOT OPERATE THE APPLIANCE WITHOUT THE LEGS SUPPLIED FITTED.

Specifications
General
Stainless steel enclosure
All burner has flame safeguard
The valve is the modulating thermostat with on/off function with temperature selecting knob
Cast iron burner
Thermostat with manual reset limit switch
Three/four burner; Three/four combustion tube
Oil Tank size 14” X 14"
Pack Contents
The following is included:
Gas Fryer
Feet
Instruction Manual
Gas Supply Requirements
2
The burner operating pressure is to be measured at the gas control valve outlet test point with
one burner operating at ‘High’ setting. The operating pressure is ex-factory set, through the
appliance regulator and not to be adjusted.
Minimum input Heat of burner: 21MJ for LPG AND NAT
Natural Gas
Propane
GH110-N
GH111-N
GH110-P
GH111-P
Single burner Heat
Input
32.5 MJ
32.5 MJ
32.5 MJ
32.5 MJ
Heat Total
65 MJ
97.5 MJ
65 MJ
97.5 MJ
Burner Operating
1.0 kPa
2.75 kPa
Supply Pressure
1.0 kPa
2.75 kPa
Gas Connection
¾” BSP
¾” BSP

Dimensions
GH110-P, GH110-N, GH111-P, GH111-N
3

Installation Requirements
NOTE:
• It is most important that this appliance is installed correctly and that operation is correct before use.
Installation shall comply with local gas, health and safety requirements.
• This appliance shall be installed with sufficient ventilation to prevent the occurrence of unacceptable
concentrations of substances harmful to health.
Our Gas Fryers are designed to provide years of satisfactory service and correct installation is essential to achieve the
best performance, efficiency and trouble-free operation.
This appliance must be installed in accordance with National installation codes and in addition, in accordance with
relevant National / Local codes covering gas and fire safety.
Australia:
AS 5601/AG 601 (to be AS 5601)- Gas Installations
New Zealand:
NZS 5261 - Gas Installation.
United Kingdom:
Gas Safety (Installation and Use) Regulations 1998
BS 6173-Installation of Catering Appliances.
BS 5440-1&2 Installation Flueing & Ventilation.
Ireland:
IS 820-Non Domestic Gas Installations.
Installations must be carried out by qualified persons only. Failure to install equipment to the relevant codes and
manufacturer’s specifications shown in this section will void the warranty. Components having adjustments
protected by the manufacturer are only to be adjusted by an authorized service agent. They are not to be adjusted
by the installation person.
Unpacking
• Remove all packaging and transit protection from the appliance including all protective plastic coating from the
exterior stainless steel panels.
• Check equipment and parts for damage. Report any damage immediately to the carrier and distributor.
• Ensure that the 4 adjustable castors are fitted with the protruding centre screw.
• Report any deficiencies to the distributor who supplied the appliance.
• Check that the available gas supply is correct to that shown on the rating plate located on the right hand panel.
Location
1. Installation must allow for a sufficient flow of fresh air for the combustion air supply.
2. Installation must include adequate ventilation means, to prevent dangerous build-up of combustion products.
3. Any gas burning appliance requires adequate clearance and ventilation for optimum and trouble-free operation.
The minimum installation clearances shown below are to be adhered to.
4. Position the appliance in its approximate working position.
5. All air for burner combustion is supplied from underneath the unit. The legs must always be fitted and no
obstructions placed on the underside or around the base of the unit, as obstructions will cause incorrect
operation and / or failure of the appliance.
6. Components having adjustments protected by manufacturer are only allowed to be adjusted by an authorized
service agent. They are not to be adjusted by the installation person.
4
Installation

5
Clearances
NOTE: Only non-combustible materials can be used in close proximity to this appliance.
Assembly
NOTE:
•This appliance is assembled before delivery except castors.
•This appliance is fitted with adjustable castors to enable the appliance to be positioned securely
and level. This should be carried out on completion of the gas connection. Refer to the ‘Gas
Connection’ section.
•IM will be stated that the appliance shall be installed in such a way that side body surfaces are
not accessible in the installed position.
Gas Connection
NOTE: ALL GAS FITTING MUST ONLY BE CARRIED OUT BY A QUALIFIED PERSON.
A 3/4" male BSP line for the gas connection is located near the lower right rear corner of the fryer. The
serial plate (located inside the front door of the fryer) indicates the type of gas the unit is equipped to
burn (natural gas or propane). The fryer should be connected ONLY to the type of gas for which it is
equipped.
For orifice sizes and pressure regulator settings, see the chart on page 4. If the fryer is being installed at
over 2,000 feet altitude and that information was not specified when ordered, contact the appropriate
authorized Thor Service Representative or the Thor Service Department. Failure to install with proper
orifice sizing will result in poor performance and may void the warranty.
If applicable, the vent line from the gas appliance pressure regulator shall be installed to the outdoors in
accordance with local codes or, in the absence of local codes, with the Australia: AS 5601/AG 601 (to be
AS 5601) - Gas Installations or New Zealand: NZS 5261 - Gas Installation.
An adequate gas supply is imperative. Undersized or low pressure lines will restrict the volume of gas
necessary for satisfactory performance. A combination gas valve and pressure regulator, which is provided
with each unit, is set to maintain a 1.0kPa manifold pressure for natural gas or 2.75kPa manifold pressure
for propane gas. Fluctuations of more than 25% on natural gas or 10% on propane gas will create
problems and affect burner operating characteristics.
Purge the supply line to clean out dust, dirt, or other foreign matter before connecting the line to the unit.
It is recommended that an individual manual shutoff valve be installed in the gas supply line to the unit.
Use pipe joint compound that is suitable for use with both natural and LP gas on all threaded connections.
ALL PIPE JOINTS AND CONNECTIONS MUST BE TESTED THOROUGHLY FOR GAS LEAKS. USE ONLY SOAPY
WATER FOR TESTING ON ALL GASES. NEVER USE AN OPEN FLAME TO CHECK FOR GAS LEAKS. ALL
CONNECTIONS MUST BE CHECKED FOR LEAKS AFTER THE UNIT HAS BEEN PUT INTO OPERATION. TEST
PRESSURE SHOULD NOT EXCEED 3.45kPa
Installation
Combustible Surface
Non Combustible Surface
Left / Right Hand Side
Rear
355mm
250mm
0mm
0mm

CAUTION
THIS APPLIANCE AND ITS INDIVIDUAL COMBINATION GAS VALVE MUST BE DISCONNECTED FROM THE
GAS SUPPLY PIPING SYSTEM DURING ANY PRESSURE TESTING OF THAT SYSTEM AT TEST PRESSURES
IN EXCESS OF 14”WC (1/2 PSIG or 3.45 kPa).
If the incoming gas pressure is in excess of 14"WC (1/2PSI, 3.45 kPa), a proper step-down regulator
will be required.
Connect the gas supply directly to the 3/4" male BSP connector located near the lower left rear corner of the fryer.
When tightening the supply pipe, be sure to hold the mating connector extending from the unit securely with a
wrench. This will prevent any damage or distortion to the internal piping and controls of the unit.
After connecting the gas supply, check again that the fryer is level. Use a long spirit level four ways; across the front
and rear of the fryer pot, and along each edge.
Commissioning
1. Before leaving the new installation;
a. Check the following functions in accordance with the operating instructions specified in the
‘Operation’ section of this manual.
• Light the Pilot Burner.
• Light the Main Burner.
• Turning 'Off' the Main Burner/Pilot.
b. Ensure that the operator has been instructed in the areas of correct lighting, operation, and shutdown
procedure for the appliance.
2. This manual must be kept by the owner for future reference and a record of the Date of Purchase, Date of
Installation and the Serial Number of the Appliance must be recorded and kept with this manual. (These details
can be found on the Rating label, refer to the ‘Gas Connection’ section).
NOTE: If for some reason it is not possible to get the appliance to operate correctly, shut off the gas supply and
contact the supplier of this appliance.
Installation
6
Install the Regulator

Operation
7
Operation Guide
CAUTION:
• THIS APPLIANCE IS FOR PROFESSIONAL USE AND IS ONLY TO BE USED BY QUALIFIED PEOPLE.
• ONLY QUALIFIED SERVICE PERSONS ARE TO CARRY OUT INSTALLATION, SERVICING OR GAS CONVERSION
OPERATIONS.
• COMPONENTS HAVING ADJUSTMENTS PROTECTED (E.G. PAINT SEALED) BY THE MANUFACTURER SHOULD NOT
BE ADJUSTED BY THE USER/OPERATOR.
Filling the fryer pot
1. Close drain valve completely before filling the fryer pot.
2. When the fryer is new, fill the fryer pot with water and clean thoroughly (see “Weekly Cleaning” on
page 14) in order to remove protective coatings and any foreign matter.
3. The recommended solid shortening capacity for the fryer pot (35, 55 or 75lbs) is described on the serial
plate (which is located inside the front door).
4. Remove the basket support frame when filling the fryer pot with solid shortening.
5. When solid shortening is used, be careful not to bend, break, or twist the thin capillary wires of the
sensing elements located in the fryer pot.
6. Pack solid shortening into the zone below the tubes, all spaces between the tubes, and at least an inch
above the top of the tubes before lighting the fryer. If any air spaces are left around the heat tube
surfaces when the heat is turned on, the tube surfaces will become red hot, burn the solid shortening,
weaken the fryer pot, and could result in a fire.
CAUTION
NEVER ATTEMPT TO MELT A SOLID BLOCK OF SHORTENING ON TOP OF THE HEAT TUBES. NEVER START THE BURNERS
WHEN THE FRYPOT IS EMPTY.
7. To prevent burning or scorching the solid shortening, keep the thermostat set at the lowest
temperature until all the solid shortening between and above the tubes has been melted. Additional
solid shortening can then be added until the desired frying depth has been reached.
8. Replace the basket support frame over the fryer pot heat tubes.

Operation
8
Operation Guide
Open the burner compartment door and do the following:
1. Turn thermostat to “0”
2. Press down the ignition button, turn the thermostat counterclockwise to the “0” position (shown), and
continue to press the knob down.
3. While pressing the ignition button down, use a lit match or piezo igniter to ignite the pilot. Continue to
press the knob down for about 30 seconds. If the pilot does not stay lit when the ignition button is
released, repeat the lighting procedure and keep the ignition button pressed for 10-20 seconds.
Adjustment of pilot flame may be necessary.
4. When the pilot stays lit, turn the knob counterclockwise to the temperature required. Do not press
down on the knob in this step.
5. DO NOT turn the thermostat on until the fryer pot is filled with oil or solid shortening.
6. Once the fryer pot is filled with oil, set the thermostat to the desired temperature
Shut-down Button
Pizeo Ignitor
Thermostat
Pilot Position
High Temperature
Protection Reset
button
Ignition
Button
Shutdown Procedure
Standby: Turn thermostat on the combination gas valve to the “0”position. At this setting, only the pilot
burner will remain ignited.
Complete Shutdown: Press the shut-down button to extinguish pilot burner and main burner and turn
thermostat completely off.
Relighting
In the event of a main burner ignition failure, a five minute purge period must be observed prior to
re- establishing the ignition source.
1. Shut off all gas.
2. Wait five minutes.
3. Follow the “Lighting” procedure described on page 11.
Automatic Pilot Valve
The Automatic Pilot Valve provides an automatic safety shutoff for the fryer when the pilot flame is
extinguished. When the pilot flame is burning, the valve is held open electromagnetically by the electrical
current from a thermopile in the pilot flame. When the pilot flame goes out, generation of current ceases and
the valve closes automatically.

9
Operation
High Limit Control
Thor Fryers are equipped with a secondary heat control that prevents the oil temperature from rising above
195°C/450°F. (Because of the accuracy tolerance of the sensor, the oil temperature may reach as high as
200°C/475°F.)
In the event the fryer shuts down due to this condition, the oil must be cooled to below 185°C/400°F before
the pilot burner can be re-ignited. When the oil has cooled, use the “Lighting” procedure on page 11 to place the
fryer back in operation. If the problem persists, contact your Thor Service Representative or the Technical Service
Department of the manufacturer.
Main burner air supply:
1. For efficient burner operation, a proper balance of gas volume and primary air supply must be maintained
which will result in complete combustion. Insufficient air supply results in a yellow streaming flame. Primary air
supply is controlled by an air shutter on the front of the burner.
2. Loosen the screws on the front of the burner and adjust the air shutter to just eliminate the yellow tips of the
burner flame. Lock the air shutter in place by tightening the screws.
CAUTION
The space between the legs at the bottom admits combustion air. DO NOT BLOCK THIS SPACE.
All burners are lit from constantly burning pilots. Turning the valve to the desired flame height is all that is
required to put the unit in service.
Do not permit fans to blow directly at the unit. Wherever possible, avoid open windows next to the units' sides or
back. Avoid wall type fans which create air cross-currents within a room.
It is also necessary that sufficient air should be allowed to enter the room to compensate for the amount of air
removed by any ventilating system. Otherwise, a subnormal atmospheric pressure will occur, affecting operation
and causing undesirable working conditions.
A properly designed and installed hood will act as the heart of the ventilating system for the room or area in
which the unit is installed, and will leave the unit independent of changing draft conditions.
All valves must be checked and lubricated periodically. This must be done by an authorized service representative
in your area.
Note:
Please wait at least 15 seconds to restart the main burners to maintain the best function of the thermostat valve
after turning off the main burners.
IMPORTANT
Should any abnormal operation like;
- ignition problems,
- abnormal burner flame,
- burner control problems,
- partial or full loss of burner flame in normal operation, be noticed, the appliance requires IMMEDIATE
service by a qualified service person and should not be used until such service is carried out.

10
Thor equipment is constructed with the best quality materials and is designed to provide durable service when
properly maintained. To expect the best performance, your equipment must be maintained in good condition
and cleaned daily. Naturally, the frequency and extent of cleaning depends on the amount and degree of usage.
Following daily and more extensive periodic maintenance procedures will increase the life of your equipment.
Climatic conditions (e.g., salt air) may result in the need for more thorough and more frequent cleaning in order
to keep equipment performing at optimal levels.
If necessary to move the fryer for cleaning, etc., drain oil first to avoid death or serious injury.
If disconnection of the restraint is necessary to move the appliance for cleaning, etc., reconnect it when the
appliance is moved to it originally installed position.
DAILY CLEANING
1. Turn thermostat knob to “0” position.
2. Place hot-oil safe container under the drain and drain the fryer pot completely.
3. Remove the basket support frame (if applicable) and flush out any sediment remaining in the fryer pot with a
little hot oil.
4. Wipe off the basket support frame and the inside of the fryer pot with a clean cloth.
5. Close drain valve and strain the oil back into the fryer pot through several thicknesses of cheesecloth, or filter it
back using a filter machine.
6. Replace the basket support frame (if applicable)
7. Add oil or shortening to MIN oil level mark on rear of fryer pot.
8. To resume cooking, turn the thermostat on.
WEEKLY CLEANING
1. Follow steps 1 through 4 of the Daily Cleaning procedure (see previous section).
2. Close drain valve and fill fryer pot with a solution of warm water and boil-out compound
3. Relight the fryer and bring the solution to a gentle boil for at least five minutes.
4. Turn off main burners and let the solution stand until the gum deposits are softened and the carbon spots and
burned grease spots can be rubbed off.
5. Scrub the fryer pot walls and heat tubes, then drain out fryer pot and rinse it with clean water.
6. Refill the fryer pot with clean water and boil again.
7. Turn off gas and drain and rinse well until clean.
8. Wipe dry with a clean cloth.
9. Refill as specified in the “Filling the Fryer pot” section
Cleaning and Maintenance
CAUTION
SOME AREAS OF THE FRY POT MAY BE HOT!

11
MONTHLY CLEANING
1. Perform the Weekly Cleaning procedure (see previous section).
2. Clean around burner and orifices if lint has accumulated.
3. Visually check that burner carry-over ports are unobstructed.
CLEANING STAINLESS STEEL SURFACES
To remove normal dirt, grease and product residue from stainless steel use ordinary soap and water (with
or without detergent) applied with a sponge or cloth. Dry thoroughly with a clean cloth. Never use vinegar
or any corrosive cleaner.
To remove grease and food splatter or condensed vapors that have baked on the equipment apply
cleanser to a damp cloth or sponge and rub cleanser on the metal in the direction of the polishing lines on
the metal. Rubbing cleanser, as gently as possible, in the direction of the polished lines will not mar the
finish of the stainless steel. NEVER RUB WITH A CIRCULAR MOTION. Soil and burnt deposits that do not
respond to the above procedure can usually be removed by rubbing the surface with SCOTCH-BRITE
scouring pads or STAINLESS scouring pads. DO NOT USE ORDINARY STEEL WOOL, as any particles left on
the surface will rust and further spoil the appearance of the finish. NEVER USE A WIRE BRUSH, STEEL
SCOURING PADS (EXCEPT STAINLESS), SCRAPER, FILE OR OTHER STEEL TOOLS. Surfaces that are marred
collect dirt more rapidly and become more difficult to clean. Marring also increases the possibility of
corrosive attack. Refinishing may then be required.
Darkened areas, called “heat tint,” sometimes appear on stainless steel surfaces where the area has been
subjected to excessive heat. These darkened areas are caused by thickening of the protective surface of
the stainless steel and are not harmful. Heat tint can normally be removed by the above cleaning
techniques, but tint which does not respond to that procedure calls for a vigorous scouring in the direction
of the polish lines, using SCOTCH-BRITE scouring pads or aSTAINLESS scouring pad in combination
with apowered cleanser. Heat tint action may be lessened by not applying or by reducing, heat to
equipment during slack periods.
Cleaning and Maintenance

WARNING
Adjustments and service work may be performed only by a qualified technician who is experienced in, and
knowledgeable with, the operation of commercial gas cooking equipment. However, to assure your
confidence, contact your Thor Service Representative for reliable service, dependable advice or other
assistance, and for genuine factory parts.
Service (For Authorized Service Technician Only)
12
All units are adjusted at the factory. In case of problems in operation at initial installation, check type of gas
and manifold pressure and compare with information listed on the name plate.
A mill voltage circuit diagram is located inside the front door of the fryer, and also on page 18.
CHECKING AND ADJUSTING MAIN BURNERS
The main burners should burn with a steady blue flame, and the inner cone of the flame from each port
should be about 19mm long. The flame from each main burner should enter each heat tube without
touching the front of the fryer pot or the sides, top, or bottom of each tube.
NOTICE
Warranty will be void and the manufacturer is relieved of all liability if:
Service work is performed by other than a qualified technician OR Other than approved Thor
replacement parts are installed.
Yellow Tips
(too little air or too much gas)
Normal Flame
Blowing or Lifting Flames
(too much air)
Trouble shooting

Trouble shooting
13
GENERAL INFORMATION
BURNING SPEED:
The velocity at which flame travels through an air-gas mixture. Burning speeds vary with types of gases,
and the amount of air mixed with the gas. This air to gas ratio is very important in that it is directly
related to flame stability.
PRODUCTS OF COMBUSTION:
Carbon dioxide and water vapor is formed in burning plus the nitrogen in the reactants that entered with
the combustion air.
FLUE PRODUCTS:
The combination of combustion and excess air leaving the combustion area. Since water is produced as a
vapor in the burning of gas it is also present in flue products. If the flue products and vent system remain
hot enough this vapor is harmlessly discharged. If not, the vapor can reach the dew point and condense
into water which can accumulate in the system.
INCOMPLETE COMBUSTION:
A poorly vented appliance restricts flow of air into an appliance. Lack of ventilation around an appliance
may lower oxygen content in the surrounding air. This can be a result of spillage of combustion products
into the room as well. These conditions can cause incomplete combustion and poor performance of an
appliance. Adequate, but not excessive ventilation is a must and cannot be over emphasized.
PRIMARY AIR:
That air which is mixed with gas before the gas leaves the burner port to burn. Ideal burning condition
generally is 10 cubic feet of air per cubic foot of gas.
SECONDARY AIR:
The remaining air needed for complete combustion besides primary air. This is the air surrounding the
flames.
FLAME STABILITY:
Primary air, burning speed, port size and port depth are several factors affecting flame stability. Flames
on a burner tend to stabilize at a point where flow velocity out and burning speed back are equal. This
balance of flow velocities and burning speed explain why flames change when primary air or gas rate is
adjusted.
B.T.U.:
British Thermal Units is the heat energy produced when burning a fuel gas. One BTU of heat will raise the
temperature of one pound of fresh water one degree Fahrenheit.

Trouble shooting
14
BURNER PROBLEMS
LIFTING BURNER FLAMES:
Excessive primary air can cause flames to lift and blow off the burner ports which can be noisy as well as
inefficient. More importantly however is the production of dangerous carbon monoxide under this
condition. Any factor which reduces burning speed promotes lifting flames. Also, any factor which
increases flow velocity from ports contributes to lifting flames. Overrating of burners is also a cause. The
normal cure for lifting flames is the reduction of primary air input to the burner.
FLASHBACK:
Flashback occurs when gas-air flow velocity is less than burning speed at some point near a burner port.
Flash back is a condition where gas ignites within the burner. Any factor which increases burning speed
tends to promote flashback, and any factor decreasing flow velocity from the ports will contribute to
flashback. Flashback is more prevalent with faster burning gases. Natural gas is relatively slow burning
gas hence flashback is less likely. Reducing primary air is the usual cure for flashback.
EXTINCTION POP:
This is merely flashback occurring when a burner is turned off. It is usually instantaneous although it can
occur several seconds after the burner has been turned off. What happens is that primary air continues
to flow into the burner even though the gas jet has been cut off and does not inject air. The mixture in
the burner changes from the normal operating mixture to all air and flow rate through the ports falls off
toward zero. Under these conditions, it is possible for the flame speed to exceed flow velocity at some
instant and flashback may occur. The result is a tiny explosion or pop. Since increasing primary air
increases the burning speed, it is obvious that reducing primary air input will reduce the flashback
tendency.
YELLOW TIPPING OF FLAMES:
Too severe a reduction in primary air also causes its problems. Yellow tipping is one of them. Flames will
eventually become all yellow if no primary air is supplied. These yellow tips are caused by glowing carbon
particles in the flame. Soot will form if these yellow flames impinge on cooler surfaces. Here again
carbon monoxide can be produced. Yellow tipping is corrected by the injection of more primary air.
FLUCTUATING FLAMES:
Length of burner flames may fluctuate or shorten over a period of time with no re-adjustments of the
burner. This condition usually indicates a non-uniform gas pressure at the orifice. Fluctuating flames
usually do not create any immediate problems, such as incomplete combustion, unless flames impinge on
cool surfaces. This condition should be corrected, however, since it warns of possible future problems.
Unsteady gas pressures cause flames to fluctuate. Usually this condition indicates problems with the gas
pressure regulator, the gas meter or other gas supply problems. Check the orifice for blockage by dust or
dirt from supply lines. Very small pilot orifices are quite prone to blockage. Occasionally, too much
grease in pilot valves restricts gas flow to pilot burners. Remove any excess greases.
FLAME ROLLOUT:
When the condition known as flame rollout occurs, flames roll out of the combustion chamber openings
when the burner is turned ON.Flame rollout may create a fire hazard, or scorch appliance finishes, burn
wire, or damage controls. The gas in the burner mixer may be ignited, producing flashback. Flame rollout
is actually a variation of floating flames, with flames reaching for air outside the combustion chamber.
Again, the basic cause is a lack of combustion air. This lack of air may be due to overrating of burners,
poor draft or blockage of flueways. Apply the corrections for these problems listed for floating flames.
Some appliances use step-type controls. These controls limit initial gas flow to the burner to establish
natural draft in the appliance before full gas rate is allowed to flow. Check the operation of this control,
and replace the control if it is faulty.

Trouble shooting
15
BURNER PROBLEMS–cont’d.
FLOATING FLAMES:
The difference between floating flames and lifting (or blowing) flames should be clearly understood. Both
conditions are undesirable, but the causes and corrective steps are different. Floating flames are lazy
looking. They do not have well defined cones, and appear to be “reaching” for the air. They are long, ill-
defined, quite flames which roll around in the combustion chamber sometimes completely off the ports.
Usually a strong aldehyde odor is present. Floating flames almost always indicate incomplete combustion.
They point to a dangerous condition which require prompt correction. If secondary air supply is reduced
too far burner flames will float. Combustion products above the burner re-circulate lower in the chamber.
These products contaminate the air supply, adding to the problem. A lack of combustion air causes
burner flames to float. Several conditions, or a combination of these conditions can be the cause. The
appliance may be overrated. If so, the flue outlet area provided for the rated input may be too small for
the increase gas rate. Check appliance rate and reduce if necessary. Other conditions may cause poor
venting and lead to floating flames. Soot or dust may be blocking flueways. Check flueways and clear any
blockage found. Determine, if possible, the reason the flueways blocked up.Check for blockage of
burners, and clean them if necessary. Adjust primary air to get rid of any yellow tipping which may have
produced soot to block he flueways. Make sure secondary air inlet openings are not blocked. Reduced
natural draft (venting) through an appliance may take place when it is operated from a cold start. Some
floating flames may appear for a brief time until draft is established. When the appliance heats up it
should operate in a normal manner.
UNSTABLE OR WAVERING FLAMES:
Drafts across burners may cause flames to waver or appear to be unstable. This condition should not be
confused with lifting or floating flames. Wavering burner flames can lead to incomplete burning if flames
impinge on cool surfaces. Pilot flames under drafts may go out, or they may be diverted from heating the
sensing element of the automatic pilot device. In either case the automatic pilot will shut off gas supply
to the appliance. Drafts affecting pilot flames may be simply external drafts, such as across the floor.
Protect the pilot flames with suitable baffles. Draft-blown main burner flames may indicate a more
serious problem, such as cracked heat exchanger. Replace or repair a cracked heat exchanger without
delay.
GAS ODOR AT PRIMARY AIR OPENINGS:
Under normal burner operation, a negative pressure (vacuum) should exist inside the primary air
openings of a burner, drawing in air. If all gas fed to the burner by the orifice does not flow to the burner
head, some gas may spill from the primary air openings. If this condition is found, check the burner body
for restrictions, and check the orifice to make certain it is not out of line.
CORROSION OF APPLIANCES:
Gas appliances are designed and built to give long dependable service life. In some installations recently,
usually severe corrosion has occurred resulting in customer complaints. This corrosion is attributed to the
extensive use of aerosol propellants, hydrocarbons which contain the elements FLOURINE AND CHLORINE.
These elements are called halogens. Halogens in their free state are very corrosive. When the
propellants pass through a flame, they break down and the halogen gases are released. In combination
with the water vapor in the flue gases they cause corrosion in heat exchangers, flueways and other
appliance parts. Some of the worst cases of this corrosion have been in beauty shops where hair sprays
are used and in dry cleaning plants where halogen-containing materials are used as cleaning fluids.

Trouble shooting
16
Fault
Possible Cause
Remedy
Pilot won’t light.
No gas supply or gas isolation
valve is OFF.
Ensure gas isolation valve is turned on, and
that gas tanks are not empty.
Pilot injector is clogged or partially
blocked.
Check the pilot injector if clogged or
partially blocked, and clean if necessary.
Follow the pilot injector removal procedure.
Pilot tube is kinked and gas cannot
pass through.
Check if the pilot tube is kinked. Remove
the kink and check for possible gas leak. If
gas leak is found, turn off the main gas
valve and replace the pilot tube.
Pilot goes out when
gas control knob
released.
Releasing the knob before
the thermocouple has
heated.
Hold the knob in for at least 10~20
seconds following ignition of the pilot.
Gas pressure too low.
Check the pressure of the main line if within
standard. Adjust the pressure if necessary.
NG –1.0KPa and LPG –2.75KPa.
Partially blocked pilot injector.
Clean the pilot injector or replace the pilot
injector if necessary. Follow the pilot
injector removal procedure.
Thermocouple connection to the
combination valve is loose.
Tighten the thermocouple
connection.
Faulty thermocouple.
Check if the thermocouple is producing
20~30 millivolts. Otherwise, replace the
FDS. Follow the FDS removal procedure.
Faulty combination valve.
Replace the combination valve. Follow the
combination valve removal procedure.
Main burner won’t
light
Burner injector is clogged or
partially blocked.
Check the burner injector if clogged or
partially blocked, and clean if necessary.
Follow the burner injector removal
procedure.
Faulty combination valve.
Replace the combination valve. Follow the
combination valve removal procedure.
Main burner flame
color is yellow or
orange.
Insufficient air supply.
Check if there is anything blocking the air
passages of the fryer.
Wrong type of gas used.
Check the name plate and injector’s orifice
# used and compare with gas used on the
unit.
Partially block orifice or dirty
orifice.
Clean the orifice. Follow the orifice removal
procedure.
Blowing or lifting of
flames
Too much primary air.
Check the primary air and reduce if
necessary. When reducing primary air, make
sure yellow tipping does not occur.
Appliance input rate is lower
than the supply input rate.
Check the appliance input rate and reduce if
necessary.
The orifice size of the burner not
the same as the other burners
and it is operating above the
rated input rate.
Check the orifice size of that burner against
the others to make sure the burner is not
operating over the rated input.

17
Trouble shooting
NOTE: Vibrations or shock caused by shaking or pounding baskets on top
surface or by slamming door may cause Hi-Limit Control Switch to open. If this
condition persists, additional cushioning may be added to the rubber grommets
supporting this control to absorb these shocks.
Wiring Diagram

Trouble shooting
18
PILOT TROUBLE SHOOTING
CHECKING & CLEANING OF THE ODS INJECTOR:
1. Visually check the orifice of the pilot injector
if clogged, damaged or blocked. If it cannot
be checked visually, try to blow air in the
injector and check if there is air coming out
of the orifice.
2. If the orifice is blocked or clogged, use an air
blow to remove the clogging. Never pinch
the orifice with a pin as this could damage
the orifice.
3. If the clogging cannot be removed from the
orifice by air blow, replace the injector with
a new one. Remember to check the size of
the orifice and replace with the same size.
4. Follow the ODS injector removal procedure.
FLAME DEVICE SYSTEM
PILOT
BURNER
THERMO
COUPLE
IGNITER
ODS
INJECTOR
INSIDE PILOT
NOTE: When you order a Flame Device System
(FDS), the ODS injector is not included. The ODS
injector can be ordered separately.
PILOT
TUBE
FLAME DEVICE SYSTEM ODS INJECTOR REMOVAL:
1. Shutdown the fryer. Follow the complete
shutdown procedure.
2. Shut-off the main isolation valve and follow
the lock-out/tag-out procedure.
3. Let the fryer cool down for a few minutes
before starting your work.
4. Remove the mounting screw of the FDS
Assembly, then remove the FDS Assembly.
5. Disconnect the pilot tube from the FDS. Use
12mm spanner.
6. Pull-out the pilot tube, then remove the ODS
injector.
7. Clean or replace the ODS injector if necessary.
8. Make sure to check for gas leak, using soap &
water, after part installation.
Remove the mounting screw of the FDS
Remove the ODS injector
MOUNTING
SCREW OF FDS
ODS
INJECTOR
This manual suits for next models
3
Table of contents
Other THOR Fryer manuals
