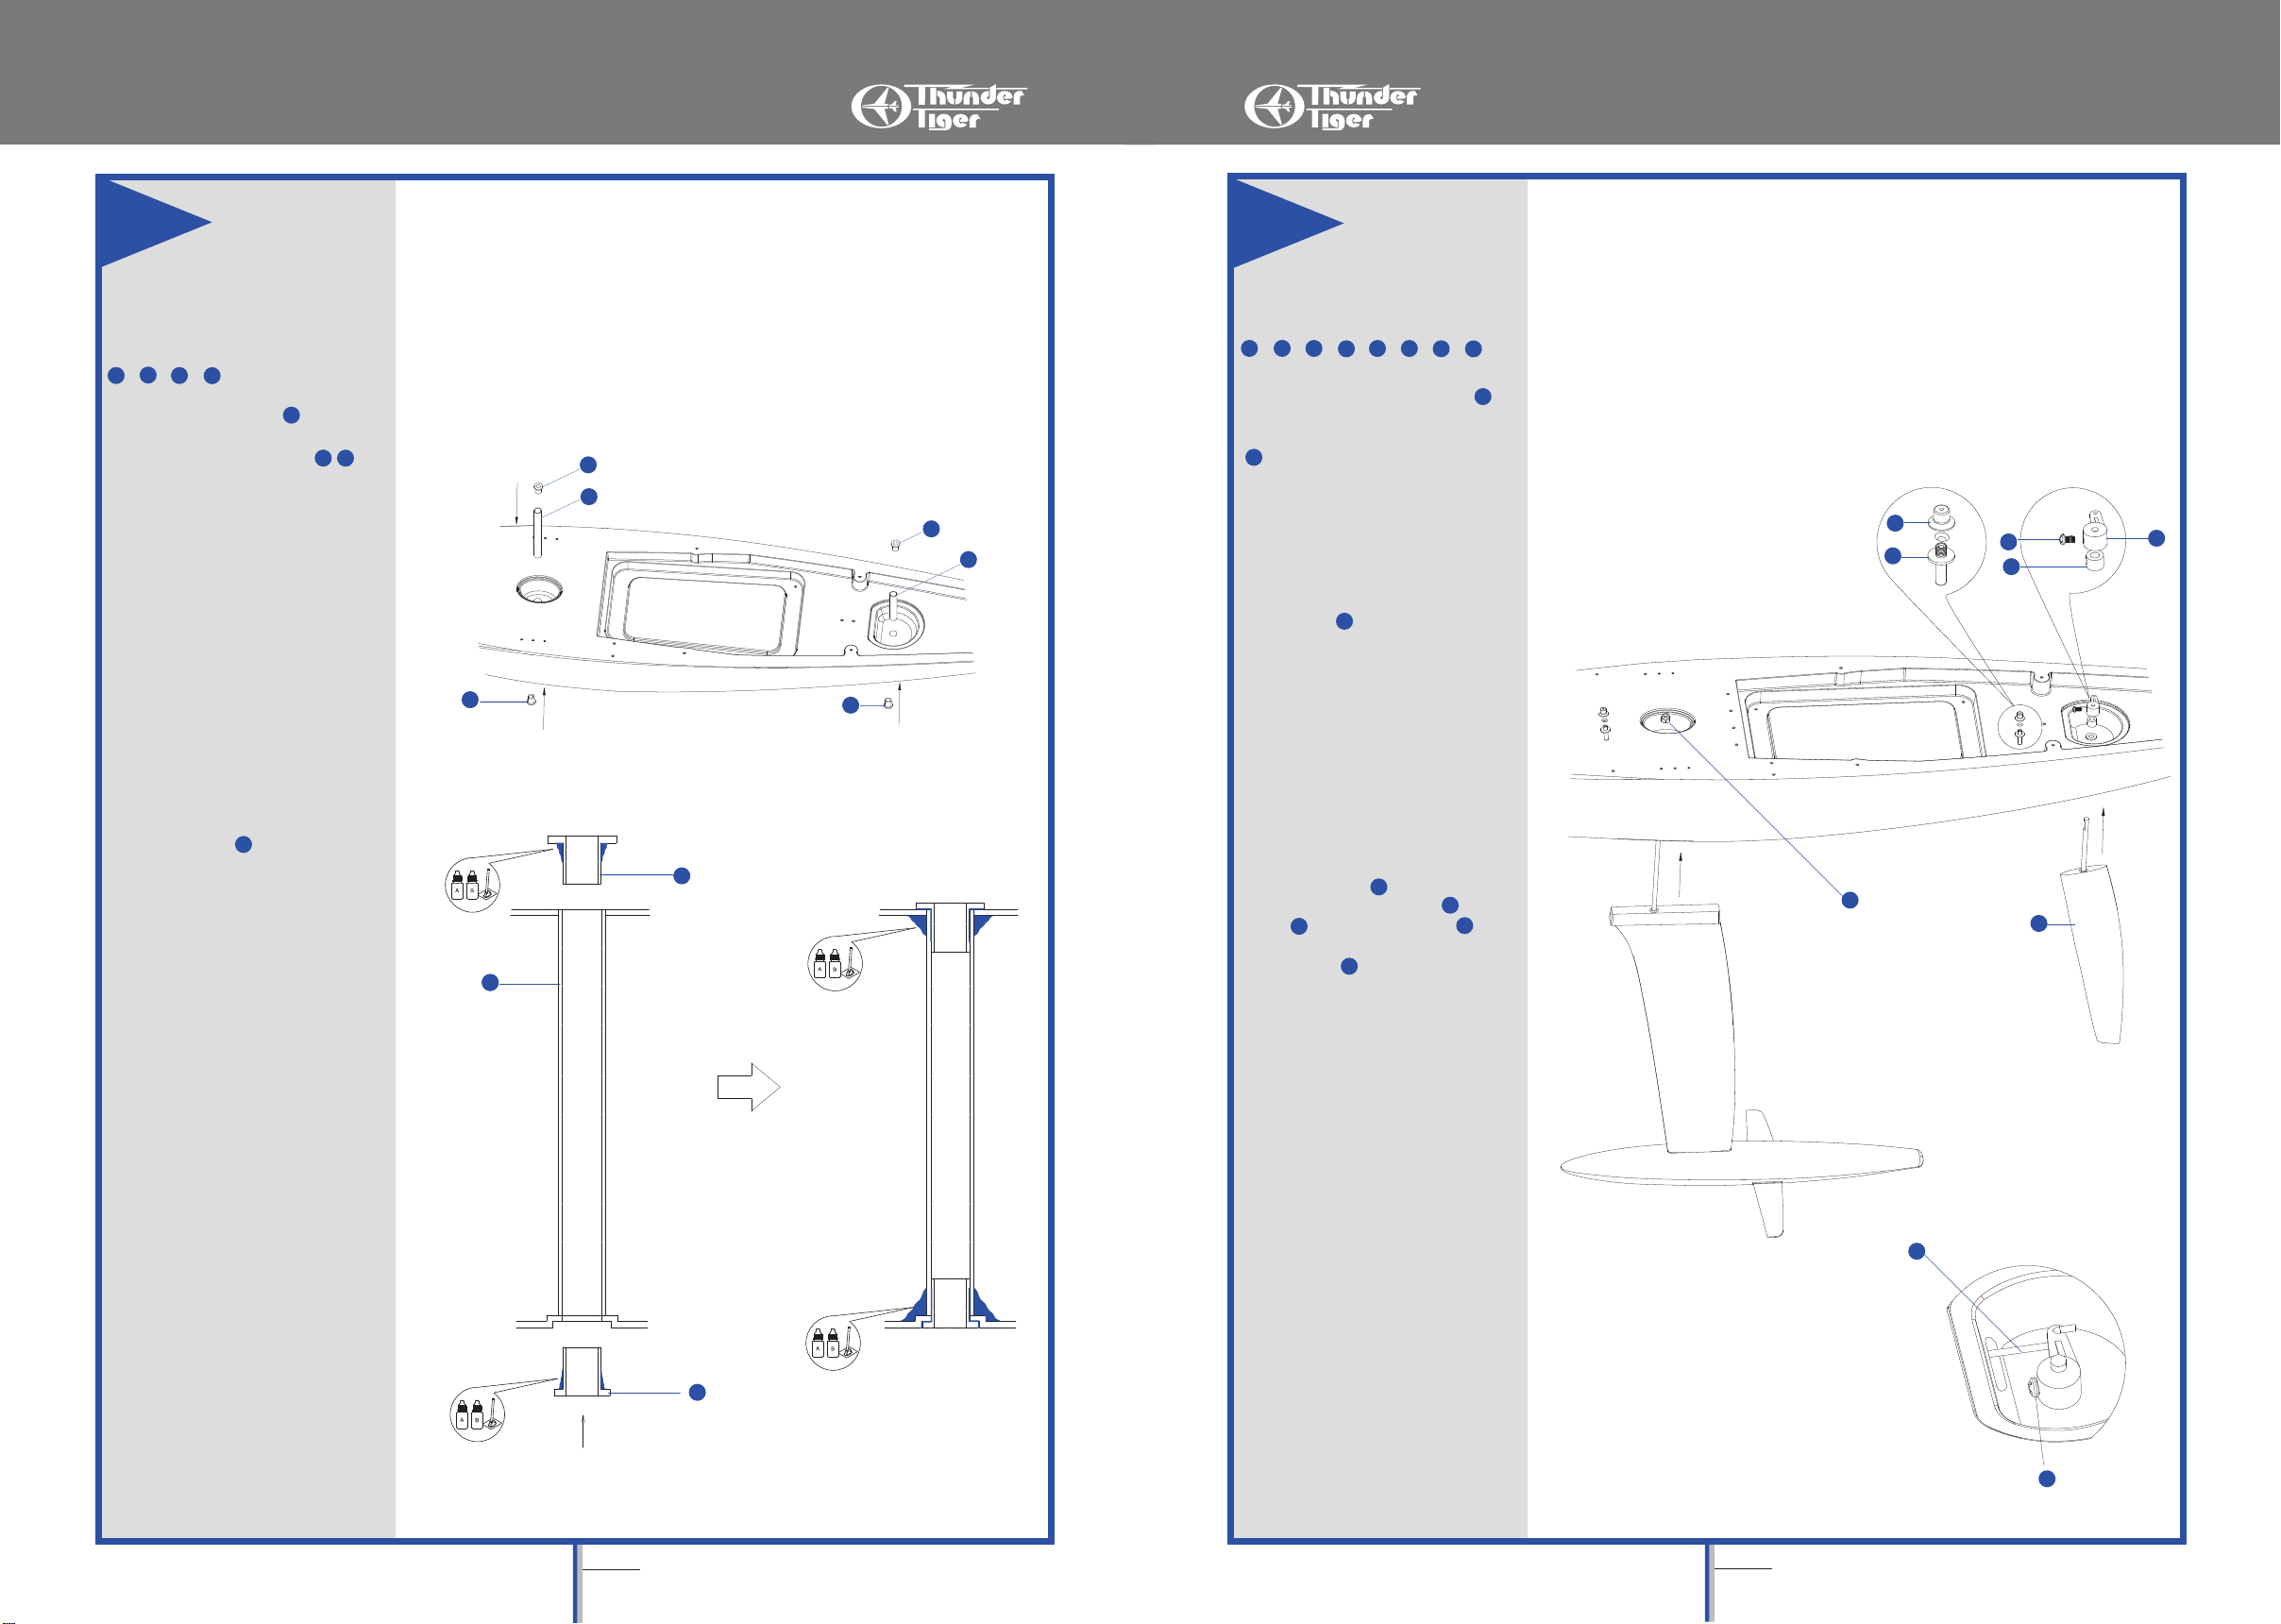
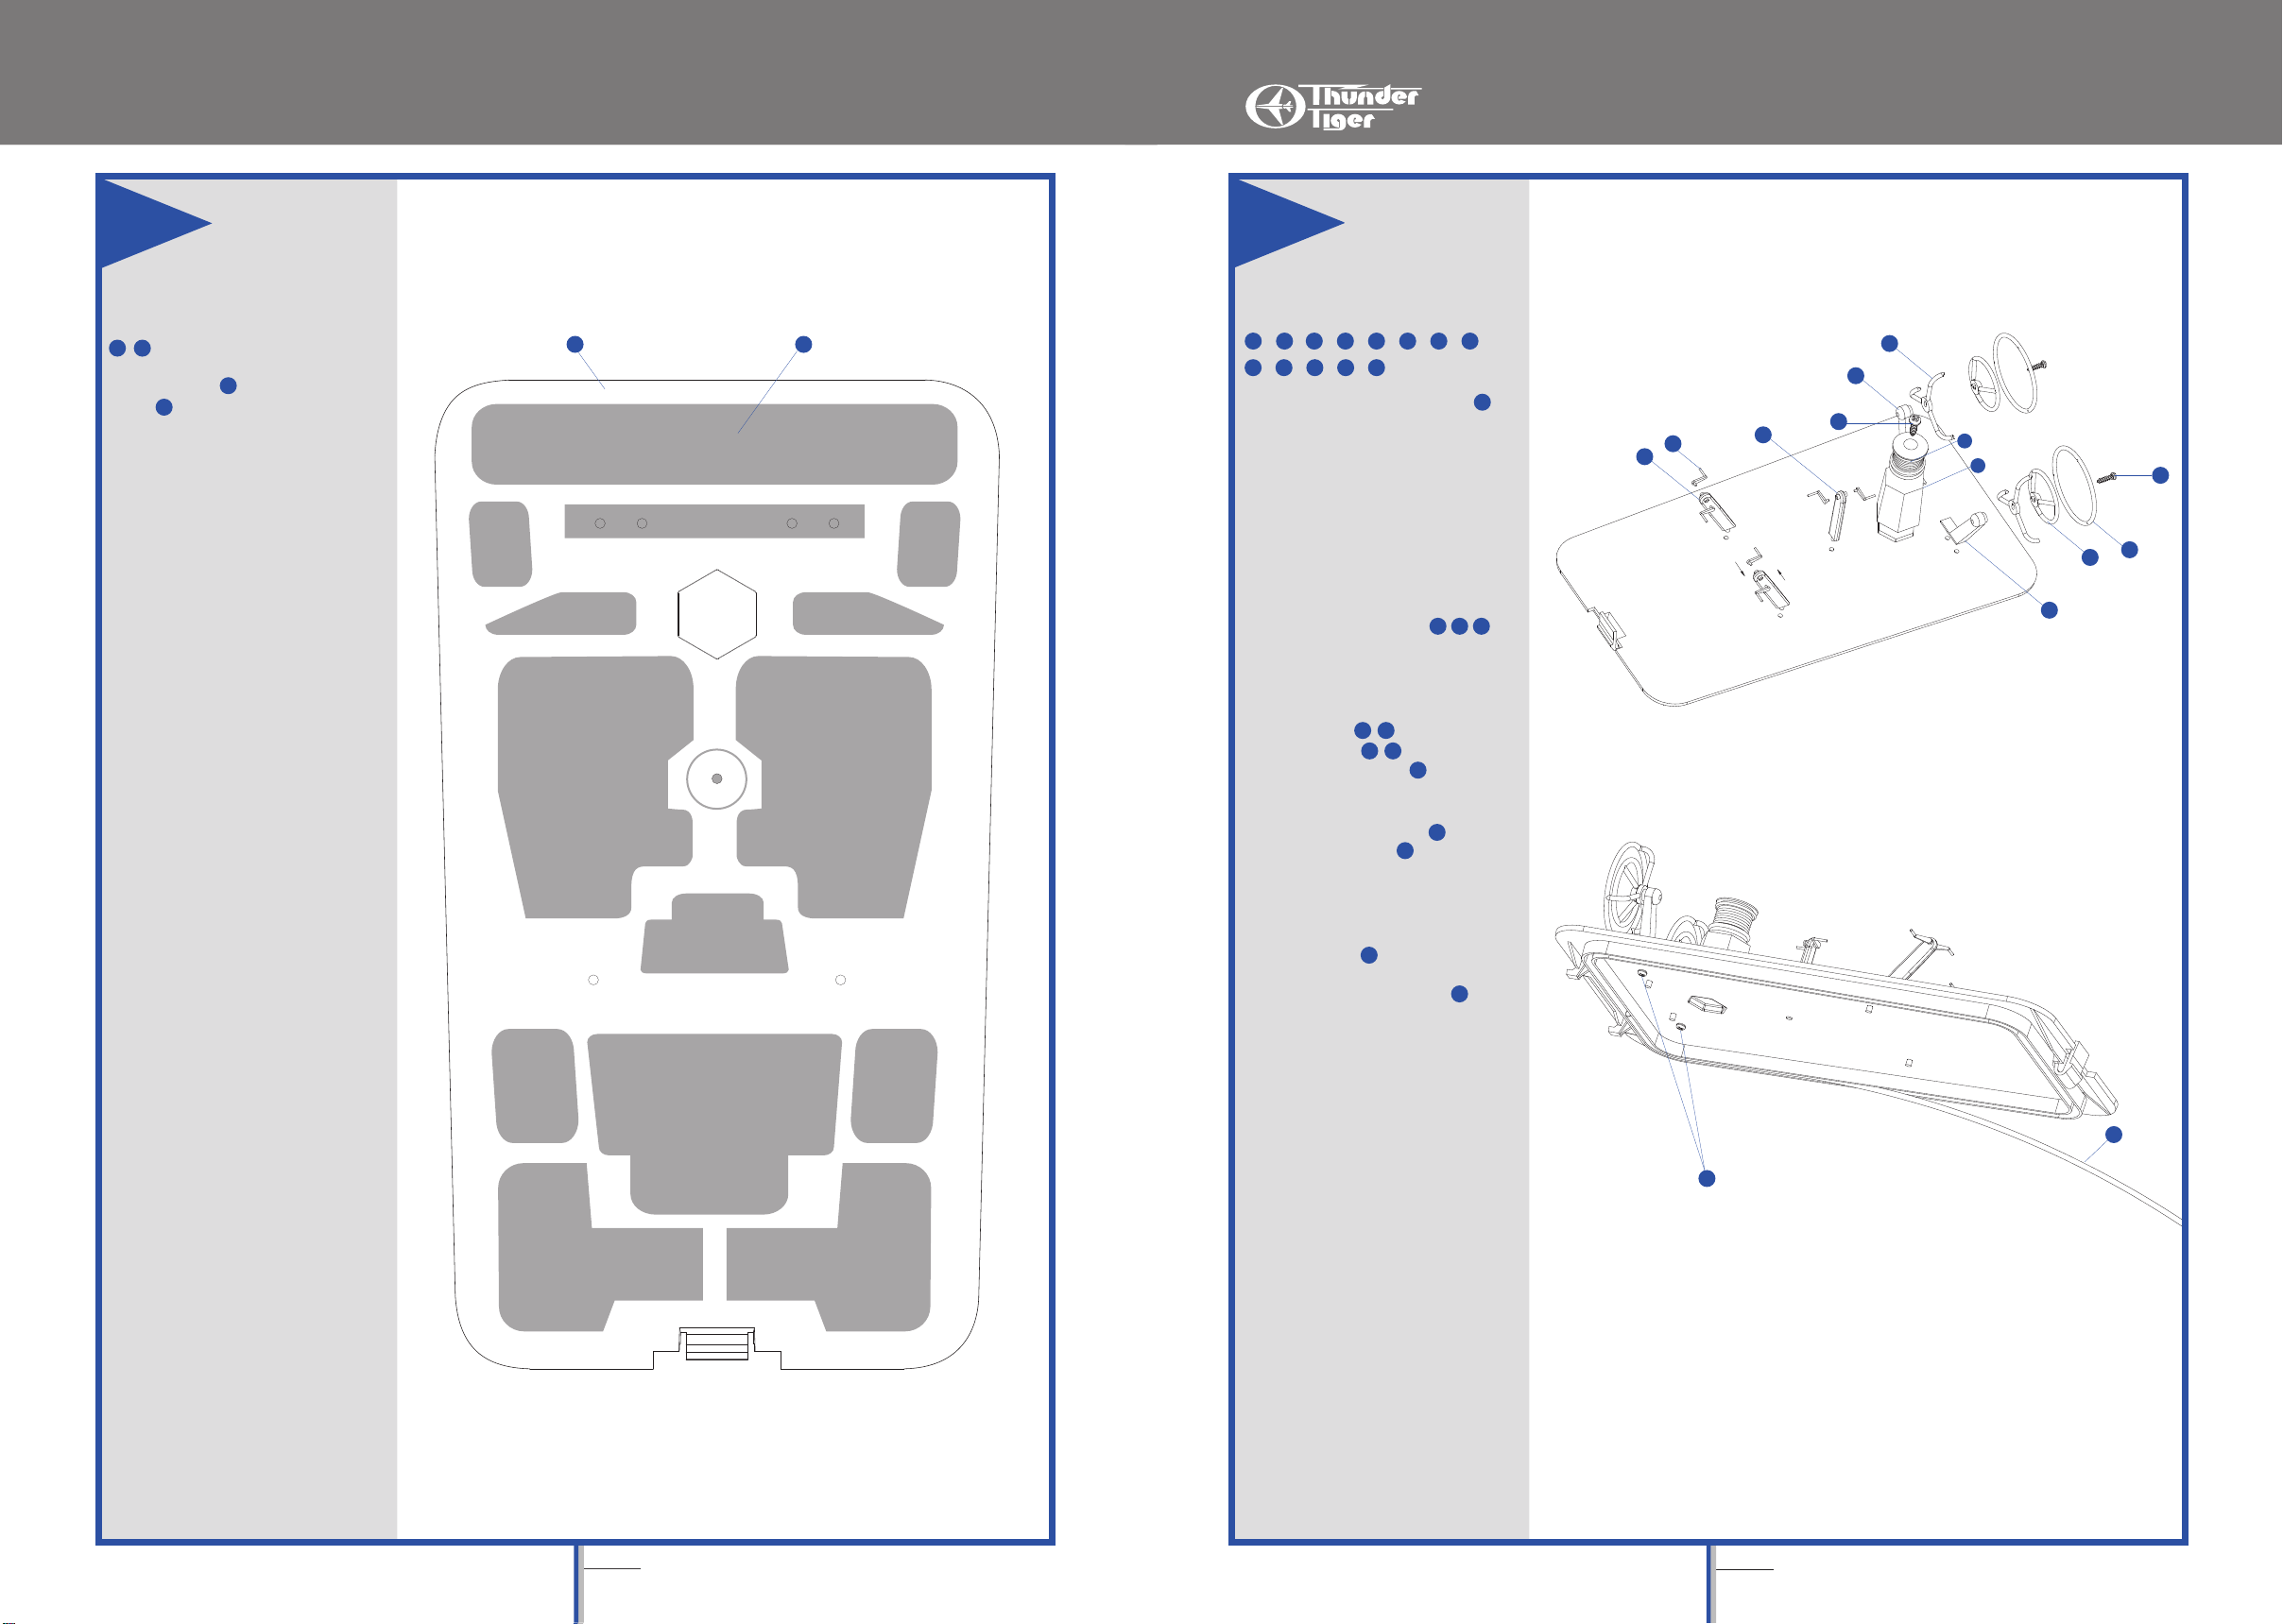
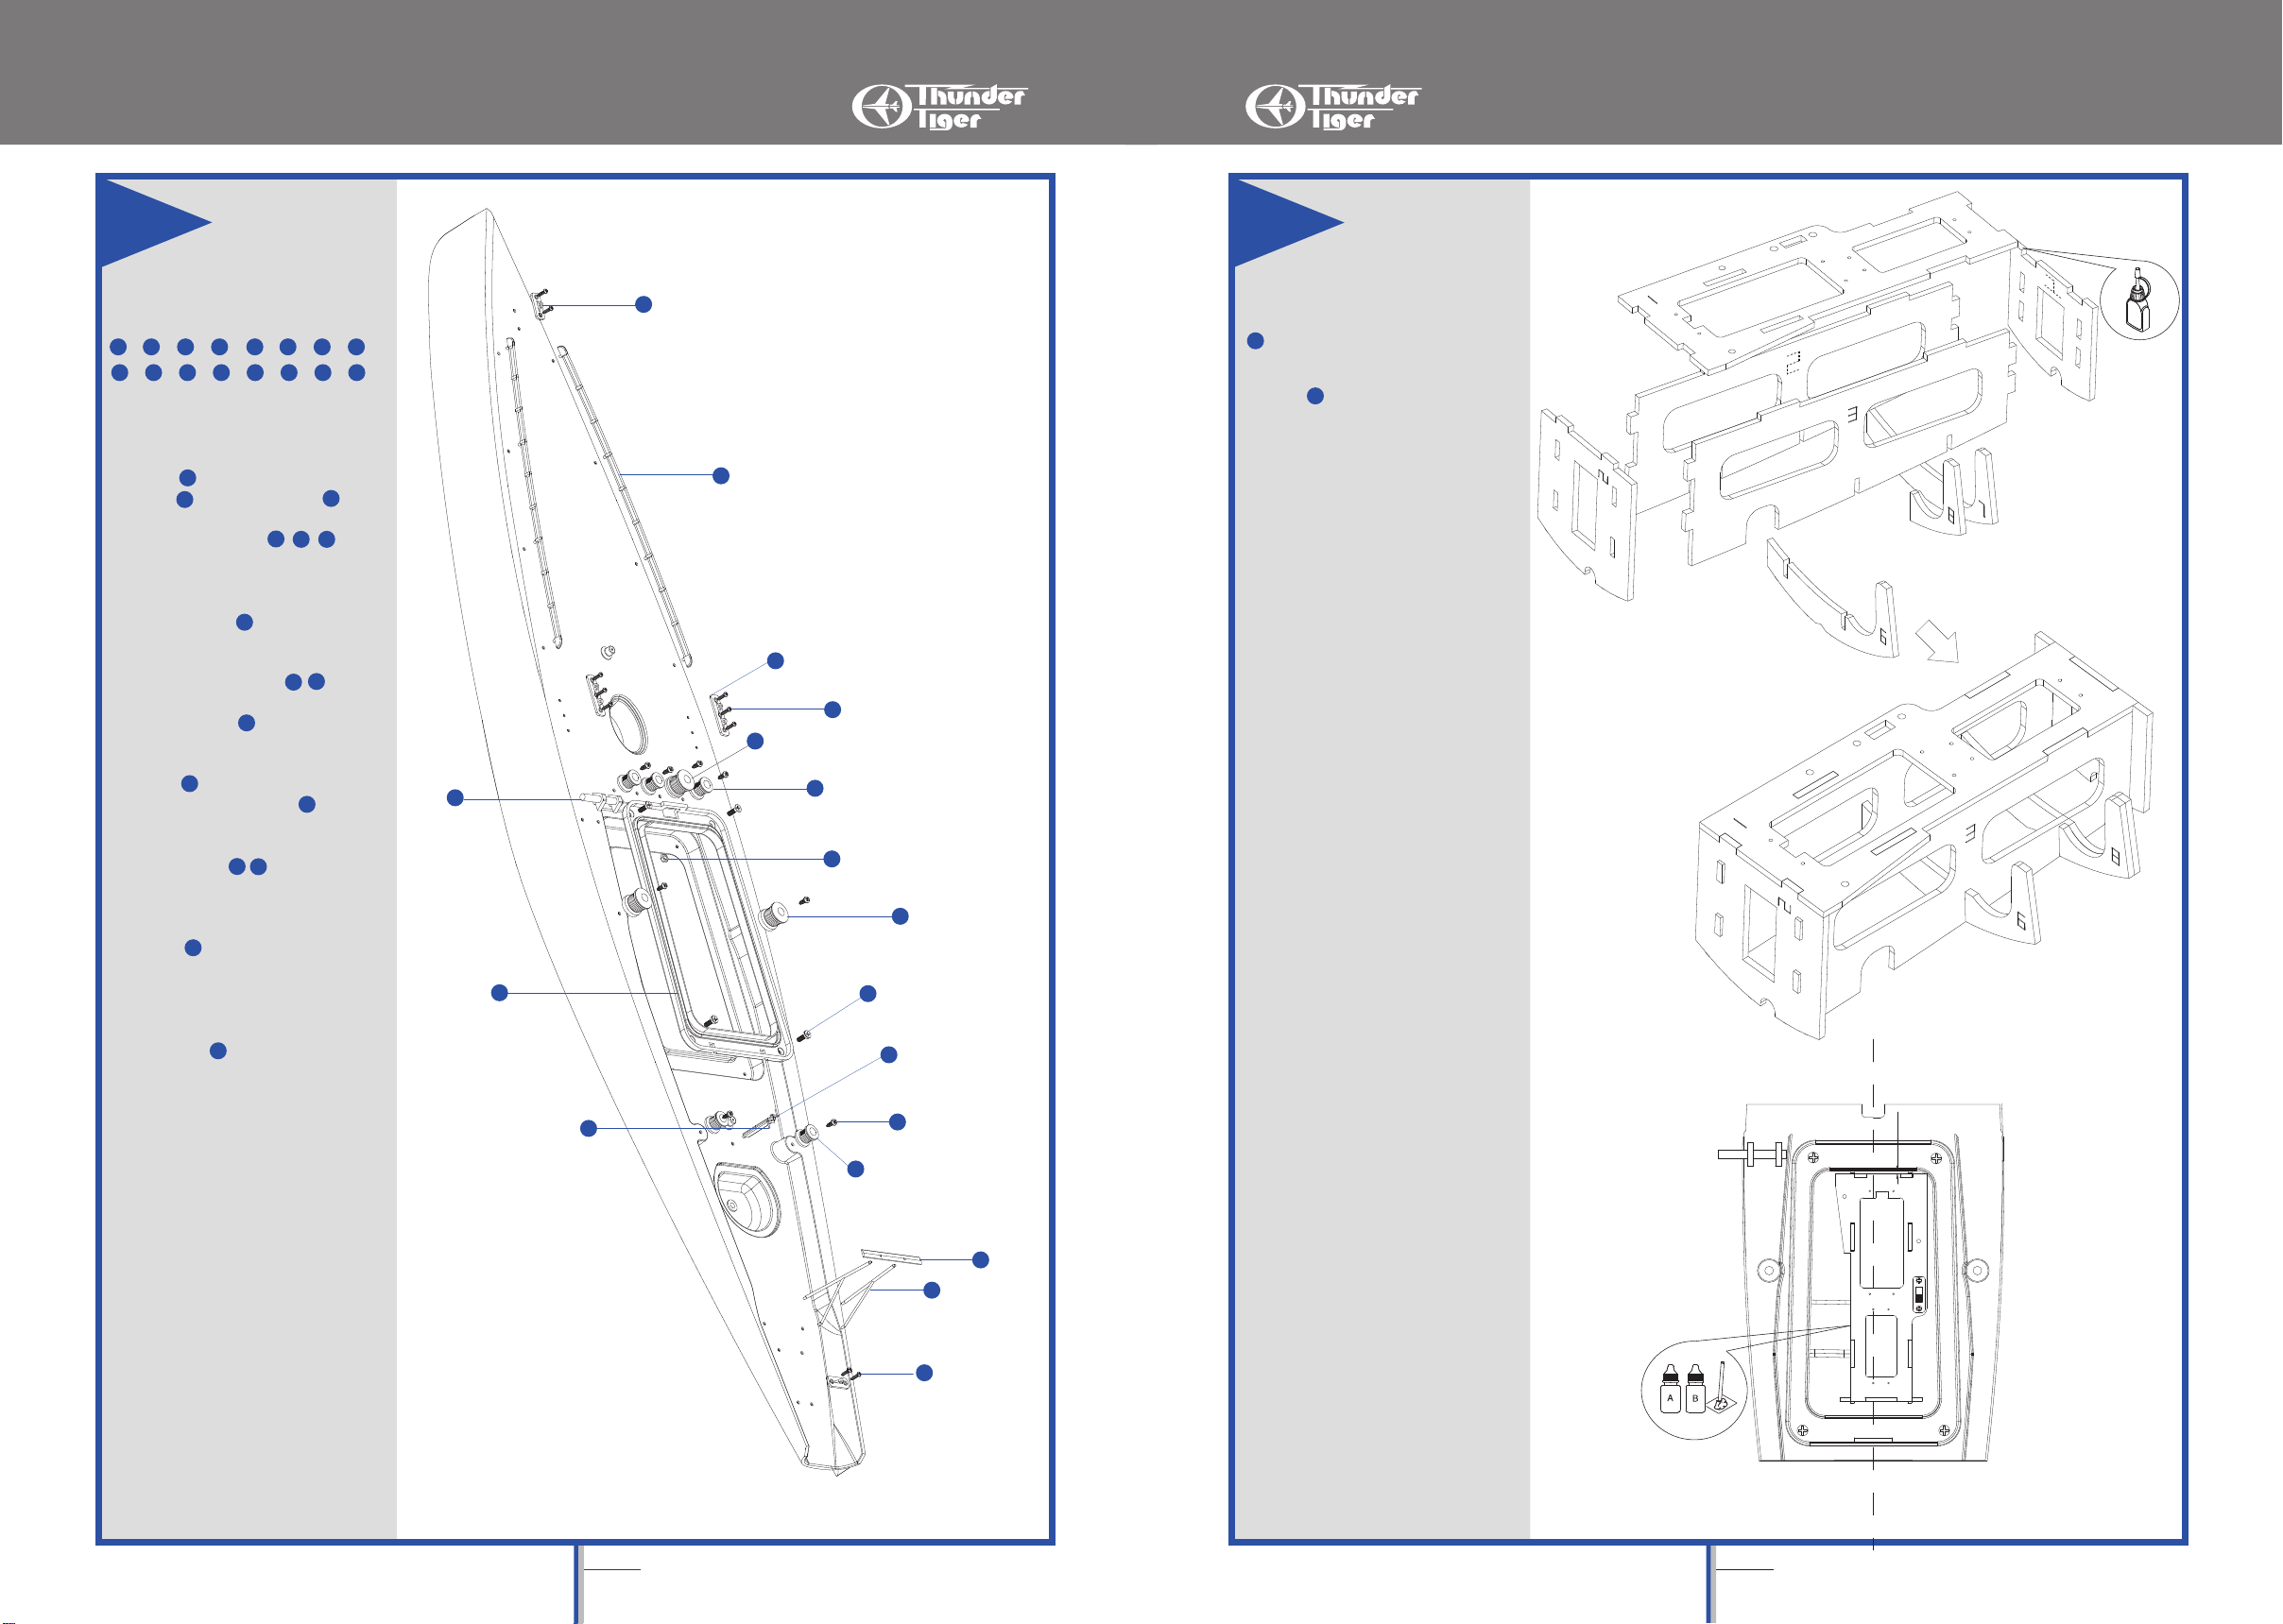
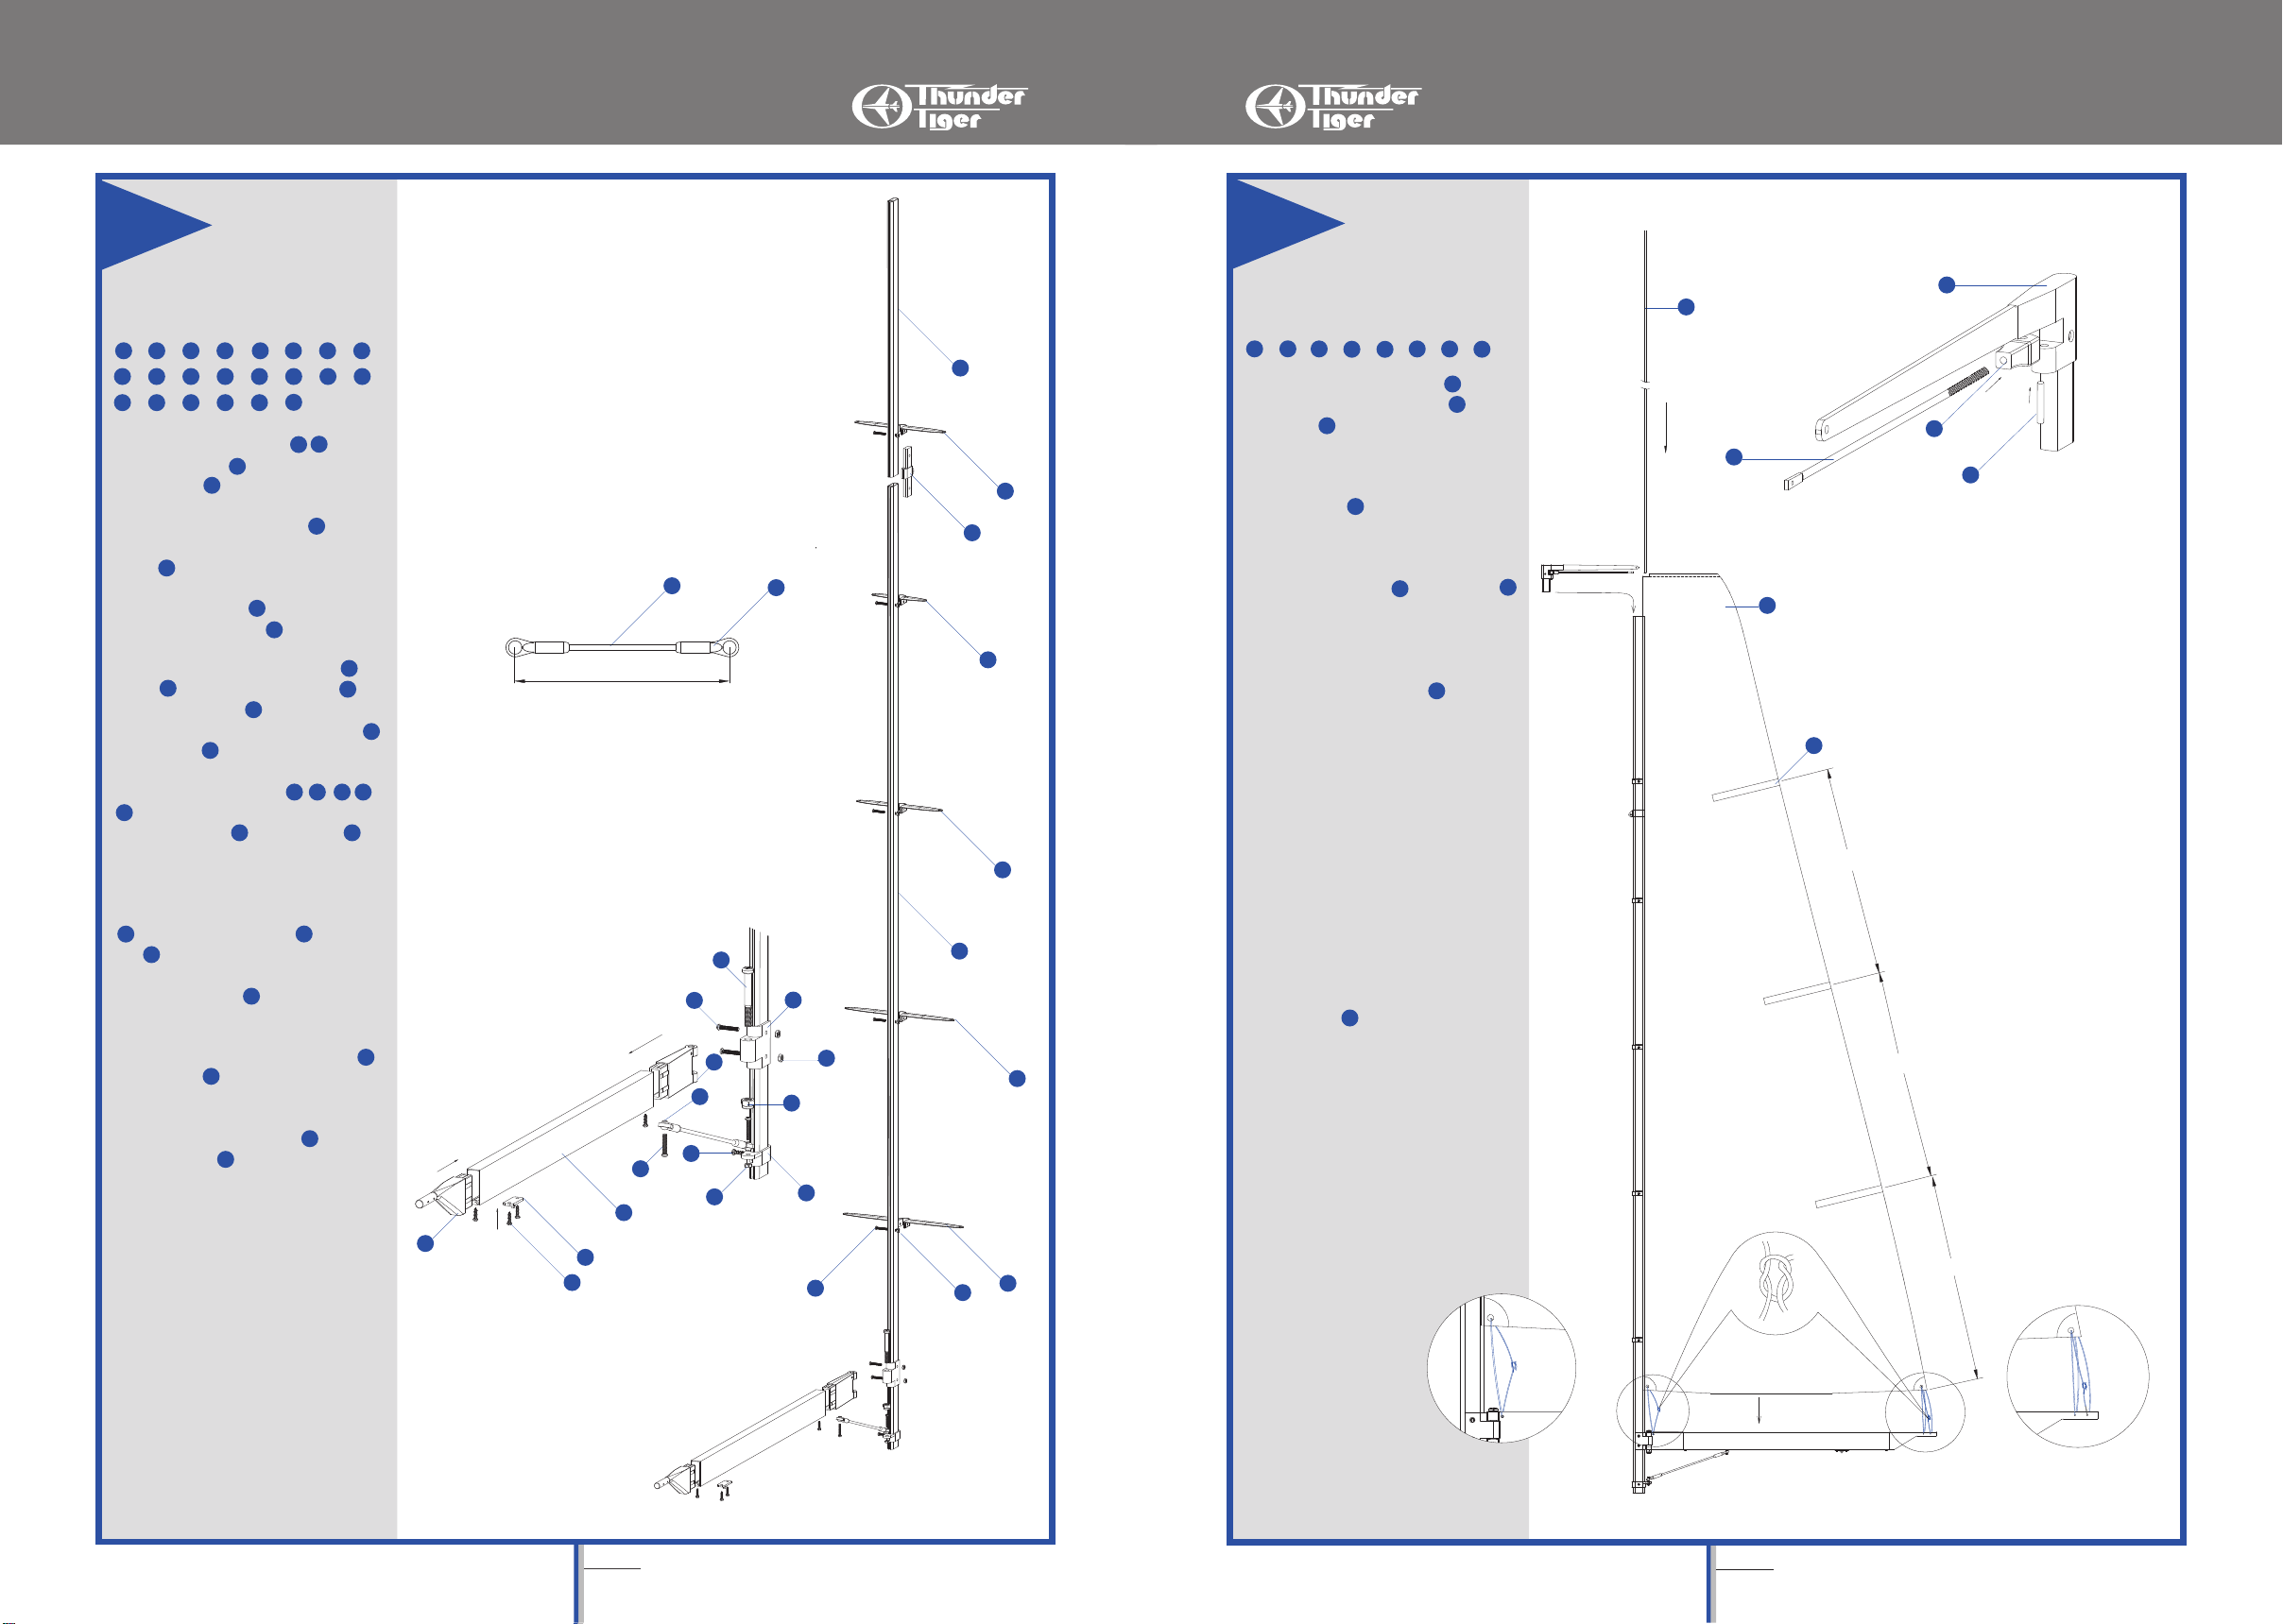
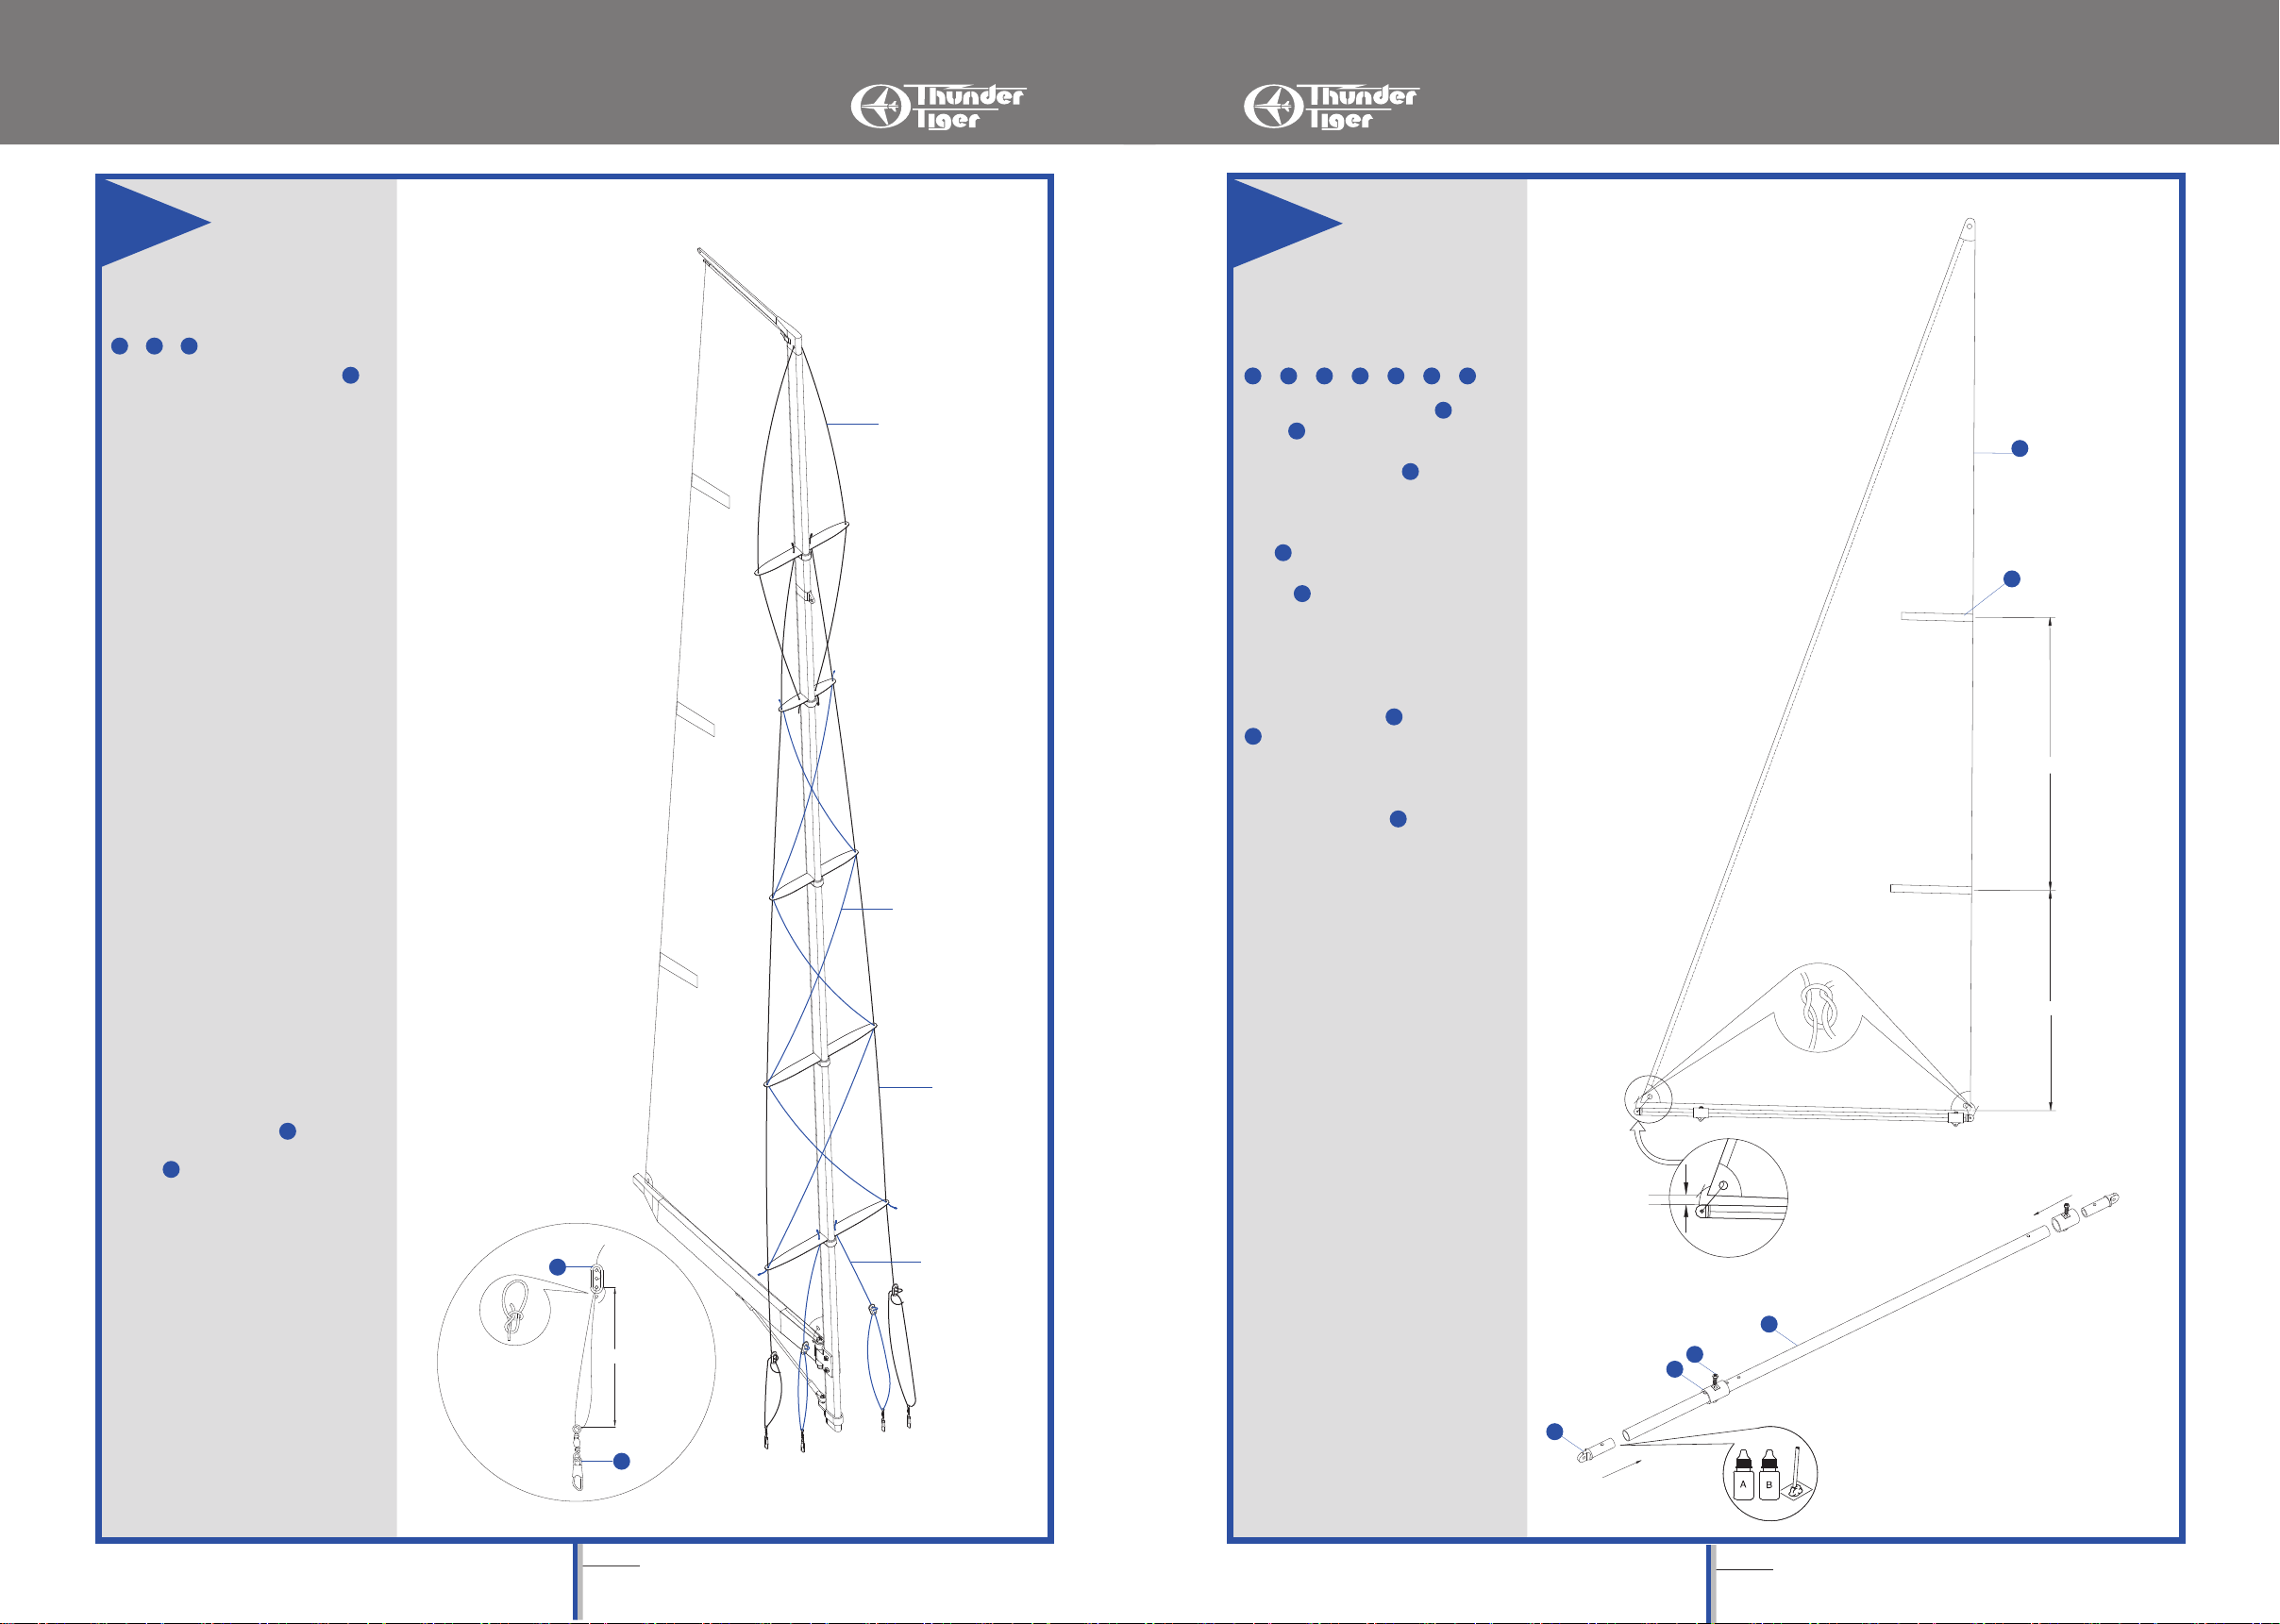
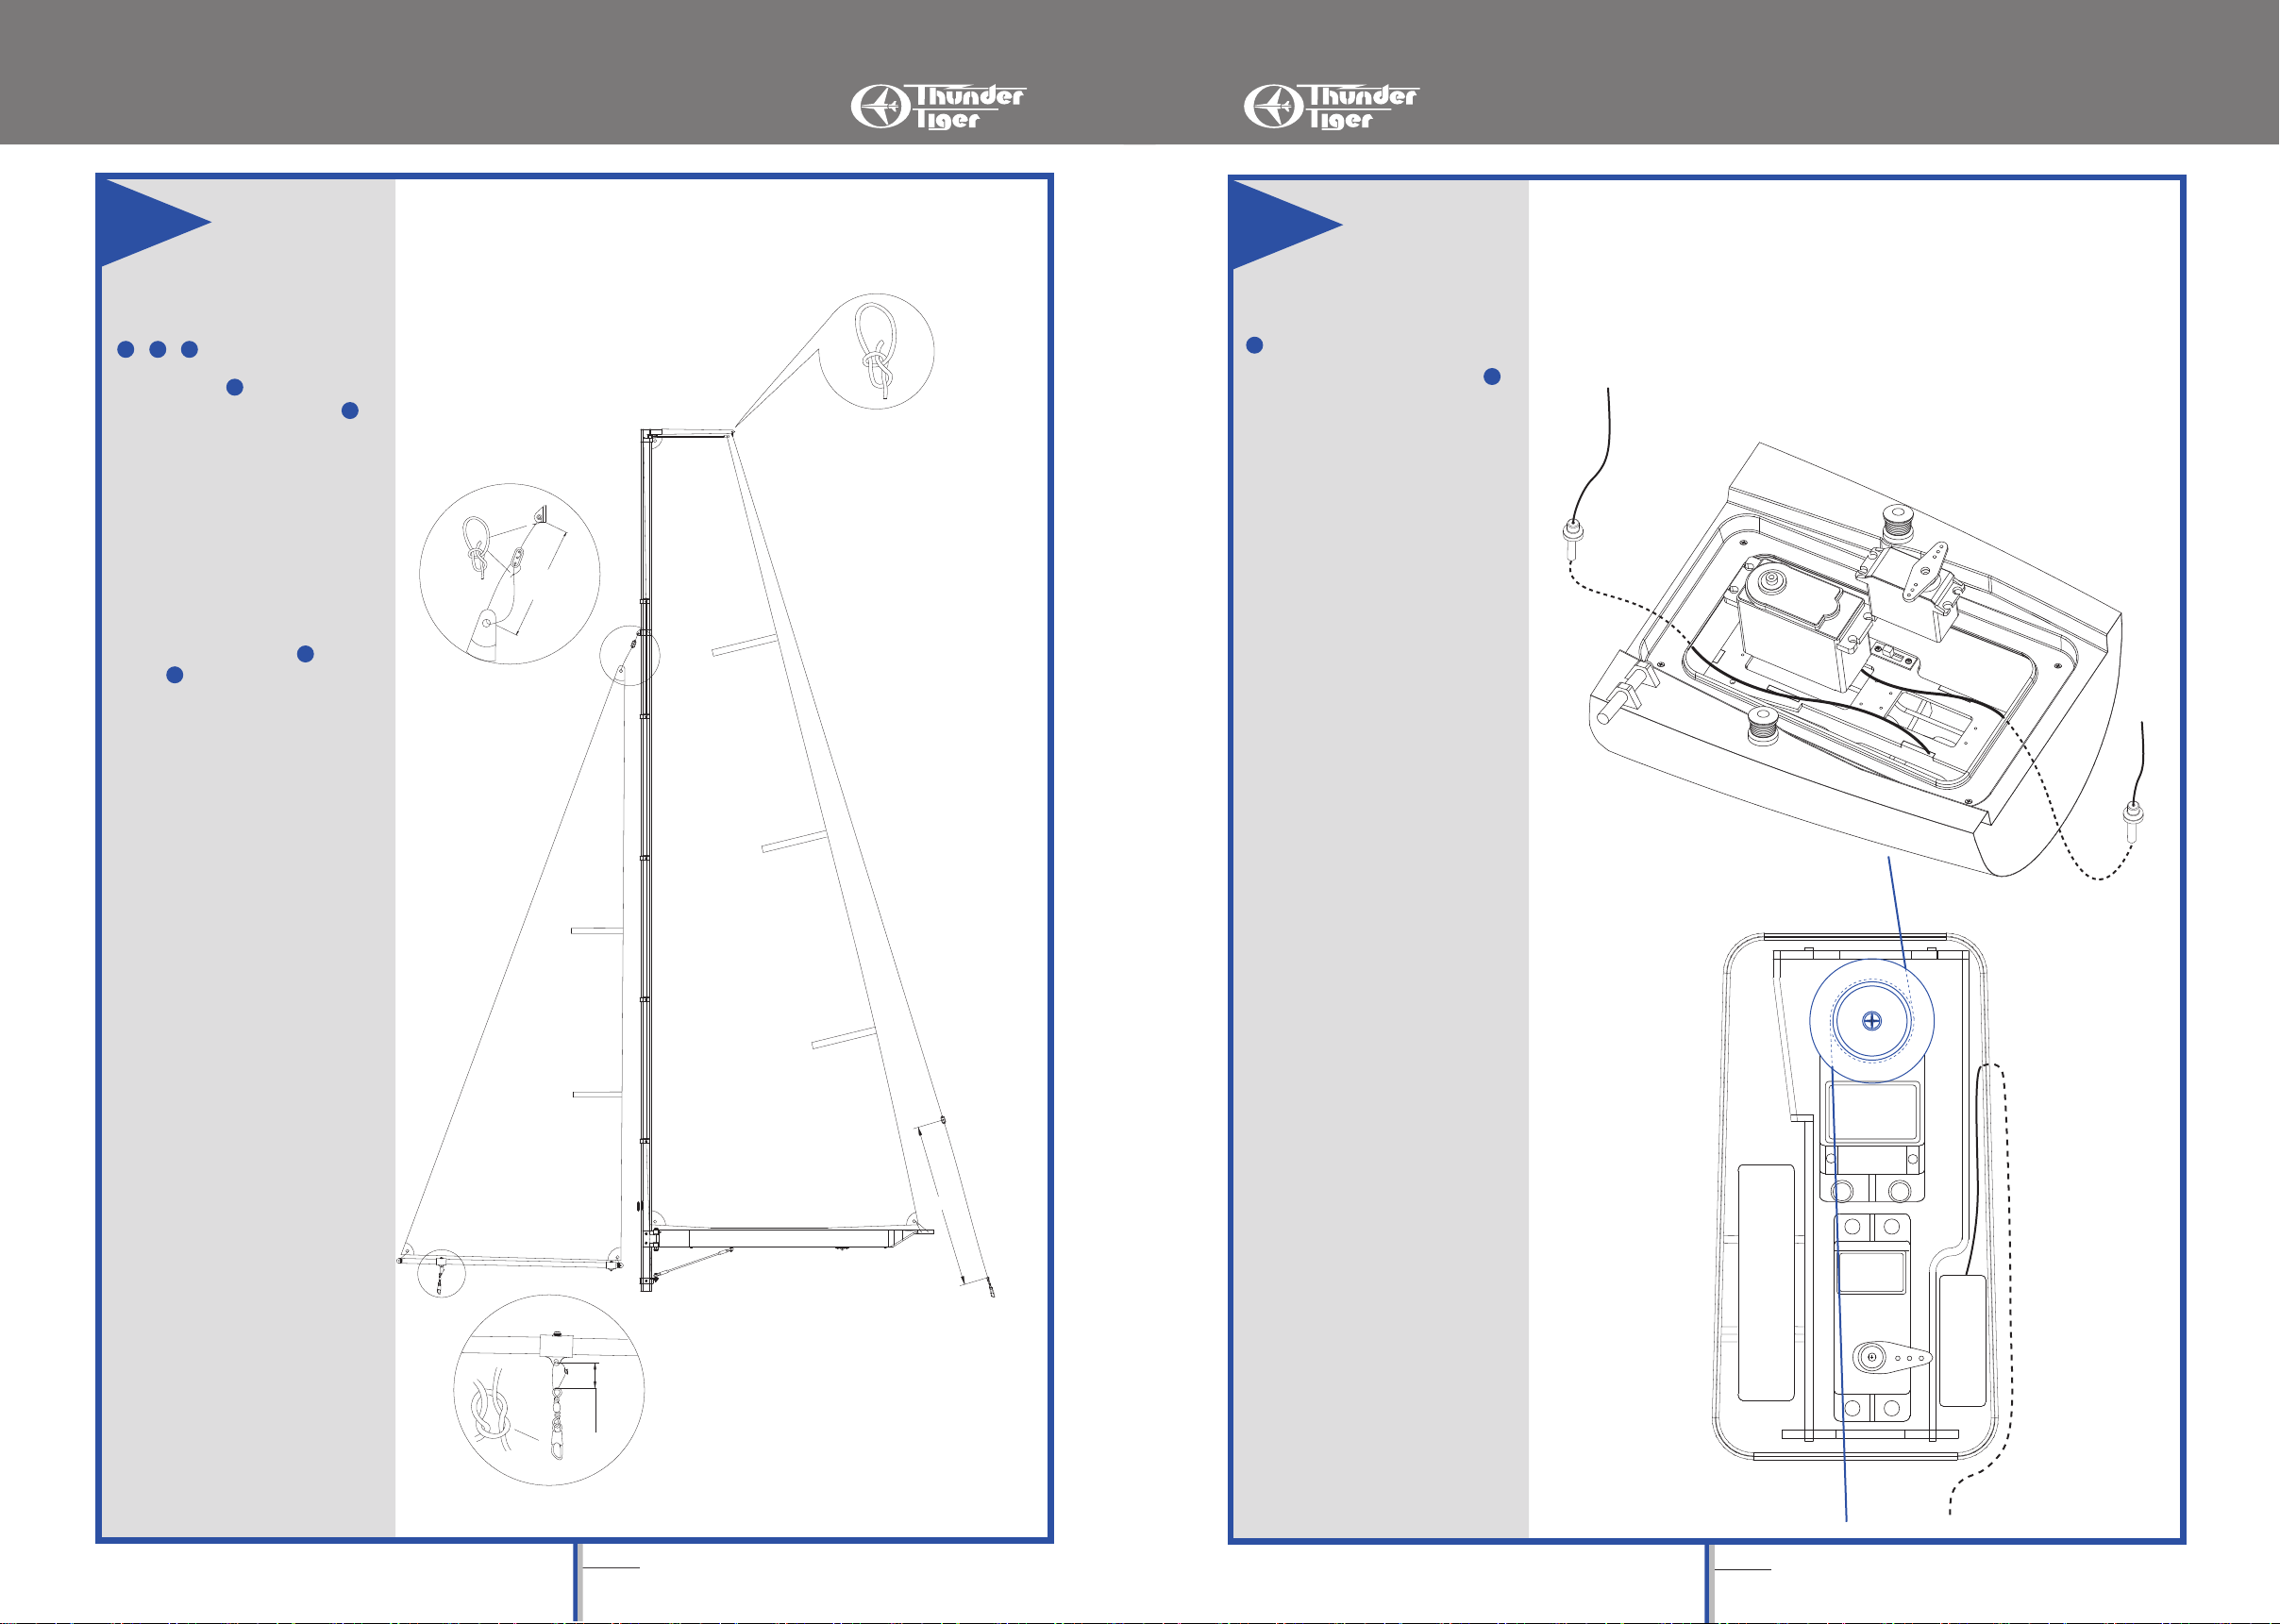
THUNDER TIGER ETNZ User manual
Other THUNDER TIGER Toy manuals

THUNDER TIGER
THUNDER TIGER P-51D MUSTANG User manual

THUNDER TIGER
THUNDER TIGER hawk 1400 User manual

THUNDER TIGER
THUNDER TIGER SB 5 User manual

THUNDER TIGER
THUNDER TIGER YAK 54 User manual

THUNDER TIGER
THUNDER TIGER TTR4572 User manual

THUNDER TIGER
THUNDER TIGER AH-1W Super Cobra Gunship mini Titan E325 CONVERSION... Installer manual

THUNDER TIGER
THUNDER TIGER F-8F BEARCAT - ASSEMBLY User manual

THUNDER TIGER
THUNDER TIGER Raptor E550 Quick guide

THUNDER TIGER
THUNDER TIGER Piper J-3 Cub User manual

THUNDER TIGER
THUNDER TIGER Raptor SE 50 Size 3D Heli Quick guide

THUNDER TIGER
THUNDER TIGER mini Titan E325 User manual

THUNDER TIGER
THUNDER TIGER Hammer S18 User manual

THUNDER TIGER
THUNDER TIGER Fun Tiger Extra User manual

THUNDER TIGER
THUNDER TIGER mini Titan 3325 User manual

THUNDER TIGER
THUNDER TIGER Sept. Fury User manual

THUNDER TIGER
THUNDER TIGER ECUREUIL AS355 User manual

THUNDER TIGER
THUNDER TIGER YAK 54 User manual

THUNDER TIGER
THUNDER TIGER Outlaw JR. OBL 5123 User manual

THUNDER TIGER
THUNDER TIGER V-Bat User manual

THUNDER TIGER
THUNDER TIGER RAPTOR RC User manual


Popular Toy manuals by other brands

FUTABA
FUTABA GY470 instruction manual

LEGO
LEGO 41116 manual

Fisher-Price
Fisher-Price ColorMe Flowerz Bouquet Maker P9692 instruction sheet

Little Tikes
Little Tikes LITTLE HANDIWORKER 0920 Assembly instructions

Eduard
Eduard EF-2000 Two-seater exterior Assembly instructions

USA Trains
USA Trains EXTENDED VISION CABOOSE instructions