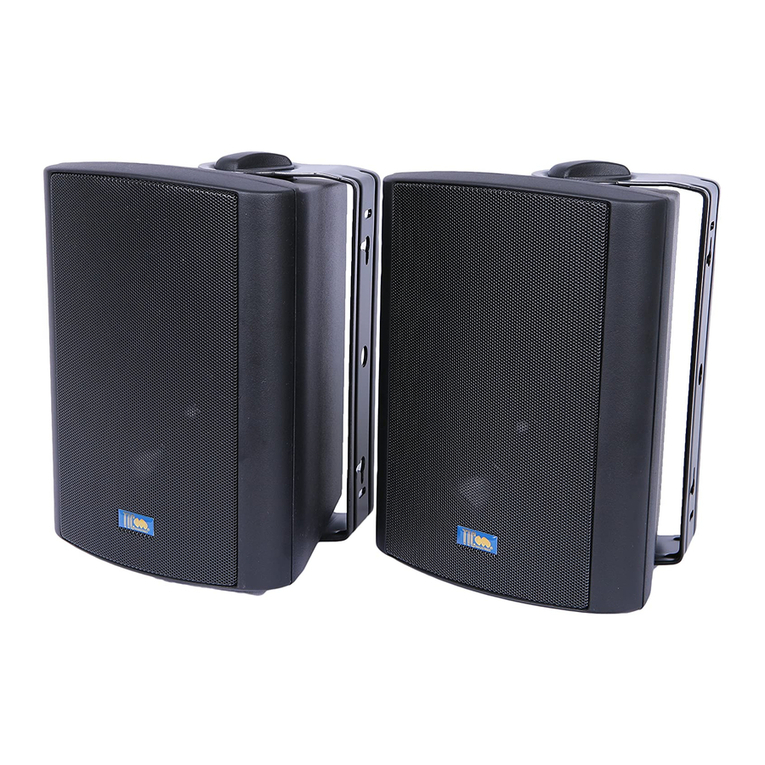
TIC WPS5 User manual

TIC Wifi Patio Speakers
Featuring TIC WifiStream
multi-room music streaming platform
WPS5
Instruction Manual


1-2-3 Quick Start Guide
1. Connect main and pairing speaker with included
speaker wire. Plug in power adapter to main
speaker.
2. Download TIC WifiStream app from Apple App
Store or Google Play. Follow instruction on TIC
WifiStream app to connect speaker to your Wifi
network.
3. Once connected, install patio speakers in desired
locations. Play music via AirPlay or TIC
WifiStream app.

Content
Main Speaker Pairing Speaker
Power Adapter 15’Speaker Wire

Overview
1. Power Indicator LED
2. Bass Enhancing Sound Port
3. Tweeter
4. Woofer
5. Wifi Connect/Reset Button
6. Speaker Wire Connector
7. Power Adapter Connector
8. Mounting Threads
9. Bracket End Caps
10. 180° Mounting Bracket

Connection
The pairing speaker should be installed at least 5 feet apart but at
most 15 feet from the main speaker (with the included speaker wire).
If the pairing is installed further apart, you need to purchase an
additional speaker wire cable, ideally in thicker gauge (14AWG or
higher) for installation longer than 30 feet apart. Pairing speaker
performance may decline over long distance, especially when using
low-quality speaker wire.

Installation
While not required, we recommend that you first connect the speaker to
your Wifi network before you install the patio speakers in the desired
locations and allow the speakers to reconnect automatically.
Step-by-Step:
1. First determine the locations where the main and pairing speaker will
be installed. The main speaker should be installed close enough to a
suitable power source.
2. Remove the brackets from the speakers by simply unscrewing the
end caps. Secure the brackets to the desired locations with the
appropriate mounting screws/anchors. Please ensure the
appropriate screws/anchors match with the material of the mounting
location and can safely support the weight of the speaker.

3. Once the bracket is securely mounted, attach and install the speakers
by screwing back the end caps. Be sure to adjust the desired angle
before tightening the end caps.
4. Alternatively, the speaker may be installed directly (without the
brackets) with common 3rd party speaker mounts by using the
embedded mounting thread on the back of the speakers.
5. Connect power adapter to the main speaker. Ensure the connector is
screwed in tightly to prevent potential water damage.
6. Plug in power adapter to an electrical outlet. If the outlet is outdoor,
please ensure the connection is covered during use or the adapter is
unplugged when not in use.
7. Connect the speaker wire from the main speaker to the pairing
speaker. Ensure the polarity (Red +/Black -) of the wire matches on
both ends.
Please note the speakers are water-resistant but not water-proof. They are not
designed to be submerged in water. In addition, the front of the speaker should
be pointed at least 5° downward to minimize water pooling on drivers and
entering the sound port. To maximize longevity, the speakers are best installed
under an overhang (or patio, beam, awning, etc.) During periods of prolonged
inactivity and/or extreme weather, we recommend removing the speakers from
the brackets and storing them in a safe indoor space.

Wifi Setup
In order to use this speaker, you must download the
TIC WifiStream app on the Apple App Store or Google
Play. Search for “TIC WifiStream” in the respective
store. Alternatively, follow this QR code (or go to
www.ticcorp.com/wifistream) for download links and
additional help for installation and operation.
The TIC WifiStream app contains step-by-step instruction on how to
connect your speaker to your Wifi network. The supplemental instruction
below is provided for your convenience.
In order to connect the speaker to your Wifi network, your smartphone or
tablet device must be connected to the same network. This speaker is only
compatible with 2.4G band, not 5.8G band. Please ensure you are using
the 2.4G signal for any multi-band router.
During the initial set up, we recommend that you move the speaker close
to the router. While not required, it will provide the fastest and most
seamless set up. However, it is required that the speaker is close to the
phone/tablet you are using during the setup.
Please note the speaker is powered on when the power adapter is plugged
in (as indicated by the blue LED). However, it will take 10-20 seconds to
boot up the system. You will hear a musical phrase once the speaker is
ready to connect and operate.

WifiStream App Operation
Overview
The TIC WifiStream app is required to set up the speakers and
maintain AirPlay capability. Music can be streamed to any
WifiStream device via the app or AirPlay. The app must be
installed on each device that uses the speakers via AirPlay.
Streaming via AirPlay provides the most seamless experience and
the widest range of compatibility. On Apple devices, you can
directly choose the speaker as the output device in most native
media apps/services (ie. Pandora, Apple Music, Amazon Music,
Spotify, YouTube, TuneIn Radio etc.) under the AirPlay icon.
Android devices may take advantage of AirPlay capability via
third-party apps/services. Additional cost may be applied and
service is not guaranteed.

Main Screen
Device List
Service
Setting Menu
Service Icon
Playlist
Favorite
Music Control
Setting Menu –access music services, favorite, and playlists
Service –access service-specific menu& control
Device List –multi-room and device control
Service Icon –icon to denote current service (non-clickable)
Favorite –add/delete favorite (local or service-specific if applicable)
Playlist –view playlist (local or service-specific if applicable)
Music Control –repeat, back, play/pause, forward/scan, volume control
Music Control

Device List Screen
Play/Pause All
Multi-room Control
Instruction Hint
Add WifiStream Device
Back
Speaker Setting
Channel Setting
Volume Control
Add WifiStream Device –access wifi setup wizard to add more speakers
Speaker Setting –rename speaker & misc speaker setting
Channel Setting –switch output channel (stereo, left-only, or right-only)
Instruction Hint –click to see how to set up multi-room groups*
*You can group speakers by dragging a “grouped” speaker into a “main”
speaker. Ungroup by dragging a “grouped” speaker to the bottom half.
Once a group is formed, only the “main” speaker can be selected in any
AirPlay menu. While volume can be customized individually, speakers in the
same group will play content in sync.

Troubleshooting
Issue: Not connecting to wifi network
•Check if the wifi network SSID and password is correct
and the network you are using is 2.4G, not 5.8G.
•Make sure phone/tablet and speaker are close to each
other during set up.
•Speaker may be out of wifi range of router. Try moving
speaker closer to router.
•Check if the router’s internet connection is active.
•Hold the wifi button until factory default setting is
restored and rerun wifi setup wizard.
Issue: Audio does not play
•Check power is turned on. (Blue LED is on)
•Unmute or turn up volume on app and phone/tablet.
There is no volume control on speaker itself.
•In device list screen, make sure multi-room group
setting is correct. The wrong speaker may be chosen.
For more detailed instruction, walk-through videos, and additional
help, please visit www.ticcorp.com/wifistream.

Specification
Power Handling: 2 × 25W
Tweeter: 1”PET dome
Woofer: 5.25” injection molded PP
cone with butyl rubber
Frequency Response: 72hz - 20Khz
Sensitivity: 86±3db
Cabinetry Material: Formulated ABS
Input: DC19V 3.1A
Unit Dimension: 16” x 9” x 11.5”

IMPORTANT SAFETY INSTRUCTIONS:
1. Read these instructions.
2. Keep and follow all instructions.
3. Heed all warnings.
4. For indoor products, do not use this apparatus near water. For outdoor products,
please do not expose apparatus to water longer than its intended time and level.
5. Clean only with a dry cloth.
6. Do not install this apparatus near any heat sources such as radiators, heat
registers, stoves or other apparatus (including amplifiers) that produce heat.
7. Do not block any ventilation openings. Install this apparatus in accordance with
the manufacturer’s instructions.
8. Do not defeat the safety purpose of the polarized or grounding-type plug. A
polarized plug has two blades with one wider than the other. A ground-type plug
has two blades and a third grounding prong. The wide blade or the third prong is
provided for your safety. If the provided plug does not fit into your outlet,
consult an electrician for replacement of the obsolete outlet.
9. Protect the power cord from being walked on or pinched, particularly at plugs,
convenience receptacles and the point where they exit from the apparatus.
10. Use only attachments and accessories specified by the manufacturer.
11. Unplug this apparatus during lightning storms or when unused for long periods
of time.
12. Refer all servicing to qualified service personnel. Servicing is required when the
apparatus has been damaged in any way, such as when the power supply cord or
plug is damaged, liquid has been spilled or objects have fallen into the
apparatus, or the apparatus had been exposed to rain or moisture, does not
operate normally or has been dropped.
13. Do not expose this apparatus to dripping or splashing, and ensure that no
objects filled with liquids, such as vases, are placed on the apparatus.
14. To disconnect this apparatus from the AC mains completely, disconnect the
power supply cord plug from the AC receptacle.
15. The mains plug of the power supply cord shall remain readily operable.
16. Do not expose batteries to excessive heat such as sunshine, fire, or the like.
17. This is not a children’s product and is not intended for use by children under 14
years old.

CAUTION:
Risk of Electric Shock. Do Not Open.
The lightning flash with an arrowhead symbol, within an equilateral triangle, is intended
to alert the user to the presence of uninsulated “dangerous voltage” within the
product’s enclosure that may be of sufficient magnitude to constitute a risk of electric
shock to persons.
The exclamation point within an equilateral triangle is intended to alert the user to the
presence of important operating and maintenance (servicing) instructions in the
literature accompanying the product.
SOUND WARNING:
Avoid hearing damage by establishing safe listening volumes. Listening to this product at
high volumes or for extended time periods may cause permanent hearing loss. Protect
your hearing by establishing safe volumes. Start with the volume setting control at its
lowest setting. Slowly increase the volume until you can hear it comfortably and clearly
without distortion. Reduce the volume or stop listening if you experience ringing in your
ears or any discomfort. Consult with a physician if needed.

FCC WARNING:
This device complies with Part 15 of the FCC Rules. Operation is subject to the following
two conditions:
(1) this device may not cause harmful interference, and
(2) this device must accept any interference received, including interference that may
cause undesired operation. Changes or modifications not expressly approved by the
party responsible for compliance could void the user’s authority to operate the
equipment.
Note 1:
This equipment has been tested and found to comply with the limits for a Class B digital
device, pursuant to part 15 of the FCC Rules. These limits are designed to provide
reasonable protection against harmful interference in a residential installation. This
equipment generates, uses and can radiate radio frequency energy and, if not installed
and used in accordance with the instructions, may cause harmful interference to radio
communications. However, there is no guarantee that interference will not occur in a
particular installation. If this equipment does cause harmful interference to radio or
television reception, which can be determined by turning the equipment off and on, the
user is encouraged to try to correct the interference by one or more of the following
measures:
•Reorient or relocate the receiving antenna.
•Increase the separation between the equipment and receiver.
•Connect the equipment into an outlet on a circuit different from that to which the
receiver is connected.
•Consult the dealer or an experienced radio/TV technician for help.
Note 2:
1. Changes or modifications to this unit not expressly approved by the party responsible
for compliance could void the user’s authority to operate the equipment.
2. This equipment should be installed and operated with a minimum distance of 20 cm
between the device and your body.

WARRANTY
TIC offers a limited one-year full parts and labor warranty for all of our new products.
Please visit TIC’s warranty page (http://www.ticcorp.com/warranty/) for detail to our
latest warranty policy.
TRADEMARK
Apple and the Apple logo are trademarks of Apple Inc., registered in the U.S. and other
countries. App Store is a service mark of Apple Inc., registered in the U.S. and other
countries.
Google Play and the Google Play logo are trademarks of Google LLC.
TIC Audio Inc. All rights reserved. The TIC logo is a trademark of TIC Audio Inc, registered
in the United States. Features, specifications, and appearance are subject to change
without notice.
For more information, please visit our website: www.ticcorp.com.


Table of contents
Other TIC Speakers manuals
