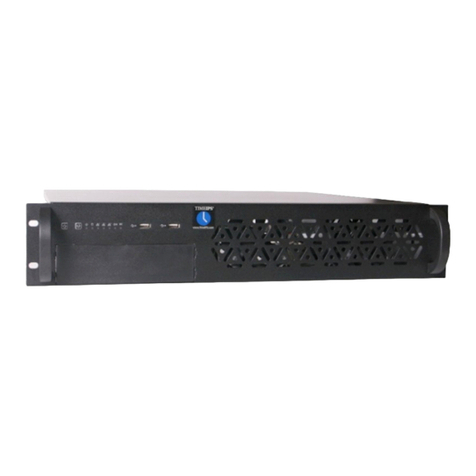
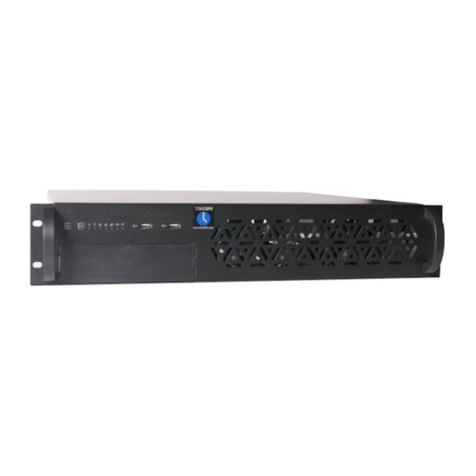
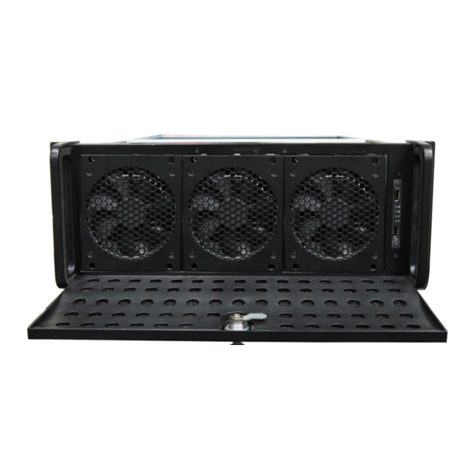
TimeIPS IPS230T User manual

IPS230T/IPS260T
TimeIPS Compact Server
Installation Guide

FCC Declaration of Conformity (DoC)
Compliance Information (according to FCC 2.1077)
(1) Product: IPS230T/IPS260T.
The above device complies ith Part 15 of the FCC Rules.
Operation is subject to the follo ing conditions: (1) these devices may not cause harmful
interference, and (2) these devices must accept any interference received, including
interference that may cause undesired operation.
(2) The above device contains the follo ing modular components authorized under their o n
DoC.
Modular Component
Model Number
System Board
D201GLY2
Po er Supply
PD-230
(3) The responsible party is TimeIPS, Inc. 3522 North Comotara, Wichita KS, 67226. Phone
316.264.1600
Notice to Users
The components in this system have been tested and found to comply ith the limits for a
Class B digital device, pursuant to Part 15 of the FCC Rules. These limits are designed to
provide reasonable protection against harmful interference in a residential installation. The
device generates, uses and can radiate radio frequency energy and, if not installed and used in
accordance ith the instructions, may cause harmful interference to radio communications.
Ho ever, there is no guarantee that interference ill not occur in a particular installation. If this
equipment does cause harmful interference to radio or television reception, hich can be
determined by turning the equipment off and on, try to correct the interference by one or more
of the follo ing measures:
•Reorient or relocate the receiving antenna.
•Increase the separation bet een the equipment and receiver.
•Connect the equipment into an outlet circuit other than the one to hich the receiver is
connected.
•Consult the dealer or an experienced radio/TV technician for help.
These devices have been tested to comply ith the limits for a Class B computing device,
pursuant to FCC rules. In order to maintain compliance ith FCC regulations, shielded cables
must be used ith the equipment if not connected directly to the system. Operation ith
unshielded cables is likely to result in interference to radio and television reception.
CAU ION: Changes and modifications made to the device without the approval of the
manufacturer could void the user's authority to operate this device.
Page 2 http://support.timeips.com 316.264.1600 TimeIPS

able of Contents
Prepare and P an..........................................................................................................3
Layout and Insta ation Considerations.................................................................4
IPS230T/IPS260T Series Overview......................................................................5
Network Requirements..........................................................................................5
Ports and Connections.................................................................................................6
Mounting the TimeIPS System...................................................................................7
Power Backup.............................................................................................................7
Power-up and Determine IP Address..........................................................................8
Initia Login Using IP Address....................................................................................9
Network Troub eshooting..........................................................................................10
Accessing System Menu...........................................................................................11
Additiona Network Settings.....................................................................................12
Backups.....................................................................................................................13
Network Troub eshooting Your PC...........................................................................14
Network Settings in Windows.............................................................................15
Technica Support......................................................................................................16
System Specifications...............................................................................................16
Prepare and Plan
TimeIPS insta ations consist of one "master" server system and, optiona y, one or
more additiona network c ock "c ient" systems. Initia configuration and periodic
administration require a computer with a network connection and a web browser.
Optiona network c ocks can be connected on a LAN (Loca Area Network) or at
remote ocations connected on a WAN (Wide Area Network) via secure VPN
(Virtua Private Network). These c ocks can be ocated at any door or entrance to
your faci ity, or at any ocation that is convenient for your emp oyees to c ock in and
out. If this is your on y TimeIPS system, it wi be the master station and wi be
used by emp oyees to c ock-in and c ock-out.
We recommend a TimeIPS c ock at each emp oyee entrance to your faci ity and/or
in your centra break-room. Each c ock wi require an AC power out et and a
connection to your oca area network. The master station can be connected to any
ocation on your network (wa p ate jack, switch or hub).
P ease examine the diagram on the next page to assist in p anning your TimeIPS
insta ation. Most insta ations wi have the first station at the main emp oyee
entrance. Additiona network c ocks can be added at any time to other entrances or
any ocation within your business.
TimeIPS http://support.timeips.com 316.264.1600 Page 3

Layout and Installation Considerations
Page 4 http://support.timeips.com 316.264.1600 TimeIPS
LCD Display /
S ystem
S peaker Employee
Identification
device
Power S ource
(Wall outlet)
ecommended
UPS Power
Backup
(not included)
TimeIPS
station
Note: Station c an be
installed in the ceiling
or behind the wall.
Overall Installation Notes:
Insta ation of the TimeIPS system norma y takes about an hour. Our Technica Support
department is avai ab e to assist if you have insta ation questions.
A TimeIPS systems and c ocks shou d be insta ed in an indoor ocation, out of direct sun ight,
meeting the temperature requirements isted on the back cover of this guide.
Possible Primary and Remote Facility Installation
Existin g Eth ernet
10 /10 0 Netwo rk
Existin g Eth ernet
10 /10 0 Netwo rk
Primary
Facility
Administration
and
Reporting
(Password
Protected)
Side
Door
Front
Door
Back Door
Remote
Facility
Typical Door Area Installation
TimeIPS master or
c ock station
Any PC with a web
browser
Permanent network
connection
Permanent or
temporary network
connection

IPS230T/IPS260T Series Overview
The IPS230T/IPS260T Series TimeIPS systems are designed to be master systems.
With the purchase of an LCD disp ay and an input device, it is a so possib e to use
the system as a time c ock. Norma y, additiona network c ocks are used for wa k-
up c ocking and are connected via Ethernet.
Networ Requirements
TimeIPS is an Ethernet TCP/IP app iance. A standard RJ-45 Ethernet network cab e
connects TimeIPS to your network. The master system requires a static IP address.
Additiona network c ocks can be set to static IP addresses, or can be dynamica y
addressed with DHCP. Network c ocks send a broadcast packet to ook for a master
on the same subnet. C ocks on different networks or subnets wi need to be
manua y configured (this is done through the menu or by visiting http://<IP address
of the c ock>).
Ports Used By TimeIPS
The fo owing ports are used by TimeIPS on the Internet (if avai ab e) for the
reasons described be ow:
80 (HTTP) Required for update down oads
25 (SMTP) Recommended for emai reports and messages
53 (DNS) Required for name reso ution
123 (NTP) Recommended for time synchronization
443 (TimeIPS) Required for update and backup authorization
P ease visit http://support.timeips.com for additiona network and port information.
Best practice: Configure a TimeIPS systems with static IP addresses and provide
an a ways-on Internet connection (broadband) to a TimeIPS systems with a the
above outbound ports avai ab e.
TimeIPS http://support.timeips.com 316.264.1600 Page 5

Ports and Connections
Page 6 http://support.timeips.com 316.264.1600 TimeIPS
US B Ports :
Connect to optiona
LCD disp ay or USB
input device such as
keypad, proximity
reader, scanner or
swipe reader
Optiona Large
Disp ay
PS/2 Port: Connect to opt iona P S/2
input device, such as keyboard,
scanner or swipe reader
Paral le l Port: Connect
to optiona LCD disp ay
Au di o O ut:
Connect to optiona
LCD disp ay or t o
your own amp ified
speakers
Ne twor Port: Connect
to your net work with an
RJ-45 Cab e
Se rial Port: Connect to
opt iona LCD disp ay, modem,
or power-backup UP S
Powe r C ord: Connect
to 110-240VAC.
C ool i n g Fan:
Keep c ear for
air circu at ion.
Vol tage Se le ction :
Se ect 115 or 230VAC.
Powe r Light: On when
the system is running.
Di s Ligh t: On when t he
system is accessing data.
Powe r: System wi automat ica y power on when AC power is app ied. T o reset , unp ug
power for 60 seconds and then reconnect power. Your syst em may have a recessed power
but ton t hat can be pressed wit h a straightened paper c ip.
Caution:
Never p ug anything into this jack
Lin an d Activity Lights:
Verify network connect ion

Mounting the TimeIPS System
The TimeIPS IPS230T/IPS260T Series systems are designed to be
operated on a she f, on a tab e, on the f oor, above a cei ing, or
hanging on a wa .
The TimeIPS system shou d have reasonab e air circu ation to prevent
overheating.
Power Bac up
As with any server, proper power backup is essentia for TimeIPS. We
recommend using a UPS with a minimum rating of 700VA.
TimeIPS has support for most APC brand Smart-UPS units with
Seria or USB cab es. The signa s from these UPS units a ow
TimeIPS to report power outages and perform a c ean automated
shutdown in the case of an extended outage. This wi protect your
data and is high y recommended.
TimeIPS http://support.timeips.com 316.264.1600 Page 7
The station can be vertica y mounted with the
stands, if inc uded.
3
2
1
Vertica Mounting
Horizonta Mounting
Set on any stab e surface
App y the
inc uded
rubber feet.

Power-up and Determine IP Address
Page 8 http://support.timeips.com 316.264.1600 TimeIPS
After the display and network cable are attached, power-on the server by plugging
in the power cord. You will need a VGA display or an optional TimeIPS LCD display
for initial configuration.
Step 1) Power On TimeIPS
Attention: The server may power on
immediate y upon connecting the power cord.
This is to a ow the system to start after a power
oss.
Note: If your disp ay does not show text,
adjust the contrast knob unti text appears. Contrast
knob Volume knob
If the network is connected, the fo owing messages wi disp ay in 1-2 minutes:
The first step to configuring your new TimeIPS system is to determine the IP
address it received from your network. Your system is set to automatica y obtain
an IP address from your network via DHCP by defau t. To see the IP address of
your TimeIPS system, use the arrow keys on your keypad (or USB keyboard) to
scro down to Configure Network and press Enter. TimeIPS shou d disp ay a
screen simi ar to the fo owing:
Se ect Show Network Info and press Enter to see the IP address of your TimeIPS
system. You shou d see the fo owing screen:
Fig. A1
-Clock Not Set Up-
->Search For Master
Configure Network
Clean Shutdown
Fig. A
Welcome to TimeIPS
Browse to http://
192.168.1.119
To configure
Step 2) Network Connection Verification
The actual IP address shown on your LCD
display will be different from this example.
->Show Network Info
Set Master IP
Revert to DHCP
Set IP Address
Ver: 5.0.27
IP: 192.168.1.119
GW: 192.168.1.1
Mst:
The actual IP addresses shown on your
display will be different from this example.
Your version number may also differ from
this example.

Initial Login Using IP Address
TimeIPS http://support.timeips.com 316.264.1600 Page 9
Go to a PC on your
network with a web
browser.
In your web browser,
enter the IP address
ocated on the TimeIPS
disp ay to configure
TimeIPS.
Beginning with the
screen shown here,
fo ow the instructions
that appear on each
screen.
The setup process wi
inc ude creating the first
emp oyee, who wi
have access to a areas
of TimeIPS and who
wi be ab e to designate
other emp oyees as
administrators and/or
managers.
Once you comp ete the
configuration, you can add and edit a settings and emp oyees as needed.
For assistance with further configuration and use of TimeIPS, p ease visit our
support web site at http://support.timeips.com. If you do not find the information
you need there, ca our Technica Support department at 316.264.1600.
IMPORTANT: During the configuration process, we recommend you update the
system and set a static IP address. These two functions can a so be done at a ater
time under the Administration -> System Administration section in TimeIPS.
Configuration Screen
Note: The actual IP
address shown on your
LCD display will be
different from this
example.
Note: When you have successfu y connected to TimeIPS from your
PC, the screen on your PC shou d ook ike the screen above. After
reading the information at the bottom of this page, you wi be ready to
proceed with the guided setup process.

Networ Troubleshooting
In the event you were unab e to reach the web interface for your TimeIPS system,
you may be having network re ated prob ems.
1) Repeat Step 2 on page 8 to make sure your system has obtained a va id IP address
from your network.
2) If no network connection was detected you shou d see a screen simi ar to this:
If you see this screen, check the network cab e on the back of the TimeIPS unit.
Unp ug and reconnect the network cab e at both ends and/or try a different network
cab e. The green ink ight shou d be on. If not, your network is not working.
Once you have checked the cab e and/or reconnected it, scro down to Revert to
DHCP and press Enter. When you return to the Configure Network menu scro
down to App y Settings and press Enter. This wi cause TimeIPS to rescan your
network for an IP address. Repeat Step 2 on page 8 once more to check what IP
address TimeIPS has received. If TimeIPS is sti unsuccessfu in obtaining an IP
address p ease contact our Technica Support department for further assistance.
Page 10 http://support.timeips.com 316.264.1600 TimeIPS
Ver: 5.0.27
IP: 169.254.45.112
GW:
Mst:
The actual IP address shown on your
display will be different from this example.
Your version number may also differ from
this example.

Accessing System Menu
If you need to access the menu on your system you wi need to press Enter on your
keypad. To prevent tampering, you can configure the system to require a badge
number and PIN for access. Initia y, no badge number or PIN is needed.
If a badge number and PIN are provided, you wi see the User Menu. From here,
the System Menu can be accessed through the Configuration menu item. Users with
administrative access wi see the Fu System Menu whi e those without
administrative access wi see the Limited System Menu.
You can set “Security and Va idation Options” for each additiona c ock on your
network via the C ock Configuration page. These settings are independent of any
emp oyee badge or PIN numbers. Pressing the BS key at any time wi take you up
one eve in the menu system.
TimeIPS http://support.timeips.com 316.264.1600 Page 11

Additional Networ Settings
The TimeIPS system can be assigned a static IP address on your network. You may
set a static IP address through the menu or by visiting the web interface for your
TimeIPS system.
(A) To set a static IP address through the web interface p ease visit:
http://192.168.1.119/quickset_ip.php
Your web browser wi take you to a page where you can set the IP address, Subnet
Mask, Defau t Gateway, Primary and Secondary DNS servers and the NTP server
for this system. Be sure to c ick on “App y Changes” to save your settings.
(B) To set a static IP address through the menu you must be an administrative user.
Access the menu and navigate to the Fu System Menu. Scro down to Configure
Network and press Enter. Then scro to Set IP Address and press Enter. You
shou d then see something ike the fo owing screen:
Specify the IP address you want this system to have
and press Enter. You wi see a screen simi ar to this:
In a coup e of seconds you wi return to the Configure Network screen. Do not
se ect App y Settings unti you have changed a of the network settings.
Repeat this process to set your Subnet Mask, Gateway, Primary DNS server and
Secondary DNS server. You may a so specify your NTP server if you know its IP
address. If you know your NTP server by its name (such as ntp.yourcompany.com)
you wi need to use a USB keyboard or enter this information through the web
interface. Be sure to se ect App y Settings to save your changes.
If you have set your system to a static IP address you can easi y change it back to
DHCP. You wi need to be an administrative user. Access the menu and navigate
to Configure Network. Scro down to Revert to DHCP and press Enter.
Be sure to se ect App y Settings to save your changes.
Page 12 http://support.timeips.com 316.264.1600 TimeIPS
Step 1) Setting a Static IP Address
Be sure to use the current IP
address of your TimeIPS system.
Oct 03, 12:00:00PM
NETWORK SETUP
Enter IP Address
Select
“Apply Settings”
to apply network
changes.
Step 2) Reverting to DHCP
Show Network Info
Set Master IP
->Revert to DHCP
Set IP Address

Bac ups
TimeIPS http://support.timeips.com 316.264.1600 Page 13
FOR YOUR PROTECTION, SECURITY AND BUSINESS OPERATING
EFFICIENCY, WE STRONGLY RECOMMEND REGULAR AND FREQUENT
DATA BACKUP.
TimeIPS wi store important personne management data and it's critica for this
data to be backed up regu ar y. We recommend dai y backups.
Local Bac ups
TimeIPS can generate oca backups at any time. You may choose to save these as
an archive on your oca machine, or have them emai ed to a specified emai
address. We recommend you use our off-site backup option in addition to oca
backups for the highest data security.
To access oca backups, c ick on “Backups” in the “System Administration” section
of the “Administration” Menu.
Off-Site Bac ups
The best way to protect the TimeIPS data is to use an automatic, off-site backup
system. A oss of just a few days of data can take hours or days of work to re-enter
and re-create.
The TimeIPS off-site backup service is designed for businesses that are ooking for
password-protected, automatic off-site backups at an affordab e price. Uti izing our
off-site backup service wi a ow a TimeIPS master system to be rebui t using the
data from the ast avai ab e backup fi e on our secure servers in the un ike y event of
system ma function, data corruption or oss. A backup wi get your business back
up and running as quick y as possib e.
To use the TimeIPS off-site backup service, you must have a backup account. Use
our “Account Management” page to sign up for your backup account, check your
backup account status, or upgrade your backup account. You may access this page
by c icking the ink “TimeIPS Off-site Backup Account Management” ocated in the
“Off-site Backup” section of the “Backups” page. The “Backups” page is accessib e
from the “System Administration” section of the “Administration” menu.
A security password is used to encrypt off-site backups. This password shou d be
chosen carefu y and MUST NOT BE LOST OR FORGOTTEN. Recovery of a ost
or forgotten security password requires sending the TimeIPS station to our service
department and paying a service fee. In the un ike y event that the TimeIPS station
is ost in a natura disaster, fire, is destroyed, comp ete y corrupted, or suffers tota
fai ure, you must have your security password to restore your data from the off-site
backup. Contact our Technica Support department if you have any questions.
Note: The data stored in TimeIPS (and the resu ting size of backups) grows as a resu t of
additiona c ock events, edits and payro ca cu ations added each day.

Networ Troubleshooting Your PC
Page 14 http://support.timeips.com 316.264.1600 TimeIPS
If you have troub e accessing TimeIPS from a PC, you may be having network re ated issues. Fo ow
this check ist to verify your network settings and connectivity.
✔If the system's “network activity indicator” ights (shown on page 6) are not it, then check a
network cab es, hubs and switches to verify the physica connections. If cab es are disconnected,
you wi need to reconnect these for proper network functiona ity. After reconnecting network
cab es, you may need to restart your PCs and/or TimeIPS station(s) to reestab ish the network
connection.
✔Check the power ight to verify that the TimeIPS master station is powered on. You shou d a so fee
or hear the system fan running. (see page Error: Reference source not found)
✔Enter the TimeIPS IP address (the IP address can be ocated on the System Configuration page) into
a web browser on another PC on your network (see page 9). If you see the TimeIPS setup page,
then your network and TimeIPS are working proper y.
The IP address assigned to your desktop PC must be reachab e by the TimeIPS IP address as shown on
the TimeIPS disp ay. For examp e, if the address on the TimeIPS disp ay begins with 169.254.___.___,
then your PC must a so have a 169.254.___.___ IP address with a “netmask” of 255.255.0.0 in order to
connect to the TimeIPS station (see System Configuration page). The ast two numbers you choose
shou d be a number between 1 and 254. If you need to change your PC's IP address to reach the
TimeIPS master station, fo ow the instructions for your PC's operating system.
Setting or changing your PC's IP Address:
If you are not ab e to connect, you may need to change your PC's IP address to connect to the TimeIPS
master station. When making changes to your PC's network settings, be sure to record any previous
settings, so that you may restore them after you have set your TimeIPS master station to the correct IP
address for your network.
To change your IP address in Windows, fo ow the instructions on the fo owing page (page 15). For
he p changing your IP address in any other operating system, p ease use an Internet search engine to
ook for "IP settings" and your operating system name and version.
Note: After initia configuration and guided setup is comp ete, the System Administrator can shut
down or restart the master station from the “System Settings” page accessib e from the “System
Administration” section of the “Administration” menu. Wait for the power indicator ight to turn off
before unp ugging the power cord.
Obtains an address automatica y? (DHCP) ..................[ Yes / No ]
If set, what is the IP Address of your PC? .....................[ _____ . _____ . _____ . _____ ]
If set, what is the Subnet of your PC? ..........................[ _____ . _____ . _____ . _____ ]

Networ Settings in Windows
TimeIPS http://support.timeips.com 316.264.1600 Page 15
To configure the IP address of your PC
or notebook running the Windows XP or
Windows 2000 operating system:
1. Open Windows “Start” menu.
2. Open “Contro Pane ”
3. Classic view: Open “Network
Connections”
Category view: Se ect “Network and
Internet Connections,” and then
“Network Connections”
4. Doub e-c ick on your active “LAN or
Internet connection”
5. C ick “Properties”
Windows XP/2000
"Start" Menu
“Control Panel”
Classic view
“Control Panel” Category view
“Control Panel” Category view
“Network
Connections”
“TCP/IP Properties”
“Connection
Properties”
To configure the IP address of your PC
or notebook running the Windows
95/98/98se or Windows ME (Windows
Mi ennium) operating system:
1. Open Windows “Start” menu.
2. Open “Contro Pane ”
3. Open “Network”
4. Se ect the TCP/IP protoco (NOT
dia -up adapter) and C ick
“Properties”
Windows 95/98/ME
"Start" Menu
“Control Panel”
“Network”
“TCP/IP Properties”

Technical Support
Technica Support Resources:
1. Our support web site at http://support.timeips.com offers extensive
resources inc uding documentation and our know edge-base. P ease check
our support web site first, as it provides comp ete answers and instructions
on a most everything. In the "Know edge Base Search:" box, enter a few
words describing your question. For examp e, if you have a question on
payro , enter "payro " and browse the artic es isted.
2. If you have a question not answered on our support site, you can ca or
emai us. A period of imited emai /phone support is inc uded with your
system. A seria number or registration number is required for this service.
Additiona support can be purchased by ca ing TimeIPS, or by visiting our
web site at http://secure.timeips.com.
3. If you have a simp e question, or need direction on how to use our support
is quick, we' be happy to he p. If it's not, we' et you know that you
need to purchase additiona support.
Support website http://support.timeips.com
Support e-mail [email protected]
Support phone number 316.264.1600
This manua is copyright 2008 TimeIPS, Inc. TimeIPS and the TimeIPS ogos are registered trademarks
of TimeIPS, Inc. A other trademarks are the property of their respective owners.
Thank you for reading this manua carefu y. If you noticed errors, have any suggestions or found
typographica prob ems, we want to know! P ease send an emai with the version code be ow and your
feedback to [email protected]om We appreciate your time. Version: IPS230T_1.0.2 090320
Page 16 http://support.timeips.com 316.264.1600 TimeIPS
System Speci ications:
Approximate dimensions:
13in (33cm) x 4in (10cm) x 16in (40cm)
Approximate weight:
15lb (6.8 kg)
Power: 100-240VAC, 75W (typical)
Operating environment:
Clean and dust free,
Proper air circulation around unit,
3in (7.62cm) ventilation clearance,
32° - 90°F (0° - 33°C) non-condensing
System Administration
Requirements:
PC with modern OS.
(Linux™, MacOS™ or Windows™)
A network port and an up-to-date
version of Firefox™ or IE™ web
browser.
Network Requirement:
10/100Base-T Ethernet,
Internet connection required for email
notifications, time synchronization,
updates and off-site backups
This manual suits for next models
1
Table of contents
Other TimeIPS Server manuals
