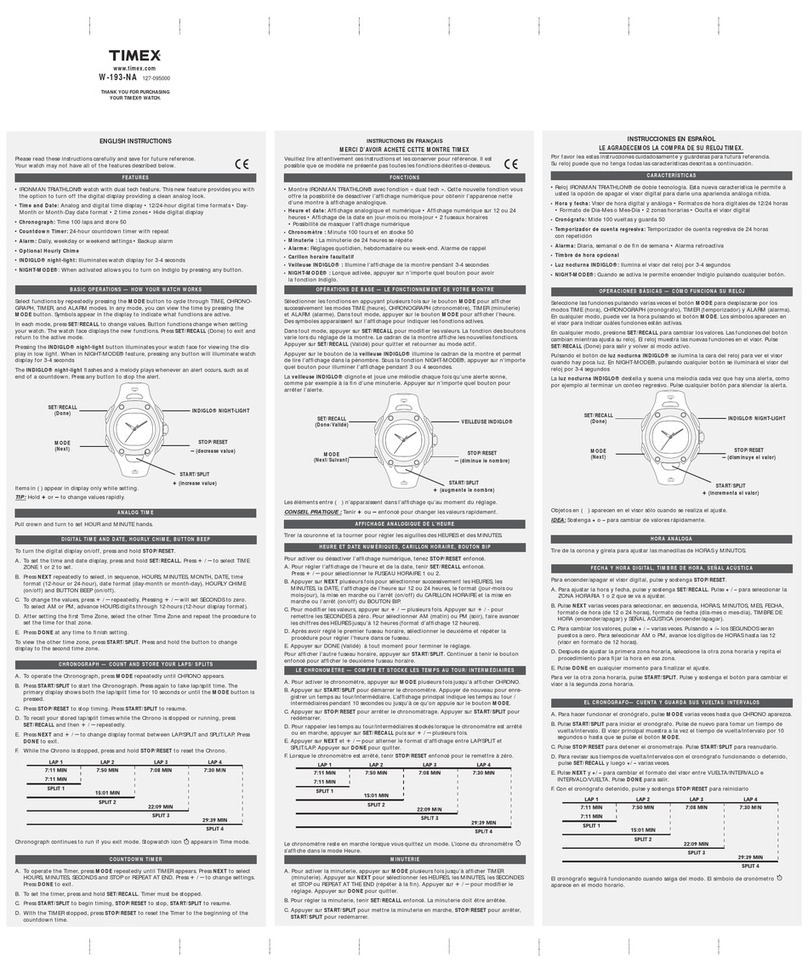
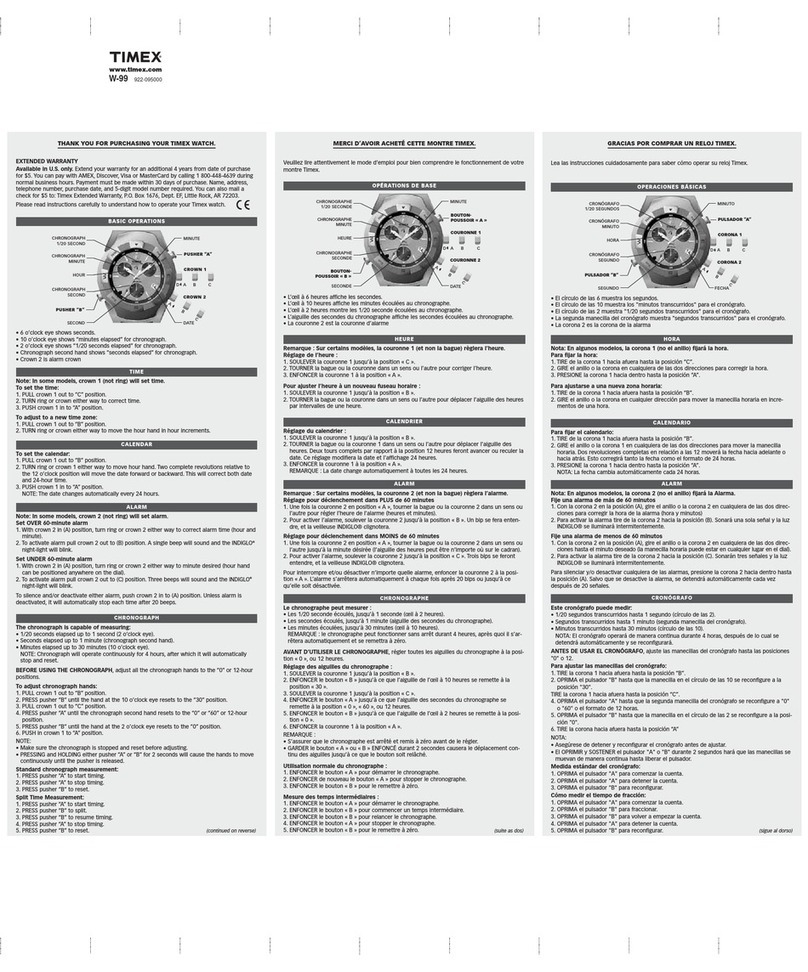
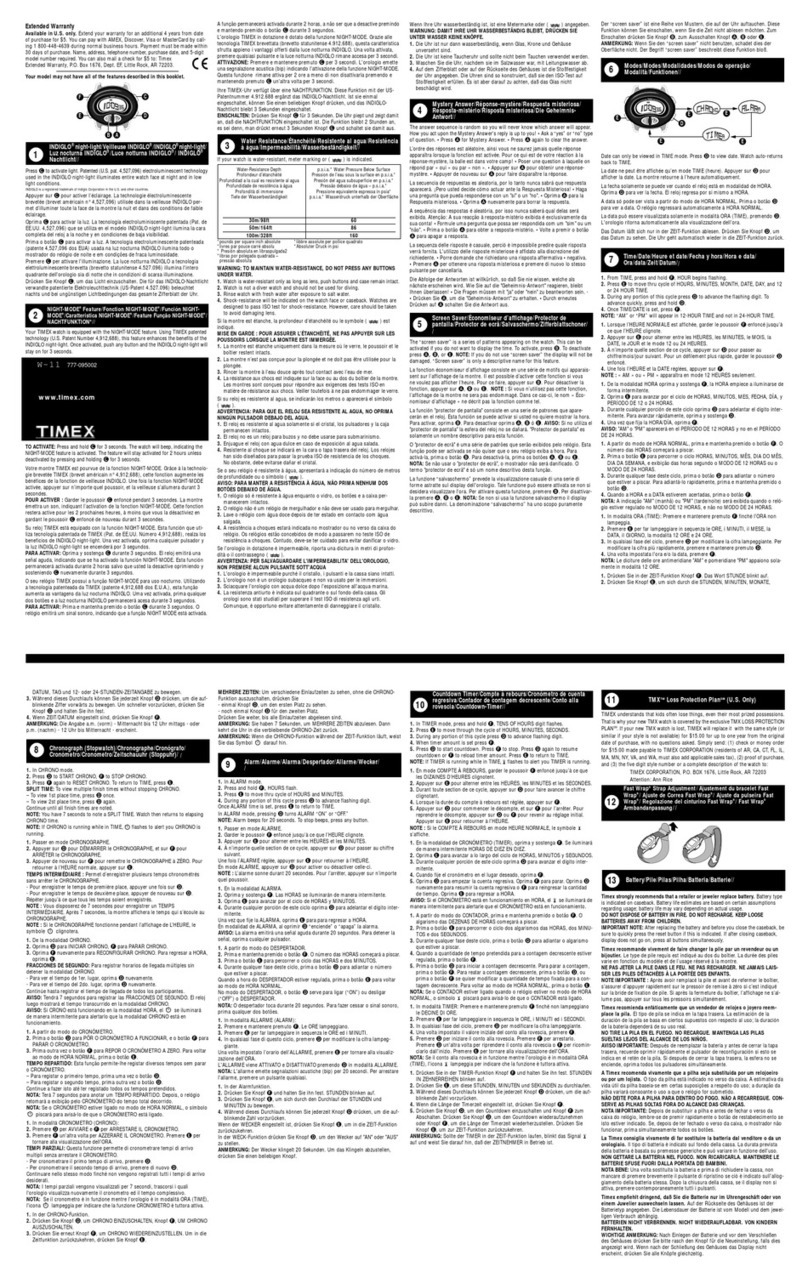
Timex M097 User manual

USER GUIDE …..……..……..……..……..… 1
GUÍA DEL USUARIO ..……..……..……..… 8
MODE D’EMPLOI……..……..……..…….. 16
GUIA DO USUÁRIO …..……..……..…….. 24
GUIDA DELL’UTENTE ..……..……..…….. 32
BENUTZERHANDBUCH …..……..…….. 40
GEBRUIKERSHANDLEIDING ……..…….. 47
用户指南 ..……..……..……..……..…….. 55
HIGHER-FUNCTION ANALOG
1938_INS21
00057_W223
W223 222-095001-02 12.2.21
Register your product at https://www.timex.com/product-registration.html
Registra tu producto en www.timex.es/es_ES/product-registration.html
Enregistrez votre produit sur fr.timex.ca/product-registration.html
www.timex.fr/fr_FR/product-registration.html
Registre o seu produto no site www.timex.eu/en_GB/product-registration.html
Registrare il prodotto all’indirizzo www.timex.it/it_IT/product-registration.html
Registrieren Sie Ihr Produkt bei www.timex.de/de_DE/product-registration.html
Registreer uw product bij www.timex.eu/en_GB/product-registration.html
www.timex.eu/en_GB/product-registration.html
製品登録サイト https://www.timexwatch.jp/
Зарегистрируйте свое изделие на сайте www.timex.eu/en_GB/product-registration.html
Zaregistrujte si svůj produkt na www.timex.eu/en_GB/product-registration.html
Regisztrálja termékét a következő címen www.timex.eu/en_GB/product-registration.html
Zachęcamy do zarejestrowania produktu podhttps://www.timex.pl/pl_PL/product-registration.html
Înregistrați-vă produsul la adresa www.timex.eu/en_GB/product-registration.html
Şu adresten ürününüzün kaydını gerçekleştirin: www.timex.eu/en_GB/product-registration.html
ユ ー ザ ガ イド …..……..……..……..……..…62
ИНСТРУКЦИИ ПО ЭКСПЛУАТАЦИИ ..…69
UŽIVATELSKÁ PŘÍRUČKA ..……..……..…77
HASZNÁLATI ÚTMUTATÓ …..……..……..…84
PRZEWODNIK UŻYTKOWNIKA …..……..…91
GHIDUL UTILIZATORULUI…..……..……..…98
KULLANICI KILAVUZU..……..……..…….. 105

1
ENGLISH 222-095001-02
TABLE OF CONTENTS
How to Start Your Watch ...................................................................... 2
Water and Shock Resistance................................................................ 2
Indiglo®Night-Light............................................................................... 2
Analog/Digital Models........................................................................... 2
Multi-Function Models .......................................................................... 3
Day/Date/AM/PM/Sun/Moon Models ................................................... 4
Chronograph Models............................................................................ 4
Elapsed Time Ring................................................................................ 6
Tachymeter Ring................................................................................... 7
Compass Ring...................................................................................... 7
How to Adjust Bracelet......................................................................... 7
Bracelet Link Removal.......................................................................... 7
Battery.................................................................................................. 7
Warranty............................................................................................... 7

2
ENGLISH 222-095001-02
Congratulations on purchasing your TIMEX®watch. Please read these
instructions carefully to understand how to operate your Timex timepiece.
Your watch may not have all of the features described in this booklet.
For more information, please visit: Timex.com
HOW TO START YOUR WATCH
To start your watch remove the plastic guard from under the crown, then press
the crown in against the case. The second hand will begin advancing in one-
second intervals.
Some deep-depth water-resistant watches require the setting crown to be
screwed in to secure water-resistance. If your watch case has a protrusion with
screw threads, the crown must be screwed in after setting the watch.
To screw in, push the crown firmly against the threaded protrusion and hold
in while turning the crown clockwise. Continue to screw in the crown until it is
tight. You will need to unscrew the crown (counter-clockwise) before pulling it
out the next time you want to set your watch.
WATER AND SHOCK RESISTANCE
If your watch is water-resistant, meter marking (WR_M) is indicated.
Water-Resistance Depth p.s.i.a. * Water pressure Below Surface
30m/98ft 60
50m/164ft 86
100m/328ft 160
200m/656ft 284
*pounds per square inch absolute
WARNING: TO MAINTAIN WATER-RESISTANCE, DO NOT PRESS ANY
BUTTONS OR PULL OUT THE CROWN UNDER WATER UNLESS YOUR
WATCH IS INDICATED AS 200 METER WATER-RESISTANT.
1. Watch is water-resistant only as long as crystal, crown and case remain
intact.
2. Watch is not a diver watch and should not be used for diving.
3. Rinse watch with fresh water after exposure to salt water.
4. Shock-resistance will be indicated on the watch face or caseback. Watches
are designed to pass ISO test for shock-resistance. However, care should be
taken to avoid damaging the crystal.
INDIGLO®NIGHT-LIGHT
Press button or crown to activate light. Electroluminescent technology used in
the INDIGLO®night-light illuminates entire watch face at night and in low light
conditions.
ANALOG/DIGITAL MODELS
4-PUSHER ANALOG/DIGITAL MODEL WITH INDIGLO®NIGHT-LIGHT &
NIGHT-MODE®FEATURE
“B” PUSHER
“C”
CROWN
POSITION
PUSHER
“D”
A B
PUSHER
“B”
PUSHER
“A ”
PUSHER
“C”
CROWN
POSITION
PUSHER
“D”
A B
PUSHER
PUSHER
“A”
TO USE INDIGLO®NIGHT-LIGHT
1. PRESS pusher “B” to illuminate the entire dial (Both analog and digital).
TO USE NIGHT-MODE®FEATURE
1. PRESS and HOLD pusher “B” for 3 seconds until you hear a beep.
2. Pressing any pusher will cause the INDIGLO®night-light to illuminate and
stay on for 3 seconds.
3. NIGHT-MODE®feature will last for 3 hours.
4. To deactivate NIGHT-MODE®feature PRESS and HOLD pusher “B” for 3
seconds.
ANALOG TIME
TO SET ANALOG TIME
1. PULL the crown out to the “B” position.
2. TURN the crown either way to the correct time.
3. PUSH in the crown to the “A” position.
DIGITAL DISPLAY
1. The Digital display changes to each function every time you PRESS pusher
“A”. (As illustrated below):
TIME / CALENDAR
DAILY ALARM
COUNTDOWN TIMER
CHRONOGRAPH
DUAL TIME
START
Press and release MODE
button once.
DUAL TIME CHRONOGRAPH
COUNTDOWN
TIME/
CALENDAR
DAILY
ALARM TIMER
CALENDAR
HOUR MINUTE SECOND MONTH DATE DAY
Press and release MODE
button once.
Press and release MODE
button once.
TO SET TIME / CALENDAR
1. PRESS pusher “A” to bring up TIME / CALENDAR display.
2. PRESS and HOLD pusher “D”. HOLD will display until second flashes.
3. PRESS pusher “C” to reset to second to “00”.
4. PRESS pusher “A” to let hour flash.
5. PRESS pusher “C” to advance hour.
6. PRESS pusher “A” and “C” as above to adjust tens of minutes, minute, year,
month, date, day and 12/24 hour format.
7. PRESS pusher “D” to complete setting.
8. View or select the TIME or CALENDAR to appear in your digital display.
• PRESS pusher “C” to view the CALENDAR for 2 seconds.
• PRESS and HOLD pusher “C” for 3 seconds until the watch beeps to
change the display to CALENDAR.
• To view or change the display to TIME, repeat the steps above.
NOTE: “A” or “P” will appear when the 12-Hour format is selected.
• Set this time to coordinate with the Analog time or another time zone.
• PRESS and HOLD pusher “C” for 2 seconds in setting mode, to activate fast
advance.
FOLLOWED BY
THE CURRENT
ALARM SETTING
TIME AND TIME
ZONE.
WILL
APPEAR
FOR 3
SECONDS

3
ENGLISH 222-095001-02
TO SET DAILY ALARM
1. PRESS pusher “A” to bring up DAILY ALARM display: “ALARM” will appear
for 3 seconds followed by the current alarm setting time and time zone. The
ALARM mode symbol “AL” and the applicable time zone symbol “T1” or “T2”
alternate to give complete information.
2.PRESS pusher “D” to let time zone flash.
3. PRESS pusher “C” to select time zone.
4. PRESS pusher “A” to let hour flash.
5. PRESS pusher “C” to advance hour.
6. PRESS pusher “A” and “C” as above to adjust tens of minutes and minute.
7. PRESS pusher “D” to complete setting.
8. Alarm is automatically activated after setting Sis displayed.
NOTE:
• When the alarm sounds, it will beep for 20 seconds.
• To stop the alarm beep, PRESS any pusher.
• PRESS and HOLD pusher “C” for 2 seconds in setting mode, to activate
fast advance.
TO SET DAILY ALARM OR CHIME ON/OFF
1. PRESS pusher “A” to bring up DAILY ALARM display.
2. PRESS pusher “C” to activate or deactivate daily alarm and chime
accordingly.
NOTE:
• aor Cwill appear or disappear according to daily alarm activation or
deactivation.
• NorBwill appear or disappear according to chime activation or deactivation.
• The alarm coordinates with the digital time not analog time.
• The alarm will sound only if the digital time zone (T1 or T2) selected in the
Alarm set mode is currently displayed, as confirmed by the alarm symbol a
or C.
TO USE COUNTDOWN TIMER
SETTING MODE
HOUR MINUTE
1. PRESS pusher “A” to bring up COUNTDOWN TIMER display. “24 HR TR”
will appear.
2. PRESS pusher “D” to let hour flash.
3. PRESS pusher “C” to advance hour.
4. PRESS pusher “A” to set tens of minutes.
5. PRESS pusher “C” to advance tens of minutes.
6. PRESS pusher “A” and “C” as above to adjust minute.
7. PRESS pusher “D” to complete setting.
8. PRESS pusher “C” to start the timer.
9. PRESS pusher “D” to stop the timer.
10. PRESS pusher “D” again to resume timer to the preset time.
NOTE: When the timer counts down to zero it will beep for 20 seconds.
To stop the timer beep, PRESS any pusher.
“T” will appear to designate that the countdown timer is running.
Countdown time up to 24 hours.
PRESS and HOLD pusher “C” for 2 seconds in setting mode, to activate fast
advance.
TO USE CHRONOGRAPH FOR STANDARD MEASUREMENT:
OR
1. PRESS pusher “A” to bring up CHRONOGRAPH display; “CH LAP” or “CH
SPL” will appear.
2. PRESS pusher “C” to start timing.
3. PRESS pusher “D” to stop timing.
4. PRESS pusher “D” to reset.
TO USE CHRONOGRAPH FOR LAP OR SPLIT TIME MEASUREMENT:
1. PRESS pusher “A” to bring up CHRONOGRAPH display; “CH LAP” or “CH
SPL” will appear.
2. PRESS pusher “D” to select LAP or SPLIT.
3. PRESS pusher “C” to start timing.
4. PRESS pusher “C” to record the first Lap or Split time; digits will be frozen for
15 seconds; “L” or “S” will flash to indicate that the next Lap or Split time is
being recorded in the background.
5. PRESS pusher “A” to view the running display while the display is frozen.
6. PRESS pusher “C” to take another Lap or Split.
7. PRESS pusher “D” to stop.
8. PRESS pusher “D” again to reset.
NOTE: CHRONOGRAPH must be reset to zero to switch between LAP and
SPLIT.
Records time up to 24 hours and shows 1/100 of seconds for the first hour.
TO SET DUAL TIME:
HOUR MINUTE
1. PRESS pusher “A” to bring up DUAL TIME display. “T2” will appear beside
the dual time.
2. PRESS and HOLD pusher “D”; “Hold” will display until hour flashes.
3. PRESS pusher “C” to advance hour.
4. PRESS pusher “A” to let month flash.
5. PRESS pusher “C” to advance month.
6. PRESS pusher “A” and “C” as above to adjust date, day, and to set
12 / 24 hour format.
7. PRESS pusher “D” to complete setting.
NOTE: PRESS and hold pusher “C” for 2 seconds in setting mode to activate
fast advance.
NOTE:
1. While in setting of any mode, if no pusher is pressed for 90 seconds the
display will automatically return to TIME / CALENDAR mode.
2. While in any mode other than TIME / CALENDAR mode, whenever pusher
“C” or “D” is pressed, the next press of pusher “A” will automatically return
the display to TIME / CALENDAR mode.
MULTI-FUNCTION MODELS
CB
A
CROWN POSITION
NORMAL POSITION
Your watch has a normal large face display and three small faces displaying
date, day and 24-hour time.
TO SET THE DAY
1. Pull crown all the way out and turn CLOCKWISE until correct day appears.
2. Push crown in to restart.
NOTE: You must set day before setting time.
TO SET THE TIME
1. Pull crown all the way out and turn to correct time.
2. Push crown in to restart.
NOTE: 24-hour display will set automatically.
4
ENGLISH 222-095001-02
TO SET THE DATE
Instant date change:
1. Pull crown out one stop and turn CLOCKWISE until you reach correct date.
2. Push crown in to restart.
DAY/DATE/AM/PM/SUN/MOON MODELS
CBA
CROWN
POSITION
DATE
DAY
AM/PM
SUN/MOON
NORMAL POSITION
TO SET TIME:
1. PULL out crown to “C” position.
2. TURN crown clockwise to correct time. Day/am/pm/moon will also change.
3. Push in crown to “A” position.
NOTE: Remember to set time for am or pm (sun or moon).
TO SET DATE:
1. PULL out crown to “B” position.
2. TURN crown clockwise to correct date.
3. PUSH in crown to “A” position
TO SET DAY:
1. PULL out crown to “C” position.
2. Advance time 24 hours to change the day.
3. PUSH in crown to “A” position
CHRONOGRAPH MODELS
Review all chronographs to determine your watch type
TYPE 1
CB
A
PUSHER “A”
PUSHER “B”
STOPWATCH
SECOND HAND
SMALL
SECOND HAND CROWN POSITION
PUSHER “C”
STOPWATCH
HOUR HAND
STOPWATCH
1/20 SEC. HAND
NORMAL POSITION
• Crown position “A”, “B” & “C”
• Pusher “A” (right) & “B” (left)
• Hour, minute and small second hands (6 o’clock eye) show time
• 12 o’clock eye shows “minutes elapsed” for chronograph
• 9 o’clock eye shows “hours elapsed” for chronograph
• The seconds sweep hand shows “seconds elapsed” for chronograph
TIME, CALENDAR, CHRONOGRAPH
This chronograph watch has three functions:
TIME
TO SET THE TIME:
1. PULL out Crown to “C” position
2. TURN Crown either way to correct time
3. PUSH in Crown to “A” position
CALENDAR
TO SET THE CALENDAR
1. PULL out Crown to “B” position
2. TURN Crown clockwise to correct position
3. PUSH in Crown to “A” position
CHRONOGRAPH
• The Chronograph is capable of measuring:
• Minutes elapsed up to 1 hour (12 o’clock eye)
• Hour elapsed up to 12 hours (9 o’clock eye)
• Seconds elapsed up to 1 minute (seconds sweep hand)
BEFORE USING THE CHRONOGRAPH:
Adjust all the chronograph hands to the “0” or 12 hr. position.
TO ADJUST THE CHRONOGRAPH HANDS:
1. PULL out CROWN to “C” position
2. PRESS pusher “A” intermittently until the seconds sweep hand resets to “0”
or 12-hr. position
3. PRESS pusher “B” intermittently until the hands in the 12 o’clock eye reset to
“0” or 12-hr position
4. PUSH in Crown to “A” position
NOTE: Make sure that the chronograph is stopped and reset before
adjusting.
NOTE: PRESSING and HOLDING either pusher “A” or “B” will cause the hands
to move continually until the pusher is released.
STANDARD CHRONOGRAPH MEASUREMENT:
1. PRESS pusher “A” to start timing
2. PRESS pusher “A” to stop timing
3. PRESS pusher “B” to reset
TYPE 2
B C
PUSHER “A”
DATE
CHRONOGRAPH
SECOND
CROWN
POSITION
PUSHER “B”
SMALL SECOND
CHRONOGRAPH
HOUR
CHRONOGRAPH
MINUTE
HOUR
MINUTE HAND
7
NORMAL POSITION “A”
SETTING THE TIME
1. PULL the crown out to the 2nd position “C”.
2. Turn the crown to set hour and minute hands.
3. When the crown is pushed back to the normal position “A”, small second
hand begins to run.
SETTING THE DATE
1. PULL the crown out to the 1st position “B”.
2. Turn the crown counter-clockwise to set the date. *If the date is set between
the hours of around 9:00 PM and 1:00 AM, the date may not change on the
following day.
3. After the date has been set, push the crown back to the normal position “A”.

5
ENGLISH 222-095001-02
USING THE CHRONOGRAPH
This chronograph is able to measure and display time in 1/2 second up to
maximum of 11 hours 59 minutes 59 seconds. The chronograph second hand
keeps continuously for 11 hours 59 minutes 59 seconds after starting.
MEASURING TIME WITH THE CHRONOGRAPH
1. The chronograph can be started and stopped each time pusher “A” is
pressed.
2. Pressing pusher “B” resets the chronograph and the chronograph second
hand, chronograph minute hand, and chronograph hour hand return to zero
position.
TIME MEASUREMENT STOP
RESET
CHRONOGRAPH RESET (INCL. AFTER REPLACING BATTERY)
This procedure should be performed when the chronograph second hand does
not return to zero position after the chronograph has been reset, including after
the battery has been replaced.
1. Pull the crown out to the 2nd position “C”.
2. Press pusher “A” to set the chronograph second hand to the zero position.
The chronograph hand can be advanced rapidly by continuously pressing
pusher “A”.
3. Once the hand returns to zero position, return the crown to the normal
position.
*Do not push crown to normal position while the chronograph second hand
returns to zero position.It stops on the way when crown is returned to normal
position and its position is recognized as zero position.
TYPE 3
B
D
A
C
PUSHER “A”
DATE
CHRONOGRAPH
1/20 SECOND
CROWN
POSITION
PUSHER “B”
SECOND
CHRONOGRAPH
SECOND
CHRONOGRAPH
MINUTE
HOUR
MINUTE
NORMAL POSITION
BASIC OPERATIONS
• 6 o’clock eye shows seconds.
• 10 o’clock eye shows “minutes elapsed” for chronograph.
• 2 o’clock eye shows “1/20 seconds elapsed” for chronograph.
• Chronograph second hand shows “seconds elapsed” for chronograph.
TIME
TO SET THE TIME:
1. PULL crown out to “C” position.
2. TURN crown either way to correct time.
3. PUSH crown in to “A” position.
TO ADJUST TO A NEW TIME ZONE:
1. PULL crown out to “B” position.
2. TURN crown either way to move the hour hand in hour increments.
CALENDAR
TO SET THE CALENDAR:
1. PULL crown out to “B” position.
2. TURN crown either way to move hour hand. Two complete revolutions
relative to the 12 o’clock position will move the date forward or backward.
This will correct both date and 24-hour time.
3. PUSH crown in to “A” position.
NOTE: The date changes automatically every 24 hours.
CHRONOGRAPH
THE CHRONOGRAPH IS CAPABLE OF MEASURING:
• 1/20 seconds elapsed up to 1 second (2 o’clock eye).
• Seconds elapsed up to 1 minute (chronograph second hand).
• Minutes elapsed up to 30 minutes (10 o’clock eye).
NOTE: Chronograph will operate continuously for 4 hours, after which it will
automatically stop and reset.
NOTE: The 1/20th of a second hand does not move during chronograph
function, the 1/20th seconds are indicated when chronograph is stopped and
not yet reset.
BEFORE USING THE CHRONOGRAPH, adjust all the chronograph hands to
the “0” or 12-hour positions.
TO ADJUST CHRONOGRAPH HANDS:
1. PULL crown out to “B” position.
2. PRESS pusher “B” until the hand at the 10 o’clock eye resets to the “30”
position.
3. PULL crown out to “C” position.
4. PRESS pusher “A” until the chronograph second hand resets to the “0” or
“60” or 12-hour position.
5. PRESS pusher “B” until the hand at the 2 o’clock eye resets to the “0”
position.
6. PUSH in Crown to “A” position.
NOTE:
• Make sure the chronograph is stopped and reset before adjusting.
• PRESSING and HOLDING either pusher “A” or “B” for 2 seconds will cause
the hands to move continuously until the pusher is released.
STANDARD CHRONOGRAPH MEASUREMENT:
1. PRESS pusher “A” to start timing.
2. PRESS pusher “A” to stop timing.
3. PRESS pusher “B” to reset.
SPLIT TIME MEASUREMENT:
1. PRESS pusher “A” to start timing.
2. PRESS pusher “B” to split.
3. PRESS pusher “B” to resume timing.
4. PRESS pusher “A” to stop timing.
5. PRESS pusher “B” to reset.
INDIGLO®NIGHT-LIGHT
With the crown in the “A” position, PUSH crown to the “D” position. Entire dial
will be illuminated. Electroluminescent technology used in INDIGLO®night-light
illuminates entire watch face at night and in low light conditions.
NIGHT-MODE®FEATURE:
1. PUSH and HOLD Crown to “D” position for 4 seconds to activate NIGHT-
MODE®feature. PRESSING any pusher will cause the INDIGLO®night-light to
stay on for 3 seconds.
2. NIGHT-MODE®feature will stay activated for 8 hours.
3. Or PUSH and HOLD Crown to “D” position for 4 seconds to deactivate.
IF STOPWATCH HANDS DO NOT RETURN TO “0 POSITION” WHEN THE
STOPWATCH IS RESET:
1. PULL crown out to “B” position
2. PRESS pushers “A” or “B” repeatedly to move hands to “0” position
3. PUSH in crown to “A” position

6
ENGLISH 222-095001-02
TYPE 4
AB
BASIC OPERATIONS
• 6 o’clock eye displays “seconds elapsed” for the chronograph
• 9 o’clock eye displays “minutes elapsed” for the chronograph
• 3 o’clock eye displays the current time in a 24 hour format
TIME
TO SET THE TIME:
NOTE: The stopwatch must be stopped and reset to the zero position prior to
setting the time.
1. Pull the crown out to position B.
2. Rotate the crown either direction until the 24-hour, hour, and minute hands
display the correct time.
3. Push Crown in to position A.
TO ADJUST THE STOPWATCH HANDS TO THE ZERO POSITION:
1. Pull the crown out to position B.
2. Press pusher “A” to move the stopwatch minute and second hands counter
clockwise to the zero position. Press pusher “B” to move the stopwatch
minute and second hands clockwise to the zero position.
3. Push Crown in to position A.
CHRONOGRAPH
THE CHRONOGRAPH IS CAPABLE OF MEASURING:
• Seconds elapsed up to one minute (6 o’clock eye)
• Minutes elapsed up to one hour (9 o’clock eye)
STANDARD CHRONOGRAPH MEASUREMENT
• Press pusher “A” to start timing
• Press pusher “A” to stop timing
• Press pusher “B” to reset the chronograph to the zero position
SPLIT TIME MEASUREMENT
• Press pusher “A” to start timing
• Press pusher “B” to split
• Press pusher “B” to resume timing
• Press pusher “A” to stop timing
• Press pusher “B” to reset the chronograph to the zero position
TYPE 5
BC
7
SETTING THE TIME
1. PULL the crown out to the 2nd position “C”.
2. Turn the crown to set hour and minute hands. Make sure that the 24-hour
time is correct.
3. When the crown is pushed back to the normal position “A”, second hand
begins to run.
SETTING THE DATE
1. PULL the crown out to the 1st position “B”.
2. Turn the crown counter-clockwise to set the date. *If the date is set between
the hours of around 9:00 PM and 1:00 AM, the date may not change on the
following day.
3. After the date has been set, push the crown back to the normal position “A”.
USING THE CHRONOGRAPH
This chronograph is able to measure and display time in 1-second increments
up to maximum of 29 minutes 59 seconds. The chronograph second hand
moves continuously for 30 minutes after starting.
STANDARD CHRONOGRAPH MEASUREMENT:
1. PRESS pusher “A” to start timing.
2. PRESS pusher “A” to stop timing.
3. PRESS pusher “B” to reset.
SPLIT TIME MEASUREMENT:
1. PRESS pusher “A” to start timing.
2. PRESS pusher “B” to split.
3. PRESS pusher “B” to resume timing.
4. PRESS pusher “A” to stop timing.
5. PRESS pusher “B” to reset.
CHRONOGRAPH RESET (INCL. AFTER REPLACING BATTERY)
This procedure should be performed when the chronograph minute hand or
second hand do not return to zero position after the chronograph has been
reset, including after the battery has been replaced.
1. Pull the crown out to the 2nd position “C”.
2. Press pusher “A” or “B” to set the stopwatch hands to the zero position.
The movements of the stopwatch minute hand and the stopwatch second
hand are interlocked. To set the stopwatch minute hand to the zero position,
continue to move the stopwatch second hand until the stopwatch minute
hand reaches the zero position.
3. Once the hands returns to zero position, return the crown to the normal
position.
ELAPSED TIME RING
If your watch is equipped with a rotatable outer ring on the face, with numbers
corresponding to minutes, you can use this Elapsed Time Ring to time an
activity from the start, or to mark the ending time for the duration of an activity.
TO TIME AN ACTIVITY FROM THE START:
Set the Start/Stop triangle at the time (hour or minute) when you start the activity
(As shown on the left in the illustration shown below). At completion, you can
see how long the activity took.
TO MEASURE THE TIME REMAINING:
Set the triangle to the hour or minute position when you wish to complete the
activity, and check the watch periodically for progress towards that goal.
In the illustration shown on the previous page on the right you can stop when
the minute hand reaches the 20 minutes past the hour position.
HOUR HAND
SECOND HAND
STOPWATCH
MINUTE HAND
STOPWATCH
SECOND HAND
PUSHER “A”
MINUTE HAND
CROWN POSITION
NORMAL POSITION “1”
PUSHER “B”
24-HOUR HAND
PUSHER “A”
MINUTE HAND
CROWN POSITION
NORMAL POSITION “A”
PUSHER “B”
SECOND HAND
DATE
24-HOUR TIME
CHRONOGRAPH
MINUTES
CHRONOGRAPH
SECONDS
HOUR

7
ENGLISH 222-095001-02
TACHYMETER RING
The tachymeter feature can be used to measure speed in miles per hour (MPH),
nautical miles per hour (knots) or kilometers per hour (KPH) using the sweep
second hand and the scale on the wall above the watch face. You need to
know the actual distance you are covering in miles or km.
Start the chronograph with the second hand at zero (the twelve o’clock
position). Within the first minute, the second hand will point to the rate for a one-
mile (or one kilometer) course: if it takes 45 seconds, the hand will point to 80 at
that position – 80 MPH or 80 KPH.
If within the first minute, a distance greater than one mile or kilometer is
covered, multiply the tachymeter number by the distance to get the actual rate:
if you went 1.2 miles in 45 seconds, multiply the 80 by 1.2 – 96 MPH.
COMPASS RING
If your watch is equipped with a movable ring around the dial marked at the
letters “N”, “E”, “W”, “S” (for the four compass directions) or compass degrees,
you can use this feature to find an approximate compass directional reading.
1. Lay the watch on a flat surface, or hold it so that the face is parallel to the
ground.
2. Locate the sun and point the hour hand at the sun.
3. In the A.M., rotate the ring until the “S” (south) marker is halfway between
the hour hand and 12:00 (after the hour hand or within the shortest distance
between the hour hand and 12:00).
4. In the P.M., rotate the ring until “S” is before the hour hand and halfway
between the hour hand and 12:00.
12 1
2
3
4
5
6
7
8
9
10
11
N
S
W
E
HOW TO ADJUST BRACELET
(Variations of the following bracelet sections apply to all watch models).
SLIDING CLASP BRACELET
1 Open locking plate.
2. Move clasp to desired bracelet length.
3. Exert pressure while holding locking plate and slide clasp back and forth until
it engages in grooves on underside of bracelet.
4. Press locking plate down until it snaps closed. Clasp can be damaged if
excessive force is used.
FOLDOVER CLASP BRACELET
1. Find spring bar that connects bracelet to clasp.
2. Using a pointed tool, push in spring bar and gently twist bracelet to
disengage.
3. Determine wrist size, then insert spring bar in correct bottom hole.
4. Push down on spring bar, align with top hole and release to lock in place.
Fig. 2Fig. 1 Fig. 3
BRACELET LINK REMOVAL
REMOVING LINKS:
1. Place bracelet upright and insert pointed tool in opening of link.
2. Push pin forcefully in direction of arrow until link is detached (pins are
designed to be dicult to remove).
3. Repeat until desired number of links are removed.
RE-ASSEMBLY:
1. Rejoin bracelet parts.
2. Push pin back into link in opposite direction of arrow.
3. Press pin down securely into bracelet until it is flush.
BATTERY
Timex strongly recommends that a retailer or jeweler replace battery. If
applicable, push reset button when replacing battery. Battery type is indicated
on caseback. Battery life estimates are based on certain assumptions regarding
usage; battery life may vary depending on actual usage.
DO NOT DISPOSE OF BATTERY IN FIRE. DO NOT RECHARGE. KEEP
LOOSE BATTERIES AWAY FROM CHILDREN.
EXTENDED WARRANTY
Available in U.S. only. Extend your warranty for an additional 4 years from date of
purchase for $5. You can pay with AMEX, Discover, Visa or MasterCard by
calling 1 800-448-4639 during normal business hours. Payment must be made
within 30 days of purchase. Name, address, telephone number, purchase date,
and 5-digit model number required. You can also mail a check for $5 to: Timex
Extended Warranty, P.O. Box 1676, Dept. EF, Little Rock, AR 72203.
TIMEX INTERNATIONAL WARRANTY
http://www.timex.com/productWarranty.html
©2022 Timex Group USA, Inc. TIMEX, INDIGLO and NIGHT-MODE are
registered trademarks of Timex Group B.V. and its subsidiaries.

8
ESPAÑOL 222-095001-02
ÍNDICE
Cómo iniciar tu reloj.............................................................................. 9
Resistencia al agua y a los golpes ........................................................ 9
Luz nocturna Indiglo®........................................................................... 9
Modelos analógicos/digitales................................................................ 9
Modelos multifuncionales.................................................................... 11
Modelos de día/fecha/am/pm/sol/luna................................................11
Modelos con cronógrafo..................................................................... 11
Anillo de tiempo transcurrido .............................................................. 14
Anillo de tacómetro............................................................................. 14
Anillo giratorio..................................................................................... 14
Cómo ajustar la pulsera...................................................................... 14
Retirada de eslabones de la pulsera ................................................... 14
Pila ..................................................................................................... 15
Garantía.............................................................................................. 15

9
ESPAÑOL 222-095001-02
Enhorabuena por la compra de tu reloj TIMEX®. Lee atentamente estas
instrucciones para entender el funcionamiento de tu reloj Timex.
Es posible que tu reloj no tenga todas las características descritas
en este folleto.
Para obtener más información, visita: Timex.com
CÓMO INICIAR TU RELOJ
Para iniciar tu reloj retira el protector de plástico de debajo de la corona y luego
empuja la corona contra la caja. El segundero comenzará a avanzar a intervalos
de un segundo.
Algunos relojes resistentes al agua a grandes profundidades necesitan que
la corona de ajuste se enrosque hacia dentro del todo para asegurar
la resistencia al agua. Si la caja de tu reloj tiene una protuberancia roscada,
hay que enroscar la corona hacia dentro del todo después de ajustar el reloj.
Para enroscarla, empuja la corona con firmeza contra la protuberancia roscada
y mantén la presión mientras giras la corona en sentido horario. Continúa
enroscando la corona hasta que esté bien apretada. Necesitarás desenroscar
la corona (en sentido antihorario) antes de tirar de ella hacia fuera la próxima vez
que quieras ajustar tu reloj.
RESISTENCIA AL AGUA Y A LOS GOLPES
Si tu reloj es resistente al agua, se indicarán los metros (WR_M).
Profundidad de resistencia al agua p.s.i.a. * Presión bajo la superficie del agua
30 m/98 pies 60
50 m/164 pies 86
100 m/328 pies 160
200 m/656 pies 284
*libras por pulgada cuadrada absoluta
ADVERTENCIA: PARA MANTENER LA RESISTENCIA AL AGUA,
NO PULSES NINGÚN BOTÓN NI TIRES DE LA CORONA DEBAJO
DEL AGUA A MENOS QUE TU RELOJ ESTÉ INDICADO PARA UNA
RESISTENCIA AL AGUA DE 200 METROS.
1. El reloj es resistente al agua solamente mientras el cristal, la corona y la caja
permanezcan intactos.
2. El reloj no es apropiado para hacer submarinismo y no debería usarse
para ello.
3. Aclara el reloj con agua dulce después de haber estado expuesto a agua
salada.
4. La resistencia a los golpes estará indicada en la esfera del reloj o en la parte
de atrás de la caja. Los relojes están diseñados para pasar la prueba ISO
de resistencia a los golpes. Sin embargo, se debe tener cuidado para evitar
dañar el cristal.
LUZ NOCTURNA INDIGLO®
Pulsa el botón o la corona para activar la luz. La tecnología electroluminiscente
utilizada en la luz nocturna INDIGLO®ilumina toda la esfera del reloj por
la noche y en condiciones de poca luz.
MODELOS ANALÓGICOS/DIGITALES
MODELO ANALÓGICO/DIGITAL DE 4 BOTONES CON LUZ NOCTURNA
INDIGLO®Y FUNCIÓN NIGHT-MODE®
BOTÓN
“C”
BOTÓN
“D”
AB
AB
BOTÓN
“B”
BOTÓN
“A”
POSICIÓN DE
LA CORONA
POSICIÓN DE
LA CORONA
BOTÓN
“B”
BOTÓN
“A”
BOTÓN
“C”
BOTÓN
“D”
PARA UTILIZAR LA LUZ NOCTURNA INDIGLO®
1. PULSA el botón “B” para iluminar la esfera completa (tanto analógica
como digital).
PARA USAR LA FUNCIÓN NIGHT-MODE®
1. PULSA y MANTÉN OPRIMIDO el botón “B” durante 3 segundos hasta
escuchar un pitido.
2. Oprimir cualquier botón hará que la luz nocturna INDIGLO®se ilumine
y permanezca encendida durante 3 segundos.
3. La función NIGHT-MODE®permanecerá activa durante 3 horas.
4. Para desactivar la función NIGHT-MODE®PULSA y MANTÉN OPRIMIDO
el botón “B” durante 3 segundos.
HORA ANALÓGICA
PARA AJUSTAR LA HORA ANALÓGICA
1. TIRA de la corona hacia fuera hasta la posición “B”.
2. GIRA la corona en cualquiera de los dos sentidos hasta la hora correcta.
3. EMPUJA hacia dentro la corona hasta la posición “A”.
PANTALLA DIGITAL
1. La pantalla digital cambia a cada función cada vez que OPRIMES
el botón “A”. (Como se ilustra a continuación):
HORA / CALENDARIO
ALARMA DIARIA
TEMPORIZADOR DE CUENTA ATRÁS
CRONÓGRAFO
HORA DUAL
INICIO
Pulsa y suelta el botón
MODE una vez.
HORA DUAL CRONÓGRAFO
TEMPORIZADOR DE
CUENTA ATRÁS
HORA/
CALENDARIO ALARMA
DIARIA
CALENDARIO
HORA MINUTOS SEGUNDOS MES FECHA DÍA
Pulsa y suelta el botón
MODE una vez.
Pulsa y suelta el botón
MODE una vez.
PARA AJUSTAR LA HORA / CALENDARIO
1. PULSA el botón “A” hasta llegar a la pantalla HORA / CALENDARIO.
2. PULSA y MANTÉN OPRIMIDO el botón “D”. Aparecerá HOLD hasta que los
segundos destellen.
3. PULSA el botón “C” para poner los segundos a “00”.
4. PULSA el botón “A” para hacer que destelle la hora.

10
ESPAÑOL 222-095001-02
5. PULSA el botón “C” para que la hora avance.
6. PULSA los botones “A” y “C” como antes para ajustar las decenas
de minutos, minutos, año, mes, fecha, día y formato de 12 /24 horas.
7. PULSA el botón “D” para completar el ajuste.
8. Visualiza o selecciona la HORA o CALENDARIO para que aparezca
en tu pantalla digital.
• PULSA el botón “C” para visualizar el CALENDARIO durante 2 segundos.
• PULSA y MANTÉN OPRIMIDO el botón “C” durante 3 segundos hasta que
el reloj pite para cambiar la pantalla a CALENDARIO.
• Para visualizar o cambiar la pantalla a HORA, repite los pasos anteriores.
NOTA: aparecerán “A” o “P” cuando se haya seleccionado el formato de
12 horas.
• Ajusta esta hora para coordinar con la hora analógica o con otro huso horario.
• PULSA y MANTÉN OPRIMIDO el botón “C” durante 2 segundos en modo
de ajuste para activar el avance rápido.
APARECERÁ
DURANTE 3
SEGUNDOS
SEGUIDO DE LA
HORA FIJADA
PARA LA ALARMA
Y EL HUSO
HORARIO.
PARA AJUSTAR LA ALARMA DIARIA
1. PULSA el botón “A” hasta llegar a la pantalla HORA / CALENDARIO:
“ALARM” aparecerá durante 3 segundos seguido por el ajuste actual
de hora de la alarma y el huso horario. El símbolo del modo de ALARMA,
“AL”, y el símbolo del huso horario aplicable, “T1” o “T2”, se alternan para dar
la información completa.
2.PULSA el botón “D” para hacer que destelle el huso horario.
3. PULSA el botón “C” para seleccionar el huso horario.
4. PULSA el botón “A” para hacer que destelle la hora.
5. PULSA el botón “C” para que la hora avance.
6. PULSA los botones “A” y “C” como antes para ajustar las decenas
de minutos y minutos.
7. PULSA el botón “D” para completar el ajuste.
8. La alarma queda automáticamente activada después de mostrar el ajuste S.
NOTA:
• Cuando la alarma suene, lo hará durante 20 segundos.
• Para detener la alarma, PULSA cualquier botón.
• PULSA y MANTÉN OPRIMIDO el botón “C” durante 2 segundos en modo
de ajuste para activar el avance rápido.
PARA ENCENDER O APAGAR LA ALARMA DIARIA O EL TIMBRE
1. PULSA el botón “A” hasta llegar a la pantalla de ALARMA DIARIA.
2. PULSA el botón “C” para activar o desactivar la alarma diaria y el timbre
horario a tu conveniencia.
NOTA:
• Aparecerán o desaparecerán ao Cde acuerdo con la activación
o desactivación de la alarma diaria.
• Aparecerán o desaparecerán NoBde acuerdo con la activación
o desactivación del timbre horario.
La alarma se coordina con la hora digital, no con la hora analógica.
La alarma sonará solo si el huso horario digital (T1 o T2) seleccionado al ajustar
la alarma está en la pantalla, como lo confirma el símbolo de alarma ao C.
PARA USAR EL TEMPORIZADOR DE CUENTA ATRÁS
MODO DE AJUSTE
HORA MINUTOS
1. PULSA el botón “A” hasta llegar a la pantalla de TEMPORIZADOR
DE CUENTA ATRÁS. Aparecerá “24 HR TR”.
2. PULSA el botón “D” para hacer que destelle la hora.
3. PULSA el botón “C” para que la hora avance.
4. PULSA el botón “A” para ajustar las decenas de minutos.
5. PULSA el botón “C” para avanzar las decenas de minutos.
6. PULSA los botones “A” y “C” como antes para ajustar los minutos.
7. PULSA el botón “D” para completar el ajuste.
8. PULSA el botón “C” para iniciar el temporizador.
9. PULSA el botón “D” para detener el temporizador.
10. PULSA el botón “D” nuevamente para retomar el temporizador hasta la hora
preseleccionada.
NOTA: cuando el temporizador llegue a cero pitará durante 20 segundos.
Para detener la alarma del temporizador, PULSA cualquier botón.
Aparecerá “T” para señalar que está funcionando el temporizador de cuenta
atrás.
Realiza cuentas atrás de hasta 24 horas.
PULSA y MANTÉN OPRIMIDO el botón “C” durante 2 segundos en modo
de ajuste para activar el avance rápido.
PARA USAR EL CRONÓGRAFO PARA MEDICIONES ESTÁNDAR:
O
1. PULSA el botón “A” hasta llegar a la pantalla de CRONÓGRAFO; aparecerán
“CH LAP” o “CH SPL”.
2. PULSA el botón “C” para iniciar el cronometraje.
3. PULSA el botón “D” para detener el cronometraje.
4. PULSA el botón “D” para reiniciar.
PARA USAR EL CRONÓGRAFO PARA MEDICIONES DE VUELTA
O FRACCIÓN:
1. PULSA el botón “A” hasta llegar a la pantalla de CRONÓGRAFO; aparecerán
“CH LAP” o “CH SPL”.
2. PULSA el botón “D” para seleccionar LAP (vuelta) o SPLIT (fracción).
3. PULSA el botón “C” para iniciar el cronometraje.
4. PULSA el botón “C” para registrar el tiempo de la primera vuelta o fracción;
los números permanecerán congelados durante 15 segundos; “L” o “S”
destellarán para indicar que se está registrando el tiempo de la siguiente
vuelta o fracción en el trasfondo.
5. PULSA el botón “A” para ver la pantalla que corre mientras la pantalla está
congelada.
6. PULSA el botón “C” para tomar otra vuelta o fracción.
7. PULSA el botón “D” para detener el cronometraje.
8. PULSA el botón “D” nuevamente para reiniciar.
NOTA: hay que poner a cero el CRONÓGRAFO para cambiar entre vuelta
y fracción.
Registra eventos hasta 24 horas y muestra centésimas de segundo para
la primera hora.
PARA AJUSTAR LA HORA DUAL:
HORA MINUTOS
1. PULSA el botón “A” hasta llegar a la pantalla de HORA DUAL. Aparecerá “T2”
junto a la hora dual.
2. PULSA y MANTÉN OPRIMIDO el botón “D”; aparecerá “Hold” hasta que
la hora destelle.
3. PULSA el botón “C” para que la hora avance.
4. PULSA el botón “A” para hacer que destelle el mes.
5. PULSA el botón “C” para que el mes avance.
6. PULSA los botones “A” y “C” como antes para ajustar la fecha, día y para
ajustar el formato de 12 / 24 horas.
7. PULSA el botón “D” para completar el ajuste.
NOTA: PULSA y MANTÉN OPRIMIDO el botón “C” durante 2 segundos
en modo de ajuste para activar el avance rápido.
NOTA:
1. Al estar en ajuste en cualquiera de los modos, si no se pulsa ningún botón
durante 90 segundos, la pantalla regresará automáticamente al modo
de HORA / CALENDARIO.

11
ESPAÑOL 222-095001-02
2. Al estar en cualquier modo que no sea el de HORA / CALENDARIO,
cuando o bien el botón “C” o el “D” estén pulsados, la siguiente vez que
se pulse el botón “A” la pantalla regresa automáticamente al modo
de HORA / CALENDARIO.
MODELOS MULTIFUNCIONALES
CB
A
POSICIÓN DE LA CORONA
POSICIÓN NORMAL
Tu reloj tiene una esfera normal grande y tres esferas pequeñas que muestran
la fecha, día y hora de 24 horas.
PARA AJUSTAR EL DÍA
1. Tira de la corona hacia fuera del todo y gírala en sentido HORARIO hasta que
aparezca el día correcto.
2. Empuja la corona hacia dentro para reiniciar.
NOTA: se debe ajustar el día antes de ajustar la hora.
PARA AJUSTAR LA HORA
1. Para buscar la hora, tira completamente hacia fuera de la corona.
2. Empuja la corona hacia dentro para reiniciar.
NOTA: se establecerá automáticamente la pantalla de 24 horas.
PARA AJUSTAR LA FECHA
Cambio de fecha instantáneo:
1. Tira de la corona una posición y gírala en sentido HORARIO hasta
la fecha correcta.
2. Empuja la corona hacia dentro para reiniciar.
MODELOS DE DÍA/FECHA/AM/PM/SOL/LUNA
CBA
POSICIÓN DE LA
CORONA
FECHA
DÍA
AM/PM
SOL/LUNA
POSICIÓN NORMAL
PARA AJUSTAR LA HORA:
1. TIRA de la corona hacia fuera hasta la posición “C”.
2. GIRA la corona en sentido horario hasta la hora correcta. También cambiará
Day/am/pm/moon (día/mañana/tarde/luna).
3. EMPUJA la corona hasta la posición “A”.
NOTA: recuerda ajustar la hora para am/pm (mañana o tarde, sol o luna).
PARA AJUSTAR LA FECHA:
1. TIRA de la corona hacia fuera hasta la posición “B”.
2. GIRA la corona en sentido horario hasta la fecha correcta.
3. EMPUJA la corona hasta la posición “A”
PARA AJUSTAR EL DÍA:
1. TIRA de la corona hacia fuera hasta la posición “C”.
2. Adelanta la hora 24 horas para cambiar el día.
3. EMPUJA la corona hasta la posición “A”
MODELOS CON CRONÓGRAFO
Consulta todos los cronógrafos para determinar tu tipo de reloj
TIPO 1
CB
A
BOTÓN “A”
BOTÓN “B”
CRONÓMETRO
SEGUNDERO
PEQUEÑA
SEGUNDERO POSICIÓN DE LA CORONA
BOTÓN “C”
CRONÓMETRO
MANECILLA DE
LAS HORAS
CRONÓMETRO
MANECILLA DE 1/20 SEG.
POSICIÓN NORMAL
• Posiciones “A”, “B” y “C” de la corona
• Botones “A” (derecha) y “B” (izquierda)
• Las manecillas de horas, minutos y el segundero pequeño (índice de las 6)
muestran la hora
• El índice de las 12 muestra los “minutos transcurridos” para el cronógrafo
• El índice de las 9 muestra las “horas transcurridas” para el cronógrafo
• El segundero de barrido muestra los “segundos transcurridos” para
el cronógrafo
HORA, CALENDARIO, CRONÓGRAFO
Este reloj con cronógrafo tiene tres funciones:
HORA
PARA AJUSTAR LA HORA:
1. TIRA de la corona hacia fuera hasta la posición “C”
2. GIRA la corona en cualquiera de los dos sentidos hasta la hora correcta.
3. EMPUJA la corona hasta la posición “A”
CALENDARIO
PARA AJUSTAR EL CALENDARIO
1. TIRA de la corona hacia fuera hasta la posición “B”
2. GIRA la corona en sentido horario hasta la posición correcta
3. EMPUJA la corona hasta la posición “A”
CRONÓGRAFO
• El cronógrafo puede medir:
• Minutos transcurridos hasta 1 hora (índice de las 12)
• Horas transcurridas hasta 12 horas (índice de las 9)
• Segundos transcurridos hasta 1 minuto (segundero de barrido)
ANTES DE USAR EL CRONÓGRAFO:
Ajusta todas la manecillas a la posición de “0” o 12 horas.
PARA AJUSTAR LAS MANECILLAS DEL CRONÓGRAFO:
1. TIRA de la CORONA hacia fuera hasta la posición “C”
2. PULSA el botón “A” de forma intermitente hasta que el segundero se ajuste a
la posición de “0” o 12 horas
3. PULSA el botón “B” de forma intermitente hasta que las manecillas del índice
de las 12 se ajusten a la posición de “0” o 12 horas
4. EMPUJA la corona hasta la posición “A”
NOTA: asegúrate de que el cronógrafo esté detenido y puesto a cero antes de
ajustarlo.
NOTA: PULSAR y MANTENER OPRIMIDOS los botones “A” o “B” hará que las
manecillas se muevan de forma continua hasta que se suelte el botón.
MEDICIÓN ESTÁNDAR DE CRONÓGRAFO:
1. PULSA el botón “A” para iniciar el cronometraje.
2. PULSA el botón “A” para detener el cronometraje.
3. PULSA el botón “B” para reiniciar.

12
ESPAÑOL 222-095001-02
TIPO 2
BC
BOTÓN“A”
FECHA
CRONÓ-GRAFO
SEGUNDOS
POSICIÓN DE
LA CORONA
BOTÓN“B”
SEGUNDERO PEQUEÑO
CRONÓGRAFO
HORA
CRONÓGRAFO
MINUTOS
HORA
MINUTERO
7
POSICIÓN NORMAL“A
”
PARA AJUSTAR LA HORA
1. TIRA de la corona hacia fuera hasta la 2ª posición “C”.
2. Gira la corona para ajustar las manecillas de hora y minutos.
3. Cuando se tira de la corona de vuelta a la posición normal “A”, la manecilla
pequeña de segundos empieza a correr.
PARA AJUSTAR LA FECHA
1. TIRA de la corona hacia fuera hasta la posición “B”.
2. Gira la corona en sentido antihorario para ajustar la fecha. *Si la fecha
se ajusta entre las 9:PM y la 1:AM, puede que no avance la fecha
al día siguiente.
3. Después de ajustar la fecha, empuja la corona de vuelta a la posición
normal “A”.
USO DEL CRONÓGRAFO
Este cronógrafo puede cronometrar y mostrar el tiempo en fracciones de 1/2
de segundo hasta un máximo de 11 horas, 59 minutos, 59 segundos.
La manecilla de segundos sigue marcando continuamente durante 11 horas,
59 minutos, 59 segundos después de comenzar.
CRONOMETRAR EL TIEMPO CON EL CRONÓGRAFO
1. El cronógrafo puede ser iniciado y detenido cada vez que se pulsa
el botón “A”.
2. Pulsando el botón “B” se reinicia el cronógrafo, y las manecillas de segundos,
minutos y hora se devuelven a la posición cero.
MEDICIÓN DE TIEMPO PARADA
REINICIO
REINICIO DEL CRONÓGRAFO (INCLUYENDO DESPUÉS DE CAMBIAR
LA PILA)
Este procedimiento se debe realizar cuando la manecilla de segundos no vuelve
a cero después de haber reiniciado el cronógrafo, incluyendo después de haber
cambiado la pila.
1. TIRA de la corona hacia fuera hasta la 2ª posición “C”.
2. Pulsa el botón “A” para ajustar el segundero del cronógrafo en la posición 0.
Se puede avanzar rápidamente la manecilla oprimiendo el botón “A”
de forma continua.
3. Una vez que la manecilla haya vuelto a la posición cero, devuelve la corona
a la posición normal.
*No empujes la corona a la posición normal mientras el segundero del
cronógrafo esté volviendo a la posición cero. Se detiene en el recorrido cuando
la corona es devuelta a la posición normal, y su posición es reconocida como
la posición cero.
TIPO 3
B
DC
BOTÓN “A”
FECHA
CRONÓ-GRAFO
1/20 SEGUNDOS
POSICIÓN DE
LA CORONA
BOTÓN “B”
SEGUNDOS
CRONÓGRAFO
SEGUNDOS
CRONÓGRAFO
MINUTOS
HORA
MINUTOS
POSICIÓN NORMAL
A
OPERACIONES BÁSICAS
• El índice de las 6 muestra segundos.
• El índice de las 10 muestra los “minutos transcurridos” para el cronógrafo.
• El índice de las 2 muestra las “vigésimas de segundo transcurridas” para
el cronógrafo.
• El segundero del cronógrafo muestra los “segundos transcurridos” para
el cronógrafo.
HORA
PARA AJUSTAR LA HORA:
1. TIRA de la corona hacia fuera hasta la posición “C”.
2. GIRA la corona en cualquiera de los dos sentidos hasta la hora correcta.
3. EMPUJA la corona hasta la posición “A”.
PARA AJUSTAR UNA ZONA HORARIA DISTINTA:
1. TIRA de la corona hacia fuera hasta la posición “B”.
2. GIRA la corona en cualquiera de los dos sentidos para mover la manecilla
horaria en incrementos de una hora.
CALENDARIO
PARA AJUSTAR EL CALENDARIO:
1. TIRA de la corona hacia fuera hasta la posición “B”.
2. GIRA la corona en cualquiera de los dos sentidos para mover la manecilla
horaria. Dos vueltas completas con respecto a la posición de las 12 en
punto adelantarán la fecha o la retrasarán. Así corregirás tanto la fecha como
la hora para las 24 horas.
3. EMPUJA la corona hasta la posición “A”.
NOTA: la fecha cambia automáticamente cada 24 horas.
CRONÓGRAFO
EL CRONÓGRAFO PUEDE MEDIR:
• Vigésimas de segundo transcurridas hasta un segundo (índice de las 2).
• Segundos transcurridos hasta 1 minuto (segundero del cronógrafo).
• Minutos transcurridos hasta 30 minutos (índice de las 10).
NOTA: el cronógrafo funcionará continuamente durante 4 horas, luego
se detendrá y se pondrá a cero.
NOTA: la aguja de vigésimas de segundo no se mueve durante la función
cronógrafo; se indican las vigésimas de segundo cuando el cronógrafo está
detenido y no ha vuelto a cero.
ANTES DE UTILIZAR EL CRONÓGRAFO, ajuste todas las manecillas
del cronógrafo a las posiciones “0” o 12 horas.
PARA AJUSTAR LAS MANECILLAS DEL CRONÓGRAFO:
1. TIRA de la corona hacia fuera hasta la posición “B”.
2. PULSA el botón “B” hasta que la manecilla del índice de las 10 vuelva
a la posición “30”.
3. TIRA de la corona hacia fuera hasta la posición “C”.
4. PULSA el botón “A” hasta que el segundero del cronógrafo vuelva
a las posiciones “0”, “60” o 12 horas.
5. PULSA el botón “B” hasta que la manecilla del índice de las 2 vuelva a la
posición “0”.
6. EMPUJA la corona hasta la posición “A”.
NOTA:
• Asegúrate de que el cronógrafo se haya detenido y reiniciado antes
de ajustarlo.
• Al PULSAR y MANTENER los botones “A” o “B” durante dos segundos,
las manecillas se moverán de forma continua hasta que se suelte el botón.

13
ESPAÑOL 222-095001-02
MEDICIÓN ESTÁNDAR DEL CRONÓGRAFO:
1. PULSA el botón “A” para iniciar el cronometraje.
2. PULSA el botón “A” para detener el cronometraje.
3. PULSA el botón “B” para reiniciar.
MEDICIÓN DE TIEMPO ACUMULATIVO:
1. PULSA el botón “A” para iniciar el cronometraje.
2. PULSA el botón “B” para tomar una fracción.
3. PULSA el botón “B” para continuar el cronometraje.
4. PULSA el botón “A” para detener el cronometraje.
5. PULSA el botón “B” para reiniciar.
LUZ NOCTURNA INDIGLO®
Con la corona en la posición “A”, EMPUJA la corona hasta la posición “D”. Se
iluminará la esfera completa. La tecnología electroluminescente utilizada en la
luz nocturna INDIGLO®ilumina toda la esfera del reloj de noche en condiciones
de poca luz.
FUNCIÓN NIGHT-MODE®:
1. PULSA y MANTÉN OPRIMIDA la corona en la posición “D” durante 4
segundos para activar la función NIGHT-MODE®. OPRIMIR cualquier botón
hará que la luz nocturna INDIGLO®permanezca encendida durante 3
segundos.
2. La función NIGHT-MODE®permanecerá activada durante 8 horas.
3. O PULSA y MANTÉN OPRIMIDA la corona en la posición “D” durante 4
segundos para desactivarla.
SI LAS MANECILLAS DEL CRONÓMETRO NO REGRESAN A LA
POSICIÓN “0” CUANDO SE REINICIA EL CRONÓMETRO:
1. TIRA de la corona hacia fuera hasta la posición “B”.
2. PULSA los botones “A” o “B” para ajustar las manecillas en la posición 0
3. EMPUJA la corona hasta la posición “A”
TIPO 4
AB
OPERACIONES BÁSICAS
• El índice de las 6 muestra los “segundos transcurridos” para el cronógrafo
• El índice de las 9 muestra los “minutos transcurridos” para el cronógrafo
• El índice de las 3 muestra la hora actual en un formato de 24 horas
HORA
PARA AJUSTAR LA HORA:
NOTA: es preciso detener y poner el cronómetro a cero antes de ajustar
la hora.
1. Tira de la corona hacia fuera hasta la posición B.
2. Gira la corona en cualquier sentido hasta que las manecillas de 24 horas,
de hora y de minutos muestren la hora correcta.
3. Empuja la corona hasta la posición A.
PARA AJUSTAR LAS MANECILLAS DEL CRONÓMETRO
A LA POSICIÓN 0 (CERO):
1. Tira de la corona hacia fuera hasta la posición B.
2. Pulsa el botón “A” para mover las manecillas de minutos y segundos del
cronómetro en sentido antihorario hasta la posición 0. Pulsa el botón “B”
para mover las manecillas de minutos y segundos del cronómetro en sentido
horario hasta la posición 0.
3. Empuja la corona hasta la posición A.
CRONÓGRAFO
EL CRONÓGRAFO PUEDE MEDIR:
• Segundos transcurridos hasta un minuto (índice de las 6)
• Minutos transcurridos hasta una hora (índice de las 9)
MEDICIÓN ESTÁNDAR DEL CRONÓGRAFO
• Pulsa el botón “A” para iniciar el cronometraje
• Pulsa el botón “A” para detener el cronometraje
• Pulsa el botón “B” para devolver el cronógrafo a la posición cero.
MEDICIÓN DE TIEMPO PARCIAL
• Pulsa el botón “A” para iniciar el cronometraje
• Pulsa el botón “B” para tomar un tiempo parcial
• Pulsa el botón “B” para continuar el cronometraje
• Pulsa el botón “A” para detener el cronometraje
• Pulsa el botón “B” para devolver el cronógrafo a la posición cero.
TIPO 5
BC
7
PARA AJUSTAR LA HORA
1. TIRA de la corona hacia fuera hasta la 2ª posición “C”.
2. Gira la corona para ajustar las manecillas de hora y minutos. Asegúrate
de que la hora de 24 horas es correcta.
3. Cuando se tira de la corona de vuelta a la posición normal “A”, la manecilla
de segundos empieza a correr.
PARA AJUSTAR LA FECHA
1. TIRA de la corona hacia fuera hasta la posición “B”.
2. Gira la corona en sentido antihorario para ajustar la fecha. *Si la fecha se
ajusta entre las 9:00PM y la 1:00AM, puede que no avance la fecha al
día siguiente.
3. Después de ajustar la fecha, empuja la corona de vuelta a la posición
normal “A”.
USO DEL CRONÓGRAFO
Este cronógrafo puede cronometrar y mostrar el tiempo en fracciones de 1
de segundo hasta un máximo de 29 minutos, 59 segundos. La manecilla de
segundos sigue moviéndose continuamente durante 30 minutos después de
comenzar.
MEDICIÓN ESTÁNDAR DEL CRONÓGRAFO:
1. PULSA el botón “A” para iniciar el cronometraje.
2. PULSA el botón “A” para detener el cronometraje.
3. PULSA el botón “B” para reiniciar.
MEDICIÓN DE TIEMPO ACUMULATIVO:
1. PULSA el botón “A” para iniciar el cronometraje.
2. PULSA el botón “B” para tomar una fracción.
3. PULSA el botón “B” para continuar el cronometraje.
4. PULSA el botón “A” para detener el cronometraje.
5. PULSA el botón “B” para reiniciar.
MANECILLA
DE LAS HORAS
SEGUNDERO
CRONÓMETRO
MINUTERO
CRONÓMETRO
SEGUNDERO
BOTÓN “A”
MINUTERO
POSICIÓN DE
LA CORONA
POSICIÓN NORMAL “1”
BOTÓN “B”
MANECILLA
DE 24 HORAS
BOTÓN “A”
MINUTERO
POSICIÓN DE LA
CORONA
POSICIÓN NORMAL “A”
BOTÓN “B”
SEGUNDERO
FECHA
HORA DE 24
HORAS
MINUTOS DEL
CRONÓGRAFO
SEGUNDOS DEL
CRONÓGRAFO
HORA

14
ESPAÑOL 222-095001-02
REINICIO DEL CRONÓGRAFO
(INCLUYENDO DESPUÉS DE CAMBIAR LA PILA)
Este procedimiento se debe realizar cuando la manecilla de minutos o la
de segundos no vuelven a cero después de haber reiniciado el cronógrafo,
incluyendo después de haber cambiado la pila.
1. TIRA de la corona hacia fuera hasta la 2ª posición “C”.
2. Pulsa el botón “A” o “B” para poner las manecillas del cronómetro en la
posición cero. Los movimientos del minutero y el segundero del cronómetro
están sincronizados. Para poner el minutero del cronómetro en la posición
cero, sigue moviendo el segundero hasta que el minutero llegue a la posición
cero.
3. Una vez que las manecillas haya vuelto a la posición cero, devuelve la corona
a la posición normal.
ANILLO DE TIEMPO TRANSCURRIDO
Si tu reloj cuenta con un anillo giratorio externo en la esfera, con números que
corresponden a los minutos, puedes usar este anillo de tiempo transcurrido
para medir el tiempo de una actividad desde el inicio o para marcar el tiempo de
finalización de una actividad.
PARA MEDIR EL TIEMPO DE UNA ACTIVIDAD DESDE EL INICIO:
Coloca el triángulo de Iniciar/Detener en la hora (hora o minuto) en que
comienza la actividad (como se muestra a la izquierda en la ilustración de
abajo). Al terminar, puedes ver cuánto tiempo tomó la actividad.
PARA MEDIR EL TIEMPO RESTANTE:
Coloca el triángulo en la posición de hora o minuto en que deseas completar
la actividad y mira periódicamente el reloj para verificar el avance hasta ese
objetivo.
En la ilustración de la página previa a la derecha puedes detenerte cuando el
minutero llegue a la posición de 20 minutos después de la hora.
ANILLO DE TACÓMETRO
La función de tacómetro se puede usar para medir la velocidad en millas
por hora (MPH), millas náuticas por hora (nudos) o kilómetros por hora (KPH)
mediante el segundero de barrido y la escala en el muro sobre la esfera del
reloj. Necesitas saber la distancia real que estás cubriendo en millas o km.
Inicia el cronógrafo con el segundero en cero (en la posición de las 12 en
punto). Dentro del primer minuto, el segundero apuntará a la velocidad para
un trayecto de una milla (o un kilómetro): si toma 45 segundos, la manecilla
apuntará a 80 en esa posición; 80 MPH u 80 KPH.
Si en el primer minuto se cubre una distancia mayor a una milla o un kilómetro,
multiplica el número del tacómetro por la distancia para obtener la velocidad
real: si recorriste 1,2 millas en 45 segundos, multiplica el 80 por 1,2 - 96 MPH:
ANILLO GIRATORIO
Si tu reloj está equipado con un anillo móvil alrededor de la esfera marcado con
las letras “N”, “E”, “W”, “S” (para las cuatro direcciones de la brújula) o grados
de brújula, puedes usar esta función para encontrar una orientación aproximada
de brújula.
1. Coloca el reloj en una superficie horizontal o sujétalo de manera que la esfera
esté paralela al suelo.
2. Ubica el sol y apunta la manecilla horaria al sol.
3. Por la mañana, gira el anillo hasta que la marca “S” (sur) esté a medio camino
entra la manecilla de las horas y las 12:00 (después de la manecilla de las
horas o en la distancia más corta entre la manecilla horaria y las 12:00).
4. Por la tarde, gira el anillo hasta que “S” esté antes de la manecilla de las
horas y a mitad de camino entre la manecilla de las horas y las 12:00.
12 1
2
3
4
5
6
7
8
9
10
11
N
S
W
E
CÓMO AJUSTAR LA PULSERA
(Las variaciones de las siguientes secciones de pulseras se aplican a todos
los modelos de relojes).
PULSERA CON BROCHE DESLIZANTE
1. Abre la chapa de cierre.
2. Mueve el broche hasta lograr la longitud de pulsera deseada.
3. Ejerce presión mientras sostienes la chapa de cierre y desliza el broche hacia
atrás y hacia delante hasta que se acople en las ranuras situadas en la parte
de abajo de la pulsera.
4. Presiona hacia abajo la chapa de cierre hasta que encaje a presión y quede
cerrada. El broche puede dañarse si se usa una fuerza excesiva.
PULSERA CON BROCHE PLEGABLE
1. Localiza el pasador elástico que conecta la pulsera al broche.
2. Utilizando una herramienta puntiaguda, empuja el pasador elástico hacia
dentro y gira suavemente la pulsera para desacoplarla.
3. Determina el tamaño de la muñeca y después introduce el pasador elástico
en el agujero inferior correcto.
4. Empuja el pasador hacia abajo, alinéalo con el agujero superior y suéltalo
para que encaje en su sitio.
Fig. 2Fig. 1 Fig. 3
RETIRADA DE ESLABONES DE LA PULSERA
CÓMO QUITAR ESLABONES:
1. Coloca la pulsera en posición vertical e introduce una herramienta puntiaguda
en la abertura del eslabón.
2. Empuja el pasador con fuerza en el sentido de la flecha hasta que el eslabón
se suelte (los pasadores están diseñados para ser difíciles de quitar).
3. Repite el procedimiento hasta que se haya quitado el número de eslabones
deseado.

15
ESPAÑOL 222-095001-02
CÓMO VOLVER A ENSAMBLAR:
1. Vuelve a unir las piezas de la pulsera.
2. Empuja el pasador nuevamente hacia el interior del eslabón en sentido
contrario al indicado por la flecha.
3. Presiona el pasador hacia abajo hasta que encaje firmemente en la pulsera y
quede a ras.
PILA
Timex recomienda encarecidamente que un minorista o un joyero cambien
la pila. Si procede, pulsa el botón de reinicio (Reset) cuando cambies la pila.
El tipo de pila se indica en la parte posterior de la carcasa. La vida útil estimada
de la pila depende de ciertas suposiciones relacionadas con el uso; la vida útil
de la pila puede variar según el uso real.
NO ARROJES LA PILA AL FUEGO. NO LA RECARGUES. MANTÉN
LAS PILAS SUELTAS FUERA DEL ALCANCE DE LOS NIÑOS.
GARANTÍA INTERNACIONAL DE TIMEX
http://www.timex.es/es_ES/productWarranty.html
©2022 Timex Group USA, Inc. TIMEX, INDIGLO y NIGHT-MODE son marcas
comerciales registradas de Timex Group B.V. y sus afiliados.

16
FRANÇAIS 222-095001-02
SOMMAIRE
Comment mettre votre montre en marche .......................................... 17
Résistance aux chocs et à l’eau..........................................................17
Veilleuse Indiglo®................................................................................ 17
Modèles analogique et numérique ...................................................... 17
Modèles multi-fonctions...................................................................... 19
Modèles de Jour/Date/AM (matin)/PM (soir) Soleil/Lune...................... 19
Modèles chronographes ..................................................................... 19
Bague de durée écoulée..................................................................... 22
Bague de tachymètre ......................................................................... 22
Bague de la boussole......................................................................... 22
Comment ajuster le bracelet ............................................................... 23
Démontage de maillons du bracelet.................................................... 23
Pile ..................................................................................................... 23
Garantie.............................................................................................. 23

17
FRANÇAIS 222-095001-02
Félicitations pour votre achat d’une montre TIMEX®. Lire ces instructions
attentivement pour bien comprendre le fonctionnement de cette montre Timex.
Il est possible que ce modèle ne présente pas toutes les fonctions décrites dans
le dépliant.
Pour de plus amples renseignements, visiter le site : Timex.com
COMMENT METTRE VOTRE MONTRE EN MARCHE
Pour mettre la montre en marche, retirer la bague de protection en plastique
située sous la couronne, puis enfoncer la couronne vers le boîtier. L’aiguille des
secondes commencera àavancer par intervalles d’une seconde.
Pour certaines montres étanches en eaux profondes, la couronne de réglage
doit être vissée afin d’en garantir l’étanchéité. Si le boîtier présente un bouton
fileté, la couronne doit être vissée après le réglage de la montre.
Pour visser, enfoncer fermement la couronne sur le bouton fileté et la maintenir
enfoncée tout en la faisant tourner dans le sens horaire. Continuer à visser la
couronne jusqu’à ce qu’elle soit bien serrée. Il faudra dévisser la couronne
(dans le sens anti-horaire) avant de la tirer la prochaine fois que la montre doit
être réglée.
RÉSISTANCE AUX CHOCS ET À L’EAU
Si la montre est étanche, la profondeur maximale (WR_M) est indiquée.
Profondeur d'étanchéité p.s.i.a. * Pression de l’eau sous la surface
30m/98pi 60
50m/164pi 86
100m/328pi 160
200m/656pi 284
*livres par pouce carré (abs.)
AVERTISSEMENT: POUR PRÉSERVER L’ÉTANCHÉITÉ, NE PAS
ENFONCER LES BOUTONS NI TIRER LA COURONNE SOUS L’EAU,
SAUF SUR LES MODÈLES ÉTANCHES JUSQU’À 200 MÈTRES.
1. La montre est étanche aussi longtemps que le verre, les couronnes et le
boîtier sont intacts.
2. La montre n’est pas conçue pour la plongée. Ne pas l’utiliser dans ces
conditions.
3. Rincer à l’eau douce après tout contact avec l’eau de mer.
4. La résistance aux chocs est indiquée sur la face de la montre ou le dos du
boîtier. Les montres sont conçues pour se conformer à l’essai de choc ISO.
Toutefois, prendre garde àéviter d’endommager le verre.
VEILLEUSE INDIGLO®
Appuyez sur le bouton ou la couronne pour activer l’éclairage. La technologie
électroluminescente utilisée dans la veilleuse INDIGLO®permet d’illuminer le
cadran de la montre la nuit et dans des conditions de faible éclairage.
MODÈLES ANALOGIQUE ET NUMÉRIQUE
MODÈLE ANALOGIQUE/NUMÉRIQUE À 4 BOUTONS-POUSSOIR AVEC
VEILLEUSE INDIGLO®ET FONCTION NIGHT-MODE®
BOUTON-POUSSOIR
«C»
BOUTON-POUSSOIR
«D»
AB
AB
BOUTON-POUSSOIR
«B»
BOUTON-POUSSOIR
«A»
POSITION
COURONNE
COURONNE
POSITION
BOUTON-POUSSOIR
«B»
BOUTON-POUSSOIR
«A»
BOUTON-POUSSOIR
«C»
BOUTON-POUSSOIR
«D»
ACTIVATION DE LA VEILLEUSE INDIGLO®
1. APPUYER sur le bouton-poussoir « B » pour illuminer toute la face de la
montre (analogique et numérique).
UTILISATION DE LA FONCTION NIGHT-MODE®
1. TENIR le bouton-poussoir « B » ENFONCÉ pendant 3 secondes jusqu’à ce
qu’un bip sonore se fasse entendre.
2. Appuyer sur un bouton-poussoir quelconque pour activer la veilleuse
INDIGLO®et illuminer le cadran pendant 3 secondes.
3. La fonction NIGHT-MODE®reste active pendant 3 heures.
4. Pour désactiver la fonction NIGHT-MODE, TENIR le bouton-poussoir « B »
ENFONCÉ pendant 3 secondes.
AFFICHAGE ANALOGIQUE DE L’HEURE POUR RÉGLER L’AFFICHAGE
ANALOGIQUE DE L’HEURE
1. TIRER la couronne en position « B ».
2. TOURNER la couronne dans un sens ou dans l’autre jusqu’à acher l’heure
exacte.
3. ENFONCER la couronne en position « A ».
AFFICHAGE NUMÉRIQUE
1. L’achage numérique passe à une nouvelle fonction chaque fois que vous
APPUYEZ sur le bouton-poussoir « A ». (Tel qu’illustré ci-dessous) :
HEURE/CALENDRIER
ALARME QUOTIDIENNE
MINUTERIE RÉGRESSIVE
CHRONOGRAPHE
DOUBLE AFFICHAGE DE L’HEURE
DÉBUT
Appuyer une fois
sur le bouton MODE.
DOUBLE AFFICHAGE DE L’HEURE CHRONOGRAPHE
COMPTE À REBOURS
MINUTERIE
HEURE/
CALENDRIER ALARME
QUOTIDIENNE
CALENDRIER
HEURESMINUTES SECONDESMOIS DATE JOUR
Appuyer une fois
sur le bouton MODE.
Appuyer une fois
sur le bouton MODE.
RÉGLAGE DE L’HEURE ET DU CALENDRIER :
1. APPUYER sur le bouton-poussoir « A » pour acher HEURE / CALENDRIER.
2. TENIR le bouton-poussoir « D » ENFONCÉ. HOLD s’ache jusqu’àce que
les secondes clignotent.
3. APPUYER sur le bouton-poussoir « C » pour remettre les secondes à zéro.
4. APPUYER sur le bouton-poussoir « A » pour faire clignoter l’heure.

18
FRANÇAIS 222-095001-02
5. APPUYER sur le bouton-poussoir « C » pour avancer l’heure.
6. APPUYER sur le bouton-poussoir « A » et « C » comme ci-dessus pour
régler les dizaines de minutes, les minutes, l’année, le mois, la date,
le jour et le format d’achage 12 ou 24heures.
7. ENFONCER le bouton-poussoir « D » pour finir le réglage.
8. Acher ou sélectionner l’HEURE ou le CALENDRIER pour les faire apparaître
sur l’achage numérique.
• APPUYER sur le bouton-poussoir « C » pour acher le CALENDRIER
pendant 2 secondes.
• TENIR le bouton-poussoir « C» ENFONCÉ pendant 3secondes jusqu’à ce
que la montre émette un bip sonore et passe à l’achage du CALENDRIER.
• Pour acher ou passer à l’achage de l’ HEURE, répéter les étapes décrites
ci-dessus.
REMARQUE: « A » ou « P » apparaît lorsque le format 12-Heures est
sélectionné.
• Régler cette heure pour qu’elle corresponde à l’achage analogique de
l’heure ou àun autre fuseau horaire.
• En mode réglage, TENIR le bouton-poussoir « C» ENFONCÉ pendant
2secondes pour activer l’avance rapide.
S’AFFICHE
PENDANT 3
SECONDES
SUIVI PAR LE É
COURANT DE
L’HEURE ET DU
FUSEAU HORAIRE
DE L’ALARME.
RÉGLAGE DE L’ALARME QUOTIDIENNE
1. APPUYER sur le bouton-poussoir « A » pour acher l’écran ALARME
QUOTIDIENNE. « ALARM » s’ache pendant 3 secondes, suivi par le
réglage courant de l’heure et du fuseau horaire de l’alarme. Le symbole du
mode ALARME « AL » et le symbole du fuseau horaire courant, «T1» ou
«T2» selon le cas, s’achent alternativement pour fournir des informations
complètes.
2. APPUYER sur le bouton-poussoir « D » pour faire clignoter le fuseau horaire.
3. APPUYER sur le bouton-poussoir « C » pour sélectionner le fuseau horaire.
4. APPUYER sur le bouton-poussoir « A » pour faire clignoter l’heure.
5. APPUYER sur le bouton-poussoir « C » pour avancer l’heure.
6. APPUYER sur le bouton-poussoir « A » et « C » comme ci-dessus pour régler
les dizaines de minutes et les minutes.
7. ENFONCER le bouton-poussoir « D » pour finir le réglage.
8. L’alarme est automatiquement activée dès que le réglage Ss’ache.
REMARQUE:
• Lorsque l’alarme se déclenche, elle émet des bips sonores pendant
20secondes.
• APPUYER sur un bouton quelconque pour couper l’alarme sonore.
• En mode réglage, TENIR le bouton-poussoir « C» ENFONCÉ pendant
2secondes pour activer l’avance rapide.
RÉGLAGE DE L’ALARME QUOTIDIENNE OU DU CARILLON HORAIRE
(MARCHE/ARRÊT)
1. APPUYER sur le bouton-poussoir « A » pour acher l’écran ALARME
QUOTIDIENNE.
2. APPUYER sur le bouton-poussoir « C » pour activer ou désactiver l’alarme
quotidienne et le carillon.
REMARQUE:
• aou Cs’ache ou disparaît selon que l’alarme quotidienne est activée ou
désactivée.
• NouBs’ache ou disparaît selon que le carillon est activé ou désactivé.
• L’alarme est synchronisée avec l’achage numérique de l’heure et non avec
l’achage analogique.
• L’alarme sonne uniquement lorsque le fuseau horaire numérique (T1 ou T2)
sélectionné sous le mode de réglage de l’alarme est aché, et confirmé par
le symbole de l’alarme aou C.
UTILISATION DU COMPTE À REBOURS
MODE RÉGLAGE
AIGUILLE DES HEURESMINUTE
1. APPUYER sur le bouton-poussoir « A » pour acher l’écran COMPTE À
REBOURS. « 24 HR TR » s’ache.
2. APPUYER sur le bouton-poussoir « D » pour faire clignoter l’heure.
3. APPUYER sur le bouton-poussoir « C » pour avancer l’heure.
4. APPUYER sur le bouton-poussoir « A » pour régler les dizaines de minutes.
5. APPUYER sur le bouton-poussoir « C » pour faire avancer les dizaines
de minutes.
6. APPUYER sur le bouton-poussoir « A » et « C » comme ci-dessus pour
régler les minutes.
7. ENFONCER le bouton-poussoir « D » pour finir le réglage.
8. APPUYER sur le bouton-poussoir « C » pour démarrer la minuterie.
9. APPUYER sur le bouton-poussoir « D » pour arrêter la minuterie.
10. APPUYER sur le bouton-poussoir « D » une nouvelle fois pour redémarrer
la minuterie à l’heure préréglée.
REMARQUE: Lorsque la minuterie arrive à zéro, elle émet des bips sonores
pendant 20 secondes.
APPUYER sur un bouton-poussoir quelconque pour couper l’alarme sonore
de la minuterie.
« T » s’ache pour indiquer que le compteur à rebours est en marche.
Compte àrebours jusqu’à24 heures.
En mode réglage, TENIR le bouton-poussoir « C» ENFONCÉ pendant
2secondes pour activer l’avance rapide.
UTILISATION DU CHRONOMÈTRE POUR DES MESURES STANDARD :
OU
1. APPUYER sur le bouton-poussoir « A » pour acher l’écran
CHRONOMÈTRE; « CH LAP » ou « CH SPL » s’ache.
2. APPUYER sur le bouton-poussoir « C » pour commencer le chronométrage.
3. APPUYER sur le bouton-poussoir « D » pour arrêter le chronométrage.
4. APPUYER sur le bouton-poussoir « D » pour remettre à zéro.
UTILISATION DU CHRONOMÈTRE POUR MESURER LE TEMPS AU
TOUR OU INTERMÉDIAIRE :
1. APPUYER sur le bouton-poussoir « A » pour acher l’écran
CHRONOMÈTRE; « CH LAP » ou « CH SPL » s’ache.
2. APPUYER sur le bouton-poussoir « D » pour sélectionner le temps au tour
(LAP) ou intermédiaire (SPLIT).
3. APPUYER sur le bouton-poussoir « C » pour commencer le chronométrage.
4. APPUYER sur le bouton-poussoir « C » pour enregistrer le premier temps au
tour ou intermédiaire ; les chires se figent sur l’écran pendant 15 secondes;
« L » ou « S » clignote pour indiquer que le temps au tour ou intermédiaire
suivant est enregistré en arrière-plan.
5. APPUYER sur le bouton-poussoir « A » pour acher le chronométrage
en cours pendant que l’achage est figé.
6. APPUYER sur le bouton-poussoir « C » pour enregistrer un nouveau temps
au tour ou intermédiaire.
7. APPUYER sur le bouton-poussoir « D » pour arrêter.
8. APPUYER sur le bouton-poussoir « D » une nouvelle fois pour remettre
à zéro.
REMARQUE: Le CHRONOMÈTRE doit être remis à zéro pour pouvoir alterner
entre LAP et SPLIT.
Mesure des durées jusqu’à24 heures avec une résolution de 1/100 de seconde
pendant la première heure.

19
FRANÇAIS 222-095001-02
RÉGLAGE DU DOUBLE AFFICHAGE DE L’HEURE :
AIGUILLE DES HEURESMINUTE
1. APPUYER sur le bouton-poussoir « A » pour acher l’écran DUAL TIME
(double achage de l’heure). « T2 » s’ache à côté du double achage
de l’heure.
2. TENIR le bouton-poussoir « D » ENFONCÉ ; « HOLD » s’ache jusqu’à ce
que l’heure clignote.
3. APPUYER sur le bouton-poussoir « C » pour avancer l’heure.
4. APPUYER sur le bouton-poussoir « A » pour faire clignoter le mois.
5. APPUYER sur le bouton-poussoir « C » pour faire avancer le mois.
6. APPUYER sur le bouton-poussoir « A » et « C » comme ci-dessus pour régler
la date, le jour et le format d’achage 12 ou 24 heures.
7. ENFONCER le bouton-poussoir « D » pour finir le réglage.
REMARQUE: En mode réglage, APPUYER et tenir enfoncé le bouton-poussoir
« C » pendant 2 secondes pour activer l’avance rapide.
REMARQUE:
1. Lors du réglage de tout mode, si aucun bouton-poussoir n’est enfoncé
pendant 90 secondes, l’achage retourne automatiquement au mode
HEURE / CALENDRIER.
2. En tout autre mode autre que HEURE / CALENDRIER, chaque fois que le
bouton-poussoir « C » ou « D » est enfoncé, appuyer ensuite sur le bouton-
poussoir « A » fait automatiquement revenir l’achage au mode HEURE /
CALENDRIER.
MODÈLES MULTI-FONCTIONS
CB
A
POSITION DE LA COURONNE
POSITION NORMALE
La montre est dotée du cadran principal habituel et de trois petits cadrans
achant la date, le jour et l’heure au format 24 heures.
RÉGLAGE DU JOUR
1. Tirer la couronne complètement et tourner DANS LE SENS HORAIRE jusqu’à
acher la date courante.
2. Enfoncer la couronne pour redémarrer.
REMARQUE: Vous devez régler le jour avant de régler l’heure.
RÉGLAGE DE L’HEURE
1. Tirer la couronne complètement et tourner jusqu’àacher l’heure exacte.
2. Enfoncer la couronne pour redémarrer.
REMARQUE: L’achage de l’heure sur 24 heures se règle automatiquement.
RÉGLAGE DE LA DATE
Changement instantané de la date :
1. Tirer la couronne d’un cran et tourner DANS LE SENS HORAIRE jusqu’à
acher la date courante.
2. Enfoncer la couronne pour redémarrer.
MODÈLES DE JOUR/DATE/AM (MATIN)/PM (SOIR)
SOLEIL/LUNE
CBA
COURONNE
POSITION
DATE
JOUR
AM/PM
SOLEIL/LUNE
POSITION NORMALE
POUR RÉGLER L’HEURE :
1. TIRER la couronne en position « C ».
2. TOURNER la couronne dans le sens horaire jusqu’à acher l’heure correcte.
L’achage jour/am/pm/lune sera modifié aussi.
3. Pousser la couronne en position « A ».
REMARQUE: Pensez à régler am ou pm (soleil ou lune) lors du réglage
de l’heure.
POUR RÉGLER LA DATE :
1. TIRER la couronne en position « B ».
2. TOURNER la couronne dans le sens horaire jusqu’à acher la date correcte.
3. POUSSER la couronne en position « A »
POUR RÉGLER LE JOUR :
1. TIRER la couronne en position « C ».
2. Avancer l’heure de 24 heures pour changer le jour.
3. POUSSER la couronne en position « A »
MODÈLES CHRONOGRAPHES
Étudiez tous les chronomètres pour trouver votre modèle
TYPE 1
CB
A
BOUTON-POUSSOIR « A »BOUTON-POUSSOIR « B »
CHRONOGRAPHE
TROTTEUSE
PETITE
TROTTEUSE POSITION DE LA COURONNE
BOUTON-POUSSOIR « C »
CHRONOGRAPHE
AIGUILLE DES HEURES
CHRONOGRAPHE
AIGUILLE 1/20 SECONDE
POSITION NORMALE
• Position de couronne «A», «B» et «C»
• Bouton-poussoir «A» (droite) et «B» (gauche)
• Les aiguilles des heures et des minutes et la petite trotteuse (cadran interne
à 6 heures) indiquent l’heure
• Le cadran interne à 12 heures indique les « minutes écoulées » lors du
chronométrage
• Le cadran interne à 9 heures indique les « heures écoulées » lors du
chronométrage
• La trotteuse indique les « secondes écoulées » lors du chronométrage
HEURE, CALENDRIER, CHRONOMÈTRE
Cette montre à chronographe présente trois fonctions :
HEURE
RÉGLAGE DE L’HEURE:
1. TIRER la couronne en position « C »
2. TOURNER la couronne dans un sens ou dans l’autre jusqu’àacher l’heure
actuelle
3. ENFONCER la couronne en position « A »
Table of contents
Languages:
Other Timex Watch manuals

Timex
Timex 759-095003 User manual

Timex
Timex Data Link 150 User manual

Timex
Timex Metropolitan R User manual

Timex
Timex Marathon User manual

Timex
Timex w257 User manual

Timex
Timex 472-095002 User manual

Timex
Timex W-184 User manual

Timex
Timex 108 User manual

Timex
Timex W-207 User manual

Timex
Timex 176-095000 NA User manual

Timex
Timex IronMan Run x50+ User manual

Timex
Timex MARATHON M434 User manual

Timex
Timex 814-095006 User manual

Timex
Timex TX 800 Series User manual

Timex
Timex W217 User manual

Timex
Timex Ironman SLEEK 250-LAP User manual

Timex
Timex Ironman T5K018 User manual

Timex
Timex IronmanW-276 User manual

Timex
Timex SLEEK 150 User manual

Timex
Timex 558-095002 User manual