18 | Apprentice Plus User Guide Apprentice Plus User Guide | 19
Check the tension of the bobbin by holding the loaded
bobbin case in one hand. With one hand under the
bobbin case, hold the tail of thread and watch as the
thread ows out of the bobbin case. A slight bounce
should cause the bobbin case to slide down the thread.
If the thread slides out of the case as you pick it up, it
needs more tension. If it barely moves down the thread or
doesn’t move at all, it needs less tension. See gure 37
To adjust the tension: See gure 38
Use a small screwdriver to turn the largest set screw
on the bobbin case to adjust tension. Make very small
adjustments. Be very careful not to remove the screw as
it is very small and dicult to nd if lost. Remember, righty
(clockwise) tighty, lefty (counter clockwise) loosey.
To place the bobbin into the machine:
Step 1: Insert the bobbin into the bobbin case. It does
not matter which way you put the bobbin in, but once you
have it one way just keep doing it that way.
Step 2: Holding the bobbin case, pull the thread through
the slot.
Step 3: Draw the thread down and under the spring,
making sure the thread is in the highest position of the
bobbin case.
Step 4: Place the bobbin case in the machine. Always
listen for the pop as it engages in the machine. See
gure 39
We suggest using a soft bristle brush to wipe out the
bobbin case and the bobbin area. Canned air only blows
the lint around. By using the soft bristle brush you collect
the dust on the brush. Use a business or index card to
clean under the tension spring on the bobbin case. See
gure 40
Each day before you start quilting, unthread your machine
past the take up lever and remove the bobbin case. Place
a small drop of oil in the bobbin hook area before you
begin quilting. This will clean out the fuzz and lint. Place a
drop of oil in the bobbin hook area. Turn your machine on
to run at the slowest setting.
TIP: Lint has a tendency to build up in the bobbin case, especially with cotton threads. A tiny
amount of lint can cause a huge headache! Check the bobbin case each time you change a
bobbin to keep it clean.
Figure 40
Figure 39
Figure 38Figure 37
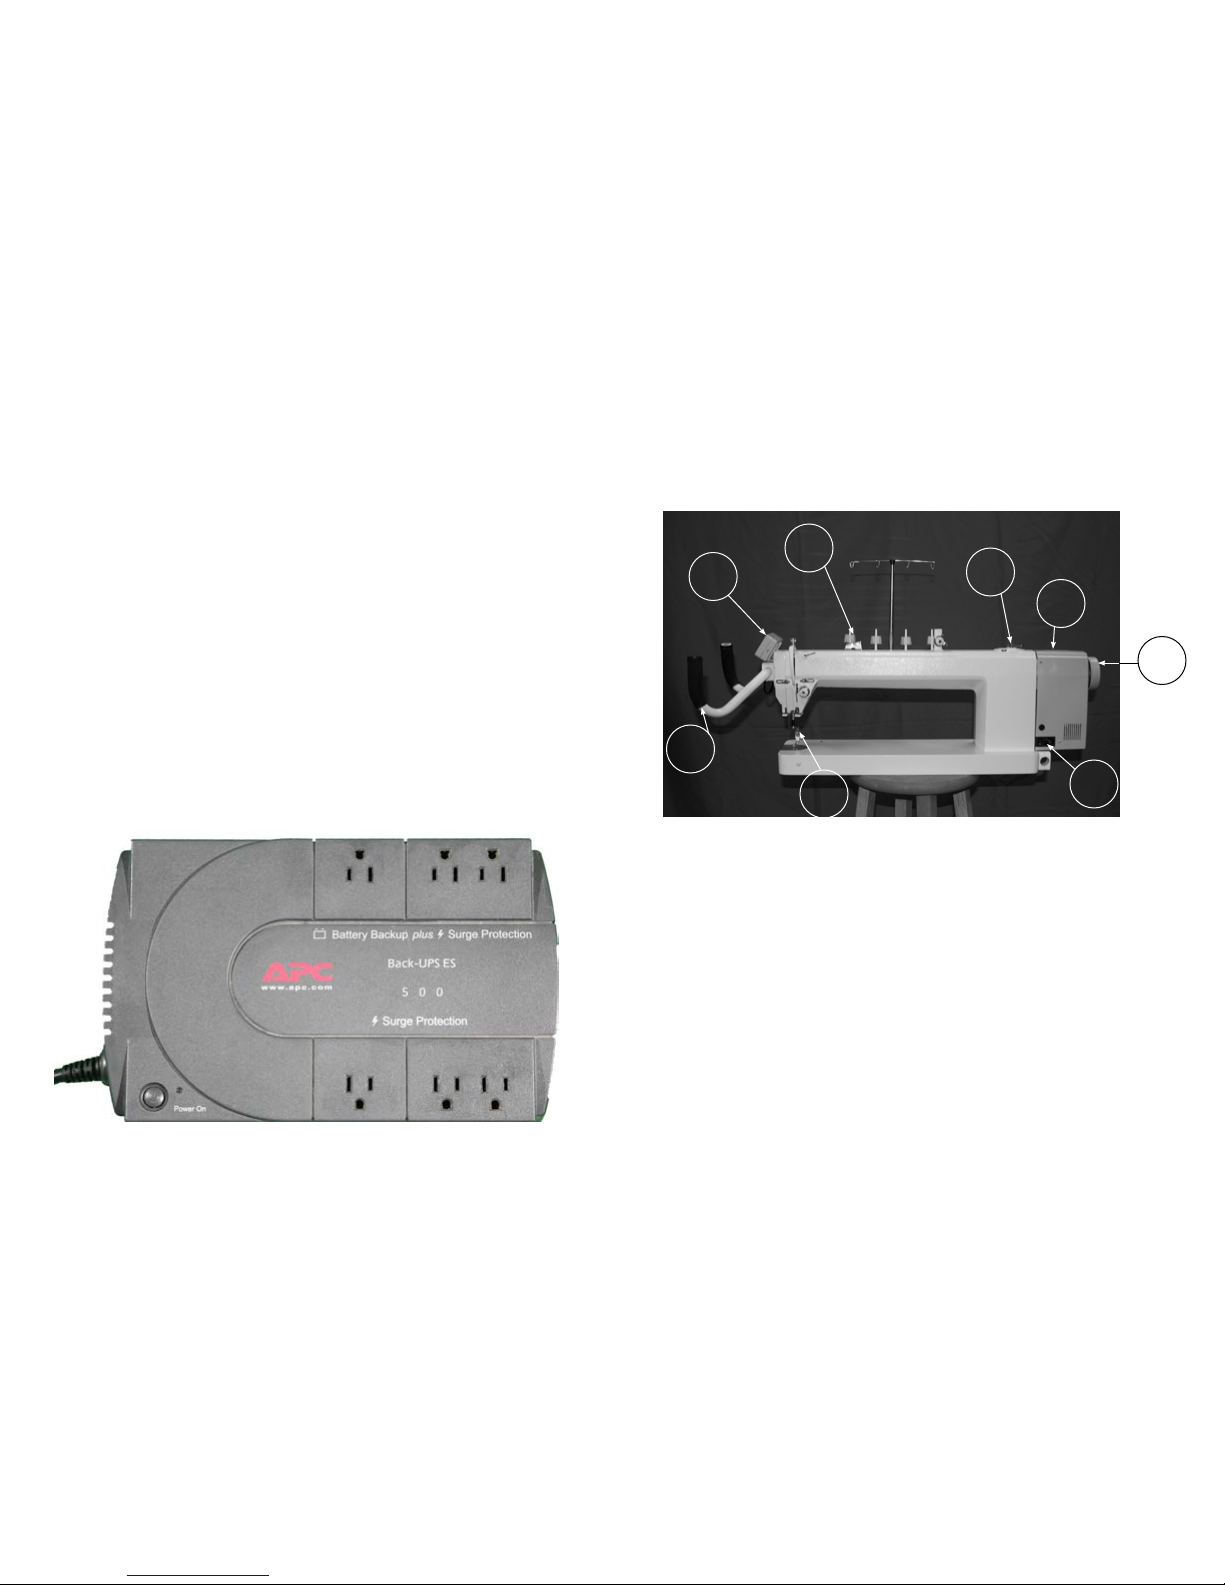
Threading Overview
This is a diagram of the front side of your Apprentice Plus.
This is the side that faces the fabric. The back of your
machine has the electrical outlet and stitch regulator
connectors.
The numbers have been assigned in threading order.
See gure 41
1. Upper Thread Guide
2. Three Hole Thread Guide
3. Tension Assembly Disc
4. Check Spring
5. Silver Angle Bracket
6. Thread Guide
7. Take Up Lever
Threading Your Apprentice Plus
Your Apprentice Plus is capable of sewing with many types of threads. One thing to keep in mind is
this machine is an industrial machine, so very light threads will be harder to use than more traditional
machine quilting threads. Use of the other threads is alright, as long as you adjust the tension and
slow down. These machines are tested with Superior King Tut thread, which has a long staple and is a
machine quilting thread. When we are at quilt shows we use King Tut on top with Sone on the bottom.
The reason for this is two threads of equal size will ride on top of each other and ght to interlock.
When using a smaller thread in the bobbin, you can get more thread on the bobbin and the threads will
interlock faster and with less ghting since the smaller thread will nestle right down into the twist of the
larger thread, creating a better locking of the stitches.
Lets get started threading the machine:
Step 1: Place a cone of thread on the thread
holder.
Step 2: Pull the thread through the eyelet above
the cone of thread. Make sure to use the eyelet
directly above the cone of thread. See gure 42
8. Thread Guide
9. Thread Guide
10. Thread Eyelet Above the Needle
11. Needle
Figure 41
Figure 42