Tinyloc MiniHond User manual

ESPAÑOL 1
MiniHond
Gundog tracking
3
Manual de instrucciones
User guide
Bedienungsanleitung
Manuel utilisation
Manuale di istruzioni
9
15
21
27

Inserción de las pilas
El transmisor MiniHOND se alimenta con dos pilas alcalinas de tipo AAA.
Se debe respetar la polaridad indicada por el dibujo (Fig.1.).
Duración de las pilas
Las horas de autonomía del transmisor en funcionamiento normal son 720 horas (30 días)
y en pila baja 120 horas (5 días).
¿Cuándo se debe sustituir la batería?
Mediante el sistema inteligente de detección de pila baja el transmisor MiniHOND le
indica en qué momento se deben sustituir las pilas, antes de que se pueda producir una
pérdida de potencia en la señal.
La indicación de pila baja se realiza mediante la emisión por parte del transmisor Mini-
HOND de dos pulsos continuos (pip-pip) cada 3 segundos.
IMPORTANTE: Se recomienda sustituir las pilas lo más pronto posible al de-
tectar pila baja, de este modo aseguramos siempre la máxima potencia del
transmisor.
Manual de instrucciones
Figura 1. Polaridad pilas
NO CORTOCIRCUITAR
LA PILA
MiniHOND
Atención al cliente
T. +34 902 444 232
ESPAÑOL 3

ESPAÑOL
4
ESPAÑOL 5
Funcionamiento Normal (Tracking)
Cuando el transmisor entra en funcionamiento, envía un pulso de 50ms cada 1,2 se-
gundos. El pulso coincide con el encendido del LED, de este modo se puede comprobar
fácilmente que el equipo está en funcionamiento. Además de constituir una gran ayuda
para localizaciones nocturnas o de baja luminosidad.
Características técnicas
NOTA: Se recomienda extraer las pilas si no se va a utilizar el equipo durante un
largo periodo de tiempo (2 meses), ya que se podría producir la descarga total
de las pilas.
Antenas
Antenas reemplazables por el usuario.
Debido a que las antenas se pueden llegar a deteriorar por el uso, estas se pueden
reemplazar simplemente desenroscando con una tuerca.
Encendido/Apagado del transmisor
El transmisor viene provisto de un interruptor magnético situado en la zona de acti-
vación/desactivación mediante el cual se podrá encender y apagar el transmisor sin
necesidad de abrir y cerrar la tapa de las pilas.
Encendido
Con las pilas insertadas y el transmisor apagado, se puede proceder a encenderlo de
la siguiente forma:
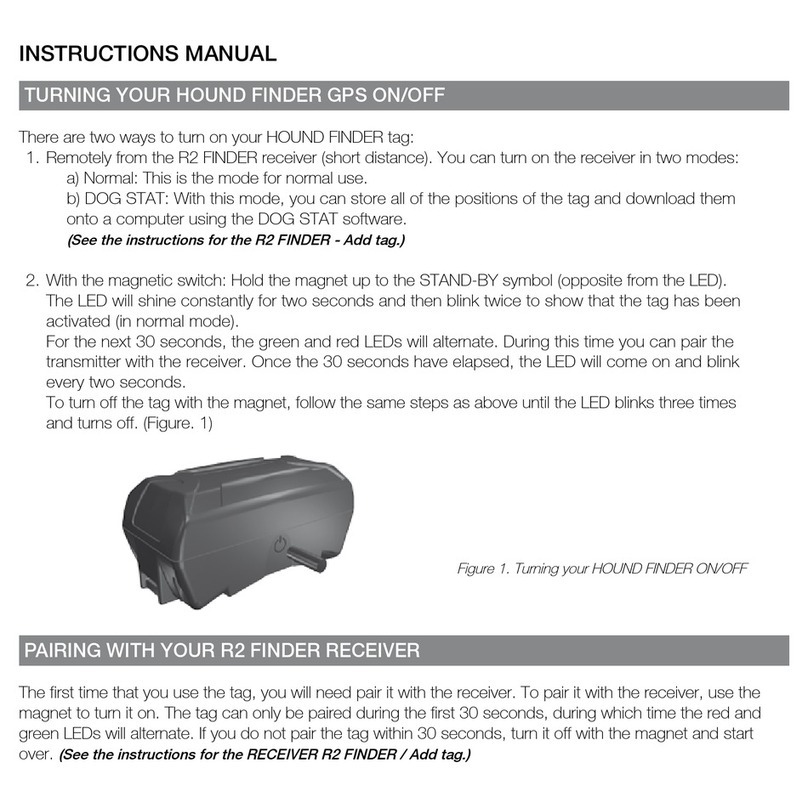
> Mantener situado un imán en la zona de activación/desactivación (ver Fig.2).
> Durante dos segundos el LED se encenderá y se realizará un pulso de
1 segundo (pip), indicando la activación correcta.
> Apartar y guardar el imán en un lugar seguro.
Apagado
Con el transmisor en funcionamiento, realizamos la misma operación del encendido.
> Mantener situado un imán en la zona de activación/desactivación (ver Fig.2).
> El LED se encenderá durante dos segundos y se apagará, indicando la
desconexión correcta.
> Apartar y guardar el imán en un lugar seguro.
PRECAUCIÓN: No mantenga el imán cerca del transmisor ya que se podría
producir la activación accidental.
Alimentación
PRE
Frecuencia radio
Temperatura de funcionamiento
Temperatura de almacenaje
Índice de protección
Peso
Dimensiones
Señal pulsante
3 voltios (2x LR6 “AAA”)
<10 mW
433,050 - 434,790 MHz
-30 a 50º
-40º a -70º
IP 67
60gr con pilas
25x54x26 mm
50ms cada 1,2 segundos
LED
indicador de
activación
Zona de activación/
desactivación Figura 2. Zona de
activación/desactivación
El fabricante Tinytronic S.L declara, bajo su responsabilidad, que este aparato cumple con lo dispuesto en
la Directiva 99/05/CE, del Parlamento Europeo y del Consejo de 9 de marzo de 1999, transpuesta a la
legislación española mediante el Real Decreto 1890/2000, de 20 de noviembre.

ESPAÑOL
6
ESPAÑOL 7
Nombre del Fabricante TinyTronic S.L
Dirección del Fabricante
C/ Batista i Roca, 6 - 8 1ª Planta 08302 MATARÓ Barcelona (Spain)
Declaramos bajo nuestra responsabilidad la conformidad del producto,
Nombre del producto: Transmitter MiniHOND
Número de Modelo: MiniHOND
Opciones del producto: Todas,
al que se refiere esta declaración con las normas:
> Uso eficiente del espectro radioeléctrico (Artículo 3.2 de la Directiva R&TTE)
Estándard harmonizado: EN 300 220/2000
> Compatibilidad electromagnética (Article 3.1.b de la Directiva R&TTE)
Estándard harmonizado EN 301 489-1/ 2001
Estándard harmonizado: EN 301 489-3/ 2000
> Requisitos de seguridad de los equipos (Artículo 3.1.a de la Directiva R&TTE)
Estándard harmonizado: EN 60950/1995 +A4/1999, AN/2000
De acuerdo con las disposiciones de la Directiva 99/05/CE, del Parlamento
Europeo y del Consejo de 9 de marzo de 1999, transpuesta a la legisla-
ción española mediante el Real Decreto 1890/2000 de 20 de noviembre
de 2000.
A. López
C.E.O
Mataró, 01.08.2007
Declaración de conformidad
(según ISO/IEC Guía 22 y EN 45015)
GARANTÍA Condiciones Generales de venta
TinyTronic, S.L., garantiza el funcionamiento del equipo contra todo defecto de fabri-
cación, durante un periodo de 2 años.
> Es requisito indispensable la factura de compra para cualquier reclamación.
> La garantía no incluye daños causados por el transporte, mal uso o manipulación
indebida.
> Tampoco cubre daños causados por descargas eléctricas, fuego, etc.
Nº de serie / Modelo / Fecha
TinyTronic garantiza, durante 2 años desde la fecha de la compra, que sus equipos de
radio localización y telemetría carecen de defectos de mano de obra y materiales. La
garantía es efectiva solamente para el propietario original.
En caso de Avería durante el periodo de garantía de los equipos, TinyTronic sl cubrià
el 50% de los gastos de envío, corriendo a cargo del cliente el 50% restante.
Si un producto sale defectuoso, en TinyLoc se repara o sustituye sin cargo alguno,
durante la vigencia de la garantía. Pero no nos hacemos responsables del daño
provocado por una mala utilización, daños físicos o por el desgaste del uso habitual
de los productos.
Bajo ninguna circunstancia TinyLoc será responsable de los daños o pérdidas de
animales.
NOTA: En TinyLoc le aconsejamos que si detectan en el equipo un posible mal
funcionamiento, se pongan en contacto con nosotros y no utilicen el aparato
por la seguridad de su animal.
Para las personas que utilizan un equipo de radio localización por primera vez, reco-
mendamos hagan unas cuantas pruebas antes, para familiarizarse con el sistema.
Sello TinyTronic

Battery insertion
The MiniHOND transmitter is powered by two (2) AAA alkaline batteries. Their
polarity must be respected according to the graph (Fig.1)
Battery life
The MiniHOND transmitter battery life is on regular operation 720 hours (30 days)
and 120 hours (5 days) on low battery detection. The quality of the batteries could
decrease the battery life of the transmitter.
When does the battery need to be replaced?
The MiniHOND transmitter has a low battery detector indicating the moment in which
the batteries must be replaced before it affects the performance of the equipment.
The low battery detector changes the transmission of the MiniHOND by changing the
pulse to a double beep followed by a single one every three seconds.
User guide
Fig. 1. Battery polarity
DO NOT SHORT-CIRCUIT
THE BATTERIES
MiniHOND
Customer service
T. +34 902 444 232
ENGLISH ENGLISH
8 9

If the switch is broken during the hunt, the equipment will not stop operating
due to an intelligent error control of the transmitter.
Regular Operation (Tracking)
The MiniHOND transmitter comes with a magnet switch located on one of the
sides that allows to turn ON and OFF the transmitter with a magnet without
opening the battery cover lid.
Technical characteristics
IMPORTANT: We recommend the replacement of the batteries once the low
battery indication is on since we will make sure that we have the maximum
possible power available.
NOTE: We also recommend extracting the batteries if the equipment is not
going to be used for a long period of time (2 months) since the batteries may
run out.
Turning ON and OFF the transmitter
The MiniHOND transmitter comes with a magnet switch located on one of the
sides that allows to turn ON and OFF the transmitter with a magnet without
opening the battery cover lid.
On position
To turn ON the transmitter, with the batteries in and the transmitter OFF the user must
proceed as follows:
> Keep a magnet in the ON/OFF activation area (see Fig. 2)
> In 2 seconds the LED will turn on and will produce a double pulse
(beep-beep on the receiver)
> Take the magnet aside in a safe place
Off position
To turn OFF the transmitter the user must proceed as follows:
> Keep a magnet in the ON/OFF activation area (see Fig. 2)
> The LED light will stay for two seconds and will produce a triple beep,
indicating a safe disconnection.
> Take the magnet aside in a safe place.
CAREFULL: Do not store the magnet near the MiniHOND transmitter
since it can accidentally turn it ON discharging the batteries.
IMPORTANT: If the magnet switch is broken or the magnet lost the
transmitter may be turned ON and OFF by unscrewing the lid.
Activation
indicador
LED
Fig. 2. On/off activation area
On/off
activation area
Batteries
PRE
Radio Frequency
Temperature
Storage temperature
Protection Index
Weight
Dimensions
Pulsed signal
3 volts (2x LR6 “AAA”)
<10 mW
433,050 - 434,790 MHz
-30 to 50º
-40º to -70º
IP 67
60gr (batteries included)
25x54x26 mm
50ms each 1,2 seconds
ENGLISH 11
10 ENGLISH

Manufacturer’s Name
TinyTronic S.L
Manufacturer’s Address
C/ Batista i Roca, 6 - 8 1ª Planta
08302 MATARÓ Barcelona
(Spain)
declares that the product,
Product Name: Transmitter MiniHOND
Model: MiniHOND
Product options: All,
complies with the essential requirements of Article 3 of the R&TTE 1995/5/
EC Directive, if used for its intented use and that the following standards
has been applied:
> Efficient use of the radio frequency spectrum (Article 3.2 of the R&TTE Directive)
Harmonised standards applied: EN 300 220-3 v1.1.1 (2000-09)
> Electromagnetic compatibility (Article 3.1.b of the R&TTE Directive)
Harmonised standards applied: EN 301 489-1 v1.3.1 (2001-09)
Harmonised standards applied: EN 301 489-3 v1.2.1 (2002-08)
> Health and safety requirements (Article 3.1.a of the R&TTE Directive)
Harmonised standards applied: EN 60950-1/1995
A. López
C.E.O
Mataró, 01.08.2007
Declaration of conformity
(according to ISO/IEC Guide 22 y EN 45015)
GUARANTEE General Terms of sale
TinyTronic, S.L., guarantees correct operation of the unit against all manufacturing
defects for a period of 2 years.
> Proof of purchase must be presented when making any claim.
> The guarantee does not include damage caused by incorrect transport,
unauthorised use or manipulation.
> Neither does it cover damage caused by electrical shock, fire, etc.
TinyTronic guarantees that its radio location and telemetry units are free of labour and
material defects for 2 years from the date of purchase.
The guarantee is only effective for the original owner.
In the event of malfunction during the guarantee period for the units, Tinytronic SL
will cover 50% of the cost of transport, the remaining 50% being at the customer’s
expense.
If a product is defective, TinyLoc will repair or replace it free of charge during the
guarantee period.
TinyLoc is not responsible for any damage caused by incorrect use, physical damage or
normal wear of its products.
Under no circumstances will TinyLoc be responsible for injury or loss of animals.
NOTE: Should a possible malfunction be detected, TinyLoc recommends not
using the device to ensure the safety of your animal and to contact them
immediately.
Customers who are using a radio-tracking unit for the first time, should carry our a few
tests to familiarise themselves with the operation of the system.
TinyTronic
13
12 ENGLISH ENGLISH

DEUTSH DEUTSH
14 15
Einsetzen Batterien
Der Sender MiniHOND wird von zwei Alkalibatterien des Typs AAA betrieben.
Wie auf der Zeichnung (Abb. 1).
Lebensdauer der Batterien
Im Normalbetrieb beträgt die Autonomie des Senders 720 Std. (30 Tage) und bei
niedrigem Batteriezustand 120 Std. (5 Tage).
Wann müssen die Batterien ersetzt werden?
Anhand des intelligenten Systems zur Erkennung des niedrigen Batteriezustands zeigt
der Sender MiniHOND an, in welchem Moment die Batterien ersetzt werden müssen,
bevor es zu einem Leistungsverlust des Signals kommen kann.
Der niedrige Batteriezustand wird angezeigt, indem der Sender HOND alle drei Sekunden
zwei aufeinanderfolgende akustische Signale (zwei Piepstöne) aussendet.
WICHTIG! Es wird empfohlen, die Batterien sofort zu ersetzen, sobald ein nie-
driger Batteriezustand festgestellt wird, um die maximale Leistung des Senders
jederzeit zu gewährleisten.
Bedienungsanleitung
Fig. 1. Batteriepolaritä
MiniHOND
Customer service
T. +34 902 444 232

ACHTUNG! Magnet nicht in der Nähe des Senders aufbewahren, da
es sonst zu einer unbeabsichtigten Aktivierung kommen könnte.
Normalbetrieb (Tracking)
Wenn der HOND Sender eingeschaltet ist, sendet Er einen Impuls von 50ms jede
1,2 Sekunden. Der Impuls und die Beleuchtung von der LED sind so aufeinander
abgestimmt, dass der Betreiber sehr leicht überprüfen kann ob das Gerät eingeschaltet
ist. Auch die LED könnte Ihnen bei der Nachtsuche behilflich sein.
Technische Daten
HINWEIS: Es wird empfohlen, die Batterien zu entnehmen, wenn das Gerät über
einen längeren Zeitraum (2 Monate) nicht benutzt wird, da es anderenfalls zu einer
vollständigen Entladung der Batterien kommen kann.
Antennen
Vom Benutzer auswechselbare Antennen.
Die Antennen können infolge des Gebrauchs beschädigt werden. Sie lassen sich
jedoch einfach abschrauben und ersetzen.
Ein-/Ausschalten des Senders
Der Sender ist mit einem Magnetschalter ausgerüstet, der sich im Bereich der
Aktivierung/Deaktivierung befindet, mit dem der Sender ein- und ausgeschaltet
werden kann, ohne dass die Abdeckung des Batteriefachs geöffnet und geschlossen
werden muss.
Einschalten
Mit eingesetzten Batterien und bei ausgeschaltetem Sender kann dieser
folgendermaßen eingeschaltet werden:
> Im Bereich der Aktivierung/Deaktivierung einen Magnet platzieren (siehe Abb. 2).
> Die LED leuchtet zwei Sekunden lang auf und es erfolgt ein Impuls von 1
Sekunde (Piepston), der die korrekte Aktivierung anzeigt.
> Magnet entfernen und an einem sicheren Ort aufbewahren.
Ausschalten
Bei eingeschaltetem Sender dieselben Schritte durchführen wie beim
Einschaltvorgang:
> Im Bereich der Aktivierung/Deaktivierung einen Magnet platzieren (siehe Abb. 2).
> Die LED leuchtet zwei Sekunden lang auf und der Sender wird
AUSGESCHALTET, wobei die korrekte Deaktivierung angezeigt wird.
> Magnet entfernen und an einem sicheren Ort aufbewahren.
16 DEUTSH 17
DEUTSH
LED Fig. 2. On/off
On/off
Spannungsversorgung
PRE
Funkfrequenz
Betriebstemperatur
Lagertemperatur
Schutzindex
Gewicht
Abmessungen
Impulssignal
3 volt (2x LR6 “AAA”)
<10 mW
433,050 - 434,790 MHz
-20 / 50º
-40º / -70º
IP 67
60gr g inkl. Batterien
25x54x26 mm
50ms alle 1,2 s
Der Hersteller Tinytronic S.L. erklärt in eigener Verantwortung, dass dieses Gerät die Bestimmungen der
Richtlinie 99/05/EG des Europäischen Parlaments und des Rates vom 9. März 1999, die mittels königlichem
Dekret 1890/2000 vom 20. November auf die spanische Gesetzgebung übertragen wurden, erfüllt.

Manufacturer’s Name
TinyTronic S.L
Manufacturer’s Address
C/ Batista i Roca, 6 - 8 1ª Planta
08302 MATARÓ Barcelona
(Spain)
declares that the product,
Product Name: Transmitter MinHOND
Model: MiniHOND
Product options: All,
complies with the essential requirements of Article 3 of the R&TTE 1995/5/
EC Directive, if used for its intented use and that the following standards
has been applied:
> Efficient use of the radio frequency spectrum (Article 3.2 of the R&TTE Directive)
Harmonised standards applied: EN 300 220-3 v1.1.1 (2000-09)
> Electromagnetic compatibility (Article 3.1.b of the R&TTE Directive)
Harmonised standards applied: EN 301 489-1 v1.3.1 (2001-09)
Harmonised standards applied: EN 301 489-3 v1.2.1 (2002-08)
> Health and safety requirements (Article 3.1.a of the R&TTE Directive)
Harmonised standards applied: EN 60950-1/1995
A. López
C.E.O
Mataró, 01.08.2007
Declaration of conformity
(according to ISO/IEC Guide 22 y EN 45015)
DEUTSH DEUTSH
18 19
GARANTIE
Allgemeine Verkaufsbedingungen
TinyTronic, S.L. gewährleistet den Betrieb des Geräts ohne jeglichen Herstellungsfehler für einen
Zeitraum von 2 Jahren.
> Die Kaufquittung ist für jegliche Beanstandung unerlässlich.
> Von der Garantie ausgeschlossen sind Transportschäden sowie Schäden infolge von
unsachgemäßem oder zweckfremdem Gebrauch.
Während zwei Jahren ab Kaufdatum gewährleistet das Unternehmen TinyTronic, dass seine
Funkortungs- und Telemetriegeräte weder Herstellungs- noch Materialfehler aufweisen. Die
Garantie gilt nur für den ursprünglichen Eigentümer.
Im Fall von Schäden an den Geräten während des Garantiezeitraums übernimmt TinyTronic S.L.
50% der Versandkosten. Die übrigen 50% der Versandkosten gehen zu Lasten des Kunden.
Sollte ein Produkt in mangelhaftem Zustand ausgeliefert werden, wird dieses innerhalb des
Garantiezeitraums bei TinyLoc kostenlos repariert oder ersetzt. Bei Schäden infolge von
unsachgemäßem Gebrauch, Sachschäden oder der üblichen Abnutzung des Produkts lehnt das
Unternehmen jedoch jegliche Haftung ab.
TinyLoc haftet keinesfalls für Schäden an Tieren oder für deren Verlust.
HINWEIS: TinyLoc empfiehlt, sich im Fall eines möglicherweise unkorrekten Betriebs des
Geräts mit dem Unternehmen in Kontakt zu setzen und das Gerät zur Sicherheit des Tieres
nicht mehr benutzen.
Stempel TinyTronic

FRENCH FRENCH
Insertion de piles
Le transmetteur MiniHOND est alimenté avec deux piles alcalines de type AAA.
On doit respecter la polarité indiquée sur le dessin. (Fig.1.).
Durée des piles
Fonctionnement Normal > 724 heures (30 jours)
Dés Réception su signal pide basse > 120 heures (5 jours)
Quand on devra remplacer la batterie?
Por le systéme intelligent de détection de pile basse le transmetteur HOND l’indique
dans quel momment doivent se remplacer les piles, dont peut se produir une perte de
puissance dans le signal.
L’indication de pile basse est effectuée par l’émission pour le transmetteur MiniHOND
de deux impulsions continues (pip-pip) chaque 3 seconds. En pile basse, pour aug-
menter l’autonomie du transmetteur dans des situations de perte de l’animal se
on automatiquement tones la factions de détection.
Manuel utilisation
Fig. 1. Polarité
MiniHOND
Égards au cliente
T. +34 902 444 232
20 21

PRÉCUATION: Ne maintenez pas l’aimant près du transmetteur car il
pourrait se produire 1’activation automatique de celui-ci et une perte
de capacité des piles.
IMPORTANT: En cas rupture du contact d’allumage, ou de perte de l’aimant,
l’activation devra être manuelle en extrayant les piles et on les insérant à
nouveau, ce qui provoque l’allumage.
Si la rupture se produisait pendant la chasse, l’équipement ne cesserait de
fonctionner à aucun moment gràce au systéme intelligent de contrôle d’erreurs
du transmetteur.
Fonctionnement normal (Tracking)
Quand le transmetteur fonctionne, il envoie une impulsion de 50 ms chaque 1,2
secondes, avec allumage de LED, de cette manière il peut facilement être vérifié que
l’équipement est en fonctionnement.
LED
On/off
IMPORTANT: On recommande de remplacer les batteries le plus rapidement
possible des le signal pile basse, de cette manière nous assurous toujours la
puissance maximale du transmetteur.
NOTE: On recommande d’extraire les piles si on n’utiliser l’equipement pendent
une longue période de temps (2 mois).
Recommandation tres importante
L’usager peut remplacer les antennes lui-même.
Lorsque vous refermez le capot du logement des piles, vous devez prendre 2
précautions pour assurer l’étanchéité. Sans quoi vous risquez des pénétrations
d’humidité et la détérioration définitive du transmetteur:
1- Vérifier que le capot est bien en place dans son logement
2- Serrer fortement la vis du capot.
Allumage/Arrêt du Transmetteur
Le transmetteur est pourvu d’un interrupteur magnétique situé dans la zone
d’activation/désamorçage et qui permet de l’allumer ou l’éteindre, sans enlever le
couvercle des piles.
Mise en marche
Avec les piles insérées, le capot fortement vissé et le transmetteur éteint:
> Approcher un aimant dans la zone d’activation/désamorçage (voir Fig.2).
> Pendant deux secondes le LED clignotera 2 fois pour confirmer l’activation
correcte ( pip-pip)
> Écarter et garder l’aimant dans un lieu
Extinction
Avec le transmetteur en fonctionnement, on renouvelle la même opération que pour
la mise en marche:
> Le LED clignotera 3 fois pour confirmer
> Séparer et garder l’aimant dans un lieu sûr.
22
Fig. 2. On/off
23
FRENCH FRENCH

Manufacturer’s Name
TinyTronic S.L
Manufacturer’s Address
C/ Batista i Roca, 6 - 8 1ª Planta
08302 MATARÓ Barcelona
(Spain)
declares that the product,
Product Name: Transmitter MiniHOND
Model: MiniHOND
Product options: All,
complies with the essential requirements of Article 3 of the R&TTE 1995/5/
EC Directive, if used for its intented use and that the following standards
has been applied:
> Efficient use of the radio frequency spectrum (Article 3.2 of the R&TTE Directive)
Harmonised standards applied: EN 300 220-3 v1.1.1 (2000-09)
> Electromagnetic compatibility (Article 3.1.b of the R&TTE Directive)
Harmonised standards applied: EN 301 489-1 v1.3.1 (2001-09)
Harmonised standards applied: EN 301 489-3 v1.2.1 (2002-08)
> Health and safety requirements (Article 3.1.a of the R&TTE Directive)
Harmonised standards applied: EN 60950-1/1995
A. López
C.E.O
Mataró, 01.08.2007
Declaration of conformity
(according to ISO/IEC Guide 22 y EN 45015)
GARANTIE
Conditions Generales de vente
TinyTronic, S.L.,garanti le fonctionnement de l’équipe contre tout défaut de fabrication,
pendant un (2) annés.
> C’est condition indispensable joindre la facture commerciale pour faire la réclamation
> La garantie ne comprend pas les dégâts causés par le transport, mauvaise utilisation ou
manipulation indue.
> Elle ne couvre non plus les dommages dus aux décharges électriques, feu, etc.
TinyLoc garanti pendant 2 années pour l’émetteur et 2 années pour le récepteus, depuis la
date d’achat, que ses équipements de localisation par radio et télémétrie manque de défauts
de main d’oeuvre et matériels.
La garantie est effective seulement pour le propietaire original.
Si un produit est défectueux, TinyLoc fera la réparation sans coût, pendant la durée de
garantie.
La garantie ne couvre pas les dommages provoqués par une mauvaise utilisation, des
dommages physiques ou par la détériorisation due à l’utilisation habituelle des produits.
Sous aucune circonstance TinyLoc sera responsable des dommages ou les pertes des
animaux.
NOTE: TinyLoc conseille aussi que lors de la détection d’un possible mauvais
fonctionnement du équipement, nous contacter et n’utiliser pas l’appareil, par
sécurité de vos animaux.
Pour les personnes qui utilisent un équipement de localisation par radio pour la première
fois, nous recommandons faire quelques essais auparavant, pour se familiariser avec les
système.
Sous aucune circonstance TinyLoc ne sera pas responsable des dommages ou les pertes
des animaux..
TinyTronic
FRENCHFRENCH
24 25

26
Inserimento delle pile
Il trasmettitore MiniHOND è alimentato con due pile alcaline di tipo AAA.
Si deve rispettare la polarità indicata nel disegno (Fig.1.)
Durata delle pile
Le ore di autonomia del trasmettitore con un funzionamento normale sono 720 (30 giorni)
e con le pile basse 120 (5 giorni).
Quando occorre sostituire le pile?
Mediante il sistema intelligente di intercettazione di pila scarica, il trasmettitore MiniHOND
vi indica quando occorre sostituire le pile, prima che si possa produrre una perdita di
potenza nel segnale.
Per indicare che la pila si sta scaricando il trasmettitore MiniHOND emette due suoni
continui (beep-beep) ogni 3 secondi.
IMPORTANTE: Si raccomanda di sostituire le pile non appena ci venga indicato
che stanno per scaricarsi; in questo modo, garantiamo sempre la massima
potenza del trasmettitore.
Manuale di istruzioni
Figura 1. Polarità batterie
NON CORTOCIRCUITARE
LA PILA
MiniHOND
Assistenza clienti
T. +34 902 444 232
ITALIANITALIAN 27

Funzionamento Normale (Tracking)
Quando il trasmettitore entra in funzionamento, invia un suono di 50ms ogni
1,2 secondi. Il suono coincide con l’accensione del LED; in questo modo si può
verificare facilmente che l’apparecchio è in funzionamento ed è inoltre di grande
aiuto per le intercettazioni notturne o a bassa luminosità.
Caratteristiche tecniche
NOTA: Si raccomanda di estrarre le pile se l’apparecchio non verrà utilizzato per
un lungo periodo di tempo (2 mesi), visto che le pile si potrebbero scaricare com-
pletamente.
Antenne
Antenne sostituibili dall’utente.
Poiché le antenne si possono deteriorare per via dell’uso, queste si possono sostituire;
per cambiarle basta soltanto svitarle con l’aiuto di una chiave.
Accensione/Spegnimento del trasmettitore
Il trasmettitore è provvisto di un interruttore magnetico situato nella zona di attivazione
/disattivazione, mediante il quale si potrà accendere e spegnere il trasmettitore senza
dover aprire e chiudere l’alloggiamento delle pile.
Accensione
Con le pile inserite e il trasmettitore spento, si può procedere ad accenderlo nel se-
guente modo:
> Collocare un magnete nella zona di attivazione/disattivazione (vedi Fig.2).
> Durante due secondi il LED si accenderà ed emetterà un beep di 1 secondo,
indicando la corretta attivazione.
> Togliere il magnete e conservarlo in un luogo sicuro.
Spegnimento
Con il trasmettitore in funzionamento, si realizza la stessa operazione effettuata per
l’accensione.
> Collocare un magnete nella zona di attivazione/disattivazione (vedi Fig.2).
> Il LED si accenderà durante due secondi e poi SI SPEGNERÀ, indicando la
corretta sconnessione.
> Togliere il magnete e conservarlo in un luogo sicuro.
AVVERTENZA: Non conservare il magnete vicino al trasmettitore in quanto
si potrebbe produrre un’attivazione accidentale.
Alimentazione
PRE
Frequenza radio
Temperatura di funzionamento
Temperatura di stoccaggio
Indice di protezione
Peso
Dimensioni
Segnale pulsante
3 volt (2x LR6 “AAA”)
<10 mW
433,050 - 434,790 MHz
-20 a 50º
-40º a 70º
IP 67
60gr con pile
25x54x26 mm
di 50ms ogni 1,2 secondi
LED
indicatore di
attivazione
Zona di accensione/
spegnimento Fig. 2. Zona di
attivazione/disattivazione
Il fabbricante Tinytronic S.L dichiara, sotto sua responsabilità, che questo apparecchio è in regola con quanto
disposto nella Direttiva 99/05/CE, del Parlamento Europeo e del Consiglio del 9 marzo 1999, trasposta
nella legislazione spagnola mediante il Real Decreto 1890/2000, del 20 novembre.
ITALIANITALIAN 2928

Manufacturer’s Name
TinyTronic S.L
Manufacturer’s Address
C/ Batista i Roca, 6 - 8 1ª Planta
08302 MATARÓ Barcelona
(Spain)
declares that the product,
Product Name: Transmitter MiniHOND
Model: MiniHOND
Product options: All,
complies with the essential requirements of Article 3 of the R&TTE 1995/5/
EC Directive, if used for its intented use and that the following standards
has been applied:
> Efficient use of the radio frequency spectrum (Article 3.2 of the R&TTE Directive)
Harmonised standards applied: EN 300 220-3 v1.1.1 (2000-09)
> Electromagnetic compatibility (Article 3.1.b of the R&TTE Directive)
Harmonised standards applied: EN 301 489-1 v1.3.1 (2001-09)
Harmonised standards applied: EN 301 489-3 v1.2.1 (2002-08)
> Health and safety requirements (Article 3.1.a of the R&TTE Directive)
Harmonised standards applied: EN 60950-1/1995
A. López
C.E.O
Mataró, 01.08.2007
Declaration of conformity
(according to ISO/IEC Guide 22 y EN 45015)
GARANZIA E CONDIZIONI GENERALI DI VENDITA
TinyTronic, S.L., garantisce il funzionamento dell’apparecchio contro ogni difetto di
fabbricazione, per un periodo di 2 anni.
> Per qualsiasi reclamo, è indispensabile disporre della fattura di acquisto.
> La garanzia non include danni causati dal trasporto, uso improprio o
manipolazione indebita.
> Né copre danni causati da scariche elettriche, fuoco, ecc.
TinyTronic garantisce, per i 2 anni successivi alla data di acquisto, che i suoi apparec-
chi di radio localizzazione e telemetria siano privi di difetti di mano d’opera e materiali.
La garanzia è valida soltanto per il proprietario originale.
In caso di avaria durante il periodo di garanzia dell’apparecchio, Tinytronic coprirà
soltanto il 50% delle spese di spedizione, mentre il restante 50% andrà a carico del
cliente.
Se un prodotto risulta difettoso, TinyLoc provvederà a ripararlo o sostituirlo senza
alcun addebito, durante il periodo di validità della garanzia. L’azienda non si assume
nessuna responsabilità per eventuali danni provocati da un uso improprio o dal logorio
dovuto al comune utilizzo dei prodotti.
In nessuna circostanza TinyLoc sarà responsabile di eventuali danni o smarrimenti
degli animali.
NOTA: Se rilevate un possibile malfunzionamento dell’apparecchio, TinyLoc
vi consiglia di mettervi in contatto con la nostra azienda e di non utilizzare
l’apparecchio per la sicurezza del vostro animale.
Per coloro che utilizzano un dispositivo di radio localizzazione per la prima volta, racco-
mandiamo di familiarizzarsi con il sistema eseguendo diverse prove prima dell’uso.
ITALIAN 31
ITALIAN
30

TinyTronic S.L
Manufacturer’s Address
C/ Batista i Roca, 6 - 8 1ª Planta
08302 MATARÓ Barcelona (Spain)
Más información en /
More information/
www.tinyloc.com
Fecha:
Nº de serie:
Modelo:
This manual suits for next models
2
Table of contents
Languages:
Other Tinyloc Pet Care Product manuals
Popular Pet Care Product manuals by other brands

Zoovilla
Zoovilla PTH0662020110 Assembly instructions

Best Friend Mobility
Best Friend Mobility extra large-size wheelchair owner's manual

Funpaw
Funpaw Playbot Q user manual

Petcube
Petcube Bites 2 Lite user guide
Pawever Pets
Pawever Pets PPDOGTRNCLA quick start guide
Smart Retract
Smart Retract Bow Wow Barrier user guide
Frisco
Frisco CAT TREE instruction manual
Petsafe
Petsafe Drinkwell PWW00-13705 quick start guide
Dogwidgets
Dogwidgets DW-1 user manual
Zoovilla
Zoovilla MPS006 manual

Lectric eBikes
Lectric eBikes WAG-ALONG PET TRAILER Owner's manual & safety instructions
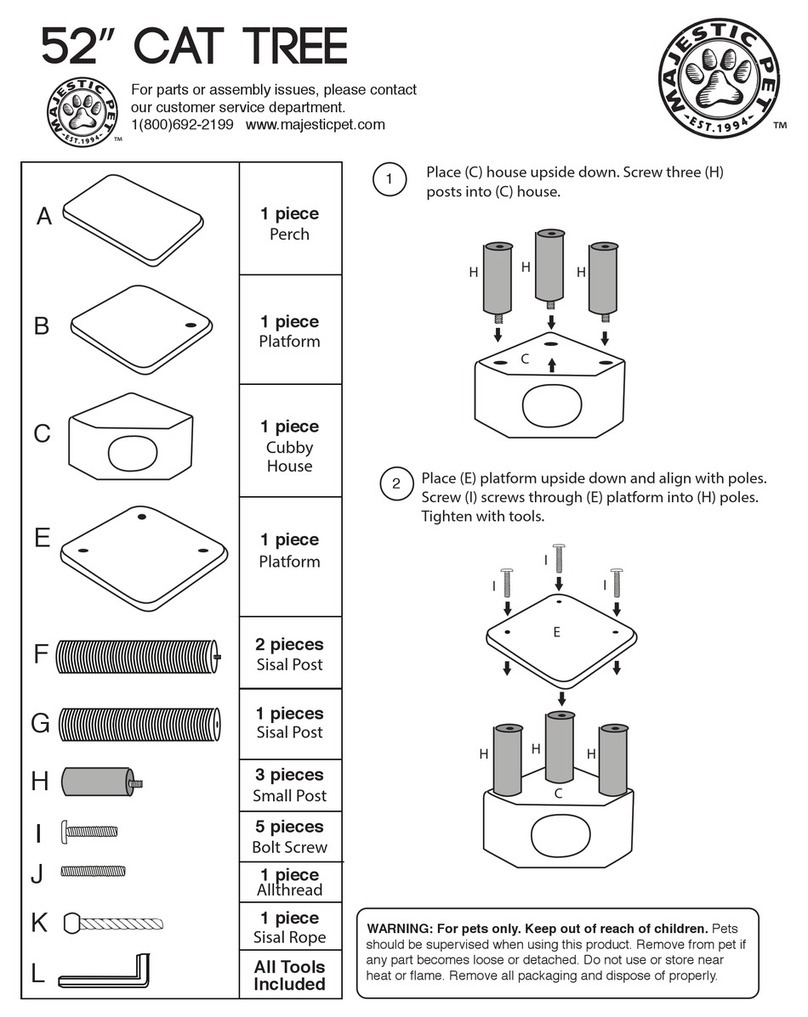
Majestic Pet
Majestic Pet 52" Cat Tree Assembly instructions
