Lectric eBikes WAG-ALONG PET TRAILER Assembly instructions

WAG-ALONG PET TRAILER
OWNER’S MANUAL & SAFETY INSTRUCTIONS
IMPORTANT
KEEP THESE INSTRUCTIONS FOR FUTURE REFERENCE

TRAILER MEASUREMENTS
MAX. LENGTH 26 in.
MAX. SHOULDER HEIGHT 18 in.
MAX. WEIGHT 50 lbs.
1
WARNING
!
Do read instructions before driving. Failure to comply with the instructions
and warnings in this manual could result in serious injury or death.
• Consult veterinarian to ensure it is safe for your pet to ride in a trailer.
• Make sure pet cannot make contact with the wheel spokes.
• Check comfort and safety of pet frequently, especially during hot or cold weather.
• Never leave pet unattended and always hold the trailer/stroller from tipping backward
when dog is entering or leaving the trailer.
1. CHOOSE THE RIGHT SIZE OF TRAILER
2. SAFETY GUIDELINES

2
• DO NOT use with a total load that exceeds 45 kg/100 LB
• Never use pet trailer for transporting child or cargo.
• DO NOT make any modifications to the product.
• DO NOT over-inflate the tires. Failure to comply with the rated pressure on the tire sidewall
may lead to explosion of the tire and possible injury.
• Before each ride, be sure the trailer does not interfere with braking, pedaling or steering of
the bicycle.
• Always comply with local regulations when using the trailer on public roadways.
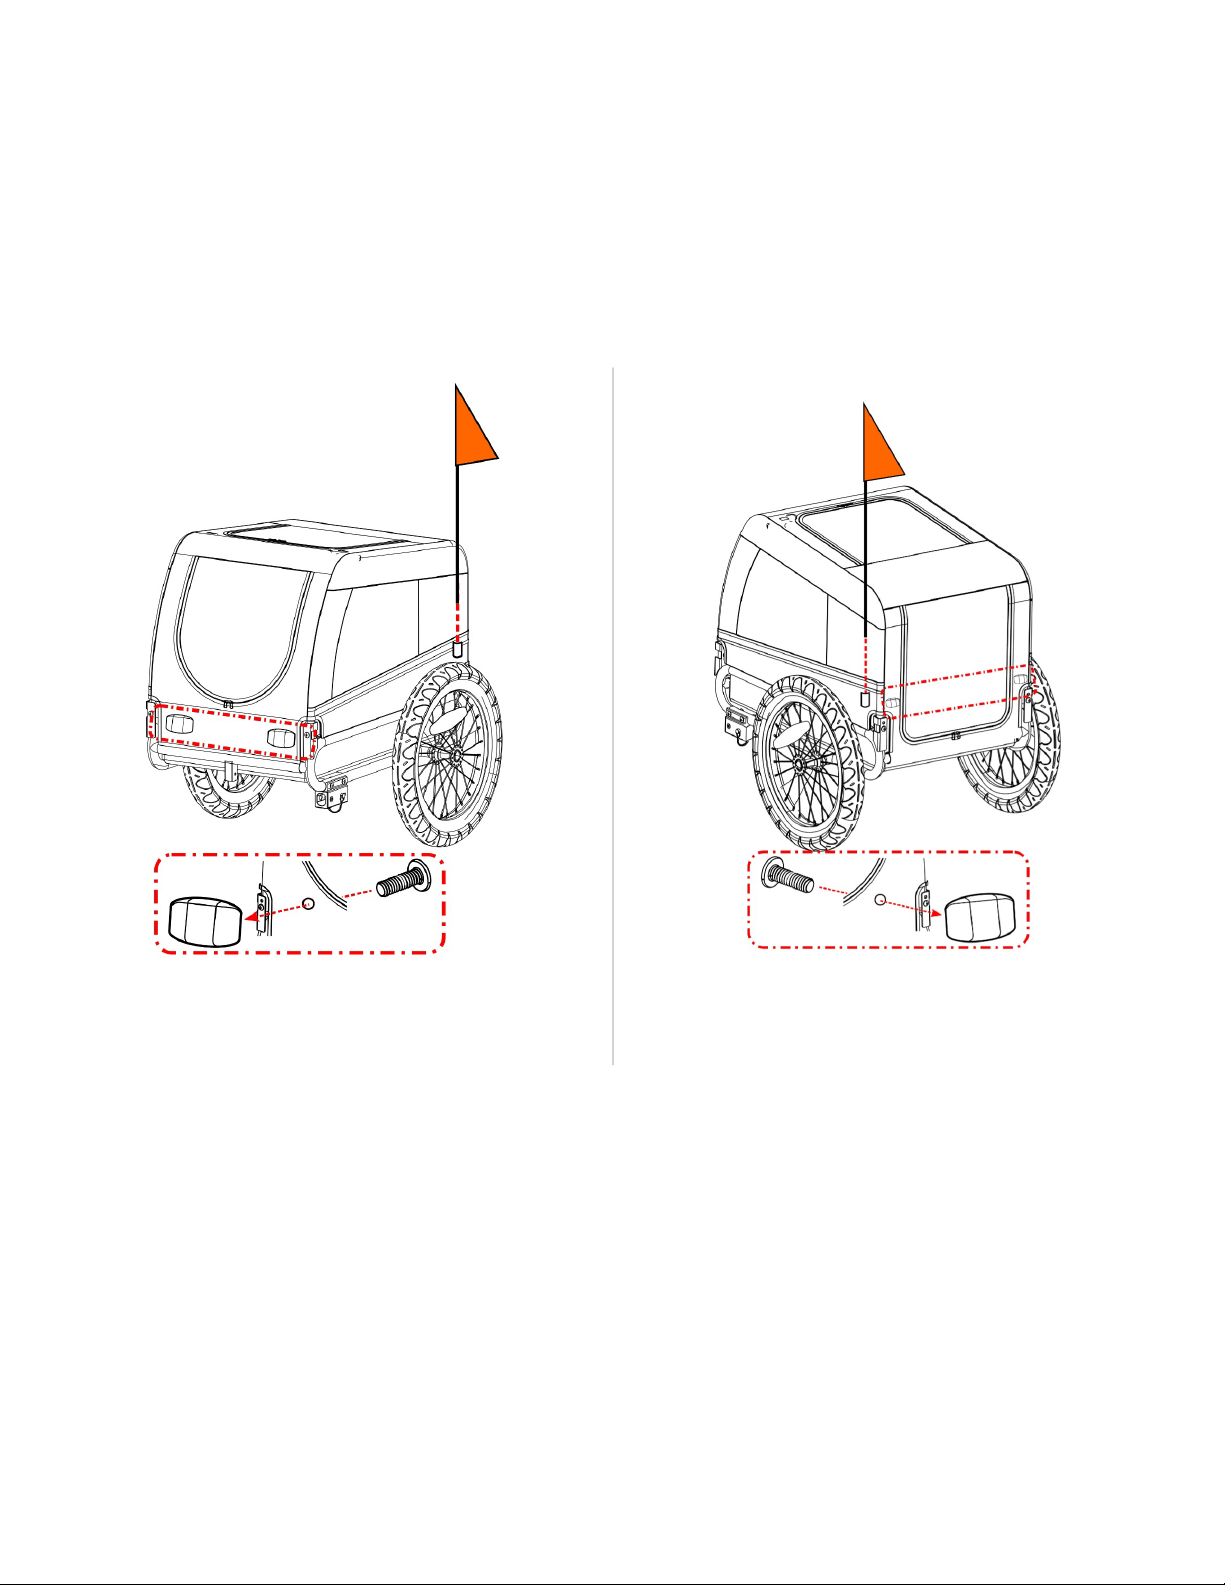
• Obey all local legal requirements for lighting.
• When using your trailer, you are towing extra weight and a bigger vehicle. You must allow
more time for braking, slowing, stopping and starting, and allow more room for turns and
passageways. Experiment with the loaded trailer in an uncongested area until you become
familiar with how your bike handles towing a trailer.
• Avoid rocks, curbs, hard braking and sudden swerving. Avoid riding over obstacles with one
wheel, as this may cause the trailer to tip over.
• Always ride with the front and rear door fully closed to protect pet from flying debris and
prevent pet from jumping from the trailer
• The rider of the bicycle must be at least 16 years old.
• Recommended speed limits: - 10 mph on smooth, straight roads – 5 mph when turning or
on uneven roads.
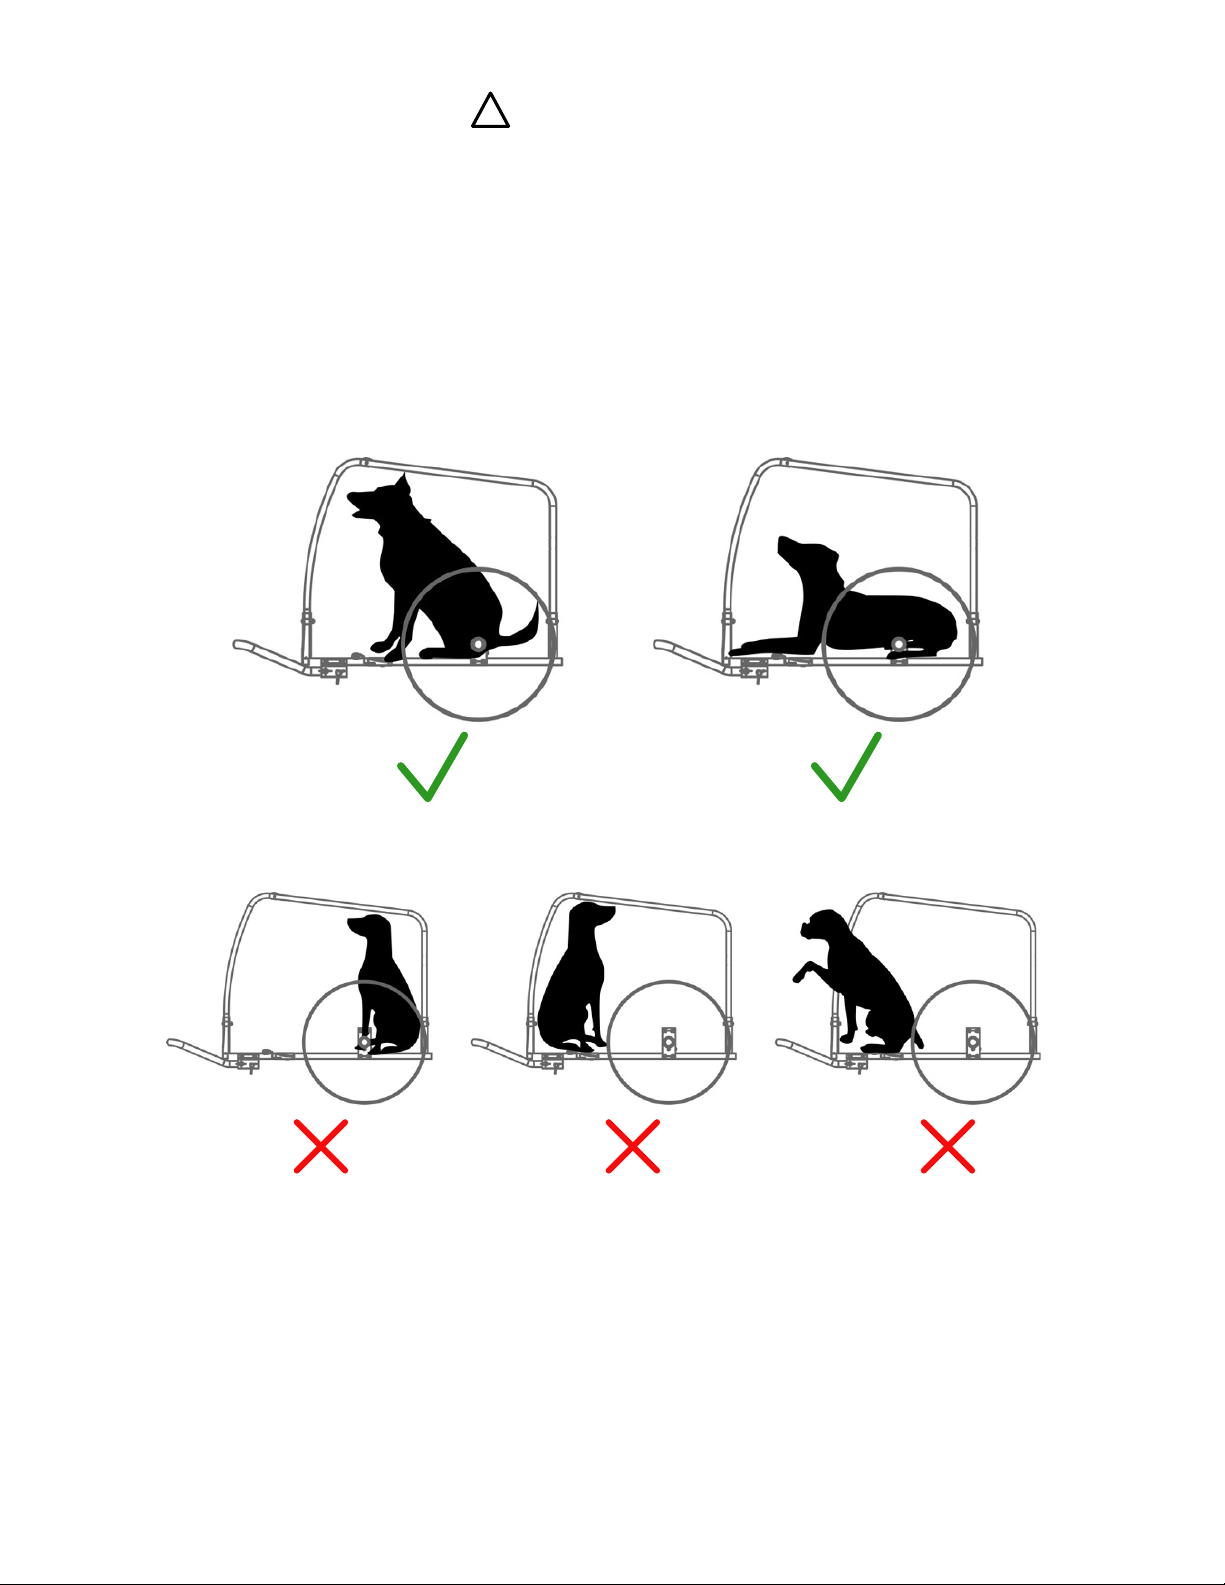
• Trailer weight must be properly distributed for safe handling. The weight on the hitch
connector should be between 4.4 and 22 lbs. To measure this, load your trailer and place
next to bathroom scale. Step on scale and make a note of your weight. Standing on scale,
lift up the end of the tow bar one foot (approximately 25cm) off the ground. The weight
shown should be 4.4 and 22 lbs. more than your own weight. If the weight is too low, the
rear wheel of the bicycle could lose traction. If it is too high the hitch may be overloaded.

3
WARNING
!
Never overload the trailer and never ride with a tow bar load that is outside the
specified range of 4.4 to 22 lbs. Always distribute the load evenly. Failure to do so
could result in accidents with serious injury or death. Tip: Make sure that your
dog is positioned with its center of gravity as close as possible to the wheel axle.
This is the best way to ride with an optimal weight distribution.

4
1 X MAIN FRAME 2 X WHEELS
1 X TOW BAR 1 X TOW BAR RECEIVER
1 X UNIVERSAL HITCH 1 X FLAG
1 X FRONT REFLECTORS (WHITE)
2 X WHEEL GUARDS
1 X REAR REFLECTORS (RED)
TOOLS
11 MM WRENCH 6 MM HEX KEY
3. BOX CONTENTS

5
Take out the trailer main frame and
all other components from the
carton. Remove black protective caps
on 4 corners. Raise both side panels
to an upright position (Figure 1).
Fasten the crossbar to the top part of the main frame. Raise and lock the cross
bar using the safety pin attached to the bolt (Figure 2). Make sure that safety
pins are properly locked in place as shown (Figure 3).
Figure 1
Figure 2 Figure 3
4. OPENING THE MAIN FRAME

Insert wheel axle into axle receiver underneath the trailer frame until it snaps in
place (Figure 4). Pull firmly on wheel to confirm the axle is fully engaged (Figure 5).
To remove the wheels, press the button on the axle receiver and take the wheels out.
Figure 5Figure 4
6
5. ATTACHING THE WHEELS
6. INSTALLING THE PARKING BRAKES/WHEEL GUARDS
Insert wheel guard bolts through frame tube. Match holes in wheel guards to bolts.
Tighten securely with hex key (Figure 6). Repeat for wheel guard on other side.
Figure 6

7
Figure 7 Figure 8
7. ATTACHING THE FLAG
Insert the flag pole into the flagpole pocket at the left rear corner of the side panel
(Figure 7, Figure 8).
Insert screws into holes on the cover to fasten front (white) and rear (red) reflectors.

8
Fix the tow bar receiver to main frame
as shown (Figure 9).
Pressing the spring button, slide the
tow bar into the tow bar receiver until
the spring button comes out of the hole
A. Insert the safety pin from the hole B
through the other side. Make sure the
safety pin is properly locked in place.
Figure 9
Remove the quick release from the left side of bike’s rear axle. Install the hitch between
the quick release and frame. Tighten the quick release following the bike manufacturer’s
manual. Hitch can remain on the bike when the trailer is removed (Figure 10).
a. Quick Release Axle
The tension-adjusting nut must engage the threads
for at least five full turns in order to ensure adequate
clamping force for holding the rear wheel securely.
Failure to tighten the tension-adjusting nut fully may
result in accidents with serious injury or death. If the
quick release skewer is too short, it must be
replaced. Consult a professional bicycle mechanic
for the appropriate parts and assistance.
Figure 10
WARNING
!
8. INSTALLING THE TOW BAR
9. ATTACHING TRAILER TO BICYCLE

The universal hitch doesn’t fit a bike
with thru axle. Please consult the
retailer for possible solution.
Connect the coupler on the tow bar
and secure the safety pin (Figure 12).
Once the tow bar is attached, wrap
safety belt around the frame of the
bike and hook onto the D-ring on the
tow bar.
c. Thru Axle
Figure 12
9
Unscrew the nut with washer from the left side of bike’s rear axle. Install the hitch onto
the axle and screw the nut back on with the washer (Figure 11).
b. Nutted Axle
Figure 11
WARNING
!
The axle nut must engage the threads for at least
five full turns in order to ensure adequate
clamping force for holding the rear wheel
securely. Failure to tighten the nut fully may
result in accidents with serious injury or death. If
the axle is too short, the Universal Hitch cannot
be used! Consult a professional bicycle mechanic
for the appropriate parts and assistance.

10
Check before each use:
1. Wheels are properly secured to the trailer
2. Tires are inflated to recommended pressure on the tire side wall
3. Tow bar is properly secured to the trailer
4. Hitch is properly secured to the bicycle
5. All safety pins are securely locked in place.
6. Safety strap on the tow bar is properly installed
7. Weight of tow bar at coupler is greater than 4.4 lbs. but does not exceed 22 lbs. with
fully loaded trailer
8. Make sure that bicycle is in proper working order, especially brakes and tires (refer to
bicycle manufacturer’s instructions)
9. Safety flag is in place
10. Always leash your dog/pet in the trailer.
STORAGE: For longer product life, store trailer indoors. The trailer should not be stored at
temperatures less than -10°F (-23°C) or greater than 150°F (65°C).
FABRIC CARE: Hand wash fabric parts with warm water and mild soap. DO NOT use bleach
or solvents. Wipe dry and store out of direct sunlight in a dry, well-ventilated area. Clean
windows with a damp, soft cloth.
10. BEFORE YOU RIDE
11. MAINTENANCE AND CARE
Lectric eBikes | 2311 W. Utopia Rd. Phoenix, AZ 85027 | www.lectricebikes.com
Table of contents