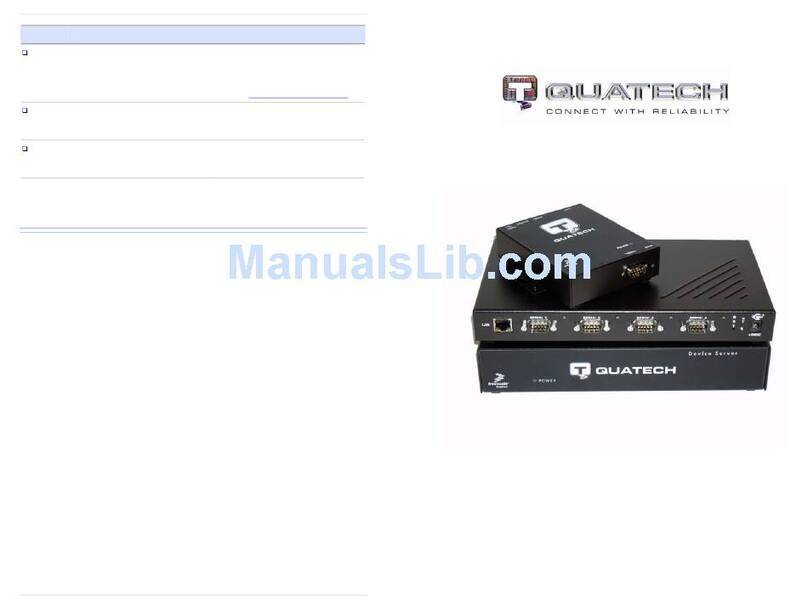
Titan Electronics NCOM SERIAL 4XX Series User manual

NCOM SERIAL DEVICE SERVER
4XX SERIES USER’S MANUAL
2017-07-07 Edition
Titan Electronics Inc.
Web: www.titan.tw

1
Contents
1. INTRODUCTION..........................................................................................................4
1.1 Key Features.........................................................................................................5
1.2 Specifications .......................................................................................................6
2. PANEL LAYOUT OF NCOM-413...................................................................................9
3. CONNECTING THE HARDWARE................................................................................10
Step 1 –Connecting to the Network........................................................................10
Step 2 –Connecting the Power................................................................................10
Step 3 –Connecting to a Serial Device ....................................................................10
3.1 Serial Port Pin-Out Information of DB9 Connector............................................11
3.2 Hardware Reset Button......................................................................................12
3.2.1 Hardware Restore Factory Defaults Button................................................12
3.3 Changing Serial Port Operation Mode in NCOM-413/NCOM-412 ....................13
3.4 LED Indicators ....................................................................................................15
3.5 RS-422/485 Termination Resistors Option for NCOM-413/NCOM-412............16
3-pin Header for Termination Option Configuration...........................................16
4. CONFIGURING NCOM-413 FOR THE FIRST TIME .....................................................19
4.1 Configuring Static IP Address.............................................................................19
4.2 Opening the Web Console Interface of NCOM-413 ..........................................20
4.3 Setting NCOM-413 to Work in DHCP Networks.................................................21
5. SETTING THE PROPER OPERATION MODE...............................................................22
5.1 Driver Mode.......................................................................................................23
5.2 RFC2217 Server Mode........................................................................................24
5.3 RFC2217 Client Mode.........................................................................................25
5.4 Pair Connection Mode .......................................................................................26
5.5 TCP Raw Server Mode........................................................................................27
5.6 TCP Raw Client Mode.........................................................................................28
5.7 UDP Mode..........................................................................................................29
6. WEB CONSOLE CONFIGURATION INTERFACE..........................................................31
6.1 Port 1, 2, 3 and 4 Settings ..................................................................................32
6.2 System Settings..................................................................................................34
6.3 Firmware Update ...............................................................................................37
6.4 Change Password...............................................................................................38
6.5 Accessible IP Settings.........................................................................................40
6.6 Reboot................................................................................................................42

2
7. NCOM VIRTUAL SERIAL PORT MANAGER AND DRIVER INSTALLATION...................43
7.1 NCOM Virtual Serial Port Manager....................................................................43
7.2 Installing NCOM Virtual Serial Port Manager ....................................................44
8. RUNNING NCOM VIRTUAL SERIAL PORT MANAGER ...............................................48
8.1 NCOM Virtual Serial Port Manager Functions ...................................................49
8.2 Manually Add Virtual Serial Port for NCOM Devices.........................................50
8.3 Manually Edit Existing Virtual Serial COM Ports for NCOM Devices .................52
8.4 Manually Remove Existing Virtual Serial COM Ports for NCOM Devices ..........53
8.5 Refreshing Virtual Serial Port Information.........................................................54
8.6 Automatically Search for NCOM Devices...........................................................55
8.6.1 Selecting an NCOM Device to Read Parameters ........................................57
8.6.2 Installing Virtual Serial Port Driver for NCOM Devices...............................58
8.6.3 Manually Search for NCOM Devices...........................................................60
8.6.4 Opening the Web Console Interface...........................................................61
8.6.5 Rebooting NCOM Devices...........................................................................62
8.6.6 Restoring to Factory Defaults .....................................................................63
8.6.7 Firmware Update Tool ................................................................................64
8.7 Configuring NCOM Devices................................................................................67
8.7.1 Selecting an NCOM Device to Configure Parameters.................................69
8.7.2 Device Status...............................................................................................70
8.7.3 COM Port Status..........................................................................................73
8.7.4 Device Control.............................................................................................79
8.7.5 Importing/Exporting Configuration Settings ..............................................88
9. NCOM VIRTUAL SERIAL PORT MANAGER AND DRIVER UNINSTALLATION .............92
Uninstalling NCOM Virtual Serial Port Manager and Virtual COM Port Driver .......92

3
The computer programs provided with the hardware are supplied under a license.
The software provided should be used only with the NCOM series hardware
designed and manufactured by TITAN Electronics Inc.
Trademarks
TITAN and the logo is a registered trademark of TITAN Electronics Inc. in Taiwan.
Microsoft, Windows, Windows XP, Windows Vista, Windows Server, Windows 7,
Windows 8, Windows 10 are trademarks of Microsoft Corporation. All other
trademarks and brands are property of their respective owners.
Copyright
Copyright © TITAN Electronics Inc. 2016. All right reserved. Reproduction of the
manual and software without permission is prohibited.
Disclaimer
TITAN Electronics Inc. provides this document and computer programs “as is” without
warranty of any kind, either expressed or implied, including, but not limited to, its
particular purpose. TITAN Electronics Inc. reserves the right to make improvements
and changes to this user manual, or to the products, or the computer programs
described in this manual, at any time.
Information provided in this manualis intendedto be accurate and reliable. However,
TITAN Electronics Inc. assumes no responsibility for its use, or for any infringements
on the rights of third parties that may result from its use.
This product might include unintentional technical or typographical errors. Changes
are periodically made to the information herein to correct such errors, and these
changes are incorporated into new editions of the publication.

4
1. INTRODUCTION
References to NCOM-413 in this document represents NCOM-413, NCOM-412 and
NCOM-411, unless stated otherwise.
NCOM-413 is a network-based serial device server. It is designed to control your serial
devices located virtually anywhere through a TCP/IP or UDP/IP network connection.
The serial device server can map TCP/IP connections and UDP broadcasts to a virtual
serial port. Applications include accessing a faraway device for functions such as
remote control and data transmission. NCOM-413 serves as a transparent virtual serial
port without limitations on operating systems and distances. The virtual serial port
redirection uses the protocol known as RFC2217.
NCOM-413 supports several operation modes, including Driver mode, RFC2217
Server/Client mode, Pair Connection mode, TCP Server/Client mode and UDP mode.
It also supports Windows virtual serial port driver, allowing you to add four virtual
serial ports in your Windows system to work over a TCP/IP network. The virtual serial
port functions as a native Windows COM port and is compatible with Windows serial
communication applications. It is installed in the device manager of the operating
system. This in turn will allow communications with the connected serial device in the
same manner as a device physically connected to the COM port on a PC. The serial
port supports high serial speeds up to 460.8kbps in RS-232for NCOM-411, RS-422/485
for NCOM-412 or RS-232/RS-422/485 for NCOM-413.
Serial port operation mode can be easily changed in NCOM-413/NCOM-412 via
software. This can be done using our Windows utility software or the web console
interface.
NCOM-413 serial device server supports automatic IP configuration protocol (DHCP)
and fixed static IP configuration via the handy web browser console. NCOM-413
provides a utility software for Windows, called NCOM Virtual Serial Port Manager. This
program can detect, manage and configure NCOM serial device server in your network.
This manual covers three different models of four-port serial device server:
NCOM-411 Quad RS-232
NCOM-412 Quad RS-422/485
NCOM-413 Quad RS-232/422/485
In general, the software installation and operation is the same on all models, except
for the different software settings for the configuration of serial operation modes on
NCOM-413 and NCOM-412.

5
1.1 Key Features
The NCOM-413 has the following features:
Adds four virtual serial COM ports via network connection
NCOM-413 fully supports the “COM Port Control” protocol known as
RFC2217
Supports network protocols such as TCP and UDP client/server
Serial port operation mode can be easily changed via our Windows utility
software or the web console interface
Firmware upgradable for future firmware revisions
Supports virtual serial port driver for Windows OS (Windows XP up to
Windows 10)
Supports pair connection mode for connectingtwo serial device servers over
a network without a PC
Easy-to-use Windows utility software for easy configuration and installation
10/100Mbps Ethernet with auto-detection
Configuration via web console interface or utility software
Windows utility software automatically finds NCOM devices on the network
Supports “reset” button for system reset
Supports “default” button to restore to factory settings
Data rates: 300bps to 460.8kbps
Auto transmit buffer control for 2-wire RS-485 half-duplex operation (NCOM-
413 and NCOM-412 only)
Termination resistorsinstalled on-board (NCOM-413/NCOM-412 only)
Supported RS-232 signals: DCD, RxD, TxD, DTR, GND, DSR, RTS, CTS (NCOM-
413 and NCOM-411 only)
Supported RS-422, RS-485 4-wire signals: TxD-, TxD+, RxD+, RxD- (NCOM-413
and NCOM-412 only)
Supported RS-485 2-wire signals: data-, data+ (NCOM-413 and NCOM-412
only)
LEDs indicating Ethernet port’s link and activity statuses
LEDs indicating serial port’s TxD and RxD statuses
LEDs indicating serial port’s TxD and RxD statuses (NCOM-413 and NCOM-
412 only)
Virtual serial port drivers for Windows 10, 8.1, 8, 7, Vista, 2003, XP
Built-in 15kV ESD protection for all serial signals

6
1.2 Specifications
LAN
Ethernet
10/100Mbps
Connector
RJ-45 connector
Protection
Built-in 1.5kV magnetic isolation
NCOM-413 Serial Interface
Interface
RS-232/422/485
No. of Ports
Four
Connector
DB9 male connector
Max. Speed
460.8kbps for serial data transmission & reception
RS-232 Signals
DCD, RxD, TxD, DTR, GND, DSR, RTS, CTS
RS-422 Signals
TxD-, TxD+, RxD+, RxD-, GND
RS-485 Signals
4-wire TxD-, TxD+, RxD+, RxD-, GND
2-wire Data-, Data+, GND
Protection
15kV ESD for all signals
RS-485 Data Direction
Automatic RS-485 direction control
NCOM-412 Serial Interface
Interface
RS-422/485
No. of Ports
Four
Connector
DB9 male connector
Max. Speed
460.8kbps for serial data transmission & reception
RS-422 Signals
TxD-, TxD+, RxD+, RxD-, GND
RS-485 Signals
4-wire TxD-, TxD+, RxD+, RxD-, GND
2-wire Data-, Data+, GND
Protection
15kV ESD for all signals
RS-485 Data Direction
Automatic RS-485 direction control

7
NCOM-411 Serial Interface
Interface
RS-232
No. of Ports
Four
Connector
DB9 male connector
Max. Speed
460.8kbps for serial data transmission& reception
RS-232 Signals
DCD, RxD, TxD, DTR, GND, DSR, RTS, CTS
Protection
15kV ESD for all signals
Serial Communication Parameters
Data Bits
5, 6, 7, 8
Parity
None, Odd, Even, Mark, Space
Stop Bit
1, 1.5, 2
Flow Control
Hardware (RTS, CTS)
Software Features
Protocols
ICMP, IP, TCP, UDP, DHCP, DNS, HTTP
Utility
NCOM management tool for Windows OS
OS Driver Support
Virtual serial port driver for Windows OS
Configuration
Web console, Windows utility
Power Requirement
Power Input
9VDC to 48VDC
Power Consumption
NCOM-413: 200mA@12VDC, 90mA@48VDC
NCOM-412: 180mA@12VDC, 80mA@48VDC
NCOM-411: 140mA@12VDC, 60mA@48VDC
Environment
Operating Temperature
0°C to 55°C (32°F to 131°F)
Storage Temperature
-20°C to 75°C (-4°F to 167°F)
Humidity
5% to 95% RH
Safety Approvals
CE, FCC

8
Mechanical
Casing
Plastic, ABS
Dimensions
133mm × 125mm × 41mm (L × W × H)
Weight
240g

9
2. PANEL LAYOUT OF NCOM-413
Note: The layouts of NCOM-413, NCOM-412 and NCOM-411 are the same.

10
3. CONNECTING THE HARDWARE
Before connecting the NCOM serial device server for the first time, you may want to
follow these instructions for testing purposes. We will describe how to connect to the
network, power, your serial devices, and also state the functions of the LED indicators.
Step 1 –Connecting to the Network
First, connect an Ethernet cable to NCOM’s Ethernet port. Once the Ethernet cable is
connected, connect the other end of the cable to your network. This can be a free
Ethernet port on your DSL router, Ethernet hub/switch, or 802.11n router/base
station. If you do not have a network, you can connect NCOM directly to the Ethernet
port on your computer.
Step 2 –Connecting the Power
Connect the included power supply to NCOM’s power input connector. Once the
NCOM is powered, the “PWR” LED turns ON. After a few seconds, the “PWR” LED will
flash two times to indicate that the NCOM serial device server is ready.
Step 3 –Connecting to a Serial Device
Connect the serial data cable between NCOM and the serial device. The NCOM-411’s
serial port provides RS-232, the NCOM-412 provides RS-422/485 and the NCOM-413
provides RS-232/422/485 interface for data transmission. The port uses a standard
male DB9 pin assignment.

11
3.1 Serial Port Pin-Out Information of DB9 Connector
Pin Number
Pin Type
Description
1
Input
DCD Data Carrier Detect
2
Input
RxD Receive Data
3
Output
TxD Transmit Data
4
Output
DTR Data Terminal Ready
5
Ground
GND Signal Ground
6
Input
DSR Data Set Ready
7
Output
RTS Request To Send
8
Input
CTS Clear To Send
RS-232 pin-out for DB9 connector
Pin Number
Pin Type
Description
1
Output
TxD- Transmit Data, negative polarity
2
Output
TxD+ Transmit Data, positive polarity
3
Input
RxD+ Receive Data, positive polarity
4
Input
RxD- Receive Data, negative polarity
5
Ground
GND Signal Ground
RS-422/485 full duplex pin-out for DB9 connector
Pin Number
Pin Type
Description
1
Output/Input
Data- Transmit/Receive Data, negative polarity
2
Output/Input
Data+ Transmit/Receive Data, positive polarity
5
Ground
GND Signal Ground
RS-485 half duplex pin-out for DB9 connector

12
3.2 HardwareReset Button
NCOM-413 has a hardware reset button for resetting the device. When the hardware
reset button is pressed for a short duration, NCOM’s power will be reset.
3.2.1 Hardware Restore Factory Defaults Button
The NCOM-413 serial device server has a hardware restore factory defaults button to
restore all settings to factory default states. You will need to open up the case, turn
the power on and press the hardware restore factory defaults button until the “PWR”
LED flashes.

13
3.3 Changing Serial Port Operation Mode in NCOM-413/NCOM-
412
Serial port operation mode of NCOM-413/NCOM-412 can be easily changed via
software. This can be done using our Windows utility software or the web console
interface.
The web console interface is used to configure the serial device server. Open any web
browser and enter the device’s IP address in the address bar to access the firmware’s
“HOME” page.
Under the firmware’s “HOME” page, select “SERIAL SETTINGS” under “Port 1 Settings”,
“Port 2 Settings”, “Port 3 Settings” and “Port 4 Settings”. Under “Mode”, select the
proper serial port operation mode, check the “Make these the default settings”box
and click “Submit” to set your device into the proper serial port operation mode.

14
The serial port operation mode can also be configured with our Windows utility
software, NCOM Virtual Serial Port Manager.
After running NCOM Virtual Serial Port Manager, click on “Configuration” to enter the
control menu page. Select an attached device to configure the virtual serial port
parameters. You will find “Device Status”, “COM Port Status”, “Device Control” and
“Configuration Import/Export” on the main window of NCOM Configuration.
Under the “COM Port Status” window, select “Port 1”, “Port 2”, “Port 3” or “Port 4”.
Under “Mode”, select the proper serial port operation mode, then check “Set Default”
and click “Update” to set your NCOM-413/NCOM-412 in the proper serial port
operation mode.

15
3.4 LED Indicators
The NCOM-413 has 15 LED indicators, as described in the following table:
LED
Name
LED
Color
LED Function
PWR
Red
Steady on: Power is on and functioning normally.
Steady off: Power is off.
Flashes two times to indicate the device is ready.
Link
Yellow
Steady on: The Ethernet link has established.
Steady off: Ethernet cable is disconnected.
ACT
Green
Steady on/blinking: Ethernet data transmission is
occurring.
Steady off: Ethernet cable not connected.
Tx
Green
Blinking: The serial port is transmitting data.
Rx
Yellow
Blinking: The serial port is receiving data.
Mode
Green
Red
Steady off: The port is working in RS-232 mode.
Green LED steady on: The port is working in RS-422 or RS-
485 full duplex (4-wire) mode.
Red LED Steady on: The port is working in RS-485 half
duplex (2-wire) mode.

16
3.5 RS-422/485 Termination Resistors Option for NCOM-
413/NCOM-412
In some critical environments, when transmitted RS-422/485 signals arrive at the end
of a cable, they are reflected. This causes the signals to travel on the cable more than
once, which is called ringing. This can cause false reading of transmitted data. For long
cables, termination resistors are required. These increase the damping in order to
reduce reflections. The value of the termination resistor must match the impedance
of the cable, which is typically 120Ω. Generally, this must be done in the cabling, since
this depends on the installation of connections. Before applying the option, check your
cable specification for proper impedance matching.
Inside NCOM-413/NCOM-412, there are eight 3-pin 2.54mm pitch header blocks
(JP3~JP10) for jumper caps to enable TxD, RxD 120Ωtermination resistors and eight
3-pin 2mm pitch header blocks (J2~J9) for jumper caps to enable TxD 750Ωbiasing
resistors. You will need to open up the case and set the jumper settings for RS-422
mode or RS-485 mode, as per the requirements of your application.
Termination must not be installed in the middle of the cable. It is only permitted at
both ends. Since a computer controlled serial port is almost always at one end of the
cable, termination is disabled by default.
Biasing of data lines must only occur at a single point anywhere in the cabling.
NCOM-413/NCOM-412 provides biasing for ease of installation. If your cabling
doesn’t provide biasing, please be sure to enable this inside the unit.
Settings are listed as follows:
3-pin Header for Termination Option Configuration
Serial Port 1
Jumper
Function
JP3
1-2
Enable
Enable TxD+/- 120Ω termination resistor.
2-3
Disable
Disable TxD+/- 120Ω termination resistor.
JP4
1-2
Enable
Enable RxD+/- 120Ω termination resistor.
2-3
Disable
Disable RxD+/- 120Ω termination resistor.
Jumper
Function
J2
1-2
Enable
Enable TxD+ pull-high 750Ω biasing resistor.
2-3
Disable
Disable TxD+ pull-high 750Ω biasing resistor.
J3
1-2
Enable
Enable TxD- pull-low 750Ω biasing resistor.
2-3
Disable
Disable TxD- pull-low 750Ω biasing resistor.

17
Serial Port 2
Jumper
Function
JP5
1-2
Enable
Enable TxD+/- 120Ω termination resistor.
2-3
Disable
Disable TxD+/- 120Ω termination resistor.
JP6
1-2
Enable
Enable RxD+/- 120Ω termination resistor.
2-3
Disable
Disable RxD+/- 120Ω termination resistor.
Jumper
Function
J4
1-2
Enable
Enable TxD+ pull-high 750Ω biasing resistor.
2-3
Disable
Disable TxD+ pull-high 750Ω biasing resistor.
J5
1-2
Enable
Enable TxD- pull-low 750Ω biasing resistor.
2-3
Disable
Disable TxD- pull-low 750Ω biasing resistor.
Serial Port 3
Jumper
Function
JP7
1-2
Enable
Enable TxD+/- 120Ω termination resistor.
2-3
Disable
Disable TxD+/- 120Ω termination resistor.
JP8
1-2
Enable
Enable RxD+/- 120Ω termination resistor.
2-3
Disable
Disable RxD+/- 120Ω termination resistor.
Jumper
Function
J6
1-2
Enable
Enable TxD+ pull-high 750Ω biasing resistor.
2-3
Disable
Disable TxD+ pull-high 750Ω biasing resistor.
J7
1-2
Enable
Enable TxD- pull-low 750Ω biasing resistor.
2-3
Disable
Disable TxD- pull-low 750Ω biasing resistor.
Serial Port 4
Jumper
Function
JP9
1-2
Enable
Enable TxD+/- 120Ω termination resistor.
2-3
Disable
Disable TxD+/- 120Ω termination resistor.
JP10
1-2
Enable
Enable RxD+/- 120Ω terminationresistor.
2-3
Disable
Disable RxD+/- 120Ω termination resistor.
Jumper
Function
J8
1-2
Enable
Enable TxD+ pull-high 750Ω biasing resistor.
2-3
Disable
Disable TxD+ pull-high 750Ω biasing resistor.
J9
1-2
Enable
Enable TxD- pull-low 750Ω biasing resistor.
2-3
Disable
Disable TxD- pull-low 750Ω biasing resistor.

18
The NCOM serial device server hardware installation is now complete. Please proceed
to the next step to start the first time configuration NCOM-413.

19
4. CONFIGURING NCOM-413 FOR THE FIRST TIME
4.1 Configuring Static IP Address
When setting up your NCOM-413 for the first time, it is important to configure the IP
address in order to operate in your network. The NCOM-413 products are configured
with the followingdefault private IP address:
Default private IP address: 192.168.254.254
You need to set up your client computer to static IP address manually. Please go to
“Internet Protocol Version 4 (TCP/IPv4)” under “Local Area Connection Properties” to
change the IP address to a static IP address. (This can be found from Start → Settings
→ Control Panel → Network and Internet → Network and Sharing Center → Change
Adapter Settings → Local Area Connection → Properties).
Under “Internet Protocol Version 4 (TCP/IPv4)”, select “Use the following IP address:”
and enter the static IPaddress 192.168.254.XXX (such as 192.168.254.253) and Subnet
mask (such as 255.255.255.0) then click “OK” to set your client computer to static IP
address.
After setting your client computer to static IP address and connecting to NCOM-413,
you can configure NCOM-413 via its web console interface.
Table of contents
Other Titan Electronics Server manuals
Popular Server manuals by other brands
Dell
Dell PowerEdge R310 Hardware installation instructions

Lenovo
Lenovo ThinkServer RD210 warranty and support information
StarTech.com
StarTech.com WALLSHELF4U instruction manual
Huawei
Huawei FusionServer Pro 2288X V5 Product White Paper
NEC
NEC Expres5800/A2040b installation guide

Supermicro
Supermicro SuperServer SYS-821GE-TNHR user manual
