TITO FOGLIE User manual

FOGLIE (istruzioni, agosto 2020)
LEAVES
(Manual, August 2020)
-1-
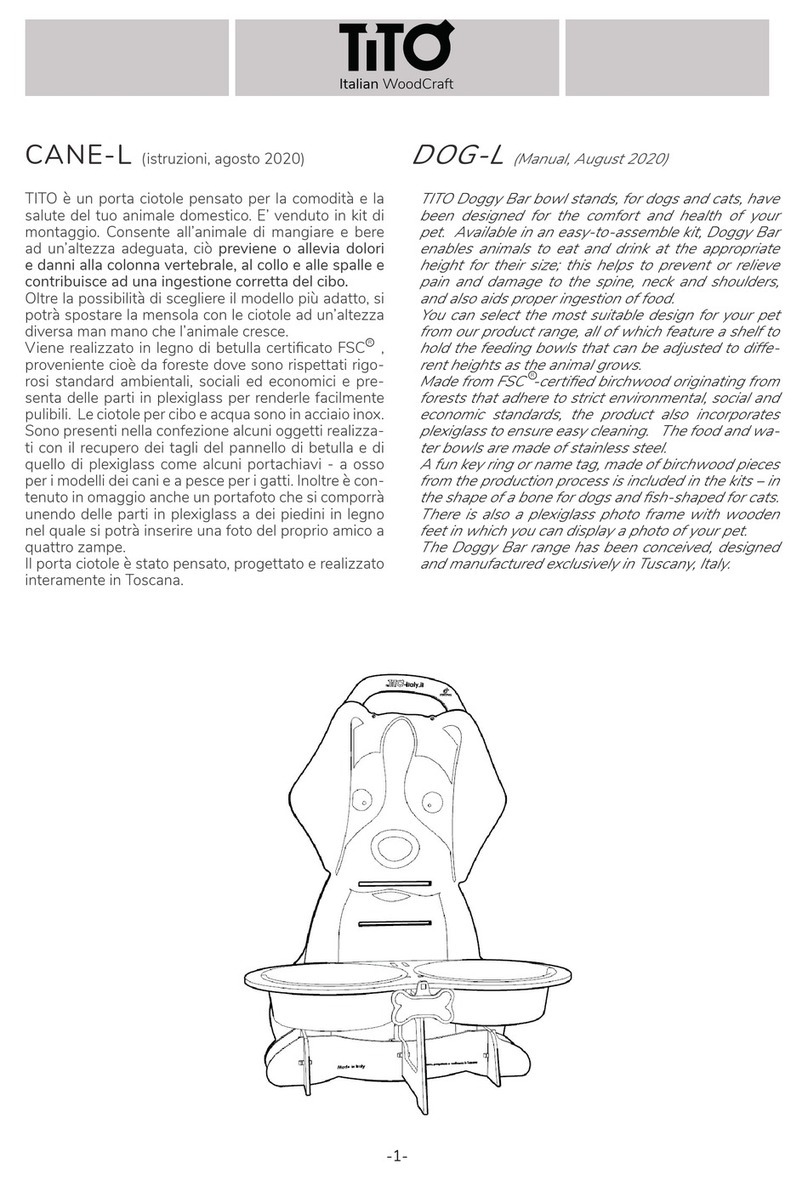
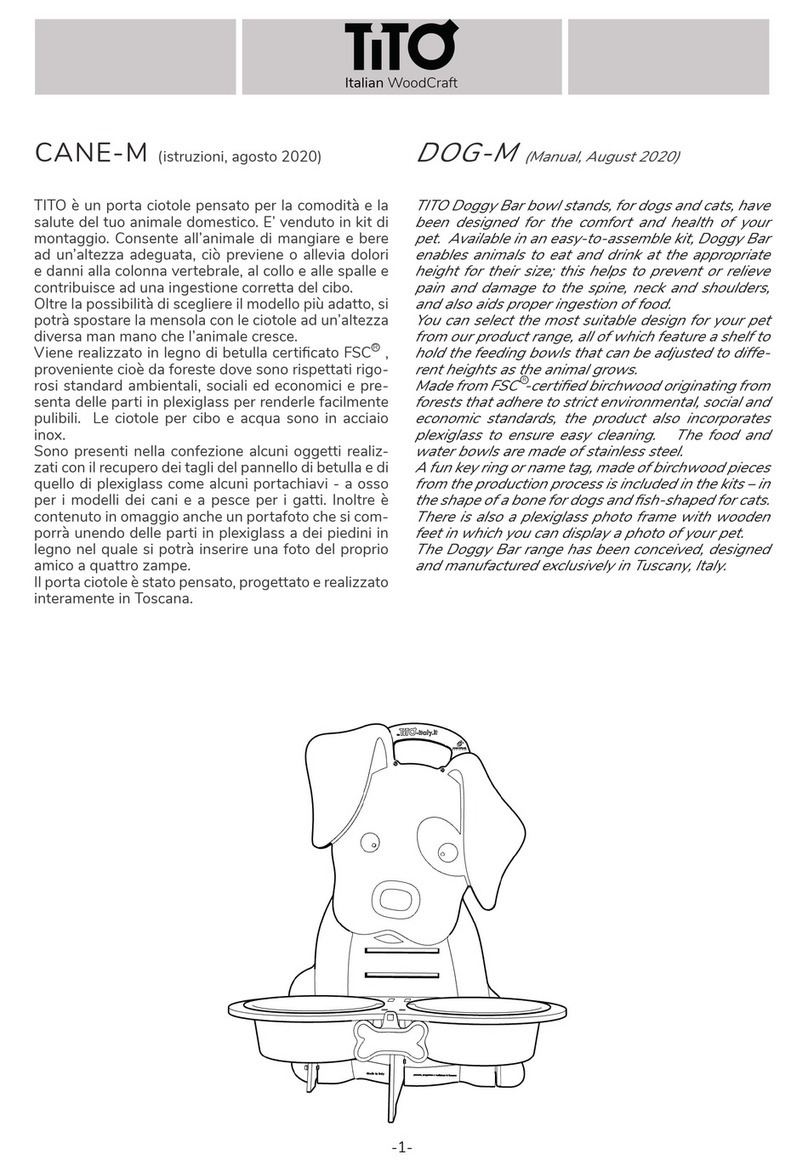
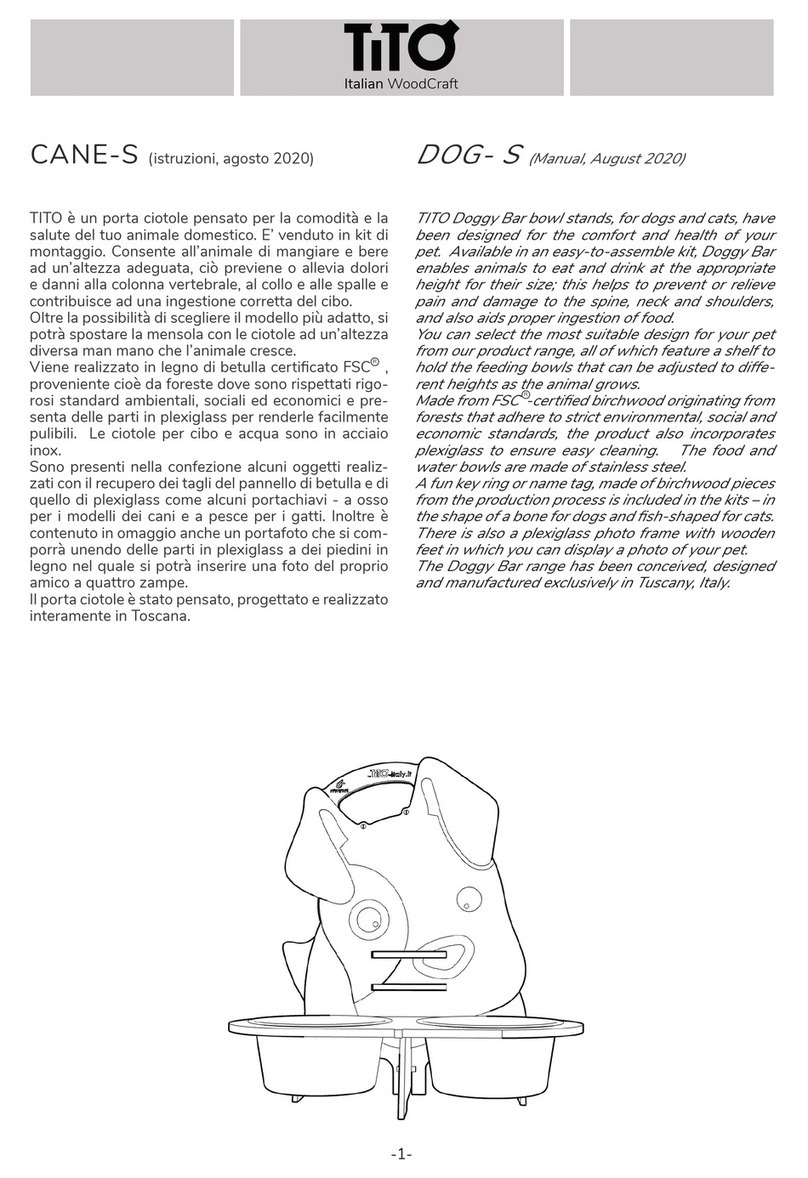
TITO è un porta ciotole pensato per la comodità e la
salute del tuo animale domestico. E’ venduto in kit di
montaggio. Consente all’animale di mangiare e bere
ad un’altezza adeguata, ciò previene o allevia dolori
e danni alla colonna vertebrale, al collo e alle spalle e
contribuisce ad una ingestione corretta del cibo.
Oltre la possibilità di scegliere il modello più adatto, si
potrà spostare la mensola con le ciotole ad un’altezza
diversa man mano che l’animale cresce.
Viene realizzato in legno di betulla certicato FSC ,
proveniente cioè da foreste dove sono rispettati rigo-
rosi standard ambientali, sociali ed economici e pre-
senta delle parti in plexiglass per renderle facilmente
pulibili. Le ciotole per cibo e acqua sono in acciaio
inox.
Sono presenti nella confezione alcuni oggetti realiz-
zati con il recupero dei tagli del pannello di betulla e di
quello di plexiglass come alcuni portachiavi - a osso
per i modelli dei cani e a pesce per i gatti. Inoltre è
contenuto in omaggio anche un portafoto che si com-
porrà unendo delle parti in plexiglass a dei piedini in
legno nel quale si potrà inserire una foto del proprio
amico a quattro zampe.
Il porta ciotole è stato pensato, progettato e realizzato
interamente in Toscana.
TITO Doggy Bar bowl stands, for dogs and cats, have
been designed for the comfort and health of your
pet. Available in an easy-to-assemble kit, Doggy Bar
enables animals to eat and drink at the appropriate
height for their size; this helps to prevent or relieve
pain and damage to the spine, neck and shoulders,
and also aids proper ingestion of food.
You can select the most suitable design for your pet
from our product range, all of which feature a shelf to
hold the feeding bowls that can be adjusted to diffe-
rent heights as the animal grows.
Made from FSC -certied birchwood originating from
forests that adhere to strict environmental, social and
economic standards, the product also incorporates
plexiglass to ensure easy cleaning. The food and
water bowls are made of stainless steel.
A fun key ring or name tag, made of birchwood pieces
from the production process is included in the kits – in
the shape of a bone for dogs and sh-shaped for cats.
There is also a plexiglass photo frame with wooden
feet in which you can display a photo of your pet.
The Doggy Bar range has been conceived, designed
and manufactured exclusively in Tuscany, Italy.
Italian WoodCraft
R
R

-2-
Insiemi ed elementi di cui è composto il kit:
Sets and elements of which the kit is composed:
FIG.2
In totale il Kit è composto da n. 21 elementi.
Gli elementi inseriti dentro gli insiemi sono tutti pre-
tagliati e tenuti aggregati da piccoli ponticelli per il
distacco (semplicemente premendo sopra con le dita
delle due mani). Trattandosi di legno naturale (che
può avere diverse consistenze) è possibile, anche se
non frequente, che gli elementi presentino difcol-
tà alla separazione, in questo caso (e solo in questo
caso) utilizzare una lama aflata con la quale incide-
re i ponticelli da ambo i lati (questa operazione deve
essere fatta solo se indispensabile e da una persona
adulta).
Nel caso di scheggiature o rotture degli elementi leg-
gere le indicazioni nali.
Tempo stimato totale per il montaggio: 20 minuti.
Prima di iniziare ad assemblare il prodotto leggere
attentamente queste istruzioni e fare attenzione a
montare il lato degli elementi con la lettera identi-
cativa incisa nella posizione indicata in descrizione,
comunque sempre verso sinistra (fronte oggetto) o
verso l’alto.
Sono necessari i seguenti attrezzi e materiali:
• Avvitatore o cacciavite
• Piccolo martello
Per il montaggio non serve colla.
A ne montaggio, ribadire con un piccolo martello
tutte le zeppe nella direzione di ssaggio in modo
che il tutto risulti bloccato e non si perda nessun pez-
zo (operazione obbligatoria se si hanno minori di 36
mesi in casa).
Per estrarre una zeppa una volta inserita nella sede,
utilizzare lo scalpellino W fornito nella confezione col-
pendolo con un martello (vd.indicazioni nali).
The kit contains a total of 21 parts.
All the pieces are pre-cut while the parts inside Kit Z
are held in place by small tabs for easy detachment,
by applying gentle pressure with the ngers of both
hands.
As the product is made of natural wood (which can
have different textures) on occasion there may be
some difculty in detaching some of the pieces by
hand. If needed, a small, sharp blade may be used to
gently assist in separating the piece (this should only
be done if absolutely necessary and by an adult).In
case any of the pieces or parts chip or break during
assembly, please turn to the guidelines in this leaet
for advice on what to do.
Approximate assembly time: 20 minutes
Before beginning to assemble the product, please
read the instructions carefully and then take care to
place each piece with its identifying letter in the cor-
rect position as stipulated in the instructions. This
would be always to the left (when placing it on the
front of the object) or facing upwards.
You will need the following tools to assemble product:
• Electric drill or screwdriver
• Small hammer
Please note that glue is not generally required
Once you have assembled the product, make sure
that all the wedges are xed rmly in place in the cor-
rect direction using a small hammer, so all are secure
and no piece can be lost (this is particularly important
if you have children younger than 36 months).
To remove a wedge after it has been inserted, use
the small chisel marked W on the diagram below, to-
gether with a small hammer, to gently ease the we-
dge out (turn to the assembly instructions for further
information).
FOGLIE (istruzioni, agosto 2020) LEAVES (manual, August 2020)

FIG.4
FIG.5
-3-
1. Sovraapporre gli elementi A e B facendo
in modo che le lettere identicative A e B
siano rivolte verso l’alto (Fig.3).
1. Take the pieces marked A and B and lay
them together so that letters A and B are
facing upwards (Fig 3).
FIG.3
A
B
2. Inserire 2 tasselli (dal kit Z) con il taglio rivolto verso
l’alto nei 2 fori tondi e spingerli no a ne corsa (Fig.4).
2. Insert two dowels (from Kit Z) into the round holes
with the cut facing upwards, and push them in as far as
3. Sovrapporre ai primi 2 strati l’elemento C (lettera
verso l’alto) il De l’E, facendo passare i fori attraver-
so i tasselli inseriti precedentemente (Fig.5).
3. Place together the pieces marked C (letter facing
upwards), D and E and lay them over the rst two
layers, aligning the holes so they pass through the
dowels previously inserted (Fig 5).
A
B
C
E
D
FIG.6
4. Inserire le viti (dal kit Z) nei 2 tasselli, posi-
zionandole pressappoco al metà del taglio del
tassello (Fig.6).
4. Insert the screws (from Kit Z) into the dowels,
positioning them approximately in the middle of
the cut of the dowel (Fig 6).
FOGLIE (istruzioni, agosto 2020) LEAVES (manual, August 2020)

8. Inserire 2 zeppe nei fori relativi di cia-
scuno dei due piedini G e H orientandoli
come in gura (Fig.10).
8. Insert two wedges in the correspon-
ding holes of feet G and H, positioning
them as shown in the diagram (Fig 10).
FIG.10
FIG.9
5. Posizionare per comodità l’oggetto composto sul
bordo di un piano rialzato e inserire l’elemento M ( pie-
de centrale) nell’apposita sede con la lettera M rivolta
verso sinistra (fronte oggetto) (Fig.7).
5. For convenience, place the product on the edge of
a raised surface and insert the piece marked M (the
central foot) in the appropriate slot with the letter M
facing to the left at the front of the product (Fig 7).
6. Inserire 2 zeppe (dal kit Z) nei fori
indicati in gura (Fig.8)
6. Insert two wedges (from Kit Z) into
the holes as shown in the diagram
(Fig 8).
FIG.7
FIG.8
-4-
M
7. Inserire gli elementi G e H (piedi late-
rali) nelle relative sedi orientandoli come
in gura (Fig.9).
7. Insert pieces G and H (the right and
left-hand feet) into the appropriate slots,
as shown in the diagram (Fig 9).
H
G
FOGLIE (istruzioni, agosto 2020) LEAVES (manual, August 2020)

9. Inserire la mensola portaciotole
L nella fessura ritenuta più adatta
all’altezza del vostro animale, orien-
tandola in modo che la lettera L in-
cisa sia rivolta verso l’alto (Fig.11).
9. Insert the bowl holder L into the
most suitable slot for your pet’s hei-
ght, positioning it so that the letter
L is facing upwards (Fig 11).
-5-
FIG.11
L
G
FIG.12
10. Inserire le zeppe necessarie nei fori posti sul retro della men-
sola L (Fig.12).
10. Insert the wedges into the holes on the back of the bowl
holder L (Fig 12).
FIG.13
N
11. Disegnare il portanome N a
proprio piacimento e incastrarlo
con leggera pressione sul dente
posto frontalmente alla menso-
la L (Fig.13).
11. Illustrate the name tag (N)
as you wish and x it with light
pressure on to the small hanger
at the front of the shelf L (Fig
13).
12. Attaccare sotto ogni piedino un gommi-
no antiscivolo T fornito nella confezione. Se
tendessero a staccarsi assicurarli con colla
adeguata ai materiali (Fig.14).
12. Attach non-slip rubber pads (T) supplied
in the kit under each foot. These can be se-
cured even more rmly in place using a glue
suitable for use on wood (Fig 14).
FIG.14
T
FOGLIE (istruzioni, agosto 2020) LEAVES (manual, August 2020)

-6-
UTILIZZO DELL’ELEMENTO F:
Utilizzare gli elementi F come portachiavi o come portanome per collarino
(Fig.18).
USING PIECE F:
Can be used as keyrings or name tags for your pet’s collar (Fig 18).
FIG.18
F
V
FIG.15
S
13. Inserire nei fori della mensola L le 2 ciotole
S fornite nella confezione (Fig.15).
13. Place the two bowls (S) supplied in the kit
into the shelf L (Fig 15).
FIG.16
FIG.17
W
Q
I
Q
RIMOZIONE DI UNA ZEPPA:
Nel caso si voglia estrarre una zeppa già inserita,
puntare nella sua estremità piatta lo scalpellino for-
nito e colpire piano con un martello (Fig.16).
REMOVING A WEDGE:
If you want to remove a wedge that has already
been inserted, position the chisel provided (W) using
the at end and strike it gently with a hammer (Fig
16).
MONTAGGIO DEL PORTAFOTO:
Posizionare la fotograa al centro del primo elemen-
to Q, poi sovrapporre il secondo elemento Q.
Inserire poi i 2 piedini I negli alloggi degli elementi Q
sovrapposti (Fig.17).
ASSEMBLING THE PHOTO FRAME:
Place the photograph between the two pieces mar-
ked Q, then insert the two small feet (I) in the slots
(Fig 17).
FOGLIE (istruzioni, agosto 2020) LEAVES (manual, August 2020)

-7-
FOGLIE (istruzioni, agosto 2020) LEAVES (manual, August 2020)
PULIZIA DEL PRODOTTO • Utilizzare prodotti per la pulizia
del legno per le parti in legno e sapone delicato o detergente
e acqua tiepida con un panno morbido per per la pulizia delle
parti in plexiglass (eventualmente un detergente antistatico
per avitare di attirare la polvere). Evitare per il plexiglass di
utilizzare panni ruvidi e liquidi per pulizia nestre, benzene,
alcool concentrato e solventi (potrebbero provocarfe micro-
cricche).
CONSERVAZIONE DEL PRODOTTO • Il prodotto, per i ma-
teriali di cui è costituito, non è adatto per essere esposto al
sole e agli agenti atmosferici per lungo tempo, cosa per altro
non idonea al contenuto di cibo e acqua del le ciotole. Se si
desiderasse comunque posizionarlo in un luogo in cui si trovi
esposto agli agenti atmosferici si consiglia di trattare le parti
in legno con vernici protettive naturali per legno. Spolverare
di tanto in tanto con un pennello morbido per evitare l’accu-
mulo di polvere.
COSA FARE SE…
•1 Durante la liberazione degli elementi pretagliati si rompe
o si neggia un pezzo necessario:
Non gettare i pezzi danneggiati ma incollarli subito con colla
vinilica ripristinando l’elemento (il materiale del quale sono
fatti è realizzato a strati di legno. In fase di taglio vengono
scelti i pannelli la cui supercie appare integra, ma è possibile
che all’interno esista una discontinuità del materiale che ne
può determinare l’indebolimento facilitandone la rottura).
• 2 Nella confezione appena aperta risultano mancanti o
danneggiati uno o più elementi (Attenzione: la confezione al
momento dell’apertura dovrà essere integra): richiedere via
email i pezzi mancanti indicando: il lotto di produzione (inci-
so sull’elemento H con un numero da 01 a 12, una barra di
divisione “/” o “-” e le ultime 2 cifre dell’anno di produzione es.
“10/20”), la denominazione prodotto (riportata sulla scatola,
es. “CS” o “Cane S”), il codice dell’elemento o elementi man-
canti (es. “H” o “L” incisi sopra ogni pezzo) e quantità, (facen-
do anche riferimento alle indicazioni riportate nelle istruzioni
di montaggio), una copia leggibile dello scontrino di acquisto,
nome, indirizzo per la spedizione, n. di telefono per contatti.
Spedire a info@tito-italy.it indicando in oggetto: “Richiesta
materiali mancanti nel Kit…(specicare modello)”. I materiali
verranno spediti il più rapidamente possibile.
• 3 Se l’oggetto già montato si danneggia in maniera lieve:
Procedere come da precedente punto 1. Se il danneggia-
mento è tale da ritenere giusta la sostituzione del pezzo
richiedere il disegno ed i dettagli della sagoma del pezzo da
ricostruire autonomamente, oppure fare una richiesta con le
stesse indicazioni di cui al punto 2 precedente con oggetto:
“Richiesta materiali per sostituzione”, verrà risposto con le
indicazioni del costo, il metodo di pagamento e i tempi occor-
renti per il recapito.
CLASSIFICAZIONE DEL PRODOTTO • In base al capitolo
10 della direttiva Giocattoli 2009/48 il presente oggetto è
assimilato ai prodotti destinati a maggiori di 14 anni e supe-
riore (10.1.2 punto 2) pertanto non necessita di marchiatura
CE ma sottostà alle regole del Codice del Consumo (decreto
legislativo 206/2009 e relativi aggiornamenti).
SMALTIMENTO • Il prodotto è formato da materiali non clas-
sicabili come riuti speciali e/o pericolosi, pertanto i riuti
sviluppati sia in fase di montaggio che a ne vita del prodot-
to possono essere trattati come normali riuti domestici; si
consiglia comunque di informarsi presso gli ufci territoriali
degli Enti che trattano la problematica per uno smaltimento
consapevole.
GARANZIA • Il prodotto è coperto dalla garanzia prevista
dalla legislazione vigente al momento dell’acquisto. Eventuali
usi impropri(*1) o danneggiamenti del prodotto non dipen-
denti da trasporto o da rottura di pezzi dentro la confezione
(che dovrà essere integra e sigillata al momento dell’acqui-
sto), non sono coperti da garanzia.
CLEANING THE PRODUCT • Use a special cleaning product for
wood, and a mild soap or detergent with tepid water to clean the
plexiglass section with a soft cloth (you can use an anti-static
detergent to avoid build-up of dust).
Avoid cleaning the plexiglass section with either rough cloths,
products for window cleaning or those that contain benzene,
concentrated alcohol and solvents (all these could cause mi-
cro-cracks to develop).
MAINTAINING THE PRODUCT • It is recommended to avoid
prolonged exposure to the sun or other weather conditions that
could damage the wood and plexiglass, and also affect food and
water in the bowls. If, however, you wish to keep the product in
an exposed place it is advisable to apply a natural wood protec-
tor to the wooden sections, and clean now and then with a soft
cloth to prevent dust accumulation.
WHAT TO DO IF…
1. One of the pre-cut pieces breaks or becomes damaged as it is
being detached during assembly:
Do not throw away the damaged pieces but repair them straight
away using a specic glue suitable for use on the material (the
pieces are comprised of wood layers). During the cutting phase,
the panels selected are those whose surfaces appear intact;
occasionally however there may be a hidden weak spot which
can cause breakage.
2. One or more pieces are missing or damaged on opening the
package (please ensure that the packaging has been properly
sealed before opening for the rst time): You should submit a
request by email to info@tito-italy.it entitled ‘Request for missing
material from kit xxx’ (here indicate the product type).
Specify which piece/s are missing by the production batch num-
ber (there is a number engraved on piece H from 01 to 12, a bar
“/”o”-“-e, and the last two digits of the year of production, eg
10/20), the product name (indicated on the box eg, CS or Cane
S), the code of the missing piece/s (eg. the letter engraved on
each piece such as H or L), and the quantity (you can also refer
to the information in the assembly instructions), a legible copy of
the receipt of purchase, your name, delivery address and contact
phone number. The replacement materials will then be shipped
as soon as possible.
3. If a piece has been damaged during the assembly process at
home:
Proceed as per the guidelines in Point 1.
If, however, it is not possible to repair the damage and you need
a replacement piece, you can either request details of the design
and shape of the piece to commission the replacement inde-
pendently, or you can submit an email request to TITO entitled
‘Request for replacement materials’, following the guidelines in
Point 2. You will receive a response detailing the cost of repla-
cing the piece, the method of payment and delivery time.
CLASSIFICATION OF THE PRODUCT • According to Chapter 10
of the Toys Directive 2009/48, this object is assimilated to pro-
ducts intended for those aged 14 years and over (10.1.2 Point
2), therefore it does not require CE marking but is subject to the
regulations of the Consumer Code (legislative decree 206/2009
and related updates).
WASTE DISPOSAL • This product consists of materials that
are not classied as special and/or hazardous waste, therefore
waste generated during the assembly process and at the end of
the product’s life can be treated as normal household waste; it is
advisable, however, to seek advice from your local authority to
ensure it is disposed of responsibly.
GUARANTEE • This product is covered by the guarantee accor-
ding to legislation current at the time of purchase. Any improper
usage (*1), damage to the product which does not occur in tran-
sit or damage to the pieces inside the package (please note that
the package must be intact and sealed at the time of purchase
and/or on delivery) will not be covered by the warranty.

-8-
FOGLIE (istruzioni, agosto 2020) LEAVES (manual, August 2020)
MANUALI •
Aggiornamenti nel sito web:
https://www.tito-italy.it/progetti/porta-ciotole/#manuali
PRODUZIONE E VENDITA
Riciclandia
di Multi Tranciati S.R.L.
DESIGN
Angelo Catalani Designer
PRODUCT MANUALS•
For updates, visit
https://www.tito-italy.it/en/project/bowl-stand/#manuals
PRODUCTION AND SALES
Riciclandia di Multi Tranciati S.R.L.
DESIGN
Angelo Catalani Designer
*1 *2 *3 *4 *5 *6 *7
TITO-italy srl • www.tito-italy.it • info@tito-italy.it
AVVERTENZE DI SICUREZZA: In tutte le fasi del mon-
taggio, ed anche a montaggio terminato, tenere fuori
dalla portata dei bambini di età inferiore a 36 mesi.
Tra gli elementi che compongono il kit (compreso il
materiale di imballaggio), si potrebbero trovare piccole
parti che, se ingerite o inalate, potrebbero provocare
problemi di varia natura all’organismo. Se nella zona
di montaggio possono essere presenti bambini di età
inferiore a 36 mesi, gettare prima possibile, negli appo-
siti contenitori di smaltimento, gli imballaggi ed i resti
del materiale usato. Il prodotto è stato progettato per
essere montato escludendo strumenti taglienti e/o a
punta, a meno di casi di assoluta necessità (vd. pagina
2). Non avvicinare i pezzi a amme libere perché po-
trebbero prendere fuoco. Non smontare o distruggere
il prodotto, perché le parti di legno, rompendosi, si
potrebbero scheggiare e provocare danni agli occhi e
ad altre parti delicate del corpo umano. A ne lavoro
ripulire l’ambiente e eliminare ogni traccia delle polveri
prodotte. Conservare le presenti avvertenze no a ne
vita del prodotto.
Per liberare i vari pezzi dagli insiemi che li contengono,
esercitare una lieve pressione e oscillazione, sollecitan-
do più volte le sagome sulle linee pretagliate, per rom-
pere i ponticelli che uniscono gli elementi; se neces-
sario esercitare una lieve pressione di lato ai ponticelli
con una moneta sottile. Una volta liberati i pezzi, se
dovessero rimanere bave di legno sul perimetro degli
stessi, stronare localmente con il bordo di una moneta
o con carta abrasiva. Eventuali lievissime scheggiature
presenti, sono da considerarsi nella norma; laddove
possibile, montare queste parti in posizione meno visi-
bile o rovesciarli.
DESCRIZIONE DEI SIMBOLI UTILIZZATI *1 Tempo
indicativo del montaggio *2 Adatto a persone di età
superiore a 14 anni *3 Non disperdere nell’ambiente
*4 Cartone riciclabile *5 Polietilene a bassa densità *6
Polietilene pluriball riciclato al 100% *7 Legno certi-
cato FSC.
SAFETY WARNING: At all stages of product assembly
and also after completion, please keep out of the reach
of children younger than 36 months. Among the com-
ponents of the kit (including the packaging material),
there may be small objects that, if ingested or inhaled,
could cause various health issues. If children younger
than 36 months are present in the area where the
assembly process is taking place, please ensure the
immediate safe disposal of packaging and all other wa-
ste material in suitable waste containers. This product
has been designed to be assembled without the use of
sharp or pointed tools unless absolutely necessary (see
page 2) .
Keep all pieces from the kit away from open ames to
avoid risk of re. Do not disassemble or demolish the
product in case the wooden pieces splinter, causing
damage to eyes and other delicate areas of the body.
At the end of the assembly process thoroughly clean
the area, eliminating all traces of any dust produced.
Please abide by these safety guidelines until the end of
the product’s life.
To remove various pieces from the set, apply slight
pressure and, with very gentle movements, press
along the pre-cut outlines of each shape several times
to break the tabs holding them in place; if necessary,
apply light pressure to the sides of the tabs with a thin
coin. Once the pieces have been detached, gently rub
any rough edges with the edge of a coin or with san-
dpaper. The presence of very slight chips on some of
the pieces is considered normal; where possible, po-
sition those pieces in a less visible position or reverse
them when assembling the product.
DESCRIPTION OF SYMBOLS USED:
*1 Approximate length of time it takes to assemble
product *2 Suitable for those aged 14 years and over
*3 Do not release into the environment *4 Recyclable
cardboard *5 Low density polyethylene*6 100%
recycled bubble wrap polyethylene *7 FSC certied
wood.
R R
This manual suits for next models
1
Other TITO Pet Care Product manuals
