manuals.online logo
Brands
  1. Home
  2. •
  3. Brands
  4. •
  5. Trixie
  6. •
  7. Pet Care Product
  8. •
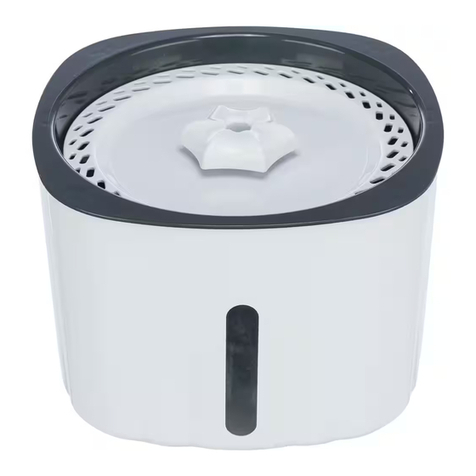
  9. Trixie 24444 User manual

Trixie 24444 User manual

E Instructions FInstructions eInstrucciones
#24444
2
Please note:
• Read all the instructions before using this appliance.
• SAVE THESE INSTRUCTIONS
• Never run the pump without water or when the water level is
too low.
• Unplug the drinking fountain before any maintenance.
• Do not touch any moving parts.
• Do not use outdoors. FOR INDOOR HOUSEHOLD USE ONLY.
• Do not operate the drinking fountain with a damaged power cord or
plug, after a malfunction, or has been dropped or damaged in any
manner.
• To protect against electric shock, do not place cord or plug in water or
other liquids. It is advisable to use a power outlet that
is located higher than the drinking fountain.
• Please note this item should not be disposed of with household wa-
ste. Drop it off at a disposal facility appropriate for the type of device.
• The pump (#24444-10) & filter (#24445) included are available
separately as replacement parts.
Start-up:
1. First run the pump power cable through the cable channel and out
from inside the water tank.
2. Now connect the cable to the power supply.
3. Slide the filter sponge into the holder provided at the bottom
of the water tank to protect the pump.
4. Next place the pump in the recess next to the cable duct so the grilled
intake opening is aligned with the filter sponge.
5. Then cover the pump with the angled cover.
6. Now push the curved outlet onto the angled cover from above so that
you can hear the connection click into place. Make sure the funnel-
shaped plastic tube connects with the pump. If in doubt, adjust the
position of the pump slightly.
7. Then fill the fountain with water (approx. 84.5 oz). Do not let the
pump run without water. If you hear the pump sucking in air and
being louder than usual, the water level is too low. Fill in water imme-
diately.
8. The power plug can now be plugged into the outlet.
9. The adjustable pump allows you to choose the strength of the water
jet yourself. To do this, adjust the slider on the pump.
Cleaning:
• If using the Curved Stream for a single pet, the water should be
changed every two days. The filter should also be cleaned once a
week. For multiple pets, water and filter should be changed more
frequently.
• For cleaning, you can simply remove and clean the pump, plastic parts
and filter. The fountain parts themselves are dishwasher safe.
• If necessary, the curved water outlet can also be disassembled into
its individual parts - e.g. to clean the silicone hose inside. First, pull
off the small cap at the tip of the curved outlet. Then carefully pry
the two halves apart to release the connector. Remove the top half to
gain access to the silicone hose. You can clean the hose with a suitable
cleaning brush (pipe cleaner).
• If your water is hard, it is recommended not to use tap water but
mineral water without carbonic acid. If you still use tap water, more
frequent cleaning of the pump is necessary to prevent calcification.
Otherwise, it will be necessary to treat the pump with a descaler
every now and then.
Note: Unplug the drinking fountain before any maintenance. Do not
touch any moving parts.
Cleaning the pump:
The pump should be cleaned every 3-4 weeks during continuous
operation to prevent wear and tear.
Proceed as follows:
1. Remove the pump cover and unplug the rotor.
2. Clean all parts with a small brush or cotton swab and then rinse the
parts with clean water. Do not use any detergent for cleaning.
3. Then carefully put the rotor back into the pump housing and place the
cover over it.
Getting your pet used to the Fountain:
For very timid pets, a circulating fountain may be intimidating. Create
a trail of treats on the edge of the drinking fountain, your pet will now
associate the water dispenser with a positive experience.
Still have a reluctant drinker?
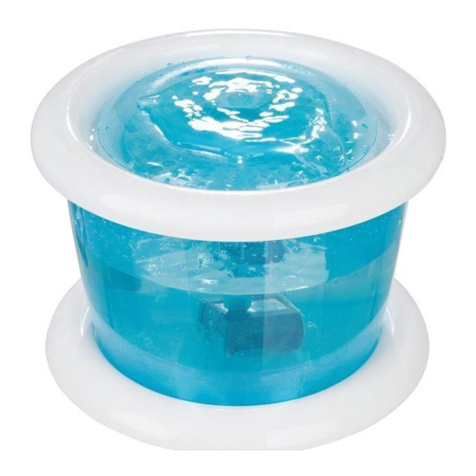
You invested in the TRIXIE Flower water fountain to help your picky
pet stay hydrated, but they are still being stubborn. Try these helpful
tips to lead your pet to water!
• Place the water fountain some distance from their food source.
• Avoid placing the fountain near the walls or corners.
• Positive reinforcement, reward your pet with treats when they inspect
their new fountain.
Veuillez noter :
• Ne jamais faire fonctionner la pompe sans eau ou lorsque le niveau
d'eau est trop bas.
• Débranchez la fontaine à boire avant tout entretien.
• Ne touchez pas les pièces mobiles.
• Veuillez ne pas utiliser l'appareil à l'extérieur.
• Ne faites pas fonctionner la fontaine avec un cordon d'alimentation
ou une fiche endommagés, après un dysfonctionnement, après une
chute ou tout autre dommage.
•
Veillez à ce que la fiche d'alimentation ne soit pas mouillée
et ne soit pas branchée lorsqu'elle est mouillée. Il est conseillé d'utiliser
une prise de courant qui est située plus haut que la fontaine à boire.
• Veuillez noter que cet article ne doit pas être jeté avec les déchets
ménagers. Déposez-le dans une installation d'élimination appropriée
pour ce type d'appareil.
• La pompe (#24444-10) et le filtre (#24445) inclus sont
disponibles séparément comme pièces de rechange.
Démarrage :
1. Faites d'abord passer le câble d'alimentation de la pompe dans le
canal prévu à cet effet et sortez de l'intérieur du réservoir d'eau.
2. Connectez ensuite le câble à l'alimentation électrique.
3. Faites glisser l'éponge filtrante dans le support prévu à cet effet au
fond du réservoir d'eau pour protéger la pompe.
4. Placez ensuite la pompe dans le renfoncement à côté du canal de câ-
bles de manière à ce que l'ouverture d'admission grillagée soit alignée
avec l'éponge filtrante.
5. Recouvrez ensuite la pompe avec le couvercle coudé.
6. Poussez maintenant la sortie incurvée sur le couvercle angulaire par
le haut, de manière à entendre le déclic de la connexion. Assurez-vous
que le tube en plastique en forme d'entonnoir est bien relié à la pom-
pe. En cas de doute, ajustez légèrement la position de la pompe.
7. Remplissez ensuite la fontaine avec de l'eau (environ 2,5 litres). Ne
laissez pas la pompe fonctionner sans eau. Si vous entendez la pompe
aspirer de l'air et être plus bruyante que d'habitude,
le niveau d'eau est trop bas. Remplissez d'eau immédiatement.
FInstructions d‘utilisation
EInstructions
3
8. La fiche d'alimentation peut maintenant être branchée dans la prise
de courant.
9. La pompe réglable vous permet de choisir vous-même la puissance du
jet d'eau. Pour ce faire, réglez le curseur de la pompe.
Nettoyage :
• Lorsque le Curved Stream est utilisé par un animal, l'eau doit
être changée tous les deux jours. Le filtre doit également être nettoyé
une fois par semaine. Ou, si plusieurs animaux l'utilisent, à des inter-
valles plus courts.
• Pour le nettoyage, il suffit de retirer et de nettoyer la pompe, les
pièces en plastique et le filtre. Les pièces de la fontaine elles-mêmes
peuvent être lavées au lave-vaisselle.
• Si nécessaire, la sortie d'eau incurvée peut également être démontée,
par exemple pour nettoyer le tuyau en silicone à l'intérieur. Tout
d'abord, retirez le petit capuchon situé à l'extrémité de la sortie d'eau
courbée. Ensuite, séparez délicatement les deux moitiés pour libérer
le connecteur. Retirez la partie supérieure pour accéder au tuyau en
silicone. Vous pouvez nettoyer le tuyau avec une brosse de nettoyage
appropriée (cure-pipe).
• Si votre eau est calcaire, il est recommandé de ne pas utiliser l'eau du
robinet mais une eau minérale sans acide carbonique. Si vous utilisez
toujours l'eau du robinet, un nettoyage plus fréquent de la pompe
est nécessaire pour éviter la calcification. Sinon, il sera nécessaire de
traiter la pompe avec un détartrant de temps en temps.
Nettoyage de la pompe :
La pompe doit être nettoyée toutes les 3 à 4 semaines en cas de fonc-
tionnement continu pour éviter l'usure.
Remarque : Débranchez la fontaine avant tout entretien. Ne pas
toucher les pièces mobiles.
Procédez comme suit :
1. Retirez le couvercle de la pompe et débranchez le rotor.
2. Nettoyez toutes les pièces avec une petite brosse ou un coton-tige,
puis rincez les pièces à l'eau claire. Ne pas utiliser de détergent pour le
nettoyage.
3. Remettez ensuite soigneusement le rotor dans le boîtier de la pompe
et placez le couvercle par-dessus.
Acclimatation :
Pour habituer les animaux très capricieux au courant incurvé, répan-
dez quelques friandises sur le bord de la fontaine, par exemple. De cet-
te façon, votre animal associera le distributeur d'eau à une expérience
positive.
Tenga en cuenta:
• Nunca haga funcionar la bomba sin agua o cuando el nivel de agua sea
demasiado bajo.
• Desenchufe el bebedero antes de cualquier mantenimiento.
• No toque ninguna pieza móvil.
• No utilice el aparato al aire libre.
• No haga funcionar el bebedero con un cable de alimentación o un
enchufe dañados, después de una avería, después de una caída o si se
ha dañado de cualquier otra forma.
• Asegúrese de que el enchufe no se moje y no se enchufe cuando esté
mojado. Es aconsejable utilizar una toma de corriente que esté situada
a mayor altura que el bebedero.
• Tenga en cuenta que este artículo no debe eliminarse con la basura
doméstica. Llévelo a una instalación de eliminación de residuos apro-
piada para el tipo de dispositivo.
• La bomba (#24444-10) y el filtro (#24445) incluidos están disponi-
bles por separado como piezas de repuesto.
Puesta en marcha:
1. Primero pase el cable de alimentación de la bomba por el canal de
cables y salga del interior del depósito de agua.
2. Ahora conecte el cable a la fuente de alimentación.
3. Deslice la esponja filtrante en el soporte previsto en el fondo del
depósito de agua para proteger la bomba.
4. A continuación, coloque la bomba en el hueco situado junto al canal
de cables, de modo que la abertura de entrada de la rejilla quede
alineada con la esponja filtrante.
5. A continuación, cubra la bomba con la tapa acodada.
6. Ahora empuje la salida curvada sobre la tapa acodada desde arriba
para que pueda oír cómo encaja la conexión. Asegúrese de que el tubo
de plástico en forma de embudo conecta con la bomba. En caso de
duda, ajuste ligeramente la posición de la bomba.
7. A continuación, llene la fuente con agua (unos 2,5 litros). No deje que
la bomba funcione sin agua. Si oye que la bomba aspira aire y es más
ruidosa de lo habitual, el nivel de agua es demasiado bajo. Llene de
agua inmediatamente.
8. Ahora puede conectar el enchufe a la toma de corriente.
9. La bomba ajustable le permite elegir usted mismo la fuerza del chorro
de agua. Para ello, ajuste el regulador de la bomba.
Limpieza:
•
Si el Curved Stream es utilizado por un animal, el agua debe cambiarse
cada dos días. El filtro también debe limpiarse una vez a la semana. O, si
lo usan más de un animal, a intervalos correspondientemente más cortos.
•
Para la limpieza, basta con retirar y limpiar la bomba, las piezas de plá-
stico y el filtro. Las piezas de la fuente en sí son aptas para el lavavajillas.
• Si es necesario, la salida de agua curvada también puede desmontarse
en sus partes individuales, por ejemplo, para limpiar la manguera de
silicona del interior. En primer lugar, retire la pequeña tapa situada en
la punta de la salida curva. A continuación, separe con cuidado las dos
mitades para liberar el conector. Retire la mitad superior para acceder
a la manguera de silicona. Puede limpiar la manguera con un cepillo
de limpieza adecuado (limpiador de tuberías).
• Si su agua es dura, se recomienda no utilizar agua del grifo sino agua
mineral sin ácido carbónico. Si sigue utilizando agua del grifo, es nece-
sario limpiar la bomba con más frecuencia para evitar la calcificación.
De lo contrario, será necesario tratar la bomba con un descalcificador
de vez en cuando.
Limpieza de la bomba:
La bomba debe limpiarse cada 3-4 semanas durante su funcionamien-
to continuo para evitar el desgaste.
Nota: Desenchufe el bebedero antes de cualquier mantenimiento. No
toque ninguna pieza móvil.
Proceda de la siguiente manera:
1. Retire la tapa de la bomba y desenchufe el rotor.
2. Limpie todas las piezas con un cepillo pequeño o un hisopo de algodón
y luego enjuague las piezas con agua limpia. No utilice ningún deter-
gente para la limpieza.
3. A continuación, vuelva a colocar con cuidado el rotor en la carcasa de
la bomba y coloque la tapa sobre él.
Aclimatación:
Para que los animales muy asustadizos se acostumbren al Curved
Stream, esparza unas cuantas golosinas en el borde del bebedero, por
ejemplo. De este modo, su mascota asociará el dispensador de agua
con una experiencia positiva.
eInstrucciones
TRIXIE Pet Products, Inc. · P.O. Box 101196 · Ft. Worth, TX 76185 · www.trixiepet.com

Other Trixie Pet Care Product manuals

Trixie Dog Activity Memory Trainer 3.0 User manual

Trixie

Trixie Dog Activity Memory Trainer 3.0 User manual

Trixie natura 62336 Datasheet

Trixie

Trixie natura 62336 Datasheet

Trixie 24464 User manual

Trixie

Trixie 24464 User manual

Trixie Dayna Datasheet

Trixie

Trixie Dayna Datasheet

Trixie REPTILAND Fogger XL User manual

Trixie

Trixie REPTILAND Fogger XL User manual

Trixie TX8 Smart 2.0 User manual

Trixie

Trixie TX8 Smart 2.0 User manual

Trixie 39343 User manual

Trixie

Trixie 39343 User manual

Trixie 23888 User manual

Trixie

Trixie 23888 User manual

Trixie Curved Stream User manual

Trixie

Trixie Curved Stream User manual

Trixie 44113 User manual

Trixie

Trixie 44113 User manual

Trixie 24344 User manual

Trixie

Trixie 24344 User manual

Trixie 12670 User manual

Trixie

Trixie 12670 User manual

Trixie Turn Around User manual

Trixie

Trixie Turn Around User manual

Trixie REPTILAND User manual

Trixie

Trixie REPTILAND User manual

Trixie Cat Tree Adriano User manual

Trixie

Trixie Cat Tree Adriano User manual

Trixie 76084 User manual

Trixie

Trixie 76084 User manual

Trixie 39345 User manual

Trixie

Trixie 39345 User manual

Trixie TX2 User manual

Trixie

Trixie TX2 User manual

Trixie TX2 User manual

Trixie

Trixie TX2 User manual

Trixie Flower User manual

Trixie

Trixie Flower User manual

Trixie REPTILAND Manual

Trixie

Trixie REPTILAND Manual

Trixie TX1 User manual

Trixie

Trixie TX1 User manual

Trixie 44117 User manual

Trixie

Trixie 44117 User manual

Trixie Biker-Set Manual

Trixie

Trixie Biker-Set Manual

Popular Pet Care Product manuals by other brands

WOPET F01 instructions

WOPET

WOPET F01 instructions

Amazon B09G4KS7FY manual

Amazon

Amazon B09G4KS7FY manual

Kaytee MFH Giant 2pc 48"x24" Habitat Assembly instructions

Kaytee

Kaytee MFH Giant 2pc 48"x24" Habitat Assembly instructions

Reichert TONO-PEN XL user guide

Reichert

Reichert TONO-PEN XL user guide

deSoutter Medical Vdrive V-MBQ-707 user manual

deSoutter Medical

deSoutter Medical Vdrive V-MBQ-707 user manual

Petsafe SPT-275 operating guide

Petsafe

Petsafe SPT-275 operating guide

Walkin’ Pets Walkin' Wheels Rear manual

Walkin’ Pets

Walkin’ Pets Walkin' Wheels Rear manual

WOPET D01 instructions

WOPET

WOPET D01 instructions

SportDOG X Series operating guide

SportDOG

SportDOG X Series operating guide

DogWatch Performance Series owner's guide

DogWatch

DogWatch Performance Series owner's guide

HoneyGuaridan S68 user manual

HoneyGuaridan

HoneyGuaridan S68 user manual

INVISIBLE FENCE Indoor Micro Shields owner's manual

INVISIBLE FENCE

INVISIBLE FENCE Indoor Micro Shields owner's manual

Frisco 239693 instruction manual

Frisco

Frisco 239693 instruction manual

Premier Pet GBC00-16997 product manual

Premier Pet

Premier Pet GBC00-16997 product manual

Petsafe pawz away PWF00-14406 Operating and training guide

Petsafe

Petsafe pawz away PWF00-14406 Operating and training guide

PawHut D10-025V01 Assembly & instruction manual

PawHut

PawHut D10-025V01 Assembly & instruction manual

JULIUS K-9 IDC Longwalk manual

JULIUS K-9

JULIUS K-9 IDC Longwalk manual

AGPtek Ownpets M81N DC32 Series quick start guide

AGPtek

AGPtek Ownpets M81N DC32 Series quick start guide

manuals.online logo
manuals.online logoBrands
  • About & Mission
  • Contact us
  • Privacy Policy
  • Terms and Conditions

Copyright 2025 Manuals.Online. All Rights Reserved.