TME DVR-007 User manual
micro DV Camcorder / WebCam
model DVR-007
User Manual
Thank you for purchasing the micro DV Camcorder / Web Cam DVR- 7. Its ultra small size,
light weight and excellent audio and video resolution lends itself to many applications..
I Product Features
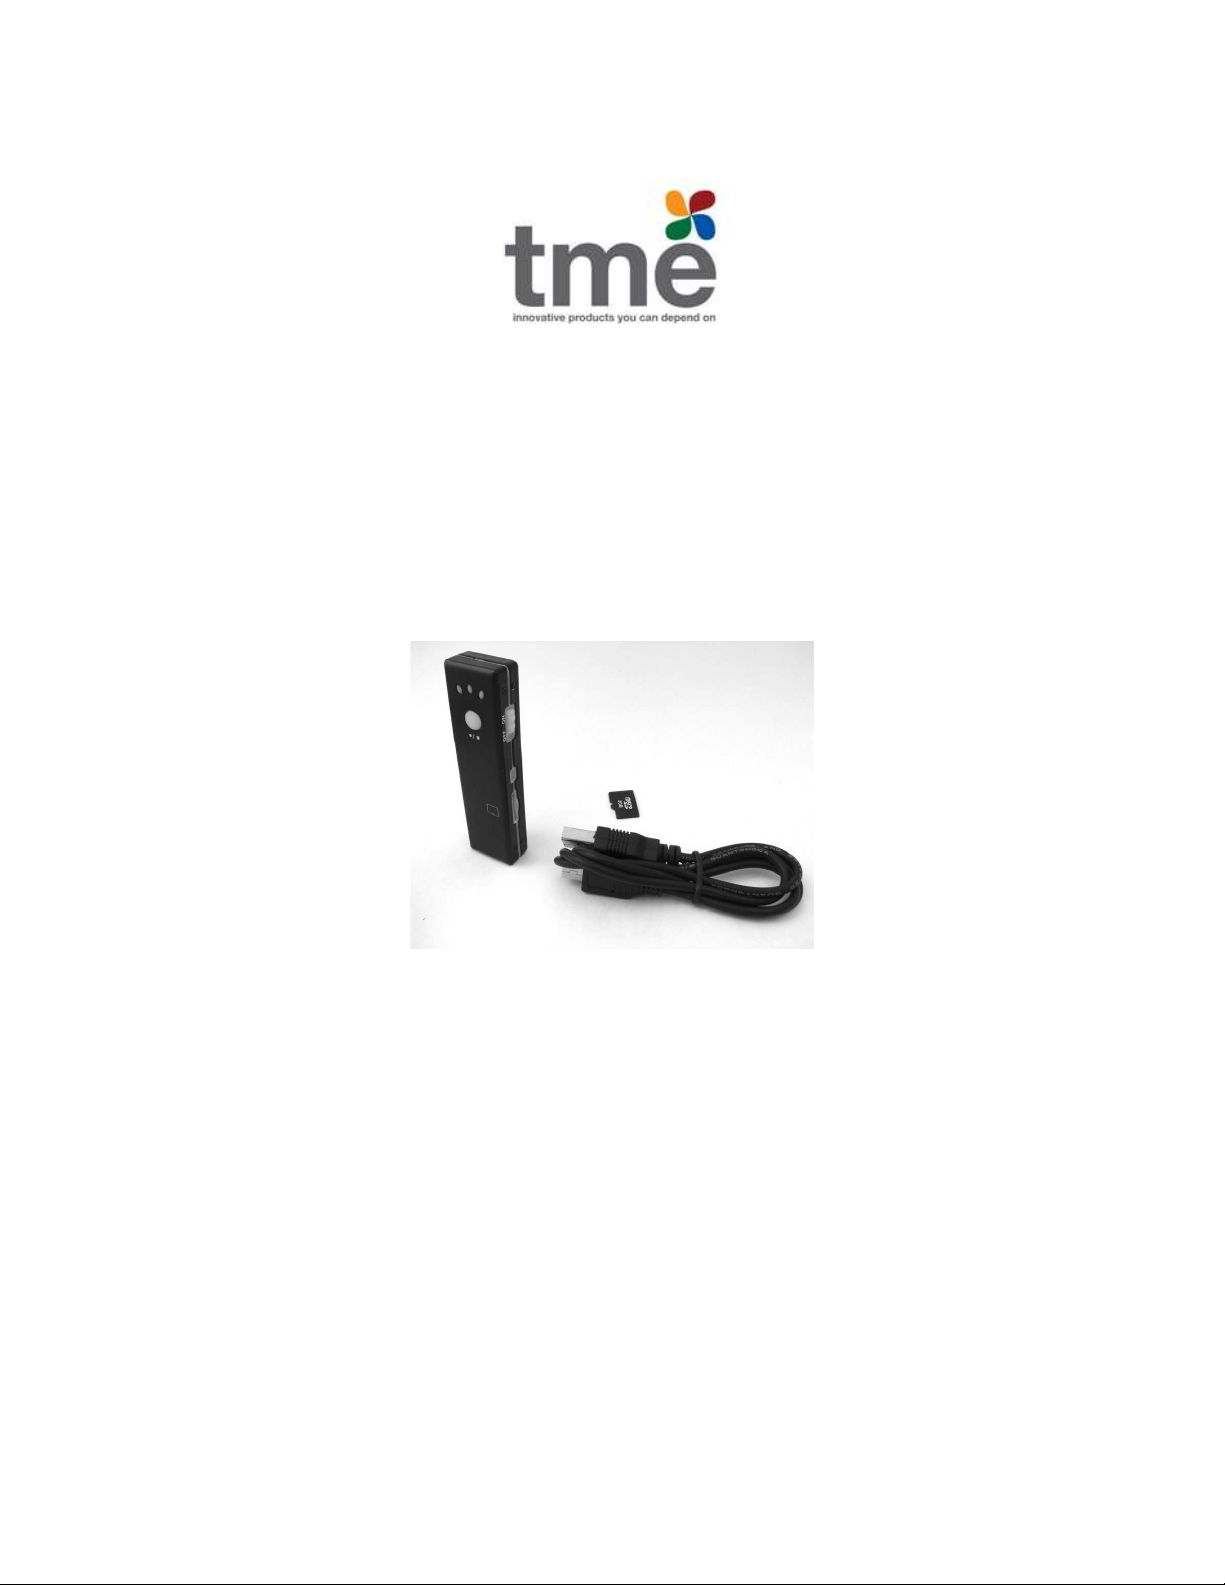
Small light design .7 oz. (21 g) with plastic clip can be worn in a shirt pocket
or attached
to hat, belt, RC Cars, Boats, Airplanes, Helicopters, model rockets, Robots, your pet and anything you
can think of.
Amazing DVD quality 72 X48 at 3 fps video with audio from built in sensitive
microphone and 128 *1 24 still image resolution.
USB Plug and Play – Looks and works like a thumb Drive!
Can be used as a Webcam with included Windows Drivers, works with Skype, MSN,
Yahoo and AIM and many surveillance programs.
2 hour operation from internal Lithium battery with built-in USB charger
Tiny 74 x 21 x 13mm (2.8 x .8 x .5inches)
Supports AVI video format.
Amazing low light capabilities for a camera this small.
Supports USB1.1 and USB2. .
Support up to 8GB Trans- lash SD card.(maximum)

II Operation
1. Charging
The camera has a built-in lithium rechargeable battery. Please completely charge the battery before
you begin using your new camera. Charging is as follows:
1.) Connect the supplied USB cable to the camera.
2.) Connect the other end of cable to a USB connector on you computer.
When you plug it in, the red indicator light will flash twice and remain on, the green light flashing
indicates a charge is in progress. The green light will
stop flashing and remain on when the when the
battery is fully charged.
Notice: If the battery has been severely discharged the unit will enter into a battery protection
mode, and will not power up. Leave it on charge for about two hours to insure a full charge.
2. Shooting Video – Video Mode
1)Insure that the ‘Video/Photo” button is in the “Video” position. Insure the “ON/OFF” power
button to “ON”
2)Momentarily pres the “Record/Stop ” button to wake up the camera. The green light comes on
to signal it is ready and flashes the red light once. When you are ready to shoot video,
momentarily press the “Record/Stop” button again, At this time, video recording begins and the
red indicator light starts to flash while recording. The resolution for video file is fixed at 72 *48 ,
at 3 fps (frames per second).
Record / Stop
Button
Microphone

3)To stop recording, momentarily press the “Record/Stop” button again, The red light will flash
rapidly and go off, your video is stopped and saved automatically. After saving, the green indicator
light will remain on for 6 seconds. If you want to continue shooting video, momentarily press the
“Record/Stop” button once more.
Note:
a. Please make sure that a Trans-flash (Micro SD) card has been inserted into the side slot, if not,
the green light will repeatedly flash and the camera will power off automatically after 6 seconds.
b. The maximum capacity of Trans-flash SD card is 8GB.
c. Saving a file takes a few seconds after you stop recording, please wait until the red light goes
out before initiating a new video.
d. For best color and clarity insure there is ample even lighting and maintain a distance of at
least 2 inches – (5 cm). This will insure that the video will be in focus and have natural colors.
e. IMPORTANT: Leave the power button switched on to maintain the correct day and time.
(See Setting Time below.)
3. Shooting Still Images – Photo Mode
Insure that the “ON/OFF” button is set to “ON”, and move the ‘Video/Photo” button to the
“Photo” position. Momentarily pres the “Record/Stop ” button to wake up the camera. The green
light comes on to signal it is ready and flashes the red light once. Momentarily press the
“Record/Stop” button again to shoot the photo. The red light will flash a few times and shut off.
Please wait until the red light stops flashing before pressing again. Photo images are saved as a jpg
file in a resolution of 128 *1 24
.
4.
..
.Setting the Date and Time
Included on the SD card or available online at http://tmenet.com/support/downloads are the
support files for setting up the date and time in the internal clock/calendar of your camera. You
will need to perform the following steps to set the time:
1. Locate the text file text called TAG.TXT and copy it to the root directory of the SD card.
2. Open the file TAG.TXT with notepad or any simple text editor, modify the date and time in
the file while retaining the exact format shown below:
[date] need space with newline/carriage return
2010/03/05 need space with newline/carriage return in format yyyy/mm/dd
12:
::
:00:
::
:00 enter hours, minutes, seconds with newline/carriage return hh: mm; ss
Close the file by exiting and put the SD card in the camera or if card was already in the
camera and editing was done via USB, simply unplug the USB cable and power on the
camera. This action will force it to check and analyze the TAG.TXT file and then set system
time to the time you entered in the file. The text file TAG.TXT will be deleted automatically.

5.
..
.Power o
For long term storage we recommend you power your unit off. Please note this will reset the
date and time. Push the “ON/OFF” button to “OFF”. This immediately turns off the camera. DO
NOT TURN OFF WHILE RECORDING VIDEO. Stop the recording and allow the video to be
saved before shutting off power..
6. Auto-power o unction
The camera will save the current file and turn off automatically under the following conditions:
a. When you shoot video without enough battery power the file will be saved automatically and
then auto-power off.
b. When the disk space of the camera is not enough the recording indicator light will go off and
your file will be saved automatically and then auto-power off.
c. While in standby mode (green light only) if no activity is detected in 6 seconds your camera
will automatically power off.
7.
..
.Connecting to your computer to retrieve your Videos or Photo Images.
Your camera will function as an external hard drive in order to retrieve the videos and images or
for any other purpose. You may connect the camera to your computer while it is powered off, in
standby mode or in video mode by using the supplied USB cable. Your computer will recognize it
as an external drive and it should appear in your system as a hard drive. At this point you can copy,
cut and paste, edit or delete the files located on the SD card. to anywhere on your computer for
viewing. Alternately you may also simply remove the SD card from the camera and connect to
computer via an SD card reader.
Notice:
a. If your computer does not recognize your camera within 3 seconds, please unplug the USB
cable and insert it again.
b. For best playback results always play your videos after copying them to your local hard drive.
c. Thumb Drive operation: You can secretly store ANY computer files and move them from
computer to computer by storing any data you want onto SD card and removing it on the receiving
computer.
8 Web/PC Camera
Before using your camera as web cam you must first install the supplied Windows driver located
on the SD card or online at http://tmenet.com/support/downloads. The driver name is called
SPCA1528_V222 _Multilan_ 9 217.exe . To install, simply double click the file and follow the
prompts. After installing there will be a small program called AMCAP. You may use this program
to test your camera. or you can use Skype, MSN, Yahoo Messenger, AIM or any other webcam
program to test.

Enabling your Web Cam
When you plug in you camera into your USB port on your computer the default mode is to appear
as an external drive to your computer. Momentarily press the “Record/Stop ” button to enter the
web cam mode and enjoy using your camera for video conferencing and security surveillance
applications. Once this mode is established you can switch it back and forth to a web cam by
momentarily pressing the “Record/Stop ” button.
9.
..
.Reset
If for some reason your device stops responding you may reset the microprocessor by
momentarily moving the “ON/OFF” button to “OFF” position and then back to “ON”.
10. Notice
LEGAL Use this camera responsibly and follow all applicable laws in your area.
MOISTURE AND HUMIDITY: Like all electronic devices do not subject a cold unit into a
warm humid environment or condensation may form and damage electronics. Do not subject to
rain or submerse in water without adequate shielding.
DO NOT EXPOSE TO EXTREME HEAT: This device uses sensitive electronics components.
Do not leave exposed to the sun in a hot automobile.
DO NOT AIM AT THE SUN: The sun can produce intense heat at the focal point of the lens and
damage the sensor in your camera. Use caution when working outdoors.
CAUTION LITHIUM BATERIES: Do not expose to extreme heat or fire. Please dispose of
properly at approved battery collection centers.
Product Made in Hong Kong
Table of contents


