Tokheim ProGauge MAGLINK LX Instruction sheet

CONFIGURATION MANUAL
MAGLINK LX
Rev. 09 – April 2016

This page is left intenti nally blank.

MAGLINK LX
C nfigurati n Manual | Summary
Rev. 09,
– April 2016
Page 3 f 28
S
UMMARY
1
PREFACE ............................................................................................................................................................. 4
2
GENERAL WARNINGS ......................................................................................................................................... 4
3
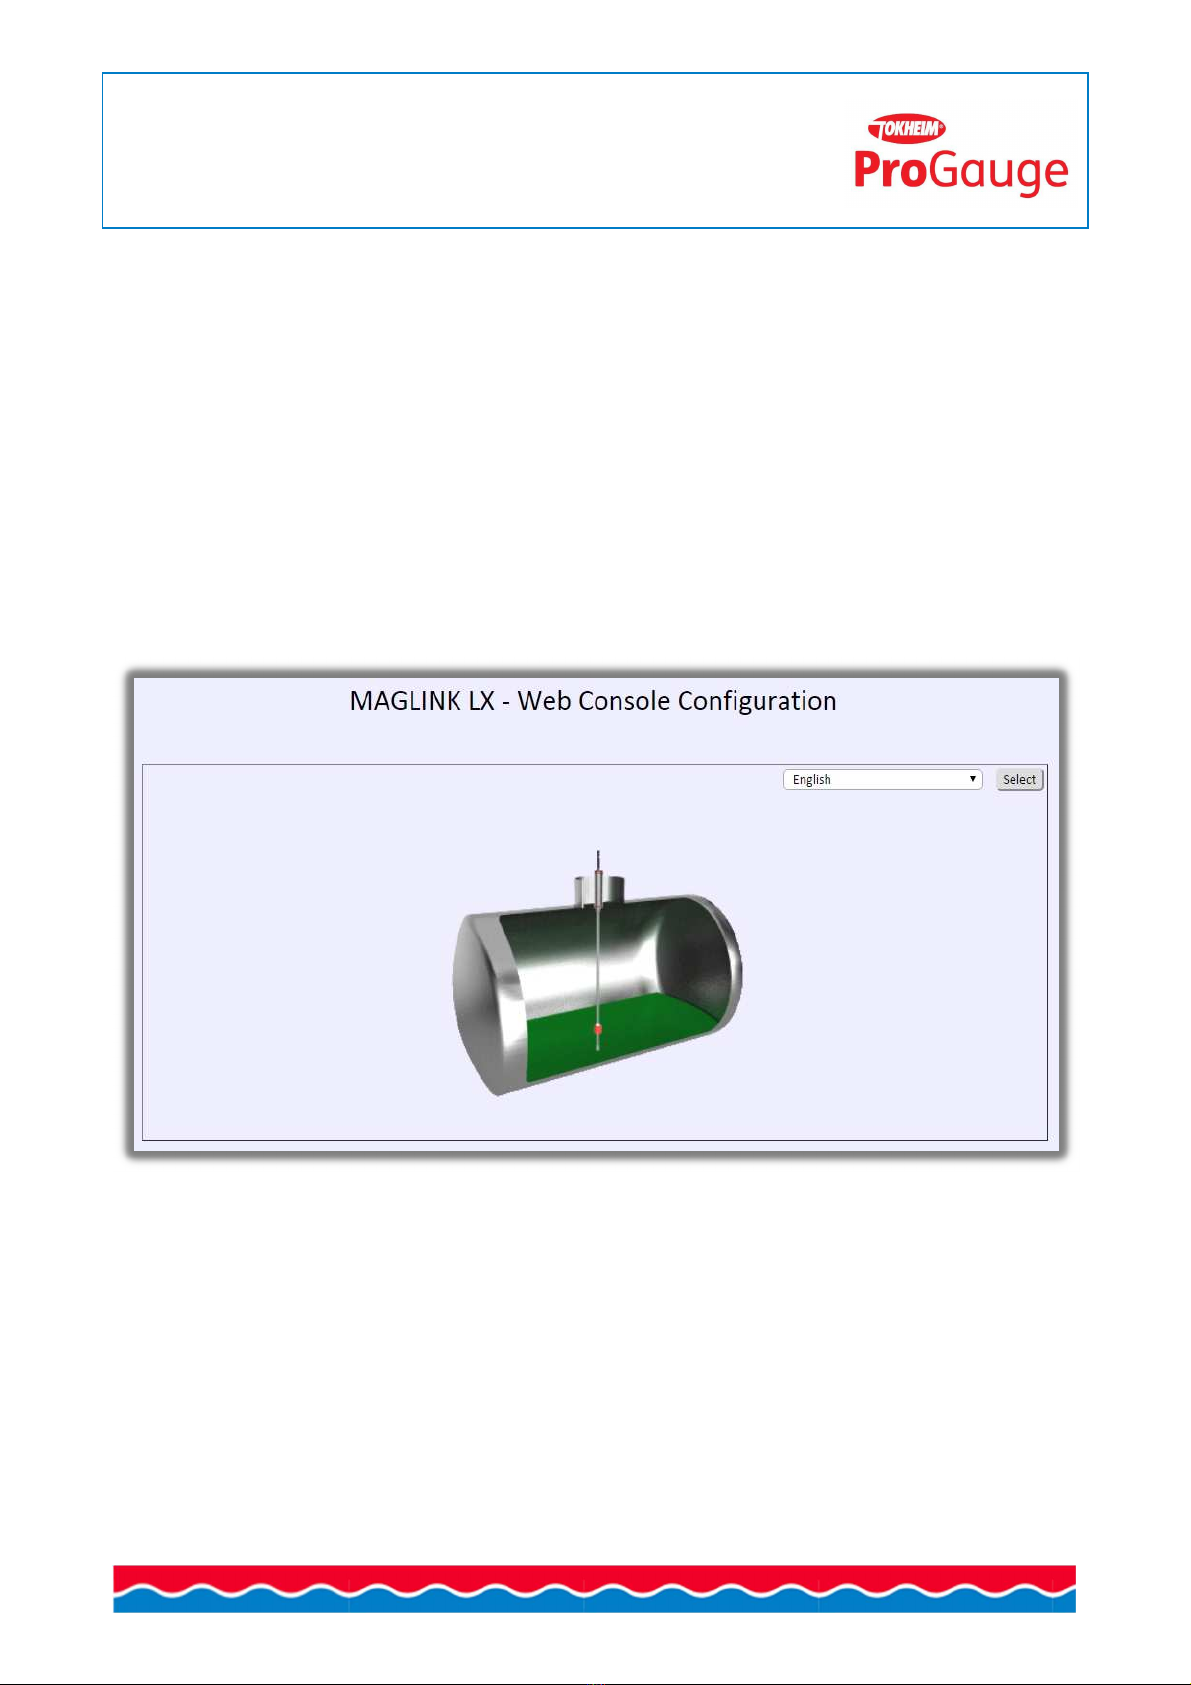
INTRODUCTION .................................................................................................................................................. 5
4
LOGIN PROCEDURE ............................................................................................................................................ 7
5
BASIC FUNCTIONS .............................................................................................................................................. 9
6
CHANGE PASSWORD .........................................................................................................................................10
7
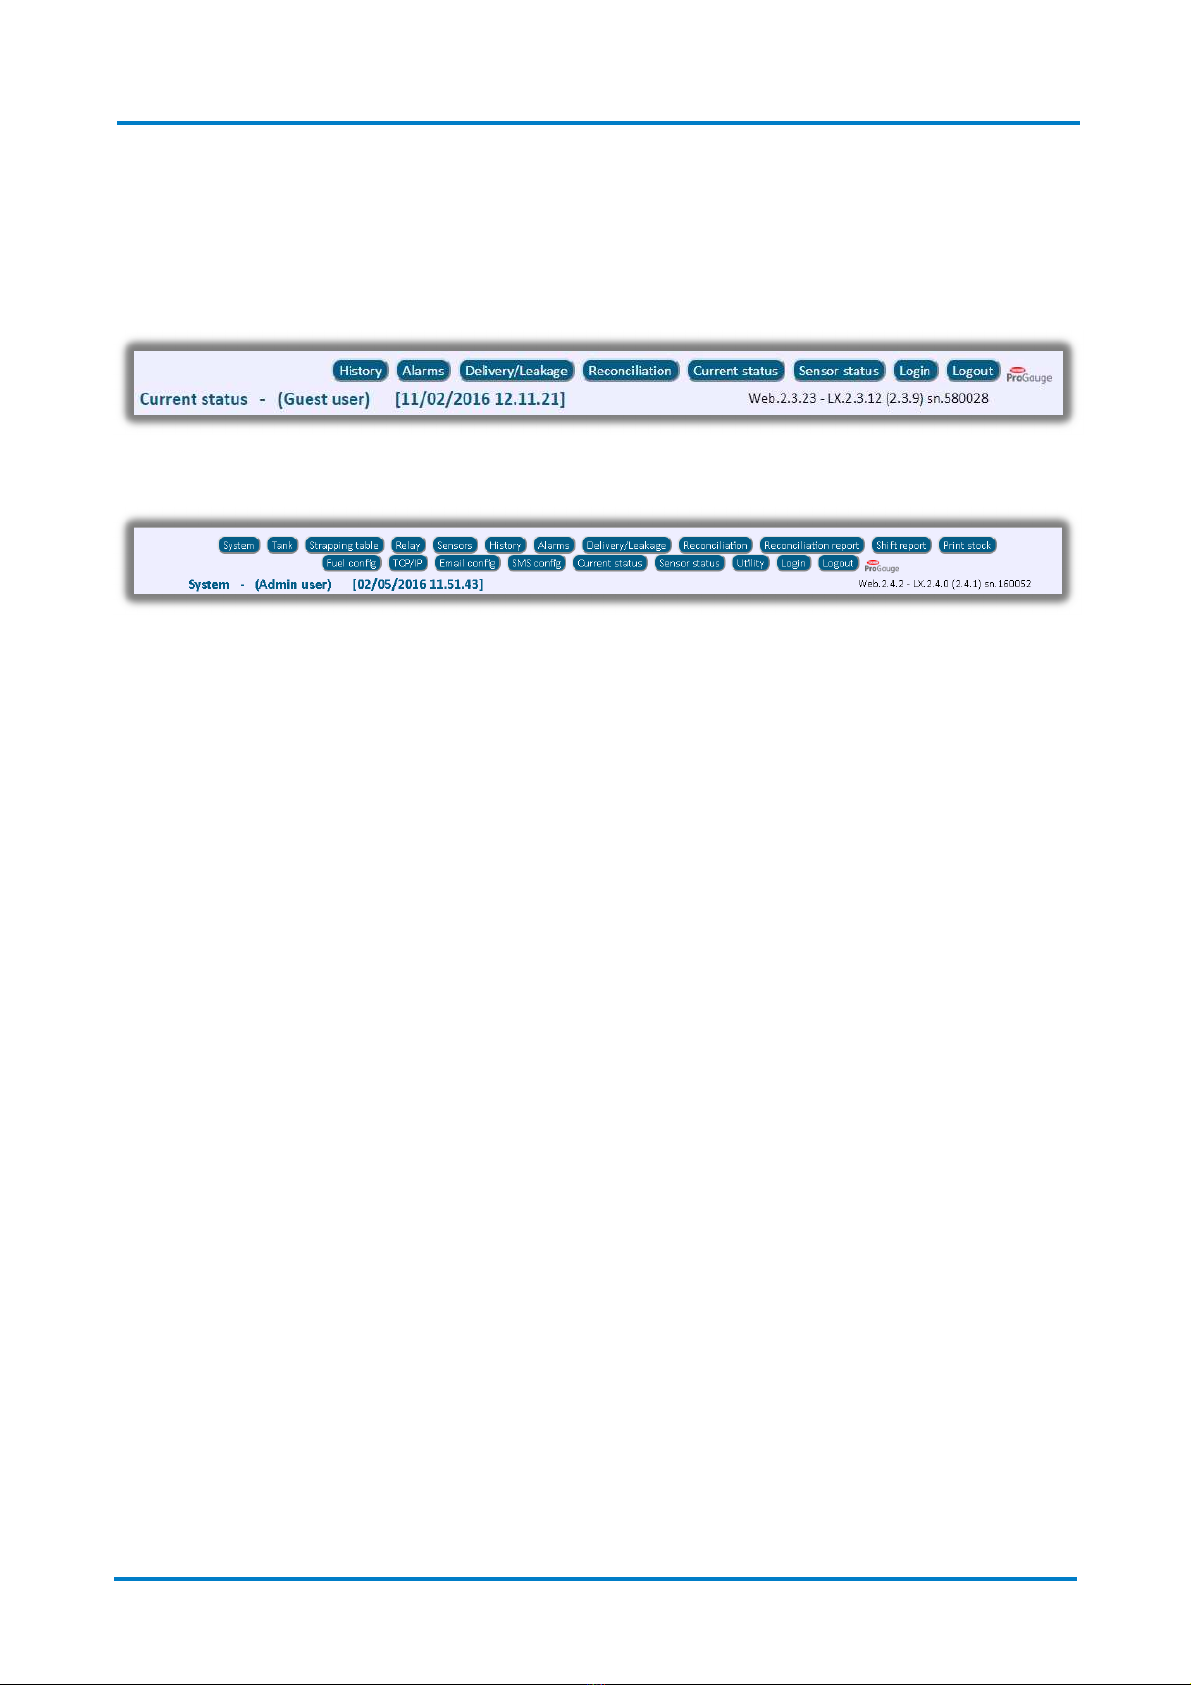
THE "GUEST" AND "ADMIN" PAGES ..................................................................................................................11
7.1
H
ISTORY
............................................................................................................................................................. 11
7.2
A
LARMS
............................................................................................................................................................. 11
7.3
D
ELIVERY
/L
OSSES
................................................................................................................................................. 12
7.4
C
URRENT
S
TATUS
................................................................................................................................................. 13
7.5
S
ENSOR STATUS
................................................................................................................................................... 13
THE "ADMIN" PAGE...........................................................................................................................................14
8.1
S
YSTEM
.............................................................................................................................................................. 14
8.2
T
ANK
................................................................................................................................................................. 16
8.3
S
TRAPPING
T
ABLE
................................................................................................................................................ 17
8.4
R
ELAYS
............................................................................................................................................................... 18
8.5
S
ENSORS
............................................................................................................................................................ 18
8.6
R
ECONCILIATION
.................................................................................................................................................. 20
8.7
S
HIFT REPORT
...................................................................................................................................................... 21
8.8
D
ISPENSER
C
ONFIGURATION
................................................................................................................................... 21
8.9
TCP/IP
C
ONNECTION
........................................................................................................................................... 21
8.10
E
MAIL
C
ONFIGURATION
......................................................................................................................................... 22
8.11
P
RINT
S
TOCK
C
ONFIGURATION
................................................................................................................................ 22
8.12
M
ODEM CONFIGURATION SETTINGS
......................................................................................................................... 23
8.13
U
TILITY
.............................................................................................................................................................. 24
9
SUPPORT ...........................................................................................................................................................25
10
REVISIONS .........................................................................................................................................................26

MAGLINK LX
C nfigurati n Manual | Preface
Rev. 09,
– April 2016
Page 4 f 28
1P
REFACE
Start Italiana S.r.l. has made every eff rt t keep this d cument c mplete, accurate and updated. With
every revisi n f the c ns le, the c rresp nding inf rmati n is peri dically added t the d cument. Start
Italiana S.r.l. reserves the right t make unann unced impr vements and/ r changes in the pr duct and/ r
ass ciated pr grams. Start Italiana S.r.l. is n t liable f r damages f any kind, including th se resulting in
the d cument, including typ graphical err rs.
Making c pies, citing qu tes r ther repr ducti ns f all r part f this d cument is permitted nly after
written c nsent f Start Italiana S.r.l.
Trade mark r name is pr tected by patents.
C pyright 2015© Start Italiana S.r.l. – All rights reserved
2G
ENERAL
W
ARNINGS
Bef re w rking n this equipment, please carefully read this instructi n in this manual.
Auth rised and trained pers nnel must perf rm c nfigurati n changes and updates.
The manufacturer is n t resp nsible f r any perati n perf rmed which is n t c vered in this manual.
Any tampering with the equipment and s ftware relieves the manufacturer f any resp nsibility in regards
t c mpetent b dies.
In case f failure r defect, refer t an auth rized service pr vider r manufacturer directly.
The manufacturer accepts n resp nsibility f r any injury and/ r damage t pers ns and/ r pr perty
and/ r pets caused by failure t f ll w instructi ns relating t safety.
Qualified and trained staff must have an understanding f the safety requirements menti ned in this
manual, the user manual and in the installati n manual.
In case f d ubt c ncerning the perati n f the equipment refer t an auth rized service pr vider r
manufacturer directly.

MAGLINK LX
C nfigurati n Manual | L gin Pr cedure
Rev. 09,
– April 2016
Page 5 f 28
3I
NTRODUCTION
This manual has been prepared in acc rdance with IEC 82079-1 standards “Preparati n f instructi ns f r
use - Structuring, c ntent and presentati n - Part 1: General principles and detailed requirements” and
acc rding t the ATEX Directive 94/9/EU c ncerning equipment and pr tective systems intended f r use in
p tentially expl sive atm spheres.
The manual pr vides necessary inf rmati n n using a Maglink LX c ns le.
The f ll wing table lists the symb ls used in the d cument:
Symbol Description
ATTENTION: Imp rtant inf rmati n and n tes regarding perati ns and use
c nsiderati ns
IMPORTANT: Danger t pers ns (including death), t pr perty r t the
envir nment
The f ll wing table lists reference data f the manufacturer:
Data Description
Name START ITALIANA S.r.l.
Address
Via P la 6
20813 B visi Masciag (MB)
Italia
Teleph ne +39 0362 1581465
Fax +39 0362 1581464
Website www.startitaliana.it
ATTENTION: This manual must be used in c njuncti n with the f ll wing manuals:
•Installati n manual
•User Manual
In rder t use the c ns le as described bel w in this manual, y u must have installed the
c ns les as per installati n manual and use the c ns le as per the user manual
ATTENTION: This manual must be used in c njuncti n with safety instructi ns:
IMPORTANT: C ns le installati n sh uld be perf rmed by qualified pers nnel, as sh wn in
the Installati n Manual and acc rding t safety instructi ns

MAGLINK LX
C nfigurati n Manual | L gin Pr cedure
Rev. 09,
– April 2016
Page 6 f 28
The Maglink LX c ns le c mplies with the requirements f Directive 2012/19/EC n waste f electrical and
electr nic equipment (WEEE) and hence displaying the acc rding symb l:
IMPORTANT: The cr ssed ut wheelie bin symb l indicates that the pr duct must be
disp sed at the end f its useful life with h useh ld waste and must be br ught t a
c llecti n p int f r electrical and electr nic equipment
ATTENTION: The units f measurement c ntained in this manual refer t a specific ch ice by
the user himself/herself. Y u can set the measurement units in a different way (see Secti n
6.1 f this manual)
The Web C ns le C nfig is a web applicati n installed n Supra Linux Apache Web Server perating system
distributed with each MagLink LX. The web applicati n is designed t c nfigure and set parameters in the
c ns le. In additi n, y u can als display a variety f inf rmati n:
•
The status f all c nnected tanks
•
The data n the shift rep rt
•
Hist rical data c llected
•
Rec nciliati ns
•
Current and previ us alarms
•
Delivery and l sses
T access the applicati n y u must kn w the IP address f the c ns le (default: 192.168.1.209) and type it
int a br wser (f r example, M zilla Firef x, G gle Chr me, Internet Expl rer, etc.).
The f ll wing figure sh ws the h me page f the Web C ns le C nfigurati n:, as a first step, y u need t
select the display language:
The p ssible display languages are as f ll ws:
B snian Czech Hungarian (Magyar) R manian Sl venian
Bulgarian English Italian Russian Spanish
Chinese Simplified, Chinese
Traditi nal French P lish Serbian (Cyrillic and Latin) Turkish
Cr atian German P rtuguese Sl vakian Ukrainian
After selecting the language, press the "Select" butt n and the applicati n displays the l gin page.

MAGLINK LX
C nfigurati n Manual | L gin Pr cedure
Rev. 09,
– April 2016
Page 7 f 28
4L
OGIN PROCEDURE
The f ll wing image sh ws the "L gin Page":
Y u can l gin as a "Guest" user r as an "Admin" user (The user has permissi n t access c nfigurati n
pages t btain c mm n parameters and system parameters relating t the system setup). The f ll wing
table sh ws the data displayed depending n the type f l g n access:
Accessible data Guest Admin
Level f the c nnected pr bes X X
Hist rical Data Table X X
Alarm status X X
Delivery/L sses X X
L gin X X
L g ut X X
Ass ciati n f alarm t relays (per tank) X
Managing internal and external sens rs X
Aut matic print features X
Definiti n and inserti n f strapping table (per tank) X
C nfiguring email address b k X
C nfigurati n f all dispensers X
TCP/IP address c nfigurati n X
Utility perati ns (Backup/rest re, Clean hist rical data: Hist rical readings, alarms, rec nciliati n, shift rep rts,
T uch screen calibrati n f the c ns le; Restarting the c ns le, Restarting the perating system f the c ns le) X
Rec nciliati n (if enabled) X
Shift rep rt with scheduling X
C nfigurati n internal/external sens rs X
Sens rs current status X X
M dem c nfigurati n X
Print st ck at predefined time f the day X

MAGLINK LX
C nfigurati n Manual | L gin Pr cedure
Rev. 09,
– April 2016
Page 8 f 28
By accessing the applicati n as "Admin" user y u can perf rm c nfigurati n changes and navigate between
pages.
The f ll wing table sh ws the default passw rds c rresp nding t the different types f l gin access:
Login access Password
Guest GUEST-LX
Admin MAGLINK-LX
Y u can nly change the passw rd by l gging in as "Admin.”
ATTENTION: The administrat r must change the passw rd as s n as p ssible t prevent
unauth rized access
ATTENTION: Please be aware that the passw rd is case sensitive
All c nfigurati n data can be changed nly after y u have l gged in as "Admin.” The user must select the
type f l gin access: "Guest" r "Admin” enter passw rd and press the "Access" butt n.

MAGLINK LX
C nfigurati n Manual | Basic Functi ns
Rev. 09,
– April 2016
Page 9 f 28
5B
ASIC
F
UNCTIONS
Once l gged in y u must enter the applicati n, all pages have the same f rmat. Menu items and user
accessibility is displayed in the main menu at the t p f the page as sh wn in the f ll wing examples:
L g n as "Guest": Main menu
L g n as "Admin": Main menu
The f ll wing items are always present:
•Menù butt ns n every pages
•L g (Returns y u t the h me page)
•Name f the current page
•Type f access ("Guest" r "Admin")
•Current date r time
•Web versi ns, c ns le and serial number
Fr m any page y u can g t h me page t change language f r web applicati n simply by clicking n the
l g displayed after the last main menu butt n. The name f the page y u are n is displayed n the t p
left.
All c nfigurati n data can be m dified after y u have l gged in as "Admin" user. T access the user must
select the access type, "Guest" r "Admin,” enter y ur passw rd and press the "L gin" butt n.
Parameter changes are c mmitted t the c ns le nly after pressing the "Apply c nfigurati n" butt n
present in all pages.

MAGLINK LX
C nfigurati n Manual | "Guest" and "Admin" pages
Rev. 09,
– April 2016
Page 10 f 28
6C
HANGE
P
ASSWORD
The first thing t d is change the passw rd f r b th "Guest" and "Admin" users. Only the "Admin" user can
make passw rd changes.
Apply the f ll wing pr cedure:
Step Description
1 L gin as "Admin"
2 Press "L gin" n the main menu
3
It pens the "L gin" page with the ability t change y ur passw rd:
4 Press the "Change passw rd" butt n
5
Type the current passw rd and the new passw rd then press the "C nfirm" butt n:
6
The applicati n displays the result f the perati n, displaying ne f the f ll wing messages:
7
Repeat the perati n in case f an inc rrect input r c ntact y ur administrat r if y u f rget y ur
passw rd. In the event that y u are n l nger able t rec ver the current passw rd f ll w the
pr cedure f r resetting passw rds.

MAGLINK LX
C nfigurati n Manual | "Guest" and "Admin" pages
Rev. 09,
– April 2016
Page 11 f 28
7T
HE
"G
UEST
"
AND
"A
DMIN
"
PAGES
7.1 Hi tory
The f ll wing image sh ws the "Hist ry Page":
The page c ntains the saved data at regular intervals in a l g file f r future analysis. Y u can select fr m the
f ll wing filters:
•Year/M nth
•Day
•Tank
Pressing the butt n "Display tank tank" displays the data with the c nsidered filters.
The butt n all ws y u t d wnl ad data in Excel CSV f rmat; the d wnl aded file c ntains all the
inf rmati n f the selected day.
7.2 Alarm
The f ll wing image sh ws the "Alarms Page":

MAGLINK LX
C nfigurati n Manual | "Guest" and "Admin" pages
Rev. 09,
– April 2016
Page 12 f 28
The page sh ws alarm hist ry. Y u can select fr m the f ll wing filters:
•Tank
•Start date
•End Date
Pressing the butt n "View Alarms" displays the data with the c nfigured filters. The alarms are c l ur
c ded acc rding t the current state:
•Green: F r s lved alarms
•Yellow: F r ackn wledged alarms
•Red: F r alarms in pr gress
7.3 Delivery/Lo e
The f ll wing image sh ws the "Delivery/L sses Page":
The page sh ws the Delivery data (White backgr und c l ur lines) and related l sses (Red backgr und
c l ur lines) as sh wn in the legend in the upper right c rner ab ve the table:
The page sh ws "Delivery/L sses" hist ry. Y u can select fr m the f ll wing filters:
•Tank
•Start Time
•End Time
Pressing the butt n "Delivery/L sses" displays the data with the c nsidered filters. The butt n all ws
y u t d wnl ad data t Excel (CSV) the created file c ntains all the inf rmati n f the selected filter.

MAGLINK LX
C nfigurati n Manual | "Guest" and "Admin" pages
Rev. 09,
– April 2016
Page 13 f 28
7.4 Current Statu
The f ll wing image sh ws the "Current Status" page:
The page all ws y u t view all the data sent by the pr bes c nnected t the c ns le. The f ll wing filters
are p ssible:
•All tanks: Data f all tanks is displayed ne after the ther
•1, …, 32: The selected tank data is displayed
The page is rel aded aut matically every minute and sh ws the latest inf rmati n. Y u can refresh the
page by pressing the F5 key, r by pressing the "Current Status" butt n fr m the main menu.
ATTENTION: The displayed data refers t the latest data saved in the hist ry file.
7.5 Sen or tatu
This is the “sens r status” page. User can check current internal/external sens r status.

MAGLINK LX
C nfigurati n Manual | "Admin" Pages
Rev. 09,
– April 2016
Page 14 f 28
8T
HE
"A
DMIN
"
PAGE
8.1 Sy tem
The f ll wing image sh ws the "Systems Page":
The page displays system inf rmati n and parameters applied t all c nnected pr bes. The f ll wing table
lists the parameters that can be set:
Parameter Description
T tal tanks Number f c nnected pr bes (Fr m 1 t 32)
T tal dispensers Number f c nnected dispensers (Fr m 1 t 32)
T tal Slaves (Reserved f r future use)
Sens rs (Reserved f r future use)
Pr t c l Type
Select fr m am ng the f ll wing:
•DIALOG
•DOMS
•FUEL POS
•GILBARCO
•ORPAK
•PIGNONE
•RETALIX
•Pr be emulati n
TCP P rt Gilbarc pr t c l via TCP
Temperature f c mp.
v lume
Selectable values f r the calculati n f the c mpensated v lume:
•15 °C •20 °C
Stati n name Stati n name
Hist ry range
Time interval between a hist ry saving data
ATTENTION: It is highly rec mmended t set the value t 1 minute
Pr be sensitivity
All w setting the value t 0.5
ATTENTION: D n t change unless instructed by Start Italiana S.r.l.
Language Select the language f the c ns le display
Measurement unit Select fr m am ng the f ll wing:
•mm/litre •inches/gall n •mm/gall n
Date f rmat Select fr m the f ll wing date f rmats:
•yyyy-MM-dd •dd-MM-yyyy •MM-dd-yyyy
Aut Print
Select when t perf rm the f ll wing aut matic stamp:
•Shift rep rt, at the beginning and end
•Alarms, at every status change
•Delivery, at the beginning and end
•L sses, up n detecti n f a l ss
•Rec nciliati n, set the "Time" f r rec nciliati n

MAGLINK LX
C nfigurati n Manual | "Admin" Pages
Rev. 09,
– April 2016
Page 15 f 28
Manual Y u can d wnl ad the PDF f the three manuals regarding the c ns le:
•User •Installati n •C nfigurati n
Fairbanks FTP c nfigurati n parameters used t upl ad data t Fairbanks servers
The l wer part f the page displays the c nfigurati n f the dipswitches.
The f ll wing table sh ws the c nfigurati n f the dipswitches:
Dipswitch Description
1 OFF = Single Gilbarc , ON = D uble Gilbarc
2, 3, 5, 8 N t used
4 OFF = Relay in n rmal m de, ON = Relay in reverse m de
6
Resetting passw rd (Turn ff c ns le, switch bit 6 t ON, turn n c ns le, wait f r the display curs r
in the t p left, turn ff c ns le, switch bit 6 t Off, turn back n c ns le)
ATTENTION: The passw rd reset results in l ss f all c nfigurati n data, the
hist rical, alarms, delivery and rec nciliati ns
7 OFF = Rec nciliati n deactivated, ON = Rec nciliati n activated

MAGLINK LX
C nfigurati n Manual | "Admin" Pages
Rev. 09,
– April 2016
Page 16 f 28
8.2 Tank
The f ll wing image sh ws the "Tank Page":
The page all ws y u t set the data f each tank; Select fr m the dr p d wn "Tank,” f r the tank y u wish
t w rk n and then set the parameters listed in the f ll wing table:
Parameter Description
Enabled When the flag is active, the applicati n queries the c rresp nding pr be during
the read cycle, therwise the pr be is n t queried
Descripti n Descripti n f the tank
Address Address f the pr be (n reading fr m pr be in case f inc rrect address)
Pr duct Type Select the type f pr duct c ntained in the tank fr m the list
Density Pr duct density, fixed value defined by the pr duct type selecti n
T tal capacity* Maximum v lume f the pr duct (read- nly value)
Maximum height* Maximum level f the pr duct (read- nly value)
Offset Value used t calibrate the p siti n f the pr duct fl at
P ssible values: ±30.000 mm
Zer water Value used t calibrate the water fl at
Res luti n: 1 mm. Maximum value: +30.000 mm
Pr be type
Select fr m the f ll wing (This decisi n impacts the diagn stics display page n
the c ns le, refer t the user manual):
•Laser pr be •L gger •N rmal •RF
Very high alarm, High alarm, L w alarm, Very
l w alarm, Water alarm Set alarm values relating t different thresh lds
Delta v l., Delta leakage Set the minimum values t trigger a l ss r leakage
W rking Capacity Set the w rking capacity f r the Ullage calculati n
DVD C nfigurati n ID, ffset and Maximum C nfidence pr be (Data pr vided by Start Italiana S.r.l.)
*This parameter cannot be set, it is taken from the last line of the strapping table (See Strapping Table section); In case of no
Strapping Table, it is possible to create a simple one, with only two lines:
mm 0 litres 0 Add r w
mm Maximum height f tank litres Maximum v lume capacity Add r w

MAGLINK LX
C nfigurati n Manual | "Admin" Pages
Rev. 09,
– April 2016
Page 17 f 28
8.3 Strapping Table
The f ll wing image sh ws the "Strapping Table Page":
The Strapping table is used t calculate the v lume f the tank, given that each tank has its wn shape and
its wn height.
After selecting the tank fr m the "tank" dr p d wn, y u can enter the inf rmati n table in three different
ways:
1. Create table manually: This meth d all ws y u t generate a c mplete linear table where the user
must enter the switch fr m ne level t the next. The table is created taking int acc unt the t tal
height f the tank. Press the butt n "Create new Inf rmati n Table” the table is generated and
displayed n the right side f the page. Only level values are c mpiled the user must enter the
values f the c rresp nding v lume. Once generated the user can add new nes, change existing
nes and/ r deleting s me with discreti n:
•Add: Set the value in mm and litres and press "Add new line."
•Edit: Set the desired level (mm) and/ r the v lume (litres) f r r ws t edit
•Delete: Check the b x next t the "Delete" butt n if y u want t delete the entire
Strapping table r put a check n lines t be deleted after finishing ticking all the lines press
the "Delete" butt n
2. Import Table: When y u have a Strapping table in Excel (CSV f rmat) y u can imp rt it by using the
"Ch se File" and "L ad" butt n. The table appears n the right side f the page
3. Duplicate table: It is p ssible t duplicate the Strapping Table f a tank f r ther tanks, ne tank at
a time. The s urce tank is selected fr m the "tank" dr p-d wn list. The target tank is selected fr m
the dr p d wn "Destinati n Tank.” Pressing the "Duplicate" butt n will duplicate the Strapping
table fr m s urce tank t destinati n tank. Duplicating a table is saved aut matically f r the
destinati n tank
Additi nal butt ns n the table:
•Validation of Strapping Table: During data entry y u can check the c nsistency f the data entered
by pressing this butt n in case f err r r missi n the c rresp nding lines are sh wn in b ld red
•Save Strapping Table: At the end f any changes press the butt n t save the data.
•Cancel changes to Strapping Table: By selecting cancel changes y u can und all the changes made
and start again.
After entering the inf rmati n table and/ r having made any changes t the existing nes press the "Apply
changes made t tables" butt n t take effect, therwise all changes will take effect the next time y u
restart the applicati n r the c ns le itself.

MAGLINK LX
C nfigurati n Manual | "Admin" Pages
Rev. 09,
– April 2016
Page 18 f 28
ATTENTION: Press the "Save strapping table" butt n t apply the changes; Otherwise, the changes are
l st.
ATTENTION: The strapping table can have a maximum f 500 p ints
The butt n all ws y u t d wnl ad the "
Strapping
Table" in an Excel file in CSV f rmat.
8.4 Relay
The f ll wing image sh ws the "Relay Page":
C nfiguring alarm relays, select the tank fr m the "tank" dr p-d wn list and wait f r data t l ad, then set
the desired alarms. Relays can be c nfigured f r the f ll wing:
•
N t used
•
L w
•
Very high
•
Water
•
N link
•
Out f range
•
Very l w
•
High
•
Pr be
•
C mmunicati n
ATTENTION: When using the DVD, d n t use Relay 4 as its used t p wer the DVD
8.5 Sen or
In this secti n user can c nfigure internal and external sens rs. User must select a sens r type and f r each
sens r define the alarm status. In additi n user can select a relè t c mbine with each sens r when alarm is
active.
Y u can specify the sens rs c nnected t the c ns le. Select the sens r fr m the "sens r type" dr p-d wn
list and fill in the fields related t sens rs. The types f sens rs available are as f ll ws:
•Internal: Internal pr be (6 sens rs)
•Triple-state: Triple-state pr be (64 sens rs)
•External Card Start Italiana S.r.l.: External card supplied by Start Italiana S.r.l. (up t 32 sens rs)
The f ll wing image sh ws the "Sens rs" page (Internal sens r type):

MAGLINK LX
C nfigurati n Manual | "Admin" Pages
Rev. 09,
– April 2016
Page 19 f 28
The f ll wing image sh ws the "Sens rs" page (Pr be type "External Card Start Italiana S.r.l.”):

MAGLINK LX
C nfigurati n Manual | "Admin" Pages
Rev. 09,
– April 2016
Page 20 f 28
The f ll wing image sh ws the "Sens rs" page ("Triple-state sens r type"):
8.6 Reconciliation
The f ll wing image sh ws the "Rec nciliati n Page":
When c nnected t an FCC (F rec urt C ntr ller) r POS enabled f r rec nciliati n the c ns le receives
inf rmati n n the am unt f fuel dispensed. The user can c mpare the dispensed v lume ("Dispenser"
c lumn) by the h ur, with the difference in v lume per h ur detected by the pr be (“V l. Diff." c lumn)
The result is sh wn in the "Delta v l." c lumn.
ATTENTION: Rec nciliati n is n t handled during Delivery: The table will n t include the c rresp nding
line f the Delivery time
The butt n all ws y u t d wnl ad the "Rec nciliati n" in an Excel file in CSV f rmat.
Other manuals for ProGauge MAGLINK LX
2
Table of contents
Other Tokheim Music Mixer manuals