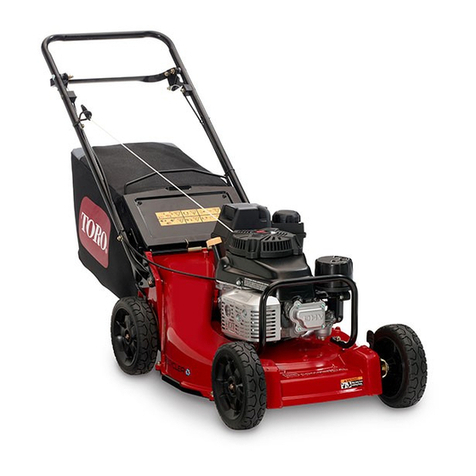
Toro 22197 User manual

FormNo.3375-293RevA
21inHeavy-DutyRecycler®/RearBaggerLawn
Mower
ModelNo.22197—SerialNo.313000001andUp
Operator'sManual
Introduction
Thisrotary-blade,walk-behindlawnmowerisintended
tobeusedbyresidentialhomeownersorprofessional,
hiredoperators.Itisdesignedprimarilyforcuttinggrass
onwell-maintainedlawnsonresidentialorcommercial
properties.Itisnotdesignedforcuttingbrushorfor
agriculturaluses.
Readthisinformationcarefullytolearnhowtooperateand
maintainyourproductproperlyandtoavoidinjuryand
productdamage.Youareresponsibleforoperatingthe
productproperlyandsafely.
YoumaycontactTorodirectlyatwww.Toro.comforproduct
andaccessoryinformation,helpndingadealer,ortoregister
yourproduct.
Wheneveryouneedservice,genuineToroparts,oradditional
information,contactanAuthorizedServiceDealerorToro
CustomerServiceandhavethemodelandserialnumbersof
yourproductready.Figure1identiesthelocationofthe
modelandserialnumbersontheproduct.Writethenumbers
inthespaceprovided.
Figure1
1.Modelandserialnumberplate
ModelNo.
SerialNo.
Thismanualidentiespotentialhazardsandhassafety
messagesidentiedbythesafetyalertsymbol(Figure2),
whichsignalsahazardthatmaycauseseriousinjuryordeath
ifyoudonotfollowtherecommendedprecautions.
Figure2
1.Safetyalertsymbol
Thismanualuses2wordstohighlightinformation.
Importantcallsattentiontospecialmechanicalinformation
andNoteemphasizesgeneralinformationworthyofspecial
attention.
WARNING
CALIFORNIA
Proposition65Warning
Thisproductcontainsachemicalorchemicals
knowntotheStateofCaliforniatocausecancer,
birthdefects,orotherreproductiveharm.
Theengineexhaustfromthisproduct
containschemicalsknowntotheStateof
Californiatocausecancer,birthdefects,
orotherreproductiveharm.
Important:Thisengineisnotequippedwithaspark
arrestermufer.ItisaviolationofCaliforniaPublic
ResourceCodeSection4442touseoroperatetheengine
onanyforest-covered,brush-covered,orgrass-covered
land.Otherstatesorfederalareasmayhavesimilarlaws.
ThissparkignitionsystemcomplieswithCanadianICES-002.
TheenclosedEngineOwner’sManualissuppliedfor
informationregardingtheUSEnvironmentalProtection
Agency(EPA)andtheCaliforniaEmissionControl
Regulationofemissionsystems,maintenance,and
warranty.Replacementsmaybeorderedthroughthe
enginemanufacturer.
Formodelswithstatedenginehorsepower,thegross
horsepoweroftheenginewaslaboratoryratedbytheengine
manufacturerinaccordancewithSAEJ1940.Ascongured
tomeetsafety,emission,andoperatingrequirements,the
actualenginehorsepoweronthisclassoflawnmowerwill
besignicantlylower.
©2012—TheToro®Company
8111LyndaleAvenueSouth
Bloomington,MN55420
Registeratwww.T oro.com.OriginalInstructions(EN)
PrintedintheUSA
AllRightsReserved*3375-293*A

Contents
Introduction..................................................................1
GeneralLawnMowerSafety.....................................2
SafetyandInstructionalDecals.................................4
Setup............................................................................5
1InstallingtheHandle.............................................5
2InstallingtheStarterRope......................................5
3InstallingtheFuelTank..........................................5
4InstallingtheDischargeTunnelPlug........................6
5FillingtheCrankcasewithOil.................................6
ProductOverview..........................................................7
Controls................................................................7
Operation.....................................................................8
CheckingtheEngineOilLevel..................................8
FillingtheFuelTank................................................9
StartingtheEngine.................................................10
StoppingtheEngine...............................................10
UsingtheSelf-propelDrive......................................10
UsingtheDischargeTunnelPlug..............................11
AdjustingtheCuttingHeight....................................11
UsingtheGrassBag................................................11
OperatingTips.......................................................12
Maintenance.................................................................14
RecommendedMaintenanceSchedule(s)......................14
LubricatingthePivotArms......................................15
LubricatingtheGearCase........................................15
ServicingtheAirFilter............................................15
ChangingtheEngineOil.........................................16
ChangingtheOilFilter............................................16
ServicingtheSparkPlug..........................................17
EmptyingtheFuelTankandCleaningtheFuel
Filter.................................................................17
AdjustingtheSelf-propelDrive................................18
AdjustingtheBlade-brakeCable...............................18
MaintainingtheCuttingBlade..................................18
CleaningundertheMachineHousing........................20
CleaningtheDischargeTunnelandPlug....................20
CleaningundertheBeltCover..................................21
Storage........................................................................21
PreparingtheFuelSystem.......................................21
PreparingtheEngine..............................................21
............................................................................21
RemovingtheMachinefromStorage.........................22
Troubleshooting...........................................................23
Safety
ThislawnmowermeetsorexceedstheCPSCblade
safetyrequirementsforwalk-behindrotarylawnmowers
andtheB71.4specicationsoftheAmericanNational
StandardsInstituteineffectatthetimeofproduction.
Improperlyusingormaintainingthislawnmowercan
resultininjury.Toreducethepotentialforinjury,
complywiththesesafetyinstructions.
Torodesignedandtestedthislawnmowerforreasonably
safeservice;however,failuretocomplywiththefollowing
instructionsmayresultinpersonalinjury.
WARNING
Engineexhaustcontainscarbonmonoxide,an
odorless,deadlypoisonthatcankillyou.
Donotruntheengineindoorsorinanenclosed
area.
Toensuremaximumsafety,bestperformance,and
togainknowledgeoftheproduct,itisessentialthat
youandanyotheroperatorofthemachinereadand
understandthecontentsofthismanualbeforethe
engineiseverstarted.Payparticularattentiontothe
safetyalertsymbol(Figure2)whichmeansCaution,
Warning,orDanger—“personalsafetyinstruction.”
Readandunderstandtheinstructionbecauseithasto
dowithsafety.Failuretocomplywiththeinstruction
mayresultinpersonalinjury.
GeneralLawnMowerSafety
Thislawnmoweriscapableofamputatinghandsandfeetand
ofthrowingobjects.Failuretoobservethefollowingsafety
instructionscouldresultinseriousinjuryordeath.
ThefollowinginstructionsarefromtheANSI/OPEI
B71.4–2004standard.
Training
•ReadtheOperator’sManualandothertrainingmaterial.
•Iftheoperator(s)ormechanic(s)cannotreadEnglishitis
theowner’sresponsibilitytoexplainthismaterialtothem.
•Becomefamiliarwiththesafeoperationoftheequipment,
operatorcontrols,andsafetysigns.
•Alloperatorsandmechanicsshouldbetrained.The
ownerisresponsiblefortrainingtheusers.
•Neverletchildrenoruntrainedpeopleoperateorservice
theequipment.Localregulationsmayrestricttheageof
theoperator.
•Theownerand/orusercanpreventandisresponsible
foraccidentsorinjuriesoccurringtothemselves,other
people,orproperty.
Preparation
•Evaluatetheterraintodeterminewhataccessoriesand
attachmentsareneededtoproperlyandsafelyperform
thejob.
•Onlyuseaccessoriesandattachmentsapprovedbythe
manufacturer.
•Wearappropriateclothing,includingsafetyglassesand
hearingprotection.Longhair,looseclothing,orjewelry
maygettangledinmovingparts.
2

•Inspecttheareawheretheequipmentistobeusedand
removeallobjectssuchasrocks,toys,andwirewhichcan
bethrownbythemachine.
•Useextracarewhenhandlinggasolineandotherfuels.
–Theyareammableandvaporsareexplosive.
–Useonlyanapprovedcontainer.
–Neverremovegascaporaddfuelwhenengineis
running.
–Donotsmoke.
–Neverrefuelordrainthemachineindoors.
•Checkthatoperator’spresencecontrols,safetyswitches
andshieldsareattachedandfunctioningproperly.Donot
operatethemunlesstheyarefunctioningproperly.
Operation
•Neverrunanengineinanenclosedarea.
•Onlyoperateingoodlight,keepingawayfromholesand
hiddenhazards.
•Onlystartenginefromtheoperator’sposition.
•Besureofyourfootingwhileusingpedestrian-controlled
equipment,especiallywhenbackingup.
•Walk,don’trun.
•Neveroperateonwetgrass.Reducedfootingcouldcause
slipping.
•Slowdownanduseextracareonhillsides.Besureto
travelintherecommendeddirectiononhillsides.
•Usecautionwhileoperatingneardrop-offs.
•Slowdownandusecautionwhenmakingturnsandwhen
changingdirectionsonslopes.
•Neverraisethedeckwiththebladesrunning.
•Neveroperatewiththedischargedeectorraised,
removedoraltered,unlessusingagrasscatcher.
•Donotchangetheenginegovernorsettingoroverspeed
theengine.
•Stoponlevelgroundandshutoffenginebeforeleaving
theoperator’spositionforanyreasonincludingemptying
thecatchersoruncloggingthechute.
•Stopequipmentandinspectbladesafterstrikingobjects
orifanabnormalvibrationoccurs.Makenecessary
repairsbeforeresumingoperation.
•Keephandsandfeetawayfromthecuttingunits.
•Lookbehindanddownbeforebackinguptobesureof
aclearpath.
•Beawareofthemowerdischargedirectionanddonot
pointitatanyone.
•Donotoperatethemowerwhileundertheinuenceof
alcoholordrugs.
•Usecarewhenloadingorunloadingthemachineintoa
trailerortruck.
•Usecarewhenapproachingblindcorners,shrubs,trees,
orotherobjectsthatmayobscurevision.
MaintenanceandStorage
•Waitforallmovementtostopbeforeadjusting,cleaning
orrepairing.
•Cleangrassanddebrisfromcuttingunit,mufer,and
enginetohelppreventres.
•Cleanupoilorfuelspills.
•Letenginecoolbeforestoringanddonotstorenear
ame.
•Donotstorefuelnearamesordrainindoors.
•Neverallowuntrainedpersonneltoservicemachine.
•Usecarewhencheckingtheblades.
•Wrapthebladesorweargloves,andusecautionwhen
servicing.
•Onlyreplaceblades.Neverstraightenorweldthem.
•Keephandsandfeetawayfrommovingparts.
•Ifpossible,donotmakeadjustmentswiththeengine
running.
•Keepallpartsingoodworkingconditionandallhardware
tightened.
•Replaceallwornordamageddecals.
3

SafetyandInstructionalDecals
Safetydecalsandinstructionsareeasilyvisibletotheoperatorandarelocatednearanyareaofpotentialdanger.Replace
anydecalthatisdamagedorlost.
Manufacturer'sMark
1.Indicatesthatthebladeisidentiedasapartfromthe
originalmachinemanufacturer.
68-7410
74-1970
1.Transmissionspeeds2.Neutral
98-4387
1.Warning—wearhearingprotection.
94-8072
1.Warning—cutting/dismembermenthazardofhandorfoot,
cuttingmechanism.
106-0690
110-4989
117–2718
121-1449
1.Warning—donotparkonslopesunlesswheelsarechocked
orblocked.
4

Setup
1
InstallingtheHandle
Partsneededforthisprocedure:
1Handle
2Bolt(5/16x1-1/4inches)
4Washer
2Thinlocknut(5/16inch)
2Bolt(5/16x1-1/2inches)
2Locknut(5/16inch)
1Bag-supportrod
2Caplocknut
1Cabletie
Procedure
1.Mountthehandletotheoutsideofthemachine
housing(usingthebottomhole)with2bolts(5/16x
1-1/4inches),washers,andthinlocknuts(5/16inch)
(Figure3).
Figure3
1.Handlelatch4.Handle
2.Bag-supportrod5.Bolt(5/16x1-1/2inches)
3.Caplocknut(2)6.Bolt(5/16x1-1/4inches)
2.Securethehandlelatchestothehandlewith2bolts
(5/16x1-1/2inches),washers,andlocknuts(5/16
inch)(Figure3).
Note:Youcanadjustthehandleheightfor
comfortableoperation.Standbehindthehandleto
determinetheheight.Toadjustthehandleheight,
positiontheboltsandthelocknutsthatsecurethe
handlelatchestothehandleintotheothermounting
holesinthelatches.
3.Slidethebag-supportrodthroughthesecondfromthe
topmountingholesinthehandleandsecureeachend
withacaplocknut(Figure3).
4.Useacabletietosecurethecontrolcablestotheleft
handlebelowthebag-supportrod.
2
InstallingtheStarterRope
NoPartsRequired
Procedure
Pulltherecoil-starterropethroughtheropeguideonthe
handle(Figure4).
Figure4
1.Recoil-starterrope2.Ropeguide
Note:Tomaketheropeeasiertoinstall,squeezethecontrol
baronthehandle.
3
InstallingtheFuelTank
Partsneededforthisprocedure:
2Self-tappingscrew
1Fueltank
Procedure
1.Slidetheplasticclipsonthefrontofthefueltankonto
thefueltankmount(Figure5).
5

Figure5
1.Plasticclip(2)
2.Securethebottomofthefueltanktothefueltank
bracketbyinstallingtheself-tappingscrewsfromthe
bottom.Torquethescrewsto40to50in-lb(4.5
to5.6N-m).
4
InstallingtheDischargeTunnel
Plug
Partsneededforthisprocedure:
1Dischargetunnelplug
Procedure
1.Openthedischargedoorbypullingforwardonthe
handleandmovingitrearward(Figure6).Holdthe
dischargedoorhandletopreventthespring-loaded
doorfromclosingwhileyouinserttheplug.
Figure6
1.Discharge-doorhandle2.Plug,rotatedclockwise
2.Sincetheplugisslightlywiderthanthedischarge
tunnelopening,rotatetheplugclockwiseslightlywhile
insertingit(Figure6).
Note:Ensurethatthearrowontheplugdecalpoints
upward.
3.Pushtheplugallthewayinuntilthespringcliponthe
bottomoftheplugclicksintoplace,lockingtheplug
securelyintothedischargetunnel(Figure7).
Figure7
1.Springclip
4.Releasethedischarge-doorhandletolockthetopof
theplug.
5
FillingtheCrankcasewithOil
NoPartsRequired
Procedure
Important:Theenginecrankcaseisshippedwithout
oil.Beforestartingtheengine,lltheenginewithoil.
1.Movethemachinetoalevelsurface.
6

2.Removethedipstickbyrotatingthecap
counterclockwiseandpullingitout(Figure8).
Figure8
1.Dipstick3.Addmark
2.Fullmark
3.Pourabout3/4ofthecrankcasecapacityofoilinthe
crankcase.
Note:Theoilcapacityoftheenginecrankcase
(withoillter)is29ounces(0.85liters).Useonly
high-qualitySAE30orSAE10W30weightdetergent
oilthathastheAmericanPetroleumInstitute(API)
serviceclassicationSF,SG,SH,orSJ.
4.Wipethedipstickcleanwithacleancloth.
5.Insertthedipstickfullyintothellerneck,thenremove
thedipstick.
6.Readtheoillevelonthedipstick(Figure8).
•IftheoillevelisbelowtheAddmarkonthe
dipstick,slowlypourasmallamountofoilinto
theoil-lltube,wait3minutes,andrepeatsteps4
through6untiltheoillevelisattheFullmarkon
thedipstick.
•IftheoillevelisabovetheFullmarkonthe
dipstick,draintheexcessoiluntiltheoillevel
onthedipstickisattheFullmark.Referto
ChangingtheEngineOil(page16).
Important:Iftheoillevelinthecrankcaseis
toolowortoohighandyouruntheengine,
youmaydamagetheengine.
7.Insertthedipstickintothellernecksecurely.
ProductOverview
Figure9
1.Handle6.Airlter
2.Throttle-controllever7.Cutting-heightlever
3.Grassbag8.Sparkplug
4.Fueltank9.Oilll/dipstick
5.Oillter10.Blade-controlbar
Controls
Figure10
1.Blade-controlbar3.Recoil-starterhandle
2.Throttle-controllever
7

Operation
Note:Determinetheleftandrightsidesofthemachine
fromthenormaloperatingposition.
Eachtimebeforeyoumow ,ensurethattheself-propeldrive
andtheblade-controlbaroperateproperly.Whenyourelease
theblade-controlbar,thebladeandself-propeldriveshould
stop.Iftheydonot,contactanAuthorizedServiceDealer.
CAUTION
Thismachineproducessoundlevelsinexcessof
85dBAattheoperator’searandcancausehearing
lossthroughextendedperiodsofexposure.
Wearhearingprotectionwhenoperatingthis
machine.
Figure11
1.Warning—wearhearingprotection.
CheckingtheEngineOilLevel
ServiceInterval:Beforeeachuseordaily
Theoilcapacityoftheenginecrankcase(withoillter)is29
ounces(0.85liters).Useonlyhigh-qualitySAE30orSAE
10W30weightdetergentoilthathastheAmericanPetroleum
Institute(API)serviceclassicationSF,SG,SH,orSJ.
Beforeeachuse,ensurethattheoillevelisbetweentheAdd
andFullmarksonthedipstick(Figure12).
Figure12
1.Dipstick3.Add
2.Full
1.Stoptheengineandwaitforallmovingpartstostop.
2.Movethemachinetoalevelsurface.
3.Removethedipstickbyrotatingthecap
counterclockwiseandpullingitout(Figure12).
4.Wipethedipstickcleanwithacleancloth.
5.Insertthedipstickfullyintothellerneck,thenremove
thedipstick.
6.Readtheoillevelonthedipstick(Figure12).
•IftheoillevelisbelowtheAddmarkonthe
dipstick,slowlypourasmallamountofoilinto
theoil-lltube,wait3minutes,andrepeatsteps4
through6untiltheoillevelisattheFullmarkon
thedipstick.
•IftheoillevelisabovetheFullmarkonthe
dipstick,draintheexcessoiluntiltheoillevel
onthedipstickisattheFullmark.Referto
ChangingtheEngineOil(page16).
Important:Iftheoillevelinthecrankcaseis
toolowortoohighandyouruntheengine,
youmaydamagetheengine.
7.Insertthedipstickintothellernecksecurely.
8

FillingtheFuelTank
DANGER
Gasolineisextremelyammableandexplosive.A
reorexplosionfromgasolinecanburnyouand
others.
•Topreventastaticchargefromignitingthe
gasoline,placethecontainerand/ormachine
directlyonthegroundbeforelling,notina
vehicleoronanobject.
•Fillthetankoutdoorswhentheengineiscold.
Wipeupspills.
•Donothandlegasolinewhensmokingoraround
anopenameorsparks.
•Storegasolineinanapprovedfuelcontainer,out
ofthereachofchildren.
•Forbestresults,useonlyclean,fresh,unleadedgasoline
withanoctaneratingof87orhigher((R+M)/2rating
method).
•Oxygenatedfuelwithupto10%ethanolor15%MTBE
byvolumeisacceptable.
•Donotuseethanolblendsofgasoline,suchasE15
orE85,withmorethan10%ethanolbyvolume.
Performanceproblemsand/orenginedamagemayresult,
whichmaynotbecoveredunderwarranty.
•Donotusegasolinecontainingmethanol.
•Donotstorefueleitherinthefueltankorinfuel
containersoverthewinterunlessfuelstabilizerhasbeen
addedtothefuel.
•Donotaddoiltogasoline.
DANGER
Incertainconditions,gasolineisextremely
ammableandhighlyexplosive.Areorexplosion
fromgasolinecanburnyouandothersandcan
damageproperty.
•Fillthefueltankoutdoors,inanopenarea,and
whentheengineiscold.Wipeupanygasoline
thatspills.
•Fillthefueltanktothebottomofthellerneck.
Donotlltothetopofthellerneck.
•Neversmokewhenhandlinggasoline,andstay
awayfromanopenameorwhereasparkmay
ignitethegasolinefumes.
•Storegasolineinanapprovedfuelcontainerand
keepitoutofthereachofchildren.
•Neverbuymorethana30-daysupplyof
gasoline.
DANGER
Whenfueling,undercertaincircumstances,astatic
chargecandevelop,ignitingthegasoline.Areor
explosionfromgasolinecanburnyouandothers
anddamageproperty.
•Alwaysplacegasolinecontainersontheground
andawayfromyourvehiclebeforelling.
•Donotllgasolinecontainersinsideavehicleor
onatruckortrailerbedbecauseinteriorcarpets
orplastictruckbedlinersmayinsulatethe
containerandslowthelossofanystaticcharge.
•Whenpractical,removegasoline-powered
equipmentfromthetruckortrailerandrefuel
theequipmentwithitswheelsontheground.
•Ifthisisnotpossible,thenrefuelsuch
equipmentonatruckortrailerfromaportable
container,notfromagasolinedispensernozzle.
•Ifyoumustuseagasolinedispensernozzle,
keepthenozzleincontactwiththerimofthe
fueltankorcontaineropeningatalltimesuntil
fuelingiscomplete.
Useafuelstabilizer/conditionerregularlyduringoperation
andstorage.Astabilizer/conditionercleanstheengineduring
operationandpreventsgum-likevarnishdepositsfrom
formingintheengineduringperiodsofstorage.
Important:Donotusefueladditivesotherthanafuel
stabilizer/conditioner.Donotusefuelstabilizerswithan
alcoholbasesuchasethanol,methanol,orisopropanol.
1.Cleanaroundthefuel-tankcap,andremovethecap
fromthetank(Figure13).
Figure13
1.Fueltankcap3.Aircleaner
2.Oilll/dipstick4.Sparkplug
9

2.Fillthefueltankwithunleadedgasolineuptothe
bottomofthellerneck.Donotllintothellerneck.
3.Installthefuel-tankcapandwipeupanyspilled
gasoline.
StartingtheEngine
1.Connectthewiretothesparkplug(Figure13).
2.Openthefuelvalve(Figure14).
Figure14
1.Fuelvalve2.Oillter
3.MovethethrottlecontroltotheChokeposition.
4.MovethegroundspeedcontroltotheNeutral(N)
position(Figure15).
Figure15
1.Ground-speedcontrol
5.Pullthestarterhandlelightlyuntilyoufeelresistance,
thenpullitsharply.
6.Regulatethethrottleandtheground-speedcontrolas
desiredwhentheenginestarts.
Note:Iftheenginefailstostartafter3pulls,repeat
steps3through6.
StoppingtheEngine
1.Releasetheblade-controlbarandmovethethrottle
controltotheOffposition.
2.Disconnectthewirefromthesparkplugifyoudonot
usethemachineorifyouleaveitunattended.
UsingtheSelf-propelDrive
Themachinehas3groundspeeds:1isslow,2ismedium,
and3isfast.Theground-speedcontrolislocatedattherear
ofthebeltcover(Figure16).
Figure16
1.Ground-speedcontrol
1.Movetheground-speedcontroltotheNeutral(N)
position.
2.Starttheengine.
3.Squeezetheblade-controlbaragainstthehandletothe
Run/Driveposition(Figure17).
Figure17
1.Run/Driveposition3.Stopposition
2.Run/Shiftposition
Note:Donotshiftspeedswhileyousqueezethe
blade-controlbaragainstthehandleintheRun/Drive
position;thiscandamagethetransmission.Movethe
blade-controlbartotheRun/Shiftposition(Figure17)
whenyouchangethegroundspeed.
Note:Youcanvarythegroundspeedbyincreasing
ordecreasingthedistancebetweenthecontrolbarand
thehandle.Lowerthecontrolbartoslowthemachine
whenmakingaturnorifthemachineismovingtoo
fastforyou.Ifyoulowerthecontrolbartoofar,the
machinestopsself-propelling.Squeezethecontrol
barclosertothehandletoincreasethegroundspeed.
Whenyouholdthecontrolbartightagainstthehandle,
themachineself-propelsatthemaximumground
speed.MovethegroundspeedcontroltotheNeutral
(N)positionwhenyouusethemachinefortrimming
andwheneveryouleavethemachine.
10

UsingtheDischargeTunnel
Plug
1.Stoptheengineandwaitforallmovingpartstostop.
2.Inserttheplug;referto
4InstallingtheDischargeTunnelPlug(page6).
3.Toremovetheplug,movethedischargedoorhandle
rearwardandliftupthespringcliponthebottomof
theplug.Whentheplugisunlocked,pullitoutofthe
dischargetunnel.
Note:Whenthegrassisthickandlush,theclippings
maycollectonandaroundthedischargetunnelplug.
makingitdifculttoremovetheplug.Cleantheplug
thoroughlyaftereachuse.
AdjustingtheCuttingHeight
Eachwheelisadjustedindividuallywithawheelheight
adjustmentlever.Cuttingheightsare1inch(25mm),1-1/2
inches(38mm),2inches(51mm),2-1/2inches(64mm),3
inches(76mm),and3-1/2inches(89mm).
DANGER
Adjustingthecutting-heightleverscouldbringyour
handsintocontactwithamovingbladeandresult
inseriousinjury.
•Stoptheengineandwaitforallmovementto
stopbeforeadjustingthecuttingheight.
•Donotputyourngersunderthehousingwhen
adjustingthecuttingheight.
1.Pullthewheelheightadjustmentlevertowardthe
wheel(Figure18)andmoveittothedesiredsetting.
Figure18
1.Wheel-height-adjustmentlever
2.Releasethewheel-height-adjustmentleverandseatit
securelyinthenotch.
3.Adjustallthewheelstothesamecutting-heightsetting.
UsingtheGrassBag
Occasionally,youmaywishtousethegrassbagforbagging
extralonggrass,lushgrass,orleaves.
InstallingtheGrassBag
1.Stoptheengineandwaitforallmovingpartstostop.
2.Ensurethatthedischargedoorhandleisfullyforward
andthatthepinisengagedinthecatch(Figure19).
Figure19
1.Bagframeretainingpost3.Handlefullyforward;
dischargedoorclosed
2.Pinengagedincatch
3.Slidetheholeinthebagframeontotheretainingpost
onthedischargetunnel(Figure19).
4.Settherearofthebagframeontothebag-supportrod.
5.Pullthedischarge-doorhandleforwarduntilthepin
clearsthecatch,andmovethehandlerearwarduntil
thepinlocksinthebagnotch(Figure20).
Figure20
1.Pinlockedinbagnotch
Note:Thedischargedoorinthemachinehousingis
nowopen.
11

MowingwiththeGrassBag
WARNING
Aworngrassbagcouldallowsmallstonesand
othersimilardebristobethrownintheoperator’sor
bystander’sdirectionandresultinseriouspersonal
injuryordeathtotheoperatororbystanders.
Checkthegrassbagfrequently.Ifitisdamaged,
installanewTororeplacementbag.
RemovingtheGrassBag
1.Stoptheengineandwaitforallmovingpartstostop.
2.Raisethedischargedoorhandleandmoveitforward
toengagethepinwiththecatch(Figure19).
3.Graspthehandlesatthefrontandtherearofthebag
andliftthebagoffthemachine.
4.Graduallytipthebagforwardtoemptytheclippings.
5.Toinstallthebag,referto
InstallingtheGrassBag(page11).
DANGER
Ifthedischargedoordoesnotclosecompletely,
themachinecouldthrowobjects,causingserious
personalinjuryordeath.
Ifyoucannotclosethedoorbecausethegrass
clippingsclogthedischargearea,stoptheengine
andgentlymovethedischargedoorhandleback
andforthuntilyoucanclosethedoorcompletely.
Ifyoustillcannotclosethedoor,removethe
obstructionwithastick,notyourhand.
DANGER
Thismachinecanthrowgrassclippingsand
otherobjectsthroughanopendischargetunnel.
Objectsthrownwithenoughforcecouldcause
seriouspersonalinjuryordeathtotheoperatoror
bystander.
Neveropenthedooronthedischargetunnelwhen
theengineisrunning.
OperatingTips
GeneralTips
•Reviewthesafetyinstructionsandreadthismanual
carefullybeforeoperatingthemachine.
•Cleartheareaofsticks,stones,wire,branches,andother
debristhatthebladecouldhitandthrow .
•Keepeveryone,especiallychildrenandpets,awayfrom
theareaofoperation.
••Avoidstrikingtrees,walls,curbs,orothersolidobjects.
Neverdeliberatelymowoveranyobject.
•Ifthemachinestrikesanobjectorstartstovibrate,
immediatelystoptheengine,disconnectthewirefrom
thesparkplug,andexaminethemachinefordamage.
•Maintainasharpbladethroughoutthecuttingseason.
Periodicallyledownnicksontheblade.
•ReplacethebladewhennecessarywithanoriginalToro
replacementblade.
•Mowonlydrygrassorleaves.Wetgrassandleavestend
toclumpontheyardandcancausethemachinetoplug
ortheenginetostall.
WARNING
Wetgrassorleavescancauseseriousinjuryifyou
slipandcontacttheblade.
Mowonlyindryconditions.
•Cleanunderthemachinehousingaftereachmowing.
RefertoCleaningundertheMachineHousing(page20).
•Keeptheengineingoodrunningcondition.
•Settheenginespeedtothefastestpositionforthebest
cuttingresults.
WARNING
Operatingamachinewithitsenginerunning
ataspeedgreaterthanthefactorysettingcan
causethemachinetothrowapartoftheblade
orengineintotheoperator’sorbystander’sarea
andresultinseriouspersonalinjuryordeath.
–Donotchangetheenginespeedsetting.
–Ifyoususpecttheenginespeedisfaster
thannormal,contactanAuthorizedService
Dealer.
•Cleantheairlterfrequently.Mulchingstirsupmore
clippingsanddustwhichclogstheairlterandreduces
engineperformance.
CuttingGrass
•Grassgrowsatdifferentratesatdifferenttimesofthe
year.Inthesummerheat,itisbesttocutgrassatthe2
inch(51mm),2-1/2inch(64mm),or3inch(76mm)
cuttingheightsettings.Cutonlyaboutathirdofthegrass
bladeatatime.Donotcutbelowthe2inch(51mm)
settingunlessthegrassissparseoritislatefallwhen
grassgrowthbeginstoslowdown.
•Whencuttinggrassover6inches(15cm)tall,rstmow
atthehighestcutting-heightsettingandwalkslower;then
mowagainatalowersettingforthebestlawnappearance.
12

Ifthegrassistoolongandtheleavesclumpontopofthe
lawn,themachinemayplugandcausetheenginetostall.
•Alternatethemowingdirection.Thishelpsdispersethe
clippingsoverthelawnforevenfertilization.
Ifthenishedlawnappearanceisunsatisfactory,tryoneor
moreofthefollowing:
•Sharpentheblade.
•Walkataslowerpacewhilemowing.
•Raisethecuttingheightonyourmachine.
•Cutthegrassmorefrequently.
•Overlapcuttingswathsinsteadofcuttingafullswath
witheachpass.
•Setthecuttingheightonthefrontwheelsonenotch
lowerthantherearwheels.Forexample,setthefront
wheelsat2inches(51mm)andtherearwheelsat2-1/2
inches(64mm).
CuttingLeaves
•Aftercuttingthelawn,ensurethathalfofthelawnshows
throughthecutleafcover.Youmayneedtomakemore
thanonepassovertheleaves.
•Forlightleafcoverage,setallthewheelsatthesame
cuttingheightsetting.
•Iftherearemorethan5inches(12.7cm)ofleavesonthe
lawn,setthefrontcuttingheight1or2notcheshigher
thantherearcuttingheight.Thismakesiteasiertofeed
theleavesunderthemachinehousing.
•Slowdownyourmowingspeedifthemachinedoesnot
cuttheleavesnelyenough.
•Ifyoumowoveroakleaves,youcanaddlimetothegrass
inthespringtoreducetheacidityoftheoakleaves.
13

Maintenance
Determinetheleftandrightsidesofthemachinefromthenormaloperatingposition.
RecommendedMaintenanceSchedule(s)
MaintenanceService
IntervalMaintenanceProcedure
Aftertherst8hours•Changetheengineoil.
Beforeeachuseordaily
•Checktheengineoillevel.
•Ensurethattheenginestopswithin3secondsafterreleasingtheblade-controlbar.
•Inspecttheblade.
•Cleanunderthemachinehousing.
•Cleanthedischargetunnelandplug.
Every25hours•Lubricatethepivotarms.
•Cleanthefoampre-cleaner(morefrequentlyindustyconditions).
Every50hours
•Changetheengineoil.
•Checkthefuelhoseandreplaceitifnecessary.
•Cleanunderthebeltcover.
Every100hours
•Lubricatethegearcase.
•Changetheoillter.
•Servicethesparkplug.
•Cleanthefuellter.
•Adjusttheself-propeldrive.
•Adjusttheblade-brakecable.
Every300hours•Replacethepaperairlter(morefrequentlyindustyconditions).
Yearlyorbeforestorage•Emptythefueltank.
Important:RefertoyourEngineOperator’sManualforadditionalmaintenanceprocedures.
CAUTION
Ifyouleavethewireonthesparkplug,someonecouldaccidentlystarttheengineandseriouslyinjure
youorotherbystanders.
Disconnectthewirefromthesparkplugbeforeyoudoanymaintenance.Setthewireasidesothatitdoes
notaccidentlycontactthesparkplug.
14

LubricatingthePivotArms
ServiceInterval:Every25hours
1.Movetherearwheelcutting-heightleverstothecenter
setting.
2.Wipethegreasettingswithacleanrag(Figure21).
Figure21
1.Greasetting
3.Installagreasegunontothettingandgentlyapply2
or3pumpsof#2multi-purposelithium-basegrease.
Important:Excessivegreasepressuremay
damagetheseals.
LubricatingtheGearCase
ServiceInterval:Every100hours
1.Removethegrassbag.
2.Wipethegreasettingswithacleanrag(Figure22).
Figure22
1.Beltcover2.Greasetting
3.Installagreasegunontothettingthroughthebelt
coveropening(Figure22).
Important:Excessivegreasepressuremay
damagetheseals.
4.Gentlyapplyoneto2pumpsof#2multi-purpose
lithium-basegrease.
5.Installthegrassbag.
ServicingtheAirFilter
ServiceInterval:Every25hours—Cleanthefoam
pre-cleaner(morefrequentlyindusty
conditions).
Every300hours—Replacethepaperairlter(more
frequentlyindustyconditions).
Important:Donotoperatetheenginewithouttheair
lterassembly;extremeenginedamagewilloccur.
1.Stoptheengineandwaitforallmovingpartstostop.
2.Disconnectthewirefromthesparkplug(Figure13).
3.Removethecoverandcleanitthoroughly(Figure23).
Figure23
1.Cover3.Air-lterbase
2.Paper-airlter
4.Removeandinspectthepaperairlter(Figure23),and
discarditifitisexcessivelydirty.
Important:Donottrytocleanapaperlter.
5.Removethefoampre-cleanerandwashitwithamild
detergentandwater,thenblotitdry(Figure23).
6.Installthefoampre-cleanerontothepaper-airlter.
7.Installtheairlterassembly.
Note:Installanewpaperairlterifyoudiscarded
theoldone.
8.Installthecover.
15

ChangingtheEngineOil
ServiceInterval:Aftertherst8hours
Every50hours
OilCapacity
Withoillter29ounces(0.85l)
Withoutoillter22ounces(0.65l)
1.Runtheenginetowarmtheengineoil.
Note:Warmoilowsbetterandcarriesmore
contaminants.
WARNING
Oilmaybehotafterenginehasbeenrun,and
contactwithhotoilcancauseseverepersonal
injury.
Avoidcontactingthehotengineoilwhenyou
drainit.
2.Stoptheengineandwaitforallmovingpartstostop.
3.Disconnectthewirefromthesparkplug(Figure13).
4.Drainthegasolinefromthefueltank;referto
EmptyingtheFuelTankandCleaningtheFuelFilter(page17).
5.Placeasuitabledrainpannexttothedipstickonthe
machine.
6.Removethedipstick(Figure24)byrotatingthecap
counterclockwiseandpullingitout.
Figure24
7.Tipthemachineonitsside,withthedipstickdown,to
draintheusedoilintothedrainpan.
Note:Youcanalsoremovetheoilfromthecrankcase
usinganoilextractor.
8.Returnthemachinetotheoperatingposition.
9.Pourabout3/4ofthecrankcasecapacityoffreshoil
inthecrankcase.
Note:Theoilcapacityoftheenginecrankcase
(withoillter)is29ounces(0.85liters).Useonly
high-qualitySAE30orSAE10W30weightdetergent
oilthathastheAmericanPetroleumInstitute(API)
serviceclassicationSF,SG,SH,orSJ.
10.Wipethedipstickcleanwithacleancloth.
11.Insertthedipstickfullyintothellerneck,thenremove
thedipstick.
12.Readtheoillevelonthedipstick(Figure24).
•IftheoillevelisbelowtheAddmarkonthe
dipstick,slowlypourasmallamountofoilinto
theoil-lltube,wait3minutes,andrepeatsteps
10through12untiltheoillevelisattheFullmark
onthedipstick.
•IftheoillevelisabovetheFullmarkonthe
dipstick,draintheexcessoiluntiltheoillevel
onthedipstickisattheFullmark.Referto
ChangingtheEngineOil(page16).
Important:Iftheoillevelinthecrankcaseis
toolowortoohighandyouruntheengine,
youmaydamagetheengine.
13.Insertthedipstickintothellernecksecurely.
14.Wipeupanyspilledoil.
15.Recycletheusedoilaccordingtolocalcodes.
ChangingtheOilFilter
ServiceInterval:Every100hours
1.Runtheenginetowarmtheoil.
WARNING
Oilmaybehotaftertheenginehasbeenrun,
andcontactwithhotoilcancausesevere
personalinjury.
Avoidcontactingthehotengineoilwhenyou
drainit.
2.Stoptheengineandwaitforallmovingpartstostop.
3.Disconnectthewirefromthesparkplug(Figure13).
4.Drainthegasolinefromthefueltank;referto
EmptyingtheFuelTankandCleaningtheFuelFilter(page17).
5.Draintheengineoil;referto
ChangingtheEngineOil(page16).
6.Placearagundertheoilltertocatchanyoilthatmay
leakoutasyouremovethelter.
7.Removetheoillter(Figure25).
16

Figure25
1.Fuelvalve2.Oillter
8.Useyourngertocoatthegasketonthenewlter
withoil(Figure26).
Figure26
1.Gasket
9.Installthenewlterandhandtightenit2/3turnonly.
10.FillthecrankcasetotheFulllineon
thedipstickwithfreshoil;referto
5FillingtheCrankcasewithOil(page6).
11.Connectthewiretothesparkplug.
12.Runtheengineforabout3minutes.
13.Stoptheengine,waitforallmovingpartstostop,and
checkforoilleakagearoundthelter.
14.Addoiltocompensatefortheoilintheoillter.Refer
toCheckingtheEngineOilLevel(page8).
15.Recycletheusedoillterproperly.
ServicingtheSparkPlug
ServiceInterval:Every100hours
Note:UseanNGKBPR5ESsparkplugorequivalent.
1.Stoptheengineandwaitforallmovingpartstostop.
2.Disconnectthewirefromthesparkplug(Figure13).
3.Cleanaroundthesparkplug.
4.Removethesparkplugfromthecylinderhead.
Important:Replaceacracked,fouled,ordirty
sparkplug.Donotcleantheelectrodesbecause
gritenteringthecylindercandamagetheengine.
5.Setthegapontheplugto0.030in.(0.76mm)
(Figure27).
Figure27
1.Center-electrodeinsulator3.Airgap(nottoscale)
2.Sideelectrode
6.Installthesparkplugandthegasketseal.
7.Torquetheplugto17ft-lb(23N-m).
8.Connectthewiretothesparkplug.
EmptyingtheFuelTankand
CleaningtheFuelFilter
ServiceInterval:Every50hours—Checkthefuelhoseand
replaceitifnecessary.
Every100hours—Cleanthefuellter.
Yearlyorbeforestorage—Emptythefueltank.
Note:Thefuellter(screen)elementislocatedinsidethe
fueltank.
1.Stoptheengineandwaitforittocooldown.
Important:Draingasolinefromacoldengine
only.
2.Disconnectthewirefromthesparkplug(Figure13).
3.Closethefuelvalve(Figure25).
4.Disconnectthefuellinebylooseningthetubeclampat
thecarburetor.
5.Openthefuelvalve.
6.Drainthegasolinecompletelyfromthetankandfuel
lineintoanapprovedfuelcontainer.
7.Removethefueltankfromthemachine.
8.Closethefuelvalve.
9.Pourasmallamountoffuelinthefueltank,move
thefuelaroundinthetank,andpouritoutintoan
approvedfuelcontainer.
17

10.Installthefueltankandfuelline;referto
3InstallingtheFuelTank(page5).
AdjustingtheSelf-propelDrive
ServiceInterval:Every100hours
Ifthemachinedoesnotself-propelorhasatendencytocreep
forwardwhenthecontrolbarismorethan1-1/2inches(3.8
cm)fromthehandle,adjustthewheeldrivecontrolknob
ontherearofthegearbox.
1.Closethedoorinthemachinehousingandremove
thegrassbag.
2.Rotatethecontrolknobclockwiseahalfturnifthe
machinedoesnotself-propel.Ifthemachinecreeps
forward,rotatetheknobahalfturncounterclockwise
toloosenthebelt(Figure28).
Figure28
1.Controlknob
3.Slowlypullthemachinebackwardwhileyougradually
movethecontrolbartowardthehandle.
Note:Theadjustmentiscorrectwhentherearwheels
stopturningandthecontrolbarisaboutoneinch(2.5
cm)fromthehandle(Figure29).
Figure29
1.1inch(2.5cm)
AdjustingtheBlade-brake
Cable
ServiceInterval:Beforeeachuseordaily—Ensurethat
theenginestopswithin3secondsafter
releasingtheblade-controlbar.
Every100hours
Wheneveryouinstallanewblade-brakecableassembly,adjust
it.
1.Stoptheengineandwaitforallmovingpartstostop.
2.Disconnectthewirefromthesparkplug.
3.Checktheadjustmentofthecablebymovingthe
blade-controlbartowardthehandleuntilyouremove
theslackinthecable.
4.Toadjustthecable,dothefollowing:
A.Loosenthenutonthecablebracket(Figure30).
Figure30
1.Handle3.3/16to1/4inch(5to6
mm)
2.Brakelever4.Cablebracket
B.Inserta3/16to1/4inch(5to6mm)object
betweenthebrakeleverandthehandle(Figure30).
C.Pulldownonthecableconduituntilyouremove
theslackfromthewire(Figure30).
D.Tightenthenut.
MaintainingtheCuttingBlade
Alwaysmowwithasharpblade.Asharpbladecutscleanly
andwithouttearingorshreddingthegrassblades.
1.Stoptheengineandwaitforallmovingpartstostop.
2.Disconnectthewirefromthesparkplug.
3.Drainthegasolinefromthefueltank;referto
EmptyingtheFuelTankandCleaningtheFuelFilter(page17).
4.Tipthemachinewiththeairlterup(Figure31).
18

Figure31
1.Blade3.Accelerator
2.Bladeboltandlockwasher
InspectingtheBlade
ServiceInterval:Beforeeachuseordaily
Carefullyexaminethebladeforsharpnessandwear,especially
wheretheatandthecurvedpartsmeet(Figure32A).
Becausesandandabrasivematerialcanwearawaythemetal
thatconnectstheatandcurvedpartsoftheblade,check
thebladebeforeusingthemachine.Ifyounoticeaslotor
wear(Figure32BandFigure32C),replacetheblade;refer
toRemovingtheBlade.
Figure32
1.Sail3.Wear
2.Flatpartoftheblade4.Slotformed
Note:Forthebestperformance,installanewbladebefore
thecuttingseasonbegins.Duringtheyear,ledownany
smallnickstomaintainthecuttingedge.
DANGER
Awornordamagedbladecanbreak,andapiece
ofthebladecouldbethrownintotheoperator’s
orbystander’sarea,resultinginseriouspersonal
injuryordeath.
•Inspectthebladeperiodicallyforwearor
damage.
•Replaceawornordamagedblade.
RemovingtheBlade
Grasptheendofthebladeusingaragorathicklypadded
glove.Removethebladebolt,thelockwasher,theaccelerator,
andtheblade(Figure31).
SharpeningtheBlade
Filethetopsideofthebladetomaintainitsoriginalcutting
angle(Figure33A)andinnercuttingedgeradius(Figure33B).
Thebladewillremainbalancedifyouremovethesame
amountofmaterialfrombothcuttingedges.
Figure33
1.Sharpenatthisangleonly.2.Maintaintheoriginalradius
here.
BalancingtheBlade
1.Checkthebalanceofthebladebyplacingthecenter
holeofthebladeoveranailorscrewdrivershank
clampedhorizontallyinavise(Figure34).
Figure34
Note:Youcanalsocheckthebalanceusinga
commerciallymanufacturedbladebalancer.
2.Ifeitherendofthebladerotatesdownward,lethat
end(notthecuttingedgeortheendnearthecutting
edge).Thebladeisproperlybalancedwhenneither
enddrops.
InstallingtheBlade
1.Installasharp,balancedToroblade,theaccelerator,the
lockwasher,andthebladebolt.Thesailoftheblade
mustpointtowardthetopofthemachinehousingfor
properinstallation.Torquethebladeboltto50ft-lb
(68N-m).
19

WARNING
Operatingthemachinewithouttheaccelerator
inplacecancausethebladetoex,bend,or
break,resultinginseriousinjuryordeathto
theoperatororbystanders.
Donotoperatethemachinewithoutthe
accelerator.
2.Returnthemachinetoitsuprightposition.
3.Connectthewiretothesparkplug.
CleaningundertheMachine
Housing
ServiceInterval:Beforeeachuseordaily
Toensurethebestperformance,keeptheundersideofthe
machinehousingclean.Beespeciallycarefultokeepthe
kickersfreeofdebris(Figure35).
Figure35
1.Kickers
WashingMethod
1.Positionthemachineonaatconcreteorasphalt
surfacenearagardenhose.
2.Starttheengine.
3.Holdtherunninggardenhoseathandlelevelanddirect
thewatertoowonthegroundjustinfrontofthe
rightreartire(Figure36).
Figure36
1.Rightrearwheel
Note:Thebladewilldrawinwaterandwashout
clippings.Letthewaterrununtilyounolongersee
clippingsbeingwashedoutfromunderthehousing.
4.Stoptheengineandwaitforallmovingpartstostop.
5.Turnoffthewater.
6.Startthemachineandletitrunforafewminutestodry
outthemoistureonthemachineanditscomponents.
ScrapingMethod
Ifwashingdoesnotremovealldebrisfromunderthe
machine,scrapeitclean.
1.Disconnectthewirefromthesparkplug(Figure13).
2.Drainthefuelfromthefueltank.Referto
EmptyingtheFuelTankandCleaningtheFuelFilter(page17).
WARNING
Tippingthemachinemaycausethefuelto
leakfromthecarburetororthefueltank.
Gasolineisextremelyammable,highly
explosive,and,undercertainconditions,can
causepersonalinjuryorpropertydamage.
Avoidfuelspillsbyrunningtheenginedryor
byremovingthegasolinewithahandpump;
neversiphon.
3.Tipthemachineontoitssidewiththeairlterup.
4.Removethedirtandgrassclippingswithahardwood
scraper.
Note:Avoidburrsandsharpedges.
5.Returnthemachineintheoperatingposition.
6.Fillthefueltank.
7.Connectthewiretothesparkplug.
CleaningtheDischargeTunnel
andPlug
ServiceInterval:Beforeeachuseordaily
Removetheplugfromthedischargetunnelandcleanitafter
eachuse.
Alwaysbesurethatthedischargetunneldoorclosessecurely
whenyoureleasethehandle.Ifthedebrispreventsthe
dischargedoorfromclosingsecurely,cleantheinsideofthe
dischargetunnelandthedoorthoroughly.
20
Other manuals for 22197
1
Table of contents
Other Toro Lawn Mower manuals

Toro
Toro Super Recycler 20054 User manual

Toro
Toro Super Recycler 20792 User manual

Toro
Toro 4383 User manual

Toro
Toro Super Recycler 20383 User manual

Toro
Toro 74723 User manual

Toro
Toro 21753 User manual

Toro
Toro 20487 User manual

Toro
Toro Recycler 21762 User manual

Toro
Toro 22289 User manual

Toro
Toro 21690 User manual