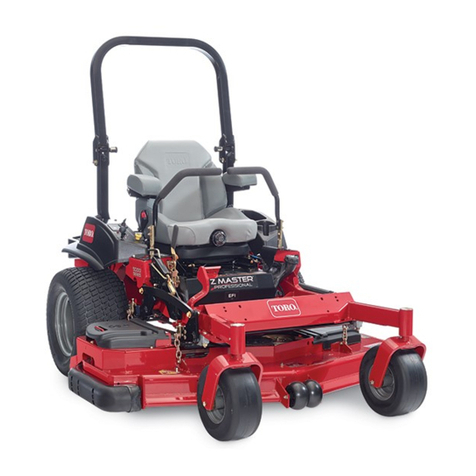
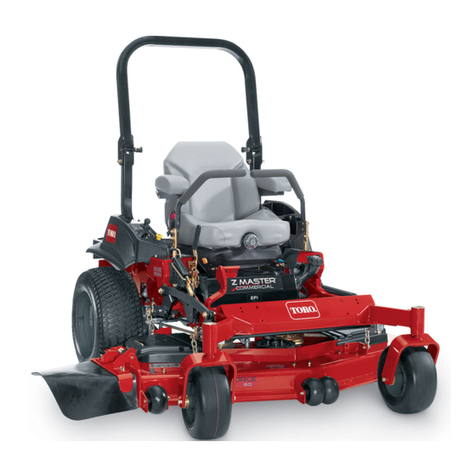
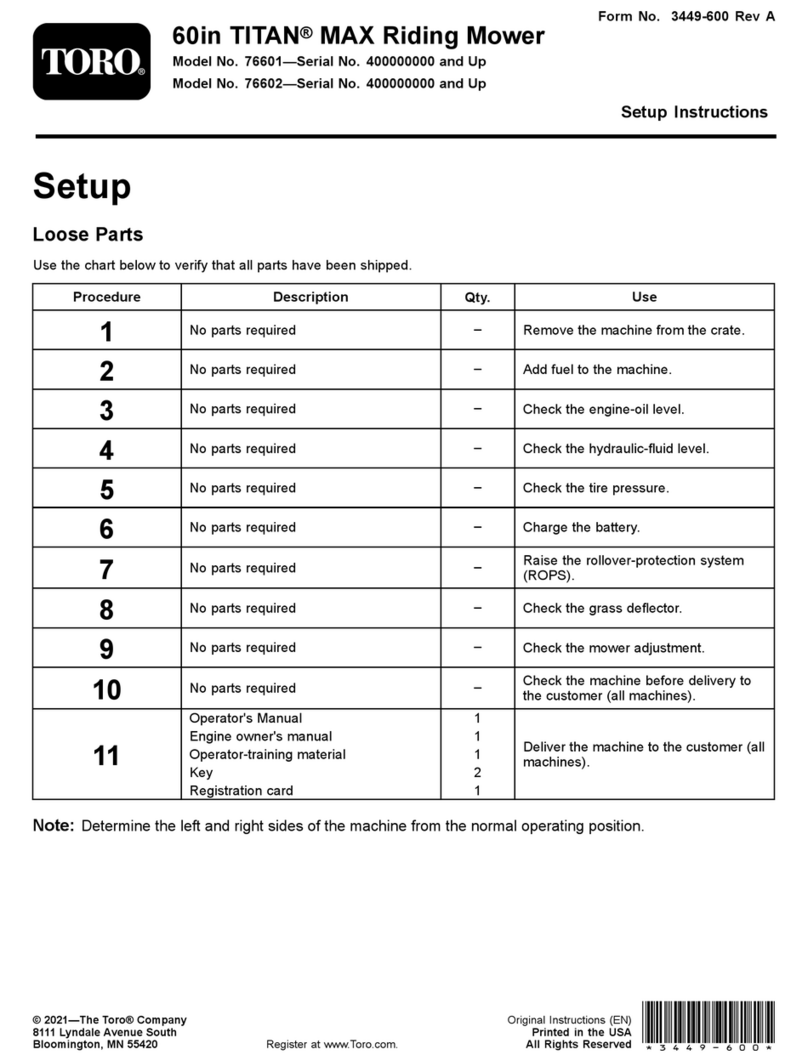
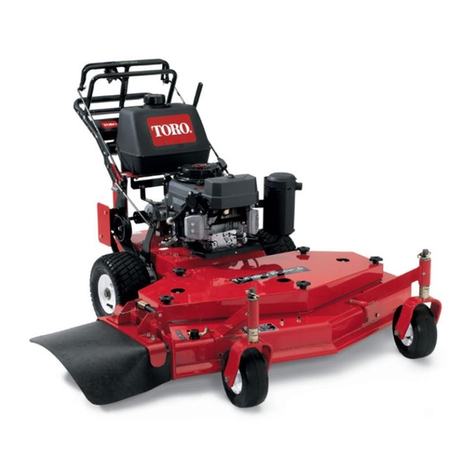
Toro 3675 User manual

FormNo.3400-995RevA
Reelmaster®5410and5510
TractionUnit
ModelNo.03675—SerialNo.316000501andUp
ModelNo.03676—SerialNo.316000501andUp
Registeratwww.Toro.com.
OriginalInstructions(EN)*3400-995*A

ThisproductcomplieswithallrelevantEuropeandirectives;
fordetails,pleaseseetheseparateproductspecicDeclaration
ofConformity(DOC)sheet.
WARNING
CALIFORNIA
Proposition65Warning
Thisproductcontainsachemicalorchemicals
knowntotheStateofCaliforniatocausecancer,
birthdefects,orreproductiveharm.
Dieselengineexhaustandsomeofits
constituentsareknowntotheStateof
Californiatocausecancer,birthdefects,
andotherreproductiveharm.
Important:ItisaviolationofCaliforniaPublic
ResourceCodeSection4442or4443touseoroperate
theengineonanyforest-covered,brush-covered,or
grass-coveredlandunlesstheengineisequippedwith
asparkarrester,asdenedinSection4442,maintained
ineffectiveworkingorderortheengineisconstructed,
equipped,andmaintainedforthepreventionofre.
Theenclosedengineowner’smanualissuppliedfor
informationregardingtheUSEnvironmentProtection
Agency(EPA)andtheCaliforniaEmissionControl
Regulationofemissionsystems,maintenance,and
warranty.Replacementmaybeorderedthroughtheengine
manufacturer.
Introduction
Thismachineisaride-on,reel-bladelawnmowerintended
tobeusedbyprofessional,hiredoperatorsincommercial
applications.Itisprimarilydesignedforcuttinggrasson
well-maintainedlawnsingolfcourses,parks,sportselds,
andoncommercialgrounds.Itisnotdesignedforcutting
brush,mowinggrassandothergrowthalongsidehighways,
orforagriculturaluses.
Readthisinformationcarefullytolearnhowtooperateand
maintainyourproductproperlyandtoavoidinjuryand
productdamage.Youareresponsibleforoperatingthe
productproperlyandsafely.
YoumaycontactTorodirectlyatwww.Toro.comforproduct
andoperationtrainingmaterials,accessoryinformation,help
ndingadealer,ortoregisteryourproduct.
Wheneveryouneedservice,genuineToroparts,oradditional
information,contactanAuthorizedServiceDealerorToro
CustomerServiceandhavethemodelandserialnumbers
ofyourproductready.Themodelandserialnumbersare
onaplatemountedontheleftsideoftheframeunderthe
footrest.Writethenumbersinthespaceprovided.
ModelNo.
SerialNo.
Thismanualidentiespotentialhazardsandhassafety
messagesidentiedbythesafety-alertsymbol(Figure1),
whichsignalsahazardthatmaycauseseriousinjuryordeath
ifyoudonotfollowtherecommendedprecautions.
Figure1
1.Safety-alertsymbol
Thismanualuses2wordstohighlightinformation.
Importantcallsattentiontospecialmechanicalinformation
andNoteemphasizesgeneralinformationworthyofspecial
attention.
©2015—TheToro®Company
8111LyndaleAvenueSouth
Bloomington,MN554202
Contactusatwww.Toro.com.
PrintedintheUSA
AllRightsReserved

Contents
Safety...........................................................................4
SafeOperatingPractices...........................................4
ToroRidingMowerSafety........................................6
SoundPowerLevel..................................................7
SoundPressureLevel...............................................7
VibrationLevel.......................................................7
SafetyandInstructionalDecals.................................7
Setup...........................................................................11
1AdjustingtheTirePressure....................................11
2AdjustingtheControl-ArmPosition.......................12
3InstallingtheCuttingUnits....................................12
4AdjustingtheTurf-CompensationSpring................15
5InstallingtheCEHoodLatch................................16
6UsingtheCutting-UnitKickstand...........................16
ProductOverview.........................................................17
Controls...............................................................17
Specications........................................................23
Attachments/Accessories........................................23
Operation....................................................................24
ThinkSafetyFirst...................................................24
CheckingtheEngine-OilLevel.................................24
CheckingtheCoolingSystem...................................25
AddingFuel...........................................................25
CheckingtheHydraulic-FluidLevel..........................27
CheckingtheReel-to-BedknifeContact.....................27
CheckingtheTorqueoftheWheelNuts.....................28
Breaking-intheMachine..........................................28
StartingandStoppingtheEngine..............................28
SettingtheReelSpeed.............................................29
AdjustingtheLift-ArmCounterbalance.....................30
AdjustingtheLift-ArmTurnaroundPosition..............30
LocatingtheJackingPoints......................................30
TransportingtheMachine........................................31
LoadingtheMachine..............................................31
PushingorTowingtheMachine................................32
UnderstandingtheDiagnosticLight..........................32
CheckingtheInterlockSwitches...............................33
HydraulicValveSolenoidFunctions..........................33
OperatingTips......................................................34
Maintenance.................................................................35
RecommendedMaintenanceSchedule(s)......................35
DailyMaintenanceChecklist....................................36
ServiceIntervalChart.............................................37
Lubrication...............................................................37
GreasingtheBearingsandBushings..........................37
EngineMaintenance..................................................39
ServicingtheAirCleaner.........................................39
ServicingtheEngineOilandFilter............................40
AdjustingtheThrottle.............................................40
FuelSystemMaintenance...........................................41
DrainingtheFuelTank...........................................41
CheckingtheFuelLinesandConnections..................41
ServicingtheWaterSeparator...................................41
CleaningtheFuelPick-upTubeScreen......................41
BleedingtheFuelSystem.........................................41
ElectricalSystemMaintenance....................................42
ServicingtheBattery...............................................42
Fuses....................................................................42
DriveSystemMaintenance.........................................43
AdjustingtheTractionDriveforNeutral....................43
AdjustingtheRearWheelToe-in..............................43
CoolingSystemMaintenance......................................44
RemovingDebrisfromtheCoolingSystem................44
BrakeMaintenance....................................................45
AdjustingtheParkingBrakes....................................45
AdjustingtheParking-BrakeLatch............................45
BeltMaintenance......................................................46
TensioningtheAlternatorBelt.................................46
HydraulicSystemMaintenance....................................46
ChangingtheHydraulicFluid...................................46
ReplacingtheHydraulicFilters.................................47
CheckingtheHydraulicLinesandHoses....................47
TestingthePressureintheHydraulicCircuits..............48
CuttingUnitSystemMaintenance.................................49
BacklappingtheCuttingUnits..................................49
Storage........................................................................50
PreparingtheTractionUnit.....................................50
PreparingtheEngine..............................................50
3

Safety
ThismachinehasbeendesignedinaccordancewithEN
ISO5395:2013andANSIB71.4-2012.
Improperlyusingormaintainingthemachinecanresult
ininjury.Toreducethepotentialforinjury,complywith
thesesafetyinstructionsandalwayspayattentiontothe
safety-alertsymbol,whichmeansCaution,Warning,or
Danger—personalsafetyinstruction.Failuretocomply
withtheinstructionmayresultinpersonalinjuryor
death.
SafeOperatingPractices
Training
•ReadtheOperator'sManualandothertrainingmaterial
carefully.Befamiliarwiththecontrols,safetysigns,and
theproperuseoftheequipment.
•Neverallowchildrenorpeopleunfamiliarwiththese
instructionstouseorservicethemower.Local
regulationsmayrestricttheageoftheoperator.
•Nevermowwhilepeople,especiallychildren,orpetsare
nearby.
•Donotcarrypassengers.
•Alldriversandmechanicsshouldseekandobtain
professionalandpracticalinstruction.Theowneris
responsiblefortrainingtheusers.Suchinstructionshould
emphasize:
–Theneedforcareandconcentrationwhenworking
withride-onmachines;
–Controlofaride-onmachineslidingonaslopewill
notberegainedbytheapplicationofthebrake.The
mainreasonsforlossofcontrolare:
◊Insufcientwheelgrip
◊Beingdriventoofast
◊Inadequatebraking
◊Thetypeofmachineisunsuitableforitstask
◊Lackofawarenessoftheeffectofground
conditions,especiallyslopes
•Theowner/usercanpreventandisresponsiblefor
accidentsorinjuriesoccurringtopeopleordamageto
property.
Preparation
•Whilemowing,alwayswearsubstantial,slip-resistant
footwear,longtrousers,safetyglasses,andearprotection.
Tiebacklonghair.Donotwearjewelry.
•Thoroughlyinspecttheareawheretheequipmentisto
beusedandremoveallobjectswhichmaybethrownby
themachine.
•Replacefaultysilencers/mufers.
•Evaluatetheterraintodeterminewhataccessoriesand
attachmentsareneededtoproperlyandsafelyperform
thejob.Onlyuseaccessoriesandattachmentsapproved
bythemanufacturer.
•Checkthattheoperator'spresencecontrols,safety
switchesandshieldsareattachedandfunctioning
properly.Donotoperateunlesstheyarefunctioning
properly.
SafeHandlingofFuels
•Toavoidpersonalinjuryorpropertydamage,useextreme
careinhandlingfuel.Fuelisextremelyammableandthe
vaporsareexplosive.
•Extinguishallcigarettes,cigars,pipes,andothersources
ofignition.
•Useonlyanapprovedfuelcontainer.
•Neverremovefuelcaporaddfuelwiththeengine
running.
•Allowenginetocoolbeforerefueling.
•Neverrefuelthemachineindoors.
•Neverstorethemachineorfuelcontainerwherethereis
anopename,spark,orpilotlightsuchasonawater
heateroronotherappliances.
•Neverllcontainersinsideavehicleoronatruckor
trailerbedwithaplasticliner.Alwaysplacecontainerson
thegroundawayfromyourvehiclebeforelling.
•Removeequipmentfromthetruckortrailerandrefuelit
ontheground.Ifthisisnotpossible,thenrefuelsuch
equipmentwithaportablecontainer,ratherthanfroma
fuel-dispensernozzle.
•Keepthenozzleincontactwiththerimofthefueltank
orcontaineropeningatalltimesuntilfuelingiscomplete.
Donotuseanozzlelockopendevice.
•Iffuelisspilledonclothing,changeclothingimmediately.
•Neveroverllfueltank.Replacefuelcapandtighten
securely.
Operation
•Donotoperatetheengineinaconnedspacewhere
dangerouscarbonmonoxideandotherexhaustgasescan
collect.
•Mowonlyindaylightoringoodarticiallight.
•Beforeattemptingtostarttheengine,disengageallblade
attachmentclutches,shiftintoneutral,andengagethe
parkingbrake.
•Rememberthereisnosuchthingasasafeslope.Travel
ongrassslopesrequiresparticularcare.Toguardagainst
overturning:
–Donotstoporstartsuddenlywhengoingupor
downhill.
4

–Machinespeedsshouldbekeptlowonslopesand
duringtightturns.
–Stayalertforhumpsandhollowsandotherhidden
hazards.
–Donotturnsharply.Usecarewhenreversing.
–Usecounterweight(s)orwheelweightswhen
suggestedintheOperator'sManual.
•Stayalertforholesintheterrainandotherhiddenhazards.
•Watchoutfortrafcwhencrossingornearroadways.
•Stopthebladesrotatingbeforecrossingsurfacesother
thangrass.
•Whenusinganyattachments,neverdirectdischargeof
materialtowardbystandersnorallowanyonenearthe
machinewhileinoperation.
•Neveroperatethemachinewithdamagedguards,shields,
orwithoutsafetyprotectivedevicesinplace.Makesure
thatallinterlocksareattached,adjustedproperly,and
functioningproperly.
•Donotchangetheenginegovernorsettingsorover-speed
theengine.Operatingtheengineatexcessivespeedmay
increasethehazardofpersonalinjury.
•Beforeleavingtheoperator'sposition,dothefollowing:
–Stoponlevelground.
–Disengagethepowertake-offandlowerthe
attachments.
–Changeintoneutralandsettheparkingbrake.
–Stoptheengineandremovethekey.
•Disengagedrivetoattachmentswhentransportingornot
inuse.
•Stoptheengineanddisengagedrivetoattachmentfor
thefollowing:
–Beforerefuelling
–Beforeremovingthegrasscatcher/catchers
–Beforemakingheightadjustmentunlessadjustment
canbemadefromtheoperator'sposition
–Beforeclearingblockages
–Beforechecking,cleaningorworkingonthemower
–Afterstrikingaforeignobjectorifanabnormal
vibrationoccurs.Inspectthemowerfordamage
andmakerepairsbeforerestartingandoperatingthe
equipment
•Reducethethrottlesettingduringenginerun-outand,if
theengineisprovidedwithashut-offvalve,turnthefuel
offattheconclusionofmowing.
•Keephandsandfeetawayfromthecuttingunits.
•Lookbehindanddownbeforebackinguptobesureof
aclearpath.
•Slowdownandusecautionwhenmakingturnsand
crossingroadsandsidewalks.Stopcylinders/reelsifnot
mowing.
•Donotoperatethemachinewhileill,tired,orunderthe
inuenceofalcoholordrugs.
•Lightningcancausesevereinjuryordeath.Iflightning
isseenorthunderisheardinthearea,donotoperate
themachine;seekshelter.
•Usecarewhenloadingorunloadingthemachineintoa
trailerortruck.
•Usecarewhenapproachingblindcorners,shrubs,trees,
orotherobjectsthatmayobscurevision.
MaintenanceandStorage
•Keepallnuts,bolts,andscrewstighttomakesurethat
theequipmentisinsafeworkingcondition.
•Neverstoretheequipmentwithfuelinthetankinsidea
buildingwherefumesmayreachanopenameorspark.
•Allowtheenginetocoolbeforestoringinanyenclosure.
•Toreducetherehazard,keeptheengine,
silencer/mufer,batterycompartmentandfuelstorage
areafreeofgrass,leaves,orexcessivegrease.
•Keepallpartsingoodworkingconditionandallhardware
andhydraulicttingstightened.Replaceallwornor
damagedpartsanddecals.
•Ifthefueltankhastobedrained,dothisoutdoors.
•Becarefulduringadjustmentofthemachinetoprevent
entrapmentofthengersbetweenmovingbladesand
xedpartsofthemachine.
•Onmulti-cylinder/multi-reelmachines,takecareas
rotatingonecylinder/reelcancauseothercylinders/reels
torotate.
•Disengagedrives,lowerthecuttingunits,setparking
brake,stopengineandremovekeyfromignition.Wait
forallmovementtostopbeforeadjusting,cleaningor
repairing.
•Cleangrassanddebrisfromcuttingunits,drives,
silencers/mufers,andenginetohelppreventres.Clean
upoilorfuelspillage.
•Usejackstandstosupportcomponentswhenrequired.
•Carefullyreleasepressurefromcomponentswithstored
energy.
•Disconnectbatterybeforemakinganyrepairs.Disconnect
thenegativeterminalrstandthepositivelast.Reconnect
positiverstandnegativelast.
•Usecarewhencheckingthecylinders/reels.Weargloves
andusecautionwhenservicingthem.
•Keephandsandfeetawayfrommovingparts.Ifpossible,
donotmakeadjustmentswiththeenginerunning.
•Chargebatteriesinanopenwellventilatedarea,away
fromsparkandames.Unplugchargerbeforeconnecting
ordisconnectingfrombattery.Wearprotectiveclothing
anduseinsulatedtools.
5


Hauling
•Usecarewhenloadingorunloadingthemachineintoa
trailerortruck.
•Usefull-widthrampsforloadingmachineintotraileror
truck.
•Tiethemachinedownsecurelyusingstraps,chains,cable,
orropes.Bothfrontandrearstrapsshouldbedirected
downandoutwardfromthemachine.
ToroRidingMowerSafety
ThefollowinglistcontainssafetyinformationspecictoToro
productsorothersafetyinformationthatyoumustknowthat
isnotincludedintheCEN,ISO,orANSIstandard.
Thisproductiscapableofamputatinghandsandfeetand
throwingobjects.Alwaysfollowallsafetyinstructionsto
avoidseriousinjuryordeath.
Useofthisproductforpurposesotherthanitsintendeduse
couldprovedangeroustouserandbystanders.
WARNING
Engineexhaustcontainscarbonmonoxide,which
isanodorless,deadlypoisonthatcankillyou.
Donotoperatetheengineinaconnedspace
wheredangerouscarbonmonoxideandother
exhaustgassescancollect.
•Knowhowtostoptheenginequickly.
•Handlefuelcarefully.Wipeupanyspills.
•Checkthesafetyinterlockswitchesdailyforproper
operation.Ifaswitchshouldfail,replacetheswitch
beforeoperatingthemachine.
•Beforestartingtheengine,sitontheseat.
•Usingthemachinedemandsattention.Topreventloss
ofcontrol:
–Donotdriveclosetosandtraps,ditches,creeks,or
otherhazards.
–Reducespeedwhenmakingsharpturns.Avoid
suddenstopsandstarts.
–Whennearorcrossingroads,alwaysyieldthe
right-of-way.
–Applytheservicebrakeswhengoingdownhillto
keepforwardspeedslowandtomaintaincontrolof
themachine.
•Raisethecuttingunitswhendrivingfromoneworkarea
toanother.
•Donottouchtheengine,silencer/mufer,orexhaust
pipewhiletheengineisrunningorsoonafterithas
stoppedbecausetheseareascouldbehotenoughtocause
burns.
•Iftheenginestallsorlosesheadwayandcannotmakeit
tothetopofaslope,donotturnthemachinearound.
Alwaysbackslowly,straightdowntheslope.
•Whenapersonorpetappearsunexpectedlyinornear
themowingarea,stopmowing.Donotresumemowing
untiltheareaiscleared.
MaintenanceandStorage
•Makesureallhydrauliclineconnectorsaretightandall
hydraulichosesandlinesareingoodconditionbefore
applyingpressuretothesystem.
•Keepyourbodyandhandsawayfrompinholeleaksor
nozzlesthatejecthydraulicuidunderhighpressure.
Usepaperorcardboard,notyourhands,tosearchfor
leaks.Hydraulicuidescapingunderpressurecanhave
sufcientforcetopenetratetheskinandcauseserious
injury.Seekimmediatemedicalattentionifuidis
injectedintoskin.
•Beforedisconnectingorperforminganyworkonthe
hydraulicsystem,allpressureinthesystemmustbe
relievedbystoppingtheengineandloweringthecutting
unitsandattachmentstotheground.
•Checkallfuellinesfortightnessandwearonaregular
basis.Tightenorrepairthemasneeded.
•Iftheenginemustberunningtoperformamaintenance
adjustment,keephands,feet,clothing,andanypartsof
thebodyawayfromthecuttingunits,attachments,and
anymovingparts.Keepeveryoneaway.
•Toensuresafetyandaccuracy,haveyourToroDistributor
checkthemaximumenginespeedwithatachometer.
Maximumgovernedenginespeedshouldbe3200rpm.
•Formajorrepairs,warrantywork,updatestosystems,or
assistance,contactyourToroDistributor.
•Toensureoptimumperformanceandcontinuedsafety
certicationofthemachine,useonlygenuineToro
replacementpartsandaccessories.Replacementparts
andaccessoriesmadebyothermanufacturerscouldbe
dangerous,andsuchusecouldvoidtheproductwarranty.
6

SoundPowerLevel
Thisunithasaguaranteedsoundpowerlevelof102dBA,
whichincludesanUncertaintyValue(K)of1dBA.
Soundpowerlevelwasdeterminedaccordingtothe
proceduresoutlinedinISO11094.
SoundPressureLevel
Thisunithasasoundpressurelevelattheoperator’searof86
dBA,whichincludesanUncertaintyValue(K)of1dBA.
Soundpressurelevelwasdeterminedaccordingtothe
proceduresoutlinedinENISO5395:2013.
VibrationLevel
Hand-Arm
Measuredvibrationlevelforrighthand=0.59m/s2
Measuredvibrationlevelforlefthand=0.54m/s2
UncertaintyValue(K)=0.5m/s2
Measuredvaluesweredeterminedaccordingtotheprocedures
outlinedinENISO5395:2013.
WholeBody
Measuredvibrationlevel=0.44m/s2
UncertaintyValue(K)=0.5m/s2
Measuredvaluesweredeterminedaccordingtotheprocedures
outlinedinENISO5395:2013.
SafetyandInstructionalDecals
Safetydecalsandinstructionsareeasilyvisibletotheoperatorandarelocatednearanyareaofpotential
danger.Replaceanydecalthatisdamagedorlost.
93-7272
1.Cutting/dismembermenthazard;fan—stayawayfrom
movingparts.
93–6696
1.Storedenergyhazard—readtheOperator'sManual.
106-6754
1.Warning—donottouchthehotsurface.
2.Cutting/dismembermenthazard,fanandentanglement
hazard,belt—stayawayfrommovingparts.
110-0986
1.Pressthebrakepedalandparkingbrakepedaltosetthe
parkingbrake.
2.Pressthebrakepedaltoapplythebrake.
3.Pressthetractionpedaltomovethemachineforward.
4.Reelenabledmode
5.Transportmode
110-8921
1.Tractionunitspeed
2.Slow
3.Fast
7

110-9642
1.Storedenergyhazard—readtheOperator'sManual.
2.Movethecotterpintotheholeclosesttotherodbracket
andthenremovetheliftarmandpivotyoke.
106-6755
1.Enginecoolantunder
pressure.
3.Warning—donottouchthe
hotsurface.
2.Explosionhazard—read
theOperator'sManual.
4.Warning—readthe
Operator'sManual.
93-6689
1.Warning—donotcarrypassengers.
117–2718
BatterySymbols
Someorallofthesesymbolsareonyourbattery
1.Explosionhazard6.Keepbystandersasafe
distancefromthebattery.
2.Nore,opename,or
smoking.
7.Weareyeprotection;
explosivegasescan
causeblindnessandother
injuries
3.Causticliquid/chemical
burnhazard
8.Batteryacidcancause
blindnessorsevereburns.
4.Weareyeprotection9.Flusheyesimmediately
withwaterandgetmedical
helpfast.
5.ReadtheOperator's
Manual.
10.Containslead;donot
discard.
121–5644
1.Lightswitch6.Slow
2.Engage7.Lower
3.Powertake-off8.Raise
4.Disengage9.ReadtheOperator’s
Manual.
5.Fast
8

120–4158
1.ReadtheOperator’s
Manual.
3.Engine—preheat
2.Engine—start4.Engine—stop
117–0169
1.ReadtheOperator'sManual.
2.Powerpoint—10A
3.Headlights—10A
4.Power—10A
5.Enginestart—15A
6.Optionalairrideseatsuspension—20A
7.EnginecomputermanagementC—7.5A
8.EnginecomputermanagementB—7.5A
9.EnginecomputermanagementA—7.5A
133-2930
1.Warning—readtheOperator'sManual;donotoperatethis
machineunlessyouaretrained.
4.Tippinghazard—slowthemachinebeforeturning;donotturn
athighspeeds;onlydriveonslopeswiththecuttingunits
lowered;alwayswearaseatbelt.
2.Warning—wearhearingprotection.5.Warning—donotparkonslopes;locktheparkingbrake,stop
theengineandremovetheignitionkeybeforeleavingthe
machine.
3.Thrownobjecthazard—keepbystandersasafedistance
awayfromthemachine.
6.Warning—readtheOperator'sManual;donottowthe
machine.
9

133-2931
1.Warning—readtheOperator'sManual;donotoperatethis
machineunlessyouaretrained.
4.Tippinghazard—donotdriveacrossordownslopesgreater
than15degrees;onlydriveonslopeswiththecuttingunits
lowered;alwayswearaseatbelt
2.Warning—wearhearingprotection.5.Warning—donotparkonslopes;locktheparkingbrake,stop
theengineandremovetheignitionkeybeforeleavingthe
machine.
3.Thrownobjecthazard—keepbystandersasafedistance
awayfromthemachine
6.Warning—readtheOperator'sManual;donottowthe
machine.
93-6688
1.Warning—readthe
instructionsbefore
servicingorperforming
maintenance.
2.Cuttinghazardofhandor
foot—stoptheengineand
waitformovingpartsto
stop.
125-8753
1.ReadtheOperator'sManualformoremaintenanceinformation.
10

Setup
LooseParts
Usethechartbelowtoverifythatallpartshavebeenshipped.
ProcedureDescriptionQty.Use
1Nopartsrequired–Adjustthetirepressure.
2Nopartsrequired–Adjustthecontrol-armposition.
Rightfronthoseguide1
3Leftfronthoseguide1Installthecuttingunits.
4Nopartsrequired–Adjusttheturf-compensationspring.
Hoodlatchassembly1
5Washer1InstalltheCEhoodlatch.
6Cutting-unitkickstand1Installthecutting-unitkickstand.
MediaandAdditionalParts
DescriptionQty.Use
Operator'sManual1
EngineOperator’sManual1Readthemanualsbeforeoperatingthemachine.
PartsCatalog1UsetothePartsCatalogtoreferencepartnumbers.
DeclarationofConformity1Thisdocumentindicatesconformitywithcertainstandards.
Operatortrainingmaterial1Reviewthetrainingmaterialbeforeoperatingthemachine.
Note:Determinetheleftandrightsidesofthemachine
fromthenormaloperatingposition.
1
AdjustingtheTirePressure
NoPartsRequired
Procedure
Thetiresareover-inatedforshipping.Therefore,release
someoftheairtoreducethepressure.Correctairpressurein
thefrontandreartiresis83to103kPa(12to15psi).
Important:Maintainevenpressureinalltirestoensure
thatthereisuniformcontactwiththeturf.
11

2
AdjustingtheControl-Arm
Position
NoPartsRequired
Procedure
Thecontrol-armpositioncanbeadjustedfortheoperators
comfort.
1.Loosenthe2boltssecuringthecontrolarmtothe
retainingbracket(Figure2).
Figure2
1.Controlarm3.Bolts(2)
2.Retainingbrackets
2.Rotatethecontrolarmtothedesiredpositionand
tightenthe2bolts.
3
InstallingtheCuttingUnits
Partsneededforthisprocedure:
1Rightfronthoseguide
1Leftfronthoseguide
Procedure
1.Removethereelmotorsfromtheshippingbrackets.
2.Removetheshippingbracketsanddiscard.
3.Removethecuttingunitsfromthecartons.Assemble
andadjustasdescribedinthecuttingunitOperator's
Manual.
4.Makesurethecounterweight(Figure3)isinstalledto
theproperendofthecuttingunitasdescribedinthe
cuttingunitOperator'sManual.
Figure3
1.Counterweight
5.Mounttheturf-compensationspringtothesameside
ofthecuttingunitasthereel-drivemotor.Reposition
theturf-compensationspringasfollows:
Note:Allcuttingunitsareshippedwiththe
turf-compensationspringmountedtotherightside
ofthecuttingunit.
A.Removethe2carriageboltsandnutssecuringthe
rodbrackettothecutting-unittabs(Figure4).
Figure4
1.Turf-compensationspring3.Springtube
2.Rodbracket
B.Removetheangenutsecuringthespring-tube
bolttothecarrier-frametab(Figure4)Remove
theassembly.
C.Mountthespring-tubebolttotheoppositetabon
thecarrierframeandsecurewiththeangenut.
12

Theboltheadistobepositionedtotheouterside
ofthetabasshowninFigure5.
Figure5
1.Oppositecarrier-frametab2.Rodbracket
D.Mounttherodbrackettothecutting-unittabs
withthecarriageboltsandnuts(Figure5).
Important:Onthe#4(leftfront)and#5
(rightfront)cuttingunits(Figure6),use
therod-bracketmountingnutstoinstallthe
hoseguidestothefrontofthecutting-unit
tabs(Figure7).Thehoseguidesshouldlean
towardthecentercuttingunit(Figure7and
Figure8).
Figure6
Figure7
1.Hoseguide(cuttingunit4
shown)
3.Nut
2.Rodbracket
g019284
11
Figure8
1.Hoseguidesmustleantowardthecentercuttingunit.
Note:Wheninstallingorremovingthecutting
units,makesurethehairpincotterisinstalled
inthespringrodholenexttotherodbracket.
Otherwise,thehairpincottermustbeinstalledin
theholeintheendoftherod.
6.Lowerallliftarmscompletely.
7.Removethesnapperpinandthecapfromthelift-arm
pivotyoke(Figure9).
13

Figure9
1.Snapperpin2.Cap
8.Forthefrontcuttingunits,slideacuttingunitunder
theliftarmwhileinsertingthecarrier-frameshaftup
intothelift-arm-pivotyoke(Figure10).
Figure10
1.Liftarm3.Lift-arm-pivotyoke
2.Carrier-frameshaft
9.Usethefollowingprocedureontherearcuttingunits
whentheheightofcutisabove19mm(3/4inch).
A.Removethelynchpinandwashersecuringthe
lift-arm-pivotshafttotheliftarmandslidethe
lift-arm-pivotshaftoutoftheliftarm(Figure11).
Figure11
1.Lynchpinandwasher
B.Insertthelift-armyokeontothecarrier-frame
shaft(Figure10).
C.Insertthelift-armshaftintotheliftarmand
secureitwiththewasherandlynchpin(Figure
11).
10.Insertthecapoverthecarrier-frameshaftandlift-arm
yoke.
11.Securethecapandthecarrier-frameshafttothe
lift-armyokewiththesnapperpin(Figure9).
Note:Usetheslotifasteeringcuttingunitisdesired
orusetheholeifthecuttingunitistobelockedin
position.
12.Securethelift-armchaintothechainbracketwiththe
snapperpin(Figure12).
Note:Usethenumberofchainlinksdescribedinthe
cuttingunitOperator'sManual.
Figure12
1.Lift-armchain3.Snapperpin
2.Chainbracket
13.Oncuttingunit4(leftfront)andcuttingunit5(right
front),insertthereel-motorhosesintotherespective
hoseguide.
14.Coatthesplineshaftofthereelmotorwithclean
grease.
15.OilthereelmotorO-ringandinstallitontothemotor
ange.
16.Installthemotorbyrotatingitclockwisesothatthe
motorangesclearthebolts(Figure13).
Note:Rotatethemotorcounterclockwiseuntilthe
angesencircletheboltsthentightenthebolts.
Important:Makesurethatthereel-motorhoses
arenottwisted,kinkedorintheriskofbeing
pinched.
14

Figure13
1.Reel-drivemotor2.Mountingbolts
4
Adjustingthe
Turf-CompensationSpring
NoPartsRequired
Procedure
Theturf-compensationspring(Figure14)transfersweight
fromthefronttotherearroller.Thishelpstoreduceawave
patternintheturf,alsoknownasmarcellingorbobbing.
Important:Makespringadjustmentswiththecutting
unitmountedtothetractionunit,pointingstraight
aheadandloweredtotheground.
1.Makesurethehairpincotterisinstalledintherearhole
inthespringrod(Figure14).
Figure14
1.Turf-compensationspring3.Springrod
2.Hairpincotter4.Hexnuts
2.Tightenthehexnutsonthefrontendofthespringrod
untilthecompressedlengthofthespringis12.7cm
(5inches)onReelmaster5410(5-inchcuttingunits)
or15.9cm(6.25inches)onReelmaster5510(7-inch
cuttingunits);refertoFigure14.
Note:Whenoperatingonroughterrain,decreasethe
springlengthby12.7mm(1/2inch).Thisslightly
decreasesthegroundfollowing.
15

5
InstallingtheCEHoodLatch
Partsneededforthisprocedure:
1Hoodlatchassembly
1Washer
Procedure
1.Unlatchandraisethehood.
2.Removetherubbergrommetfromtheholeintheleft
sideofthehood(Figure15).
Figure15
1.Rubbergrommet
3.Removethenutfromthehoodlatchassembly(Figure
16).
Figure16
1.Hoodlatch3.Rubberwasher
2.Nut4.Metalwasher
4.Outsidethehood,insertthehookendofthelatch
throughtheholeinthehood.Makesurethatthe
rubbersealingwasherremainstotheoutersideofthe
hood(Figure16).
5.Insidethehood,insertthemetalwasherontothelatch
andsecurewiththenut.Makesurethatthelatch
engagestheframecatchwhenitislocked.Usethe
enclosedhoodlatchkeytooperatethehoodlatch.
6
UsingtheCutting-Unit
Kickstand
Partsneededforthisprocedure:
1Cutting-unitkickstand
Procedure
Wheneverthecuttingunithastobetippedtoexposethe
bedknife/reel,propuptherearofthecuttingunitwiththe
kickstandtomakesurethatthenutsonthebackendofthe
bedbar-adjustingscrewsarenotrestingontheworksurface
(Figure17).
Figure17
1.Cutting-unitkickstand
Securethekickstandtothechainbracketwiththesnapper
pin(Figure18).
16

Figure18
1.Chainbracket3.Cutting-unitkickstand
2.Snapperpin
ProductOverview
Figure19
1.Enginehood5.Seatadjustments
2.Operator'sseat6.Frontcuttingunits
3.Controlarm7.Rearcuttingunits
4.Steeringwheel
Controls
Seat-AdjustingKnobs
Theseat-adjustinglever(Figure20)allowsyoutoadjustthe
seatforeandaft.Theweight-adjustingknobadjuststhe
seatfortheoperator'sweight.Theweightgaugeindicates
whentheseatisadjustedtotheweightoftheoperator.The
height-adjustingknobadjuststheseatfortheoperator's
height.
Figure20
1.Weightgauge3.Height-adjustingknob
2.Weight-adjustingknob4.Adjustinglever(foreand
aft)
TractionPedal
Thetractionpedal(Figure21)controlstheforwardand
reverseoperation.Pressthetopofthepedaltomovethe
machineforwardandthebottomtomovethemachine
17

backward.Groundspeeddependsonhowfaryoupressthe
pedal.Fornoload,maximumgroundspeed,fullypressthe
pedalwhilethethrottleisintheFASTposition.
Tostopthemachine,reducefootpressureonthetraction
pedalandallowittoreturntothecenterposition.
Figure21
1.Tractionpedal4.Brakepedal
2.Mow/transportlever5.Parkingbrake
3.Mow-speedlimiterand
spacers
6.Tiltsteeringpedal
Mow/TransportLever
Usethemow/transportlever(Figure21)toputthemachine
intoMOWmodeorTRANSPORTmode.Pushthelever
forwardtoselecttheMOWmode,andbackwardtoselect
theTRANSPORTmode.
Note:Thecuttingunitscannotbeloweredwhenthe
mow/transportleverisintheTRANSPORTposition.
Mow-SpeedLimiter
Whenthemow-speedlimiter(Figure21)isipped
up/forwarditlimitsthemowspeedandallowthecutting
unitstobeengaged.Eachspaceradjuststhemowingspeed
by0.8km/h(0.5mph).Themorespacersthereareonthe
topofthebolt,theslowerthemachinegoes.Flipthemow
speedlimiterbackwardtoallowmaximumtransportspeed.
BrakePedal
Pressthebrakepedal(Figure21)tostopthemachine.
ParkingBrake
Toengagetheparkingbrake,(Figure21)pushdownon
thebrakepedalandpressthetopforwardtolatchit.To
releasetheparkingbrake,pressthebrakepedaluntilthe
parking-brakelatchretracts.
Tilt-SteeringPedal
Totiltthesteeringwheeltowardsyou,pressthefootpedal
(Figure21)down,pullthesteeringtowertowardyoutothe
mostcomfortableposition,andreleasethepedal.
ThrottleControl
Movethethrottlecontrol(Figure22)forwardtoincreasethe
enginespeedandrearwardtodecreasespeed.
Figure22
1.Lowermow/raisecontrol
lever
4.Enable/disableswitch
2.Keyswitch5.Throttlecontrol
3.InfoCenter6.Headlightswitch
KeySwitch
Thekeyswitch(Figure22)has3positions:OFF,
ON/PREHEAT,andSTART.
LowerMow/RaiseControlLever
Thislever(Figure22)raisesandlowersthecuttingunitsand
alsostartsandstopsthecuttingunitswhenthecuttingunits
areenabledintheMOWmode.Youcannotlowerthecutting
unitswhenthemow/transportleverisintheTRANSPORT
position.
HeadlightSwitch
Pivottheswitchdownwardtoturnontheheadlights(Figure
22).
Enable/DisableSwitch
Usetheenable/disableswitch(Figure22)inconjunctionwith
thelowermow/raisecontrollevertooperatethecuttingunits.
BacklapLevers
Usethebacklapleversinconjunctionwiththelower
mow/raisecontrolleverforbacklappingthereels(Figure23).
18

1
g021209
Figure23
1.Backlaplevers
Hydraulic-FilterRestrictionIndicator
Withtheenginerunningatnormaloperatingtemperature,
ensurethattheindicatorisinthegreenzone(Figure24).
Whentheindicatorisintheredzone,changethehydraulic
lters.
Figure24
1.Hydraulic-lter-restrictionindicator
PowerPoint
Thepowerpointisa12Vpowersupplyforelectronicdevices
(Figure25).
Figure25
1.Powerpoint
UsingtheInfoCenterLCDDisplay
TheInfoCenterLCDdisplayshowsinformationaboutyour
machinesuchastheoperatingstatus,variousdiagnostics
andotherinformationaboutthemachine(Figure26)There
isasplashscreenandmaininformationscreenofthe
InfoCenter.Youcanswitchbetweenthesplashscreenand
maininformationscreen,atanytime,bypressinganyof
theInfoCenterbuttonsandthenselectingtheappropriate
directionalarrow.
1
g020650
2
3
4
TORO
Figure26
1.Indicatorlight3.Middlebutton
2.Rightbutton4.Leftbutton
•LeftButton,MenuAccess/BackButton—Pressthis
buttontoaccesstheInfoCentermenus.Youcanuseitto
backoutofanymenuyouarecurrentlyusing.
•MiddleButton—Pressthisbuttontoscrolldownmenus.
•RightButton—Pressthisbuttontoopenamenuwherea
rightarrowindicatesadditionalcontent.
Note:Thepurposeofeachbuttonmaychangedepending
onwhatisrequiredatthetime.Eachbuttonislabeledwith
anicondisplayingitscurrentfunction.
19

InfoCenterIconDescription
SERVICEDUEIndicateswhenscheduledservice
shouldbeperformed
Hourmeter
Infoicon
Fast
Slow
Fuellevel
Theglowplugsareactive.
Raisethecuttingunits.
Lowerthecuttingunits.
Sitintheseat.
TheparkingbrakeisOn.
Therangeishigh(transport).
Neutral
Therangeislow(mow).
Engine-coolanttemperature(°Cor
°F)
Temperature(hot)
ThePTOisengaged.
Notallowed
Starttheengine.
Stoptheengine.
Engine
Keyswitch
InfoCenterIconDescription(cont'd.)
Thecuttingunitsarelowering.
Thecuttingunitsareraising.
PINpasscode
CANbus
InfoCenter
Badorfailed
Bulb
OutputofTECcontrollerorcontrol
wireinharness
Switch
Releasetheswitch.
Changetotheindicatedstate.
Symbolsareoften
combinedtoform
sentences.Some
examplesareshown
below
PutthemachineintoNeutral.
Enginestartisdenied.
Engineshutdown
Enginecoolantistoohot.
or
Sitdownorsettheparkingbrake
20
Other manuals for 3675
1
This manual suits for next models
3
Table of contents
Other Toro Lawn Mower manuals

Toro
Toro 2000 Series User manual

Toro
Toro 313000001 User manual

Toro
Toro TimeCutter 74780 User manual

Toro
Toro 74228 User manual

Toro
Toro 22285 User manual

Toro
Toro Haven 20459 User manual

Toro
Toro Z Master Series Manual

Toro
Toro LAWN-BOY Series User manual

Toro
Toro 03180 User manual

Toro
Toro 74381 TimeCutter Z4202 User manual

Toro
Toro Greensmaster 1610 User manual

Toro
Toro 20789 User manual

Toro
Toro LX425 User manual

Toro
Toro ProLine 30196 User manual

Toro
Toro 73547 Manual

Toro
Toro 74406 User manual

Toro
Toro 3428 User manual

Toro
Toro Recycler 20372 User manual

Toro
Toro GrandStand 72507 User manual

Toro
Toro Z Master Z300 User manual