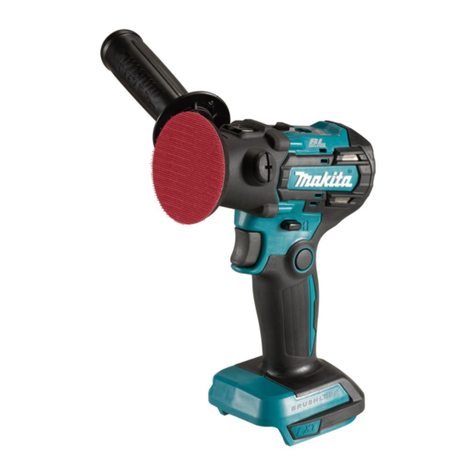
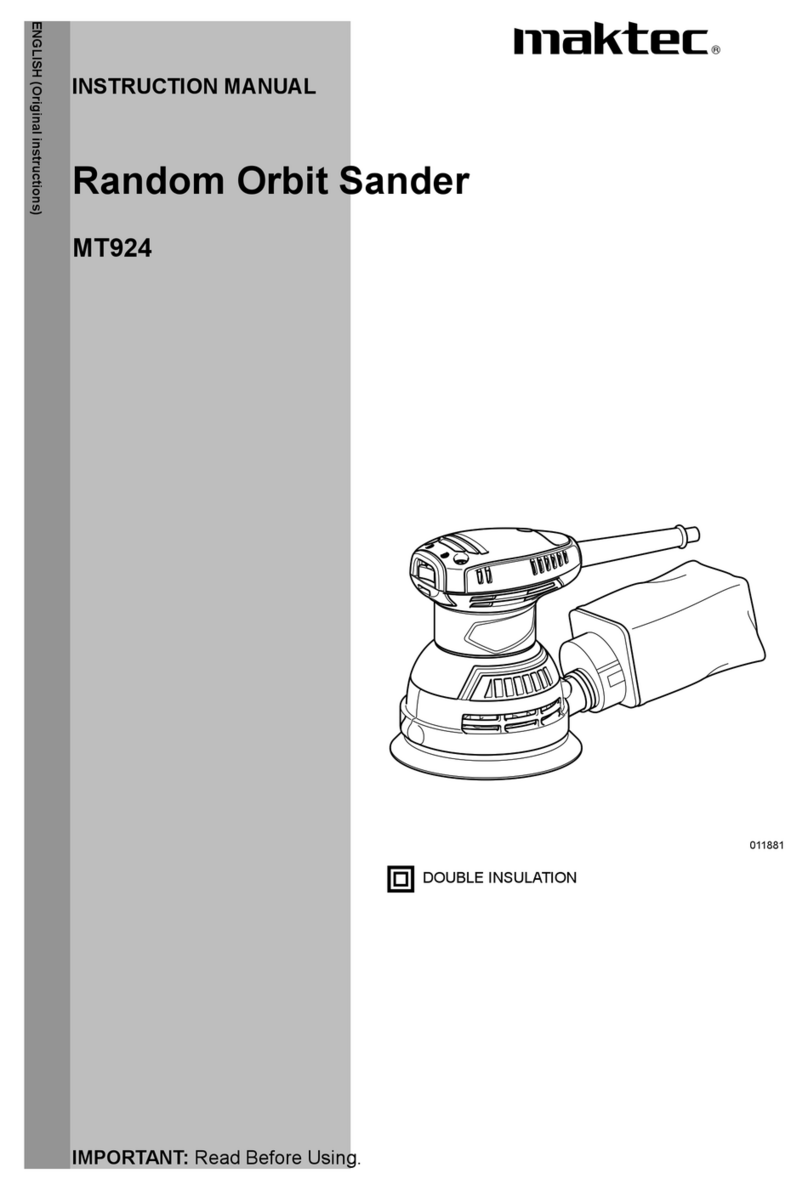
TORQ TORQX User manual

Instruction Manual

GENERAL POWER TOOL
SAFETY WARNINGS
WARNING: READ ALL SAFETY
WARNINGS AND INSTRUCTIONS.
Failure to follow the warnings and in-
structions may result in electric shock
or injury.
SAVE ALL WARNINGS AND INSTRUC-
TIONS FOR FUTURE REFERENCE
The term ″power tool″ in the warnings
refers to your main-operated (corded)
power tool.
WORK AREA SAFETY
1. Keep work area clean and well lit. Clut-
tered or dark areas invite accidents.
2. Do not operate power tools in explo-
sive atmospheres, such as in the pres-
ence of ammable liquids, gases or
dust. Power tools create sparks which
may ignite the dust or fumes.
3. Keep children and bystanders away
while operating a power tool. Distrac-
tions can cause you to lose control.
ELECTRICAL SAFETY
1. Power tool plugs must match the
outlet. Never modify the plug in any
way. Do not use any adapter plugs with
Definitions – safety GuiDelines
WARNING: Indicates a potentially
hazardous situation which, if not
avoided could result in death or seri-
ous injury.
CAUTION: Indicates a potentially
hazardous situation which, if not
avoided, may result in minor or mod-
erate injury.
earthed (grounded) power tools. Un-
modied plugs and matching outlets
will reduce risk of electric shock.
2. Avoid body contact with earthed or
grounded surfaces such as pipes, radia-
tors, ranges and refrigerators. There is
an increased risk of electric shock if your
body is grounded.
3. Do not expose power tools to rain or
wet conditions. Water entering a pow-
er tool will increase the risk of electric
shock.
4. Do not abuse the cord. Never use the
cord for carrying, pulling or unplugging
the power tool. Keep cord away from
heat, oil, sharp edges or moving parts.
Damaged or entangled cords increase
the risk of electric shock.
5. When operating a power tool out-
doors, use an extension cord suitable for
outdoor use. Use of a cord suitable for
outdoor use reduces the risk of electric
shock.
6. If operating a power tool in a damp
location is unavoidable, use a Ground
Fault Circuit Interrupter (GFCI) protect-
ed supply. Use of a GFCI reduces the risk
of electric shock.
PERSONAL SAFETY
1. Stay alert, watch what you are doing
and use common sense when operat-
ing a power tool. Do not use a power
tool while you are tired or under the in-
uence of drugs, alcohol or medication.
A moment of inattention while operat-
ing power tools may result in serious
personal injury.
2. Use personal protective safety equip-
ment. Always wear eye protection. Safe-
ty equipment such as dust mask, non-
skid safety shoes, hard hat, or hearing
protection used for appropriate condi-
tions will reduce personal injuries.
3. Prevent unintentional starting. Ensure
the switch is in the OFF-position before
connecting to power source and/or bat-

tery pack, picking up or carrying the tool.
Carrying power tools with your nger
on the switch or energizing power tools
that have the switch on invites accidents.
4. Remove any adjusting key or wrench
before turning the power tool ON.
A wrench or a key left attached to a ro-
tating part of the power tool may result
in personal injury.
5. Do not overreach. Keep proper foot-
ing and balance at all times. This en-
ables better control of the power tool in
unexpected situations.
6. Dress properly. Do not wear loose
clothing or jewelry. Keep your hair,
clothing and gloves away from moving
parts. Loose clothes, jewelry or long hair
can be caught in moving parts.
7. If devices are provided for the connec-
tion of dust extraction and collection fa-
cilities, ensure these are connected and
properly used. Use of these devices can
reduce dust-related hazards.
POWER TOOL USE AND CARE
1. Do not force the power tool. Use the
correct power tool for your application.
The correct power tool will do the job
better and safer at the rate for which it
was designed.
2. Do not use the power tool if the
switch does not turn it ON and OFF. Any
power tool that cannot be controlled
with the switch is dangerous and must
be repaired.
3. Disconnect the plug from the power
source before making any adjustments,
changing accessories, or storing power
tools. Such preventive safety measures
reduce the risk of starting the power
tool accidentally.
4. Store idle power tools out of the reach
of children and do not allow persons
unfamiliar with the power tool or these
instructions to operate the power tool.
Power tools are dangerous in the hands
of untrained users.
5. Maintain power tools. Check for mis-
alignment or binding of moving parts,
breakage of parts and any other con-
dition that may affect the power tool’s
operation. If damaged, have the power
tool repaired before use. Many acci-
dents are caused by poorly maintained
power tools.
6. Keep cutting tools sharp and clean.
Properly maintained cutting tools with
sharp cutting edges are less likely to
bind and are easier to control.
7. Use the power tool, accessories and
tool bits etc. In accordance with these
instructions, taking into account the
working conditions and the work to be
performed. Use of the power tool for op-
erations different from those intended
could result in a hazardous situation.
VIBRATION SAFETY
This tool vibrates during use. Repeated
or long-term exposure to vibration may
cause temporary or permanent physical
injury, particularly to the hands, arms
and shoulders. To reduce the risk of vi-
bration-related injury:
1. Anyone using vibrating tools regularly
or for an extended period should rst
be examined by a doctor and then have
regular medical check-ups to ensure
medical problems are not being caused
or worsened from use.
2. Pregnant women or people who have
impaired blood circulation to the hand,
past hand injuries, nervous system dis-
orders, diabetes, or Raynaud’s Disease
should not use this tool. If you feel any
medical or physical symptoms related
to vibration (such as tingling, numb-
ness, and white or blue ngers), seek
medical advice as soon as possible.
3. Do not smoke during use. Nicotine
may reduce the blood supply to the
hands and ngers, increasing the risk of
vibration-related injury.

4. Wear suitable gloves to reduce the vi-
bration effects on the user.
5. Use tools with the lowest vibration
when there is a choice between differ-
ent processes.
6. Include vibration-free periods each
day of work.
7. Grip tool as lightly as possible (while
still keeping safe control of it). Let the
tool do the work.
8. To reduce vibration, maintain the
tool as explained in this manual. If any
abnormal vibration occurs, stop use
immediately.
SERVICE
1. Have your power tool serviced by
a qualied repair person using only
identical replacement parts. This will
ensure that the safety of the power tool
is maintained.
ADDITIONAL SAFETY
WARNINGS COMMON FOR
POLISHING OPERATIONS
CORRECT USAGE
1. This tool is designed to be used as
a polisher. Read all the warnings, in-
structions, indications provided on
drawings and specications supplied
with this tool. Failure to comply with all
the instructions provided below may
cause electrical shocks, re and/or seri-
ous injuries.
2. This tool is not intended to be used for
smoothing, metal brushing and cutting
operations. The use of this tool for unin-
tended applications may cause hazards
and injuries to people.
3. The tool must be used with acces-
sories that have been specically de-
signed or recommended by the man-
ufacturer, (TORQ Tool Company). The
xing of the accessory to the tool does
not guarantee a safe operation.
4. The rated speed of the accessories
must be at least equivalent to the maxi-
mum speed specied on the tool. Using
the accessories at speeds above the rat-
ed maximum, may cause them to break
or be projected into the air.
5. The external diameter and thickness
of the accessories must match the
specications of the tool. Accessories
with incorrect dimensions cannot be
adequately protected controlled.
6. The conguration of accessories
must match the tool. The use of acces-
sories that cannot be perfectly tted on
the tool may result in imbalance, exces-
sive vibrations and in the impossibility
of controlling the tool.
7. Do not use damaged accessories.
Before use, inspect all the accessories.
Inspect the supporting pads and verify
there are no cracks, tears or excessive
wear. If the tool or accessory has been
dropped, verify that it is not damaged or
install a new accessory. After inspecting
or installing an accessory, test the op-
eration of the tool at maximum speed
and without load for one minute, keep-
ing at a safety distance. If the accesso-
ries are damaged, they will break during
this test.
8. Wear personal protective equipment.
Depending on application, use face
shield, safety goggles or safety glasses.
As appropriate, wear dust mask, hear-
ing protectors, gloves and workshop
apron capable of stopping small abra-
sive or work piece fragments. The eye
protection must be capable of stopping
ying debris generated by various op-
erations. The eye protection must be
capable of stopping ying debris gen-
erated by various operations. The dust
mask or respirator must be capable of
ltering out particles generated by your
operation. Prolonged exposure to high
intensity noise may cause hearing loss.

9. Keep bystanders a safe distance away
from work area. Anyone entering the
work area must wear personal protec-
tive equipment. Fragments of work
piece or of a broken accessory may y
away and cause injury beyond immedi-
ate area of operation.
10. Hold power tool by insulated grip-
ping surfaces only, when performing
an operation where the accessory may
contact hidden wiring or its own cord.
An accessory contacting a ″live″ wire
may make exposed metal parts of the
power tool ″live″ and shock the operator.
11. Position the cord clear of the spin-
ning accessory. If you lose control, the
cord may be cut or snagged and your
hand or arm may be pulled into the
spinning accessory.
12. Never lay the power tool down until
the accessory has come to a complete
stop. The spinning accessory may grab
the surface and pull the power tool out
of your control.
13. Do not run the power tool while car-
rying it at your side. Accidental contact
with the spinning accessory could snag
your clothing, pulling the accessory into
your body.
14. Regularly clean the power tool’s air
vents. The motor’s fan will draw the dust
inside the housing and excessive accu-
mulation of powdered metal may cause
electrical hazards.
15. Do not operate the power tool near
ammable materials. Sparks could ig-
nite these materials.
16. Do not use accessories that require
liquid coolants. Using water or other liq-
uid coolants may result in electrocution
or shock.
17. Do not leave the tool unattended
when it is plugged into an electrical
outlet. Turn OFF the tool, and unplug it
from its electrical outlet before leaving.
KICKBACK AND RELATED WARNINGS
Kickback is a sudden reaction to
a pinched or snagged rotating wheel,
backing pad, brush or any other acces-
sory. Pinching or snagging causes rapid
stalling of the rotating accessory which
in turn causes the uncontrolled power
tool to be forced in the direction op-
posite of the accessory’s rotation at the
point of the binding.
For example, if an abrasive wheel is
snagged or pinched by the work piece,
the edge of the wheel that is enter-
ing into the pinch point can dig into
the surface of the material causing
the wheel to climb out or kick out. The
wheel may either jump toward or away
from the operator, depending on direc-
tion of the wheel’s movement at the
point of pinching. Abrasive wheels may
also break under these conditions.
Kickback is the result of power tool mis-
use and/or incorrect operating proce-
dures or conditions and can be avoided
by taking proper precautions as given
below.
1. Maintain a rm grip on the power tool
and position your body and arm to allow
you to resist kickback forces. Always use
side handle, if provided, for maximum
control over kickback or torque reaction
during start-up. The operator can con-
trol torque reactions or kickback forces,
if proper precautions are taken.
2. Never place your hand near the rotat-
ing accessory. Accessory may kickback
over your hand.
3. Do not position your body in the area
where power tool will move if kickback
occurs. Kickback will propel the tool in
direction opposite to the wheel’s move-
ment at the point of snagging.
4. Use special care when working cor-
ners, sharp edges etc. Avoid bouncing
and snagging the accessory. Corners,
sharp edges or bouncing have a ten-
dency to snag the rotating accessory

WARNING: Always wear safety glass-
es. Everyday eyeglasses are not safety
glasses. Also use face or dust mask if
cutting operation is dusty. Always wear
certied safety equipment.
WARNING: Always wear proper per-
sonal hearing protection that conforms
to ansi s12.6 (S3.19) During use.
WARNING: Some dust created by
polishing contains chemicals known
to the state of California to cause can-
cer, birth defects or other reproductive
harm. Some examples of these chemi-
cals are:
• lead from lead-based paints
• crystalline silica
• arsenic and chromium from chemi-
cally-treated lumber
WARNING: use of this tool can gen-
erate and/or disperse dust, which may
cause serious and permanent respira-
tory or other injury. Always use niosh/
osha approved respiratory protection
appropriate for the dust exposure.
and cause loss of control or kickback.
5. Do not attach a saw chain woodcarv-
ing blade or toothed saw blade. Such
blades create frequent kickback and
loss of control.
EXTENSION CORD
An extension cord must have adequate
wire size (AWG or American Wire Gauge)
for safety. The smaller the gauge num-
ber of the wire, the greater the capacity
of the cable, that is 16 gauge has more
capacity than 18 gauge. An undersized
cord will cause a drop in line voltage re-
sulting in loss of power and overheating.
When using more than one extension to
make up the total length, be sure each
individual extension contains at least
the minimum wire size. The following
table shows the correct size to use de-
pending on cord length and nameplate
ampere rating. If in doubt, use the next
heavier gauge. The smaller the gauge
number, the heavier the cord.
Minimum Gauge for Cord Sets
Ampere
Rating
Volts Total Lenght of Cord Feet
(meters)
230 V 25
(7,6)
50
(15,2)
100
(30,5)
150
(45,7)
More
Than
No
More
Than
AWG
0 6 18 16 16 14
6 10 18 16 14 12
10 12 16 16 14 12
12 16 14 12 Not
Recommended

TORQ Tool Company Random Orbital Polisher
The Values shown are based on nominal voltage of 120 V / 60 Hz. In the case of volt-
ages and frequencies of different power, values may vary. Refer to the label techni-
cal specications to the nominal values of the tool.
Model TORQX
Protection Class II
Power W 680 W
Speed Control Yes
Rotation OPM 2800 / 7800
Backing Plate Fixing Thread M8 (5 / 16,8 mm)
Plate Diameter (inch) 5″
Pad Type Velcro Faced
Orbit 8 mm
Weight (lb) 4,85 lbs
PARTS OF THE TOOL
1. Identication Plate
2. ON/OFF Switch
3. Total Control Speed Adjust Dial
4. Back-Up Pad Fixing Screw
5. Handle
6. Ergonomic Comfort Grip Handle
7. Power cord with plug
8. Velcro faced back-up pad
9. Motor ventilation slots
10. Integrated Cooling
11. Speed Exchange Port

INTENDED USE
The TORQX Random Orbital Polisher is
designed for auto, marine, RV, motor-
cycle detailing and nishing correction.
Do not use in the presence of amma-
ble liquids or gasses.
Do not let children come into contact
with the tool. Supervision is required
when inexperienced operators use this
tool.
SAFETY WARNING APPLICABLE TO
POLISHING OPERATIONS
Verify that no loosened part of the pol-
ishing tool shroud or the locking ties can
rotate freely. Safely position or cut all
the loosened xing wires. Loosened or
revolving xing wires may twist around
the operator’s ngers or get caught by
the work piece being machined.
STARTING UP
Before starting up the TORQX ensure
that:
• The TORQX is complete. Check that
the number and type of compo-
nents comply with that reported in
this instruction booklet;
• The power supply conforms with
the characteristics of the tool;
• The power supply cable and plug
are in perfect condition;
• The ON/OFF switch works properly
though with the power supply dis-
connected;
• All the parts of the tool have been
assembled in the proper manner
and that there are no signs of dam-
age;
• The ventilation slots are not ob-
structed.
STARTING AND STOPPING
1. Starting: turn ON/OFF switch to “ON”
by switching lever in the ON direction.
2. Stopping: To stop machine, turn pow-
er lever to the “OFF” position.
TEST RUN
Start the tool and check that there
are no unusual vibrations, or no mis-
matching of the bufng pad. Otherwise
switch-OFF the tool immediately and
eliminate the fault.
ELECTRONIC RPM REGULATION
The rpm can be adjusted by adjusting
the speed dial to the desired speed set-
ting. When TORQX is in “ON” position
it will engage at the speed setting that
the Total Control Speed Adjust Dial is
set at. The choice of speed depends on
the characteristics of the buffers and
the material to be worked.
REPLACING AND ASSEMBLING THE
BUFFING PAD
Press the polishing pad to attach it to
the backing plate. When ready, pull the
used polishing pad OFF and apply the
new one, or freshly clean polishing pad
by pressing it onto the backing plate
CAUTION: Accessories must be rated
for at least the speed recommended on
the tool warning label. Accessories run-
ning over rated speed can y apart and
cause injury.
MAINTENANCE AND CLEANING
• Maintenance and cleaning of any
of the inner parts of the TORQX, like
brushes, ball bearings, gears, etc.
Must be carried out only by an au-
thorized repair dealer.
• Blow dirt and dust out of all air vents
with clean, dry air at least once
a week.
CAUTION: Never use solvents or
harsh chemicals for cleaning non-me-
tallic parts of the TORQX.

WARRANTY
TORQ Tool Company makes every effort
to assure that its products meet high
quality and durability standards.
Complying with current applicable reg-
ulations and subject to more favorable
conditions that could apply in different
countries, TORQ Tool Company supplies
a 12 month warranty against manufac-
turing defects from date of purchase
to the original purchaser. Only TORQ
Tool Company original parts must be
employed with TORQ tools. TORQ Tool
Company is not responsible for any
damages or accidents caused by not
abiding to this rule and the warranty
shall terminate if non-original parts are
employed.
Damages caused by natural wear and
tear, overloading, faulty maintenance,
and tool usage differing from the one
specied in the user guide, are not cov-
ered by this warranty. This warranty will
not apply to damage due directly or
indirectly, to misuse, abuse, negligence
or accidents, repairs or alterations out-
side our facilities, criminal activity, im-
proper installation. TORQ Tool Compa-
ny shall in no event be liable for death,
injuries to persons or property, or for
incidental, contingent, special or con-
sequential damages arising from the
use of our product. Some states do not
allow the exclusion or limitation of in-
cidental or consequential damages, so
the above limitation of exclusion may
not apply to you.
A tool that which has been proven faulty
must be delivered to a TORQ Tool Com-
pany authorized dealer with transporta-
tion charges prepaid, with original box
and accessories, along with document
of purchase. Warranty shall be void if
tool should be delivered disassembled
or tampered. The polisher’s serial num-
ber must also be intact. If our inspection
veries the defect, we will either repair
or replace the product at our election
or we may elect to refund the purchase
price if we cannot readily and quickly
provide you with a replacement. We
will return repaired products at our ex-
pense. If we determine there is no de-
fect, or that the defect resulted from
causes not within the scope of our war-
ranty, then you must bear the cost of re-
turning the product. This warranty does
not in any way imply tool’s replacement.
We suggest you complete the online
product registration form on www.Torq-
ToolCompany.com promptly to facilitate
verication of the date of original pur-
chase. However, submitting the online
form for product registration does not
eliminate the need for the consumer to
maintain the original proof of purchase
in order to obtain the warranty benets.
In the event that you do not have proof
of purchase date, the purchase date for
purposes of this warranty will be the
date of manufacture.
TORQ Tool Company reserves the right
to make specications or design chang-
es to its products without further no-
tice. TORQ Tool Company does not ac-
cept any responsibility for any possible
printing mistake.

Problem Possible Causes Likely Solutions
Tool will not start
1. Cord not connected.
2. No power at outlet.
3. Tool’s thermal reset
breaker tripped
(if equipped).
4. Internal damage or wear.
(Carbon brushes or
switch, for example.)
1. Check that cord is plugged in.
2. Check power at outlet. If
outlet is unpowered, turn
OFF tool and check circuit
breaker. If breaker is tripped,
make sure circuit is the right
capacity for tool and circuit
has no other loads.
3. Turn OFF tool and allow to
cool. Press reset button
ON tool.
4. Have technician service tool.
Tool operates slowly
1. Excess pressure applied
to work piece.
2. Power being reduced by
long or small diameter
extension cord.
1. Decrease pressure, allow tool
to do the work.
2. Eliminate use of extension
cord. If an extension cord
is needed, use one with
the proper diameter for its
length and load. See Exten-
sion Cords in GROUNDING
section.
Performance decreases
over time
Carbon brushes worn or
damaged.
Have qualied technician
replace brushes.
Excessive noise or rattling
Internal damage or wear.
(Carbon brushes or
bearings, for example.)
Have technician service tool.
Overheating
1. Forcing tool to work
too fast.
2. Blocked motor
housing vents.
3. Motor being strained by
long or small diameter
extension cord.
1. Allow tool to work at its own
rate.
2. Wear ANSI-approved safety
goggles and NIOSH-ap-
proved dust mask/respirator
while blowing dust out of
motor using compressed air.
3. Eliminate use of extension
cord. If an extension cord
is needed, use one with
the proper diameter for its
length and load. See Exten-
sion Cords in GROUNDING
section.
Tool does not sand
or polish effectively
1. Accessory loose.
2. Accessory damaged,
worn or wrong type
for the material.
1. Conrm accessory arbor is
correct and Outer Flange/
Arbor Nut is tight.
2. Check condition and type
of disc accessory. Use only
proper type of disc accessory
in good condition.
Follow all safety precautions whenever diagnosing or servicing the tool.
Disconnect power supply before service.

NOTE

TORQ X
Retain for your records. Do not throw this booklet away.
For your personal safety, read and understand the instruction manual before using.
Table of contents
