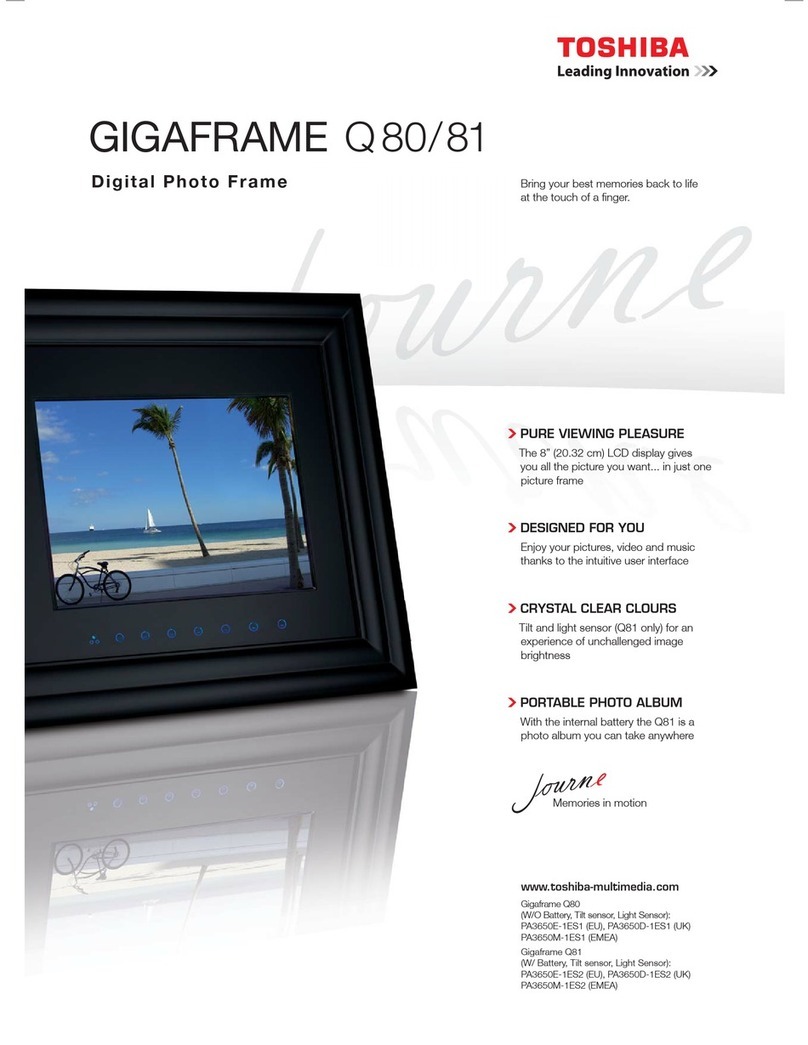
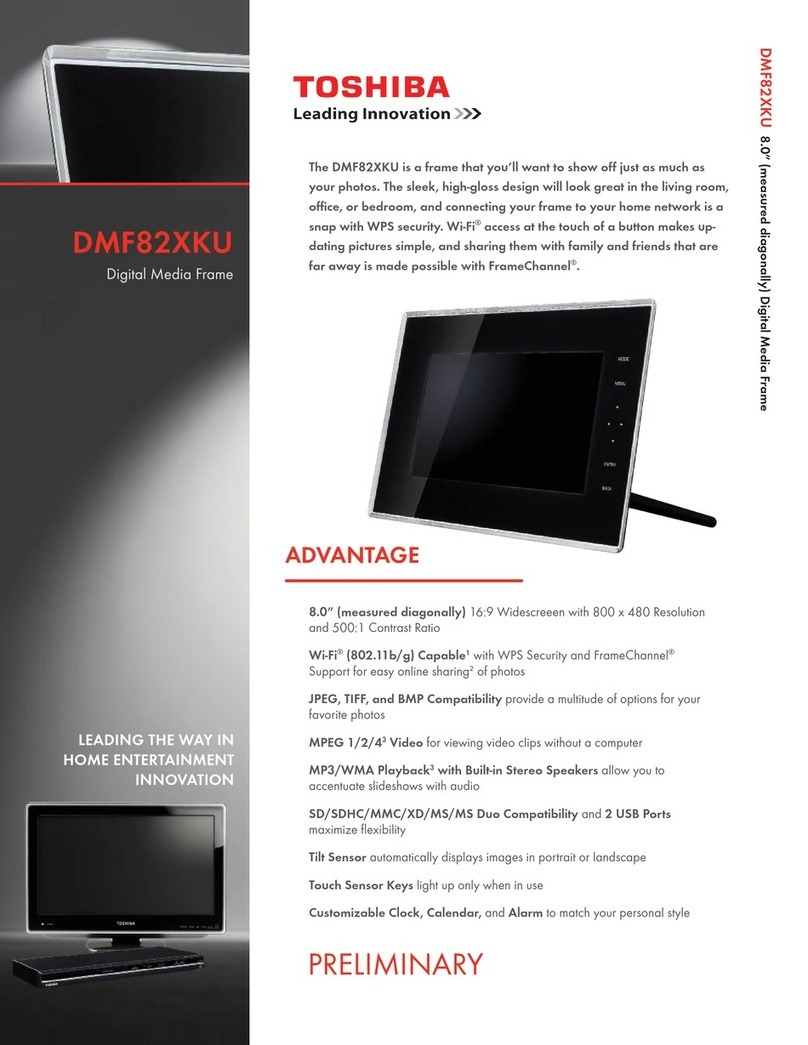
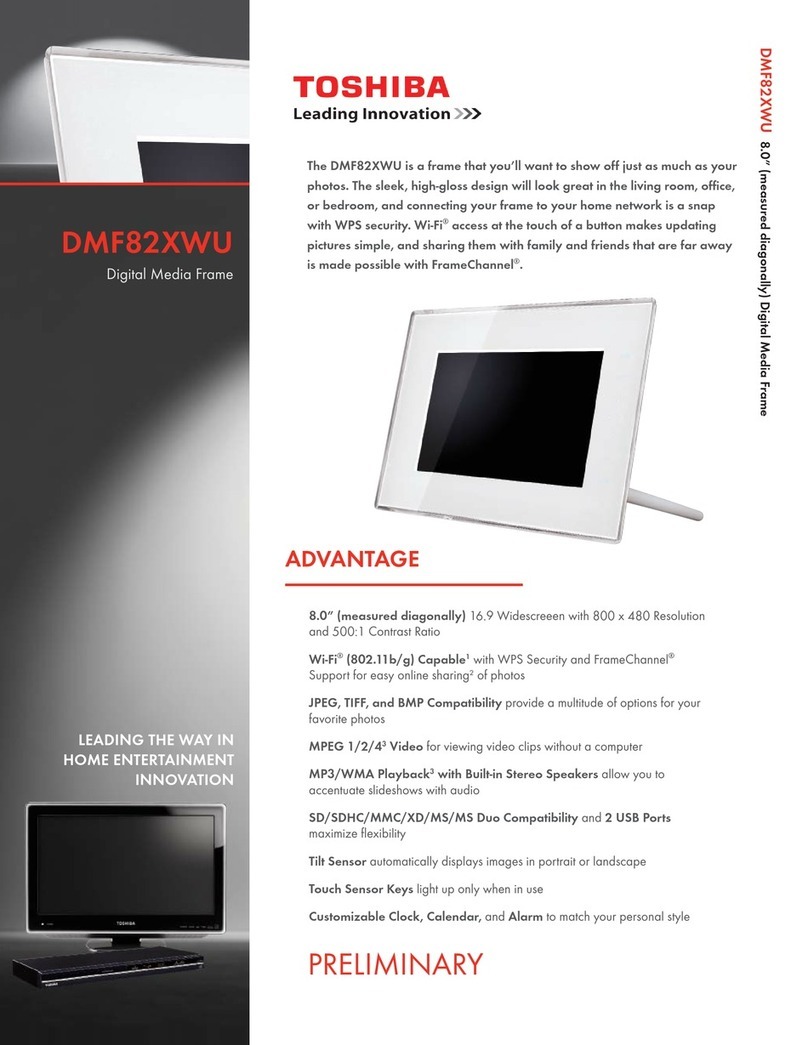
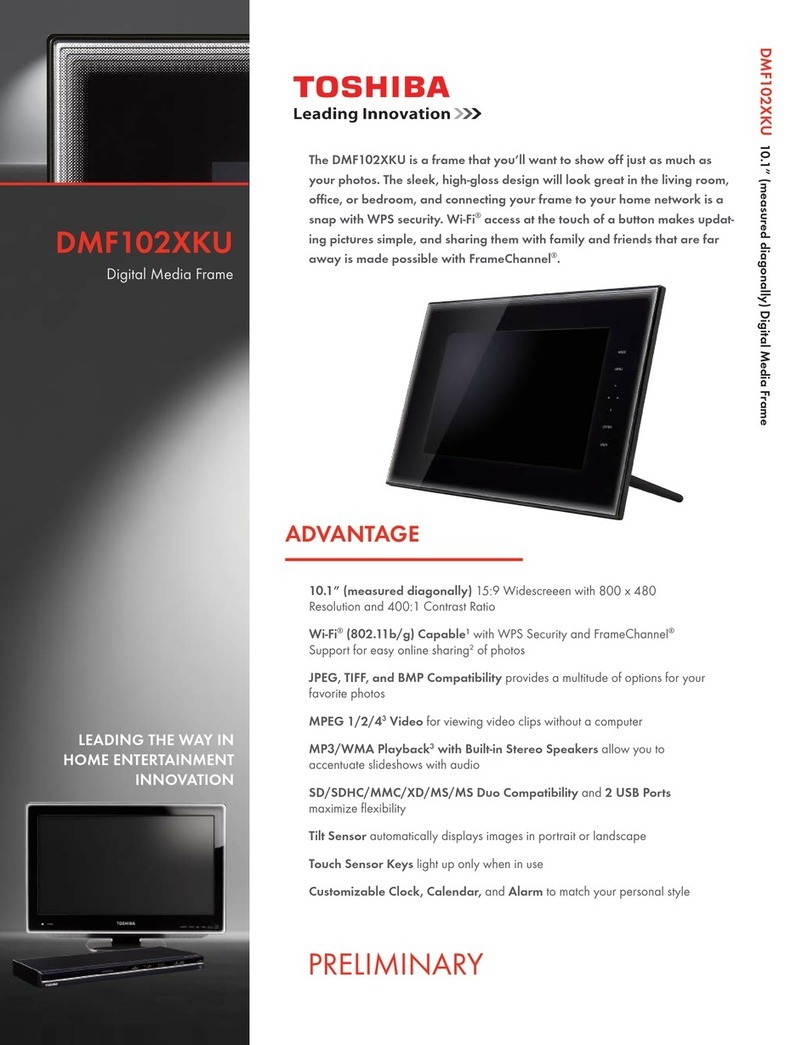
Toshiba DMF102XKU - Wireless Digital Media Frame User manual

Digital Media Frame
OWNE
R
’S MANUAL
DMF102XKU
D
MF82XKU
DMF82XWU
Owner’s Record
The model number and serial number are on the back
of your Digital Media Frame. Record these numbers in
the spaces below. Refer to these numbers whenever
you communicate with your Toshiba dealer about this
Digital Media Frame.
© 2009 Toshiba Corporation
Model number:
Serial number:


S
AFETY
PRECAUTIONS
FCC NOTICE
This equipment has been tested and found to
comply with the limits for a Class B digital device,
pursuant to part 15 of the FCC Rules. These limits
are designed to provide reasonable protection
against harmful interference in a residential
installation.
This equipment generates, uses and can radiate
radio frequency energy and, if not installed and
used in accordance with the instructions, may cause
harmful interference to radio communications.
However, there is no guarantee that interference will
not occur in a particular installation. If this equipment
does cause harmful interference to radio or televi-
sion reception, which can be determined by turning
the equipment off and on, the user is encouraged to
try to correct the interference by one or more of the
following measures:
- Reorient or relocate the receiving antenna.
- Increase the separation between the equipment
and receiver.
- Connect the equipment into an outlet on a circuit
different from that to which the receiver is
connected.
- Consult the dealer or an experienced radio/TV
technician for help.
WARNING
: Only peripherals complying with the
FCC class B limits may be attached to this equip-
ment. Operation with non-compliant peripherals or
peripherals not recommended by Toshiba is likely
to result in interference to radio and TV reception.
Shielded cables must be used between the external
devices and the computer’s external monitor port,
Universal Serial Bus (USB 2.0) ports, Serial port and
Microphone jack. Changes or modifications made to
this equipment, not expressly approved by Toshiba,
or parties authorized by Toshiba, could void the
user’s authority to operate the equipment.
This device complies with part 15 of the FCC Rules.
Operation is subject to the following two conditions:
(1) This device may not cause harmful interference,
and
(2) this device must accept any interference
received, including interference that may cause
undesired operation.
Responsible party:
Toshiba America Consumer Products, L.L.C.
82 Totowa Rd.; Wayne, N.J.07470
Phone: (800)631-3811
CAUTION
: These servicing instructions are for use
by qualified service
personnel only. To reduce the
risk of electric shock do not perform any servicing
other than that contained in the operating instruc-
tions unless you are qualified
to do so.
FCC Radiation Exposure Statement
This transmitter complies with the FCC radiation
exposure limits as set forth for the general
population/uncontrolled environment. To comply,
or maintain compliance, with the FCC RF exposure
requirements, no change to the antenna or the
device is permitted. Any changes to the antenna
or the device could result in the device exceeding
the RF exposure requirements and would void user
authorization to operate the equipment. In addition,
this transmitter must not be co-located or operating
in conjunction with any other antenna or transmitter.
IMPORTANT
S
AFETY
INSTRUCTIONS
1
. Read these instructions.
2
. Keep these instructions.
3
. Heed all warnings.
4
. Follow all instructions.
5
. Do not use this apparatus near water.
6
. Clean only with dry cloth.
7
. Do not install near any heat sources such as
radiators, heat registers, stoves, or other apparatus
(including amplifiers) that produce heat.
8
. Do not insert any foreign objects into the memory
card slot. Heat build-up or fire may result.
9
. Protect the power cord from being walked on
or pinched particularly at plugs, convenience
receptacles, and the point where they exit from the
apparatus.
1
0. Only use attachments/accessories specified by
the manufacturer.
1
1. Unplug this apparatus during lightning storms
or when unused for long periods of time. However,
while it is thundering or lightning, do not touch
the apparatus and any connected cable and/or
equipment. This will prevent you from receiving the
electric shock by an electric surge.
1
2. Refer all servicing to qualified service personnel.
Servicing is required when the apparatus has been
damaged in any way, such as power-supply cord or
plug is damaged, liquid has been spilled or objects
have fallen into the apparatus, the apparatus has
been exposed to rain or moisture, does not operate
normally, or has been dropped.
ADDITIONAL SAFETY INSTRUCTIONS
1
3. When you use headphones, keep the volume at
a moderate level. Using headphones continuously
with high volume levels may permanently damage
your hearing.

b
) The remote control battery contains Perchlorate
Material - special handling may apply. See www.
dtsc.ca.gov/hazardouswaste/perchlorate
c
) Keep coin-shaped batteries out of children’s
reach. Be careful not to ingest internally, especially
by children, as doing so may cause poisoning.
d
) Do not install the battery backwards. Follow the
instructions for battery replacement.
e
) Do not charge, heat, open, or short-circuit the
batteries. Do not throw the batteries into a fire.
f
) Do not leave a dead or exhausted battery in the
remote control.
g
) If you do not use the remote control for a
long period of time, remove the battery to avoid
possible damage from battery corrosion.
2
5. After unpacking coin-shaped batteries, store
them in poly bags, etc. separately one by one when
unused. If you leave them unwrapped, they may
be short-circuited by contact with metal objects,
resulting in battery leakage, heat or bursting. This
may cause burns or injury. The batteries must be
completely discharged when they are deposited in
collection containers for old batteries. If a charge
remains, countermeasures to prevent short circuits
must be taken.
2
6. To reduce the risk of fire or electric shock, do
not expose this apparatus to rain or moisture.
2
7. Following mark means “CAUTION - RISK OF
ELECTRIC SHOCK - DO NOT OPEN”.
2
8. Wireless Communication
a
) Turn off the digital media frame power in
locations where a person using a pacemaker may
be present nearby.
T
he radio waves generated by the product may
affect the operation of the pacemaker.
b
) Keep the product away from the location of the
pacemaker by at least 22 cm.
T
he radio waves generated by the product may
affect the operation of the pacemaker.
c
) Turn off the digital media frame power inside
hospitals and other medical facilities or near
electrically operated medical equipment.
T
he radio waves generated by the product may
negatively affect medical equipment, causing
malfunction and eventual accident.
d
) Turn off the digital media frame power near
automatic doors, fire alarms and other automatic
control equipment.
T
he radio waves generated by the product
may negatively affect such equipment, causing
malfunction and eventual accident.
e
) Turn off the digital media frame power on
airplanes or in other locations where the product
may cause radio interference.
1
4. Do not overload wall outlets; extension cords,
or integral convenience receptacles as this can
result in a risk of fire or electric shock.
1
5. Apparatus shall not be exposed to dripping or
splashing and no objects filled with liquids, such
as vases, shall be placed on the apparatus and/or
around it.
1
6. Do not place a vessel containing liquid (such as
a vase), or a metal object on top of the apparatus.
Fire or Electric shock may result if liquid or metal
objects enter the apparatus.
1
7. Do not rest the product on your lap or other
parts of body. The product may become warm
during use. Even low temperatures may cause
personal injury when exposed to your skin for
prolonged periods.
1
8. Use the supplied AC adaptor to operate
the product. Substitute devices not specified by
the manufacturer may result in fire or product
malfunction. Do not cover the AC adaptor with a
blanket or place it near heating or on electric carpet
when it is in use.
1
9. WARNING: To prevent the spread of fire,
keep candles or other open flames away from this
product at all times.
2
0. CAUTION: If the digital media frame is dropped
and the cabinet or enclosure surface has been
damaged or the digital media frame does not
operate normally, take the following precautions:
●
ALWAYS turn off the digital media frame and
unplug the AC adaptor to avoid possible electric
shock or fire.
●
NEVER allow your body to come in contact with
any broken glass or liquid from the damaged digital
media frame. The LCD panel inside the digital
media frame contains glass and a toxic liquid. If the
liquid comes in contact with your mouth or eyes, or
your skin is cut by broken glass, rinse the affected
area thoroughly with water and consult your doctor.
●
ALWAYS contact a service technician to inspect
the digital media frame any time it has been
damaged or dropped.
2
1. Use the digital media frame in a location that
facilitates the immediate removal of the plug if there
is a malfunction or failure.
2
2. Do not allow children to scratch, lick or put the
memory card into their mouth. Keep the memory
card out of the reach of children. Injury to the child
or malfunction may result.
2
3. Should you ever notice a strange odor, smoke,
or excessive heat coming from the digital media
digital media frame, remove the AC adaptor.
Continued use in this state might cause fire, electric
shock, or burns. For details on repair, consult
Toshiba Customer Service.
2
4. Coin-shaped Battery
a
) CAUTION: Danger of explosion if battery is
incorrectly replaced. Replace only with the same
or equivalent type.

T
he radio waves generated by the product may
negatively affect equipment, causing malfunction
and eventual accident. For details, follow the
instructions given by each airline.
f
) If any nearby equipment experienced radio
interference or any other problem when the digital
media frame is used, turn off the digital media
frame power.
T
he radio waves generated by the product may
negatively affect nearby equipment, causing
malfunction and eventual accident.
NOTES
AND INFOR-
MATION
NOTES ON HANDLING
●
Do not shock the LCD monitor. It may cause unit
damage and malfunction.
●
When transporting the digital media frame, the
original shipping carton and packing materials
come in handy. For maximum protection, repack
the unit as it was originally packaged at the factory.
●
Do not use volatile liquids, such as insect spray,
near the digital media frame. Do not leave rubber
or plastic products in contact with the digital media
frame for a long time. They will leave marks on the
fi nish.
●
When the digital media frame is not in use, be
sure to turn off the power.
●
If you do not use the digital media frame for a
long period, the unit may not function properly in
the future. Turn on and use the digital media frame
occasionally.
NOTES ON LOCATING
●
When you place this digital media frame near
a TV, radio, or VCR, the playback picture may
become poor and the sound may be distorted. In
this case, move the digital media frame away from
the TV, radio, or VCR.
NOTES ON
CLEANING
●
Use a soft, dry cloth for cleaning. Do not use any
type of solvent, such as thinner and benzine, as
they may damage the surface of the digital media
frame.
●
When cleaning the LCD monitor, use a soft, dry
cloth.
NOTES ON MOISTURE CONDENSATION
Moisture condensation damages the digital me-
dia frame.
Please read the following carefully.
Moisture condensation occurs, for example, when
you pour a cold drink into a glass on a warm day.
Drops of water form on the outside of the glass.
In the same way, moisture may condense on the
internal parts of the digital media frame.
●
Moisture condensation occurs during the
following cases.
-
When you transport the digital media frame
directly from a cold place to a warm place.
-
When you use the digital media frame in a room
where you just turned on the heater, or a place
where the cold air from the air conditioner directly
hits the unit.
-
In summer, when you use the digital media frame
in a hot and humid place just after you move the
unit from an air conditioned room.
-
When you use the digital media frame in a humid
place.
●
Do not use the digital media frame when moisture
condensation may occur.
If you use the digital media frame in such a situ-
ation, it may damage memory cards and internal
parts. Remove the memory cards, connect the AC
adaptor, turn on the
digital media frame, and leave
it for two or three hours. After two or three hours,
the digital media frame will have warmed up and
evaporated any moisture.


Safety Pre
cautions
...................................................................................................
3
Important Safety Ins
tructions
.................................................................................
3
MEDIA
FRAME
MEDIA FRAME MEDIA
OVERVIEW
9
Acce
ssories
..............................................................................................................
9
Front View
..............................................................................................................
1
0
Touch Cont
rol
................................................................................................................
1
0
Rear View
..............................................................................................................
1
1
Side View
..............................................................................................................
1
1
Remote Cont
rol
......................................................................................................
1
2
Getting Star
ted
......................................................................................................
1
3
Install Stan
d
..................................................................................................................
1
3
Place Media Fram
e
.........................................................................................................
1
3
Use Remote Cont
rol
.......................................................................................................
1
3
Connect to Powe
r
..........................................................................................................
1
5
Insert/Connect Devi
ce
....................................................................................................
1
6
Mode Menu
.............................................................................................................
1
8
U
SING MEDIA FRAME 1
9
Viewing Phot
os
......................................................................................................
1
9
Slideshow Mode
.............................................................................................................
1
9
Single Photo Mode
.........................................................................................................
1
9
Watching Vide
os
....................................................................................................
2
0
Playing Music
........................................................................................................
2
1
Displaying Clock
....................................................................................................
2
1
Displaying Calen
dar
..............................................................................................
2
2
Changing Display Styl
e
..........................................................................................
2
3
Displaying Thumb
nail
/
L
ist
.....................................................................................
2
4
Viewing Demo
........................................................................................................
2
5
Copying File
s
..........................................................................................................
2
5
Copying from Comp
uter
.................................................................................................
2
5
Copying from Digital Media Fram
e
..................................................................................
2
6
CONTENTS

Deleting One File
............................................................................................................
2
7
Deleting Multiple File
s
.....................................................................................................
2
8
Using Online Serv
ice
...............................................................................................
2
8
S
ETTINGS 3
1
Menu Overv
iew
......................................................................................................
3
1
Modify Viewing Sett
ings
.........................................................................................
3
3
Screen Setti
ngs
.............................................................................................................
3
3
Modify System Sett
ings
..........................................................................................
3
3
Date/Time Setti
ngs
........................................................................................................
3
3
File Access Leve
l
.............................................................................................................
3
4
Select Devi
ce
...........................................................................................................
3
5
Modify Network Sett
ings
........................................................................................
3
6
Wi-Fi Settings: Auto Confi
guration
..................................................................................
3
6
Wi-Fi Settings: Manual Confi
guration
...............................................................................
3
9
Online Service Sett
ings
....................................................................................................
4
1
SPECIFICATIONS 4
3
TROUBLESHOOTING 4
5

MEDIA FRAME OVERVIEW
ACCESSORIES
Thank you for purchasing the Toshiba
Digital Media Frame. Please check
whether all the following items are
included in your box.
□
Digital Media Frame x 1
□
Stand x 1
□
Rubber Supporter x 1
□
Remote Control x 1
□
AC Adaptor x 1
□
Owner’s Manual x 1
□
Quick Start Guide x 2
(English & Spanish)
NOTE
S
AND
INFORMATION
TRADEMARKS
All other brand and product names
are trademarks or registered trade-
marks of their respective companies.
COPYRIGHTS
The unauthorized recording, use,
distribution, or revision of copy-
righted materials including, without
limitation, television programs,
videotapes, and DVDs, is prohibited
under the Copyright Laws of the
United States and other countries,
and may subject you to civil and
criminal liability.

MEDIA
FRAME OVERVIEW
MEDIA FRAME OVERVIEWMEDIA
10
TOUCH CONTROL
The Toshiba Digital Media Frame is
designed with the touch panel technol-
ogy. You can control the Digital Media
Frame by tapping the designated keys
on the right side of the screen. The
function keys will light up when touched.
MODE
MENU
BACK
ENTER
MODE
:
T
ap
to display the Mode
screen
MENU: Tap to display the Menu
screen
▲
▼
◄
►:
Tap
to
move the
cursor
to
ward
s
d
es
ired direction (In the
mu
si
c or video playback mode,
press
▲
▼ to control the volume.)
ENTER: Tap to confirm
selection
BACK: Tap to return to the
previous option
FRONT VIEW
LCD Screen
Remote Control Sensor
Touch Control Keys
Indicator Light (The light blinks
when you use the touch control pad)
(*DMF102X model only)

MEDIA
FRAME OVERVIEW
MEDIA FRAME OVERVIEWMEDIA
11
SIDE VIEW
Power Button
SD/xD/MMC Card Slot
MS/MS Duo Card Slot
WPS Button
Headphones Jack
PC Port (Mini-USB Port)
USB Port
DC IN 12V Jack
REAR VIEW
DMF
82X
Stand
Speaker
Rubber Supporter
DMF
10
2X
Stand
Speaker
Wall-Mount Hole
Rubber Supporter

MEDIA
FRAME OVERVIEW
MEDIA FRAME OVERVIEWMEDIA
12
ROTATE
: Press to rotate a
photo
ON/S
TANDBY
: Press to turn
on/off the Digital Media Frame
SLIDESHOW
: Press to start
photo slideshow
CLOCK/CALENDAR
: Press to
display Clock/Calendar or to switch
between the two modes
STYLE
: Press to (1) change
slideshow style during slideshow
playback (2) change clock style in
Clock mode (3) change calendar
style in Calendar mode
THUMBNAIL/LIST
: Press to
display photo/video files in
thumbnail view or music files in list
view
ZOOM OUT
: Press to zoom out
of a photo. (On the file browse
screen, press the button to reduce
the size of a thumbnail picture.)
ZOOM IN
: Press to zoom in a
photo (On the file browse screen,
press the button to increase the size
of a thumbnail picture.)
MENU
: Press to display the Menu
screen
▲
▼
◄
►
: Press
to
move the
cursor
to
ward
s
d
es
ired direction (In the
mu
si
c or video playback mode,
press
▲
▼ to control the volume.)
MODE
:
Press
to display the Mode
screen
E
NTER/
: Press to confirm
selection or to pause photo/video/
music file playback
B
ACK
: Press to return to the
previous option
O
PTION
: Press to display available
options
REMOTE CONTROL

MEDIA
FRAME OVERVIEW
MEDIA FRAME OVERVIEWMEDIA
13
GETTING STARTED
INSTALL STAND
Attach the supplied stand as illustrated.
Stand
PLACE MEDIA FRAME
1
Slide the Digital Media Frame
into the slot of the rubber stopper as
illustrated.
Stopper
2
Make sure the Digital Media Frame
is stably placed.
USE REMOTE CONTROL
■
Prepare Remote
Control
Remove the transparent slip (as
illustrated) before using the remote
control.
• •
• •
■
Operate with the Remote
Control
Point the remote control at the remote
sensor and press the buttons.
Within about 7 m (23 feet)
MODE
MENU
BACK
ENTER
22.5 22.5
Distance: About 7 m from the front of
the remote sensor.
Angle: About 22.5° in each direction of
the front of the remote sensor.

MEDIA
FRAME OVERVIEW
MEDIA FRAME OVERVIEWMEDIA
14
Do not expose the remote sensor of the
Digital Media Frame to a strong light
source such as direct sunlight or other
illumination. If you do so, you may not
be able to operate the Digital Media
Frame via the remote control.
•
Do not drop or give the remote
control a shock.
•
Do not leave the remote control near
an extremely hot or humid place.
•
Do not spill water or put anything wet
on the remote control.
•
Do not disassemble the remote
control.
•
If the remote control does not func-
tion correctly or if the operating range
becomes reduced, replace the battery
with new one.
•
Inserting a battery other than the
specified one or an object may damage
the remote control.
■
Replace
Battery of the
Remote Control
Insert the specifi ed battery to the
remote control.
1
Push the battery compartment lid
slightly in the direction illustrated.
2
Gently insert a fingernail in groove.
3
Pull out the holder in the direction
illustrated. (*Take care not to break your
fingernail.)
PUSH
OPEN
4
Remove the old battery.
5
Place a new coin-shaped battery
(CR2025) with the + side up on the
holder. Keep the holder horizontal so
that the battery does not fall through.
5202R
C
V3
C
C
AUTION
AUTION
♦ Danger of explosion if battery is
incorrectly replaced. Replace only with
the same or equivalent type.
6
Insert the holder into the remote
control. The remote control battery
contains Perchlorate Material - special
handling may apply. See www.dtsc.
ca.gov/ hazardouswaste/perchlorate

MEDIA
FRAME OVERVIEW
MEDIA FRAME OVERVIEWMEDIA
15
CONNECT TO POWER
1
Connect one end of the AC adaptor
to the Digital Media Frame.
2
P
lug the other end
of the
AC adaptor
into the outlet
.
AC Adaptor
■
T
u
rn
o
n the
Digital Media
Frame
Press the
POWER
button (on the side
of the Digital Media Frame or on the
remote control) to turn on the device.
To turn off the Digital Media Frame,
press the
POWER
button again.
C
C
AUTION
AUTION
♦ Do not connect the power plug to a
power outlet other than that indicated
on the label, as this can result in a risk
of fi re or electric shock.
♦ Do not connect or disconnect the
power plug with wet hands. Doing so
may cause electric shock.
♦ Do not use an AC adaptor other than
one specifi ed, as it can cause a fi re or
damage to the Digital Media Frame.
♦ When the AC adaptor is in use, its
temperature may increase. However,
it is not a malfunction. Make sure that
the AC adaptor is disconnected and the
temperature decreases before carrying
it.
NOTE
NOTE
♦ Do not use the supplied AC adaptor
with any device other than this Digital
Media Frame.

MEDIA
FRAME OVERVIEW
MEDIA FRAME OVERVIEWMEDIA
16
INSERT
/
CONNECT DEVICE
■
Insert Memor
y Card
Insert Memory CardInsert Memor
(s
)
Insert the memory card(s) as illustrated.
SD
xD
MS DUO
MS
NOTES ON MEMORY CARDS
Some memory cards may not be
played back due to its capacity and/or
manufacturer, etc. Do not insert any
memory card other than those memory
cards referred to left. Failure to follow
this instruction may cause a malfunction
of the digital media frame and/or card.
SAVING DATA
♦ It is recommended that you back up
your memory card data. Toshiba is not
liable for any damage caused by the
use of any memory card with this digital
media frame. Toshiba will not compen-
sate for any lost data or recording(s)
caused by the use of such cards.
♦ For instructions on using your memory
card, refer to the owner’s manual for
your memory card.
♦ Failure to take proper care of a
memory card may prevent the display of
pictures from the card. Such damage is
not covered by your Toshiba Warranty.
NOTICES FOR USE
♦ Ensure that you insert the memory
card correctly into this digital media
frame.
♦ Do not eject the memory card while it
is in use. If ejected while in use informa-
tion on the memory card may be lost.
♦ This memory card is a precision
electrical instrument. Do not bend, drop
or apply strong force to it.
♦ Do not use or store the memory card
in an environment of high static electric-
ity or electrical interference.
♦ Avoid using or storing in areas of high
temperature and humidity.
♦ Be careful not to touch with your fi n-
gers, nor allow foreign objects to come
in contact with nor dirt to accumulate on
the metal area (gold-colored area) of
the memory card. Wipe off any dirt with
a soft, dry cloth.
♦ When carrying or storing the
memory card always place it inside of
its antistatic case to avoid any effects
from static electricity. If there is a stor-
age case, place the memory card in the
antistatic area of the storage case.
♦ If you place a memory card that has
been exposed to static electricity in this
digital media frame, there is a chance
that this digital media frame could
malfunction.
♦ Do not place the memory card in your
trouser pocket. The memory card may
break if any strong force is applied,
such as when sitting.
♦ When ejecting the memory card after
extended use it may feel warm to the
touch. This is normal. The memory card
is not malfunctioning.

MEDIA
FRAME OVERVIEW
MEDIA FRAME OVERVIEWMEDIA
17
♦ The memory card is designed to have
a long life but after extended use you
will not be able to delete from or write to
it. Please purchase another.
■
Conn
ect a USB
De
vice
Connect a USB device, a USB-based
card reader or a USB cable as illus-
trated.
NOTE
NOTE
♦ The USB devices are listed according
to the order by which the individual
device is connected to the Digital Media
Frame. You can switch to another
connected USB device via the Menu.
For details, please refer to the section:
Settings
Settings
> Select Device
.
♦ Multiple-port USB device hub is not
supported by the Digital Media Frame.
■
Conn
ect to a
Computer
Connect to a computer using a USB
cable or a mini-USB cable as illustrated.
After the connection is established, you
can copy fi les from computer to the
internal memory of the Digital Media
Frame and vice versa.
SYSTEM REQUIREMENTS
SYSTEM REQUIREMENTS
♦ Operating System (Windows):
Windows Vista SP1, Windows XP SP3,
Windows 2000 Professional SP4
♦ Operating System (Macintosh):
MacOS X 10.4

MEDIA
FRAME OVERVIEW
MEDIA FRAME OVERVIEWMEDIA
18
MODE MENU
Mode menu offers you convenient
shortcuts to all major functions of the
Digital Media Frame.
1
Press
MODE
to bring up the Mode
menu.
2
Press ▲▼◄► or press
MODE
repeatedly to select a desired applica-
tion, then press
ENTER
.
NOTE
NOTE
♦ Unavailable options will be shown as
grayed icons.
Other manuals for DMF102XKU - Wireless Digital Media Frame
2
This manual suits for next models
2
Table of contents
Other Toshiba Digital Photo Frame manuals

Toshiba
Toshiba DMF102XKU - Wireless Digital Media Frame User manual

Toshiba
Toshiba DMF102XKU - Wireless Digital Media Frame User manual

Toshiba
Toshiba JOURNE F700 User manual

Toshiba
Toshiba DMF82XKU - Wireless Digital Media Frame User manual

Toshiba
Toshiba GIGAFRAME Q81 User manual

Toshiba
Toshiba DMF82XWU - Wireless Digital Media Frame User manual

Toshiba
Toshiba AR100 Owner's manual

Toshiba
Toshiba GIGAFRAME L80 User manual

Toshiba
Toshiba GIGAFRAME L80 User manual