TOUCH GUITARS U8 User manual

1
Owner’s Manual
U8

2 3
The instrument which you now own has been designed for versatility, extreme playability, body-
friendly lightweight construction, rst-class manufacturing and a classic look and nish. We hope that
you will be very happy with it.
You are now also a part of the Touch Guitar family. As a company, our aim is not solely to provide
instruments. We also aim to encourage musicians (whether they are beginners or skilled players) to
become better musicians and more contented people, improving their playing
Our aim is to provide instruments which will not only help individuals develop their playing
techniques, but will also encourage new players into the fold.
Thank you for starting the journey.
When designing these instruments we put a focus on playability, versatility, lightweight, rst
You are now part of the Touch Guitar family. Enjoy the hospitality.
Thank you
Markus Reuter - Founder & Designer
Congratulations on buying your new TOUCH GUITAR
A
B
9.5
12.7
32.5
46.5
14
16.3
2.8
33
33
65.5
R2.1
R9
R5
R2
6
33
32
118.5
R3
R6
12
22
20
4
44
21
16
100
193
101.5
134
30
27
10.4
10.4
10.4
10.4
10.4
10.4
10.4
7.5
8
5.8
4.2
15
10
18
R7.5
24
56.49
55.57
75
61.5
R17.5
R22.5
R15
R15
R17.5
R15
R8
R15
2.5
3
88
10
78.723
Parts of the Guitar
1. Headstock
2. Locking Tuners
3. Saddle
4. Damper
5. Neck
6. Frets
7. Fret Markers
8. Body
9. 5-piece Neck Joint
10. Neck Pickup
11. Straplocks
12. Bridge
13. Electronics Compartment
14. String Retainer
9
13
15
10
4
12
12
8
21
5
8
6
7
11

4 5
Knobs and Electronics
The U8 Deluxe uses passive electronics to produce a
brilliant, dynamically controllable tone. These are
accessed by a hatch on the back of the instrument.
There is a volume and a tone control knobs on the front
of the instrument, attached to internal potentiometers.
Volume
As a turnable knob, it sets the overall volume of the
instrument.Note also that in order to ensure that your
instrument’s tone remains consistent at all volume
levels, a resistor has been built into the potentiometer
to prevent uncontrolled tone changes at low volumes.
Tone
This control changes the overall tone of the pickup. It
gets warmer when turning it counter-clockwise.
Tone
Volume
6 7
• A prime indicator of instrument
condition is string action (the distance
between string and fret, which in turn
aects playability). Improperly adjusted
strings will vibrate unevenly and provide
imperfect, uneven tones across the
guitar, and will also buzz against the
frets rather than sound notes cleanly.
See the longer sections on Neck and
Bridge Adjustments for information on
how to adjust string action and about
situations which relate to it.
• Intonation is another indicator of
instrument condition, although this
relates more to ne-tuning. On a Touch
Guitar (as with all fretted instruments),
correct intonation is achieved by
consistently ensuring that there is
enough “give” from the bridge to stop a
string going out of tune when fretted.
Intonation adjustment is covered in the
longer Bridge Adjustment section.
Regarding nish care:
• clean any lacquered nish with the dry
cloth.
• If your ngerboard is unlacquered,
regularly oil it with linseed oil or other
fretboard oil).
• Over time there may be small changes in
the look of the nish. This is not a sign of
decay: it is due to the natural ageing
process of the lacquer itself. These small
changes are an inevitable part of owning
a lacquered object. They will not aect
either your instrument’s tone or the
integrity of the nish. (As such, they are
not covered as defects under the Touch
Guitar warranty - although, if desired,
replacement nishes can be ordered
from us at an agreed cost between
customer and company.)
Your Touch Guitar has been built using top-
quality craftsmanship and has been
constructed from premium materials. It was
set up for perfect playing action when it left
our workshop and has been designed to be
sturdy. However, it is necessary to
consistently care for and maintain the
instrument for best playing results,
functionality, appearance and long life. It is
also sometimes necessary to adjust for
temporary changes in the Touch Guitar due
to travel or environmental conditions (or to
make adjustments for personal preference).
Basic Care:
• As with all instruments, do not store
your Touch Guitar in extremely hot or
cold environments; and avoid
subjecting it to abrupt temperature
changes (such as moving it
rapidly between a cold outdoor
environment and a warm room while
unprotected).
• Provide yourself with the following
tools and care aids: one 15mm and one
5mm hex key/Allen wrench/Allen key,
plus one set of universal pliers (all
available from any hardware store):
one soft cloth suitable for ne wood
polishing; linseed oil (or special
fretboard oil available from musical
instrument stores); any electronic
chromatic tuner.
• We recommend buying an adjustable
strap. Strap locks are included as
standard with every Touch Guitar and
can be attached or detached by the
player using universal pliers. Although
the strap locks are sturdy and stable,
they can be loose when incorrectly
attached, resulting in a small risk of the
instrument falling loose from the strap.
Check them regularly (with a gentle tug
on each strap lock) and ensure
that they are fully tight.
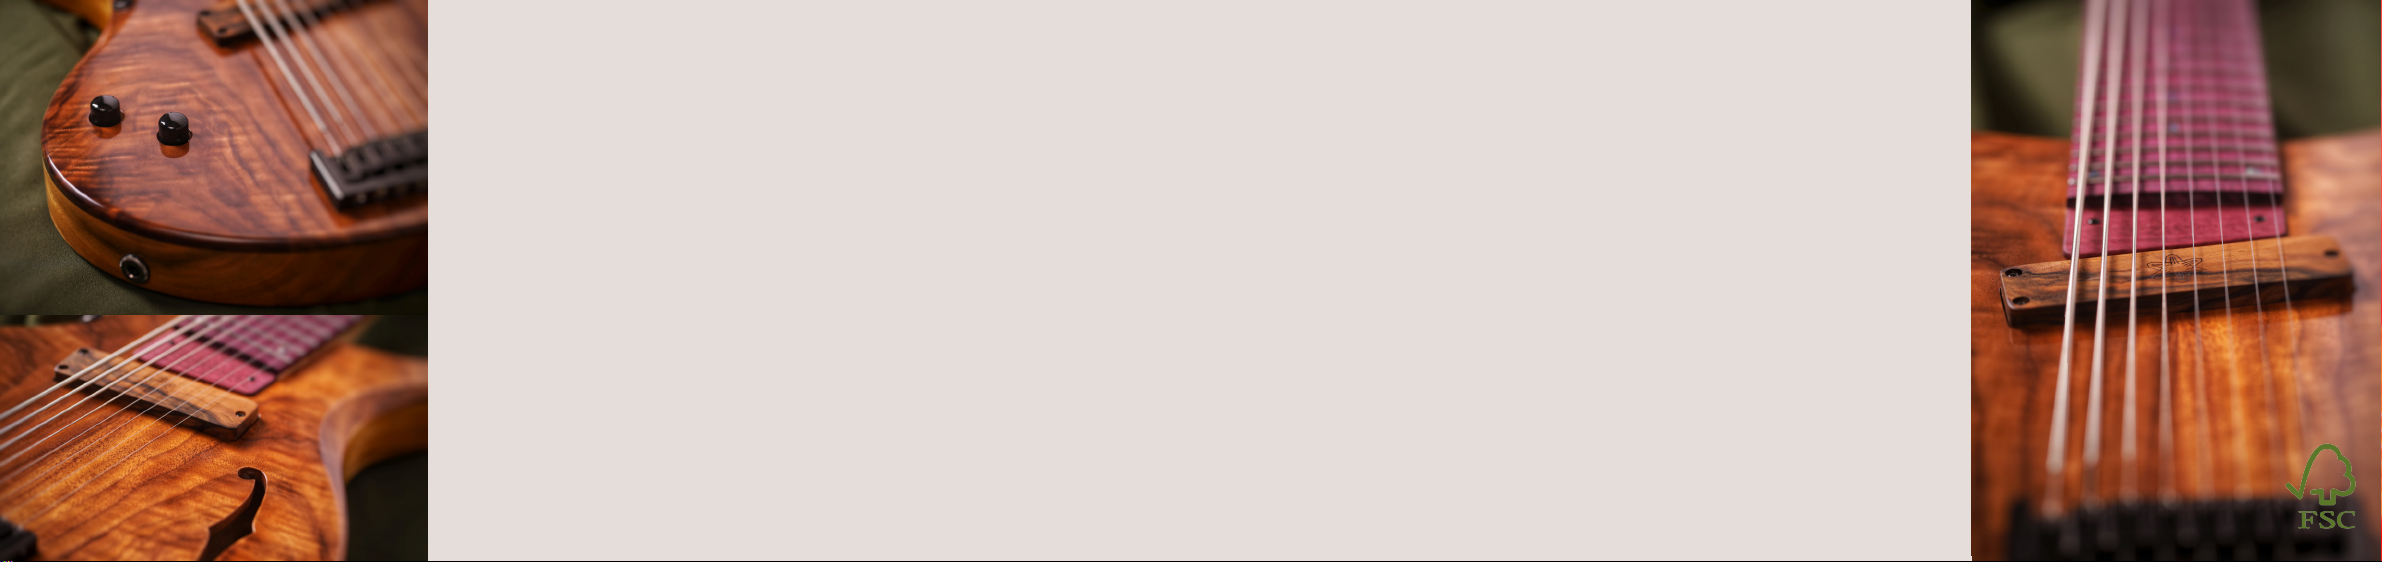
All wood we use is FSC certied
Care, Maintenance and Setup
76
8 9
As with other instruments in the guitar and lute families, adjusting the
neck of your Touch Guitar is necessary when temperature/environment
changes/string stress cause temporary expansions or contractions in
the wood and cause it to bend. To check whether neck adjustment is
necessary, rst check the string action. Press down a string at the rst
or twelfth frets, then examine the string at the seventh fret. If there is
only a small space there between string and fret then the guitar neck is
well adjusted. If there is a larger or smaller distance between string and
fret at the seventh fret position, then the neck is not properly straight.
The optimum string action is between one and two milimeter at the 7th
fret (Players who previously played a standard guitar or bass guitar
should note that standard Touch Guitar string action is very low in
comparison).
In order to adjust the neck, you will need to access the truss rod and
either tighten or loosen it. Please note that if you over-tighten the truss
rod it will break and need to be replaced. For the rst time that you
make this adjustment, we recommend that you ask for help from a
luthier or experienced guitar technician.
Remove the two screws of the truss rod cover at the bottom of the
fretboard and then remove the cover. This will reveal the end of the
metal truss rod which runs through the neck to reinforce it and to
control its degree of bending. Use your 5mm hex key to gently adjust
the rod. Turning the rod clockwise will tighten the rod (straightening the
neck), while turning it counter-clockwise will loosen the rod (allowing
the neck to bend). Use either direction to bring the string action to the
optimum setting which is as plain as possible.
Neck Adjustment Bridge Adjustment:
Often when string action is too high or too low, you need to readjust the
string saddles on the bridge. Before doing this, use the Neck
Adjustment process to ensure that the neck is properly aligned. If the
neck is at optimum adjustment but the strings are still buzzing or
exhibiting uneven action, then you will need to adjust the string height
manually.
Each string sits on a saddle mounted on a pair of vertical rider screws
going downwards into the bridge. Each of these rider screws can be
adjusted using the 1.5mm hex key. Ensure that both screws are set to
the same height and that they are also engaged with the ground plate
of the bridge (not oating free, which will make the saddle and string
unstable and put extra strain on any engaged screws).
Eight horizontal screws are set into the far end of the bridge (running
underneath and parallel to each string) and are used to ne-tune string
intonation by adjusting the string saddle tension. Use the 1.5mm hex
wrench to adjust these screws. Turning a screw clockwise makes the
notes on the string above it sound slightly higher; turning it counter-
clockwise will make the notes sound lower. Test the intonation by
playing the open string and then playing the note on the 12th fret above
(which should be exactly one octave higher), adjusting the bridge screws
if the two notes are not in relation. (We recommend using a digital
chromatic tuner to ensure accuracy).
Height adjustment
Intonation adjustment
Turn counter-clockwise for a forward bow
Turn clockwise for a back bow
98
10 11
The standard eight string Touch Guitar
tuning is :
(lowest string to highest, with all specied
notes using standard octave notation):
Bb F C G D A C D
This is designed around the greatest pitch
range available on a 34″ scale length
instrument without sacricing tonal
quality. We have found that the ideal
range is one which starts at the low Bb on
a bass guitar (Bb0) and ends at the D found
on the 22nd fret of a regular guitar (D5).
The tuning is also optimal for playing with
all eight ngers on the fretboard since it
allows you to easily cover a whole octave
with both hands in a single position
without stretching.
If you initially nd this tuning too dicult
or not to your taste, we would urge you to
persevere with it. It is by far the best
tuning option for the instrument to play
with both hands in an integrated fashion.
It allows you to play your Touch Guitar to
its full potential, and (once mastered)
opens up new options for ease of playing
and eective music making in any genre.
Teaching within this tuning is also
supported by the Touch Guitar Circle.
However, if you wish to start, continue or
experiment with more familiar guitar
tunings, this is also easy to do. The Touch
Guitar is more than capable of coping
dierent tunings without sacricing any
playability.
If you are coming to Touch Guitar having already
played guitar and/or bass guitar (or indeed any
member of the guitar or lute family), you will nd that
all the techniques which you already know can be
immediately applied to this instrument. Plucking,
plectrum picking, ngerpicking, tapping, double-
thumbing, slapping, slide... all of these and more can be directly
transferred to Touch Guitar with the minimum of fuss. (However, you
will need to adjust to the larger number of strings and the lower string
action. You may also need to adapt to the tuning arrangements - see the
Tuning section on page 10).
The same applies if you are currently choosing to learn guitar playing
from a book or online video: most of what you’re learning from these
can be easily adapted to Touch Guitar. With these skills and approaches,
you will be able to play satisfactory music on a Touch Guitar.
However, we should stress that in order to get the full benet of a
Touch Guitar, you should learn to play it using the playing system it was
designed to use; and (if at all possible) using the organisation set up to
teach and share information on this method.
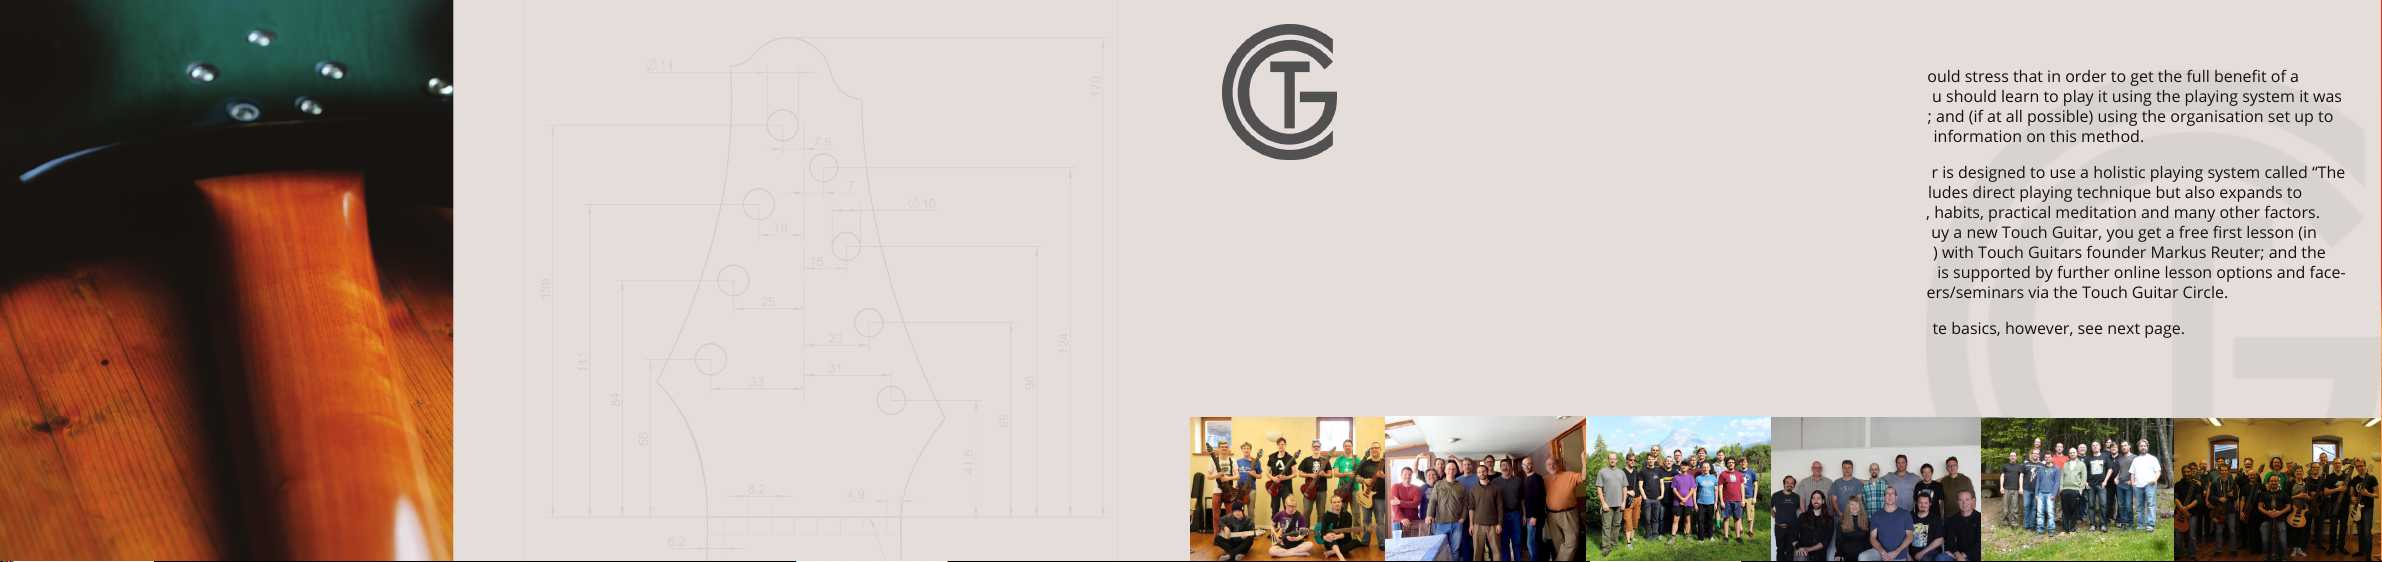
The Touch Guitar is designed to use a holistic playing system called “The
Family”. This includes direct playing technique but also expands to
include posture, habits, practical meditation and many other factors.
Whenever you buy a new Touch Guitar, you get a free rst lesson (in
person or online) with Touch Guitars founder Markus Reuter; and the
Family approach is supported by further online lesson options and face-
to-face encounters/seminars via the Touch Guitar Circle.
For the immediate basics, however, see next page.
TechniqueTuning
10
10 11

12 13
Release
Full Release
CERTIFICATE OF AUTHENTICITY
Date
Model
Serial #
Touch Guitars U8
This instrument has been custom built by Touch Guitars® in Europe.
Fingerboard technique:
The initial Family technique is the Touch Release Move (TRM), which is
the basic way to play a clean note on your instrument.
See the diagrams by TGC member Mike Rohde, that show two ways to
play a single note. When you are starting, focus on the “release”.
Playing position:
The balance design for the Touch Guitar
(in coordination with its strap lock
system) means that it can be played at
any angle and any height according to
player taste while remaining
constantly stable and in position.
However, the optimum position is
standing straight with the
instrument slightly angled to the
front. The picture of Markus
Reuter shows the perfect
position in which to play the
instrument.
1312

14
Touch Guitars®
Stefan Huth
Rheurdter Str. 51
D-47647 Kerken
Germany
www.touchguitars.com
www.touchguitarcircle.com
E-Mail: [email protected]
Table of contents
Other TOUCH GUITARS Musical Instrument manuals


Popular Musical Instrument manuals by other brands


Charvel
Charvel Pro-Mod San Dimas Style 1 HH FR EB Owner's manual & warranty

Yamaha
Yamaha Electone ME-30 user guide

Yamaha
Yamaha Clavinova CVP-94/CVP-92 owner's manual

Kawai
Kawai Concert Performer CP205 owner's manual

Elenberg
Elenberg MS-4940 manual

Bontempi
Bontempi MUSIC ACADEMY School 15 4909 owner's manual


