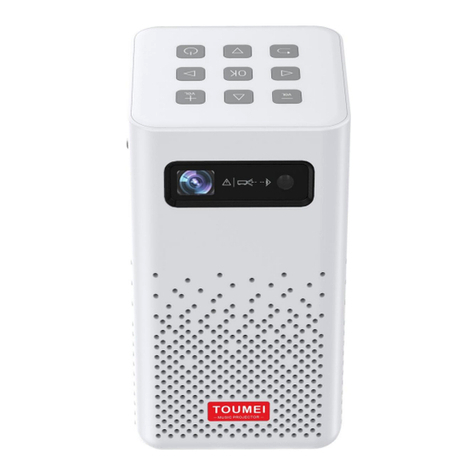
TouMei C800W User manual

C800W Smart Projector User’s Guide
1. Introduction
Thank you for choosing. This user’s guide is intended to help you to
operate the product correctly, be sure to read this guide before using the
projector. C800W Smart rojector is a full range home entertainment
device, with the range of systems available for video and audio play,
working, play games, and shopping. With the use of low-power LED light
source, you can watch TV show, movies and play games on the big screen
anytime you want. At the same time, the C800W projector equipped with
multiple expansion interfaces, which can be used in conjunction with lots
of household appliances, such as speakers, wireless keyboard and mouse,
game controller, game consoles, laptop or computer, and U disk, etc. All of
these will bring you a better entertainment experience.
2. Features
The C800W rojector uses high-performance optical engine
projection technology, which can effectively extend the using life. The
RGB LED light source and 854x480 resolution display will give you’re the
best experience with big screen.
Built-in wireless module supports wireless Internet access;
Multi-screen interactive, support DLNA, Miracast; perfectly
compatible with android system.
Directly display the videos or documents in the storage device (U disk
or Mircro SD card)
Support reading and editing of Word, Excel, DF, T format
document
Easy and simple full-function remote control and touch-button
operation, available to control by smart phone or 2.4G wireless mouse
Built-in 3500mah lithium battery for a longer battery life

3. Package Contents
1. rojector
2. Remote control
3. User’s guide
4. ower adapter
5. Holder
. Introduction about Interfaces and Keys
1
5
4
2
3
rojector
Instructions

Remote control
:
1. ower
2. Mute
3. Cursor up
4. Cursor right
5. Cursor left
6. Cursor down
7. Remote/Mouse Control
8. Back
9. Home
10. VOL-
11. VOL+
12. OK
▼Caution:
Read these instructions before using your remote control.
We do not want you to get hurt or your remote control to get
damaged.
Be careful when operating the remote control, to pr-
event falling or trampling on the remote control, or any kind
of liquid spilled into the remote control.
To reduce the risk of fire or electric shock, do not ex-
pose remote control to the outdoors, liquid, moist-
ure, excessive heat, or fire.
5. Throw Ratios and Viewing Distances

6. Setting and Usage
ower on: ress the power button on the projector for 3 seconds or press the power button on
the remote control to power on the machine. (Before the first time to power on, please charge the
battery by plugging the DC power supply. Under the full charge state, the projector can work for
about 90-150 minutes, the actual time depends on the using environment and working conditions.)
ower off: ress the power button on the projector for 3 seconds or long-press the power
button on the remote control to power off the machine.
Standby: ress the power button, or tap the power button on the remote control the projector
will get into standby state.
6.1.Language and input settings:
Click Settings and enter the language and input settings, choose “Keyboard and input method”,
choose the input method you want and tick it.
6.2.
Network Settings
Click Settings / WLAN / Choose a WiFi to connect / Enter the password / Connect WiFi
6.3.
Bluetooth settings
Click Settings / Bluetooth / Turn on bluetooth, click “Search for devices” option at upper right
corner for device pairing, and enter the password to connect.
6. .
Multi-screen sharing:
Open up the wireless screen transmission (Lebo)
Apple devices: Apple devices can make the screen transmission with micro-devices with the same
WIFI connection; Open Airplay on Apple devices, click the device name, and then the screen of
Apple devices will be projected into this device.
Android devices: Scanning the dimensional code to install the A , make the Android devices
connected the same WiFi to the rojector, click the device name and the screen of Android devices
will be projected into this device.
6.5 .
How to play video
Open the “Native Videos” on the Homepage
,
the system can check the machine's video media files
(
Contains the external SD card and U disk
)
, C800W will be manufactured 2~3 test files, click the
video, press “OK” on the remote control, and then the projector can play the video. Long press the
left or right button to fast forward or rewind .
(
Fast forward and rewind operation will be different
on the different players, we recommend that you use the systems comes player.
)

6.6 . How to play music
Open the “Music” option
,
the system will automatically scan for audio files (containing the system
internal and external SD card, U disk and other storage devices)
,
choose one you
’
d like to open and
press
“
OK
”
on the remote control and then you can listen the music.
6.7 .How to check the picture
Open “Gallery” option
,
the system will automatically scan for the image files (containing the system
internal and external SD card, U disk and other storage devices), choose one picture then
,
press
“OK” on the remote control and then you can see the picture
。
In full-screen state
,
you can switch the
pictures by pressing the left or right button on remote control.
6.8 . How to play games
This projector manufactured with no games, if any need, please download in related application
market, such as: Android Market, lay market and so on.
6.9 . Office function
C800W projector comes with W S Office software
,
open the
“
W S Office
”
option
,
use Arrow key
on remote control to check “Built-in Memory” option or device you plug in to find related files and
then you can open it.
6.10.
Font size setting
Open the “Setting”
,
use your remote control to find “Display” option and then open it, there are four
subdirectories will be appeared to the right
,
find “Font Size” option to adjust it. After done this,
press “Back” button to return to the last page.
6.11. How to adjust the brightness
Open the “Setting”
,
use your remote control to find “Display” option and then open it, there are four
subdirectories will be appeared to the right
,
find “Brightness” to adjust it. After done this, press
“Back” button to return to the last page.
6.12.
Screen zoom settings
Open the “Setting”
,
use your remote control to find “Display” option and then open it, there are four
subdirectories will be appeared to the right
,
find “Screen zoom” option to adjust it
,
After done this,
press “Back” button to return to the last page.
6.13. Color mode settings

Open the “Setting”
,
use your remote control to find “Display” option and then open it, there are four
subdirectories will be appeared to the right
,
find “Color mode” option to adjust it
,
After done this,
press “Back” button to return to the last page.
6.1 . How to check storage space
Open the “Setting”
,
use your remote control to find “Storage space” option and open it, and then
you can check the storage information of the machine.
6.15. How to check the installed app and uninstall app
Open the “Setting”
,
use your remote control to find “Application” option and open it, then you can
see all the installed app. If you need to uninstall app
,
move the cursor to the app you want to
uninstall and press “OK” button to uninstall.
6.16. Time and date settings
Open the “Setting” option
,
find the “Time and date settings” and open it, there are six subdirectories
will be appeared to the right
,
please cancel the selection of “Automatic date and time” otherwise the
follow options will not allow to change and shows in grey color. In this state, the device
automatically obtain the time from the network (Internet connection is required).After you cancel
this option, you can set your own date, time and time zone (You can still adjust the Format and Time
zone under the “Automatic date and time” state).
6.17. How to check System Information
Open the “Setting”
,
find “About the projector” option and open it
,
and then you can check the
device information.
6.18. How to download app
This projector manufactured with “ lay Store”
,
you can download apps by logging in your Google
account
。
If you have no Google Account or you want to use some other App Store, you can install
them for your own preference, such as: Android market, and so on.
6.19. How to watch videos online
Online video requires network support, first of all ensure that the projector can be connected to the
Internet, specific connecting method please refer to this specification to "6.2 Network Settings".
After the projector connected to the Internet, users can download video player to watch videos
online. Online video needs a good network, otherwise it will cause the video does not play smoothly,
this has nothing to do with the quality of the projector, it requires the user to optimize the network
。
For more details, please refer to 6.18 of this manual “How to download app”.

6.20.
Restore factory settings
Open the
“
Setting
”,
use arrow keys on remote control to find
“
Backup & reset
”
and open it
,
then it will shows
“
Data Backup
”
and
“
restore factory settings
”
options. Factory reset will erase
all user data
,
lease proceed
“
Root
”
with caution.
(
If necessary, please back up your data before
restoring the factory settings
)
6.21. Reset
If it occurs crash situation during the using time, the user can manually reset the unit. There is a
Reset hole right between TF deck and USB interface, if it occurs crash situation during the using
time, user can use a needle or other small objects to plug into this hole, press the button into it, and
the projector will be reset. Reboot the projector and it will function normally.
7. Firmware Upgrade
This device has no OTA online upgrade function so far, if you need to upgrade your device, please
download the firmware at our official website, and then follow the guide to upgrade. lease proceed
“Root” with caution. During upgrade process, if any crash, black screen or other unusual
circumstances, please do not attempt to open the device, please contact our after - sales service
8. Announcements:
1. This User Manual is important to you. lease read it before using your projector and
safekeeping it for future reference.
2. Do not look directly into the lens when the projector power is on, strong light is harmful to
human eyes.
3. Do not place this projector on an unstable cart, stand, or table. The projector may fall and
causing serious damage to the projector optical system.
4. Do not block the ventilation openings while the power is on, otherwise it will cause serious
damage to the projector.
5. Do not use this projector near water or in contact with water, once the liquid enters the machine
will cause damage to the projector and make it stop working.
6. Do not attempt to disassemble this projector by yourself. Any fault occurs please contact with
Service Center: 4006-885-113.
7. lease use the attached power adapter, an improper use of power will cause serious damage to
the projector.
8. If you don’t use the projector for a long time, please turn off the power.
9. Cannot guarantee the normal operation of large power external devices (such as mobile hard
disk).

9. Maintenance
1. When there is dirt or dust on the lens surface, apply a few drops of lens cleaning solution to a lens
tissue or cleaning cloth to remove the dust softly, or you can remove as much dust and dirt as
possible from the lens with a blower or soft-bristled brush.
2. Do not use any type of abrasive pad, alkaline / acid cleaner, scouring powder, or volatile solvent,
such as alcohol, benzene, thinner or insecticide, etc. Do not prolonged contact with rubber or vinyl
materials otherwise it may result in damage to the projector.
10. Frequently Asked Questions
Unable to boot
Check the battery level
Check whether the DC adapter is plugged in
Check whether the adapter connector and the machine is in good contact
ush the power button to see whether it’s flexible
Check whether the remote control can boot
Remote control cannot
be used
Check if the remote control battery has power
Check whether the remote control receiver is blocked by objects
Check if the remote control distance longer than 8meters (Maximum
effective range)
Has no sound
Check if the volume is adjusted to minimum or turn on the mute
function.
Check is there a connector plugged in the headphone output
TF card cannot be
read
Check if the TF card is damaged
Format the TF card to FAT32 or NTFS format
Check whether the TF card exceed the capacity (Maximum capacity is
32GB)
Unable to
transmission the
phone sscreen
Check whether your phone and the projector connect in the same
wireless
Check whether the transmission software is the latest version, if not
please upgrade the software
Low brightness of the
image
Check whether you use the DC power adapter or the battery power is low
Check the setting options of Brightness
Image blur
Adjust the focus knob
Make sure the throw distance is within the predetermined range
Check if there is dirt on the lens, if does please clean the lens.

Quality Assurance Card
Dear users:
Thank you for choose our product. In order to bring you a better service, after your purchase,
please read the instructions carefully and save this warranty card. The company will provide lifetime
maintenance for the products sold out. Within one year from the date of purchase, the company will
provide free warranty service. (Tel:+86-755-29305877)
Announcements:
If there is any fails of the product during your using time, you can send it to the local Tech
authorized service center, and the service time will be calculated at the date since the service center
received the items. And the service center will contact with you within the processing time, and
return the repaired product to you.
If there is no authorized service center at your area or the service center is far from your address,
you can send the product to the service center of the head office, and the service time will be
calculated at the date since the service center received the items. And the service center will contact
with you within the processing time, and return the repaired product to you.
Note: For discontinued products, according to the discontinued products replacement programs,
your products can be replaced by a new product or a similar which has no less than the original
performance (May incur additional costs), and the fright should be paid by the buyer.
If the product is beyond the warranty period, or any damaged caused by installation, usage,
maintenance and keeping not under instruction, or the products damaged by force majeure such as
earthquake, floods lightning strike ,transport accident and so on, Customers can choose a paid
service. Such problems requires the users send the product to the service center or call the Service
centers for engineers’ help
FCC Statement
This equipment has been tested and found to comply with the limits for a Class B digital device,
pursuant to Part 15 of the FCC Rules. These limits are designed to provide reasonable protection
against harmful interference in a residential installation. This equipment generates uses and can
radiate radio frequency energy and, if not installed and used in accordance with the instructions,
may cause harmful interference to radio communications. However, there is no guarantee that
interference will not occur in a particular installation. If this equipment does cause harmful
interference to radio or television reception, which can be determined by turning the equipment off
and on, the user is encouraged to try to correct the interference by one or more of the following
measures:
-- Reorient or relocate the receiving antenna.
-- Increase the separation between the equipment and receiver.
-- Connect the equipment into an outlet on a circuit different from that to which the receiver is
connected.
-- Consult the dealer or an experienced radio/TV technician for help.
Changes or modifications not expressly approved by the party responsible for compliance could
void the user's authority to operate the equipment.
Table of contents
Other TouMei Projector manuals
