TouMei C900 User manual

Toumei C900
User Manual • Uživatelský manuál •
Užívateľský manuál • Használatiutasítás •
Benutzerhandbuch

2
Dear customer,
Thank you for purchasing our product. Please read the following instructions carefully
before first use and keep this user manual for future reference. Pay particular attention
to the safety instructions. If you have any questions or comments about the device,
please contact the customer line.
✉www.alza.co.uk/kontakt
✆+44 (0)203 514 4411
Importer Alza.cz a.s., Jankovcova 1522/53, Holešovice, 170 00 Praha 7, www.alza.cz

3
Shortcuts Button
1. Delete the apps you download by pressing and holding down the ok button for
two seconds.
2. You can clean the memory by holding the home button for two seconds.

4
3. Long press the menu key to switch between mouse and remote control mode
Homepage
Menu
Home

5
Online Upgrade
1. Homepage>Settings>System Settings>System Upgrade. Before you update,
please connect the power adapter and Wi-Fi, otherwise the update will fail or the
system will crash.
2. If there is no reaction, please return to the settings and try again, after finishing
the update, the system will turn on automatically.
3. If it shows the latest version of the software then the system is up to date.

6
System Settings
1. Boot signal: Close/HDMI
2. Device Information: Displays equipment performance and software information.
3. System Upgrade: Online Upgrade/U-disk Upgrade
4. Restore factory reset: All apps will be deleted once you click this option.
5. Fan Settings: Automatic/Manual
6. Boot mode: Remote control/Power on

7
Sound Settings
1. Key Tone: On/Off
2. Sound Effect: Standard/Vivid/Sports/Movie/Music
3. Boot Sound: On/Off
8
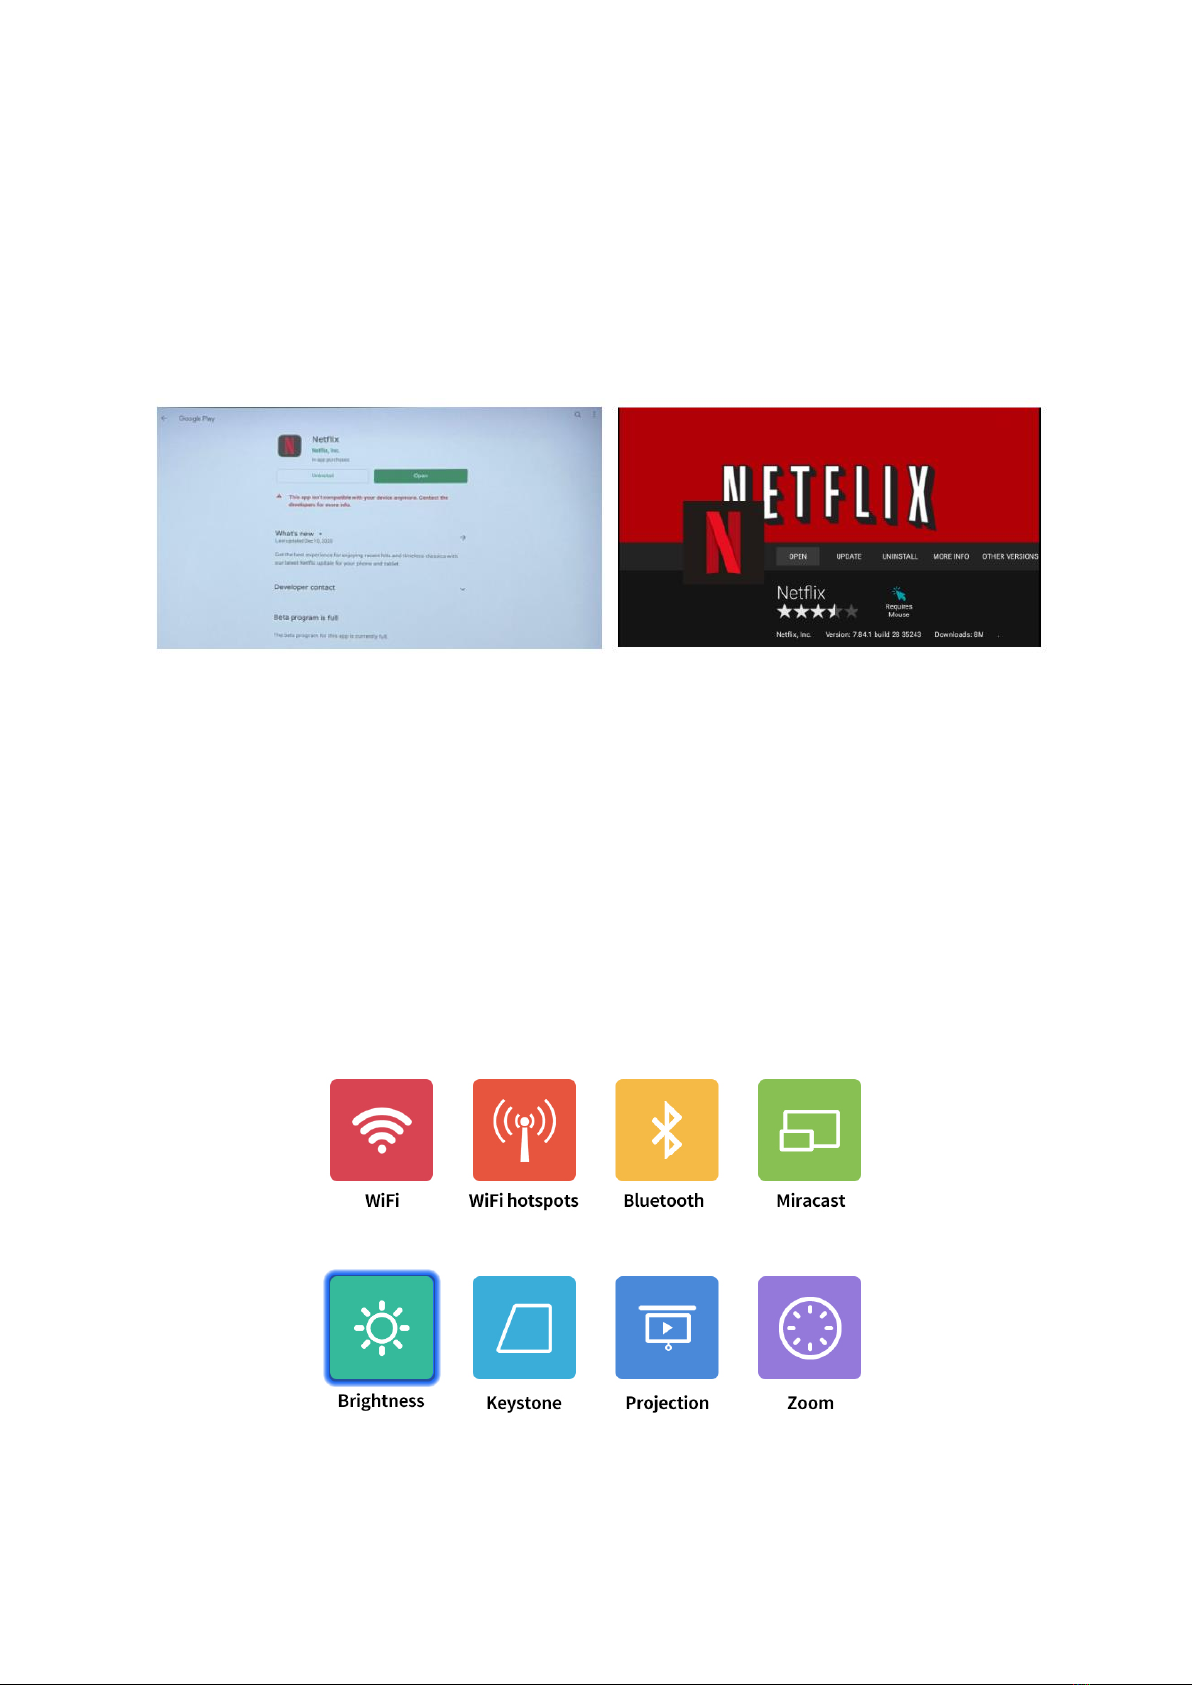
Attention
For apps already installed on the system (YouTube, Netflix, Prime Video), please do not
upgrade to other versions, otherwise the upgrade will be incompatible or the remote
control will not work.
Graphic Settings
1. Brightness: Standard Mode/Highlight Mode/Energy saving mode.
2. Keystone: Automatic or manual adjustment.
3. Projection: Front, Rear, Celling front and Celling rear mode.
4. Zoom: Stepless zoom and Image ratio.
5. Video Mode: Colour mode, warm mode, cool mode and custom mode.

9
How to adjust keystone in manual mode
1. Turn on manual mode in keystone, then choose trapezoid correction.
2. For the top left and right points, press the down button on the remote for
adjustment.
3. For the bottom left and right points, press the up button on the remote for
adjustment.

10
Wallpaper Settings
Replace Desktop Background (homepage>settings>wallpaper)

11
Wireless screen (Windows)
Windows with screen operation guide
1. Please confirm your Windows and projector IP addresses are connected to the
same LAN.
2. Use the following link to download and install:
http://cdn.sharemax.cn/app/EShareClient-STD.exe
3. Click Esharecent-STD, and the name and IP address of the projection device will
appear. Click “Start Screen Transmission” to begin using the wireless screen.
12
Airplay (iPhone)
iPhone Airplay mirror operation guide
Supported by the following devices: iPhone 5 and above, iPad 2 and above, iPod Touch
(5th generation and above).
1. Connect your iPhone and projector to the same Wi-Fi network (5G first)

13
Airplay (iPhone)
iPhone AirPlay mirror operation guide
Supported by the following devices: iPhone 5 and above, iPad 2 and above, iPod Touch
(5th generation and above).
1. Click to open the projected Airplay, and then Eshare-**** will be displayed in the
lower left corner.
2. Slide your finger from the bottom of the iPhone screen to the top, bringing up a
new menu, and open the iPhone control centre (Slide from the top down for
iPhone X),
3. Click AirPlay Mirroring and the device list will automatically search for the
projected devices within the same network
4. From the device list, click the name of the projected device you want to connect
to (Eshare-****) to successfully cast the screen.

14
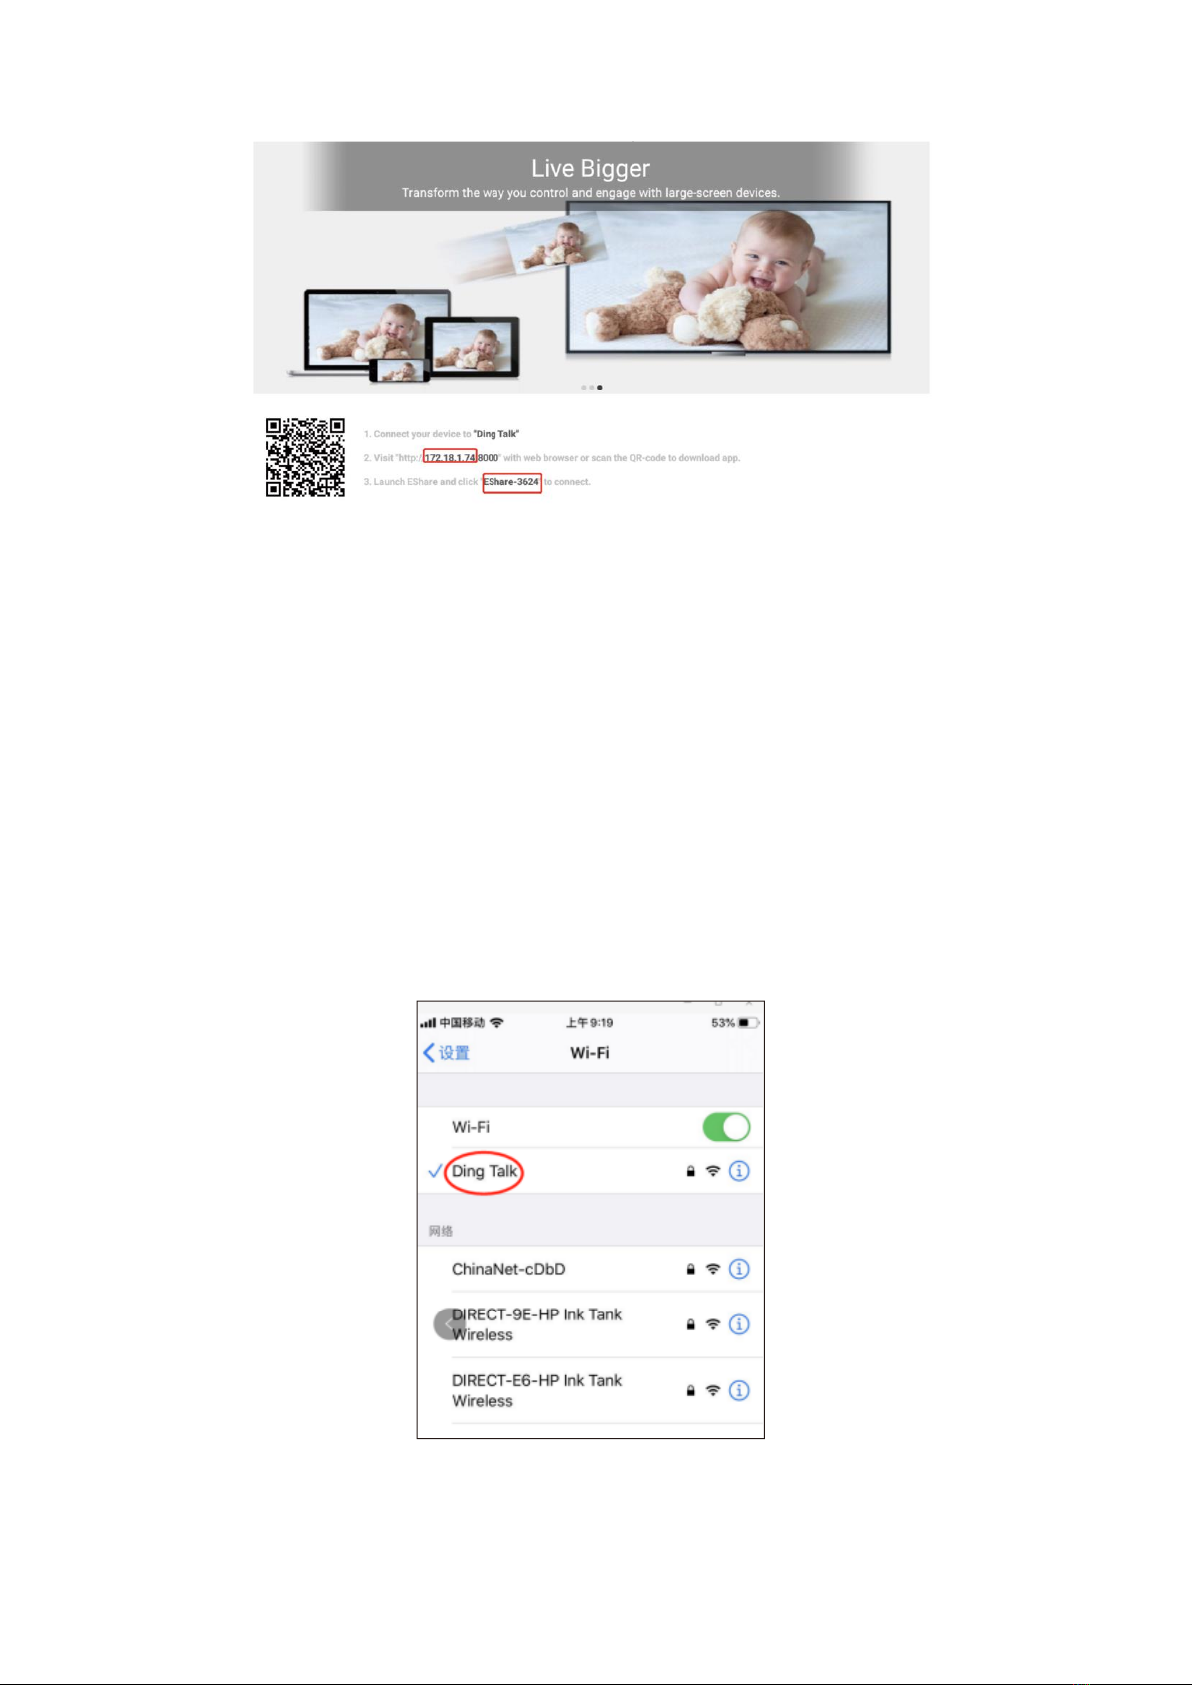
Use mobile hotspot for Airplay mirror operation guide
1. For use without having a LAN or Wi-Fi available, first turn on "Settings" - "Personal
Hot spot" - "Allow others to join" on the iPhone, select and turn on.
2. Click "Settings" of the projector - turn on "Wi-Fi", search for the hotspot name of
the iPhone, and find and connect.

15
3. Swipe your iPhone fromthebottom up and open the iPhone control center (Slide
fromthe top downfor iPhone X).
4. Click "AirPalyMirroring" and thedevice list will automatically search for the
internal projection device in the same network.
5. From the device list, click the name of the projected device you want to connect
to (Eshare-****) to successfully cast the screen.
iPhone AirPlay revers
Screen Projection operation Guide
1. Click to open the projected Airplay, then follow the prompts on the page to scan
the QR code of your iPhone, download and install the corresponding Eshare APP.
2. Open the Eshare app on the mobile phone, and the device list will automatically
search for the internal projection device of the same network.
3. Click the projection device (Eshare-****), "one-click screen transmission" and
"Reverse screen transmission" will appear simultaneously.
4. Click “Reverse Screen Transmission”.

16
Wireless screen
Android with multi-screen interactive models with screen tutorial (Android phone)
Note: It is recommended to use the built-in Android screen and Eshare android screen.
The voice cannot be transmitted (the system audio acquisition permission cannot be
obtained).
Android Miracast operation guide
1. The android phone and the projector connect the Wi-Fi.
2. Enter settings and click miracast.

17
3. Open “More Connections or Screen Projection for Android Phone” on the mobile
phone (there are a variety of models of Android mobile phones which may have
different names, and the mobile phone to be referred is HUAWEI mobile phone).
4. The phone and projector will search for the same model in a few seconds and
connect successfully.
MCast_b2eb

18
Wi-Fi Connection
Homepage>Settings>Wi-Fi >turn on Wi-Fi option

19
Bluetooth Connection
Homepage>Settings>Bluetooth>Open Bluetooth

20
HDMI
Connect External Multi-media Interface
Connect the HD cord to the projector and click HDMI on the home screen which will
appear in sync within five seconds.
Notes: It can be combined with Amazon Fire TV Stick to Connect the projector.
1. Plug the Fire TV device into projector HDMI port.
2. Check the Audio setting on your Amazon Fire TV or Fire Stick.
3. If you're still experiencing audio issues, try turning off Dolby Digital Plus: On your
Amazon Fire TV or Fire Stick, go to Settings> Display & Sounds> Audio> Dolby
Digital Output and then turn Dolby Digital Plus OFF.
HDMI
Table of contents
Languages:
Other TouMei Projector manuals


Popular Projector manuals by other brands


Globus New Media
Globus New Media ECO Spot LED40C user manual

Sanyo
Sanyo PLV-Z700 owner's manual

JVC
JVC LCT2374-001A instructions

Christie
Christie 38-VIV303-01 user manual

Digital Projection
Digital Projection HIGHlite Laser 3D Series Installation and quick start guide

InFocus
InFocus LP130 Technical specifications