Toyota PZQ60-0041 User manual

@ToYorA AM.FM RADIO WITH ELECTRONIC TUNER
AND COMPACT DISC PLAYER
ToYoTA PART r{0. P2Q60,0041, p2Q60.0042
PZQ60-0044
OWNER'S MANUAL
DISC FtD ART IN
Thank you for purchasing the TOYOTA Gr.::
Please note that this manual explains all i,:, ,i,-r rs. -
.rlr'
MF3
WMA
qvstem.
nent, including operations.
FM
Therefore, you may find some explanatio;:r .-. i:atures or --, ,ment not included in your AUDIO system.
TOYOTA MUTOR CORPORATION

TABLE OF CONTENTS
OPERATING PRECAUTIONS ........ 5
RAD|O........ ........5
CD PLAYER ....... 6
COMPACT DISCS ..............:.... ................7
PIN (PERSONAL TDENTTFTCATTON NUMBER)
sEcuRrTY oPERAT|ON ................. 9
HOW TO PROGRAM YOUR PtN ............................... 9
HOW TO CANCEL THE PtN..... ............... 9
HOW TO RESUME NORMAL AUDIO
oPERAT|ON................ ....... 10
rF wRoNG PtN tS |NPUT........ .............. 10
BASTC OPERATTON .......... ............ 11
HOW TO FEED POWER ....................... 11
HOW TO ADJUST THE VOLUME & TONE.......,......11
swrTcHrNG AUD|O CONTROL MODES ................ 1 1
HOW TO TURN TIME DISPLAY ON/OFF ...........,....12
HOW TO SET THE T|ME.......... .............12
HOW TO VIEW THE AUDTO MODE.........................12
RAD|O OPERAT|ON.......... ............ 13
HOW TO TURN ON THE RADIO .,........ 13
HOW TO TUNE...,..... .......... 13
HOW TO STORE BROADCASTING STATIONS
(PRESET) ........ 13
HOW TO SCAN BROADCASTING STATIONS
AVAILABLE FOR RECEPTION .............14
cD AND MP3/WMA OPERATION.................. 15
Dtsc PLAY ...... 15
EJECTING THE DISC.. ....... 15
ADVANCE TO THE NEXT TRACK OR RETURN TO
THE BEGINNING OF THE TRACK
BEING PLAYED..... ............. 15
FAST FORWARD AND REWIND THROUGH A
TRACK...... ....... 15
PLAYING THE BEGINNING OF TRACKS
(scAN).....
REPEATING THE SAME TRACK (REPEAT)
PLAYING TRACKS IN RANDOM ORDER
(RANDOM).
SHOWING THE TEXT INFORMATION .................... 1 6
ABOUT MP3MMA.. ............ 16
PLAYING MP3MMA .......... 18
TO GO BACK TO FIRST POSITION
(HOME JUMP) .................... 18
SHOWING MP3MMA TEXT INFORMATION.......... 19
PLAYING THE BEGINNING OF FILES
(scAN)...... ....... 1e
REPEATING THE SAME FILE OR FOLDER
(REPEAT) ........ 19
15
16
16
-'l

PLAYING FILE IN RANDOM ORDER
(RANDOM)...
usB oPERATION .......... 20
ON THE SPECIFICATIONS FOR THE USB
MEMORY THAT lS P1AYA81E................................ 20
LISTENING TO MUSIC FILES IN THE USB
MEMORY (WHEN THE USB MEMORY IS NOT
CoNNECTED) ............... --.-.20
LISTENING TO MUSIC FILES IN THE USB
MEMORY (WHEN THE USB MEMORY IS
CoNNECTED) ............... .-.-- 20
PAUSING THE USB MEMORY .............21
ADVANCE TO THE NEXT MUSIC FILE OR
RETURN TO THE BEGINNING OF THE MUSIC
FILE BEING PLAYED .........21
FAST FORWARD AND REWIND THROUGH A
MUSTC F|LE........... ...........--21
TO SELECT THE DESIRED FOLDER ...,.................21
TO GO BACK TO FIRST POSITION
(HOME JUMP) ...........--..-.-.- 21
PLAYING THE BEGINNING OF FILE (SCAN)--...--.-22
REPEATING THE SAME FILE OR FOLDER
(REPEAT) ...--...22
PLAYING FILE lN RANDOM ORDER (RANDOM)... 22
SHOWING THE TEXT INFORMATION ............ ........ 22
ipod@ OpERAT;ON .......... .............. 23
LISTENING TO THE iPod (WHEN THE iPod lS
NOT CONNECTED)...... -.....23
LISTENING TO THE iPod (WHEN THE iPod lS
CoNNECTED) ............... .....23
PAUSING THE iPod.... -.-.-...24
ADVANCE TO THE NEXT MUSIC FILE OR
RETURN TO THE BEGINNING OF THE MUSIC
FILE BEING PLAYED .........24
FAST FORWARD AND REWIND THROUGH A
REPEATING THE SAME MUSIC FILE (REPEAT)-.-24
PLAYING MUSIC FILES IN RANDOM ORDER
(SHUFFLE) .-.-.- 24
SEARCHING FOR A MUSIC F11E........... ..-,-.-....-.-... 24
SHOWING THE TEXT INFORMATION ..,....,.... ......,. 25
iPod COMPATIBILITY.. -.....-25
BLUETOOTH AUDIO OPERATION .......... ..... 26
ABOUT BLUETOOTH AUDIO ...............26
ABOUT THE DISPLAY ............. .-......-....26
REGISTERING THE PORTABLE DEVICE...... ........' 26
CONNECTING THE PORTABLE DEVICE ............." 27
DELETING A REGISTERED PORTABLE
DEV|CE...... .-.-'.28
CHANGING BLUETOOTH INFORMATION..........,... 29
DISPLAYING DEVICE INFORMATION OF
THE MAIN DEV|CE...... .-.-..-29
rNlTlALlSlNG SETTINGS ................ .-.-..29
LISTENING TO MUSIC. ......29
STOPPING THE MUSIC .....29
PAUSING THE MUSIC .......29
-2-
19
24
l

BOOK......... ......42
AUx OPERAT|ON................ .......... 31 cANcELLTNG THE RESTRIcIoNS oN pHoNE
ADVANCE TO THE NEXT TRACK OR RETURN
TO THE BEGINNING OF THE TRACK BEING
PLAYED ..........,29
FAST FORWARD AND REWIND THROUGH
A F|LE .............. 30
HOW TO USE THE AUX ........... ............ 31
HANDS.FREE OPERATION .......... 32
HANDS-FREE SYSTEM .....32
ABOUT THE DtSplAy............. ............. 33
REGISTERING A BLUETOOTH TELEPHONE
sET............ ...... 33
CONNECTING A MOBILE TELEPHONE ........... ...... 34
CHANGING THE PASS KEY............ .....34
DELETING A REGISTERED TELEPHONE SET...... 35
MAKTNG A PHONE CA11.......... ............ 35
MAKING A PHONE CALL FROM A REGISTERED
NUMBER.... ......35
MAKING CALLS FROM OUTGOING CALL
HtsToRY .........36
MAKING CALLS FROM INCOMING CALL
HrsToRY .........36
ANSWERTNG A pHONE CA11................................. 37
REFUSING AN INCOMING CALL ...,..... 38
REGISTERING A PHONE NUMBER TO SPEED
D1A1........... ...... 38
DELETING A SPEED DIAL ENTRY......................... 38
REGISTERING INFORMATION IN THE PHONE
8OOK......... ......38
CHANGING THE DATA OF THE PHONE BOOK..... 41
DELETING THE DATA IN THE PHONE BOOK .......42
RESTRICTING THE FUNCTIONS OF THE PHONE
BOOK FUNCTTONS ............43
REGISTERING/CHANGING THE PIN CODE .......... 44
DISPLAYING THE DEVICE INFORMATION OF
THE MA|N DEV|CE...... .......45
INITIALISING THE SETTINGS ..............45
SETT|NG THE VO1UME................ ....... 46
cD GHANGER(OPT|ONAL) OPERAT|ON ..... 47
Dtsc PLAY ......47
STOPPING PLAYBACK ......47
PLAYTNG CD ............. .........47
ADVANCE TO THE NEXT TRACK OR RETURN
TO THE BEGINNING OF THE TRACK BEING
PLAYED ...........47
FAST FORWARD AND REWIND THROUGH A
TRACK .............47
PLAYTNG THE BEG|NNtNG OF TRACK (SCAN)..... 4S
REPEATTNG THE SAME TRACK (REPEAT)........... 48
PLAYING TRACKS IN RANDOM ORDER
(RANDOM). ......48
SHOWI NG THE TEXT INFORMATION .................... 48
-3-

STEERING WHEEL SWITCHES
opERATtON.......... ......... 49
HOW TO FEED POWER ....................... 49
HOW TO ADJUST THE VOLUME ................ ............ 49
HOW TO SELECT TRACKS AND RADIO
STATIONS ..........:........ .......49
MESSAGES........... ......... 50
SPECTFTCATION ............ 51
-4-

The AUDIO system works only when the ignition key (switch) is
at "ON" or "ACC" position. However, do not leave the ignition
switch at "ON" position when the engine is not running. lf you
desire to listen to the AUDIO system when the engine is not
running, place the ignition key (switch) to "AGC" position.
RADIO
Adjust the length of your antenna for best reception. Usually, a short
antenna length is best in large cities, and a fully extended antenna is best
for distant reception.
To prevent damage to the antenna, make sure 11 ls retracted before
running your vehicle through an automatic car wash.
a FM reception tips
When listening to the radio in a vehicle, some characteristics of FM
may appear to be problems when they are not. This is because the
reception constantly changes if the vehicle is moving. Buildings,
terrain, signal distance and noise from other vehicles are all
working against good reception. The following characteristics are
completely normal for a given reception area, and they do not
indicate any problem with the radio itself.
ffiw
A CAUTION
The driver should avoid operating the AUDIO system while driving.
Do not turn up the volume too much. Othdrwise, warnings and sounds from
outside the vehicle cannot be heard, and could result in an accident.
Avoid using the AUDIO system when the vehicle compartment is extremely hot,
especially at summer times. Otherwise, the AUDIO system may be damaged.
Always use the system after cooling the vehicle compartment.
Do not disassemble or modify the AUDIO system as the interior structure of the
AUDIO unit is designed precisely. lf you need any technical assistance, please
contact your nearest TOYOTA dealer.
-5-

a Fading and Drifting: FM range is limited to
except for some high power stations. about 25 miles (40km), CD PLAYER
lf a vehicle is moving away from the desired station' s transmitter, the
signal will tend to fade and/or drift. This is a common condition with FM
and is accompanied by distortion.
Fading and drifting can be minimized to a certain degree by fine tuning
or tuning your radio to a stronger signal.
a Static and Fluttering: When the line-of-sight link between a transmitter
and the vehicle is blocked by large buildings or the like, the radio sound
may be accompanied with static or fluttering due to the characteristics
of FM. Similarly, a fluttering noise is sometimes heard when driving
along a tree-lined road.
This static and fluttering can be reduced by adjusting the tone control
for turning off treble response until the disturbance has passed.
o Multipath: Due to the reflecting characteristics of FM, direct and
reflected signals may reach the antenna simultaneously (multipath),
and cancel each other out.
As the vehicle moves through these electronic dead spots, a
momentary flutter or loss of reception may occur.
a Station Swapping: When two FM stations are located closely, and the
original signal is interrupted by an electronic dead spot such as static or
multipath area, sometimes the stronger second signal will be selected
until the original one returns.
This swapping can also occur as you drive away from the selected
station and approach another station of a stronger signal.
For high performance from your CD player and CD's, observe the
following precautions:
. Only the discs with the compact disc kade-label mark -.119oumr
illustrated on the label side should be used. EJ[$G
. This deck can play CD-R (CD-Recordable) and CD- orcnalAuoro
RW (CD-Rewritable) discs intended for music. Be sure
ncomffi
EJ[5G
OIGITAL AUDIO
r--TE T----'l
to use discs that have received finalization processing. .l'lgoltlEl -Jlgo;uPrEI
Some discs may not be playabte, dependins on tne lQlll$[U tll|l$tg
equipment used for editing. oGrrALAuDro DrcrrALAUoro
' The main unit can play 8 cm (diameter) cDs. ln order E@EE f Rew'ibble-l
to prevent the occurrence of malfunctions, insert CDs
only when attachments such as adapters are not being
used.
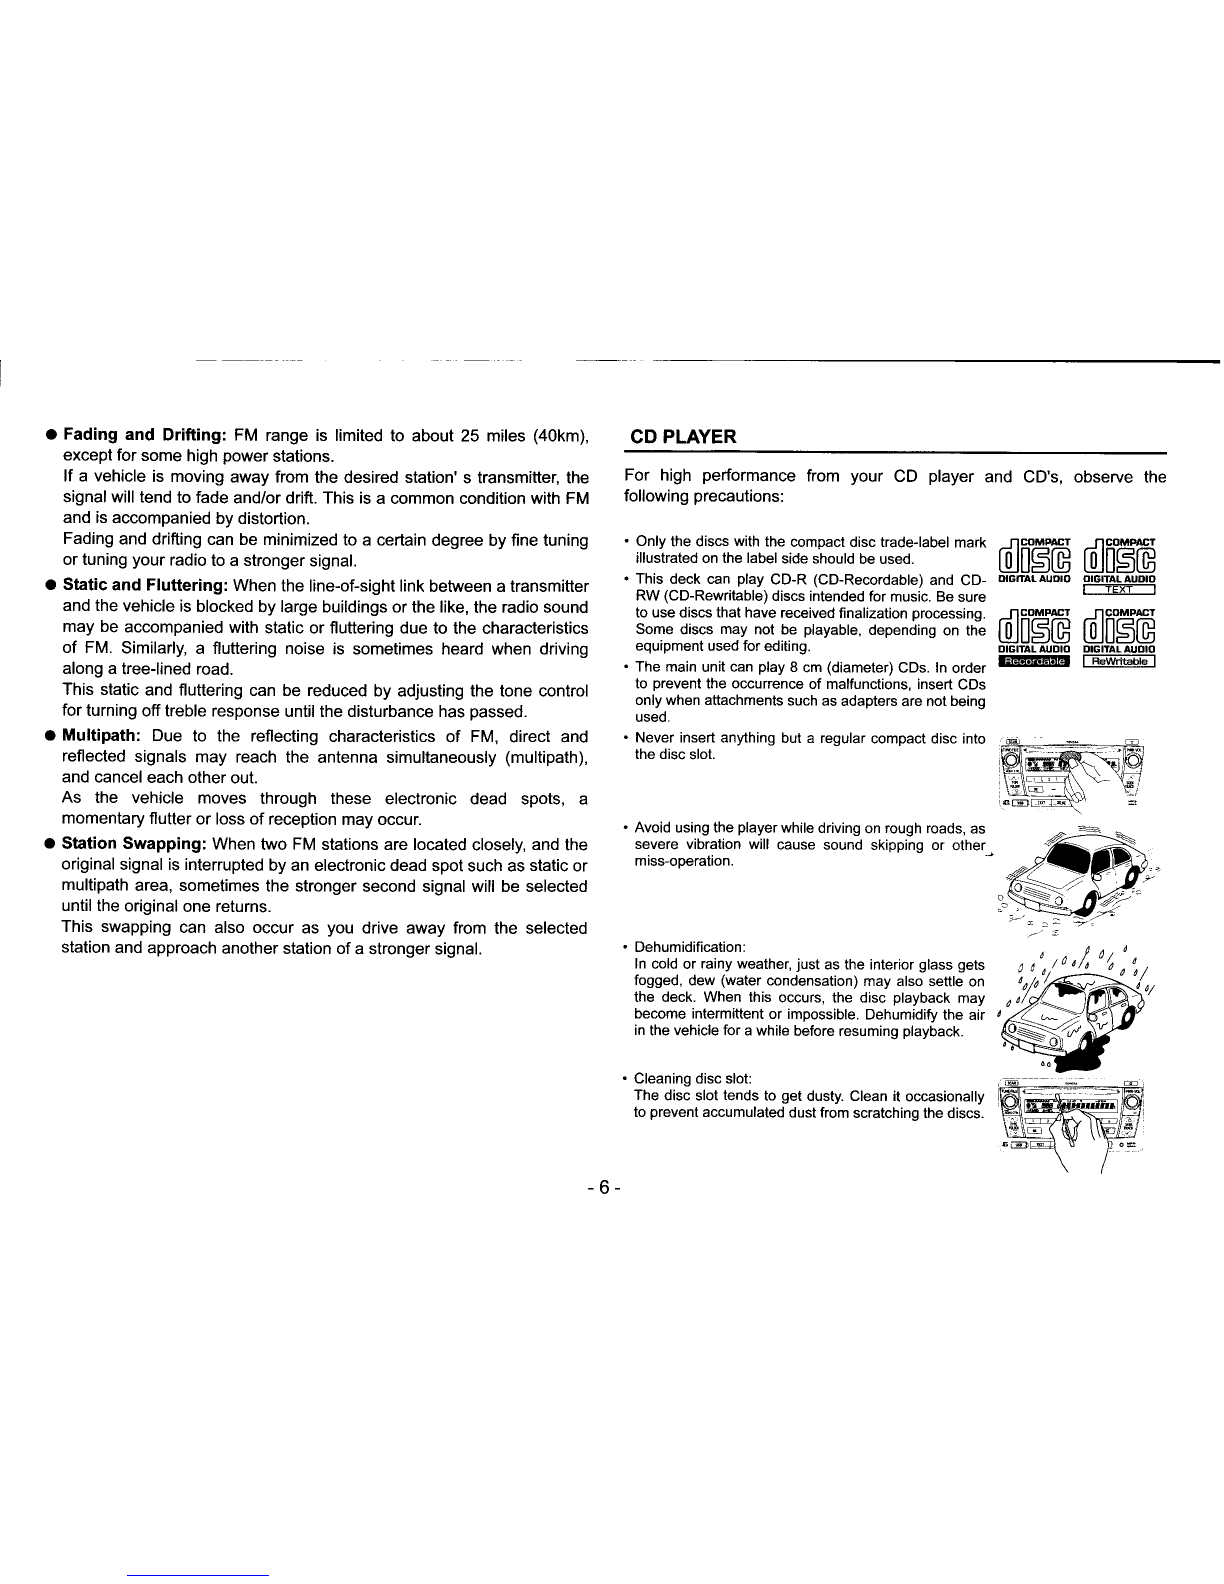
. Never insert anything but a regular compact disc into
the disc slot.
. Avoid using the playerwhile driving on rough roads, as
severe vibration will cause sound skipping or other
miss-operation.
. Dehumidification:
ln cold or rainy weather, just as the interior glass gets
fogged, dew (water condensation) may also settle on
the deck. When this occurs, the disc playback may
become intermittent or impossible. Dehumidify the air
in the vehicle for a while before resuming playback.
. Cleaning disc slot:
The disc slot tends to get dusty. Clean it occasionally
to prevent accumulated dust from scratching the discs.
-6-

COMPACT DISCS . You may notice that same brand new discs are rough
around the center hole and outside edge. Remove the
rough edges with the side of a ball-point pen or the
like. Rough edges may prevent proper loading in the
deck. Flakes from the rough edges may also stick to
the recorded surface and interfere with playback.
Do not use accessories (stabilizers, protective seals,
laser lens cleaners, etc.) sold for "improving sound
performance" or "protecting CDs." The changes in CD
thickness or outside dimensionp made by these
accessories may cause problems in the player.
Please be sure NOT to attach any ring-shape
protector(or other accessory) to your CD discs. Those
protectors are commercially available and said to
protect CD disc and to improve sound quality(and
antivibration effect), but they can do more harm than
good in regular uses. The most common problems are
lnseruEject related problems and "No playback"
problems due to the protectorring that came ofi in the
CD mechanism.
. Do not leave an ejected disc in the disc slot for very
long; the disc may warp. Discs should be stored in
their cases and kept away from high temperature and
humidity.
. Avoid using badly scratched or warped discs.
Scratched discs may cause sound skipping or sticking,
and warped discs may become stuck in the player.
. When the disc becomes dirty, wipe it gently with soft,
lint free cloth, from center to the edge. To remove
fingerprints or other oily substances from the disc's
surface, use a commercial CD cleaning fluid or spray.
(Never use record cleaning sprays, solvents, or
abrasive cleaners on a compact disc.)
. Never put tape, a label, or scratches on a disc. They
will prevent the disc from being played.
. Avoid touching the recorded surface when handling a
disc; handle discs by their edges.
rffi._,ffi-'
.A\
su
M
W
-7 -

. When removing the ejected disc, pull it straight out
along the slot. Pressing downwards in the process
may scratch the recorded surface of the disc.
. Specially shaped CD's like heart-shaped or octagonal
CD's, etc. can not be played. Do not attempt to play
them, even with an adapter, since they may damage
the player.
NOTE
To prevent the battery from being discharged, do not leave the AUDIO system
on longer than necessary when the engine is not running. lt may cause the
starting of engine impossible.
p
\z s
€/
€)c)
\7
-8-

The PIN (PERSONAL IDENTIFICATION NUMBER) SECURITY iS
provided to protect your AUDIO from theft. You can chose your own three
digit PIN Number and program it into your audio system by yourself.
" A -- " A) First Digit ............ NUMBER BUTTON 1 (0-9)
'- B -' B) Second Digit ...... NUMBER BUTTON 2 (0-9)
'- - C ' C) Third Digit .......... NUMBER BUTToN 3 (0-9)
(5) Within 10 seconds after the input of your PlN, push the SCAN
BUTTON @ for more than 1 second.
lf the input is made correctly, "SEC" will appear on the DISPLAY
WINDOW @tor2 seconds.
Then the PIN is saved in the memory, and the system will resume the
normal power OFF condition. The AUDIO system can be operated
normally.
lf "En" is displayed, return to step (3), and input the PIN again.
HOW TO CANCEL THE PIN
(1) Place the ignition switch to "ACC" position, and make sure that the
power source of the AUDIO system is turned OFF.
(2) While holding NUMBER BUTTON 1 @, and NUMBER BUTTON 6 @
at the same time, push the POWER SWITCH O until "SEC" appear in
the DISPLAY WINDOW @, then release buttons.
(3) While holding the SEEK/TRACK n BUTTON @, push NUMBER
BUTTON 1 @ and "- - -" will appear in the DISPLAY WINDOW @,
then release buttons.
(4) lnput your chosen three digit PIN
BUTTONS 1-3 @.
(5) Within 10 seconds after the input of
BUTTON @ for more than 1 second.
lf the input is made correctly, will appear on the DISPLAY
WINDOW @ for 2 seconds, and the PIN is canceled.
lf "En" is displayed, return to step (3) and input the PIN again.
The figure displayed after the "Err" message is the number of times of
failure made so far. (Example: "Err4")
IDNUMBER BUTTONS 1-3,6
HOW TO PROGRAM YOUR PIN
6) SEEK/IRACK BUTTON
(1) Place the ignition switch to "ACC" position, and make sure that the
power source of the AUDIO system is turned OFF.
(2) While holding NUMBER BUTTON 1 @, and NUMBER BUTTON 6 @
at the same time, push the POWER SWITCH O until "SEC" appear in
the DISPLAY WINDOW @, then release buttons.
(3) While holding the SEEK/TRACK n BUTTON @, push NUMBER
BUTTON 1 @ and "- - -" will appear in the DISPLAY WINDOW @'
then release buttons.
(4) lnput your chosen three digit PIN number with the NUMBER
BUTTONS 1-3 @.
Each time one of these NUMBER BUTTONS is pushed, the number
display will increment from 0-9.
number with the NUMBER
your PlN, push the SCAN
Hl' li TEXT j D$ilr
-9-

HOW TO RESUME NORMAL AUDIO OPERATION
lf the power supply to this system is cut off while the PIN security system
is operating, the security system will activate when the power supply is
restored to the system. When the ignition switch is turned to "ACC" or
"ON" position, "SEC" will appear in the DISPLAY WINDOW @. Take the
following steps to resume normal AUDIO operation:
(1) Place ignition switch to "ACC" and "SEC" will appear in the DISPLAY
WINDOW@.
(2) While holding the SEEK/TRACKn BUTTON @, push the NUMBER
BUTTON 1@ and "- - -" will appear in the DISPLAY WINDOW @.
(3) lnput your chosen three digit PIN number with the NUMBER
BUTTONS 1-3 @.
(4) Within 10 seconds after the input of your PlN, push the SCAN
BUTTON @ for more than 1 second. lf the correct PIN is input, "SEC"
will appear on the DISPLAY WINDOW @ tor 2 seconds, and normal
operation of the AUDIO system will become possible.
IF WRONG PIN IS INPUT
"Err" and the number of failures made (1 - 9 times) will be displayed for 2
seconds, then the display will change to "SEC".
lf a wrong PIN is input for 10 times in succession, "HELP' will appear on
the DISPLAY WINDOW @, and the AUDIO system will be locked (can not
be operated.) ln that case, the system can not be recovered by the user.
Please contact your nearest TOYOTA dealer for technical assistance.
10-

OAUDIo CoNTRoL BUTToN
@NUMBER BUTTONS 14 @FM BUTTON @OFF HOOK BUTTON
HOW TO FEED POWER
The AUDIO system works only when the ignition key(switch) is at "ACC"
or "ON" position.
. Either of the following procedures will feed power to the system:
Push the POWER SWITCH O, then select your desired function from @ to @.
Push the desired function from buttons from @ to @ directly.
RADIO MODE @AM BUTTON @FM BUTTON
CD MODE . @DISC .AUX BUTTON
MP3MMA MODE ................ @DISC .AUX BUTTON
AUX MODE @DISC AUX BUTTON
iPod MODE....... @DISC .AUX BUTTON
USB MODE.,...... @DISC AUX BUTTON
Bluetooth Audio MODE......... @DISC .AUX BUTTON
CD CHANGER (optional)...... @DISC .AUX BUTTON
TELEPHONE MODE @OFF HOOK BUTTON @ON HOOK BUTTON
NOTE
Pushing the POWER SWITCH O while listening to @ - @ mode will turn the
power OFF. lf you push the POWER SWITCH O again, the AUDIO system will
resume the last mode just before it was turned off.
HOW TO ADJUST THE VOLUME & TONE
VOLUME ADJUSTMENT
To adjust the volume (Turn up /Turn down), turn the VOLUME ADJUST
KNOB O (clockwise i anti-clockwise.)
NOTE
The VOLUME ADJUST KNOB O will keep on turning until you stop. However,
the volume itself is limited, and even if you keep on turning the VOLUME
ADJUST KNOB O clockwise or anti-clockwise, the volume will be kept to a
certain degree.
SWITCHING AUDIO CONTROL MODES
Various audio control modes may be fine{uned by following this
procedures.
(1) To establish the audio control mode, press the AUDIO CONTROL
button @.Pressing the AUDIO CONTROL button @ switches the
audio control mode in the manner indicated below.
BAS - TRE r FAD - BAL - Fix-EQ - ASL + CONTRAST T BAS
(repeats)
BASS MODE
Adjusts bass level.
Turn the AUDIO CONTROL BUTTON @ to the left or right.
Turn to the right: Emphasizes low sounds.
Turn to the left: Softens low sounds.
11 ,f- 7__l
T!4q 1 I
Yl I
;;i
(toN HooK
BUTTON OSEEIVTRACK
BUTTON
5i--c.J
. To turn the AUDIO system OFF, push the POWER SWITCH O.
-11

TRE (TREBLE) MODE
Adjusts treble level-
Turn the AUDIO CONTROL BUTTON @ to the lefi or right.
Turn to the right: Emphasizes high sounds.
Turn to the left: Softens high sounds.
FAD (FADER) MODE
Adjusts fronVrear speaker balance.
Turn the AUDIO CONTROL BUTTON'@ to the lefr or right.
Turn to the right: Emphasizes front speakers.
Turn to the left: Emphasizes rear speakers.
BAL (BALANCE) MODE
Adjusts lefl/right speaker balance.
Turn the AUDIO CONTROL BUTTON @ to the left or right.
Turn to the right: Emphasizes right speakers.
Turn to the left: Emphasizes left speakers.
FIX-EQ MODE
The audio control modes can be fine-tuned according to different car
types.
Pressing the AUDIO CONTROL BUTTON @ switches the car modes
in the manner indicated below.
OFF * COMPACT * SEDAN * SUV
COMPACT: Compact Car
SEDAN: Sedan
SUV: Sports Utility Vehicle
OFF: Selection cancelled
ASL (Automatic Sound Levelizer) MODE
The sound quality and volume can be fine-tuned to respond to the car
speed.
Pressing the AUDIO CONTROL BUTTON @ switches the adjustment
effects in the manner indicated below.
oFF*LOW*MtD*H|GH
LOW: Minimally effective
MID: Moderately effective
HIGH: Highly effective
OFF: No adjustment
CONIRASTCONTROL
Push the AUDIO CONTROL BUTTON @ until "CONTRAST dcHl
then tum the button as follows.
Clockwise: lncrease Contrast level
Anti-clockwise: Decrease Contrast level
HOWTO TURN TIME DISPLAY ON/OFF
(1) To turn the clocf mode ON, push the SEEI(TRACK n BUTIORI '9,
while pushing down the NUMBER BUTTON 4 €).
To turn it OFF, repeat the operation above.
(Only when power source of the AUDIO system is tumed OFF
(1) While holding the AM BUTTON O, adjust the time by pusr"rr,q filt
NUMBER BUTTONS 1-2 O.
Houradjustment .....-.... NUMBER BUTTON 1
Minute adjustment ....... NUMBER BUTTON 2
(2) To set the time to 00 min. 00 sec. (JUST) push fite Nl-ilEEm
BUTTON 3 @ while pushing the AM BUTTON @. ln thb e ill:
time is rounded up to the current hour or the next hour adnry tu
the minute.
Minute 0-29 Current hour (ex. 5:29 - 5:00)
Minute 30-59 Next hour (ex. 5:30 - 6:00)
(Only when power source of the AUDIO system is tumed OFF-!
HOW TO VIEW THE AUDIO MODE
(1) Push and hold down the AM BUTTON @ until it beeps.
Each time the button is pushed, the display will change frun CL@l[
mode to AUDIO mode. (Only when the clock mode is turned Oif
I
]'ime is not reset when clock mode is turned ofi.
HOW TO SET THE TIME
-12-

HOW TO TUNE
(1) Manual Tuning
Turn the TUNE KNOB @ clockwise (to step up the band) or anti-
clockwise (to step down the band) to your desired station.
(2) Automatic Tuning
Push the SEEI(TRACK BUTTONS @. The radio will start searching
for stations, and stops if it finds a station.
. To cancel, push the SEEI(TRACK BUTTONS @ again.
HOW TO STORE BROADCASTTNG STATTONS (PRESET)
Your favorite broadcasting stations can be tuned by one touch operation if
they are stored in the PRESET BUTTONS O.
Maximum of 18 stations can be memorized:
6 in AM, and 12 in FM (6 each for FM 1 and FM 2.)
MANUAL PRESET:
(1) Select the desired AM/FM broadcast by pushing the AM BUTTON O
or FM BUTTON @.
(2) Tune in the desired broadcasting station by turning the TUNE KNOB
@ clockwise or anti-clockwise, or by pushing the SEEI(TRACK
BUTTONS @.
(3) Push and hold down the PRESET BUTTONS @ you want to store in,
until it beeps.
When the broadcasting station is stored, the PRESET BUTTON number
and station frequency will appear on the DISPLAY WINDOW @.
13-
C) POWER SWITCH
- I I I :-t-: f-- l' ,A- i
f6T.1 ncK,
',t
i r-*- _- ;M - AM-* a ffi,
i
i
G) FM BUTTON I rsEEKrrMcK BUTTONS
€)PRESET BUTTONS OAM BUTTON
HOW TO TURN ON THE RADIO
(1) Push the AM BUTTON O to listen to the AM broadcast.
Push the FM BUTTON @ to listen to the FM broadcast.
The selected mode is shown in the DISPLAY WINDOW @
(2) To tune, follow one of the procedures below:
Turn the TUNE KNOB @
Push the SEEI(TRACK BUTTONS @
Push the SCAN BUTTON @
Push the PRESET BUTTONS @
TO TURN OFF THE RADIO
Push the POWER SWITCH O, the radio will be turned OFF.
Pushing the switch again will turn on the radio.
r^
,i't'' NOTE
. When the (n ) button of the SEEK/TRACK BUTTONS @ is pushed, the
radio is tuned to the higher frequency side (step up), and to the lower
frequency side (step down) when the (V) button is pushed.
. ln either cases, if the radio can not find stations, it continues searching.
. The radio will stop searching at a broadcasting station upon reception.

HOW TO SCAN BROADCASTING STATIONS AVAILABLE
FOR RECEPTION
You can either scan all the frequencies on the band or scan only the
preset stations for that band.
TO SCAN ALL THE FREQUENCIES: \
(1) Push the SCAN BUTTON @ quickly (for less than 0.8 seconds.)
(2) Then 'SCAN" will appear in the DISPLAY WINDOW @, and the radio
will search available broadcasting stations from the low-frequency
range to high-frequency range. lt will stop at every broadcasting
station available for approximately 5 seconds, and continue scanning.
. To cancel the scanning, push the SCAN BUTTON @ again.
(SEEK function starts after SCAN is completed.)
TO SCAN THE PRESET FREQUENCIES:
(1) Push and hold down the SCAN BUTTON @ (for more than 0.8
seconds.)
(2) The radio beeps and scans only through the broadcasting stations
stored under the PRESET BUTTONS @. At this time, the PRESET
BUTTON number and station frequency will appear on the DISPLAY
WINDOW@.
. To cancel the scanning, push the SCAN BUTTON @ again.
NOTE
The PRESET station memory is canceled when the power source is interrupted
by battery disconnection or a blown fuse.
14-

(1) When a disc is inserted into the DISC SLOT @, a message',CD,',
"MP3" or "WMA" is displayed on the screen and the unit starts disc
playing.
lf a disc has already been inserted, press the DISC .AUX BUTTON
@.
STOPPING PLAYBACK
(1) Push POWER SWITCH O to turn off the ptayer.
. Push POWER SWITCH O again to resume playback.
(2) Push AM BUTTON @ or FM BUTTON @ to change Mode.
. Push DISC .AUX BUTTON @ to ptay Mode D|SC again.
EJECTING THE DISC
(1) To eject the disc, press the EJECT BUTTON @.
INFORMATION
lf a disc could not be ejected, please contact nearest dealer for service.
ADVANCE TO THE NEXT TRACK OR RETURN TO
BEGINNING OF THE TRACK BEING PLAYED THE
(1) Push SEEKiTRACK n BUTTON oT SEEI(TRACK V BUTToN @ to
select the desired track.
. Push SEEI(TRACK A BUTTON @ to setect the next track.
. Push SEEK/TRACK V BUTTON @ to return to the beginning of the track
being played. Push SEEK/TRACK V BUTTON @ again to go to the previous
track.
FAST FORWARD AND REWIND THROUGH A TRACK
(1) Push and hold the SEEKTRACK A BUTTON or SEEK/TRACK V
BUTTON @ to fast forward or rewind.
. To fast forward, push and hotd the SEEI(TRACK n BUTTON @.
. To rewind, push and hold the SEEI(TRACK V BUTTON @.
Fast forward or rewind will stop if button is released.
PLAYTNG THE BEGINN|NG OF TRACKS (SCAN)
(1) Push SCAN BUTTON @, and the player will move up to the next track
and play it for 10 seconds, then move up to the next track and play it
for 1 0 seconds, and so on until the button is tapped again or all tracks
have been played.
(2) To playback the desired track just press SCAN BUTTON @ again.
15-

REPEATING THE SAME TRACK (REPEAT) ABOUT MP3/WMA
(1) Push RPT BUTTON O to repeat the same track being played.
. Push RPT BUTTON @ again to cancel.
PLAY|NG TRACKS tN RANDOM ORDER (RANDOM)
(1) Push RAND BUTTON @ to randomly play any track from the disc.
. Push RAND BUTTON @ again to cancel.
INFORMATION
Occasionally the same track happens to be played (selected) two or more times
in a row; this is normal operation and is no sign of a problem.
SHOWING THE TEXT INFORMATION
Push TEXT BUTTON @ to display the text information while playing CD
recorded with text information.
TO SHOW THE NEXT PAGE
Push and hold TEXT BUTTON @ while the display shows a text
information that comprises 12 or more characters to view the next page.
While the next page is displayed, keep pressing the TEXT BUTTON @ to
switch to the previous page.
INFORMATION
The display can show up to 24 characters, 12 characters on each page and up
to 2 pages.
INFORMATION
The making of MP3MMA files by recording from sources such as broadcasts,
records, recordings, videos and live performances without permission from the
copyright holder for uses other than personal enjoyment is prohibited.
WHAT IS MP3MMA?
MP3 (MPEG Audio Layer lll) is a standard format for audio compression
technology. By using MP3, a file can be compressed to one-tenth the size
of the orioinal.
wMA (Windows MediarM Audio) is a format for audio compression
technology. WMA files can be compressed to a size smaller than MP3
files.
This deck has limitations on MP3MMA file standards and recorded media
and formats that can be used.
PLAYABLE MP3 FILE STANDARDS
. Supported slandards: MPEG-1 Audio Layer lll, MPEG-2 Audio Layer lll
. Supported sampling frequencies: MPEG-1: 32, 44.1,48 (kHz)
MPEG-2: 16, 20.05, 24 (k{z\
. Supported bit rate: MPEG-1 : 64, 80, 96, 112, 128, 160, 192, 224, 256,320 (kbps)
MPEG-2: 64, 80, 96, 112.128,144, 160 (kbps)
* Supports VBR.
* Does not support free format.
. Supported channel modes: stereo, joint stereo, dual channel, monaural
PLAYABLE WMA FILE STANDARDS
. Supported standards: WMA Ver. 7
WMA Ver. 8
WMA Ver. 9
Supported sampling frequencies: 32, 44.1, 48 (kHz)
Supported bit rates: Ver. 7, I : CBR 48, 64, 80, 96, 128, 160, 192 (kbps)
Ver. 9 : CBR 48, 64, 80, 96, 128, 160, 192,256,320 (kbps)
. Only compatible with 2-channel playback
16

ID3 TAGMMA TAG
MP3A/VMA files have an "|D3/VVMA Tag" that allows the input of
information so that data such as song title and artist can be saved.
This deck supports lD3 Ver. 1.0, 1.1 ,2.2,2.3 and WMA tags.
MEDIA
Media such as CD-R and CD-RW discs are capable of playing MP3MMA
files. Compared to the CD-ROM media commonly used for music discs,
CD-R and CD-RW discs are easily damaged in high- temperature/high
humidity environments and part of the CD-R and CD-RW may become
incapable of playback. Fingerprints or scratches on the disc may prevent
playback or cause skipping during playback. Sections of a CD-R or CD-
RW may deteriorate if it is left inside a vehicle for long periods of time. lt is
also recommended that CD-R and CD-RW discs be kept in a light-
resistant case because the discs are vulnerable to ultra-violet light.
FORMAT OF DISCS
The format of discs to be used must be 1509660 Level 1 or Level 2.
Control items for this standard are as follows:
. Maximum directory layers: 8 layers
. Maximum characters for folder names/file names:
32 (including "_" and 3 letter file extension)
. Maximum number of folders: 192 (including the root folder)
. Maximum number of files per disc: 255
[Configuration example for CD supporting MP3/WMA]
FILE NAMES
Only files with the MP3A/VMA file extension ".mp3", ".wma" can be
recognised as MP3MMA and played. Be sure to save MP3 files with the
".mp3" file extension. Be sure to use the ".wma" file extension when
saving WMA files. The "MP" letters of the file extension will be recognised
whether entered as uppercase letters or lowercase letters.
MULTI-SESSIONS
Multi-sessions are supported, and playing of CD-R and CD-RW discs with
annotated MP3MMA files is possible. However, when "Track at once" has
been written, close the session or process the warning message.
Standardise the format of each session without changing the format.
PLAYING MP3MMA
When a disc with recorded MP3MMA files is inserted, the deck first
checks all the files on the disc. No sound is emitted while the deck is
checking the files on the disc. lt is recommended that the disc should be
recorded without files other than MP3MMA files and without unnecessary
folders in order to speed up the checking of disc files by the deck.
MP3MMA PLAYING TIME DISPLAY
It is possible that playing time will not be correct, depending on the writing
condition of the MP3MMA file.
* lt is possible that playing time will not be correct when VBR Fast Up/
Down is operated.
@1.mp3
@2.mp3
@3 mp3
@k
@5.mp3 ..1
159
'3
:,1
HFl5olFober l:
]_fidFobsl:
f mr mpr
f-002.np3
!F1e2lFober 1!
Maximum number of files per disc: 255
Files aside from MP3MMA files (Example: 004.txt)
also count as single files.
INFORMATION
lf the ".mp3", ".wma" file extension is attached to a file other than an MP3MMA
file, that file will be mistakenly recognised by the deck as an MP3MMA file and
played, resulting in loud noise output that can damage the speakers. Be sure to
avoid attaching the ".mp3", ".wma" file extension to files that are not MP3MMA
files.
* A root directory is counted as one folder.
-17

DISPLAY ORDER OF MP3MMA FILEiFOLDER NAMES
Names of MP3MMA folders and files within the same level are displayed
in the following order.
MP3MMA audio file
TO SELECT THE DESIRED MP3MMA FOLDER
PLAYING MP3MMA
1' MP3A/VMA folders displayed first, by ascending order of numbers, (1) push rypE/FoLDER v BUTT9N orTypE/F9LDER n BUTT6N @
letters. to select the desired Mp3MMA folder.
2. Files displayed next, by ascending order of numbers, letters. . push TypE/F6LDER n BUTTON @ to setect the next folder.
push TYPE/FOLDER V BUTTON @ to select the previous fotder.
It is assumed here that a CD has already been loaded into the unit. TO SELECT THE DESIRED MP3^/VMA FILE
Example of MP3M/MA file structure (1) Push SEEK/TRACK n BUTTON or V BUTTON @ to select the
desired MP3MMA file.
. Push SEEK/TRACK n BUTTON @ to setect the next fite.
. Push SEEI(TRACK V BUTTON @ to setect the previous fite.
(2) Turn TUNE-FILE @ to select the desired Mp3MMA fite.
. Turn TUNE-FILE @ clockwise : Go to the next fite
. Turn TUNE-FILE @ anti-clockwise : Go to the beginning of the playing file,
go to the previous lile
TO FAST-FORWARD OR REWIND A FILE
(1) Push and hold the SEEI(TRACK n BUTTON or SEEI(TRACK V
BUTTON @ to rewind or fast foruard.
. To fast foMard, push and hotd the SEEK/TRACK n BUTTON @.
. To rewind, push and hold the SEEI(TMCK V BUTTON @.
Fast forward or rewind will stop if button is released.
TO GO BACK TO FTRST pOStTtON (HOME JUMP)
You can go back to the first file, first folder of a selected Mp3MMA disc
from any position of the same selected MP3/VVMA disc by pressing TypE/
FOLDER V BUTTON @ until the beep is heard. This function is called
"Home Jump".
Example : Currently playing at Folder 4 file 5, when home jump is used, it
will start to play at Folder 1 file 1.
INFORMATION
The following operations are based on the example MP3/WMA file
structure given above.
When a CD is inserted, the CD player screen will be displayed for about
a few seconds while the unit checks whether the CD is an audio CD or
whether it contains MP3/WMA data.
Normally, tracks are played back in the order
n-E-ts-D-B-ts-n
lf there is more than one MP3/WMA file or folder at a particular level, the
files will be played back in alphanumeric character order.
-18-

SHOWING MP3/WMA TEXT INFORMATION
Push TEXT BUTTON @ to display text information in the following
sequence:
Minute & Second - FOLDER NAME - FILE NAME - ALBUM TTTLE
(only MP3)-- TRACK TITLE - ARTIST NAME (repeats)
TO SHOW THE NEXT PAGE
Push and hold TEXT BUTTON @ while the display shows the text and text
characters are more than 12 characters, the display will show the next page.
While the next page is displayed, keep pressing the TEXT BUTTON @ to
switch to the previous page.
INFORMATION
. The file information can be displayed only if a CD has been recorded
with Album name, Title, etc.
. The display can show up lo 24 characters, 12 characters on each page
and up to 2 pages.
PLAYING THE BEGINNING OF FILES (SCAN)
TO SCAN THE DESIRED MP3MMA FOLDER
(1) Push and hold SCAN BUTTON @ more than 1 second until beep
sound is heard, the display will show "aSCAN". The player will start
to playback for 10 seconds of the first file from each folder in the Mp3/
WMA disc.
(2) To continue to playback the desired MP3MMA folder, just push the
SCAN BUTTON @ again.
TO SCAN THE DESIRED MP3MMA FILE
(1) Push SCAN BUTTON @, the player will move up to the next file and
play it for 10 seconds, then move up to the next file and play it for 10
seconds, and so on until the button is tapped again or all files in the
selected folder have been played.
(2) To playback the desired file, just press SCAN BUTTON @ again
REPEATING THE SAME FILE OR FOLDER (REPEAT)
TO REPEAT THE SAME FOLDER
(1) Push RPT BUTTON @ more than 1 second until the beep sound is
heard, the display will show ",ERPT,". The player will start to
playback the first file from the same folder again after playing the last
file.
. Push RPT BUTTON O again to cancel.
TO REPEAT THE SAME FILE
(1) Push RPT BUTTON @ to repeat the same fite.
. Push RPT BUTTON @ again to cancel.
PLAYING F|LE tN RANDOM ORpER (RANpOM)
RANDOM ORDER PLAYING OF MP3A/VMA DISC FILES
(1) Push and hold RAND BUTTON @ for more than 1 second until beep
sound is heard, the display will show ", aRAND,". The player will
randomly play any file in any folder from MP3MMA discs.
. Push RAND BUTTON @ again to cancel.
RANDOM ORDER PLAYING FROM THE SAME FOLDER
(1) Push RAND BUTTON @ to randomly play any file from the same
folder.
. Push RAND BUTTON @ again to cancel.
INFOBMATION
. Occasionally the same file happens to be played (selected) two or more
times in a row; this is normal operation and is no sign of a problem.
. The Folder Random function, the Folder Scan function, and the Folder
Repeat function can only be used while there is an Mp3/WMA-formatted
disc inserted.
19
This manual suits for next models
2
Table of contents
Popular Radio manuals by other brands

Cambridge Audio
Cambridge Audio Azur 640T Technical specifications

Sirius Satellite Radio
Sirius Satellite Radio PowerConnect XMP3I quick guide

Bush
Bush 915/3219 instruction manual

Motorola
Motorola ASTRO Digital Spectra Plus Service manual

MAJORITY
MAJORITY OAKINGTON+ Instruction guide

Electra
Electra Bearcat 220FB owner's manual