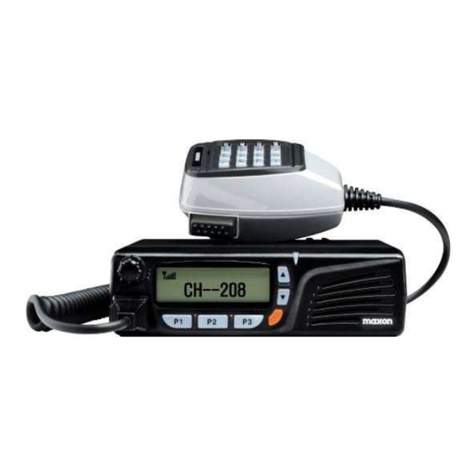
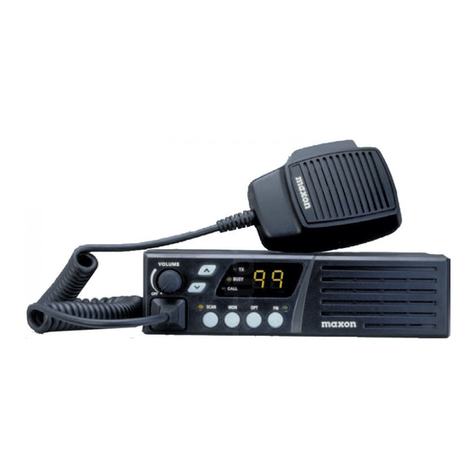
Maxon PM200 User manual

Operation Manual PM200/250
OM-PM200/250-1
PM200 / PM250
Operation Manual

Operation Manual PM200/250
Page 2 of 33
Contents
Introduction.......................................................... 6
Purpose of application notes .....................................................................6
Product description .....................................................................................6
Programming ...............................................................................................6
Programming Set-up ....................................................................................7
Reading .............................................................................................7
Writing ..............................................................................................7
Cloning .............................................................................................7
Cloning Set-up .............................................................................................7
Front Rear panel layout ...............................................................................8
Rear panel layout .........................................................................................8
Basic programmable feature Operation .............. 9
Function keys ...............................................................................................9
Up/Down keys (▼▲) ....................................................................................9
Programmable function keys .....................................................................9
Power key .....................................................................................................9
Light Key ......................................................................................................9
Monitor Key ..................................................................................................10
Lock Key .......................................................................................................10
Scan Key .......................................................................................................10
Public address Key ......................................................................................10
Open/Close Key ...........................................................................................10
Selcall Key ....................................................................................................10
SMS Key ........................................................................................................10
1200/2400 bps Key ....................................................................................... 11
DTMF Key .....................................................................................................11
Group Key ....................................................................................................11
Emergency Key.............................................................................................11
Asic Control .................................................................................................11
Basic Radio Operation ...................................... 12
C
C
Co
o
on
n
nt
t
te
e
en
n
nt
ts
s
Channels .......................................................................................................12
Channel Spacing ..........................................................................................12
ts

Operation Manual PM200/250
Page 3 of 33
Output Power ...............................................................................................12
Beep Mode ....................................................................................................12
Public Address .............................................................................................12
Microphone Hook ........................................................................................12
Squelch Options ..........................................................................................13
CTCSS ...............................................................................................13
DCS ...................................................................................................13
Squelch Defeat .................................................................................13
Muting ..........................................................................................................14
PTT timer .....................................................................................................14
TX Inhibit .....................................................................................................14
TX Delay ......................................................................................................14
Busy Channel Lockout ...............................................................................14
Marked Idle ..................................................................................................15
PTT Lockout ................................................................................................15
Display Logo ...............................................................................................15
Power up Alert ............................................................................................15
Power up O/C ..............................................................................................15
Internal and External Speaker ....................................................................15
Scanning ........................................................... 16
Normal Scan .................................................................................................16
Priority Scan .................................................................................................16
Priority Look Back Scan .............................................................................16
Transmitting during Scanning ....................................................................17
Scan Channel Delete ...................................................................................17
Group Scan Edit Mode ................................................................................17
Priority Scan Channel Edit ..........................................................................18
Selcall................................................................ 19
Tone Sets ......................................................................................................19
Encode ..........................................................................................................19
ANI .....................................................................................................19
Emergency .......................................................................................19
C
C
Co
o
on
n
nt
t
te
e
en
n
nt
ts
s
Encode Call 1–3 ...............................................................................20
Acknowledgement ...........................................................................20
Decode ..........................................................................................................20
ts

Operation Manual PM200/250
Page 4 of 33
Decode Call 1 – Call 3 ......................................................................20
Selcall Text .......................................................................................21
Decode Control 1- 4 .........................................................................21
Group Call ........................................................................................21
Decoder tone length ........................................................................21
Covert RX on time ............................................................................21
Received message selection ..........................................................21
Selcall Keypad Microphone............................... 22
Direct Selcall entry using Keypad microphone .........................................22
To edit K Key Mode .....................................................................................23
To edit S Key Mode ......................................................................................23
DTMF................................................................. 24
DTMF Call Selection ....................................................................................24
Receiving DTMF ...........................................................................................24
Transmitting an DTMF .................................................................................24
Direct DTMF entry with DTMF microphone ...............................................24
Clearing a Dialed Number ...........................................................................25
To Store a Number in Memory ....................................................................25
To Recall a Stored number from Memory ..................................................26
Clearing a Stored Number ..........................................................................26
SMS................................................................... 27
To select SMS message ..............................................................................27
Receiving an SMS ........................................................................................27
Received message selection ......................................................................27
Transmitting an SMS ...................................................................................28
Direct code entry with keypad microphone ..............................................28
Function Display................................................ 30
PC Programmer ................................................ 31
C
C
Co
o
on
n
nt
t
te
e
en
n
nt
ts
s
Computer ......................................................................................................31
Operating System ........................................................................................31
ts

Operation Manual PM200/250
Page 5 of 33
Warning Status Messages ................................ 32
Contact Details .................................................. 33
C
C
Co
o
on
n
nt
t
te
e
en
n
nt
ts
s
ts

Operation Manual PM200/250
Page 6 of 33
Introduction
Purpose of Application Notes
The purpose of this document is to outline the functional features of the PM200/250 mobile
radio. This document will be used to navigate and set-up all of the programmable features.
Product Description
The PM200/250 is a fully featured mobile radio that has been developed for the European
market. The PM200/250 is a DTMF, Selcall and SMS mobile radio with a 208-channel
capability. The radio is programmable for output power, channel spacing, and a range of
other features.
Programming
The programming kit required is the PR-PM200/250-01
Kit consists of PM200/250 programming software
Programming lead PK-PM200/250-01
To place the PM200/250 into program mode, connect PK-PM200/250-01 programming lead
to the PC and the PM200/250 via the15way High density D-type connector (please see rear
panel layout Fig. 4). Switch the PM200/250 on with the programming lead connected. If the
PC-program enable port is in active status, the CPU on the radio enters programming
Mode. The/250 should now display “ProGrAm”
Programming Set-up (Fig. 1)
PC PK-PM200/250-250- 01 PM200/250
I
I
In
n
nt
t
tr
r
rd
d
du
u
uc
c
ct
t
ti
i
io
o
on
n
n

Operation Manual PM200/250
Page 7 of 33
Reading
The PM200/250 assumes the PC is ready to receive data. When serial Commands are sent
though the interface boards, PM200/250 will transmit the data. During this sequence, the
Red LED will flash. In PC program Reading Mode, the LCD displays “Prog-r”.
Writing
The PM200/250 assumes the PC is ready to transmit data. When serial Commands are
sent though the interface boards the PC then starts the transmission of data. During this
sequence, the green LED will flash. In the PC program Writing Mode, the LCD displays
“Prog-w”.
Cloning
Cloning is a method of programming another radio with the same profile without using a
personal computer or laptop. The master radio is the radio with the desired frequencies the
slave radio is the radio to be programmed.
1.) Press and hold ▲button on power up. In this mode, radio will display “MASTER”. The
radio is now ready to transmit programming file.
2.) Press and hold the▼button on power up. In this mode, radio will display “SLAVE” with
green led blinking.
3.) Connect the cloning cable.
4.) Press the master radio ▼button.
5.) After cloning, the slave radio will display “ TURN OFF” message, and the master radio
displays ” MASTER” message on LCD. Turn off both radios.
Cloning set-up (Fig.2)
R
R
Re
e
ea
a
ad
d
d
W
W
Wr
r
ri
i
it
t
te
e
e
C
C
Cl
l
lo
o
on
n
ni
i
in
n
ng
g
Master PM200/250 Cloning lead Slave
g

Operation Manual PM200/250
Page 8 of 33
Front panel layout (Fig.3)
1.) RJ45 Microphone Socket
2.) On/Off Volume Control
3.) Alpha Numeric LCD
4.) (P1-P3) Programmable Keys
5.) Status LED
6.) Emergency Key (Orange)
7.) Up/Down Channel/Menu Keys
8.) Internal Speaker
Rear panel layout (Fig. 4)
F
F
Fr
r
ro
o
on
n
nt
t
t
a
a
an
n
nd
d
d
R
R
Re
e
ea
a
ar
r
r
P
P
Pa
a
an
n
ne
e
el
ls
s
9.) BNC Antenna Connector
10.) 15 way D-type (programming/Data)
11.) GPS antenna port (Optional)
12.) DC power lead
13.) Accessory Socket
ls

Operation Manual PM200/250
Page 9 of 33
Basic programmable feature Operation
Function Keys
There are six push-buttons on the face of the PM200/250; Up / Down (▼▲), P1, P2, P3
and Emergency, below are the default programming settings.
Up/Down Keys (▼▲)
These buttons allow the operator to scroll up/down through the available channels. A short
press-and-release of this button will increase/decrease the channel number. A press-and-
hold will scroll through the channel numbers.
Select pre-programmed Selcall mode via (P1-P3). Use ▼▲ to select the correct selcall
function.
Select pre-programmed DTMF mode via (P1-P3). Use ▼▲ to select the correct DTMF
number.
Select pre-programmed SMS mode via (P1-P3). Use ▼▲ to select the correct SMS
number.
Programmable Function Keys
The following functions can be assigned to [P1] [P2] [P3] programmable function keys.
These are located on the bottom left of the radio. Each button has a short and long press
giving a total of six button assignments.
B
B
Ba
a
as
s
si
i
ic
c
c
P
P
Pr
r
ro
o
og
g
gr
r
ra
a
am
m
mm
m
ma
a
ab
b
bl
l
le
e
e
F
F
Fe
e
ea
a
at
t
tu
u
ur
r
re
es
s
Power key
Press to toggle the transmit Output power between High and Low.
Each channel can be programmed via the PC programmer to be high or low power. The
power can also be change by the user to high-power output of 25 Watts, and a low-power
output of 2 Watt.
Light Key
Press to toggle the Auto mode, Light Off or Light On mode.
Auto Mode: In this mode the light will automatically come on for 5 seconds after a button
press
es

Operation Manual PM200/250
Page 10 of 33
Off Mode: Light will remain off permanently.
On Mode: Light will remain on permanently.
Monitor Key
By pressing the Monitor button, the user shall defeat the programmed squelch operation
and un-mute the speaker on the selected channel.
Lock Key
Select the pre-programmed Function Key (P1-P3). This function can disable all keys except
PTT, Emergency Key.
Scan Key
Press the pre-programmed Function Key (P1-P3) to start and cancel the scanning
operation. (Please refer to the Scanning section)
Public address Key
User selectable On/Off. When selected and the external speaker is attached, the radio will
output voice audio over the external speaker. Please note that the audio is not transmitted
in this mode.
Open/Close Key
B
B
Ba
a
as
s
si
i
ic
c
c
P
P
Pr
r
ro
o
og
g
gr
r
ra
a
am
m
mm
m
ma
a
ab
b
bl
l
le
e
e
F
F
Fe
e
ea
a
at
t
tu
u
ur
r
re
es
s
Press to toggle the radio status Open or Close mode. When pressed to open, Selcall will be
defeated.
Selcall Key
Select the pre-programmed Function Key (P1-P3) to enter the Selcall selection mode.
Set the correct Selcall feature using ▼▲, from the following options – ANI, RECEIVED and
CALL 1-3
Select the pre-programmed Selcall Key (P1-P3) to transmit the selcall code or to read
received messages.
SMS Key
Select the pre-programmed Function Key (P1-P3) to enter the SMS selection mode. Set
the correct SMS text message using ▼▲
es

Operation Manual PM200/250
Page 11 of 33
Press the pre-programmed SMS Key (P1-P3) to transmit the SMS text.
1200/2400 bps Key
Press the pre-programmed Function Key (P1-P3) to toggle between the SMS baud rate
1200 bps or 2400 bps, using the▼▲ keys.
DTMF Key
Select the pre-programmed Function Key (P1-P3) to enter the DTMF selection mode.
Set the correct DTMF using the ▼▲ Keys
Press the pre-programmed DTMF Key (P1-P3) to transmit the DTMF code.
Group Key
Select the pre-programmed Function Key (P1-P3) to enter the group selection mode.
Set the desired group using the ▼▲ keys.
Press the programmed key to select the group number.
Emergency Key
When the orange emergency key is pressed, a pre-programmed sequence or set of
sequences is transmitted. Up to three sequences can be attached to the emergency key.
(Please see Selcall section).
B
B
Ba
a
as
s
si
i
ic
c
c
P
P
Pr
r
ro
o
og
g
gr
r
ra
a
am
m
mm
m
ma
a
ab
b
bl
l
le
e
e
F
F
Fe
e
ea
a
at
t
tu
u
ur
r
re
es
s
Asic Control (Fig.5)
Many of the radio parameters can be controlled via the Asic control. Press Asic key to enter
Asic mode: Key assignment as below:
Key Display Parameter
P1 Mod-1 Balance Deviation
P2 Mod-2 CTCSS Balance
P3 Gain- Mic Gain/
Down ▼TX ------ Peak Deviation
Emergency rGain- CTCSS Deviation
(Refer to ASIC section in the service manual)
es

Operation Manual PM200/250
Page 12 of 33
Basic Radio Operation
Channels
The PM200/250 Series radio can store up to 208 channels within the same frequency band.
These channels can be selected by using the▼▲ keys. The channels can all be
programmed using the PM200/250 programmer.
Channel Spacing
The PM-200 is capable of programmable channel spacing. Each channel can be
programmed to 12.5 KHz or 25 KHz channel spacing using the PC programmer.
Output Power
Each channel can be programmed via the PC programmer to a high-power output of 25
Watts, and a low-power output of 2 Watts. The power can be switched by the user High /
Low by pressing pre-programmed power key (P1-P3).
Using the APC (Automatic Power Control) software, the exact RF power can be adjusted
for low and high power settings.
Beep On/Off Mode
All Beep tones can be globally enabled or disabled via the PC programmer.
Public Address
When selected and external speaker is attached, the radio will output voice audio over the
external speaker. The radio does not TX a carrier in this mode. P/A will be shown in display
when selected. When active allows operator to enable an external speaker and transmit
microphone audio only.
B
B
Ba
a
as
s
si
i
ic
c
c
R
R
Ra
a
ad
d
di
i
io
o
o
O
O
Op
p
pe
e
er
r
ra
a
at
t
ti
i
io
o
on
n
Microphone Hook
This is a PC programmable function (please see programming manual). Turned OFF, the
user is not required to ground microphone button on to the Mic hanger. All decode and
scan functions remain the same. Turned ON, the user is required to ground the microphone
hook. When microphone is removed from ground all tone decode functions are disabled,
scan functions are programmable as on or off with microphone removed from hook. Default
is off with scan disabled.
n

Operation Manual PM200/250
Page 13 of 33
Squelch Options
The radio supports 3 kinds of Squelch options. A different Squelch option can be applied to
each channel. Sub Audible Tone (SAT) codes are made up from frequencies which are
below 300Hz. These frequencies are lower than the voice audio band. The two most
common forms of SAT codes are CTCSS, Continuous Tone Coded Squelch System, and
DCS, Digitally Coded Squelch.
CTCSS / DCS information may be added to speech during transmission. A receiving radio
can then be programmed to behave according to which tones or codes are being sent by a
transmitting radio.
The PM200/250 radios are capable of generating all 38 standard CTCSS tones and can
also generate the 83 standard DCS codes and 83 inverted DCS codes.
CTCSS
38 kinds of TIA/EIA Standard CTCSS tones can be set up. All tones can be set up using
the PC Programmer.
TX Operation: If PTT key is pressed, the radio transmits a programmed CTCSS tone.
RX Operation: If CTCSS tone is detected, the radio status is changed from Busy to Correct
Call. If the CTCSS Tone is not detected, the radio would stay in Busy mode or change from
Correct Call to Busy mode.
DCS
The radio supports 83 kinds of TIA/EIA Normal/Inverted DCS codes.
TX Operation: If PTT key is pressed, the radio transmits a pre-programmed DCS Bit
pattern.
RX Operation: If DCS Data Stream is detected, the radio status will change from busy
mode to Correct Call. If DCS Data Stream is not detected, the radio will stay in busy mode
or be changed from Correct Call back to busy mode.
B
B
Ba
a
as
s
si
i
ic
c
c
R
R
Ra
a
ad
d
di
i
io
o
o
O
O
Op
p
pe
e
er
r
ra
a
at
t
ti
i
io
o
on
n
Squelch Defeat (Monitor) operation
Pressing the monitor key will open the squelch and switch on the loudspeaker. Everything
on the channel, including FM noise, will be heard.
It is possible to disable the monitor key via the programmer, to prevent a user openly
monitoring a channel in a closed user group system.
When using CTCSS or DCS controlled squelch, several user groups may use the same RF
channel without overhearing the other groups. It is common practice to allow users to listen
n

Operation Manual PM200/250
Page 14 of 33
to a channel before placing a call. This allows the user to check they are not going to
transmit over a conversation from another user group.
This allows more efficient use of the RF channels available.
Muting Options
The radio is programmable with different muting options: (please also see squelch options
and programming manual). These options are associated with various Selcall functions.
Power up: OPEN - the radio is powered up in Monitor Open mode, (Speaker On).
CLOSE - the radio is powered up in Monitor Closed mode. (Speaker Quiet).
Auto Mute: Enabled, the radio automatically returns to its quiet state after a period of
inactivity (see timer below). Disabled the radio remains in its open mode until it is manually
put into its quiet state (depending on programming).
Timer: This is the length of time of inactivity after which the radio returns to its quiet state.
PTT Timer
The PTT Timer can be set from 0 – 990 seconds with 10 second increments, which is the
allowed time for a sustained transmission.
TX Inhibit
TX inhibit does not allow a transmission for a set programmed time after the PTT timer has
expired, to allow a cool off period for the transmitter. The settings are from 0 – 75 seconds
in 5 sec. increments.
TX Delay
B
B
Ba
a
as
s
si
i
ic
c
c
R
R
Ra
a
ad
d
di
i
io
o
o
O
O
Op
p
pe
e
er
r
ra
a
at
t
ti
io
on
n
TX delay eliminates squelch tails associated with CTCSS tone transmissions, by removing
the CTCSS tone from the end of a transmission for an approximate 200ms before the
carrier is dropped.
Busy Channel Lockout
The radio has several inhibit functions which restrict transmission under the following
conditions:
Busy Channel Lockout – ON: upon PTT being pressed, if carrier is present, the radio shall
not transmit and an audible alert tone will be heard.
ion

Operation Manual PM200/250
Page 15 of 33
Busy Channel Lockout – OFF: upon PTT being pressed, the radio shall transmit regardless
of the presence of carrier.
Marked Idle
Marked Idle enabled: can only be enabled if Busy Channel Lockout is ON. If the Busy
Channel Lockout is on and carrier is detected, the radio shall be permitted to transmit if the
RX squelch option is valid.
Marked Idle disabled: eliminates Marked Idle and defaults back to ‘Busy Channel Lockout’.
PTT Lockout
The radio can control the PTT action in three ways according to radio busy status.
Off: Allows PTT to operate regardless, whether the radio is in an open state (monitor
open) or not, and does not change the state of the radio.
Auto Open: ‘Auto Open’ opens the monitor of the radio after pressing PTT.
Lock PTT:‘Lock PTT’ prevents the keying of PTT unless the radio is open
Display Logo
On start-up the display gives a welcome message, this can be programmable up to 9
characters long.
Power up Alert
Power up Alert can be globally disabled / enabled via the PC programmer.
Power up Open/closed
B
B
Ba
a
as
s
si
i
ic
c
c
R
R
Ra
a
ad
d
di
i
io
o
o
O
O
Op
p
pe
e
er
r
ra
a
at
t
ti
io
on
n
The radio can be programmed to be either open or closed on power up.
Closed: Radio is in muted state (Speaker Quiet).
Open: Radio is in unmuted state (Speaker Open).
Internal Speaker and External Audio Switch
The internal speaker and external accessory socket can be manually switched by the user.
This can be changed by the PC programmer. With the radio switched off hold in
programmable keys P1 and P3, Switch radio on. Display will read either External or
Internal.
ion

Operation Manual PM200/250
Page 16 of 33
Scanning
This feature will support three different scanning types. Dealer programming enables the
required scan type.
Normal Scan
Priority Scan
Priority Look-back
The user activates scanning by a short press on the Pre-programmed Scan button, once
the radio has enabled scan, it will traverse through the pre-programmed scan list. The time
spent on receiving a channel in the scan list is referred to as the Scan Speed Time
(programmable from 0.05sec to 2.0sec in 0.01sec increments). When an incoming call is
detected and decoded, scanning stops and the radio will un-mute. After the call has ended,
the radio enters Scan Delay / Wait Time Mode for a pre-programmed period of time (0 to 15
seconds in 1-second increments). If the radio receives a call from the same caller before
the Scan Delay expires, the radio will re-enter the Scan Delay Mode and that period of time
will reset. If the user is permitted to respond to the caller, the Scan Delay will be reset.
When the Scan delay expires, the radio resumes scanning.
Normal Scan
Any number of channels can be entered into the scan list. This will be equal to or less than
the number of programmed channels. The flashing green LED will stop when ‘CARRIER’ or
‘CARRIER AND CORRECT TONE’ is detected. During scan delay, the LED shall remain
clear. When Scan Delay expires and Scan Speed resumes, the LED shall also resume
flashing green.
Priority Scan
A priority channel can be allocated using the PM200/250 programmer. The priority channel
will be part of the list of channels that make up the scan list. The priority channel when
used with other scanned channels will operate as follows:
P1→S1→P1→S2→P1→S3→P1→S4→P1, etc.
Priority Look Back Scan
S
S
Sc
c
ca
a
an
n
nn
n
ni
in
ng
g
One channel can be programmed by the dealer to be the Priority channel, which will enable
‘Look-Back’. Pressing the Scan button shall activate Priority Look-Back. The Priority Look-
ing

Operation Manual PM200/250
Page 17 of 33
Back causes the radio to periodically ‘Look-Back’ to the priority channel for the presence of
a carrier regardless of the channel that the user may be on. The frequency that the radio
will ‘Look-Back’ to the priority channel can be programmed between 1 to 7 seconds in 1-
second increments. When carrier, or carrier and tone, are removed, the radio will revert
back to the previously selected channel.
Transmitting During Scanning
The radio shall be set to behave in a number of ways when the PTT is pressed during
Scan.
Priority Scan TX – The radio can be set to transmit on the channel on which activity has
been detected -OR- transmit on the priority channel if scanning is still active.
Priority Only TX – If scanning, or listening to an active channel, and the PTT button is
pressed, the radio will only transmit on the priority channel only. No other transmit
conditions will be permitted. If transmission is attempted, a warning tone will be sounded.
RX only, No TX – No transmissions allowed during scanning. If transmission is attempted a
warning tone will be sounded.
Normal Scan TX – Radio will only transmit on a stopped channel i.e. to return a call.
Attempting, to transmit during scanning will cause a warning alert.
Scan Channel Delete
Pressing the “▼” (when in scan mode and stopped on the channel) shall temporarily delete
the channel from the scan list. This shall remove that channel from the scan list until the
channel is changed or the radio’s power is reset. When power is restored or the scan list
channel position is selected again, the originally programmed scan list shall be activated.
Group Scan Edit Mode
You can edit your pre-programmed Group Scan List by adding or deleting scan list from the
Group Scan List. To activate scan list editing, press and hold the P1 button on the front of
the radio and turn volume on the radio. Upon entering the scan list edit function, the LCD
displays the “Scan Edit” message. To exit the scan list edit function, turn volume off the
radio.
1. Select the Scan Group
S
S
Sc
c
ca
a
an
n
nn
n
ni
in
ng
g
ing

Operation Manual PM200/250
Page 18 of 33
Each Scan Group would be displayed as “xx_nnn_xx” means group, and nnn means
Channel. To activate scan list editing for selected group, press the P1 button. You can
change the Scan Group Number by using the up or down button.
2. Adding or Deleting to Scan List
If each channel is in the ‘Scan Editable List’, Channel Number would display Scan Icon, to
add or delete each channel to Scan Editable List, use P2 button.
Priority Scan Channel Edit
Priority Channel can be setup by PC programmer. Priority Scan List is also editable by the
radio. It is called ‘Priority Channel Edit Mode’. Turn on the radio by pressing the P2 button,
the radio enters Priority Channel Edit Mode. In the Priority Edit Mode, the LCD displays the
“PscanEdit” message.
1. Select the Priority Group
Each Scan Group displays “xx_nnn_xx” which means the current Group and ‘nnn’ means
the channel. To activate P scan list editing for selected Priority group, press the P1 button.
You can change the Priority Group Number by using the up or down button.
2. Adding or Deleting to P Scan List
If each Channel is included in P Scan Editable List, the Channel Number would display
“Pscan” Icon. To add or delete channel from P Scan Editable List, use P2 button.
S
S
Sc
c
ca
a
an
n
nn
n
ni
in
ng
g
ing

Operation Manual PM200/250
Page 19 of 33
Selcall
The PM200/250 has a comprehensive Selective Calling system. With 7 standard tone-sets
plus a user defined tone set. Features include ANI, Emergency, Stun & Revive, Covert
Mode, Acknowledge, and Selcall Text.
Pre-program one of the Function Keys (P1-P3) as Selcall to activate.
Tone Sets
EEA, ZVEI1, ZVEI2, ZVEI3 DZEVI, PZVEI, CCIR, CCITT and User.
Encode
ANI
To send ANI (automatic number identification), Press pre-programmed Function Key (P1-
P3) and select Selcall, use ▲▼ to select ANI. To send press programmed selcall key
again.
Up to 3 sequences can be sent at one time. ANI can be attached to the Start or the End of
transmission.
Emergency
When the emergency button is pressed, an emergency Selcall is automatically transmitted
for the pre-programmed specified time period. This is where the sequence or set of
sequences to be transmitted as the Emergency Call can be entered. Up to 3 sequences
from 1-8 may be transmitted. After the emergency call, the transceiver performs
transmission and reception alternately with the following conditions. To cancel this function
press the PTT.
There are six actions/timings associated with the emergency call.
Check Open If enabled when the correct carrier and selcall is present monitor opens.
Check Busy If enabled and channel has carrier present PTT is denied.
Encode Alert When selcall has been sent an audible an alert will be heard.
S
S
Se
e
el
l
lc
c
ca
a
al
l
ll
l
l
E
E
En
n
nc
c
co
o
od
de
e
Repeats The amount of repeat TX RX cycles. 0 - Permentantly on.
Cycle Repeat Time The amount of time between cycles. 0-250 seconds.
TX Timer The TX on time. 0-250 seconds.
de

Operation Manual PM200/250
Page 20 of 33
Encode Call 1 – Call 3
There are three programmable call addresses; each call can have up to three sequences
attached. To initiate a call, press the Selcall key and select the correct call number by
scrolling using the ▲▼. To send the call, press the Selcall key. There are three actions
associated with the call addresses.
Check Open If enabled when correct carrier and selcall is present, monitor opens
Check Busy If enabled and channel has carrier present PTT is denied.
Encode Alert When selcall has been sent, audible alert will be heard.
Acknowledgement
Three acknowledgements can be assigned; each acknowledgement can use 1-3 of the 8
sequences available.
Decode
There are eight decode addresses, three Call addresses, four control addresses and one
group address. Up to 8 tones can be used in the decode address; X can be used as a
variable number. S can be used in the decode address as a status (please note a DTMF
Mic will have to be used to enter variable digits).
Decode Call 1 – Call 3
There are three call decode addresses that can be assigned. Up to 8 tones can be use in
the decode addresses 0-9 and A-E can be entered. There are three actions/timings
associated with call 1-3 decode addresses.
Action - Open, Close, Stun, Revive, Covert On, Covert Off
Stun – Prevents any transmission from the radio and will also mute the speaker.
Revive – Re-activates the radio.
Close – Remote muting of the speaker.
Open – Remote un-muting of the speaker.
S
S
Se
e
el
l
lc
c
ca
a
al
l
ll
l
l
D
D
De
e
ec
c
co
o
od
d
de
e
Covert On – Valid Selcall causes the radio to cycle between TX mode and RX mode. The
time periods spent in TX and RX modes are programmed into the addressee radio,
however, it will be the Base Station or Selcall Sender that remotely turns this feature ON or
OFF.
e
Other manuals for PM200
1
This manual suits for next models
1
Table of contents
Other Maxon Radio manuals

Maxon
Maxon MDP-6000 Series User manual

Maxon
Maxon SL100K User manual

Maxon
Maxon SM2102 User manual

Maxon
Maxon SL7000 User manual

Maxon
Maxon SP-120 Series User manual

Maxon
Maxon TSD-4000 Series User manual

Maxon
Maxon MBR-400 User manual

Maxon
Maxon SD170EX Series User manual

Maxon
Maxon EM-4800 User manual

Maxon
Maxon SP-220 Series Operator's manual

Maxon
Maxon SM-2402 User manual

Maxon
Maxon CM10 User manual

Maxon
Maxon SP210U2 User manual

Maxon
Maxon SP-510 User manual

Maxon
Maxon SM5102 User manual

Maxon
Maxon SL100 User manual

Maxon
Maxon HCB-40WX User manual

Maxon
Maxon SP-310 User manual

Maxon
Maxon SM-2000E Series User manual

Maxon
Maxon SP-6102 User manual