Now your thermostat will maintain the new set temperature until the next program.To
cancel the override setting, press and hold button for 5 seconds until “Temporary”
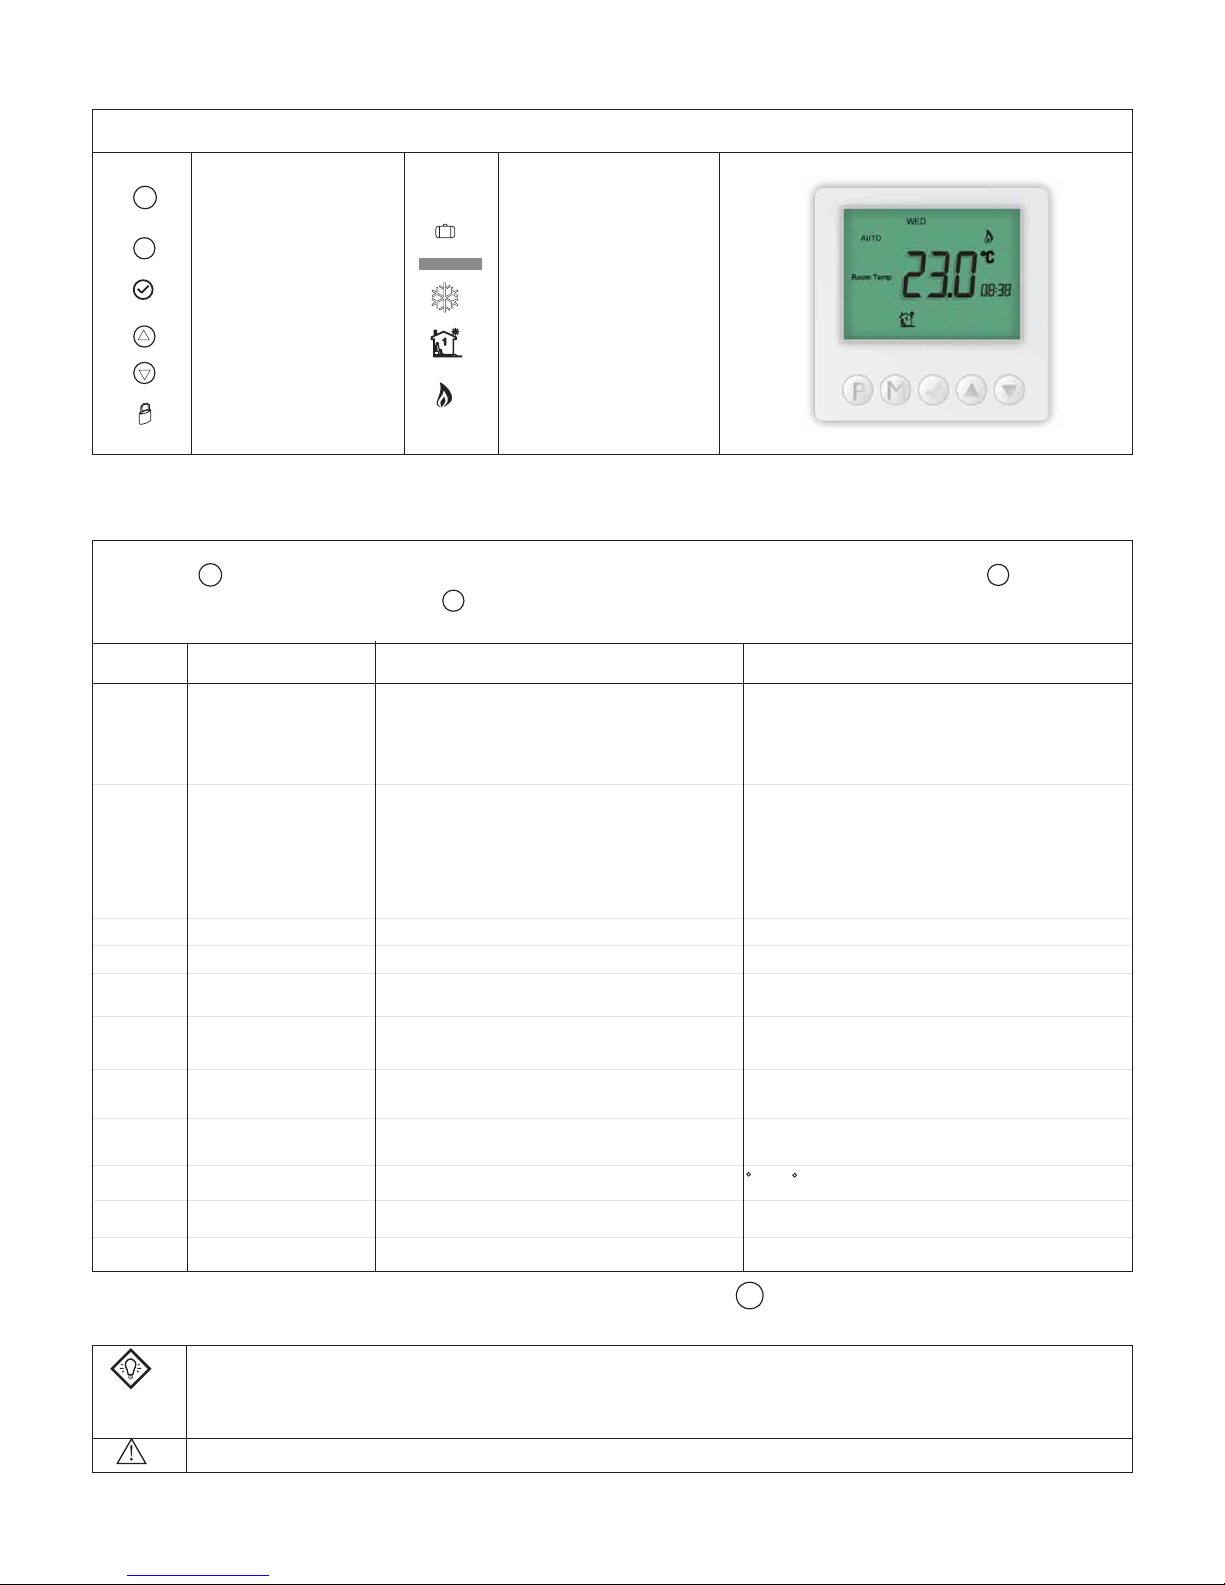
Press button M to select Auto mode. In Auto mode, the LCD will display “AUTO” on the top left corner.
The thermostat executes the preprogrammed schedules in Auto mode.
To adjust these schedules, follow the easy steps below,
press button M to select vacation mode .
Vacation mode
will maintain a set temperature(default 10
°C) all the time.
Your thermostat has the ability to reset all settings to the factory defaults. If you are
certain you want to do this: In standby mode(when thermostat is turned off), press
If thermostat is set in AF model, and set to show air temperature only, press and
automatically revert back to air temperature in 5 seconds.
hold the down button for 3 seconds, floor temperature will show and it will
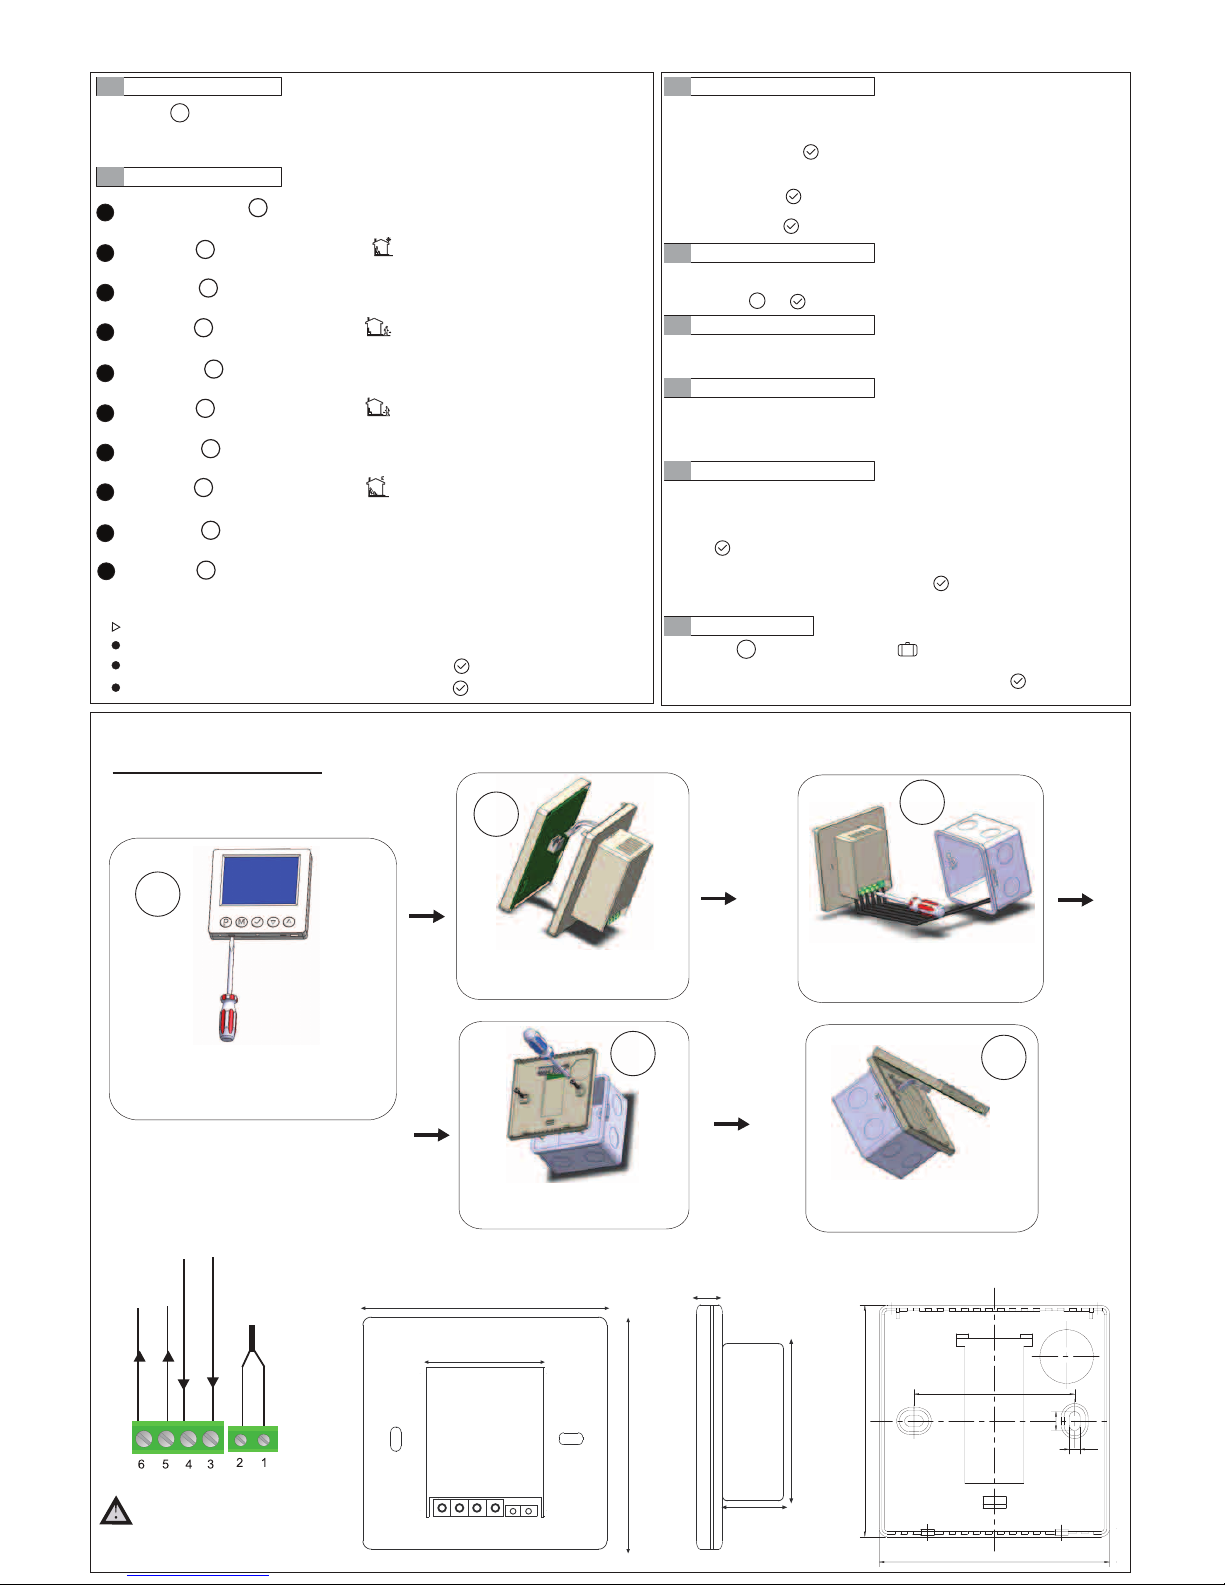
This product should be installed by
a qualified electrician.
Installation and Wiring
Dimensions
Wiring Diagram
86mm
mm68
Rear View
45mm
13mm
27 mm
26 mm
Side View
60mm
mm68
86mm
4mm
mm7
To lock the buttons, press and hold the up and down buttons for 3 seconds until you
see a lock icon appearing, to unlock, repeat the steps above.
and hold
button M and for 5 seconds until “RES” is shown for 5 seconds on LCD.
This thermostat is fitted with a real time clock. It is essential that the clock time and day
are set accurately if you require your programmed events to start on time. Follow the
Set the Time and Day
Auto Mode
Program your thermostat
Resetting factory defaults
Lock the buttons
View floor temperature
Temporary temperature override
Vacation mode
Press the button once
Use up or down button to change the time (Hold up or down button to change
Press button again, the day of the week will flash
Press button again to accept and exit
Use up or down button to change the day of the week
Press and hold button for 5 seconds until you see a day flashing. Use up or down button
adjust the day (hold up or down button for 5 seconds to set all days).
To erase program 2 and 3 for Saturday and Sunday,see below,
Note: It is faster to program the same schedule for the entire week and then to adjust the
Press button again and use up or down button to set the desired temperature to be
Press button to accept and exit.
Press button to bring up the program 1( ).Use up or down button to set the start time
In step 1, select Saturday or Sunday.
In step 4, instead of using up or down button , using button will erase the time.(--:--).
In step 6, instead of using up or down button , using button will erase the time.(--:--).
and the time will flashStep 1.
Step 2.
Step 3.
Step 4.
Step 5.
Press
up or down button to change the set point and press to
accept and exit.
Carefully separate the front half of the thermostat
from the back plate by placing a small flat head
terminal driver into the slots on the bottom face of
the thermostat
1
1
2
3
4
5
6
7
8
9
10
Carefully unplug the ribbon connector
which is plugged in to the front half of
the thermostat
2
Place the thermostat front half somewhere
safe. Terminate the thermostat as shown
in the diagrams below
3
Screw the thermostat back
plate on to the back box
4
Re-connect the thermostat ribbon cable
and clip the two halves together
5
(default 07:00).(Hold up or down button to change by 15 minutes each time.)
Press button to bring up the program 2( ). Use up or down button to set the start time
(default 09:30). (Hold up or down button to change by 15 minutes each time.)
Press button to bring up the program 3( ). Use up or down button to set the start time
(default 16:30). (Hold up or down button to change by 15 minutes each time.)
Press button to bring up the program 4( ). Use up or down button to set the start time
(default 22:30). (Hold up or down button to change by 15 minutes each time.)
maintained for program 1.(default 22
°C
)
Press button again and use up or down button to set the desired temperature to be
maintained for program 3.(default 22
°C
)
Press button again and use up or down button to set the desired temperature to be
maintained for program 2.(default 16
°C
)
Press button again and use up or down button to set the desired temperature to be
maintained for program 4.(default 16
°C
)
exceptional days.
below easy steps,
by 15 minutes each time.)
disappear.
4
3
2
1
P
P
P
P
P
P
P
P
P
P
LL
LOAD
(5500watts)
FEED
(230VAC)
Floor Sensor
NN