TranStar KD 661C User manual

Troubleshooting Guide
1
About the System
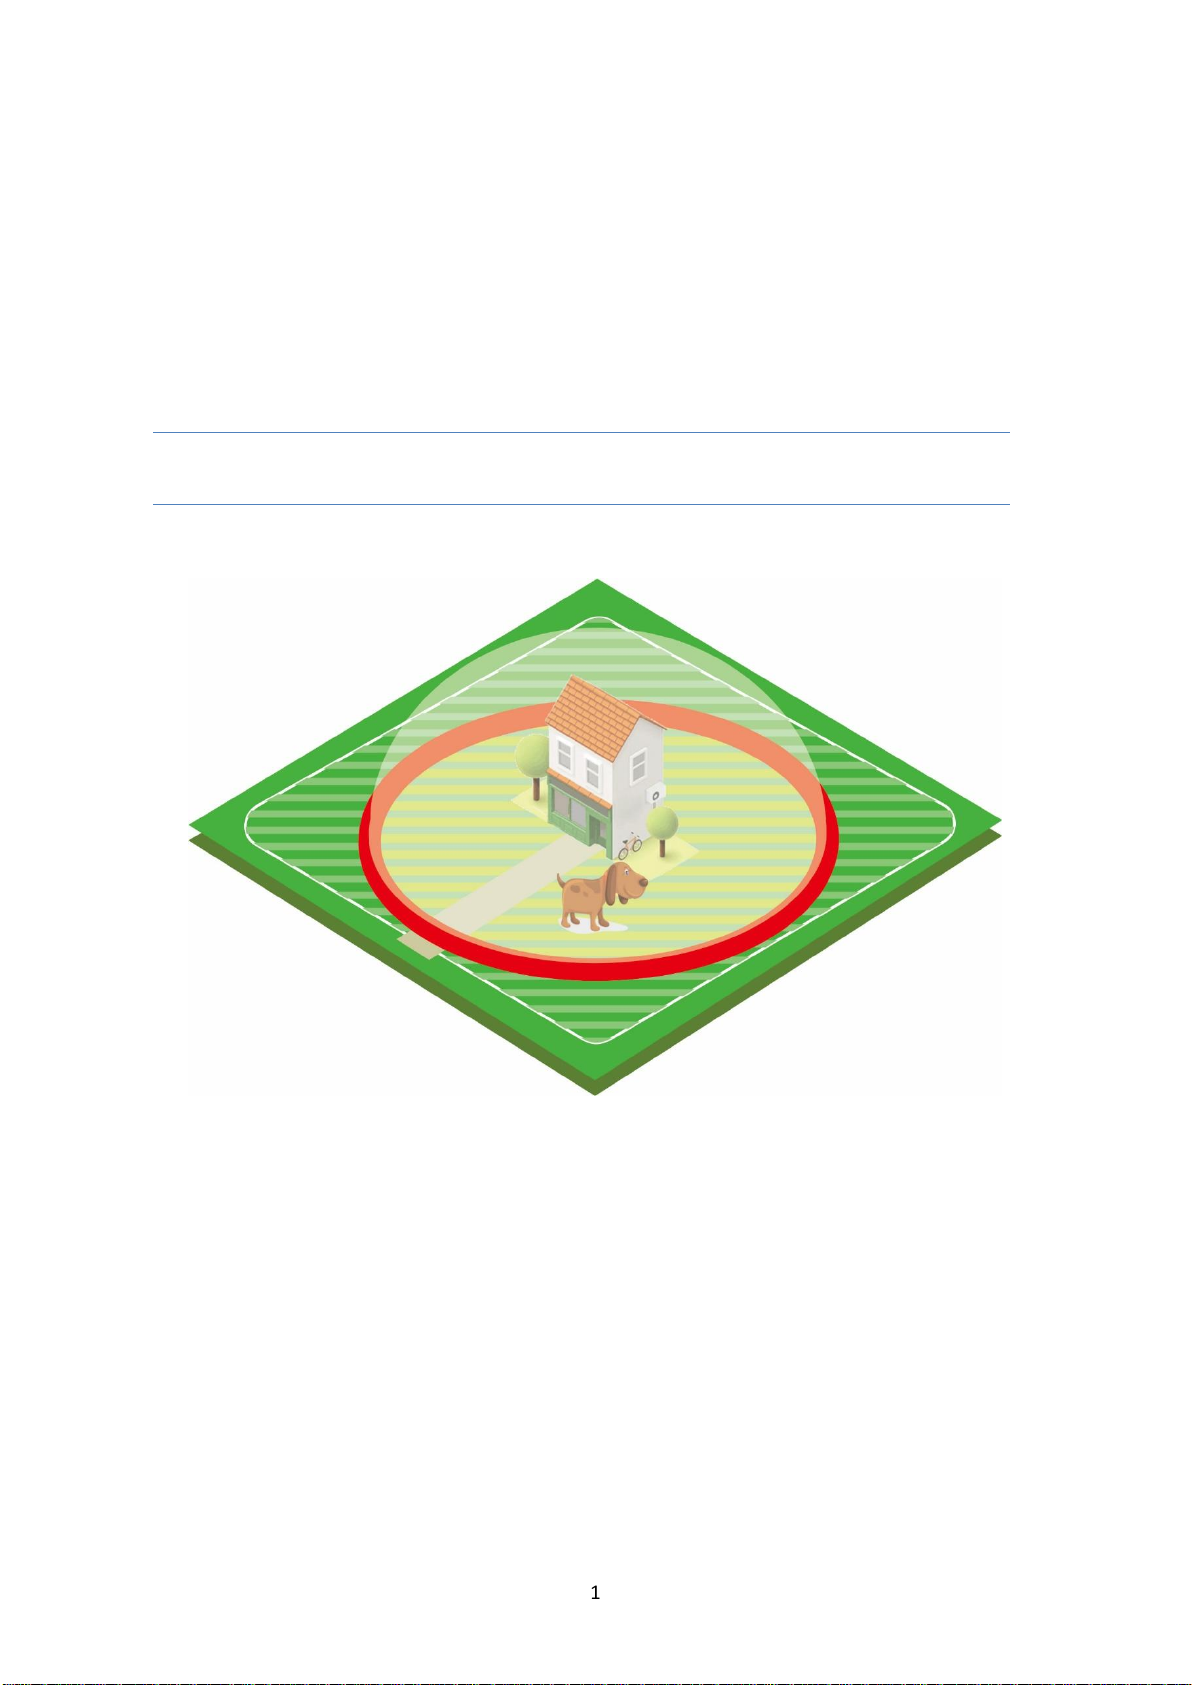
FunAce Wireless Pet Containment System is compact, safe, and effective. The
patented transmitter and receiver improve radio communication and efficiency
resulting in a large invisible outdoor boundary to protect your pet from wandering
off. Please read the entire manual and refer back to it if any problem arises.
This system will give YOU a peace of mind and can keep your DOG safe and happy.
The system is 100% wire free, there’s no need to dig up the ground to bury
wires. The transmitter broadcast the signal in all directions forming a circular
radial-shaped boundary from 40-500 feet radius, up to 17 acres.
Transtar
Radius is 10 - 900 feet for C-100
systems.
Radius is 350 - 500m for our Black
model.
Please Note:

3
Features and Functionality
Wireless Transmitter Features (Not Rechargeable Model)
Power Source
5V 1A DC Power
To Turn On/Off
Press and Hold for 3 Seconds to Power On/Off
Powered On
Power Light is Red, Power Level Display is On
Pairing Mode
Quick Press to Get in Pairing Mode: Flashes “-1dB”
Successfully Paired: Long Beep Then Flashes Blue
Light Once
Radio Signal Range
40-500 Feet (Level 0-100)
Support Number of
Collar Receivers
Unlimited
Do Not turn off the transmitter when the collar is on the dog. When
the collar receives signal from the transmitter, it will not shock. When
the transmitter is off or when the signal emitting from the transmitter
is out of range, the collar will shock.

4
Wireless Transmitter Features (Rechargeable Model)
Power Source
5V 1A DC Power
To Turn On/Off
Press and Hold for 3 Seconds to Power On/Off
Powered On
Power Light is Red, Power Level Display is On
Pairing Mode
Quick Press to Get in Pairing Mode: Flashes “-1dB”
Successfully Paired: Long Beep Then Flashes Blue
Light Once
Radio Signal Range
40-500 Feet (Level 0-100).
Support Number of
Collar Receivers
Unlimited
Battery Life
18 Hours
Charge Time
4 Hours
Low Battery
Rapid Flashes of Red Light
Charging
Solid Red Light
Full Charge
Solid Blue Light
Do Not turn off the transmitter when the collar is on the dog. When
the collar receives signal from the transmitter, it will not shock. When
the transmitter is off or when the signal emitting from the transmitter
is out of range, the collar will shock.

5
Collar Receiver Features
To Turn On/Off
Press and Hold for 3 Seconds to Power On/Off
Powered On
Short Beep Then Flashes Red Light Every 2 Seconds
Powered Off
Two Beeps Then Flashes Blue Light Once
Pairing Mode
Quick Press to Get in Pairing Mode: Solid Red Light
Successfully Paired: Long Beep Then Flashes Blue
Light Once
Low Battery
Rapid Flashes of Red Light
Charging/ Full Charge
Solid Red Light/ Solid Blue Light
Battery Type
Rechargeable
Battery Life
2 Days
Charge Time
2.5 Hours
Sleep Mode
When idled for 60 seconds, it will go into sleep mode.
A small motion will wake up the collar receiver. The
rattling sound is the motion detector.
Water Resistant Rating
Water Resistant IP65
Collar Strap Length
0-23 inches
Warning Beep
2 seconds warning beep before shock correction
Correction Mode
(Anti-Over Shocking
Design to power off after
2:36 minutes)
Correction in the following order:
Beep + Shock 18s, Beep 34s,
Beep + Shock 18s, Beep 34s,
Beep + Shock 18s, Beep 34s, Power Off

6
Pairing the Collar Receiver with the Transmitter
1. Press and hold the ON/OFF button for 3 seconds to power on the transmitter.
2. Quick Press the ON/OFF button again to get in pairing mode. The display will
flash "-1dP" for 10 second. While it is flashing “-1dP,” it is ready to pair.
3. With the collar receiver on, quickly press the ON/OFF button to start pairing.
The collar receiver will show a blue light with a long beep, it means the pairing
is successful. Repeat these steps for additional collar receivers and after
each full charge.
Quick System Test
1. Pair the collar receiver with the transmitter.
2. Press and hold the ON/OFF button for 3 seconds to power on the transmitter.
3. Set the power level to 10 on the transmitter.
4. Press and hold the ON/OFF button for 3 seconds to power on the collar
receiver.
5. Carry the collar receiver with the test light attached to the collar contacts
(metal probes) and bring it close to the transmitter. The collar receiver should
flash red light every 2 seconds that show that it is active and should not beep.
6. Carry the collar receiver and start moving away from the transmitter. Once
the collar receiver stops receiving radio signal from the transmitter, it will start
beeping and shocking.
7. Bring it close to the transmitter again and the collar receiver should stop
beeping and shocking.
8. Turn off the transmitter.
9. Again, the collar receiver will start beeping and shocking because it is not
receiving any signal.
10. The test is successful if it performs exactly as mentioned above. If not, please
see the troubleshooting section or contact us.

7
Quick Setup Guide
Fence Transmitter Placement
1. Place the unit indoor, in a dry, well ventilated area that does not fall below
freezing temperature.
2. Place it 5 feet above the ground and at least 3 feet away from large metal
objects or big appliances such as (refrigerator, washer, dryer, fuse box,
computer, and TV) as these objects may interfere with the radio signal.
3. Do not place it behind a brick or stucco wall as they will weaken/block the
radio signal.
4. Keep it plugged in and behind a surge protector.
TEST THE SYSTEM AND LAYOUT BEFORE MOUNTING THE WIRELESS
TRANSMITTER ON A WALL WITH THE PROVIDED WALL MOUNT SET.
Basic Planning Tips
The safe zone is ideally a radial-shaped boundary given the property is an
open area with no obstacles blocking and interfering the signal. In that case,
you can simply place the wireless transmitter in the middle of your property to
create a perfect circle boundary. But in reality, this is not the case because there
might be hills, trees, and walls inside the house obstructing the signal. Also,
your house might not be in the middle of the property. Therefore, knowing your
property and where to place the wireless transmitter and at what power level to
set it at is essential to creating a working safe zone barrier.
Plan your boundary with a 10 - 20 feet of leeway to compensate for signal
inconsistency due to interference.
Interference can be caused by anything with an electrical or magnetic
current and can be deteriorate by obstructions such as trees.
Changing weather patterns can also cause problems with radio reception.
8
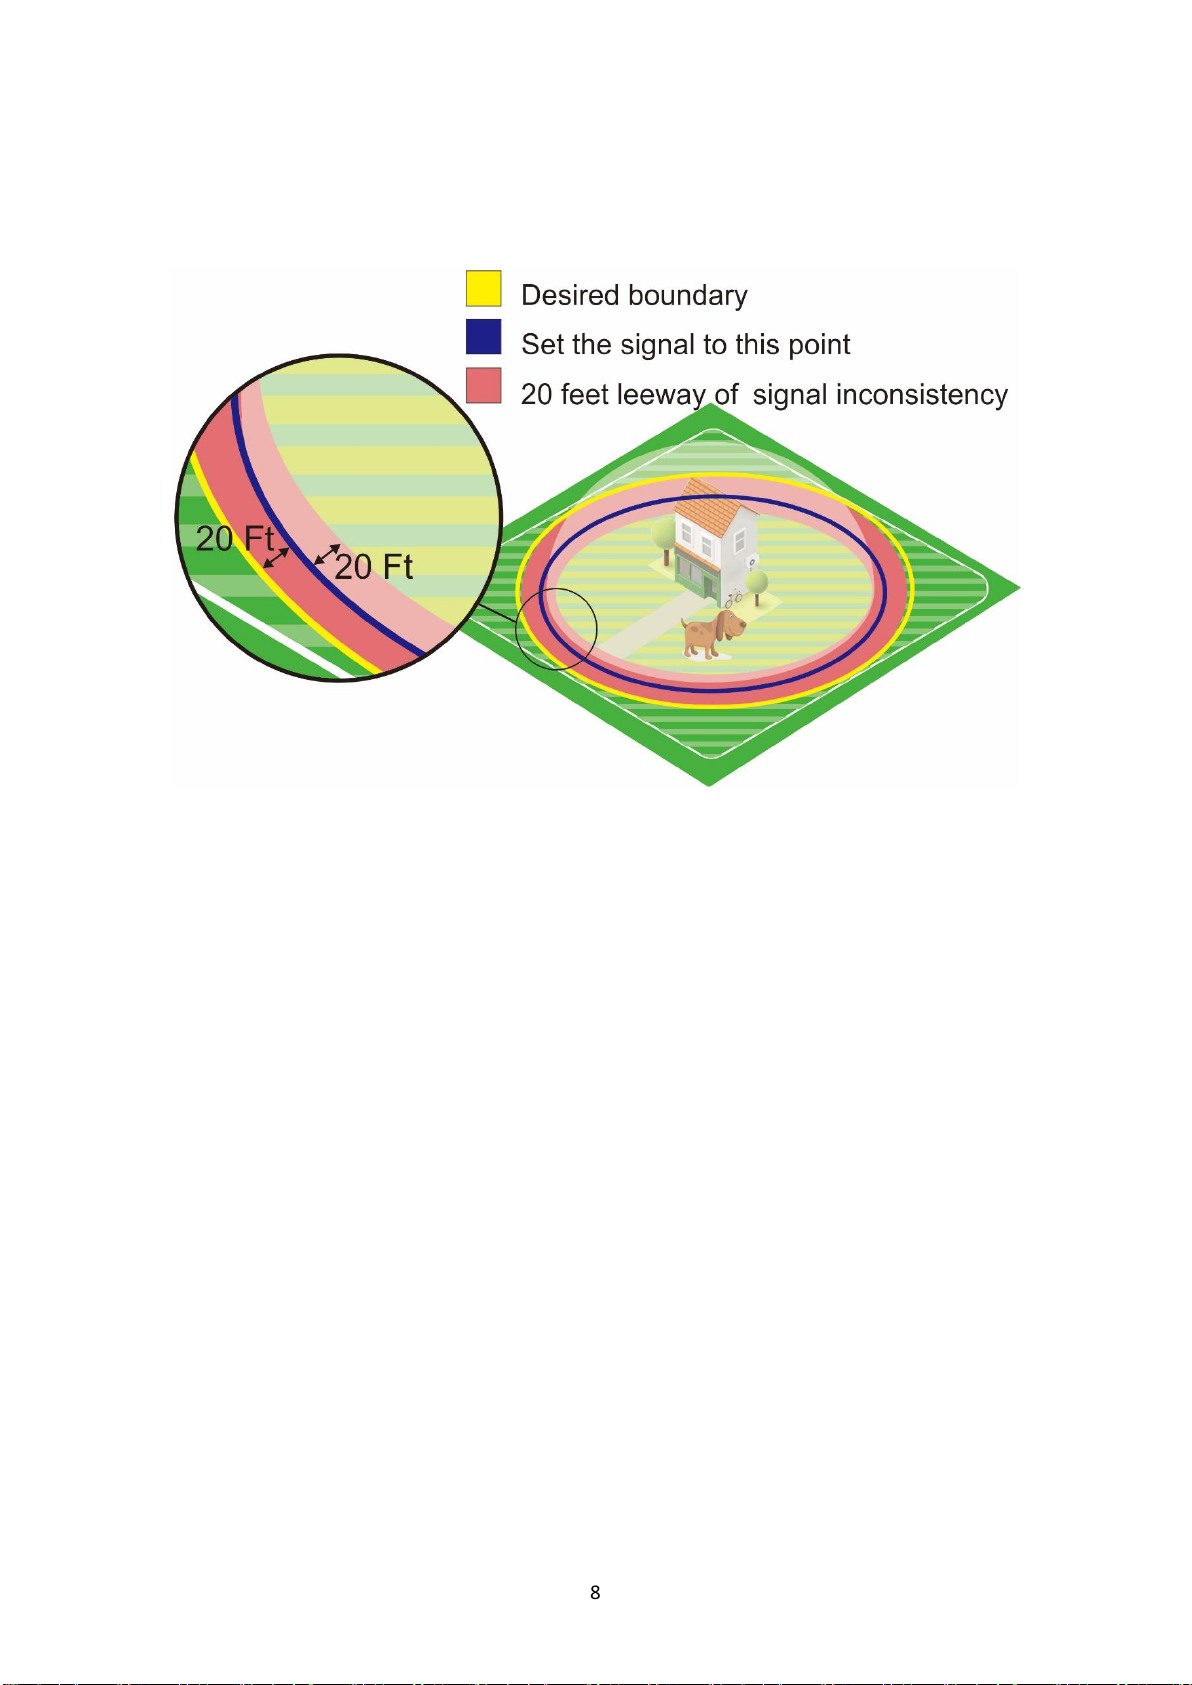
Understanding Signal Variations
Because the signal will vary and change overtime due to different types of
interferences stated above, plan your layout with a 20 feet leeway for signal
inconsistency. From the image above, assuming the yellow circle boundary is
your desired boundary where your dog must not pass, you should set the signal
level strength at where the blue circle is which is 20 feet before the yellow
boundary. The reason is to make sure your dog will not pass the yellow
boundary when the signal somehow gets stronger due to reasons such as
change in weather and temperature.
·If the signal changes and gets stronger, the collar receiver will start
shocking at the yellow boundary (your desired boundary limit).
·If the signal gets weaker, the collar receiver may start shocking 20 feet
before the blue boundary.
·In an ideal scenario with no signal lost, the collar receiver will start shocking
when your dog gets to the blue circle.

9
Zone Planning
Please read through the following 3 sections very carefully to fully
understand how to plan your zone as they are essential to make the system
work. It’s also best to have 2 people to test and do the setup.
1. Backyard Coverage
If you want to setup your wireless fence to cover your backyard, it is best to
place the transmitter behind a window that’s facing the backyard. Assuming
your backyard is 100 feet long, you should setup your boundary at the 80 feet
mark because of signal variation reason stated above.
Initial Setup
1. Place the transmitter behind a window that’s facing the backyard.
2. Pair the transmitter and collar receiver.
3. Power both the transmitter and collar receiver.
4. Place the test light on the collar receiver’s collar contacts (shocking the air
will damage collar receiver). The collar should be flashing red every 2
seconds to show that it is active and not beep while being in close proximity
of the transmitter. The collar will go into sleep mode if it’s idled for 1 minute.
Keep shaking the collar left and right to keep it active during the test.
5. Set the power level on the transmitter to 100 (highest level).
Adjusting Transmitter’s Power Level
6. Have one person carry the collar and go to the 20 feet mark before your
desired boundary, place a flag there as a reminder for you and your pet.
7. Have the second person at the transmitter. Keep lowering the transmitter
power level slowly from 100 until the collar starts beeping.
8. The power level of the transmitter where the collar just started beeping is the
level you should set it at for the signal to reach such distance.

10
2. Walking The Perimeter
If your yard’s length (ex: 80 feet) is equal to the distance from each side of the
yard to the transmitter, it would be like the following image.
9. Since the transmitter broadcasts signal in all directions equally, it will form a
circular boundary (yellow semi-circle from image above. Walk around the
yellow line and place a flag where the collar begins to beep.
10.While walking the perimeter, if the collar keeps beeping when not expected,
walk towards the transmitter and place a flag where it stops beeping.
11.After completing the entire walk around and placing the flags, you can see
how your boundary is setup by looking at the flags. It might not be a
perfectly smooth path because signal varies due to different landscapes and
interferences.
If your yard’s length is a lot longer than its width, you won’t be able to set the
boundary to cover your entire yard since the signal strength is equal in all
directions. You will have to set it so the signal just reaches the sides of the yard
and use that as the maximum distance. The boundary might look something like
the image below and your pet won’t be able to go to the far end of the yard:

11
3. In House Coverage
If you only need to have your backyard covered and your dog won’t be wearing
the collar inside the house, the setup above will be fine. But if your dog will go in
and out of the house and to the backyard, you would need to further adjust the
position and the power level of the transmitter.
There might be dead spots inside your house where the radio signal cannot
reach. The areas inside the house where there are a lot of walls or big
appliances between it and the transmitter could cause potential dead spots. The
fence transmitter works like a Wi-Fi router where there are rooms and spots in
the house with very little to no signal. Depending on the size and layout of your
house, the signal coverage could be like this:

12
12.Place the test light on the collar receiver’s collar contacts and hold it around
the height of your dog and start walking around your entire house to see
where it starts beeping. When it beeps, it means there’s no signal there.
Mark down all of the areas with no signal to get a get a general idea of all
the dead spots.
13.Once you locate all the dead spots in the house, reposition the transmitter
so it’s closer to the dead spots.
14.Have one person standing at the dead spots with the collar and have the
other person keep increasing the transmitter’s power level until the beeping
stops for all the dead spots.
15.If there are still dead spots in the house, you have to further increase the
transmitter’s power level or reposition the transmitter (repeat Step 12 to Step
14) to cover all the dead spots. (There might be rooms that are too deep in
the house with too many walls blocking the signal. Then you have the option
to continue repositioning the transmitter deeper into the house or you can
teach your dog not to go near there during your training).
16.Now that inside the house is covered, you have to repeat the Step 1
(Backyard Coverage) and Step 2 Walking The Perimeter and adjust the
power level and replace the flags accordingly.

13
Avoid The Hills
The radio signal travels straight in all directions from the wireless transmitter
forming the safe area (yellow). Any downhill or uphill ground will block the signal
entirely. When your pet goes on any hill, it is very likely that there will be no
signal and the collar receiver will begin shocking.
If you need the signal to cover areas above the hill and/or below the hill, you may
consider installing the fence transmitter on a second/third story to increase the
line of sight of the radio signal.

14
Setup the Collar Receiver
1. The collar receiver comes with the short collar contacts preinstalled. You
can use the long collar contacts for pets with long or thick hair. (Loosen and
install the collar contacts with the hexagon shape part on the test light that
came in the package)
2. Center the collar contacts under your pet’s neck and touching the skin. It
could be necessary to trim the hair around the collar contact to make sure
the contact is consistent.
3. Check the tightness of the collar strap by inserting your index finger
between the end of the collar contact (the metal prong) and your pet’s neck
and adjust accordingly. The fit should be snug but not tight.
4. Once you are certain of the fitting, you can trim the extra collar strap from
the collar receiver.
Test the collar receiver every two days for its fittings and battery life.
Battery life depends upon how often the collar receiver is activated. A
low battery may cause the system to function intermittently.

21
Troubleshooting
The transmitter does not turn
Or
The power level display does not
turn on.
The transmitter adapter or the transmitter is defective.
Reset the transmitter by unplugging the power adapter from
the transmitter for 10 minutes.
I have an intermittent/inconsistent
signal.
Make sure the transmitter is at least 3 feet from large metal
objects or appliances and 5 feet off the ground for a stable
signal broadcast.
Make sure to set the transmitter power level to 20 or higher.
Anything lower than 20 will output signal that is too weak and
can be easily interfered.
The power level must be set high enough that your entire
house (indoor) is covered.
The receiver collar might be low on battery. Make sure the
collar is fully charged.
Reset the transmitter by unplugging the power adapter from
the transmitter for 10 minutes.
Receiver collar beeps and shocks
randomly.
There might be other nearby signal that is interfering with the
signal coming from the transmitter causing the collar to beep
at random times. Since the shocking progresses on the collar,
short signal interference will only cause the collar beep and
have a millisecond shock span if any.
The receiver collar might be low on battery. Make sure the
collar is fully charged.
Receiver collar is not beeping,
shocking or flashing
When there is no motion, the collar will go into sleep mode
and stop beeping or flashing.
Recharge the collar.
Check the power level on the transmitter, maybe the power
level is higher than what it is supposed to.
Receiver collar is beeping but the
pet is not responding to the static
shock.
Or
The electric static shock is too weak
for my dog.
Test the receiver collar with the test light.
If the test light flashes, check the fit of the receiver collar and
tighten it accordingly.
Trim your pet’s fur where the contact points touch the neck
and/or switch to the longer contact points.
Repeat training steps to reinforce training.
Receiver collar activates inside the
house/safe zone.
Or
Receiver collar starts beeping as
soon as I turn it on.
Increase the power level of the transmitter.
Re-pair the receiver and the transmitter by “Pairing.”
Relocate the transmitter to cover the dead spots.
Redo the test and find dead spots procedure.

22
Receiver collar does not hold a
charge.
It takes about 2-3 hours to fully charge the collar and the
indicator light will turn blue when it is fully charged. The
rechargeable collar will last 2 days per full charge.
You would need to use the 5V power adapter that came with
the system to charge the receiver collar. Using other
compatible adapter might not give a good charge because of
low amperage.
The electric static shock is TOO
strong for my dog.
The receiver collar may be too tight. Try loosening up the
collar so that the metal contacts are just touching your dog
and are not pressed into your dog’s skin.
Two collars will go off at a different
distance.
Each collar will vary slightly in sensitivity due to the direction
of the built-in antenna and the difference in range could be 2-4
feet but it will not affect how the system works.
Why does the receiver collar LED
light keep flashing?
When the receiver collar is flashing and not beeping, it means
that the collar is active and receiving signal from the
transmitter.
I hear a rattle sound when I shake
the receiver collar.
The rattling sound is the motion detector. When there is no
motion to put the receiver collar into sleep mode to conserve
battery. And when there is motion detected, it will become
active again.
It’s too big for my dog.
This system is not meant for tiny or toy dogs since the collar
might be too heavy and bulky for them. A Chihuahua or a toy
poodle may be too small for this system.
Receiver collar does not turn on.
Or
Receiver collar shuts off shortly
even after a full charge.
There’s a fail-safe mechanism built in that will shut down the
collar permanently when it is over shocking and/or shocking
with no contact (shocking the air) for a short while. After the
fail-safe is turned on, you won’t be able to power on the collar.
Simply recharge the collar for 10 seconds to reset it and it will
work as normal.
Do not let the collar go in correction mode by itself (shocking
the air) as that will damage the collar.
For C-100 systems, a flashing collar means low battery

23
Appendix A
Glossary
Wireless Transmitter Unit: The unit that emits a radio signal to the to create
the invisible fence.
Safe Zone: The area within the correction zone where your dog can roam
freely.
Correction Zone: The outer edge of the safe zone where the radio signal is
weak/not there and where the pet’s collar receiver begins correction.
Collar Receiver: The unit that receives the radio signal from the wireless
transmitter. You place this unit on your pet’s collar to prevent it from entering the
correction zone.
Collar Contacts: The metal prongs on the collar receiver that deliver the static
shock correction.
Pairing: Syncing the collar receiver to the wireless transmitter.
Correction mode: When the collar receiver is out of the radio signal range and
begin beeping and shocking.

24
Safety Information
Please read the included manual prior to your first use. For best results, follow
these following rules.
The collar receiver is intended for use on dogs only.
The system should only be used with healthy pets. Contact your
veterinarian if you have concerns about the medical condition of your dog
This system is not for vicious or aggressive pets as static shock may further
provoke aggression. If your dog may pose a threat to others. DO NOT USE
THIS SYSTEM.
If you are unsure if your dog is aggressive. Please consult your veterinarian
or a certified trainer
A low battery may cause faulty operation, do not use if you suspect a low
battery.
Do not leave the collar on your dog for more than 12 consecutive hours a
day.
Never perform set-up procedures when the collar receiver is on your dog.
Keep out of reach from children.
Properly fit the collar on your dog. Wearing it too long or too tight may cause
skin damage or injury.
Clean the dog's collar area and the metal collar contacts weekly with a
damp cloth and mild hand soap, then rinsed thoroughly.
Examine your dog's collar contact area carefully for signs of redness, rash
or sore daily. Stop using the collar if any of these is found and can continue
to reuse when the skin fully healed. If the condition persists beyond 48
hours, please see your veterinarian.
A condition called Pressure Necrosis, which is a devitalization of the skin
due to excessive and prolonged contact against the collar contacts may
occur if the steps above are not followed.
Do not use the collar receiver on your dog unattended.
Use a surge protector between the wall outlet and the fence transmitter to
protect it from power surges and lightning strikes damaging the transmitter
unit and boundary wire.
To prevent fires and electrical hazards, install the fence transmitter in a
building that is in accordance with state and local electrical codes.
The Wireless Pet Fence is for residential use only.

25
Caution
The Wireless Pet Fence is NOT a solid physical barrier. The system merely acts
like a deterrent to remind dogs by static stimulation to remain in the boundary
established. It is imperative to complete the entire training with your dog. Note
that not all dogs can be trained to stay in the barrier. Manufacturer CANNOT
guarantee that the system will in all cases keep a dog within the established
boundary. Therefore, if you have reasons to believe that your dog may pose any
danger to others or harm itself if he is not contained within the boundaries, you
should NOT rely solely on this system. Manufacturer shall NOT be liable for any
property damage, economic loss or any consequential damages sustained as a
result of any animal crossing the boundary.
Warranty
90 Days Limited Warranty
All electronic components, including wireless transmitter, collar receiver and
power adapters under normal use conditions. Warranty extends only to the
original owner. Buyer is responsible for the shipping fee to return the unit to a
US address provided by FUNACE LIMITED.
If a defect exists, FUNACE LIMITED will, at its option and to the extent
permitted by law either
(1) provide components to repair using new or refurbished parts at no charge to
you;
(2) exchange the component and/or accessories with a functionally equivalent
product that is new or refurbished; or
(3) refund the original purchase price. FUNACE LIMITED will be responsible for
the shipping fee for returning a working unit to the buyer's US address. For
international shipping, buyer will pay for the return shipping of the replacement.
This warranty excludes damage caused by abuse, misuse, accidents,
unauthorized repairs, alterations, modifications or other causes that are not
defects in materials and workmanship for which FUNACE LIMITED is
responsible.
In layman's terms, if you didn’t break it on purpose, we will replace it as long as
your order is within 90 days. Simply contact us over the phone or email.
Transtar LLC
Transtar LLC
Transtar LLC
30
30
30
30

26
Terms of Use & Limitation of Liability
Terms of Use
This product is offered to you conditioned upon your acceptance without
modification of the terms, conditions and notices contained herein. Usage of this
Product implies acceptance of all such terms. condition. and notices.
Proper Use
This product is designed for use with dogs where training is required.
We recommend that you not use this product if your dog is less than 10 pounds
or if your dog is aggressive. If you are unsure whether this is appropriate for
your pet, please consult your veterinarian or certified trainer.
Proper use includes reviewing the entire instruction manual and training
guide provided with the product and any specific Safety information and Caution
statements.
Unlawful or Prohibited Use
This product is designed for use on dogs only. This dog training system
is not intended to harm, injure or provoke. Using this product in a way that is not
intended could result in violation of federal, state or local laws.
Limitation of Liability
In no event shall FUNACE LIMITED be liable for any direct, indirect,
punitive, incidental, special or consequential damages, or any damages
whatsoever arising out of or connected with the use or misuse of this product.
Buyer assumes all risks and liability from the use of this product.
Modification of Terms and Conditions
FUNACE LIMITED reserves the right to change the terms, conditions
and notices under which this product is offered.
Transtar LLC
Transtar LLC
Table of contents


