TranStar WA7 Guide


WA7

Contents
Product Introduction
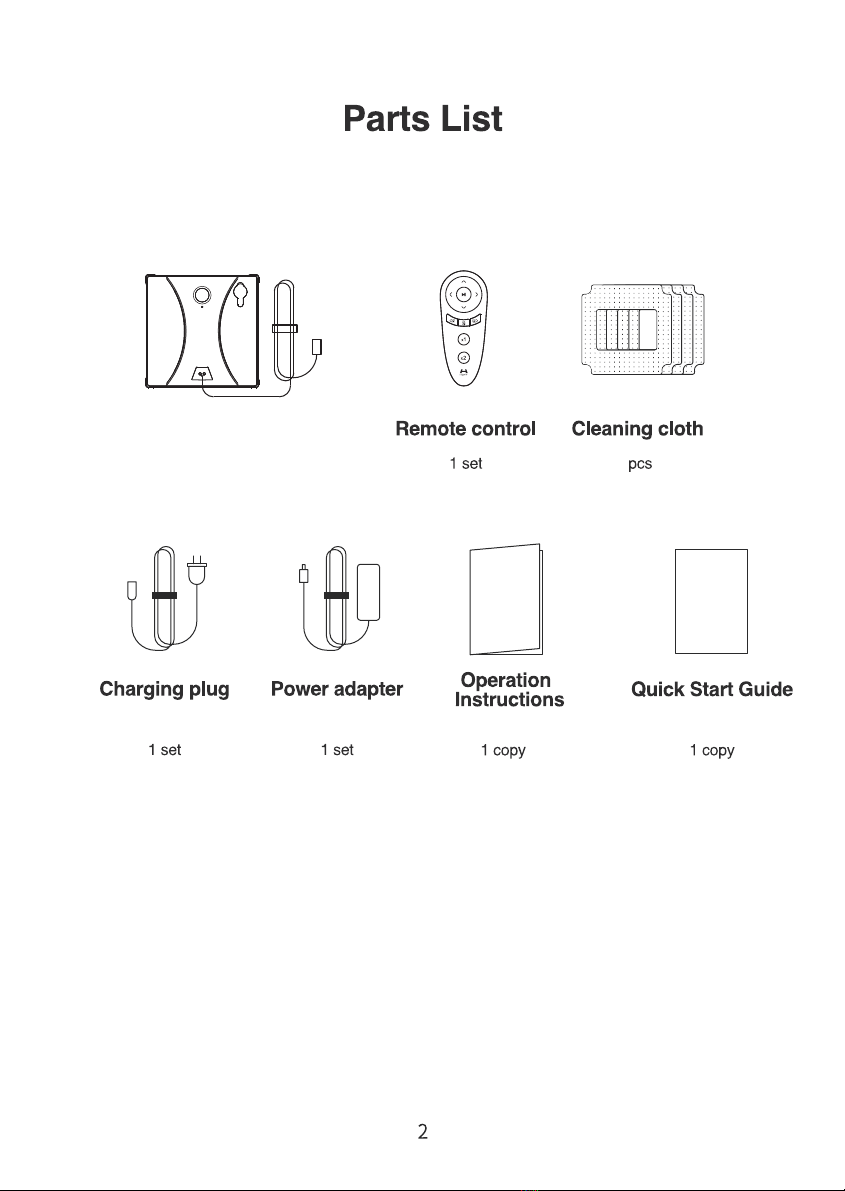
Accessories
Installation Instructions
Operation Instructions & Attentions
Path Planning Instructions
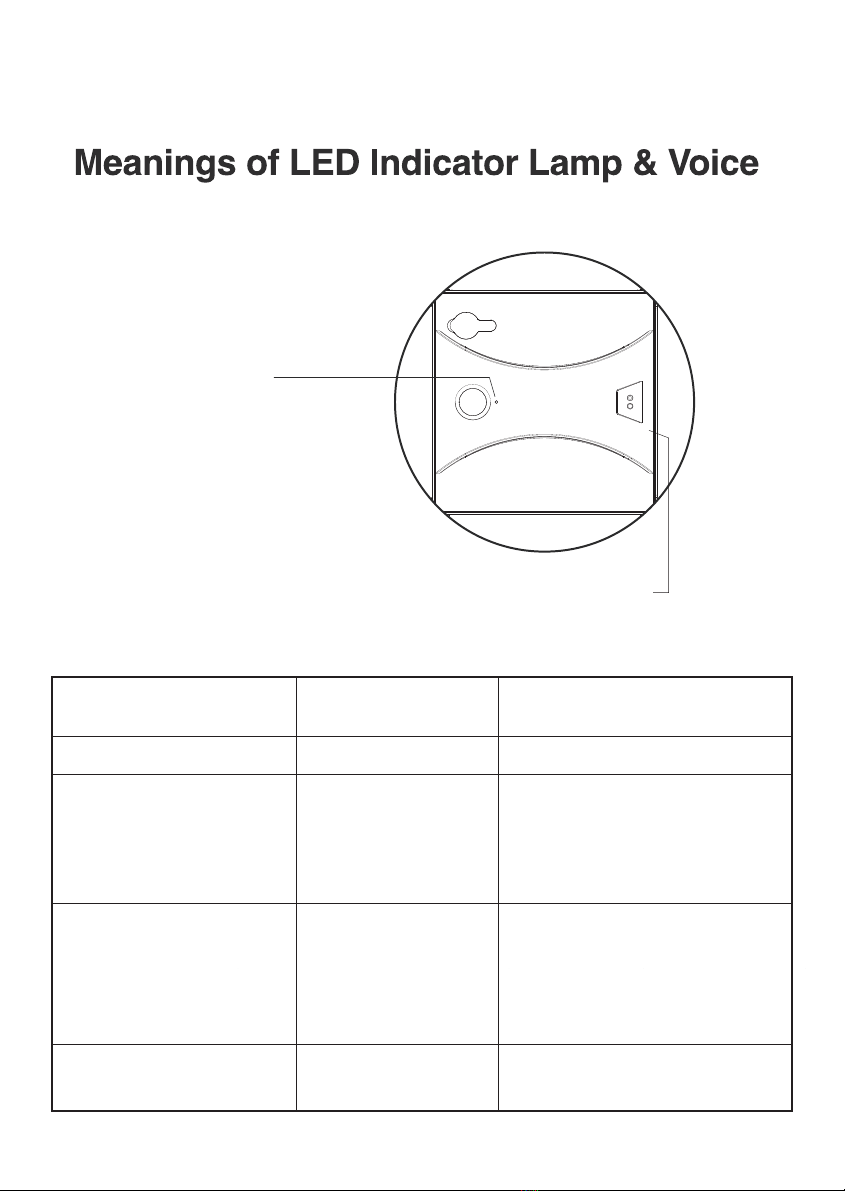
Meanings of LED Indicator Lamp & Voice
Remote Control Instructions
Basic Parameters
Troubleshooting
Safety Precautions
Failure List
1
2
3
4
5
6
7
8
8
9
10
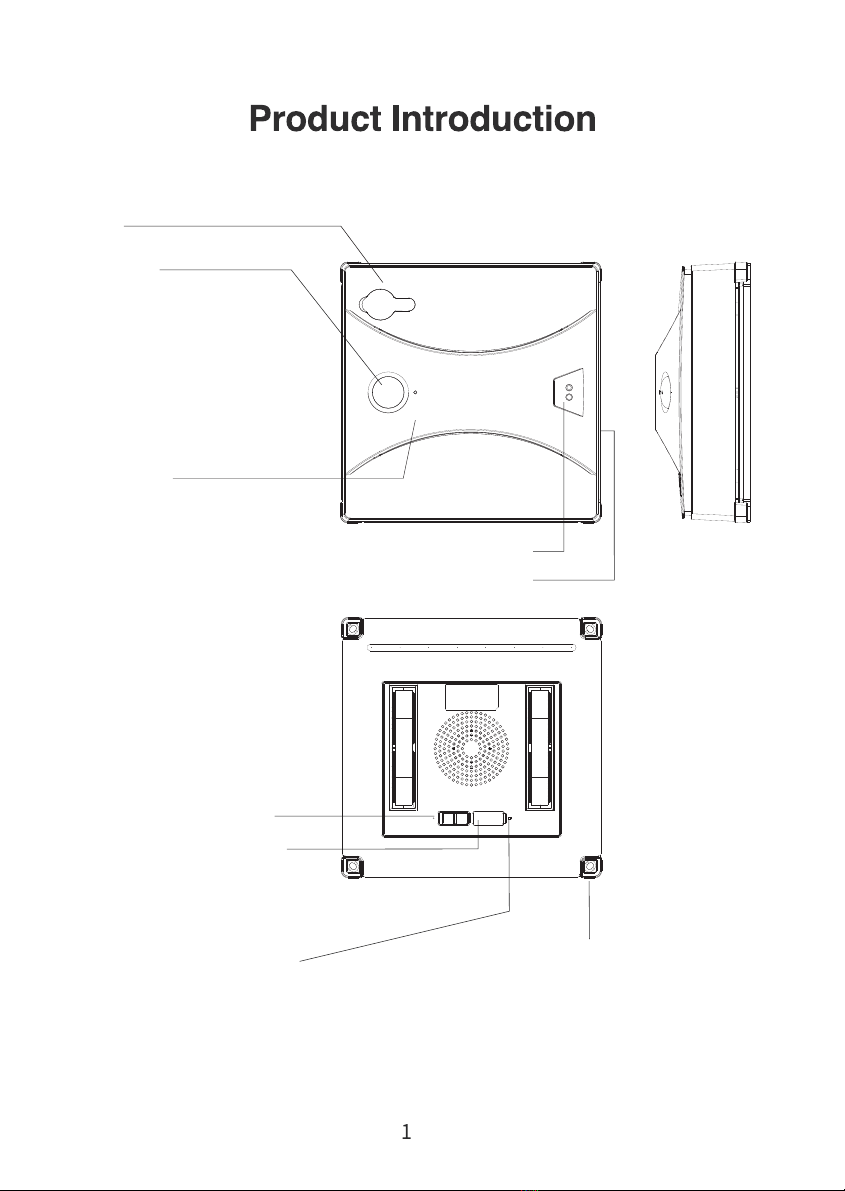
Lateral side
Water plug
Functions of the Key
Short press it to Switch On/Off when the
device is working, and recovery regular
suction power when it is standby
with small suction.
When the device is working, long press the key
to turn to standby mode with small suction
power. When the device is standby, long press
the key to operate the track so that users
can clean it.
Blue lamp: Normal
Red lamp blinks: Abnormal if the device
is working
Red lamp: low power when device is
standby.
Status indicator
Bottom
Cable & Safety rope
Vvoice guide
Power Switch
USB Port
Drop sensor
Status indicator
Blue lamp: Normal
Red lamp blinks: Abnormal if the device
is working
Red lamp: low power when device is
standby.
2
Device with cable
and safety rope

2.
1.Please ensure that safety rope has been
firmly fastened on a strong object.
Insert the frame extending line to the
end of the adapter an tighten them.
3.Stick the white surface of the cloth to the
bottom of the machine and keep it flat to
avoid air leakage.
4.
Open the bottom main switch and place
the machine in the center of the window
(avoid getting too close to the frame).
Make sure the machine is attached to the
glass and release the hand.
Press the button to start the machine.
When the machine finishes cleaning
the window and stops working, hold
the safety rope in one hand and press
the round button until the Suction de-
creases.Put it on the glass again and the
machine will automatically absorbit.
Please turn off the main switch at the bottom
of the machine and unplug the power after use.
Be sure to use the original cloth,otherwise,
the machine performance will be affected
Put clean water into the water tank
, and put back the silicon plug.

5-6 clean water on the mop. Please
don’t make t
Pay attention to the cloth should not be too wet, dirty cloth is recommended to clean and
dry before use.
Please use original cloth, non-original cloth will affect the machine performance.
he mop all wet, and do not spray on t
he track.In standby mode, press
turn off the bottom power switch.
(In case of loss of remote control)
Turn on the bottom power switch,
When the machine finishes cleaning the window and stops working, hold the safety
rope in one hand and press the round button until the suction decreases.Then take off
the machine.
and hold the round key for the track to rotate automatically, and wipe the dirt on the track
surface with a clean wet cloth.

Clean Path One Time:
Please put the machine on central position of glass and launch it. After exploring
downwards and towards to the left of glass boundary from current position, it will
move to upper left corner and start to wipe from top-down N-shaped path.
At each corner, please strictly follow the principle of “Firstly go forwards and then
fallback” while applying both wiping-omission resistance and double-overlapping
modes. Automatically return to starting position after cleaning.
Clean Path Two Times :
Continue to secondly wipe the zigzag from left to right after completion of wiped
path in previous time. And automatically return to starting position after cleaning.
Status indicator
Red Light Flashes or
Light on
+
Dripping Cycle
Not Plugged-in Power
Source
Air Leakage
SlipperyMachine movement
abnormality
Check if power source has been well
Check the power of built-in batteries
plugged in.
Check airleakage.
Check if wiped surface has appeared
excessive water spots or oil stains.
Blue Light with Dripping
Sound
+
Red Light Repeated
Flashing Cycle
LED Indicators and Definition:
LED Light & Sound Definition Solution
3 Dripping Sounds Cleaning Completed
Hardware Self-testing
alarm
Please Contact with Customer
service
Normal Audible Feedback
Blue lamp: Normal
Red lamp blinks: Abnormal if the device
is working
Red lamp: low power when device is
standby.
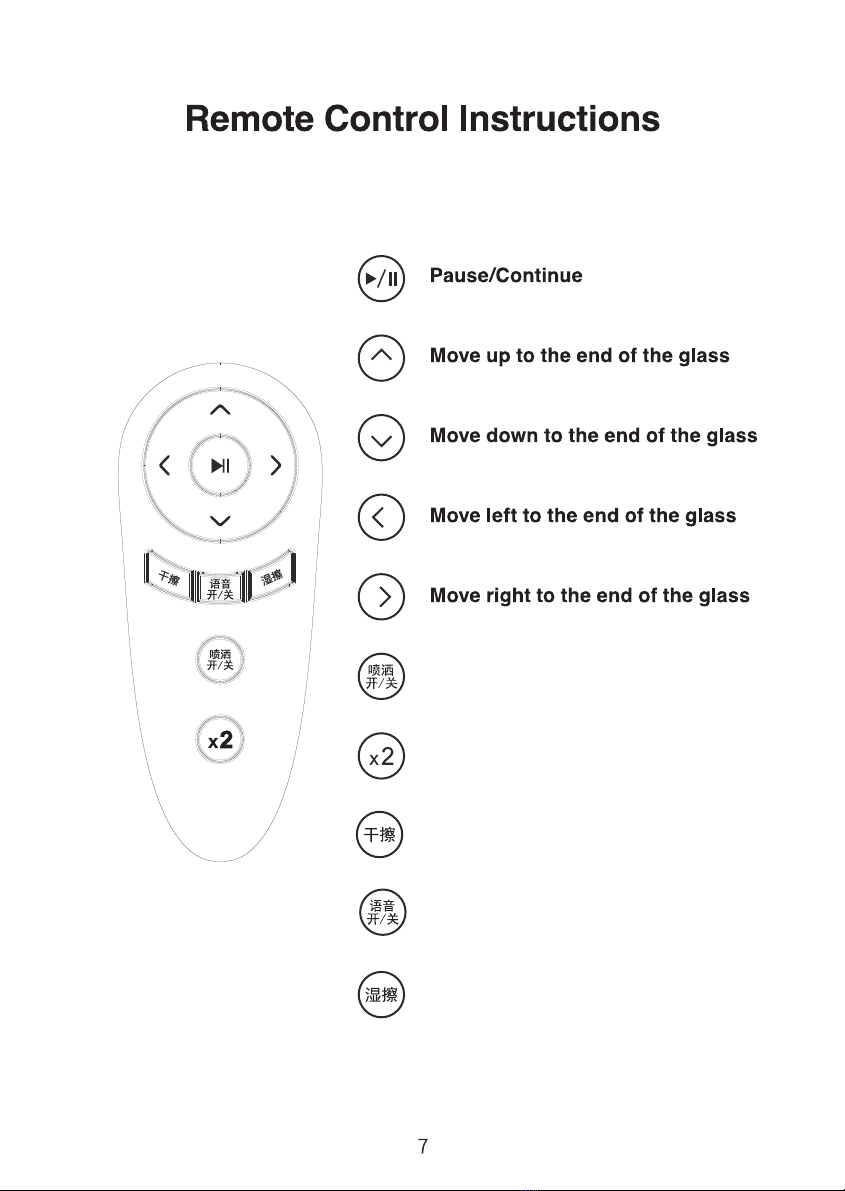
*To prevent misoperation , press pause key between instructions
Sprayer On / Off
Clean twice (in N shape and
Z shape)
Dry mopping
Wet mopping
Voice guide On / Off
Table of contents


