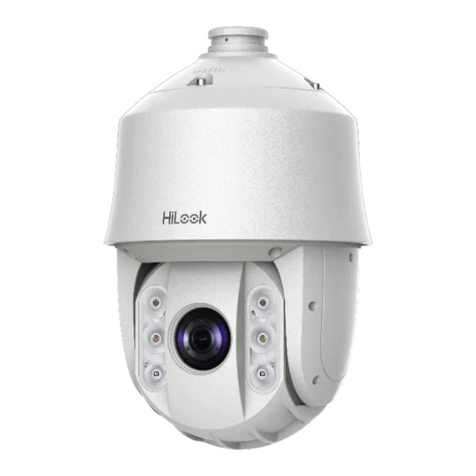
trik 312312 User manual

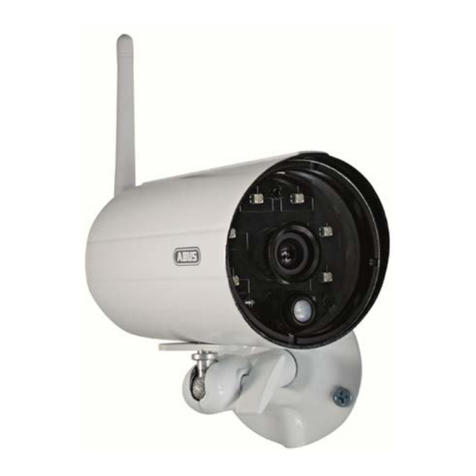
Product description Trik Cam
Model 312312
4
5
8
9
10
2
1
3
6
7
1 Infrared night vision
2 Camera
3 PIR motion sensor
4 Status LED
5 Microphone
6 Reset / Reset
7 Memory slot for micro SD card
8 Speakers
9 Power Input USB
10 Foot / Magnetic base
Product description Trik Cam
Model 312313
1
2
3
4
5
6
1 Microphone
2 Status LED
3 Reset / Reset
4 Speakers
5 Power Input USB
6 Memory slot for
micro SD card
2. Installation
Application
For Android users:
Download TRIKCAM application via Google Play
Go to Google Play and search for TRIKCAM.
Download and install TRIKCAM application via Google Play for free.
For iOS users (iPhone, iPad, etc.):
Download TRIKCAM application via the Apple App store
Go to the App Store and search for TRIKCAM application.
Download and install TRIKCAM application via the App Store for free.
3. Registration of user
Register user account and log into the application TRIK CAM.
Choose your username and password, then click Sign Up.
Use only letters, numbers and underscores when the username is created.
The minimum number of characters is 8 and the maximum number of characters 16.
4. Installing the camera
- Place the camera on a selected point in the wireless network coverage area.
- Connect the USB cable to the USB adapter and the camera.
The camera can be separated from the magnetic base and mounted on the metal surface. The camera
can also be mounted to the wall or stand independently.
With the magnetic foot the camera can easily be taken with them to another location if needed:
- Use a coin or similar tool to unscrew the bottom bracket from the base, the bracket can then be
mounted to the wall with screws. (Screws included)
- After the wall bracket screwed then easily mount the camera with the magnetic base.
Suggestion:
Selecting the location of the camera should be planned so camera don’t capture videos/images out of
your own property.
Camera 312312 and 312313 is made for indoor use.
Suitable locations for placement: Corridor / Hallway, Kitchen, Living Room, Baby room, garage, etc.
Camera Status
Start-up - LED flashes yellow
Programming mode - Green LED flashes slowly (once per second)
Connect to Wi-Fi - LED flashes green quickly (3 flashes per second)
The camera installed correctly - LED lights green continuously
5. Installing the camera into your application
An installation wizard takes you step by step through the installation
- Click the "+" sign in the top left corner of the application.
- Click "Connect my camera”.
- Select the camera model, check that the green indicator light flashes slowly.
- Click on the" Green light is flashing ".
- Connect to a 2.4GHz wireless network: Select the wireless network that the camera will connect to
(best if it your device are connected to same network) and type in the password for your wireless
network, then click "Next".
Binding Method 1: Sound Wave
- Point your phone or tablet speaker in front of the cameras microphone.
- It should be quiet in the surrounding area so there is no noise.
- Click (Send sound wave) and hold your phone or tablet steadily few seconds through the binding
process.
After the binding process is completed, you will be redirected automatically to the video list and can
start using the camera.
Binding Method 2: QR Code
If a problem occurs with the binding method 1 (Send sound wave), then click on (Add camera by QR
code scanning) and connect the camera via QR Code.
- After clicking (Add camera by QR code scanning) then the QR code comes automatically.
Hold the camera 10-15cm from the camera and the camera reads the QR code and implement
binding.
After the binding process is completed, you will be redirected automatically to the video list and can
start using the camera.
6. Camera list
Each user can install an unlimited number of cameras.
Remember that the more cameras you have installed on the same account, the more memory is
required for saving data in your phone or tablet. The cameras fall into a camera list so you can easily
switch between the cameras and adjust camera settings.
7. Playback live
Click on the camera you want to see, you can watch live streaming video or take snapshots.
8. Recording Video
Users can record video by pressing the icon “Video Recording”.
The recorded video is saved in the Albums and can be easily replayed.
9. The playback of stored video
You can play saved video.
Click "Play back", then select the video you want to watch.
Note: Recording videos from alarm activity needs to have a memory card installed.
USER MANUAL
Read the manual before installation

10. Share Camera with others
Each admin user can share up to 15 sub accounts (including the administrator account).
Administrators can add and delete the account by using the "Sub Account Management" function
from the camera settings.
- Click "Settings" of the camera you want to share.
- Click on "Sub Account Management" and enter your password.
- Click on "Add" and then type in the user name that you want to share the camera to. Finish with
"Add".
Now, the other users get access to the camera and can watch but cannot change any settings.
Existing sub-accounts can be deleted by swiping left of the account you want to delete and press
"Delete" button that appears in the application.
11. Sharing images
With Trik Cam application you can send pictures via message, email to friends or posting on social
media.
- Click on the "Album"
- Select the image to be sent, click on the image and then "Share".
- Choose the way you like to share the image, Mail, SMS, Face Book, Twitter, etc.
12. Function Mode / Working Mode
The camera can be set in two dierent working mode. Network Mode and Oine Mode.
With Network Mode the camera is connected to the Internet while Oine Mode the camera operates
as a pure monitoring. Oine can be good if you bring the camera to other locations where Internet
does not exist, then store the material on a memory card that can be inserted into the camera.
Upon installation the camera sets to Network Mode automatically.
To change the working mode to Oine Mode do the following:
- Click on the camera's "Settings" button
- Click on "Working Mode" and then "Oine Mode"
- Select the quality desired and click on "Enable Oine Storage".
Smooth (low quality that does not take much memory), SD (standard) HD high quality picture and
video but takes more memory.
Note: Before the camera goes into oine mode the camera should be connected to the Network
Mode and a micro SD memory card installed, otherwise you cannot use oine mode. (Micro SD
memory card are not included).
The path to find the storage material on the memory card are: / ithink / Oine Video (the video will be
stored in the Oine Video folder under “ithink” folder on the memory card).
The camera is compatible with a micro SD memory card up to 32GB.
Micro SD memory card is not included when purchase the camera.
To disable Oine Storage mode:
- Click on "Oine Mode" in the settings, and then click "Turn O Oine Storage".
- Use Soundwave binding button and align the speaker of the device to the front of the camera for a
few seconds to complete the process.
13. Video lock
With video lock you can lock you can protect so only you have access to the camera.
This can be useful if you must limit so that only yourself can access if you have shared your cameras
to others.
- Click "Settings" on selected camera and then "Video Lock".
- Click "Create Video Lock".
- Create a password by drawing a pattern that covers at least 4 points.
Remove Video Lock as following:
- Click "Settings" on selected camera and then "Video Lock".
- Draw your password patterns.
- Then click the Video Lock button on the right so that it is not green.
14. Infrared Night Vision
Infrared Night Vision is controlled by the camera system automatically. When there is not enough
lighting will infrared enable Night Vision. Infrared Night Vision switches o automatically when there
is enough light in the surroundings.
15. Alarm
The camera's built-in PIR motion sensor (for camera model 312312) detects when someone or
something discovered in the detection range, an alarm will ring for 5 seconds.
The user's mobile or tablet will also push notification.
Press the alarm message to view a playback of the recorded video of what triggered the alarm. You
can turn o the camera alert in the APP.
To activate the alarm function:
- Click "Settings" for the camera you want to activate the alarm function.
- Click on the "Alarm" and then click on the slider on the right side so that it becomes green.
- Adjust the sound "Alarm Tone" as you want.
- Set the time zone for the alarm to be activated by dragging the time slider until the desired time is
selected.
Deactivate the alarm
- Click "Settings" for the camera you want to deactivate the alarm function.
- Click on the "Alarm" and then click on the slider for "Alarm" on the right side so that it becomes gray.
Camera Model 312312 has integrated PIR motion sensor + night vision
Camera Model 312313 has integrated motion detection + night vision
16. Wall Mount camera model 312312
Trik cam 312312 have the opportunity with its versatile mounting plate to be mounted on a wall or
simply mounted directly on the metallic surface with its magnetic base.
1. Wall Mount camera 312312
- For wall mounting, you need screw and wall plug.
Note that the screws and wall plugsare not included.
- Recommended screw size, 2mm thick and 15mm long with conical screw head.
Select the appropriate plug to the selected screw.
Separate the camera
from the braket.
Place the bracket in one
hand, use a coin or similar
and rotate the bottom plate
clockwise to open.
After mounted the bottom plate
on the wall, Refit the front cover
of the base and rotate the front
cover clockwise to lock.
Mount the camera in the wall
bracket and tilt the camera to
the desired position.
Place the bottom plate on
selected location, mark the screw
holes with a pencil .
Distance between the screw
holes is 40mm.
Screw holes
40mm
17. FAQ
1. Cannot bind the camera
- Check that your wireless network operate on 2.4GHz.
- The user can only bind when the camera device is in binding mode
(Green LED flashes once per second).
- The camera cannot be connected to other accounts.
- Make sure that when you use Sound Wave binding the room is quiet and the speaker on your phone
or tablet is close to the microphone in front of the camera.
- When using the QR code binding, hold the phone or tablet upright approximately 10-15cm in front of
the camera lens.
- When the warning "Wi-Fi does not exist" make sure that your Wi-Fi network name is entered
correctly.
- When the warning "Wi-Fi Connection Fails" make sure that your Wi-Fi password has been correctly
entered.
- When the warning "Network abnormal please check router configuration", ensure that your router is
connected to the Internet.
2. Cannot connect to the Internet
Make sure the Wi-Fi router has Internet connection.
Make sure the Wi-Fi network name and or password has not been changed.
Check that your wireless network operate on 2.4GHz.
3. Video / Picture is not clear
Switch between "SD" or "HD" modes to adjust the picture quality.
4. Cannot play recorded video
Make sure there is a micro SD memory card installed (32GB max).
5. Why cannot I find my network and / or camera?
The camera unit cannot find a Wi-Fi network that is visible.
If your Wi-Fi network is not visible, change it to discoverable mode.
6. Restore to factory settings
When the camera is turned on, hold down the reset button for 3-5 seconds with a pin or sharp object.
When the voice message in the camera: "system is resetting" you shall not unplug the power cable.
Recovery under process.
TIPS:
- To update changes or if something not updated, you can pull down the screen of the phone or tablet
to update the camera list or other information.
- Supports up to 32GB micro SD memory card, and stores video up to 24 days.
- You can share one camera up to a maximum of 15 user accounts, including your own user account.
- When you plan to pair the camera with the application and use Sound Wave the environment has be
as quiet as possible not to be disturbed. If it's noisy environment where the camera are located then
use the QR code to pair the camera.
Specification model 312312
Microphone YES
Speaker YES
Frame rate up to 30fps
Video formats 720p (1280x720)
Video compression H.264
PIR Motion Sensor YES
Night vision YES
Storage Micro SD (not included)
Max storage 32G
Eective pixels 1 Megapixels
Field of View 100 degree
WiFi support 2.4GHz 802.11b / n / g
Automatic re-start YES
Product Size 129.5 x 48.3 x 19mm
Power Supply 5V-2A input, micro USB
Specification model 312313
Microphone YES
Speaker YES
Frame rate up to 30fps
Video formats 720p (1280x720)
Video compression H.264
Night vision YES
Storage media Micro SD (not included)
Max storage 32G
Eective pixels 1 Megapixels
Field of View 100 Degree
WiFi Stödjer 2.4GHz 802.11b / n / g
Automatic re-start YES
Power Supply 5V-2A input, micro USB
Imported by: Proove AB, Kabelvägen 7, 311 50 Falkenberg, Sweden
Tel: +46 (0) 346 64 65 00, Fax: +46 (0) 346 64 65 20, www.proove.se
Artwork version2.0
This manual suits for next models
1
