triopo Speedlite User manual

捷宝微信公众账号:捷宝TRIOPO摄影闪光灯三脚架
微信号:triopojiebao
SPEEDLITE
3000本
E版使用说明书
SPEEDLITE

The Speedlite Features
1 2
1.TTL flash
2.Manual flash
3.Multi flash
4.Wireless slave unit function:Compatibility with the Canon and Nikon
wireless flash system,realize TTL from machine,manual and frequency flash
5.S1.S2 Light flashing mode
6.Flash control by Camera (Only for the newest Canon Version)
7.High-Speed Sync 1/8000s
8.Rear-curtain Sync
9.Voice prompt
10.Custom function
11.Power save mode
12.Overheating protection
13.Automatic save function
14.Large size LCD display
15.Manual,Auto zoom function
16.Quick response:Full output recycle time only 2.9 seconds
17.Support high speed continuous shooting:In 1/16 brightness and blew,It
can support 12EPS high speed continuous shooting.
Thank you for this purchasing this speedlite.

3 4
Reflect
Lampshade
lockingbutton
Head locking
button
LCD screen
Two key at the same
time according to
factory default key
Wireless Settings
button
Select/Settings
button group
Flash key/
Wake up key
Wireless select keys
High Speedsync/
Rear-Certion/Normal
flash cutover key
(Canon version)
Mode
selection buttons
Backlight switch/
Long press button set
custom function Settings
Switch button

Set the Bounce Drecion
Power regulation
Power trimming/stroboscopic
frequency setting/TTL
Exposure Compensation
Light induction mode
( )
Multiple frequency flash
M/MULTI Manual flash/
Induction mode(S1/S2)
Buzzer switch
Custom function icon
Overheating protection icon
Electricity display
Manual Zoom
Affiliate account
( )Channel
Flash mode
5 6
<
>
Zoom
<
>
<
>
<
>
<
>
<
>
<
>
< >
<E-TTL>
<i-TTL>
Flash Exposure Bracketing
Canon TTL Modle
Nikon TTL Modle
Slave
High Speedsync
Rear-Certain
Aperture value
Auto Zoom
AF-Assist illuminator
When working under a darkness condition,the automatic AF
which is in the right ahead of the flash light may temporary
project red hard light to assist focusing.
It may disturb the subject,you can turn to manual focusing.
180
180
90
7

7 8

1.The external
power connector
Provides more
adequate power.
2.Conetect with the
PC sync
Make sure camera
and speedlite
synchronized flash.
910
,When the speedlite do
not working within 60 seconds,the CPU automatically into
hibernation.In this case press any key to wake up the speedlite.When the
speedlite does not work for more than 30 minutes,the CPU will shut
down automatically.
After automatically shut off the power opened
TTL Flash
Set the camera's shooting mode to <P>( Program automatic exposure)
or < >(Auto),when fully automatic flash will make photography
became as simple as <P> mode and < > mode under normal automatic
exposure.
Set the flash exposure compensation
value
1.Select the flash mode
2.Press 【MODE】 mode button until
the LCD display
Canon
Nikon
Set the flash exposure compensation
value.
When press five select button settings
group【Up】【Down】to set the
compensation value.
1.Select the Settings button group【RIGHT】keys,power values increase
sequentially.
Select the Settings button group【LEFT】keys,power values decrease
sequentially.
2.The compensation value is in the range of +3.0EV to -3.0EV.
The compensation value icon:
0EV→+0.3EV→+0.7EV→+1.0EV→+1.3EV→+1.7EV→....→+3.0EV
0EV→-0.3EV→-0.7EV→-1.0EV→-1.3EV→-1.7EV→.. ..→-3.0EV
State of charge indicator
Before shooting,confirmed that flash charging
indicator light and camera viewfinder lights
have been lit.
Extended Interface
Turn on the power

11 12
Using E-TTL and Autoflash in the shooting Modes
Just set camera’s shooting mode to <AV/A>(aperture -priority AE),
<TV/S>(shutter-priorityAE),or<M>(manual)and you can use E-TTL/
i-TTL autoflash.
Select this mode when you want to set the shutter speed manually.
The camera will then automatically set aperture matching the
shutter speed to obtain a standara exposure.If the aperture display
blinks,it means that the background erposure will be underexposed
or overexposed. Adjust the shutter speed until the aperture display
stops blinking.
Select this mode when you want to set the aperture manually.
The camera will then automatically set the shutter speed matching
the aperture to obtain a standard exposure.If the background is
dark like a night scene ,a slow sync speed will be used to obtain a
standard exposure of both the main subject and background.
Standard exposure of the main subject is obtained with the
flash,while a standard exposure of the background is obtained
with a slow shutter speed.Since a slow shutter speed will be
used for low-light scenes, using a tripod is recommended.If
the shutter speed display blinks,it means that the background
exposure will be underexposed or overexposed.Adjust the
aperture until the shutter speed display stops blinking.
Select this mode if you want to set both the shutter speed and
aperture manually.Standard erposure of the main subject is
obtained with the flash.The exposure of the background is
obtained with the shutter speed and aperture combination
you set.
AV
AV/A
M
M
TV
TV/S
P
If you use the <DEP>or <A-DEP>shooting mode, the result will be the
same as using the <P>(P AE)mode.rogram
Flash Sync Speeds and Apertures Used
Shutter Speed Setting Aperture Setting
Set automatically(1/60 sec.~1/Xsec.) Automatic
Manual
Automatic
Manual
Set automatically(30 sec.~1/Xsec.)
Set manually(buLb,30 sec.~1/Xsec.)
Set manually(30 sec.~1/Xsec.)
1/X sec.is the camera’s maximum flash sync speed.

13 14
0 3.02.72.32.01.71.31.00.70.3
FEB: Set theFlash exposure bracketing value
You can take three flash shots while automatically
changing the flash output for each shot up to ± 3
stops in 1/3-stop increments (1/2-stops increments
if the camera enables only 1/2-stop increments).
This is called FEB(Flash Exposure Bracketing).
For Feb,set the camera's drive mode to "single
shot".Before shooting to ensure that flash ready.
Press "Five select settings button group" 【Up】【Down】 key to set the
required exposure bracketing value.
1, Press "Five select settings button group" 【Up】 key,bracketing value
increases;
Press "Five select settings button group" 【Down】 key,bracketing value
decreasing.
2.The FEB is in the range of 0-3.0.
The FEB icon:
FEL:Flash exposure lock
Select the flash mode
Press 【MODE】 mode button until the
LCD display .
Power setting
1.Select the Settings button group
【RIGHT】keys,power values increase
Manual flash mode M
When you need a manual exposure,according to own requirements to
set the brightness of the flash output between 1/128 power to 1/1 full
power.Adjust the flash output with 1/3 speed increment,press the zoom
button 【ZOOM】 into the manual zoom.
sequentially.
Icon:1/128→1/64→1/32→...→1/1
2.Select the Settings button group
【LEFT】 keys,power values decrease
sequentially.
Icon: 1/1→1/2→1/4→...→1/128
3.Select the Settings button group
【UP】【DOWN】keys,Fine tuning of
the value of power of the flash.
Icon:
0EV→+ 0.3EV→+ 0.7EV
0EV→- 0.3EV→- 0.7EV
Flash exposure lock locks the correct flash exposure setting for any part
of the scene.With <TTL> displayed on the LCD panel,You press the
camera’s <FEL>button,If the camera does not have the <FEL>button,
press the "*" button. Nikon camera press "FV" button.If the camera
support flash exposure lock: connect the flash screen under TTL mode,
you can set the flash on the camera exposure by locking, after set, the
speedlite will fire a preflash and the required flash output for the subject
is retained in memory.The camera will calculate the flash compatible
output data,you have time to composition again,after finishing
composition can press the shutter to shot (this feature requires you to
use the camera itself support,please refer to your camera manual settings).

Select the Settings button group【RIGHT】key,focus values
increase sequentially.
Select the Settings button group【LEFT】key,focus values
decrease sequentially.
15 16
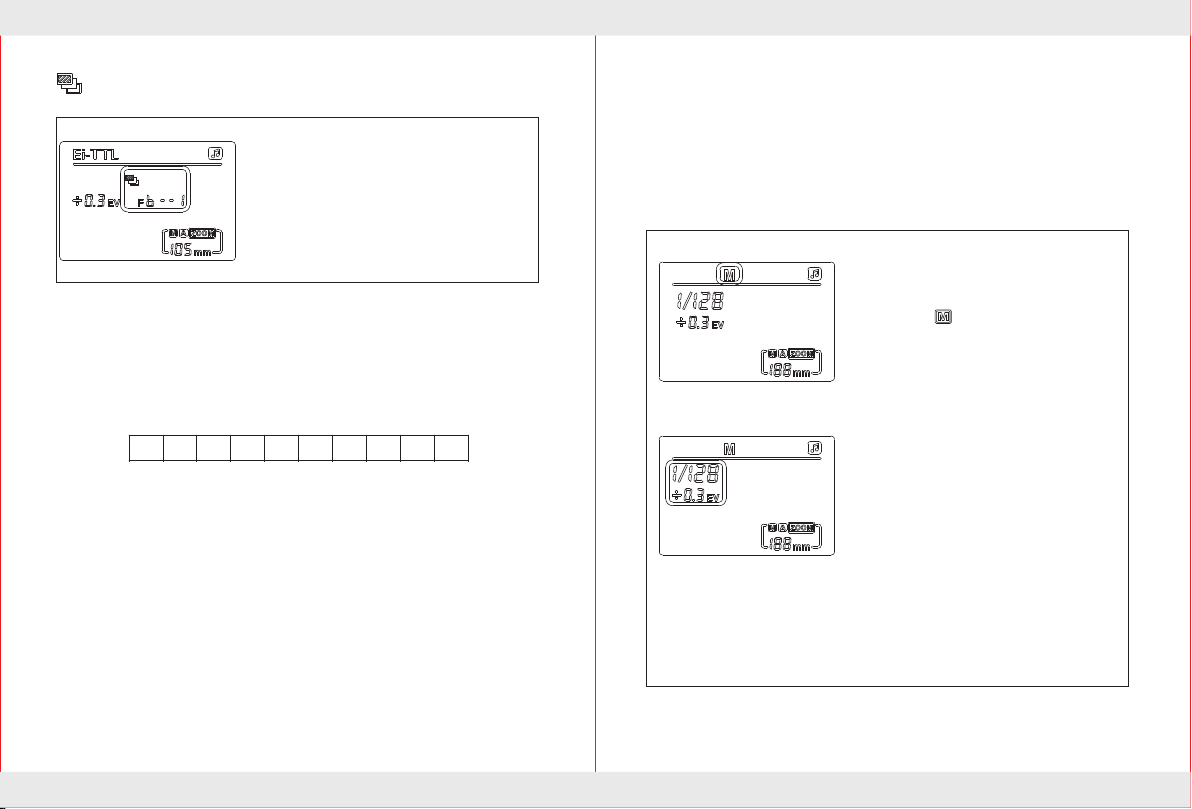
Stroboscopic flash mode(Multi)
Using Multi mode,you can issue a series of quick flash,it can shoot
multiple images of moving objects on a photo,you can set the flash
frequency (number of flashes per second can use Hz to show),the
number of flashes and flash output.During repeated Multi mode,Single
exposure create a strobe effect of multiple exposures.This mode is often
used when shooting moving objects.
To prevent the flash head overheat and damage,do not perform more
than 10 times in a row strobe flash burst.Between twice repeated
exposure operation please let flash plenty of time for the call
After flash work for 10 times please let it cool for at least 15
if you are trying to perform more than 10 times in a row strobe flash
burst the flash may automatically stop to prevent overheating of the
flash head.If this happens,please let the flash cool for at least 15
minutes.Please use a new battery or a fully charged battery to operate
this mode.
Under Strobe mode (Multi),It support flash power,time of flash as
well as frequency regulation.
Select the flash mode
Press 【MODE】 mode button until the
LCD display .
Select the setting button group
【MIDDLE】key of settings button
group to display flicker,Press
select settings button group 【LEFT】
【RIGHT】 to set the frequency.The
available flash frequency is 1HZ-
199HZ.After value setted then select
the setting button group 【MIDDLE】
key to confirm.
Frequency setting
The number of flashes set
Press select the Settings button group 【MIDDLE】 key until LCD
display flashing. Select the Settings button group 【LEFT】
【RIGHT】 key to set the flash power.After Values is setted and
then select the Settings button group 【MIDDLE】 key to confirm.
Exposure power setting
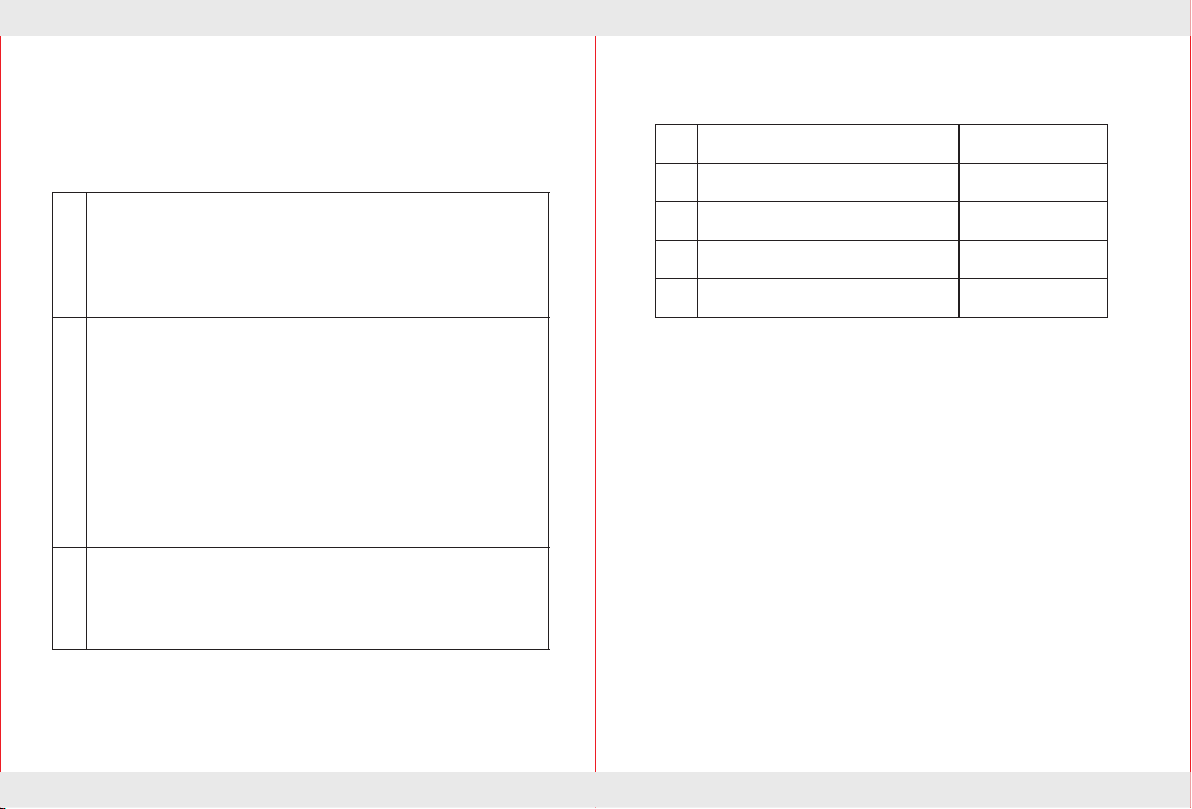
1-40 1-20 1-12 1-8 1-4 1-2
1-128 1-64 1-132 1-16 1-8 1-4
Flash power and the number of flash relational tables
Flash power
Flash number
Press the zoom button 【ZOOM】 key
to display the zoom data flashing,Select
the Settings button group 【LEFT】
【RIGHT】key to set the appropriate
focal length value,After focal length
value have been setted,Press 【ZOOM】
key to confirm.
【ZOOM】Zoom settings
back.
minutes,
Select the Settings button group 【MIDDLE】key to display
flashing,Select the Settings button group 【LEFT】 【RIGHT】key to
set the number of flashes,the available number of flashes for 1-40.After
Values setted and then select the Settings button group 【MIDDLE】
key to confirm.
A
Automatic

17 18
Wireless flash mode
C means that only to receive
Canon wireless flash signal,
avoid N signal interference;
N means that only to receive
Nikon Remote flash signal,
avoid C signal interference;
With multiple speedlite having the wireless flash feature,you can create
various lighting effects with the same ease as using normal TTL autoflash.
1.Set the speedlite to wireless flash mode by press wireless selection key,
When the LCD screen display SLAVE C.Press the Wireless select button.
The flash will switch between SLAVE C/SLAVE N/S1/S2/ as well as normal
flash.The SLAVE C/SLAVE N/S1/S2 four models as the slave unit from
machine use,create different lighting effect.
SLAVE C indicate receiving wireless flash signals from the canon 7D
/60D/600D camera flash and 580EX II,600EX,ST-E2.SLAVE N indicate
received C instruction form Nikon camera as well as C instruction signal
of SB-900/800/700, SU-800 .SLAVE C/N supports 4 channel, 3 different
groups,TTL,manual and stroboscopic wireless flash.Using this mode by
rotating flash lamp,It make the wireless trigger sensors toward the master
speedlite.Before shooting,this speedlite and the Master speedlite should
be arranged in the same channel.This speedlite as the slave unit,press the
[ZOOM] button until the channel or category flicker,respectively setting
the slave unit Communication channels (1, 2, 3, 4) and the slave unit group
(A, B, C).When work in Slave units,
The flash mode of brightness
and completely controlled by the Master control unit,and to display the
received information.
Focal length is not controlled by the
Master flash light, need to adjust manually.
4.Press【ZOOM】 key to flashing,press 【LEFT】【RIGHT】key
to set the group. Press【middle】key to confirm exit the settings.
A/B/C
2.The Master unit
The Master speedlite set any flash exposure compensation setting,flash
exposure bracketing, exposure lock,manual flash stroboscopic flash,
information settings will be automatically transferred to this speedlite.
3.Press【ZOOM】 key to . Flashing,press 【LEFT】【RIGHT】
key to set the wireless channel,Press【middle】key to confirm,exit the
settings.

19 20
(1)When you press the Settings
button【RIGHT】keys,the compensation
value in turn increases.
Icon:1/128→1/64→1/32→ →1/1
When you press the "Select the Settings
button” 【LEFT】 key the compensation
value in turn decreases.
Icon:1/128→1/64→1/32→ →1/1
(2)Select Settings button 【UP】
【DOWN】function key to fine-tune the
flash power value.
Icon:0EV→+0.3EV→+ 0.7EV
Light flashing mode S1 S2
S1 Mode:
It is suitable for manual flash environment,It
will senses every flash of the main flash and
synchronous trigger flash,It is consist effect
for use wireless flash.To properly use this
mode,your master flash should be set in the
manual flash and neither be used with pre-flash
TTL flash system,Nor be used with multiple
flash red-eye reduction function.
S2 Mode:
It is suitable for TTL flash mode,also
known as the ‘pre-flash cancel mode’,the
mode can ignore the pre-flash TTL flash
and synchronization with the main
flash,so you can support the Master flash
in TTL mode.
If the auxiliary lamp selection S1/S2
mode can not properly synchronized with
the master flash,make sure that the flash
mode of the master flash is
right.Sensing modes and power output
should be set correctly.
When need to form a flash unit off-camera flash.You can set the slave
light in S1or S2. When use S1, S2 mode,the sensor against the master
lights by rotatingthe flash head.
Set light flashing mode S1 S2:
1.Press wireless select button until the LCD display S1, S2.
2.Press the wireless select button ,can make flash into the S1,S2
mode,these two modes suited as from the the machine auxiliary lamp
role to create a variety of lighting effects.They are suitable for manual
flash environment and TTL flash environment.In these two mode to
adjust the output brightness is the same as M mode,only need to operate
in the【Left】【Right】 【Up】 【Down】and 【Middle】button.
...
...
Please note that to avoid the following situations when use the S1 S2
mode: The Master speedlite using in the red-eye reduction function
and modeling;The master speedlite using the remote flash mode (Nikon) or
wireless flash mode (Canon);Use ST-E2 as flash controller.
Note:When the flash under Slave mode,Mode key is invalid,It need to
withdraw from the Slave mode so that can change the mode manually.
When the Nikon version speedlite setting in the Slave mode,It can't
connect with the camera,It need withdraw Slave mode so that can connect.
When the canon version speedlite setting in the Slave mode,connecting with
the camera.It will automatically exit the Slave mode into E-TTL mode.

21 22
“ ”High-speed synchronous
“ ”Rear-curtain sync settings
High-speed synchronous: can make flash with the camera high shutter
speed synchronous operation,in the use of flash photography outdoor
portraits and other strong light source Shall use a large aperture, this
model is very useful.
Rear-curtain sync:With a slow shutter speed,you can create a light trail
following the subject, the flash fires right before the shutter closes.
1.Canon version speedlite,Under E-TTL,M mode,If you want to
correct use the High-speed sync/Rear-curtain sync funtion,Press
the 【High-speed sync/Rear-curtain sync/Ordinary flashlight】
switch key to ordinary flash (no, display)→High-speed
synchronization( )→Rear-curtain sync ( ) to open the
corresponding function.
2.Nikon version speedlite,you can't directly set automatic high-speed
synchronous mode on the speedlite,First setting the Camera Menu to
'FP' automatically open,When connect the camera the flash screen
display 'FP' immediately. If you need the Rear-certain synchronous
mode,The same settings to open the Rear-curtain sync on the camera
Menu.(There is no display on the speedlite)
Note:To correct use the High-speed sync/Rear-curtain sync,please
properly set camera flash mode and shutter speed.
Multi-lamp lighting applications
1.Wireless lighting light instructions
Multi stage flash, wireless flash configuration
You can create two or three slave groups to complete the multi-
directionalshooting demand. And a main controlling flash setting TTL
auto flash shooting flash ratio, manual flash output, stroboscopic etc.
(1) Using this speedlite make two slave groups Wireless flash
Set of wireless options: there are SLAVE c/SLAVE n options
A communication channel is provided: 1, 2, 3, 4
Set group: two speedlite are set to A, B gr o u p s
Set the Master unit: a communication channel is provided: set the flash
ratio of Master unit A:B or A:B:C, to flash shooting
(2) The speedlite make three slave groups Wireless flash
Set of wireless options: there are SLAVE c/SLAVE n options
A communication channel is provided: 1, 2, 3, 4
Set group: three speedlite are divided into A, B, C groups
A main control unit and shooting: a communication channel is provided:
the main control unit of the flash ratio is <A:B:C>.
Pressed to the Master unit to test flash ,test the flash normal or no.
If the slave unit does not flash, please check the speedlite toward the
master unit angle and distance to the master unit
Note: the Master unit if you set the <RATIO A:B>, set as a slave unit
<C> group will not flash .If the group of three speedlite is set to <A>,
then they will be used as a flashlight acceptor slave control by groups
control unit.
This speedlite can receive signals from the Master High-speed
synchronous flash (i.e., away from the machine high speed
synchronization)

23 24
Bounce flash
High-speed burst modle
The camera menu access (only Canon newer models)
It may be operated by a camera flash menu access in support of E-TTL
(Canon) the newest camera.In the flash control menu “External flash
function settings”and “External flash Custom settings”can set the flash
parameters;such as switching E-TTL mode / manual flash mode and
multiple flash mode (Multi),wirelessflash setting,exposure bracketing,
exposure compensation,focal length and advanced options function etc..
2.Wireless induction lighting light
The improved wireless triggering sensor trigger have higher sensor
sensitivity, S1,S2 mode can work in the outdoor environment,wireless
trigger sensing have distance of 15 meters.
Installing the bare bulb
1. Notice that the bootom of the bare
bulb has eight metal pins positioned
in a circle around a large plastic pin.
2.The center pin has a locator tab which
is situated between pin 1 and pin 8.
3.In sert the bare bu lb into the 8-pi n
socket located at the top of the flash
head. Align the locator tab of the bulb
with the locator slot in the 8-pin socket.
Be sure the flash bulb is pushed completely
into the bulb socket.
Attaching the bare bulb reflector
1. When desired, the flash head’s Reflector can be threaded
into the flash head directly around the flash bulb.
2.Use caution when screwing the reflector into the
light head. It is possible to crossthread the two
pieces. The reflector will fit snugly after 6½ turns.
Attaching the diffuser
1. If desired, the 4½-in Diffuser can be slipped
onto the outside of the Reflector.
2.The diffuser is removed by simply pulling it off the
reflector.

25 26
You can follow your shooting preferences
custom flash function.Use a custom function
to complete the set.
Press the "custom function setting button”
to the shown on the left.
Choose the functionality they
need,press【up】【down】key setting
Custom function settings
Note: Fn number of 00 ~ 13 options can be
accessed through the camera menu of
"External flash custom function Settings"
to set up; The Numbers for: 00, 02, 05, 06,
07, 09, 10, 11, 12, 13 option has been
disabled. (Internal Canon cameras menu)
C.Fn-01
C.Fn-03
0
1
0
1
Custom
Function No. Function
Auto power off
Set ID Settings and
descriptions
on
off
on
off
-→0→+
0→-→+
C.Fn-04 0
1
C.Fn-08
0
1
on
off
C.Fn-14 0
1
on
off
Flash exposure
bracketing
auto cancel
Flash exposure
bracketing
sequence
Af-assist beam
firing
Buzzer switch
1.A long ring: call back to complete
2.Two short sound: boot or call back to
complete normal flash.
3.Two long beeps: flash call back
unfinished.
4.Three short blasts: 30 minutes without
Voice prompts:
Different sound ways will prompt the different working conditions of
the speedlite so as to make you focus on shooting only.
Long press the custom function setting button to custom
settings the buzzer switch will be turned on or off.
operation automatically turn off or shut
down.
5.Four short beeps: low battery shutdown
(call back timeout).
6.The display will show continuous
shortness beep: flash overheating, to enter
the overheating protection .enter
overheating protection the display will
show overheating protection icon.
Backlight tips

The wirelss trigger: Wireless induction flash lighting
The wireless cited flash distance:Indoor 20-30 meters,
Outdoor 10-15 meters
28
Flash mode :TTL,M,FEB,Slave,S1,S2,Multi
Colour temperature:5500K
Recycle time:2.9 seconds
Flash control:1/128~1/1 step length is 0.3EV,Total 22 fine -tuning stalls.
Peripheral interface:Hot shoe,PC mount,External charge mount
Flash time:1/200 seconds ~1/20000 seconds
Power:4pcs AA alkaline cell or AA Nickel-Hydrogen(NI-MH) battery
Lighting time:100~1500 times
Additional function:PC synchronous,Sniff mode,Over temperature
prot-ection
Volume:280*75*57mm
Net Weight:495g
Circuit design:Insulated Gate Bipolar Transistor(IGBT)
Flash coverrage:18~180mm
Manual,Automatie Zoom
Swinging/Tilting flash head (bounce flash)
Flash index:56(ISO100,180mm)
Up and down whirl angle degree:-7~90degree
Left and right whirl angle degree:0~180degree
Slave Group and Unit: 4 Slave lommunication channels (1,2,3,4)
3 Slave unit group(A,B,C)
Table of contents
Other triopo Camera Flash manuals