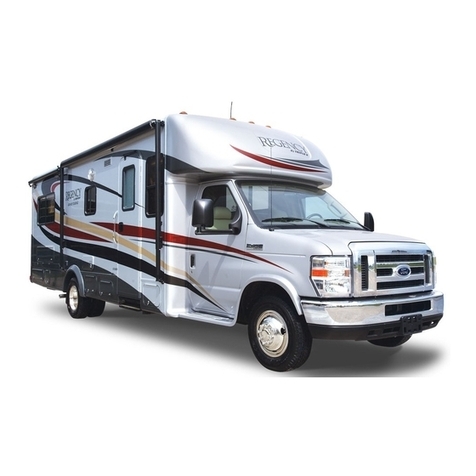
Triple E COMMANDER Series User manual

COMMANDER & EMBASSY
MOTORHOME
OWNERS MANUAL
Experience the Difference


FORWARD
A WORD TO MOTORHOME OWNERS
Welcome to the growing number of discerning peo-
ple who own and operate a Triple E Motorhome.
Our company takes great pride in the quality and
excellence that the Triple E name represents. We
have sought to anticipate your needs and desires
with respect to safety, convenience, styling, and
engineering.
We appreciate having you as our customer and
have provided this manual and various component
manuals to introduce you to the many features
of your new motorhome. Each person using the
motorhome should take time to read this manual
before operation. It will help you to better under-
stand the many built-in operational features of this
recreation vehicle. Talk to your dealer if you have
any questions about your unit.
We hope you will enjoy your new motorhome, and
we wish you pleasant and carefree driving.
Failure to read the manual completely and thor-
oughly may lessen your total enjoyable experi-
ence.
WARNING
IMPORTANT
Modifi cations that are not approved
by Triple E may void the warranty and
transfer responsibility for the changes
to the owner.
This manual is intended to be a guide-
line. This manual despite our best efforts
should not be considered comprehensive
in all details. We invite you to use this
manual to help you learn the basics about
your vehicle. The component operation
will be in the manual for the fridge, stove,
This vehicle is equipped with the latest
systems, appliances and operational
equipment making it considerably more
complicated than a normal automobile.
The use of three way systems; 120V,
12V and propane needs careful con-
sideration as the availability of energy
in both the 12V and propane systems
has a limited capacity and volume. Due
caution should be applied and in case of
doubt, clarifi cation from the authorized
Triple E dealer or our factory service
department should be obtained. Do not
modify the unit in any way. Unau-
thorized modifi cation may impair
the function or life of the vehicle and
could lead to an accident.
INFORMATION AND SAFETY
Throughout the manual, certain instructions, pro-
cedures and information is emphasized with the
words IMPORTANT, CAUTION and WARNING.
These key words denote the level of care that each
operator should exercise on mechanical and safety
items.

TABLE OF CONTENTS
SECTION DESCRIPTION PAGE SECTION DESCRIPTION
1 Introduction
..............................................
1-1
1.1 Operator's Manuals
........................
1-1
1.2 Information Kit
................................
1-1
1.3 Options and Equipment
.................
1-1
1.4 Keys
...............................................
1-1
1.5 Vehicle Certifi cation Label
.............
1-2
1.6 Identifi cation Information
................
1-4
1.7 Exterior Feature Identifi cation
........
1-5
1.8 Service Assistance
.........................
1-7
1.9 Reporting Safety Defects
...............
1-7
1.10 Driving Comfort
..............................
1-7
2 Safety
.........................................................
2-1
2.1 General Safety
...............................
2-1
2.2 Driving Safety
.................................
2-2
2.3 Fuel (Motor and LP Gas)
...............
2-2
2.4 Asphyxiation
...................................
2-3
2.5 Formaldehyde
................................
2-3
2.6 LP Gas Leaks
................................
2-3
2.7 Alarms
............................................
2-4
2.8 Electrical
........................................
2-4
2.9 Loose Components
........................
2-5
2.10 Maintenance
..................................
2-5
2.11 Emergency Exits
............................
2-5
3 Preparation
................................................
3-1
3.1 Vehicle Preparation
........................
3-1
3.1.1 Keys
...............................................
3-1
3.1.2 Vehicle Loading
.............................
3-1
3.1.3 Trailer Towing
................................
3-2
3.1.4 Auxiliary Vehicle Towing
................
3-2
3.1.5 Parking, Levelling and Blocking
.....
3-3
4 Controls
.....................................................
4-1
4.1 Chassis Controls
............................
4-1
4.2 Dash Controls
................................
4-2
4.3 Driver's Door (Commander Only)
...
4-4
4.4 Driver's/Co-Pilot Seat
.....................
4-5
4.5 Cocktail Seat
..................................
4-6
4.6 Seat/Shoulder Belts
.......................
4-6
4.7 Front Upper Cabinets
.....................
4-8
4.8 Bedroom TV
...................................
4-9
4.9 Side Entry
....................................
4-10
4.10 Refrigerator
..................................
4-11
4.11 Light Switches
..............................
4-12
4.12 Comfort Control Center
................
4-13
4.13 Furnace
........................................
4-14
4.14 Thermostatically
Controlled Celing Fan
..................
4-15
4.15 Plumbing
......................................
4-16
4.15.1 Water Heater
................................
4-16
4.15.2 Water Heater Bypass
...................
4-17
4.15.3 Water Pump
.................................
4-18
4.15.4 Utility Module
...............................
4-19
4.15.5 Water System Access
(Embassy Only)
...........................
4-21
4.16 TV Antenna
..................................
4-23
4.17 Battery Disconnect
.......................
4-24
4.17.1 Commander
.................................
4-24
4.17.2 Embassy
......................................
4-24
4.18 Slide-Out Room (Optional)
...........
4-25
4.19 System Monitor
............................
4-26
4.20 Energy Management System
(EMS) - Commander only
............
4-27
5 Driving
.......................................................
5-1
5.1 Pre-Trip Inspection
.........................
5-1
5.2 Emergency Equipment Check List
.
5-2
5.3 Before Departing
............................
5-2
5.4 Engine Operation
...........................
5-2
5.5 Driving Characteristics
...................
5-3
5.6 Driving Safety Tip
...........................
5-3
5.7 Travel Tips
.....................................
5-4
5.8 Quick Loading Check List
..............
5-5
5.9 Sever Weather Information
............
5-6
6 Safety Equipment Operation
....................
6-1
6.1 Fire Prevention
...............................
6-1
6.1.1 Fire Safety Tips
..............................
6-1
6.1.2 Fire Extinguisher
............................
6-2
6.2 Emergency Escape
........................
6-3
6.3 Alarms
............................................
6-4
6.3.1 LP Gas Alarm
.................................
6-4
6.3.2 Carbon Monoxide Alarm
................
6-5
6.3.3 Smoke Alarm
.................................
6-6
6.3.4 Intruder Alarm
(Optional - Commander only)
.........
6-7
6.4 Rear View Camera/Monitor System
....
6-8
7 Travelling
...................................................
7-1
7.1 Preparation
....................................
7-1
7.2 Baggage Loading
...........................
7-1
7.2.1 Roof Loading
..................................
7-1
7.2.2 Baggage Compartments
................
7-1
7.3 Vehicle Weight-Loaded
..................
7-2
7.4 Front Axle Tire Alignment
..............
7-2
7.5 Maximum Occupancy
....................
7-2
7.6 Seat Belts
.......................................
7-3

TABLE OF CONTENTS
SECTION DESCRIPTION PAGE SECTION DESCRIPTION
11 LP Gas System
.....................................
11-1
11.1 Safe Use of LP Gas
.....................
11-1
11.2 How LP Gas Works
......................
11-1
11.3 Selecting Fuel Types
...................
11-2
11.4 LP Tank System
...........................
11-2
11.5 LP Tank Capacity
.........................
11-2
11.6 Refi lling LP Tank
..........................
11.6 Refi lling LP Tank .......................... 11.6 Refi lling LP Tank
11-3
11.7 Air in the LP Tank
........................
11.7 Air in the LP Tank ........................ 11.7 Air in the LP Tank
11-4
11.8 Travelling LP Gas
........................
11-4
11.9 Regulator
.....................................
11-4
11.10 LP Gas Leaks
..............................
11-5
11.11 LP Gas Detector
..........................
11-5
12 Water/Plumbing System
.........................
12-1
12.1 Fresh Water System
....................
12-1
12.1.1 Fresh Water Tank Filling
Procedure
....................................
12-2
12.1.2 Water Pump
.................................
12-2
12.1.3 Water Pump Switch
.....................
12-3
12.1.4 Water Pump
.................................
12-4
12.1.5 Water System Access
..................
12-4
12.1.6 Water Pump Initial Start-Up
.........
12-4
12.1.7 Water Pump Troubleshooting
......
12-5
12.1.8 Disinfection of Water Tank
...........
12-5
12.1.9 External Water Supply
.................
12-6
12.2 Waste System
..............................
12-7
12.2.1 Grey Water - Waste Holding Tank
12-7
12.2.2 Black Water - Waste Holding
Tank
.............................................
Tank ............................................. Tank
12-7
12.2.3 Dumping Holding Tanks
...............
12-8
12.2.4 Tank Rinse
...................................
12-9
12.2.5 Do's And Don'ts Holding Tanks
...
12-9
12.2.6 Using On-Site Sewer Hook-Ups
..
12-9
12.2.7 Holding Tank Level Indicators
....
12-10
12.2.8 Tank Capacities
.........................
12-10
12.3 Plumbing System Operation
......
12-10
12.3.1 Water Heater
..............................
12-10
12.3.2 Toilet
..........................................
12-11
12.3.3 Shower
.......................................
12-11
12.3.4 Exterior Shower (Optional)
.........
12-12
12.3.5 Water Purifi er
(Optional - Commander only)
.....
12-12
12.4 Plumbing Specifi cations
.............
12-12
12.4.1 Tank Capacities
.........................
12-12
12.4.2 Plumbing Schematics
................
12-13
13 Appliances And Interior Features
.........
13-1
13.1 Refrigerator
..................................
13-1
13.1.1 Operating Instructions
..................
13-1
13.1.2 Operating Tips
.............................
13-1
7.6.2 Shoulder/Lap Belts
.........................
7-3
7.6.3 Care and Cleaning
.........................
7-4
7.6.4 Child Restraints
..............................
7-4
7.7 Mirrors
............................................
7-4
7.8 Free Standing Dinette
....................
7-5
7.9 Refuelling
.......................................
7-5
8 Emergencys While Driving
.......................
8-1
8.1 Hazard Warning Lights
..................
8-1
8.2 Flat Tire
..........................................
8-1
8.3 Towing
...........................................
8-2
8.4 Overheating
...................................
8-2
8.5 Jump Starting
.................................
8-3
9 Home Use
..................................................
9-1
9.1 Parking
...........................................
9-1
9.2 Motorhome Levelling System
(Optional)
.......................................
9-1
9.3 Slide Out Room (Optional)
.............
9-3
9.3.1 Slide Out Room - Powered
............
9-3
9.3.2 Slide Out Room
Emergency Operation
....................
9-5
9.4 Slide Out Room Troubleshooting
...
9-6
9.5 Central Vacuum System
(Commander only)
.........................
9-6
9.6 Prolonged Occupancy
....................
9-6
10 Electrical Systems
..................................
10-1
10.1 120-Volt AC System
.....................
10-1
10.1.1 External Power Cord (Shoreline)
.
10-1
10.1.2 Power Control Center
(Optional - Commander Only)
......
10-2
10.1.3 120-Volt Circuit Breakers
.............
10-2
10.1.4 Ground Fault Circuit Interrupter
(GFCI)
..........................................
10-3
10.2 Auxiliary 120-Volt Generator
........
10-4
10.2.1 Generator Safety
..........................
10-4
10.2.2 Generator Operation
....................
10-5
10.2.3 Automatic Power Transfer Switch
(Commander only)
.......................
10-6
10.2.4 Generator Refuelling
....................
10-6
10.3 12-Volt DC System
......................
10-7
10.3.1 Automotive Batteries
....................
10-7
10.3.2 Auxiliary Batteries
........................
10-7
10.3.3 12-Volt Coach Fuses
...................
10-8
10.3.4 Battery Maintenance
....................
10-8
10.3.5 Battery Condition Meter
.............
10-10
10.4 Trailer Wiring Connector
............
10-10
10.5 Electrical Schematics
.................
10-11
10.6 Vehicle Fuse Panels
..................
10-12

TABLE OF CONTENTS
SECTION DESCRIPTION PAGE SECTION DESCRIPTION
13.1.3 Exterior Refrigerator
Compartment
...............................
13-2
13.2 Range And Oven
.........................
13-2
13.2.1 Lighting Burners
...........................
13-2
13.2.2 Safety Tips
...................................
13-3
13.2.3 Range Hood
.................................
13-3
13.2.4 Lighting Oven Pilot
.......................
13-3
13.2.5 Operating Oven Control
...............
13-4
13.2.6 Shut Down Instructions
................
13-4
13.3 Microwave Oven
..........................
13-4
13.4 LP Gas Furnace
...........................
13-6
13.5 Roof Air Conditioners
...................
13-7
13.6 TV Antenna
..................................
13-7
13.7 Signal Amplifi er
............................
13-8
13.8 Dash Television - 120 Volt
...........
13-8
13.9 Video Cassette Recorder
.............
13-9
13.10 Video Control Center
...................
13-9
13.11 Phone And Cable TV Hook-Ups
..
13-9
13.12 AC/DC Inverter
.............................
13-9
13.13 Sleeping Facilities
......................
13-10
13.14 Fresh Water Toilet
.....................
13-12
13.15 Electric Step (Optional)
..............
13-13
13.16 Screen Windows
........................
13-13
13.17 Coffee Maker (Optional)
.............
13-13
13.18 Washer/Dryer Hook-Ups
(Optional - Commander only)
.....
13-14
14 Care And Maintenance
...........................
14-1
14.1 Exterior
.........................................
14-1
14.2 Interior
..........................................
14-2
15 Motorhome Maintenance
........................
15-1
15.1 Chassis Customer Service
...........
15-1
15.2 Engine Access
.............................
15-1
15.3 Engine Cooling System
................
15-1
15.4 AC And Oil Coolers
......................
15-1
15.5 Tires
.............................................
15-1
16 Storing Your RV
......................................
16-1
17 Winterization
...........................................
17-1
17.1 Cold Temperature Operation
.......
17-1
17.1.1 Chassis
........................................
17-1
17.1.2 LP Gas
.........................................
17-1
17.1.3 Furnace
........................................
17-1
17.1.4 Waste System
..............................
17-1
17.1.5 Fresh Water System
....................
17-1
17.2 Cold Temperature Storage
..........
17-2
17.2.1 Water System Winterization
.........
17-2
17.2.2 De-Winterize Water Systems
.......
17-2
17.2.3 Water Purifi er
(Commander only)
.......................
17-3
17.2.4 Washer/Dryer
(Commander only)
.......................
17-3
18 Warranty Policy
.......................................
18-1
19 Index
.....................................................
19-1

1-1
COMMANDER / EMBASSY
1 INTRODUCTION
Congratulations on your choice of a Triple E built Motorhome for your travelling and touring comfort and
enjoyment. It utilizes the latest design features and manufacturing techniques to insure safe, effi cient and
trouble-free operation at all times.
1.1 OPERATOR'S MANUALS
All owners/operators should read, understand
and follow all instructions in this the motorhome
manual, chassis manual and manuals for all
auxiliary systems and appliances. A few minutes
spent reading the appropriate manual will pay rich
dividends in providing safe, effi cient and trouble-
free operation. Refer to the Ford or GM Operator's
Manual for detailed information on the chassis.
Refer to the appropriate manual supplied for auxil-
iary equipment and appliances as required.
This manual covers all the systems, controls and
operation unique to this vehicle. Always keep the
information kit of manuals and information with the
vehicle for easy reference. Pass the kit on to new
operators or owners as appropriate for their infor-
mation as well. Use the Table of Contents or Index
to fi nd specifi c information.
If more information is required or you do not under-
stand something, please contact:
Your Triple E dealer or
Triple E Recreational Vehicles
301 Roblin Blvd., Box 1230
Winkler, Manitoba Canada
R6W 4C4
Tel: (204) 325-4361
Fax: (204) 325-5241
1.2 INFORMATION KIT
An information kit is provided with each vehicle and
includes specifi c information on specifi c systems,
features and appliances including:
1. Chassis
2. Air Conditioning
3. Generator
4. Furnace
5. General Operation
6. Entertainment System
7. Leveling System
8. Water Heater
9. Safety
10. Flooring and Counter Tops
11. Rear View Monitor
12. Electric Step
13. Fridge
14. Alarm System
15. Plumbing Fixtures
16. Roof and Side Walls
17. Converter
18. EMS (Energy Management System)
1.3 OPTIONS AND EQUIPMENT
The Commander and Embassy product lines are
available in various sizes, models and fl oor plans.
The equipment, accessories and components de-
scribed in this manual may not necessarily apply to
your vehicle. Refer to the material provided in the
information kit for the detailed instructions unique
to your unit.
1.4 KEYS
It is a good idea to keep a record of all key code
numbers and keep them in a safe place - not in
your vehicle. Use the charts in this manual but
make a duplicate copy to be stored elsewhere.

1-2
1.5 VEHICLE CERTIFICATION LABEL
This label contains vehicle identifi cation and other important reference information. The vehicle certifi ca-
tion label is located on the sidewall to the left of the steering wheel, or on the driver's door. Never remove
or destroy this label.
Reference Number Code:
1. Chassis manufacturer.
2. Chassis manufacture date.
3. Month and year of manufacture at Triple E
Recreational Vehicles.
4.
Gross Vehicle Weight Rating:
The (GVWR) Gross Vehicle Weight Rating, is
the maximum permissible weight of this fully
loaded motorhome.
5.
Gross Axle Weight Rating:
Total permissible weight allowed for the front,
and rear axles (listed in pounds and kilo-
grams).
6.
Suitable Tire Choice:
Tires recommended to meet handling, load-
ing and safety requirements. When replacing
any of the tires, the new tires must meet these
specifi cation.
7.
Suitable Rim Choice:
Wheel rims recommended to meet handling
and safety requirements. When replacing any
of the rims on the vehicle ensure that the new
rims meet these specifi cations.
8.
Cold Infl ation Pressure:
Infl ation pressures recommended (while cold)
for the tires originally equipped on your vehicle.
These pressure levels must be maintained to
assure proper handling, safety and fuel econo-
9.
Rear Axle Wheel Confi guration:
Single axle/Dual wheels.
10.
Serial Number:
This is the serial number assigned to the com-
pleted vehicle by Triple E Recreational Vehi-
cles.
11.
Vehicle Identifi cation Number (VIN):
This number identifi es the chassis on which
the motorhome is built.
12.
Type:
States the NHTSA designated usage clas-
sifi cation for your motorhome. MPV signifi es a
Multi-purpose Passenger Vehicle.
13.
Model:
Lists the Triple E product model number of
your vehicle.
14.
Color:
Signifi es the color code number of the decor
used throughout the vehicle. This number is
necessary for ordering replacement cushions,
curtains, carpet, etc. It also is found in the
wardrobe.
NOTE
MOTORHOME LABELING DEFINITIONS
COMMANDER / EMBASSY
The specifi cations sheet is located in the wardrobe.
Beneath the specifi cation sheet are the exterior
color codes.
All Triple E motorhomes are built according to CSA
and RVIA standards.

1-3
Fig. 1-2 VEHICLE LABELS
Canadian
U.S.
Fig. 1-3 IDENTIFICATION INFORMATION (LABEL LOCATION)
COMMANDER / EMBASSY

1-4
1.6
IDENTIFICATION INFORMATION
Take a few minutes to fi ll in this information. It will be a handy reference for you. (Some appliances may
be optional). The label is located on the sidewall to the left of the steering wheel or on the driver's side
door.
Your Name
______________________________
Motorhome Model
________________________
Coach Serial No.
_________________________
Chassis Serial No.
_______________________
Date Purchase
___________________________
Dealer Name
____________________________
Address
________________________________
________________________________________
Phone No.
______________________________
Insurance Policy
Agent Name
__________________________
Policy No.
___________________________
Agent's Phone No.
_____________________
Range/Oven
Manufacturer
_________________________
Model
_______________________________
Serial No.
____________________________
Microwave Oven
Manufacturer
_________________________
Model
_______________________________
Serial No.
____________________________
Video Cassette Player
Manufacturer
_________________________
Model
_______________________________
Serial No.
____________________________
Television
Manufacturer
_________________________
Model
_______________________________
Serial No.
____________________________
Dash Stereo
Manufacturer
_________________________
Model
_______________________________
Serial No.
____________________________
Water Heater
Manufacturer
_________________________
Model
_______________________________
Serial No.
____________________________
Furnace
Manufacturer
_________________________
Model
_______________________________
Serial No.
____________________________
Air Conditioner #1
Manufacturer
_________________________
Model
_______________________________
Serial No.
____________________________
Air Conditioner #2
Manufacturer
_________________________
Model
_______________________________
Serial No.
____________________________
Generator
Manufacturer
_________________________
Model
_______________________________
Serial No.
____________________________
Miscellaneous
Key No.
_____________________________
Paint Codes
____________________________________
____________________________________
____________________________________
COMMANDER / EMBASSY

1-5
1.7 EXTERIOR FEATURE IDENTIFICATION - COMMANDER MODEL
Composite model shown for illustration purposes only. Actual locations of features depends on coach
model and options.
*CAUTION
Be careful. These features may
become hot while water heater or
furnace are in use.
NOTE
Some equipment shown may be
optional.
Fig. 1-4 EXTERIOR IDENTIFICATION - COMMANDER ONLY (LEFT)
Fig. 1-3 EXTERIOR IDENTIFICATION - COMMANDER ONLY (RIGHT)
1. Water Heater Service Access.
2. Refrigerator Service Access.
3. Range Hood Vent.
4. Porch Light.
5. Propane Tank
6. Storage Compartment
7. Entrance Step.
8. Furnace Service Access Panel*.
9. Engine and Generator Fuel Tank Fill.
10. Battery Compartment.
11. Generator Compartment.
12. Utility Service Compartment.
Includes: Water Drain Valves.
Fresh Water Filler.
Winterization Valve.
Holding Tank Drain Valves.
Black Water Flush System.
13. Sewer Hose Storage.
14. Roof Air Conditioner.
15. Exterior 120v Receptacle.
16. Shore Power Hook-Up.
COMMANDER / EMBASSY
*
*

1-6
EMBASSY MODEL
Composite model shown for illustration purposes only. Actual locations of features depends on coach
model and options.
*CAUTION
Be careful. These features may
become hot while water heater or
furnace are in use.
NOTE
Some equipment shown may be
optional.
Fig. 1-6 EXTERIOR IDENTIFICATION - EMBASSY ONLY (LEFT)
Fig. 1-5 EXTERIOR IDENTIFICATION - EMBASSY ONLY (RIGHT)
1. Water Heater Service Access.
2. Refrigerator Service Access.
3. Range Hood Vent.
4. Porch Light.
5. Storage Compartment.
6. Propane Tank Access
7. Entrance Step.
8. Furnace Service Access Panel*.
9. Engine and Generator Fuel Tank Fill.
10. Battery Compartment.
11. Generator Compartment.
12. Utility Service Compartment.
Includes: Water Drain Valves.
13. Sewer Hose Storage.
14. Roof Air Conditioner.
15. Exterior 120v Receptacle.
16. Shore Power Hook-Up
17. Spare Tire
18. Ladder (Opt.)
19. Exterior Shower (Opt.)
COMMANDER / EMBASSY
18
*
*

1-7
1.8 SERVICE ASSISTANCE
Your dealer will be glad to provide any additional
information you need and to answer any questions
you may have about the operation of your mo-
torhome. When it comes time for service, remem-
ber that your dealer knows your vehicle best and
is interested in your satisfaction. Your dealer will
provide quality maintenance and assistance during
the period of your ownership. It is advisable that
you follow a regular maintenance schedule to keep
your vehicle functioning at its best.
Should you require warranty assistance while trav-
elling, take your motorhome to the nearest Triple E
dealer for help.
1.9 REPORTING SAFETY
DEFECTS
If you believe that your motorhome has a safety
defect of any kind that could cause injury, or death,
contact Triple E immediately. As well, make sure
to contact the National Highway Traffi c Safety
Administration (NHTSA) if you are a resident of the
US, or Transport Canada if you are a Canadian
resident and report your concern.
The NHTSA or Transport Canada will investigate
the concern should there be a number of similar
complaints. They have the authority to order a re-
call and repair campaign depending on the nature
and severity of the problem.
The NHTSA may be reached by using the Auto
Safety Hotline at 1-800-424-9393 (366-0123 in the
Washington, DC area) or by writing to: NHTSA, US
Department of Transportation, Washington, DC
20590. The Hotline will also provide you with ad-
ditional information on motor vehicle safety.
In Canada, call 1-613-993-9851 or write to: Trans-
port Canada and Road Safety, 2780 Sheffi eld
Road, Ottawa, Ontario K1B 3V9.
1.10 DRIVING COMFORT
Triple E has made every effort to design and con-
struct your motorhome for your comfort and safety.
We know that your investment is important to you
as well as to us. Our design team has dedicated
itself to the development of the best motorhome
comfort and protection packages in the industry.
Here are some of the features that make your unit
one of the fi nest motorhomes on the road today:
1.
Passenger Comfort
a. Optional, ducted roof-mounted air condi-
tioning units with up to 13,500 BTU's of
cooling capacity per unit. Available with
the air conditioner is a heat strip to supple-
ment the forced air furnace. An optional
single 15,000 BTU unit is also available.
b. High output chassis air conditioner for
travelling comfort.
c. Electronic ignition LP gas furnace de-
signed to maintain a comfortable tem-
perature of +20 degrees C (+70 degrees
F) when the temperature outside is -20
degrees C (-5 degrees F). However, tem-
peratures may vary in the coach depend-
ing on register location.
d. High output chassis heater for your driving
comfort.
e. Thermally effi cient vacuum-bonded com-
posite walls, fl oor and roof, using rigid
foam insulation for strength and designed
to reduce freeze-through.
f. One piece headliner for warmth and noise
reduction.
g. Automatic, electronic ignition water heater.
h. Motor-aid (Commander only) water heater
to heat hot water while travelling.
2.
Unit Protection
a. Fiberglass (Commander) or FRP (Em-
bassy) all-weather exterior fi nish. Easy to
maintain. Will not rust or pit.
b. Seamless EPDM rubber roof to ensure a
weather proof seal.
c. Tubular aluminum reinforced walls and
roof. Steel reinforced fl oor.
d. Urethane undercoating for protection
against dust and moisture and to provide
extra insulation against heat and cold.
e. Fully insulated, heated holding tank com-
partment and discharge valves to prevent
winter freeze-up (All Commanders as well
as equipped Embassy). Enclosed to pro-
tect against road damage.
f. Simplifi ed manual water winterization sys-
tem complete with water heater bypass.
g. Ultraviolet stabilized exterior components
to resist fading and deterioration.
h. Exterior screws and fasteners that resist
streaking.
i. Heavy duty mud fl aps for additional protec-
tion against fl ying stones and mud.
COMMANDER / EMBASSY

2-1
The safety glyph identifi es an area that
involves the personal safety of the operator, pas-
sengers or a bystander. Always read, understand
and follow the instructions and information in the
safety sign or manual instruction. Do not take
chances with safety. Most accidents can be pre-
vented.
In this section we have compiled a series of items
relating to safety that everyone should follow.
Although this compilation is thorough, we realize
that it does not cover everything. Each person has
the responsibility of following all listed safety items
This word is used to high-
light or emphasize a specifi c
procedure, information or
result for a system or the
vehicle.
This word is used to high-
light or emphasize a specifi c
procedure or information
that if not followed will result
in damage to a system or
the vehicle.
This word is used to high-
light or emphasize a specifi c
procedure or information
that if not followed can
involve your personal safety
as well as cause vehicle
IMPORTANT
-
CAUTION
-
WARNING
This word is used to high-
-
This word is used to high-
2.1 GENERAL SAFETY
1. The most important safety feature on this
vehicle is the operator. It is the operator's
responsibility to read, understand and follow all
safety and operating instructions in the vehicle,
chassis, appliance and system manuals. Most
accidents can be prevented.
2. A person who has not read and understood
all operating and safety instructions is not
qualifi ed to operate this vehicle. Untrained
or uninformed operators expose themselves,
passengers and other drivers/vehicles/property
to possible serious injury or death and property
damage.
3. Do not modify the vehicle in any way. Unau-
thorized modifi cation may impair the function
and/or safety and could affect the life of the
vehicle.
4. All approved driver and passenger seats are
equipped with seat belts. Swivel seats when
occupied while driving, each must be locked
in the forward facing direction. The driver and
each passenger must occupy only the ap-
proved seats and fasten seat belts when the
unit is moving. Do not allow any passengers
in the vehicle unless they have their seat belt
attached while in an approved seat. When the
vehicle is moving, no one should be using the
bedroom, galley, or bathroom area of the unit .
5. Always fasten the seat belt low on the torso
and keep it snug to transmit the force from the
belt into the hip/pelvic area of the body. Preg-
nant women should wear a lap/shoulder belt
whenever possible. Wear the belt snug and
low throughout the pregnancy.
6. Review the location, function and operation of
the escape window with everyone who will be
riding in or using the motorhome. Inspect the
locking mechanism.
7. Establish a monthly fi re extinguisher inspec-
tion program to keep the extinguisher in good
condition and fully charged. Inspect the extin-
Safety, comfort and ease of operation are key con-
siderations during the design and manufacturing
of all Triple E Motorhomes. It is the responsibility
of the owner or operator to read, understand and
follow all instructions in the Motorhome, chassis
and appliance or auxiliary system manuals and
safety signs on the vehicle. Specifi c items, pro-
cedures or instructions are identifi ed with the key
words IMPORTANT, CAUTION and WARNING to
emphasize areas of special concern. These key
words are defi ned as:
2 SAFETY
COMMANDER / EMBASSY

2-2
2.2 DRIVING SAFETY
1. Only trained and licensed drivers are allowed
to drive this vehicle.
2. Observe all applicable road and driving regula-
tions. Check with local transport authorities if
you have any questions.
3. Inspect the vehicle before driving. Adjust,
repair or replace components or systems to
maintain vehicle in good driving condition. Do
not drive the motorhome unless it is in good
condition.
4. Do not make adjustments such as seat posi-
tion, tilt steering wheel etc. while driving.
5. A motorhome is considerably larger and
heavier than an automobile and results in
different handling characteristics. Allow more
space for stopping, turning, passing, parking,
accelerating etc. during operation. The extra
height results in different stability character-
istics. Drive at a slower speed when turning,
cornering or on rough terrain. Use extra care
in adverse conditions such as rain, darkness,
snow, sleet, icy surface, hilly terrain, rough
road or a soft surface. Refer to your chassis
manual for additional instructions.
6. Maintain brakes in top condition at all times.
Allow extra distance for stopping. Be extra
vigilant in adverse surface conditions such as
wet, icy, slushy, rough or a soft surface when
applying the brakes. After going through wa-
ter, slush or snow, apply the brakes carefully
in an open area to check if one side grabs.
Use gentle pedal pressure to dry the brakes
and restore uniform operation. Do not operate
vehicle if uneven brake action persists.
2.3 FUEL
(MOTOR AND LP GAS)
1. Do not smoke when fi lling vehicle/generator
fuel tank, or LP gas tank.
2. Extinguish all pilot lights before refuelling.
3. Do not fi ll the LP gas tank or vehicle fuel tank
when the generator is running.
4. Do not bring or store fuel or LP gas contain-
ers, gasoline or other fl ammable liquids in the
vehicle. Vapours can be released causing
breathing diffi culties or an explosion or fi re. LP
gas containers vent excess pressure into the
atmosphere.
5. Do not fi ll LP gas containers more than 80%
of capacity. Overfi lling can lead to excessive
venting or gas fl ow and result in an explosion
or fi re.
6. Do not use an open fl ame to check for an LP
gas leak. Use soapy water and watch for the
bubbles. Close valve on tank and latch all cov-
ers, caps and doors after fi lling system.
7. Do not connect natural gas supply to the LP
system.
8. Install LP gas regulators with the pressure
regulator vent facing downward. Do not ob-
struct vent hole. In cold weather, condensation
can get into the regulator and cause freeze-up.
Use a light bulb to thaw out. Do not use an
open fl ame or heat lamp to thaw out.
9. Turn igniter knob to create a spark at the burn-
er when burner is turned on. Large volumes of
gas can lead to an explosion and fi re if igniter
is not turned when the burner is turned on.
Turn burner off and let gas dissipate before
trying to relight if it does not light immediately.
10. Do not use the furnace when the vehicle is
moving. Turn the gas off at the LP container.
11. Do not obstruct LP gas compartment when
parking. Open access allows emergency
workers to close master valve if an emergency
occurs.
COMMANDER / EMBASSY

2-3
2.4 MINIMIZING
ASPHYXIATION RISK
1. Do not use portable fuel-burning equipment
including wood and charcoal grills and stoves
in the vehicle. The use of this equipment can
generate deadly carbon monoxide gas or
cause fi res.
2. Provide proper ventilation when using the gas
range or oven to prevent asphyxiation. Do
not use the oven or range to heat the vehicle.
Long term use of these appliances for space
heating increases the chance of asphyxiation.
Before using the range or oven:
a. Open overhead vent or turn on exhaust
fan, and…
b. Open window.
3. Avoid breathing the exhaust fumes from a gas
engine and LP gas burner such as the vehicle
or generator engines and the range, oven,
refrigerator, furnace or water heater. Posi-
tion the vehicle so the wind blows the engine
exhaust fumes away. Provide ventilation to the
inside of the vehicle for adequate air exchange
when appliances or furnaces are being used
to prevent a build-up of carbon monoxide. Be
sure all alarms are working.
4. Do not run vehicle or auxiliary generator
engine in a confi ned area such as a garage
unless you are just moving it out of the area.
5. Use vent or air conditioning fan to force fresh
air into the interior when vehicle is in an open
area with the engine running for more than just
a short time.
6. Maintain engine(s) exhaust system compo-
nents in top condition to prevent fumes from
entering vehicle. Check when changing oil,
when exhaust sound changes or when under-
body is damaged.
7. Close rear windows when driving to prevent
drawing exhaust fumes into vehicle.
2.5 FORMALDEHYDE FUMES
WARNING
COMMANDER / EMBASSY
Formaldehyde based adhesives are used in some
components in this vehicle and may release small
amounts of formaldehyde fumes into the vehicle
for an unknown period of time until fully dissipated.
Some people who are allergic to the fumes may
experience irritation to the eyes, ears, nose and
throat. Small infants may have a more serious
reaction. Although long range effects are not well
understood, testing to date has not revealed any
serious health effects in humans at the level of
emission from these products. Reduce the effects
of the formaldehyde fumes by keeping the unit well
ventilated.
1. Read, understand and follow safety sign next
to stove:
2. Use soapy water to check for leaks and watch
for bubbles. Do not use an open fl ame.
3. Correct or repair leak(s) before using appli-
ances or vehicle again.
2.6 LP GAS LEAKS
IF YOU SMELL GAS
1. Extinguish any open fl ame, pilot lights and all smoking
material.
2. Do not touch electrical switches.
3. Shut off the LP tank valve.
4. Open doors, windows and roof vents.
5. Leave the area until the odour is gone.
6. Have the system checked for leaks and make the necessary
corrections and repairs.
WARNING

2-4
2.7 ALARMS
1.
Each Vehicle Is Equipped With A LP Gas
Alarm:
a. Sounds whenever there is an unsafe
amount of gas in the vehicle.
b. Follow instructions on safety sign and air
out vehicle to silence alarm.
c. Have a qualifi ed service personnel fi nd the
leak and correct the problem before using
unit again.
2.
Each Vehicle Is Equipped With A Carbon
Monoxide Alarm:
a. Sounds whenever there is an unsafe
amount of carbon monoxide gas in the
vehicle.
b. Open doors, vents and windows to air out
vehicle and silence alarm.
c. Have a qualifi ed service personnel check
all burners, clean, repair or replace any
defective burners.
d. Remove all fuel or wood burning devices
from inside vehicle.
e. Have a qualifi ed serviceman check all en-
gine exhaust system components. Repair
or replace any defective components. Po-
sition motorhome so wind blows exhaust
fumes away.
3.
Each Vehicle Is Equipped With A Smoke
Alarm:
a. Sounds whenever there is an unsafe
amount of smoke in the vehicle. Always
use exhaust fan over the stove when cook-
ing.
b. Open doors, vents and windows to air out
vehicle and silence alarm. Correct and
eliminate smoke source.
c. Check alarm on a regular basis. Check
when removing from storage, before trips
and weekly thereafter. Depress center
button to test alarm electronics. Test
alarm sensor by blowing smoke (from safe,
fi re-free source) past sensor. If alarm does
not sound when testing, determine source
of problem and correct or replace alarm.
d. Do not remove battery to silence alarm.
When alarm “beeps” every minute, battery
is weak and must be replaced. Do not al-
low battery to go dead. Be sure to replace
with recommended battery. Test after bat-
tery is replaced.
e. Clean and vacuum opening on smoke
alarm once a month.
f. Do not try to repair alarm. Replace it.
g. Smoke alarms are not perfect and do not
respond in all situations. The best safe-
guard is fi re prevention.
4. Recurring alarm(s) indicate the slow accumula-
tion of LP gas, carbon monoxide, or smoke.
Have an authorized service center check
system and identify source. Correct problem
before resuming use of unit.
5. Refer to alarm manual(s) for more detailed
instructions.
2.8 ELECTRICAL
1. Use care when working around batteries. The
gases given off when charging are explosive.
Keep sparks and fl ames away from battery.
Wear protective clothing, eye protection and
remove jewellery. Do not short across termi-
nals.
2. Do not overload electrical circuits. Replace
circuit breakers and fuses with components
of similar capacity. Do not replace with larger
capacity components (breakers or fuses).
3. Be sure motorhome is well grounded to pre-
vent shocks or electrocution. Do not plug utility
power cord into an outlet that is not grounded.
Do not modify any plug to fi t a receptacle for
which it was not designed.
4. Use care when handling electrical appliances,
power cords and other components. Misuse
or abuse of electrical components can lead to
shocks or electrocution. Do not use electrical
components, cords or appliances with bare
feet, wet hands or while standing in water or on
wet ground.
COMMANDER / EMBASSY

2-5
2.9 LOOSE COMPONENTS
2.10 MAINTENANCE
1. Do not attempt to start vehicle by hot wiring or
shorting across starter terminals.
2. Do not remove radiator cap when radiator
or engine is hot. Steam or hot fl uid can be
released. Check coolant level using overfl ow
reservoir.
3. Do not go under a vehicle that is supported
with a jack.
4. Do not mix bias and radial ply tires on the ve-
hicle. Mixing types of tires can affect handling
characteristics. Replace with the same size,
type and load rating.
1. Tie, strap or secure all tables, chairs and other
furniture before transporting.
2. Close, latch or lock all doors, drawers, panels
and gates before travelling.
3. Turn all swivel seats in the forward facing
direction and lock before moving. All passen-
gers must be seated in a seat that is equipped
with a seat belt and the seat belt fastened.
4. Stow all cooking, serving, eating and other
loose components before moving. Any loose
component can become a projectile during
sudden stops, manoeuvring or an accident.
2.11 EMERGENCY EXITS
Each Motorhome is designed with an emergency
exit window in the sleeping area and the driver and
side doors can also be used to exit.
1.
Emergency Exit:
Release the red latches of the emergency
egress window and push out the window. (The
egress window has hinges on top).
COMMANDER / EMBASSY

3-1
3 PREPARATION
Refer to information pack supplied with the Mo-
torhome prior to using or driving the unit. Read,
understand and follow instructions in the chassis,
motorhome, appliance and system manuals. Also
follow the safety tips provided in Section 2. Mo-
torhomes can be used many ways and in many
conditions or circumstances. We have tried to
compile operational and safety instructions to cov-
er the normal conditions encountered with the unit.
However these instructions are not all-inclusive.
Each user or operator has the responsibility to use
common sense around the unit and to consult a
dealer if you have any questions.
3.1 VEHICLE PREPARATION
The (CCC) Cargo Carrying Capacity is equal to
GVWR minus each of the following: UVW, full fresh
(potable) water weight (including water heater), full
LP-Gas weight and SCWR.
The (GCWR) Gross Combination Weight Rating,
means the value specifi ed by the Chassis manu-
facturer as the maximum allowable loaded weight
of this motorhome with its towed trailer or towed
vehicle combined.
To check that your motorhome is properly loaded,
drive the fully loaded vehicle to a scale and weigh
as follows:
a. Drive only the front wheels onto the scale
to obtain the front gross axle weight.
b. Next, place the entire vehicle (both axles)
onto the scale to obtain the gross vehicle
weight.
c. Drive forward till only the rear wheels are
on the scale and obtain the rear gross axle
weight.
Compare the gross vehicle weight (b) with the
GVWR on the sticker. If the gross vehicle weight
exceeds the GVWR, you will have to reduce the
total vehicle load. If the gross vehicle weight (b) is
less than the GVWR on the sticker, check the front
and rear gross axle weights against the front and
rear GAWR's on the sticker. If either axle weight
exceeds the GAWR for that axle, redistribute the
load to ensure that loads on front and rear axles
are within the required limit.
Heavier items should be loaded as centrally and
as low as possible. Lighter items may be stored in
cabinets, closets and drawers. Luggage or similar
cargo inside your RV should be secured to prevent
it from causing damage.
Take note of this label in all exterior storage com-
partments.
3.1.1 KEYS
Several number coded keys are supplied with the
vehicle and include ignition, side door, baggage
compartment, generator compartment and others
depending upon the features of your unit. Always
keep a list of these numbers in a safe place (not in
the vehicle) for easy reference should you mis-
place any of the key(s). Supplying a locksmith with
these numbers will allow them to cut a key to fi t
3.1.2 VEHICLE LOADING
The components of your vehicle are designed to
provide satisfactory service if the vehicle is not
loaded in excess of either the gross vehicle weight
rating (GVWR) or the maximum front and rear
gross axle weight ratings (GAWR's). These ratings
are listed on the Canadian and U.S. Department of
Transport Sticker located on the driver door panel.
The (GVWR) Gross Vehicle Weight Rating, is the
maximum permissible weight of this fully loaded
motorhome.
The (UVW) Unloaded Vehicle Weight means the
weight of the motorhome as manufactured at the
factory with full fuel, engine oil and coolants. The
UVW does not include cargo, fresh water, LP Gas,
Occupants, or factory and dealer installed options.
The (SCWR) Sleeping Capacity Weight Rating is
the manufacturer's designated number of sleeping
positions multiplied by 154 pounds (70 kilograms).
CAUTION
Baggage Compartments Are Not To Be
Loaded In Excess of 75 kgs./165 lbs.
Total Vehicle Load Not to Exceed The
Maximum GVWR/GAWR/GCWR Of The
Chassis.
COMMANDER / EMBASSY

3-2
3.1.3 TRAILER TOWING
A trailer can affect the handling, durability,
performance and economy of your mo-
torhome. The factory installed towing hitch
is rated for:
a. 500 lb. - maximum hitch or
tongue weight.
b. 5000 lb. - maximum trailer weight.
Fig. 3-1 TRAILER HITCH
The combined weight of the motorhome
and the towed vehicle should not ex-
ceed the Gross Combined Weight Rating
(GCWR). Also, the combined weight of
the motorhome and the tongue weight of
the towed vehicle should not exceed the
motorhome's Gross Vehicle Weight Rat-
ing (GVWR) or its rear Gross Axle Weight
Rating (GAWR) as listed on the Vehicle
Certifi cation label.
To be sure of the correct balance in weight, it is ad-
vised that you take your loaded vehicle to a weigh-
scale to determine the actual weight distribution.
After you have done this once, you will have a
better idea on how to load in the future.
Remember, your motorhome will handle differ-
ently with a trailer in tow. Stopping distances will
change. Make sure your trailer is equipped and
connected to your motorhome with the proper
brake system. When descending a steep or long
grade, reduce speed and shift to a lower gear to
control vehicle speed. Avoid prolonged or frequent
application of brakes if at all possible to prevent
overheating and possible failure of the braking
If you are planning to tow a vehicle or a trailer with
your motorhome, your Triple Edealer will provide
you with the information, advice and direction you
will require.
3.1.4 AUXILIARY VEHICLE TOWING
CAUTION
Exceeding any of the recommended
gross vehicle weight ratings may result
in vehicle damage.
Do not install a weight equalizing type
of hitch on your motorhome.
For safety towing and vehicle handling, maintain
proper vehicle and trailer weight distribution.
The total weight of the motorhome and the vehi-
cle towed must not exceed the GCWR rating as
stated on the Vehicle Certifi cation label.
WARNING
COMMANDER / EMBASSY
Other manuals for COMMANDER Series
1
This manual suits for next models
1
Table of contents
Other Triple E Motorhome manuals

Triple E
Triple E 1994 Regency class C User manual

Triple E
Triple E 1990 Regency A-681 SL User manual

Triple E
Triple E 1991 Empress Class A User manual

Triple E
Triple E regency class c User manual

Triple E
Triple E CLASS C User manual

Triple E
Triple E 1996 Senator User manual

Triple E
Triple E 1999 Class C User manual

Triple E
Triple E 2001 Empress series User manual

Triple E
Triple E 1999 Commander Series User manual
Triple E
Triple E 1994 EMPRESS 1061 User manual