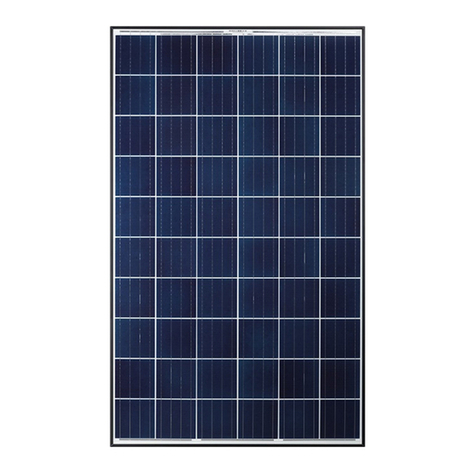
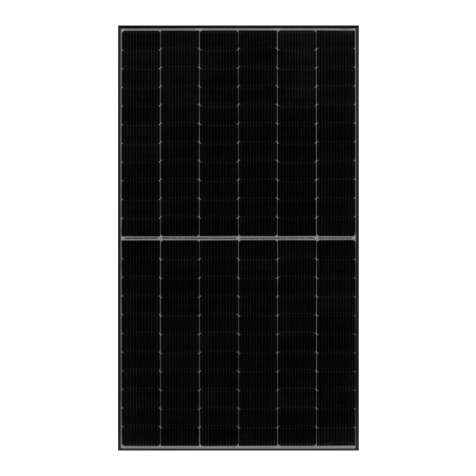
Tritec TRI-PLAT EAST-WEST User manual

energy for a better world
INSTALLATION
INSTRUCTIONS
TRI-FLAT EAST-WEST
Ballast- and transport-optimized flat
roof installation system for PV
systems with east-west exposure
• no-drill and no-screw installation
• Fast and easy module clipping
using a click system
• Easy warehousing, fast and
economical transport


Contents
1. Basics
1.1 Notes 4
1.2 Load effect 4
1.3 Statics 4
1.4 Roof condition 5
1.5 TRI-DESIGN dimensioning software 5
2. Installation
2.1 Tools 6
2.2 Setup 6
2.2.1 Pre-mounting of the substructure 6
2.2.2 Preparation of the roof and setup of the substructure 10
2.2.3 Ballasting the system 13
2.2.4 Insertion of earthing plates 16
2.2.5 Insertion and fixation of PV modules 16
2.2.6 Module replacement 18
3. Product Specification
3.1 Product details 19
3.2 Dimensions 20
3.3 Roof layout 20
3.4 Further information 21
3.5 Ballasting and snow load 22
4. List of Components 23

4_Basics
1. BASICS
1.1 Notes
For the installation of the TRI-FLAT East-West mounting system only products
from the range of the TRI-FLAT South mounting system must be used. Using
third-party components can result in adverse effects on the system’s stability
and in major damages. The system may only be installed by trained and skil-
led personnel. We do not assume any liability for damages arising from the
use of third-party components or from incorrect installation.
These installation instructions describe the proper installation procedure for
the TRI-FLAT East-West flat roof system. In some situations, it is advisable, ho-
wever, to have a specialist (e.g. roofer or joiner) check the special featrues of
the roof.
1.2 Load effect
In addition to the dead weight of the photovoltaic system, mainly wind and
snow loads affect the system components and the substructure. For this rea-
son, each system must be calculated and planned for your individual require-
ments and external influences, taking into consideration DIN EN 1991*
(Actions on Structures).
The stresses by wind loads depend mainly on the wind zone (according to DIN
EN 1991-1-4*), the building’s height, the shape and slope of the roof and the
position of the roof’s centre. Weight stresses through snow load are depen-
dent on the snow zone (according to DIN EN 1991-1-3*), the building’s height,
the shape and slope of the roof and the position of the roof’s centre.
For each location the wind and snow load zone can be determined, which
will determine the design of the system.
1.3 Statics
On principle, the structural calculations of all roofs must be checked by autho-
rised experts. The main question to be answered is whether the roof can take
the additional stresses caused by the solar system.
Since the load bearing capacity of a roof and the load effect of a photovol-
taic system are determined by many factors, structural calculations must be
made for each roof individually.
*German standard: DIN EN 1991, DIN EN 1991-1-3, DIN EN 1991-1-4
Swiss standard: SIA 261
Austrian standard: ÖNORM EN 1991-1-3, B 1991-1-3
Eurocode 1 part 1-3 and part 1-4

Bascis_5
1.4 Roof condition
The current condition of the roof must be such, that renovation will not be-
come necessary for a period of at least 20 years. In case of doubt, it is advis-
able to have the roof checked by an expert. The TRI-FLAT South mounting
system has been optimised for flat roofs with plane surfaces. If the roof is un-
even due to aging or other reasons, it is advisable to consult a qualified
specialist.
1.5 TRI-DESIGN dimensioning software
The TRI-DESIGN dimensioning software calculates and designs the
TRI-FLAT East-West mounting system according to the standards of DIN EN
1991 (EC)*. The relevant directives are DIN EN 1991-1-4* for wind loads and
DIN EN 1991-1-3* for snow and ice loads, which affect the photovoltaic sys-
tem and its substructure.
The dimensioning software calculates all sizes and distances relevant for the
installation. In addition, the dimensioning software allows us to design the
system optimally for the individual roof and thus to select the best version of
the mounting system.
Under the warranty terms and conditions, all TRI-FLAT East-West systems
must have been dimensioned using the TRI-DESIGN dimensioning software.

6_Installation
2. INSTALLATION
2.1 Tools
The TRI-FLAT bending tool is required for the installation of TRI-FLAT
East-West.
2.2 Setup
Mounting is provided in five steps:
1. Pre-mounting of the substructure
2. Preparation of the roof and setup of substructure
3. Ballasting
4. Insertion of earthing plates
5. Insertion and fixation of PV modules
2.2.1 Pre-mounting of the substructure
1. Mounting of the upper module holder
Pre-mounting of the substructure can be done on a table.
Click together the upper TRI-FLAT module holder and the module carrier.
Place the holder in the middle of the carrier.
The module holder thus pre-mounted is pushed to the stop into the TRI-FLAT
bracket.
Pre-mount another module holder and insert on the opposite side of the bra-
cket.
Note: Holders and brackets must fit together flush.

2. Mounting the central module holder
Click in the bracket between two bottom profiles. Care must be taken that
both profiles are flush together and the bracket is centred.
Subsequently, the connection between bracket and bottom profiles is bent
off at four points using the TRI-FLAT bending tool.
Note: The bend must be torn out.
3. Mounting the lower module holder
Push the TRI-FLAT clip over the lower module holder and hook in.
Centrally click together module carrier and module holder.
Installation_7

8_Installation
If necessary, for drainage of water, 2 holes may be drilled into the carrier of
the lower module holder in those places which module manufacturers
demand.
4. Clicking in lower module holder
Click the lower module holder into the bottom profile.
Click clip into bottom profile and push over link of the module holder.

Installation_9
5. Determine space of module holder
Place gauge onto the carrier of the upper and lower module holders with the
corresponding module width plus the module width tolerance of 2 mm (va-
lue by experience).
Push the lower module holder so far that the gauge lies flush on both bra-
ckets without any clearance
With the bending tool, bend off 1x per edge flush on the lower module hol-
der and the bottom profile.
Note: If the substructure is assembled without pre-mounting, this bending
off can be done later in Chapter 2.2.2 with the inserted series connector.
Note: The bend must be torn out.

10_Installation
2.2.2. Preparation of the roof and setup of substructure
1. Laying out the protective bottom mat
On the roof, the grid is drawn in accordance with the row division (RT) and
the module length + a.
a = space between two modules (e.g. 5 mm)
plus tolerance of module length (depending on manufacturer, e.g. 2 mm)
The protective bottom mats can either be cut to size or laid out directly.
As needed, the protective bottom mat is cut to size 20 mm longer than the
bottom profile and laid out according to plan in north-south direction or in
east-west direction or in both directions simultaneously.

Installation_11
2. Laying out the substructure elements
Pre-mounted elements are laid onto the protective building mat and orien-
ted on the grid. Subsequently, placement can be started in the corner area of
the system in north-south direction or in east-west direction or in both direc-
tions simultaneously
The respective elements are connected with a series connector
(see step 3).
The elements are to be oriented on the brackets and not on the bottom pro-
files.
3. Connection of elements
Click series connector into bottom profile.
Push in series connector centrically into both bottom profiles.

12_Installation
Subsequently, the series connector and the bottom profile must be edge-bent
with the bending tool 4 x per series connector
Note: The bend must be torn out.
There are three possible bending places:
1. On facing edges of the module carrier.
2. On the same edge in front of the module carrier.
3. On facing edges behind the module carrier.
Note: The bend may be combined with the fastening bend for the lower mo-
dule holder (see 2.2.1).

Installation_13
2.2.3 Ballasting the system
1. Ballasting method
Ballasting is effected in accordance with the design plan
At the beginning and the end of the row, at least half of the declared ballast
per module must rest on the outer bottom profile.
For modules with row neighbours to both sides, the declared ballast per mo-
dule can be distributed in random weighting to the northern or southern
bottom profile.
If the required ballasting per module cannot be realized with ballasting on
the bottom profiles, there are two possibilities for additional ballasting: Ad-
ditional ballasting, easternmost and westernmost row (Step 3) or northern-
most and southernmost row, as well as middle of the module field (Step 4).
2. Attaching the ballast clips
Place ballast clip on the bottom profile and click in.
The ballast clip must be placed such that it supports the ballast stone at ap-
prox. 1/3 from the bracket.
Subsequently, the ballast stones are set centrically onto the bottom profile
and flush to the bracket

14_Installation
3. Additional ballasting, easternmost and westernmost row
If the module at the eastern edge has a western neighbouring module or, re-
spectively, the one on the western edge has an eastern neighbouring modu-
le, that part of the ballast exceeding 40 kg may also be placed outside of the
field on the east or west side respectively.
Ballasting is effected in three steps:
Step 1: Cut to length series connector 340 mm and push series connector 80
mm into the bottom profile. Bend bottom profile and series connector.
Step 2:
Cut to length two bottom profiles 200 mm and one bottom profile 300 mm;
as well as two protective building mats 220 mm and one protective building
mat 320 mm. Place protective bottom mat under the bottom profile. Click se-
ries connector into bottom profile 300 mm and bend.
Laterally place one bottom profile each and one protective bottom mat left
and right from the series connector, centrically adjusted to the plate width.
Step 3: Place the required ballast stones (provided on site) in the middle.
4. Additional ballasting, northernmost and southernmost row, as well as
middle of the module field
This ballasting method can also be optionally used for the westernmost and
easternmost row.
If the required ballasting per module cannot be realized with ballasting on
the bottom profiles, two L-profiles are placed under the module with a late-
ral space from a ballast plate.
At the end of the row, the L-profiles are aligned flush on the bottom profile.
On the other side, they extend over the bottom profile.
The ballast stones are placed and should be distributed, as far as possible,
over the corner areas of the module surface.

Installation_15
The transparent ballast stones are set each depending on the ballast require-
ment. A maximum of 2 ballast stones can be set one atop the other, and they
are staggered by a few cm toward the inside and the rear.
Hereinafter are to examples showing where to place the ballast stones.
Example of ballasting 2 rows:

16_Installation
Example for ballasting 3 rows:
2.2.4 Insertion of earthing plates
The earthing plate is placed between the grooves of the module carrier on
the upper module holder. Two earthing plates are placed per module carrier.
The distance of the earthing plates to the edge of the module carriers is 40
– 50 mm and corresponds with the placement of the module clamp (see fol-
lowing chapter).
The earthing plate will subsequently bite into the module frame.
Optionally, the earthing plates may be temporarily fixed up to half with a
thin adhesive strip
40…50 mm

Installation_17
2.2.5 Insertion and fixation of PV modules
Place PV module onto the prepared substructure.
The module must rest flush and centrically in the upper and lower module
holder.
.
Per module, place 4 clamps (fitting with the thickness of the module) on the
long side and click in.
Place the clip.
Mount 2 additional clamps each at the end of the row; thus per module 6
clamps at the end of the row.
40…50 mm
max. 30 mm

18_Installation
2.2.6
Module Replacement
Position of the module clamp to be removed.
As required, modules may be removed again. To this end, the module clamps
are loosened by means of the bending tool. In the picture, the usable part of
the bending tool is circled in red.
Hook the bending tool into the module clamp. Pull bending tool upwards or
to the rear and loosen all clamps on the module to be replaced. The module
can then be removed.
Note: Removed clamps should not be used again. .
The new module is fastened again with new module clamps.

3. PRODUCT SPECIFICATION
3.1 Product details
PV module type Framed modules
PV module size Width appr. 849 – 1047 mm, for larger projects other
sizes upon request
length without limitation
Thickness of frame 35 / 38 / 40 / 45 / 46 / 50 mm,
others upon request
Module inclination nominally 10° , details see table page 18
Module orientation Landscape format
Weight Dead weight mounting system starting at 0.8 kg/m
Row division RD Modules up to 1008 mm width: 2300 – 2510 mm
Modules over 1008 mm width: 2 x module width +
(205 to 282 mm); at least 2300 mm, however
Passage width 133 – 533 mm, depending on row division and module
width
Passage width = RD – 72 mm – 2 x module width
Bearing on roof 0.115 m2per PV module (width of bottom profile 100
mm)
Total roof load As of 5 kg/m
2
with object-specific wind load
calculati on
Max. roof inclination 5°
Material High-quality aluminium alloy; resistant to sea water
specification and ammonia vapours, protective building mat
UV-resistant, temperature- and weather-resistant
Compass direction Optional
Means of fastening Without roof penetration, substructure with positive-
fit connection
Mounting aids Bending tool (for no-screw and no-rivet racks
connection)
Types of roofs Membrane roofs, bitumen roofs, gravel roofs, sub-
strate and green roofs
Special features Mostly ballast-free in central roof area; low ballasting
in marginal area. Upon request, very high ballasting
possible. Suitable for small and large module fields.
Object-specific wind load calculation results in opti-
mized ballast distribution according to DIN EN 1991-1-4
Earthing: as a standard, without earthing. Optionally earthing of
module frames to substructure, analogous with VDE
conformity test according to DIN VDE 0100 Part 712
Product Specification_19

20_Product Specification
3.2 Dimensions
Side view with dimensioning measures:
Support angle, nominal:
Support angle,
nominal:
Support angle α with module width Height h
depending on
thickness of
frame
800
mm
850
mm
900
mm
950
mm
1000
mm
1050
mm
TRI-FLAT East-
West 10° 11,4° 10,7° 10,1° 9,6° 9,1° 8.7° 235 – 250 mm
Recommended row division RD:
For the optimum utilization of roof surfaces, TRITEC recommends a short row
division which, up to a shadowing angle of 10°, does not produce any sha-
dowing at CET 12:00 noon (Central European Time) on 21 December.
Place Minimal shadowing angle on 21 December
(CET 12:00)
Hamburg 14°
Munich 18°
Rome 24°
Module clipping
Module clipping is effected without tools by means of the module clip. Width
of the clip: 30 mm. Integrated theft protection: It is very easy to remove the
clip, but possible only with a special tool.
Clipping area: Clipping on longitudinal side of module, distance x = 220 mm
3.3 Roof Layout
Roof layout for sample roof with 4 double rows in field width und 2 x 10 PV-
modules in field length.
Planning recommendation:
To be noted for planning: Required ballasting may be significantly influenced
by selecting the distance to the edge of the roof R. To keep ballasting low, a
distance to the edge of the roof is recommended of at least 1.2 m on all sides;
for roofs at heights of over 8 m, better yet even 2 m or more. The necessary
ballasting of marginal areas is individually calculated for every project to pre-
vent any unnecessary or excessive burden of the roof.
Table of contents