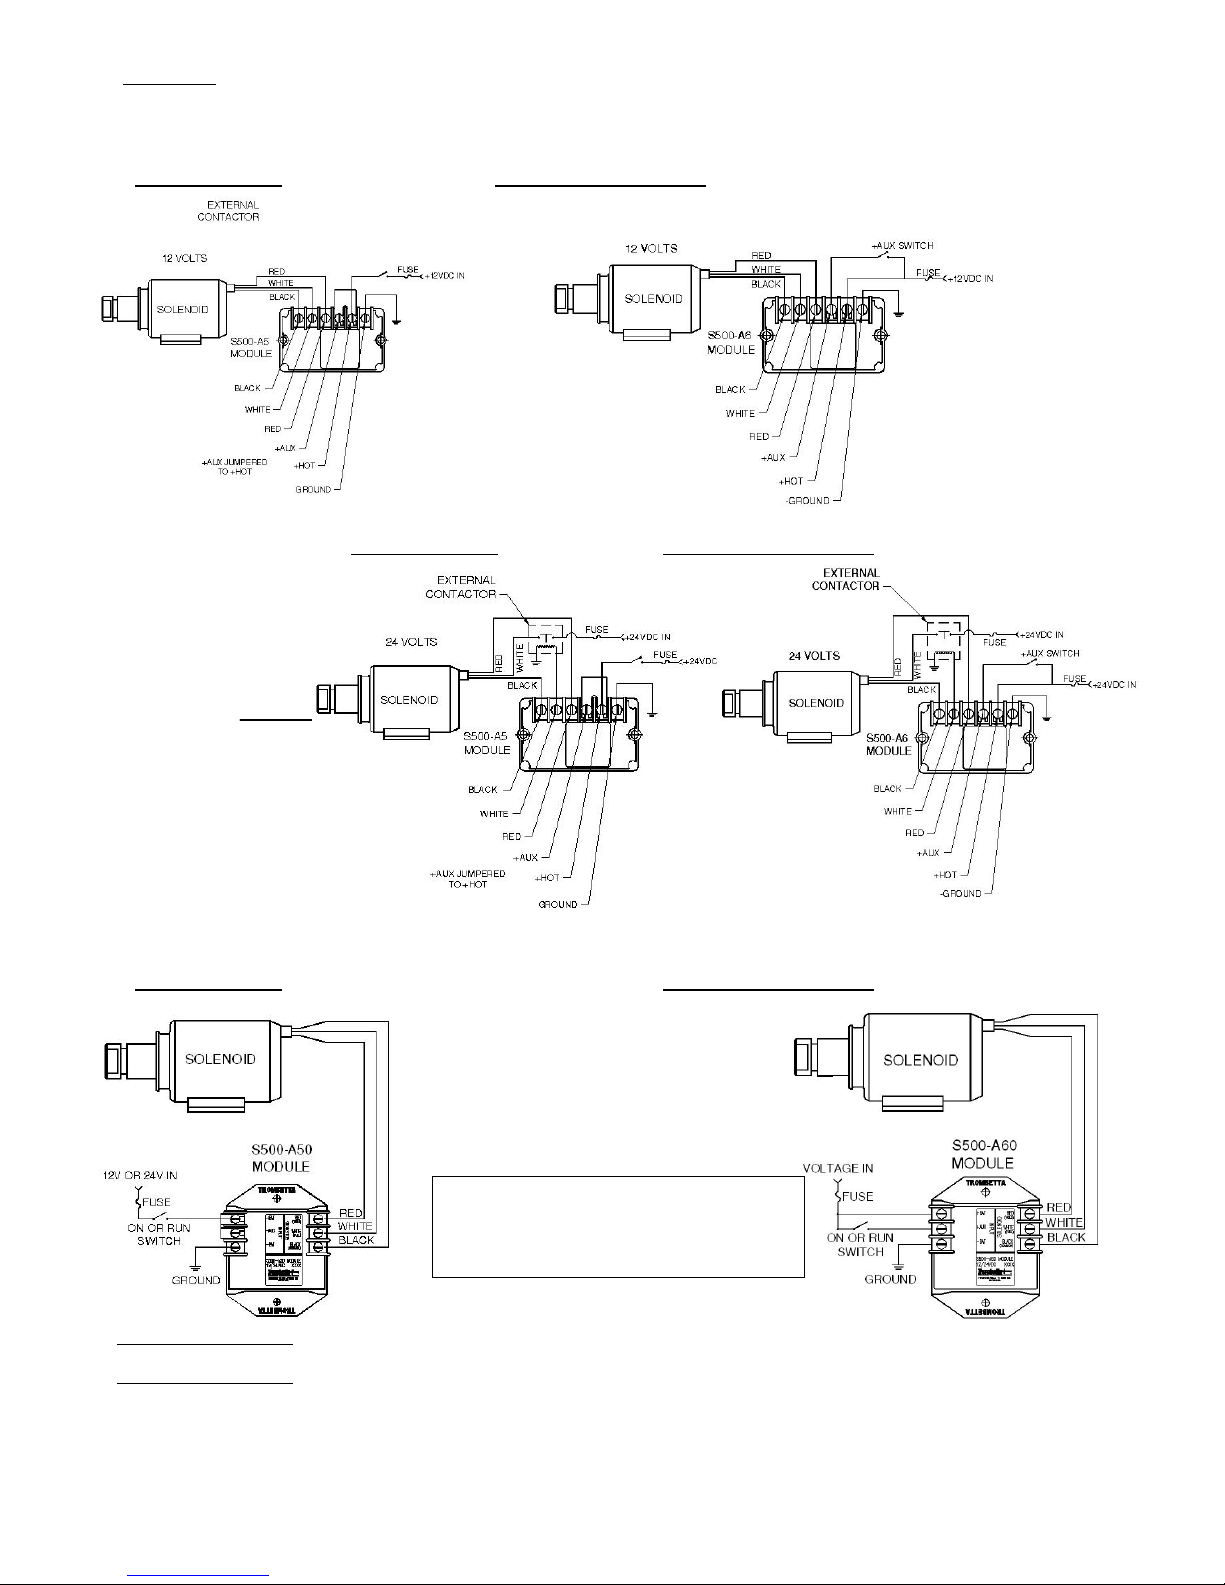
trombetta P & Q 610 User manual
Popular Power Inductor manuals by other brands

Delta Electronics
Delta Electronics SMT Power Inductor MPL10X Specifications

Delta Electronics
Delta Electronics HMP1350 Specifications

Delta Electronics
Delta Electronics HCB1060 Specifications

TRENDnet
TRENDnet TC-TP1 user guide

Delta Electronics
Delta Electronics SMT Power Inductor HAH1030 Product specifications

Delta Electronics
Delta Electronics SMT Power Inductor SHCN 660 Specification sheet

Delta Electronics
Delta Electronics SIWC75 Specification sheet

Siemens
Siemens 4EU operating instructions

Delta Electronics
Delta Electronics SIQ1055 Specification sheet

Delta Electronics
Delta Electronics THCBR1090 Specification sheet

Delta Electronics
Delta Electronics SIQ1210R Specification sheet

Delta Electronics
Delta Electronics SMT Power Inductor SIA3329 Specification sheet

Delta Electronics
Delta Electronics MPO135 Specifications

Delta Electronics
Delta Electronics SILM320A Specifications

Delta Electronics
Delta Electronics SMT Power Inductor HCB1190B Specifications

Delta Electronics
Delta Electronics SIL103 Specifications

Delta Electronics
Delta Electronics HCB1175B Specifications

Delta Electronics
Delta Electronics SMT Power Inductor SIC73 Specification sheet