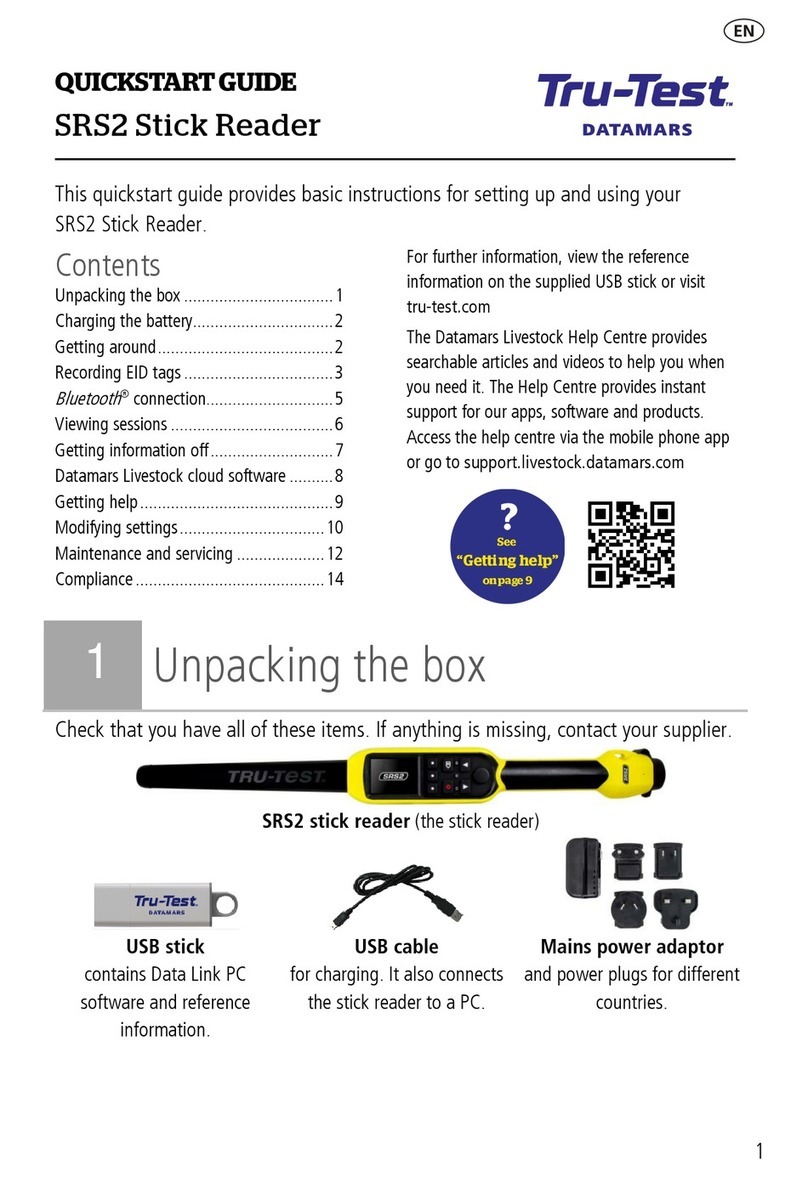
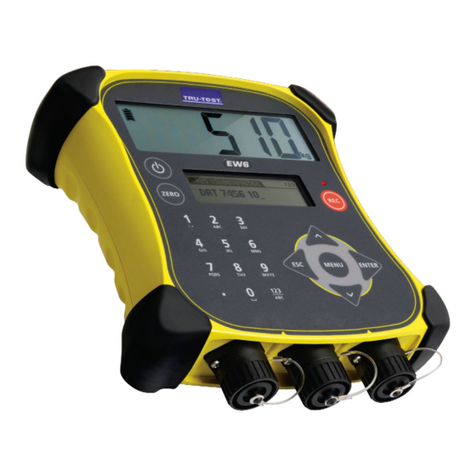
Tru-Test S3 User manual

1
QUICKSTART GUIDE
This guide provides basic instructions for setting up and using the S3 indicator. For
more information, visit tru-test.com
Before you start....................................................1
Setting up the indicator ........................................2
Installing the indicator..........................................5
Changing indicator settings with Data Link ...........6
Weighing an animal .............................................9
Maintenance and care ........................................10
Compliance ........................................................12
1Before you start
Check that you have all of these items. If anything is missing, contact your supplier.

2
2Setting up the indicator
It is recommended that you set up the indicator at home before you begin weighing
animals.
Charging the battery
Fully charge the indicator overnight by plugging it into a computer or charging it with
a USB power adaptor, such as supplied with most mobile phones.
Setting unit weights
When you first power up the indicator, you will need to select whether you will be
weighing in kg or lb before you can begin weighing.
1. Press to choose between the flashing kg or lb units.
2. Press to select the flashing units you will use.
The units you select will remain selected even after you power the indicator off and
on again. If you need to change the units, hold down for 3 seconds to swap
between kg or lb.
The indicator is now ready to be installed.

3
Record weigh sessions and change the indicator settings (such as units or
Resolution) from your phone using the Data Link mobile app, or from your
Windows* computer, using Data Link PC software. Then, track your
animals’ weights and average daily gains towards your targets, using
Datamars Livestock cloud software.
Data Link mobile app
The Data Link mobile app is the easiest way to record weights and change the
settings of the S3 indicator. You can weigh animals individually or in groups.
Afterwards, weigh session data will be available in Datamars Livestock cloud
software where you can monitor your animals’ weights and average daily gains, and
forecast their growth to ensure you meet your weight targets.
Download the app from the App Store* or Google Play*:
Supported devices:
iPhone* (iOS 9 and above)
iPad* (iOS 9 and above)
Android* smartphone (Android 4.4 and above)
To connect your mobile device to the S3 indicator:
1. Launch the Data Link app, and at the prompt create a
Datamars Livestock account.
2. Choose the S3 indicator from the list of devices that appear.
3.
Connect to the S3 indicator to record weights or to change
settings.
Learn more about the Data Link app at support.livestock.datamars.com

4
Data Link PC software
Data Link PC software allows you to connect your Windows computer to the S3
indicator to change settings on the indicator, record weights and upload your
sessions to Datamars Livestock cloud software.
Download Data Link PC software from livestock.tru-test.com
1.
Launch Data Link on your Windows
computer.
2. Plug the indicator into your computer with
the USB cable supplied.
3. Wait for the indicator to connect to record
weights or to change settings.
Learn more about Data Link PC software at support.livestock.datamars.com
Datamars Livestock
If you have recorded your weights using the Data Link mobile app or Data Link PC
software, you can view your data online, anywhere, with Datamars Livestock cloud
software.
Datamars Livestock helps you to track your animals’ weights and average daily gains,
and forecast their growth, to ensure you meet your weight targets.
You can monitor your animals in groups and act early if they fall behind target, or if
you record visual ID’s you can individually track and identify top performers and slow
growing stock.
1. Visit app.livestock.datamars.com to
create an account or log in.
2. Add animals to a group to track their
weights and average daily gains
towards your target weights.
Learn more about Datamars Livestock at support.livestock.datamars.com

5
3Installing the indicator
Ensure the indicator is fully charged before use.
1. Mount the indicator onto a post or
crush/chute using the mounting bracket
and mounting kit.
2. Plug the load bar cables into the
indicator, and secure the cables with
cable ties.
3. Power on the indicator.
To install the load bars, refer to the manual that shipped with your load bars.

6
4
Changing indicator settings with
Data Link
You may want to change the indicator settings depending on your weighing scenario.
This is a quick and simple process using Data Link on your mobile device or
Windows* computer.
Selecting non-Tru-Test load bars
The S3 indicator is pre-calibrated to work with leading non-Tru-Test load bars.
1. Plug your load bars into the indicator.
2. Connect to the indicator using Data Link on your mobile device or Windows*
computer.
3. Select to open Settings, and go to the Load bar type menu.
4. Select your load bars from the list that appears.
If your load bars are not on the list, you need to perform a span calibration.
Span calibration
If your load bars are not available for selection on Data Link, you will need to perform
a span calibration to ensure that your animals are weighed correctly.
1. Connect to the indicator using Data Link on your mobile device or Windows*
computer.
2. Select to open Settings, and choose Span calibration.
3. Follow the steps to complete the span calibration.

7
Auto power down
By default, the indicator will power down after 15 minutes of inactivity, unless it is
plugged in and charging.
On Indicator powers down after 15 minutes of inactivity
Off Indicator remains powered on until battery runs out, or it is powered off
manually
The default Auto power down setting is On.
Auto zero
Auto zero promotes rapid weighing between animals, and removes the need to press
the Zero button after each animal has been weighed.
On Rapid weighing between animals is enabled
Off Press zero after each animal is weighed
The default Auto zero setting is On.
You may want to remove Auto zero if you are weighing grain or produce
that takes time to come to full weight on the load bars.

8
Resolution
The resolution is the number of kg (or lb) the scale will increment by as weight is
added.
For example, if the animal weighs under 200 kg (or under 500 lb), the weight will be
displayed in the nearest 0.5kg (or 1 lb). If the animal weighs between 200-500 kg
(or 500-1000 lb), the weight will be shown in the nearest 1 kg (or 2 lb). The default
resolutions are listed below; however, you can change the minimum weighing
resolution.
Changing the resolution may cause the scale to take longer to stabilise on a weight.
Small resolutions on large weights may not stabilise. Ensure that you have set the
correct resolution for your weighing environment.
Weight range (kg)
Resolution
Weight range (lb)
Resolution
0-200 kg 0.5 kg 0-500 lb 1 lb
200-500 kg 1 kg 500-1000 lb 2 lb
500-1000 kg 2 kg 1000-2000 lb 5 lb
1000-capacity 5 kg 2000-capacity 10 lb
Learn more about the S3 indicator settings at
support.livestock.datamars.com

9
5Weighing an animal
Check that the indicator is zeroed before you begin weighing. If not, press
on the indicator.
If you are using Data Link to record weights, launch Data Link on your mobile device
or Windows* computer and connect to the indicator.
1. Start a new session and name it.
2. Move the animal onto the platform.
3. When the weight has stabilised, press to record the
weight.
4. When the weight is recorded, move the animal off the
platform and wait for the weight to return to zero.
If the indicator is not displaying 0 kg (0 lb) between animals or there are
problems with inaccurate or unstable weights, make sure that the bars
are firmly secured to the concrete floor and free from stones or dirt, and
that the load bars are properly connected to the indicator.

10
6Maintenance and care
Caring for the indicator
Do not leave the indicator or indicator connectors submerged in water. Store the
indicator in a cool, dry place.
Wipe the indicator using a damp cloth, warm water and soap. Other cleaners
may damage the case.
Remove dust and moisture from the plugs using methylated spirits, ethyl alcohol,
or a suitable electrical contact cleaner. Stronger spirits must not be used, as they
may react with the plastic.
Updating your software
We recommend that you regularly update the indicator software so that you keep up
with the latest features and improvements.
To update the indicator's software:
1. Connect the indicator to a PC using the cable supplied.
2. Launch Data Link on your PC.
3. Click Tools / Updates.
4. Follow the step-by-step instructions.
For more information, see the Data Link help.

11
Instructions for disposal of product
This symbol on the product or its packaging indicates that this product
(and its battery) must not be disposed of with other waste. Instead, it is
your responsibility to dispose of your waste equipment by handing it over
to a designated collection point for the recycling of waste electrical and
electronic equipment. The separate collection an
d recycling of your waste
equipment at the time of disposal will help conserve natural resources and
ensure that it is recycled in a manner that protects human health and the
environment. For more information about where you can drop off your
waste equipment for recycling, please contact your local city recycling
office or the dealer from whom you purchased the product.
This product has a lithium-ion ( IFpR20/71, 4.8 Wh) rechargeable battery.
For instructions on how to dismantle this product for recycling, email
service.dept@datamars.com

12
7Compliance
FCC notice
This device complies with part 15 of the FCC Rules. Operation is subject to the following two conditions: (1) This device may not cause
harmful interference, and (2) this device must accept any interference received, including interference that may cause undesired
operation.
This equipment has been tested and found to comply with the limits for a Class B digital device, pursuant to part 15 of the FCC Rules.
These limits are designed to provide reasonable protection against harmful interference in a residential installation.
This equipment generates, uses and can radiate radio frequency energy and, if not installed and used in accordance with the
instructions, may cause harmful interference to radio communications. However, there is no guarantee that interference will not occur
in a particular installation. If this equipment does cause harmful interference to radio or television reception, which can be determined
by turning the equipment off and on, the user is encouraged to try to correct the interference by one or more of the following
measures:
- Reorient or relocate the receiving antenna.
- Increase the separation between the equipment and receiver.
- Connect the equipment into an outlet on a circuit different from that to which the receiver is connected.
- Consult the dealer or an experienced radio/ TV technician for help.
- Any changes or modifications not expressly approved by Datamars could void the user's authority to operate the equipment
Responsible party in the USA
This product is supplied by:
Datamars Inc
528 Grant Road
Mineral Wells
Texas 76067
UNITED STATES
Toll free: 800 874 8494
ISED Canada notice
This device contains licence-exempt transmitter(s)/receiver(s) that comply with Innovation, Science and Economic Development
Canada’s licence-exempt RSS(s). Operation is subject to the following two conditions:
(1) this device may not cause interference, and
(2) this device must accept any interference, including interference that may cause undesired operation of the device.
EU declaration of conformity
Datamars Limited hereby declares that the S3 indicator is in compliance with the essential requirements and other
relevant provisions of Directives 2014/31/EU, 2014/53/EU and 2011/65/EU. The declaration of conformity may be
consulted at livestock.tru-test.com/en/compliance
The
Bluetooth
®word mark and logos are registered trademarks owned by Bluetooth SIG, Inc. and any use of such marks by Datamars
SA and its subsidiaries is under license. Other trademarks and trade names are those of their respective holders.
All trademarks with an * are neither owned by nor licensed to Datamars SA and belong to their respective owners.

13
GUÍA DE INICIA RÁPIDO
Esta guía ofrece instrucciones básicas para configurar y usar el indicador S3. Para
mayor información, visite tru-test.com
Antes de comenzar.................................................................13
Configuración del indicador ....................................................14
Instalación del indicador.........................................................17
Cómo cambiar la configuración del indicador con Data Link ....18
Pesaje de un animal ...............................................................21
Mantenimiento y cuidados......................................................22
1Antes de comenzar
Revise que cuente con todos estos artículos. Si falta algo, póngase en contacto con
su proveedor.
14
2Configuración del indicador
Se recomienda configurar el indicador en casa antes de comenzar a pesar los
animales.
Cómo cargar la batería
Cargue completamente la batería del indicador durante la noche enchufándolo a
una PC o a un adaptador de corriente USB, como el que viene con la mayoría de
los teléfonos celulares.
Configuración de las unidades de peso
Cuando encienda el indicador por primera vez, debe seleccionar si desea usar
kilogramos o libras como unidad de peso, antes de poder empezar con el pesaje.
1. Pulse para seleccionar entre kg o lb.
2. Pulse para seleccionar la unidad que parpadea que desea usar.
La unidad que elija permanecerá seleccionada incluso cuando apague el indicador.
Si desea cambiar la unidad de peso, mantenga pulsado por 3 segundos
para cambiar entre kg o lb.
El indicador ya está listo para su instalación.

15
Registre las sesiones de pesaje y cambie la configuración del indicador
(como las unidades o Resolución) desde su teléfono usando la aplicación
Data Link para dispositivos móviles, o desde su PC con Windows* usando
Data Link para PC. Entonces, usando el software en la nube Datamars
Livestock, podrá seguir los pesos de sus animales y las ganancias promedio
diarias hasta llegar a sus objetivos.
La aplicación Data Link para teléfonos inteligentes
La aplicación Data Link para dispositivos móviles es la manera más sencilla de
registrar pesos y cambiar la configuración del indicador S3. Puede pesar animales
de manera individual o en grupos. Luego, los datos de las sesiones de pesaje
estarán disponibles en el software en la nube Datamars Livestock, donde podrá
monitorear los pesos de los animales y las ganancias promedio diarias y estimar su
crecimiento para garantizar que cumplirá sus objetivos de peso.
Descargue la aplicación desde el App Store* o Google Play Store*:
Dispositivos compatibles:
iPhone* (iOS 9 y superior)
iPad* (iOS 9 y superior)
Android* Smartphone (Android 4.4 y superior)
Para conectar su dispositivo móvil al indicador S3:
1. Abra Data Link y, cuando se lo solicite, cree una cuenta de
Datamars Livestock.
2. Seleccione el indicador S3 de la lista de dispositivos que aparece.
3. Conecte el indicador S3 para registrar los pesos o cambiar la
configuración.
Descubra más acerca de Data Link en support.livestock.datamars.com

16
Software de Data Link para PC
El software de Data Link para PC le permite conectar su computadora Windows al
indicador S3 para cambiar la configuración del indicador, registrar pesos y cargar
sus sesiones a Datamars Livestock.
Descargue Data Link para PC desde livestock.tru-test.com
1.
Abra Data Link en su computadora Windows.
2. Conecte el indicador a su PC usando el cable USB que
viene incluido.
3. Conecte el indicador para registrar los pesos o cambiar
la configuración.
Descubra más acerca de Data Link para PC en support.livestock.datamars.com
Datamars Livestock
Si ha registrado los pesos usando Data Link para dispositivos móviles o Data Link
para PC, puede ver los datos en línea donde sea que esté con el software en la
nube Datamars Livestock.
Datamars Livestock le ayuda a monitorear los pesos de los animales y las ganancias
promedio diarias, y estimar su crecimiento para garantizar que cumplirá sus
objetivos de peso.
Puede monitorear a sus animales en grupos y actuar con suficiente tiempo en caso
de que su desempeño no sea suficiente para alcanzar los objetivos de peso;
también puede registrar ID visuales para seguir e identificar de manera individual a
los animales con el mejor y el peor desempeño.
1.
Visite
app.livestock.datamars.com
para
crear una cuenta o iniciar una sesión.
2. Agregue animales a un grupo para registrar
sus pesos y ganancias promedio diarias hasta
sus objetivos de peso.
Descubra más acerca de Datamars Livestock en support.livestock.datamars.com

17
3Instalación del indicador
Asegúrese de que el indicador está completamente cargado antes de
usarlo.
1. Fije el indicador a un poste o a un
brete o cajón, usando el kit y el
soporte de montaje.
2. Enchufe los cables de la barra de
carga al indicador, y fíjelo con
amarres.
3. Encienda el indicador.
Para instalar las barras de carga, revise el manual que vino con las barras de carga.

18
4Cómo cambiar la configuración
del indicador con Data Link
Tal vez desee cambiar la configuración del indicador dependiendo de las
circunstancias de pesaje.
Este es un proceso sencillo y rápido usando Data Link en su dispositivo móvil o en
su computadora con Windows*.
Selección de barras de carga que no sean de Tru-Test
El indicador S3 viene precalibrado para funcionar con las principales barras de
carga que no son de la marca Tru-Test.
1. Conecte sus barras de carga al indicador.
2. Conecte al indicador usando Data Link en su dispositivo móvil o computadora
Windows*.
3. Seleccione para abrir Configuración, y elija el el menú de Tipo de barra
de carga.
4. Elija sus barras de carga de la lista.
Si sus barras no aparecen en la lista, tendrá que realizar la
calibración span.

19
Calibración span
Si sus barras de carga no están disponibles en el menú de Data Link, tendrá que
realizar una calibración span para garantizar que el pesaje de los animales sea
correcto.
1. Conecte al indicador usando Data Link en su dispositivo móvil o computadora
Windows*.
2. Seleccione para abrir Configuración, y elija Calibración span.
3. Siga los pasos siguientes para completar la calibración span.
Apagado automático
Por defecto, el indicador se apagará después de 15 minutos de inactividad, a
menos que esté enchufado y cargándose.
Activado El indicador se apagará después de 15 minutos de inactividad
Desactivada El indicador permanece encendido hasta que la batería se agote o
se apague de manera manual
La opción predeterminada para Apagado automático es Activado.
Cero automático
La opción Cero automático acelera el pesaje entre animales y elimina la necesidad
de pulsar el botón de Cero luego de pesar un animal.
Activado El pesaje rápido entre animales está activado
Desactivada Deberá pulsar Cero después de pesar un animal
La opción predeterminada para Cero automático es "Activado".
Es posible que desee desactivar la opción de Cero automático si pesa
granos o cualquier otro producto agrícola que toma bastante tiempo
en estabilizar completamente su peso en la barra de cargas.

20
Resolución
La resolución es el valor de incremento de peso en kg (o libras) que usará la
báscula al agregar peso.
Por ejemplo, si el animal pesa menos de 200 kg, el peso se mostrará hasta el
medio kilo (0,5 kg) más cercano. Si el animal pesa entre 200-500 kg, el peso se
mostrará hasta el kilo (1 kg) más cercano. Las resoluciones predeterminadas se
muestran a continuación; sin embargo, puede cambiar la resolución mínima de
pesaje.
Al cambiar la resolución es posible que la báscula tome mayor tiempo en estabilizar
el peso.
Puede que haya problemas de estabilización si usa resoluciones pequeñas con
pesos altos. Asegúrese de que haya elegido la resolución correcta según sus
circunstancias de pesaje.
Rango de peso (kg)
Resolución
Rango de peso (libras)
Resolución
0-200 kg 0,5 kg 0-500 lb 1 lb
200-500 kg 1 kg 500-1000 lb 2 lb
500-1000 kg 2 kg 1000-2000 lb 5 lb
1000-máxima capacidad 5 kg 2000-máxima capacidad 10 lb
Conozca más sombre la configuración del indicador S3 en
support.livestock.datamars.com
Other manuals for S3
1
Table of contents
Languages:
Other Tru-Test Measuring Instrument manuals

Tru-Test
Tru-Test EziWeigh6 User manual

Tru-Test
Tru-Test S1 User manual

Tru-Test
Tru-Test Speedrite Fault Finder User manual

Tru-Test
Tru-Test SRS2 User manual

Tru-Test
Tru-Test XHD2 User manual

Tru-Test
Tru-Test XR3000 User manual

Tru-Test
Tru-Test 703 User manual

Tru-Test
Tru-Test EC-09 User manual

Tru-Test
Tru-Test EC-20 User manual

Tru-Test
Tru-Test EC-10 User manual